
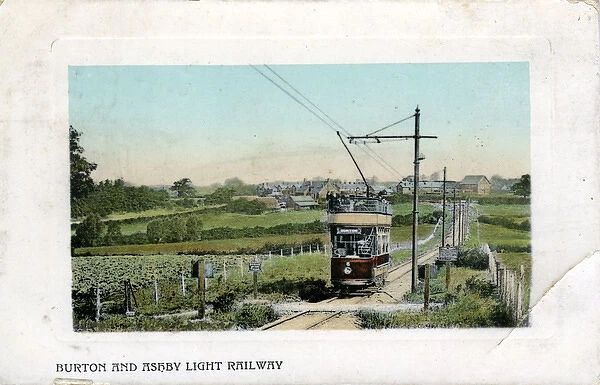
An article by Seymour Glendenning in the July 1906 issue of The Railway Magazine focussed on the newly opened Burton & Ashby Light Railway. [1]
The light railway was a 3ft 6in gauge electric tram line supplied with electricity from a diesel generator plant near Swadlincote. [3] The power plant sat alongside the tram depot. [1: p56]
The first article about the line covered the length from Burton, through Newhall and Sawdlincote to Castle Gresley. It can be found here. [4]
Glendenning notes that the construction cost for the whole network was £150,000. [1: p57] He says that it served a population of about 100,000 inhabitants in the towns and villages through which it passed.
This second article about the line completes the journey, covering the length from Sawdlincote to Ashby-de-la-Zouch.
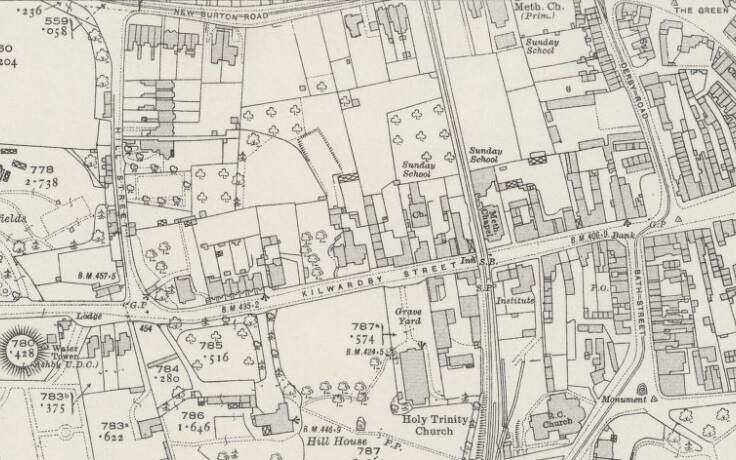
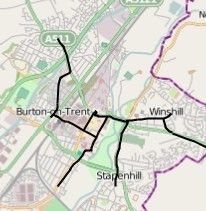
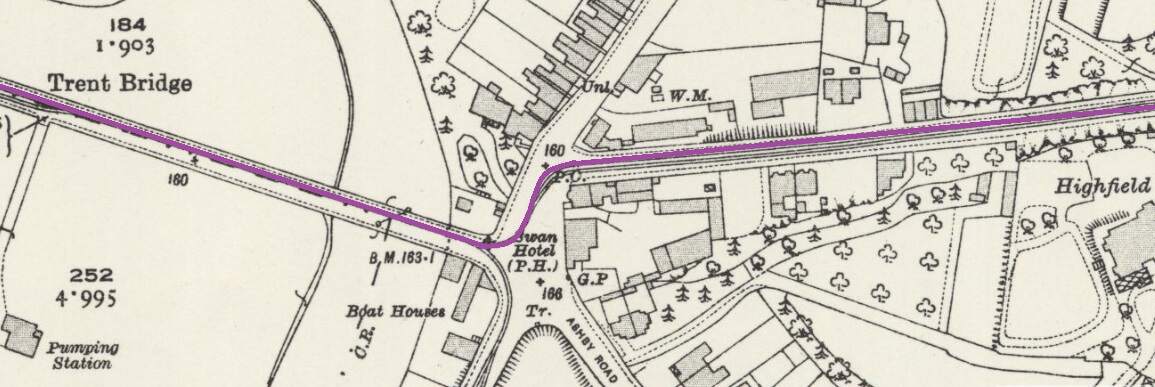
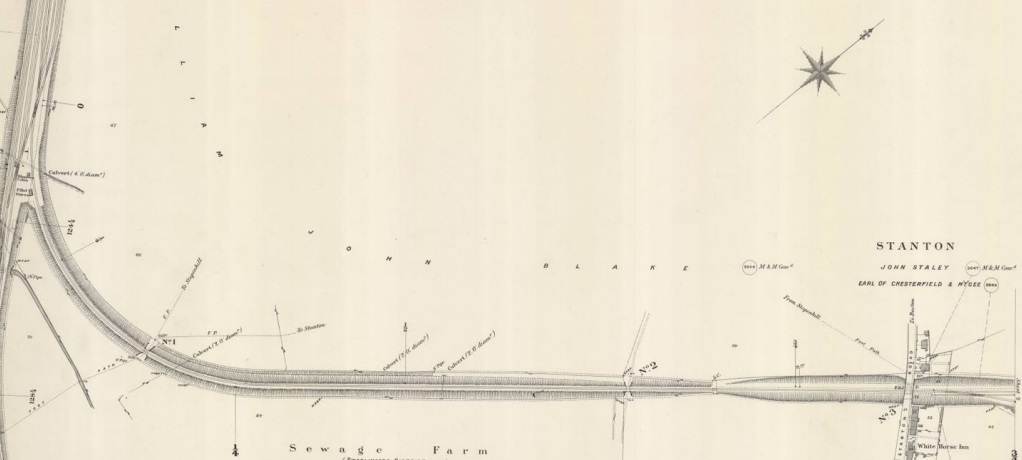
The route of the line(s) is shown in black on the map extract below.

We start this second part of the journey at the tram depot which sat in Swadlincote on the North side of the Swadlincote and Woodville Branch of the Midland Railway and to the East of the Burton and Ashby Light Railway


At Swadlincote Market Place a branch left the main line to Ashby-de-la-Zouch. That branch ran South from Swadlincote to serve Castle Gresley. We followed that branch in the first article about the Burton and Ashby Light Railway.
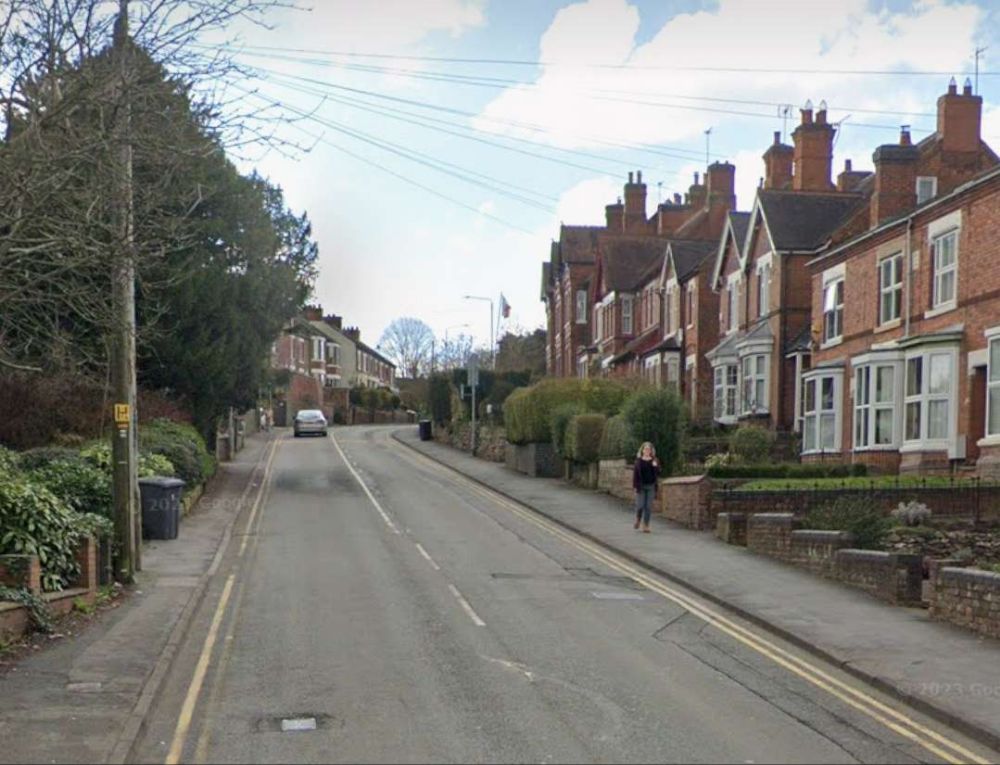
In this article we follow the route of the line from Swadlincote to Ashby-de-la-Zouch which heads East from the Market Place.
Glendenning describes this length of the journey:
“The road towards Ashby rises continuously until it reaches a height of 569 ft. above sea level. It passes through the heart of the Derbyshire Potteries, where a great industry is carried on in the manufacture of furnace bricks, sanitary pipes, and common earthenware. Furnaces and kilns abound in Swadlincote, and the subsidiary industry of crate-making is also much in evidence.
There are numerous stacks arranged in the form of a lofty cone, of the long tapering branches of timber with untrimmed bark, which are used for making the big rectangular crates for the conveyance of heavy earthenware.
The clay for the pipes and pots is obtained on the surface, but the fire clay for furnace bricks has to be reached from a depth, by sinking shafts equipped with hoisting machinery.Imperceptibly, Swadlincote grows into Woodville, where the large pipe works are situated, with their groups of ever-smoking furnaces and yards stacked with great heaps of pipes for sewerage and drainage purposes. But the broken pottery is even more aggressive than the sound ware. Every ‘grotto’, or ‘rockery’, is made of it; every garden path is edged with it, or with fused fire bricks. The mounds of refuse adjacent to the works are continually extending their borders and spreading over the country.” [1: p55]
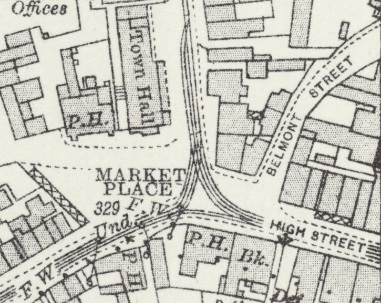
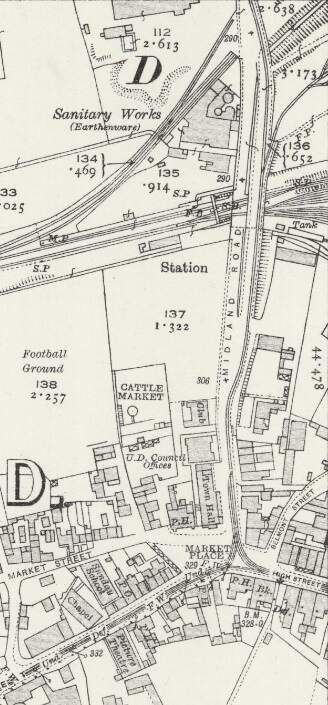
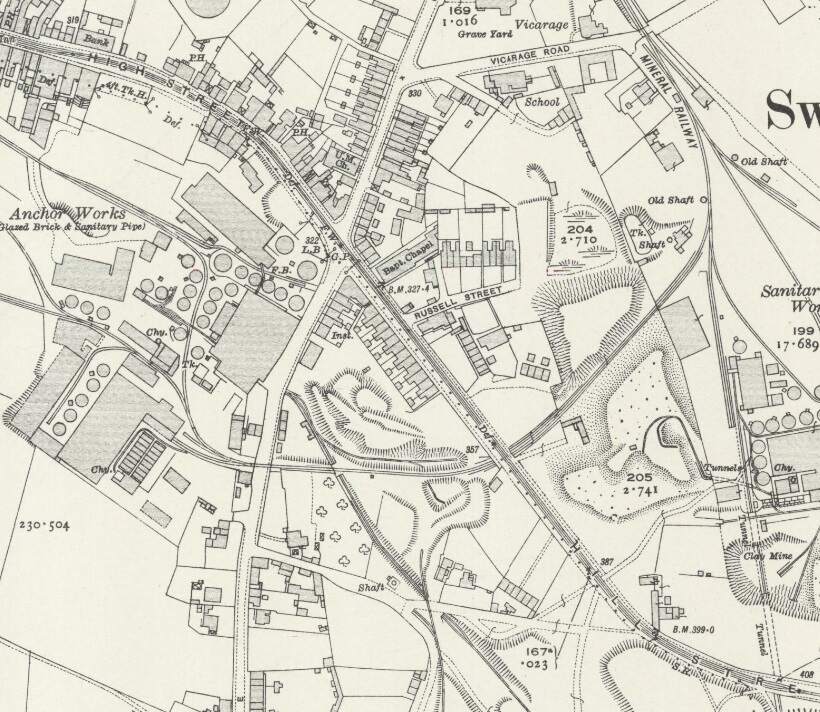
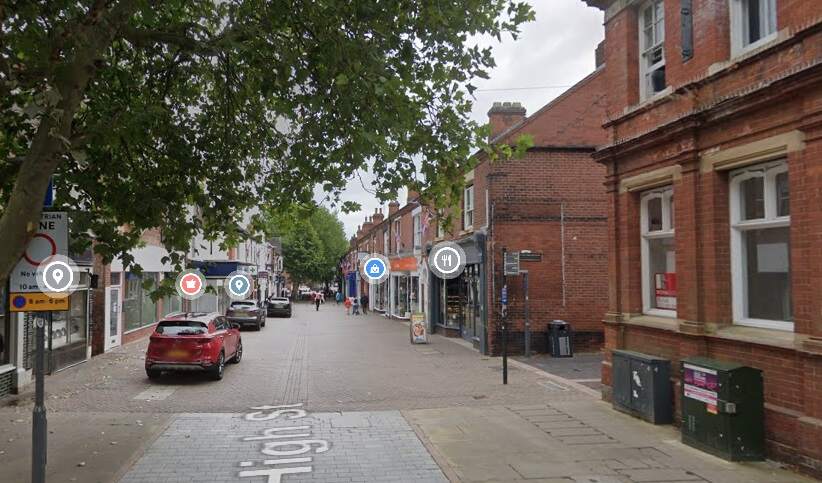
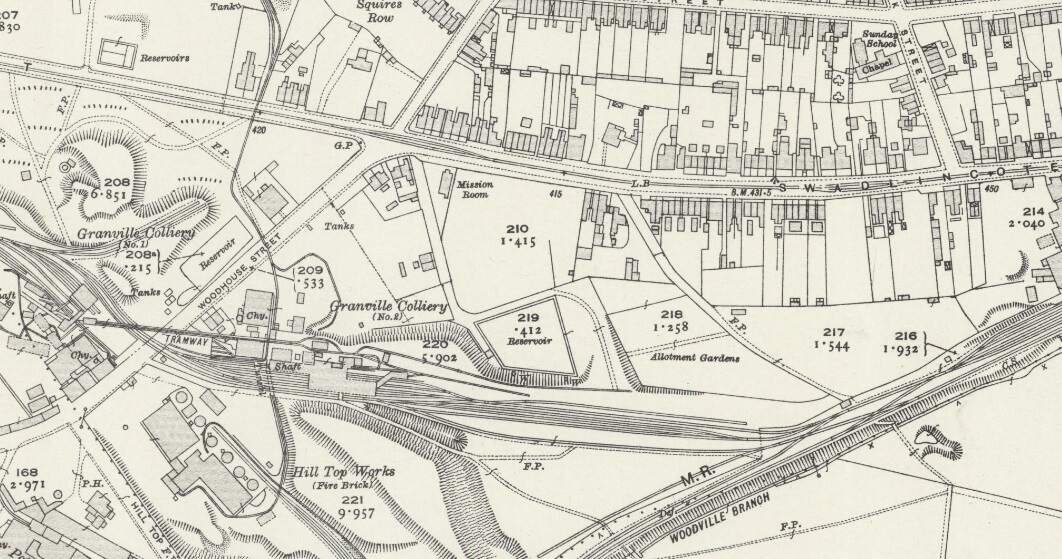
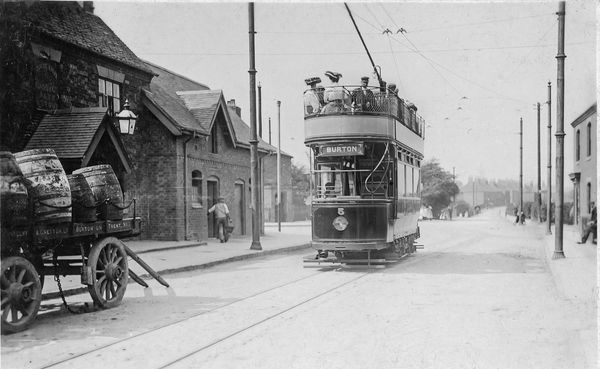
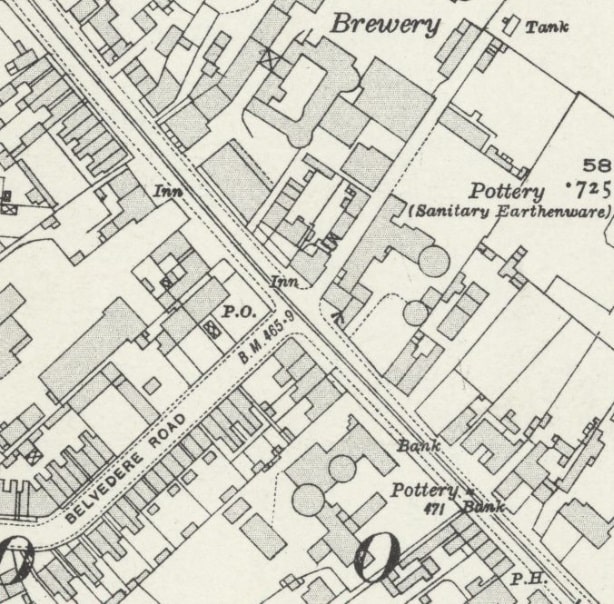
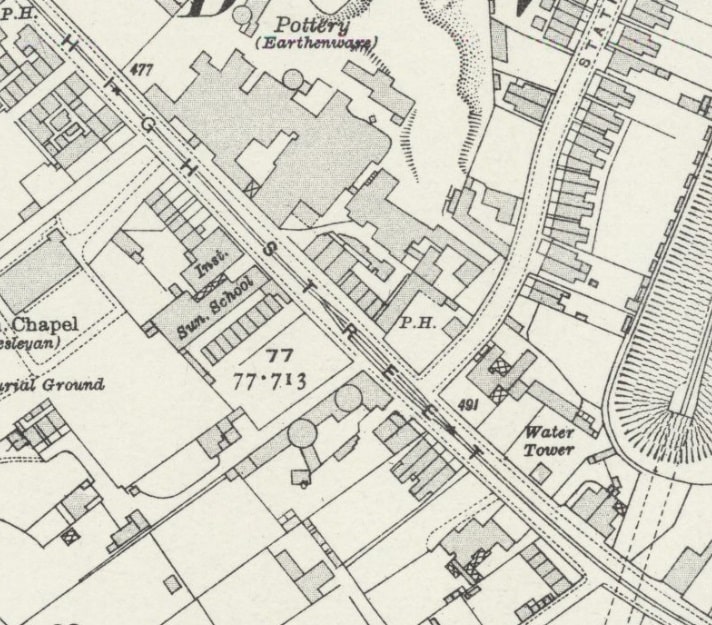
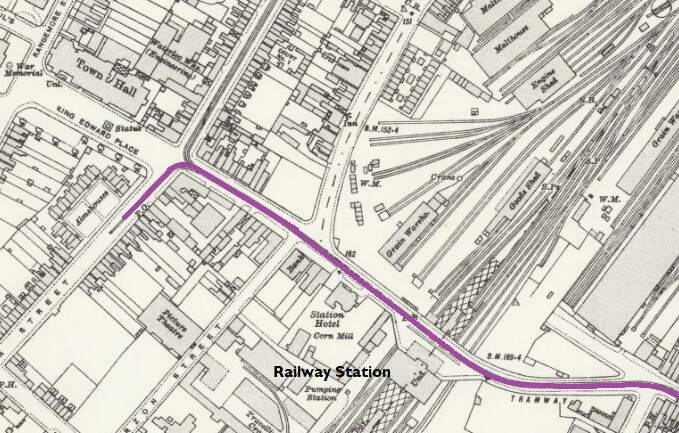
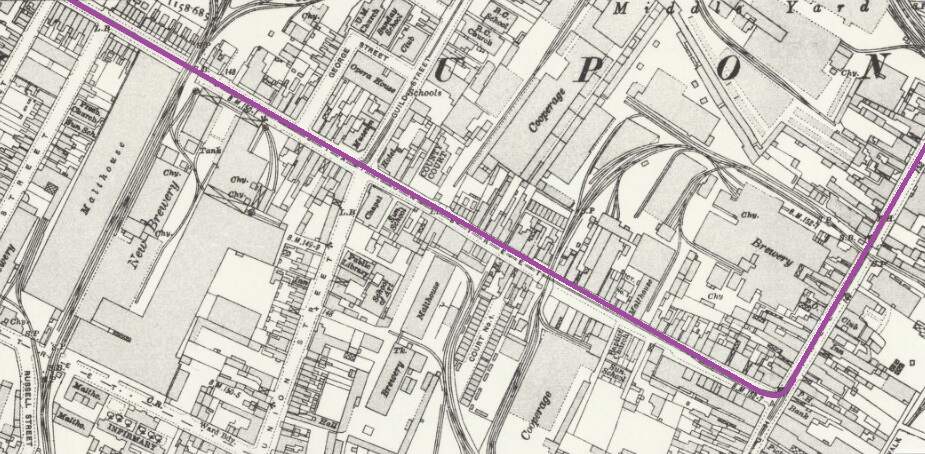
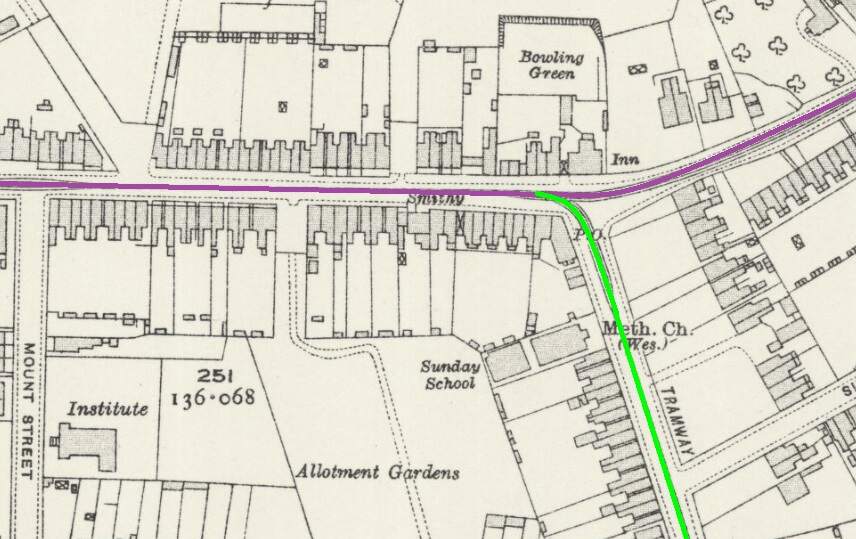
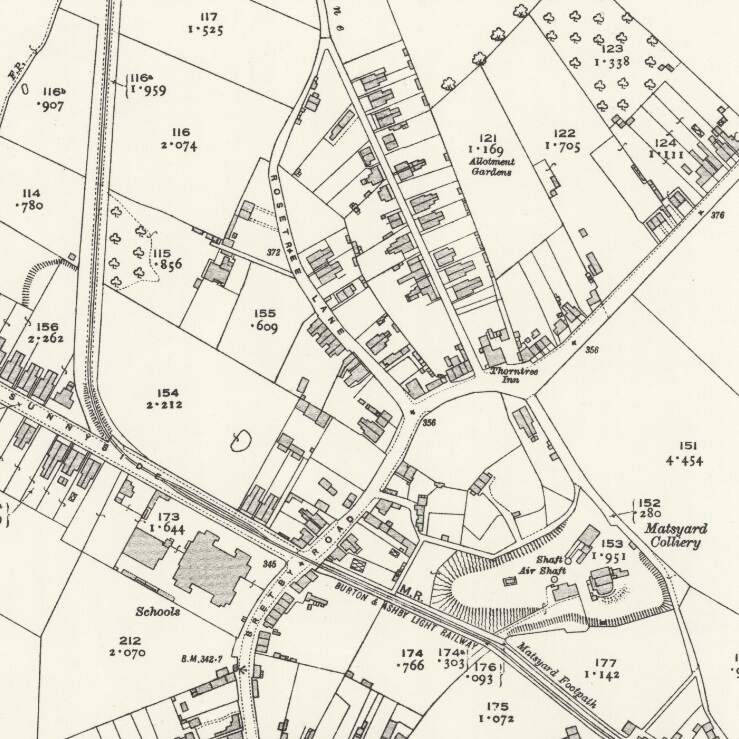
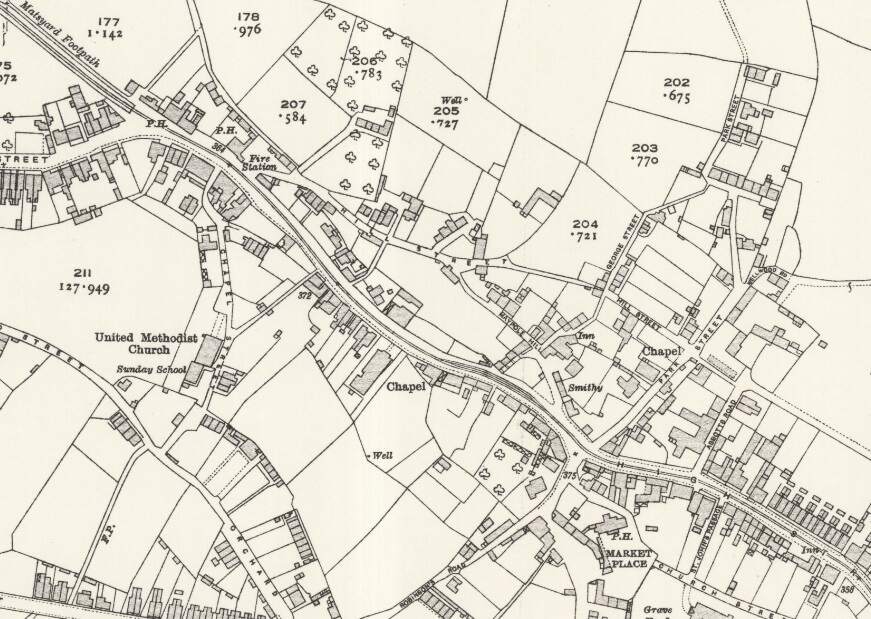
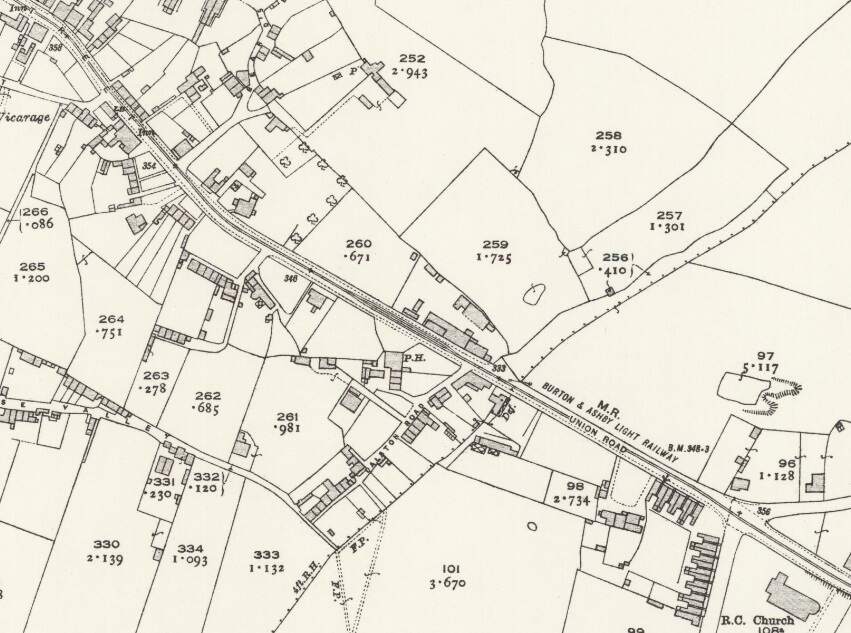
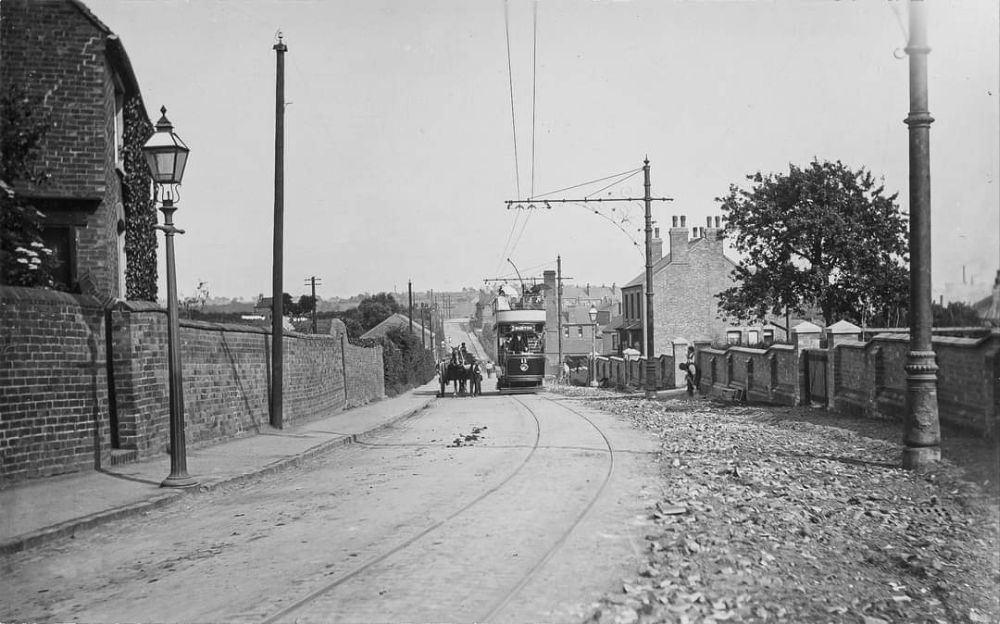
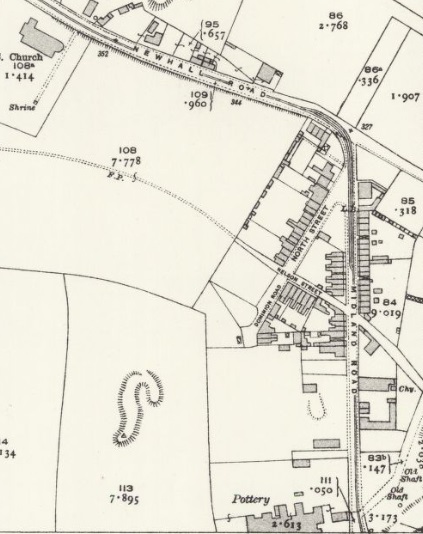
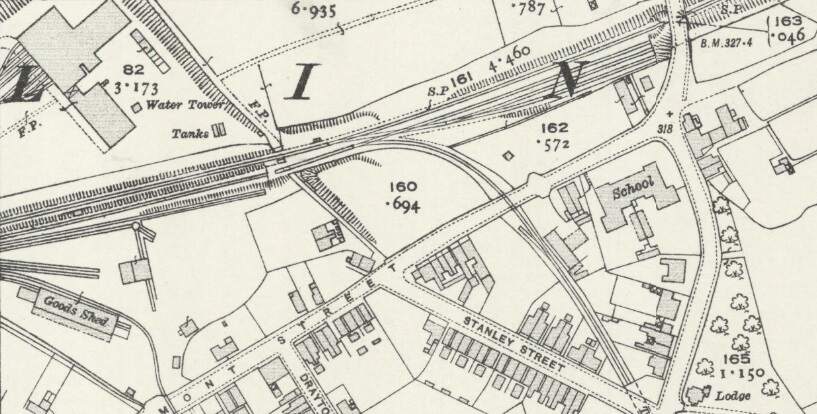
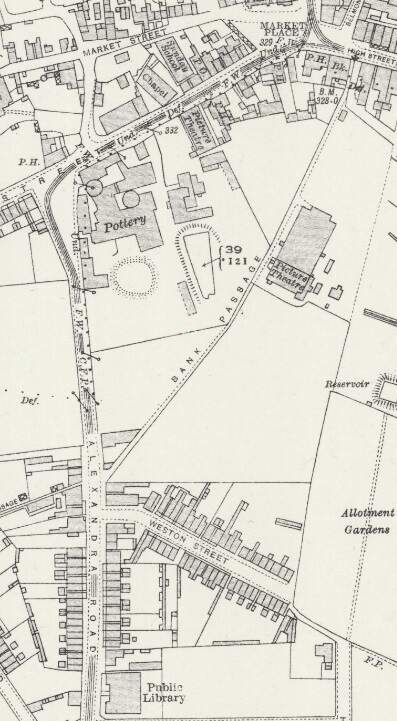
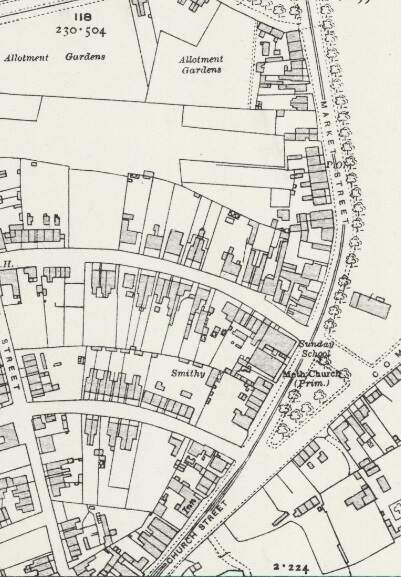
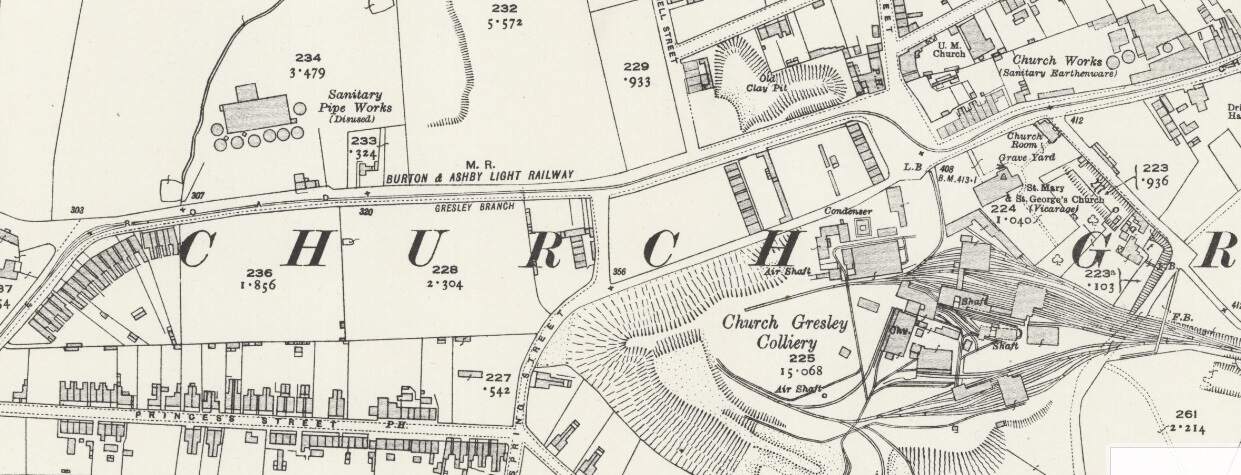
The road East of Swadlincote Market Place is High Street. As can be seen from the closely cropped extract from the 1920 25″ Ordnance Survey, the line was dual-tracked in the vicinity of the Market Place. Midland Road runs down to the Market Place on the East side of the Town Hall. Trams for Ashby left to the bottom-right of the map extract. [5]
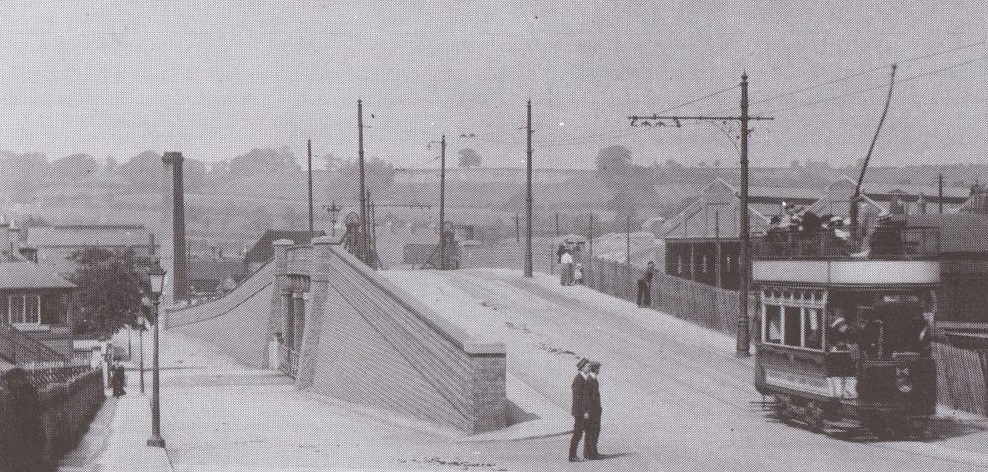
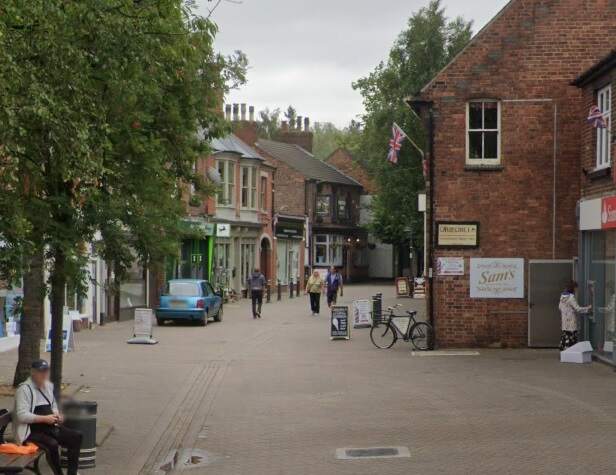
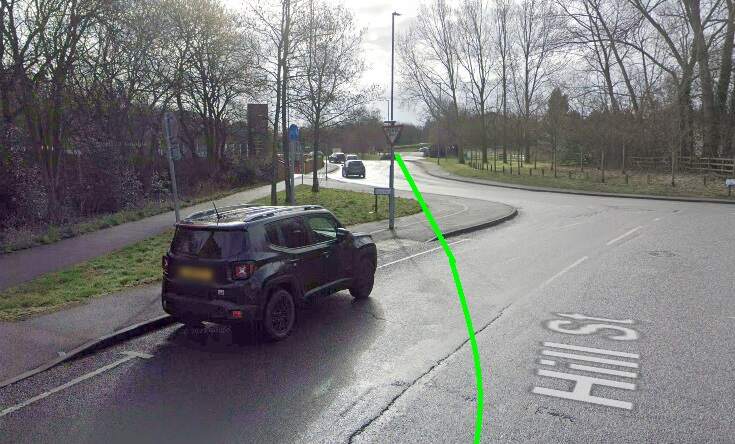
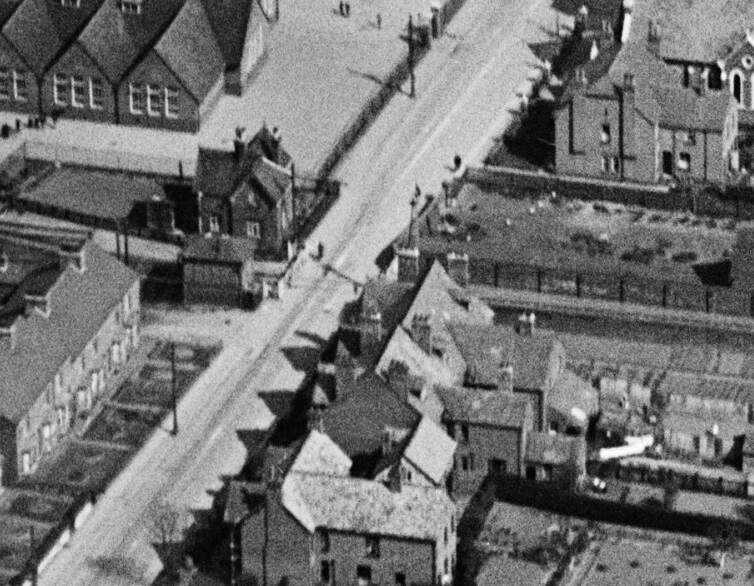
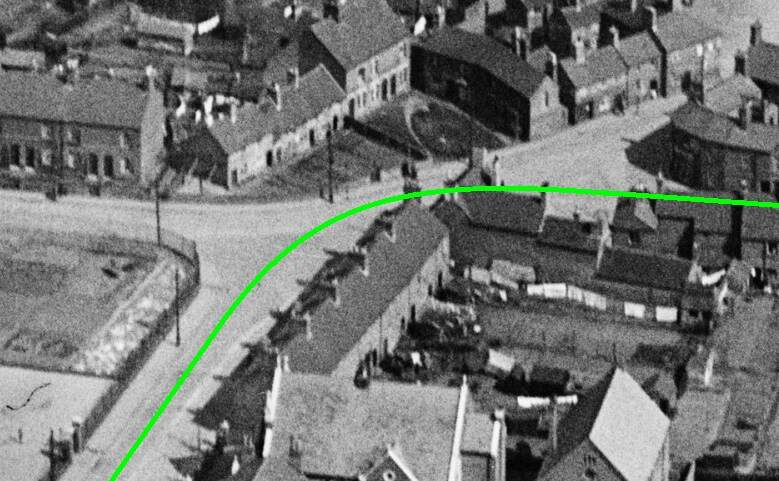
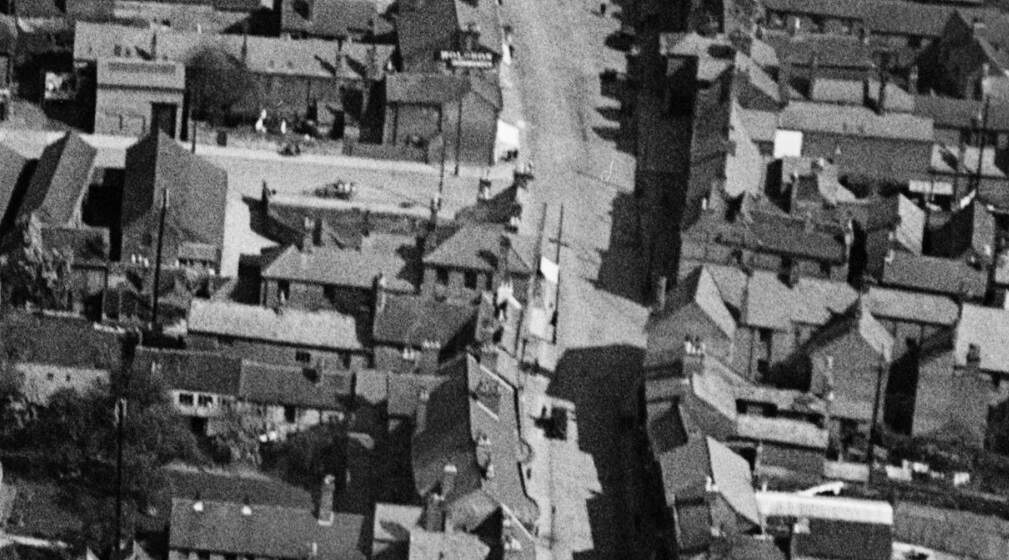
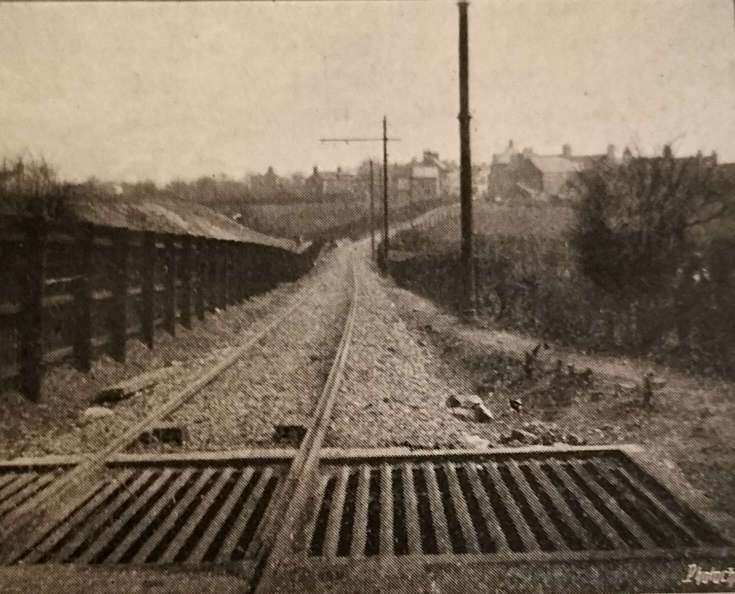
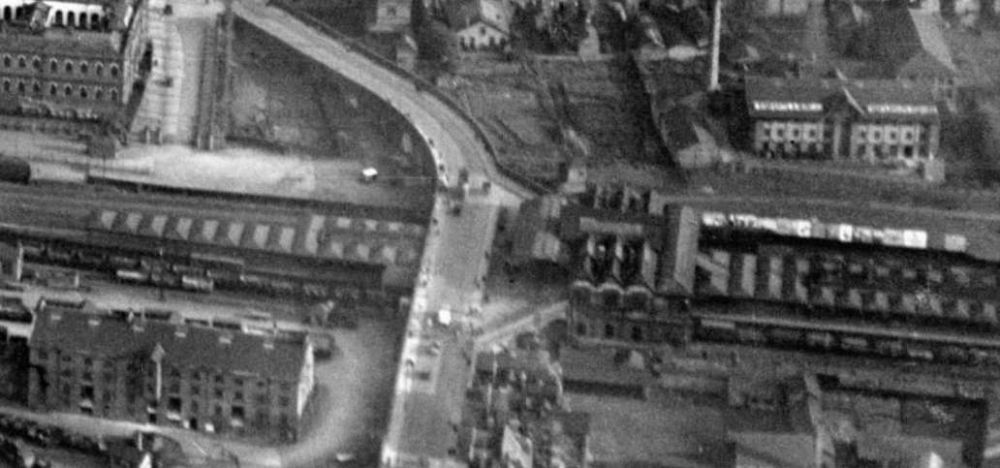
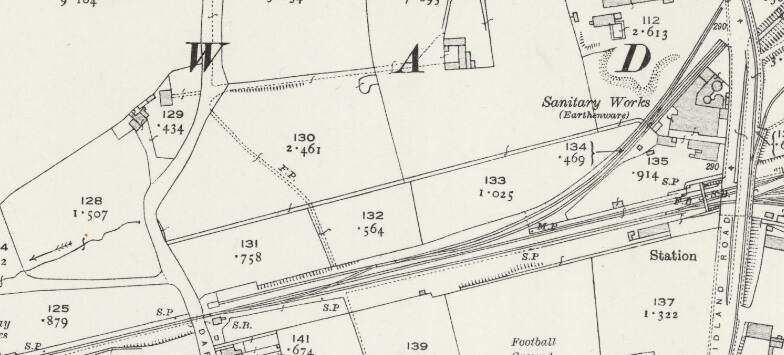
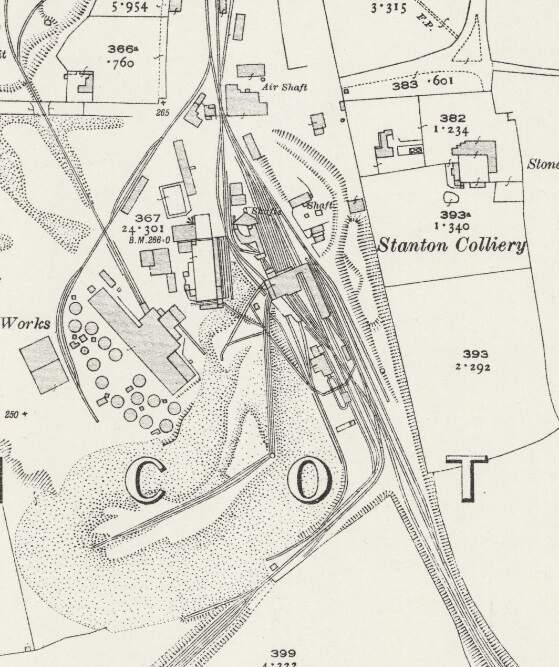
Trams ran East along High Street and turned Southeast and the road became Hill Street. The area to the East of the town centre was heavily industrialised. Different industrial concerns were linked by a network of tramways which were generally below the level of the public road and passed under it, as necessary, by means of bridges and tunnels as the map extract below illustrates.
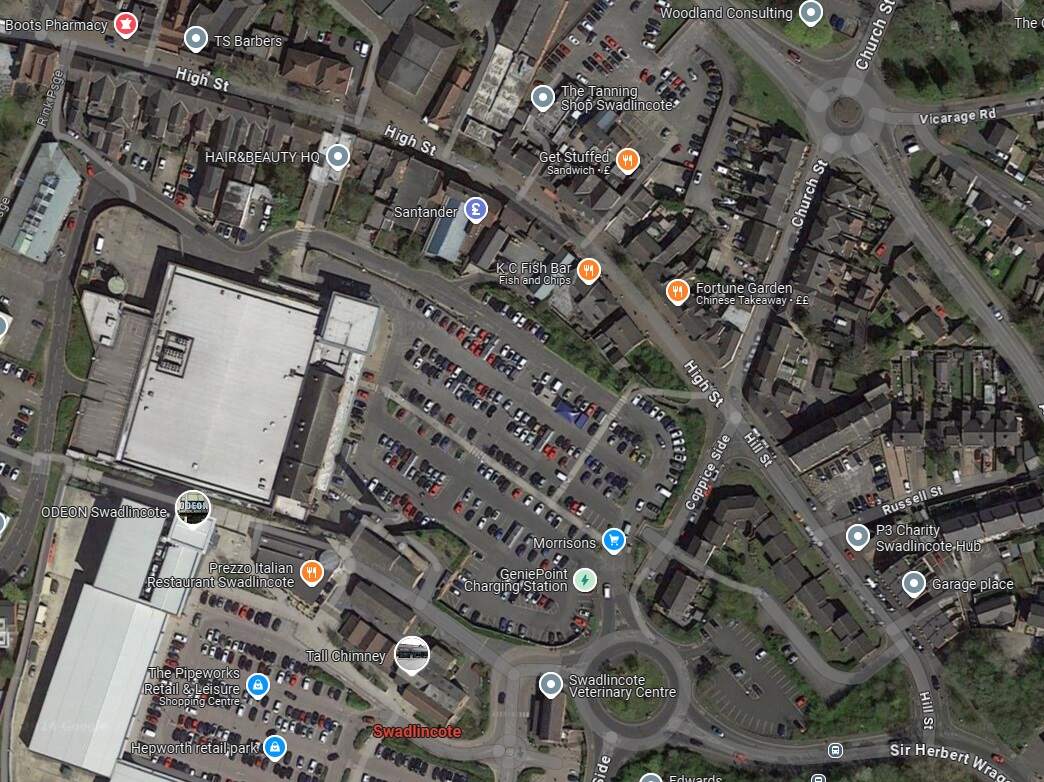
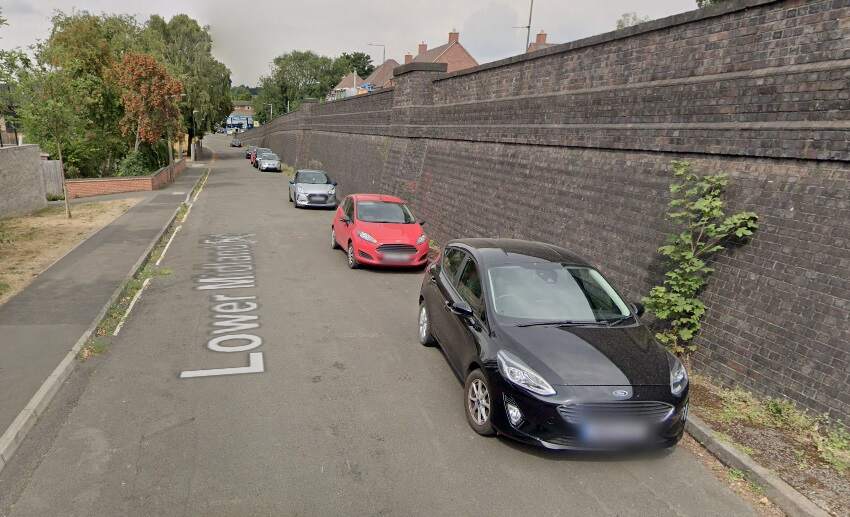
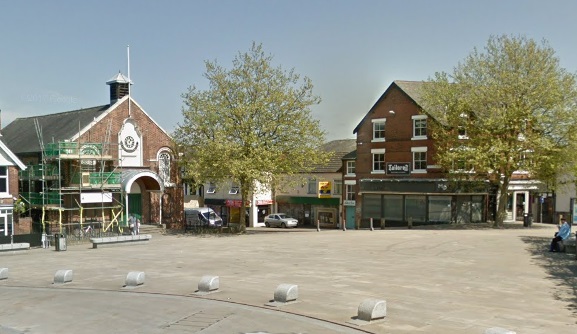
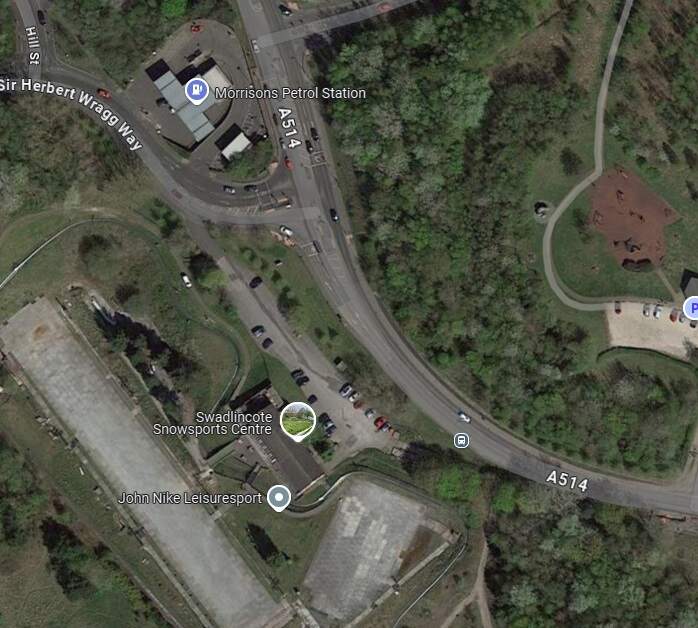
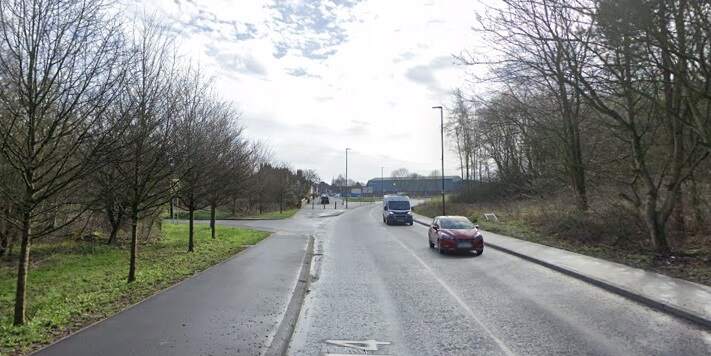
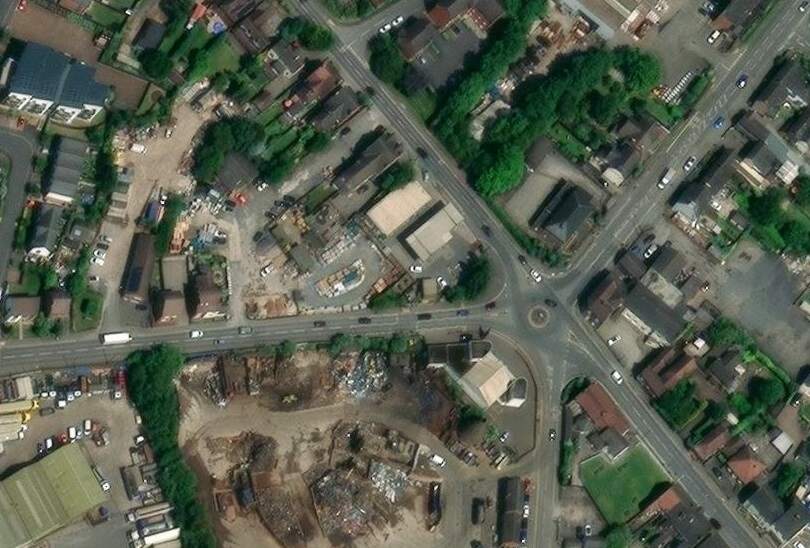
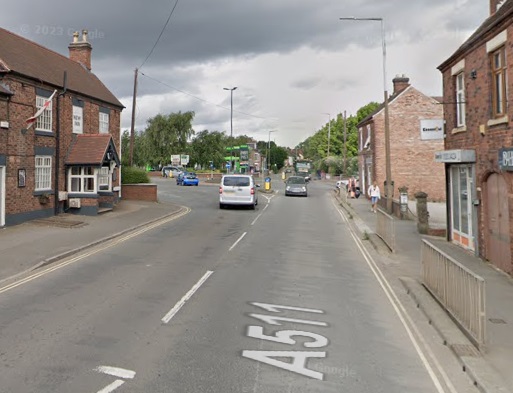
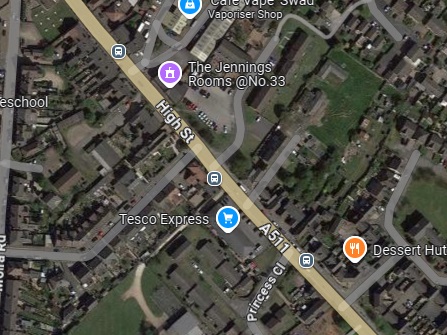
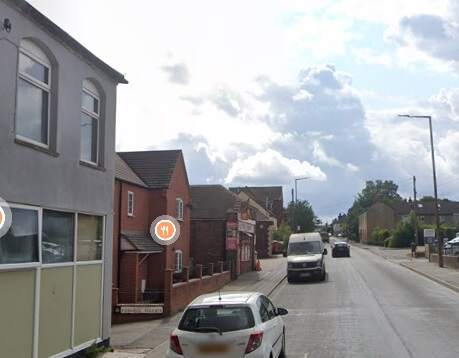
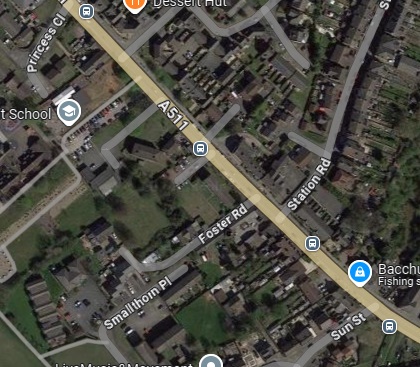
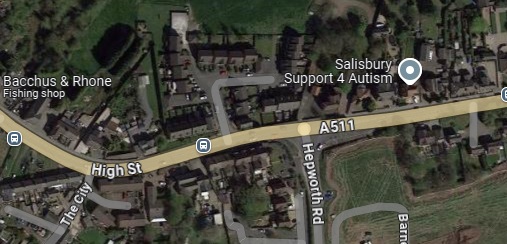
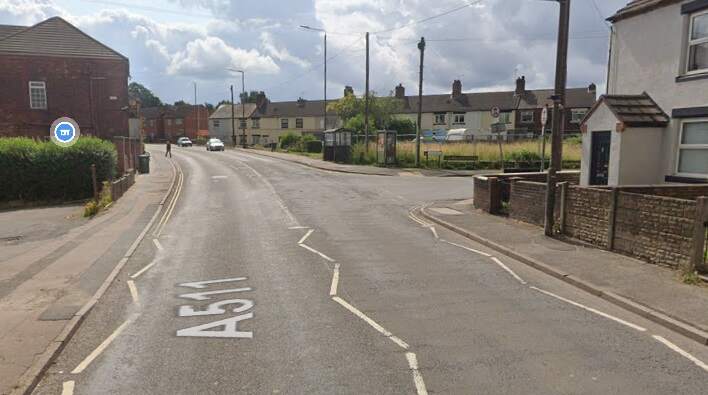
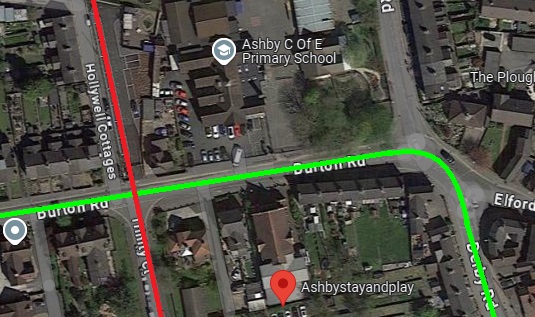
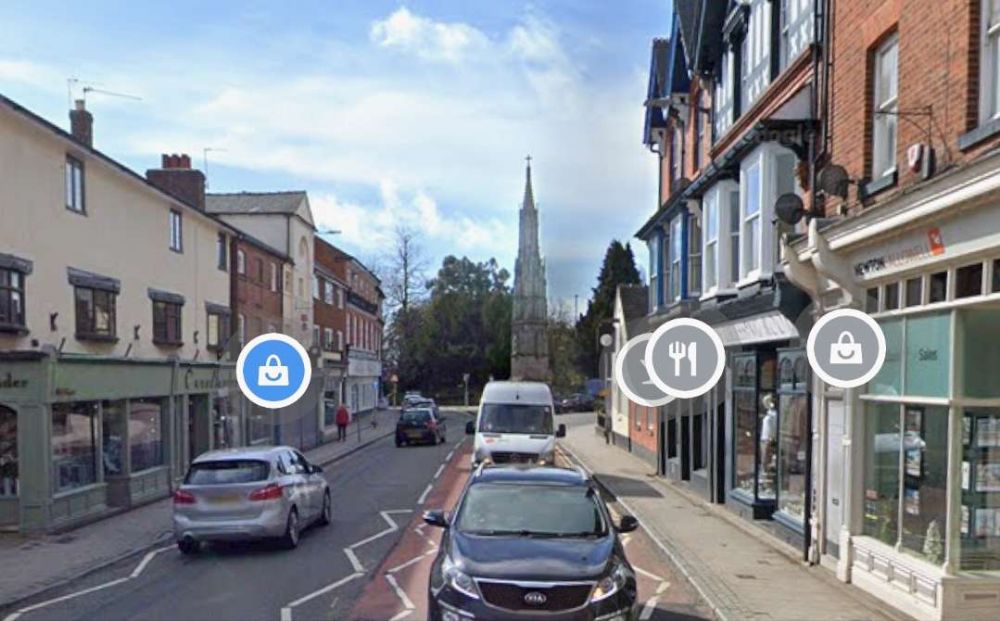
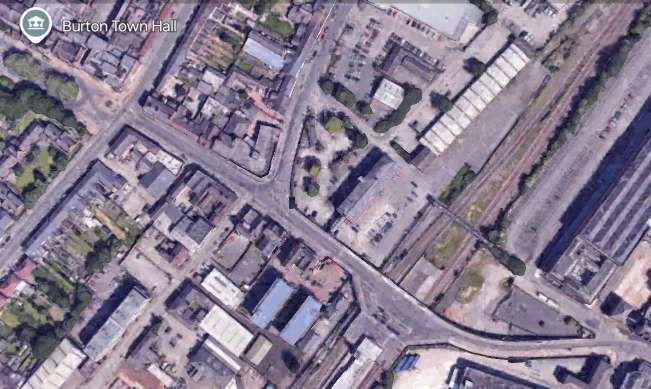
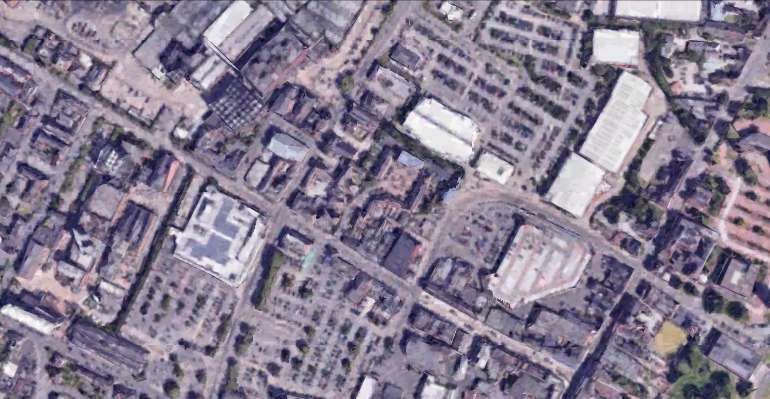
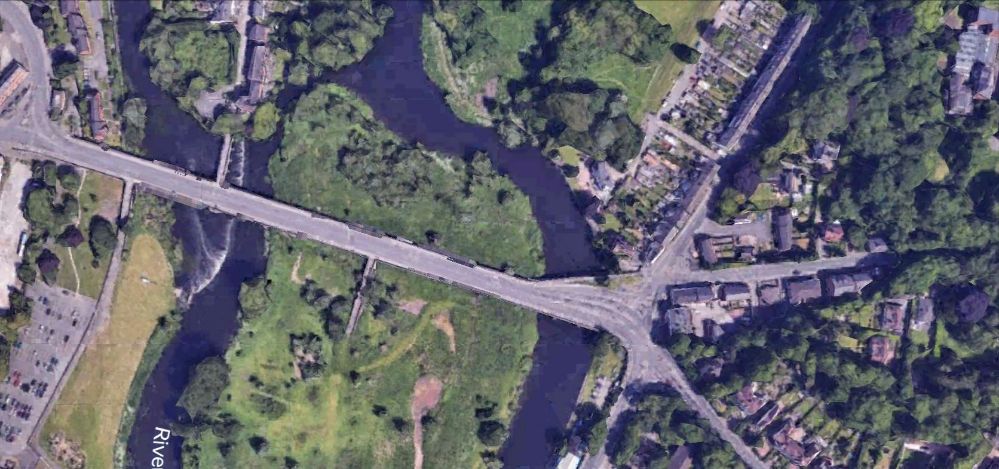
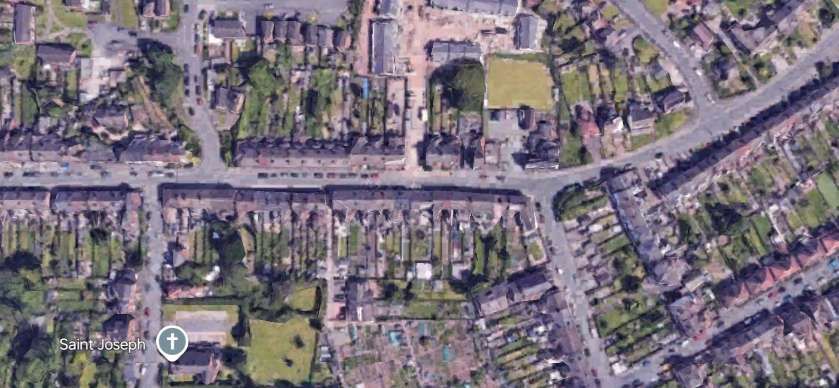
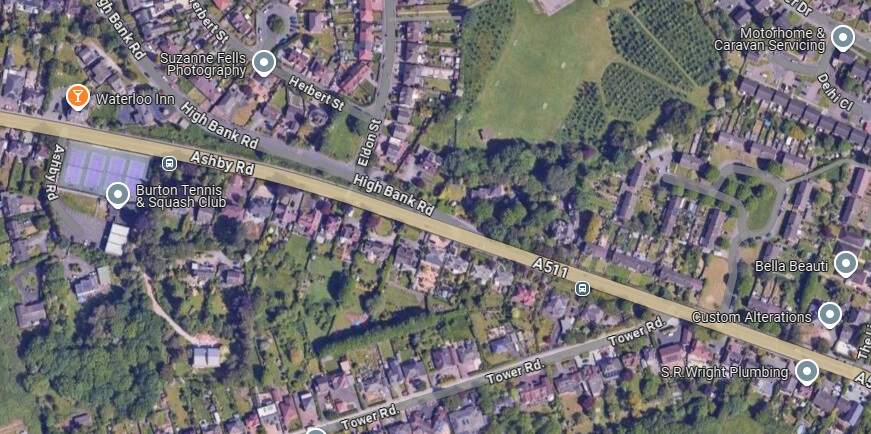
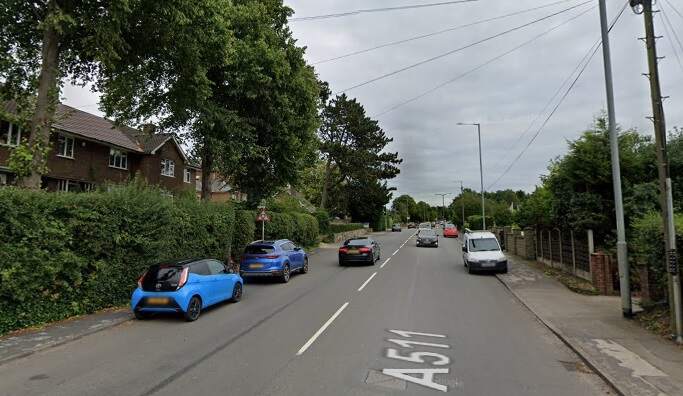
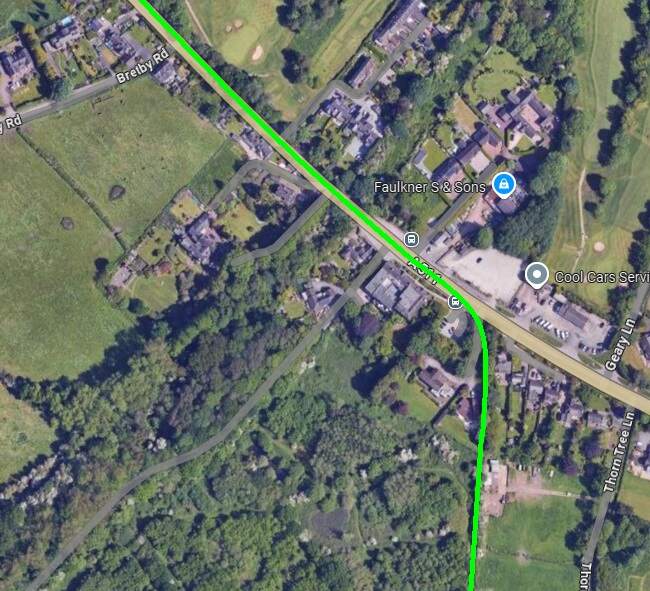
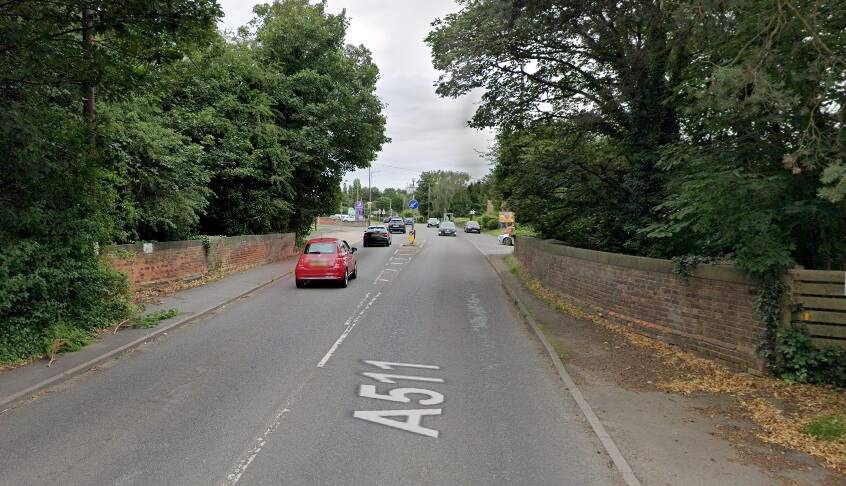
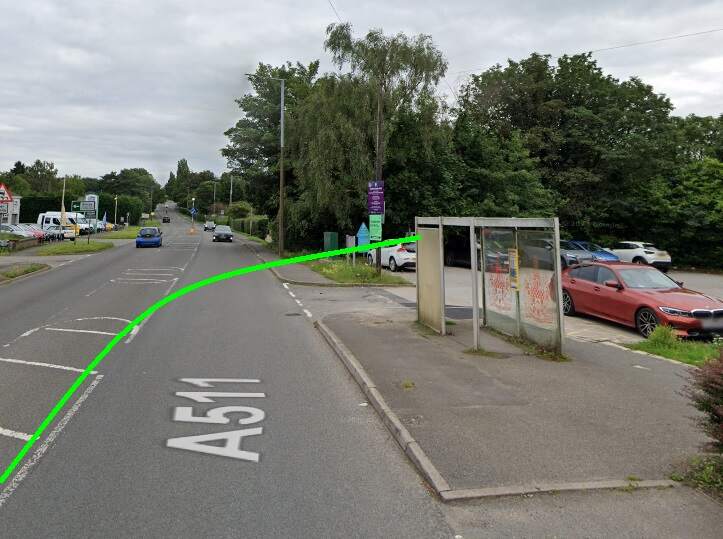
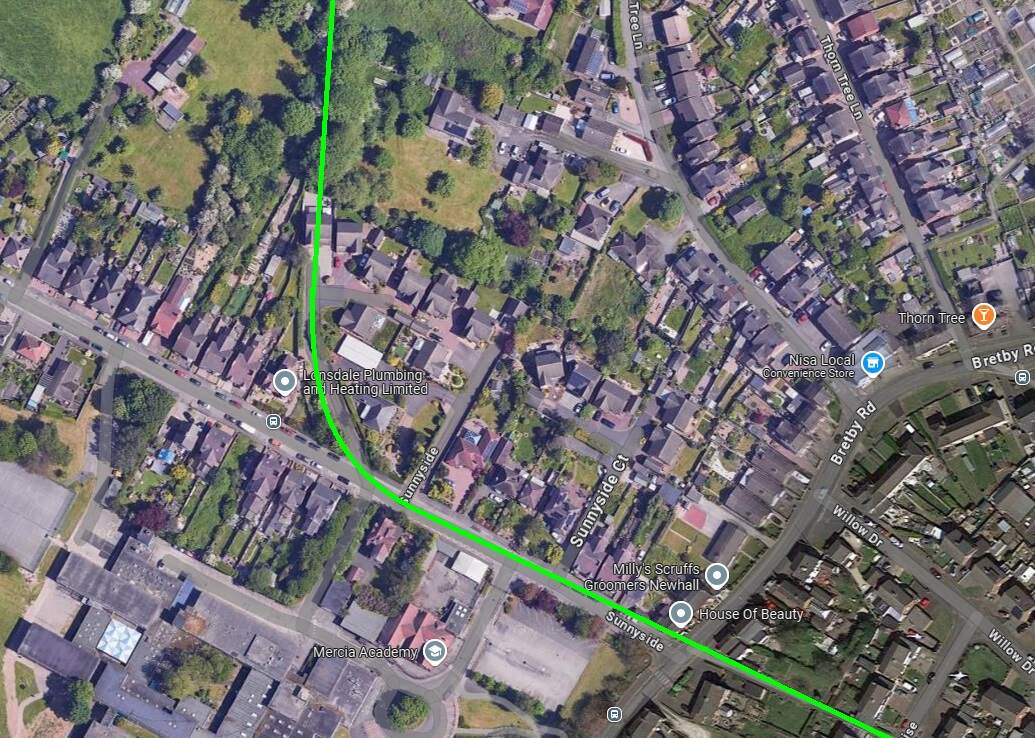
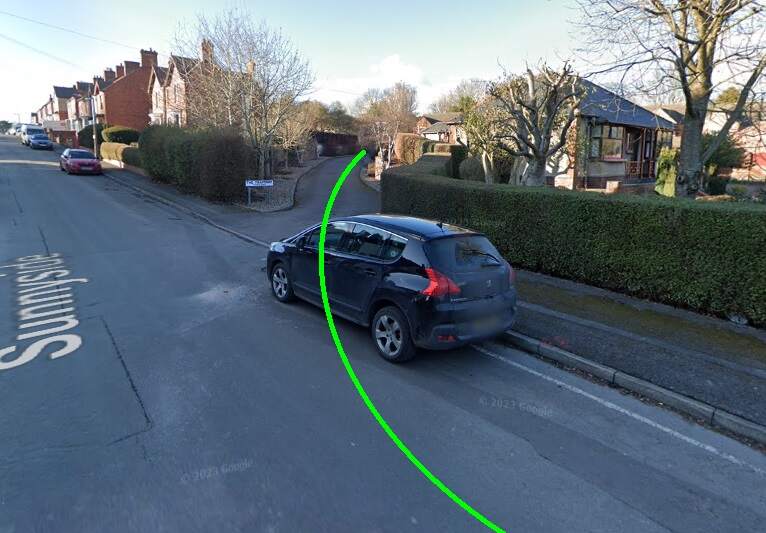
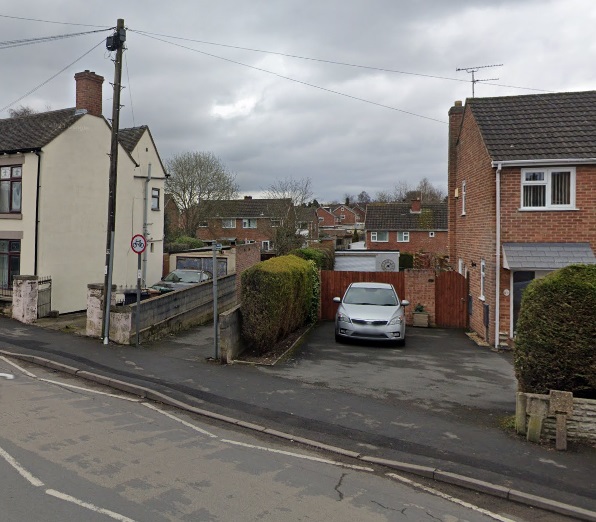
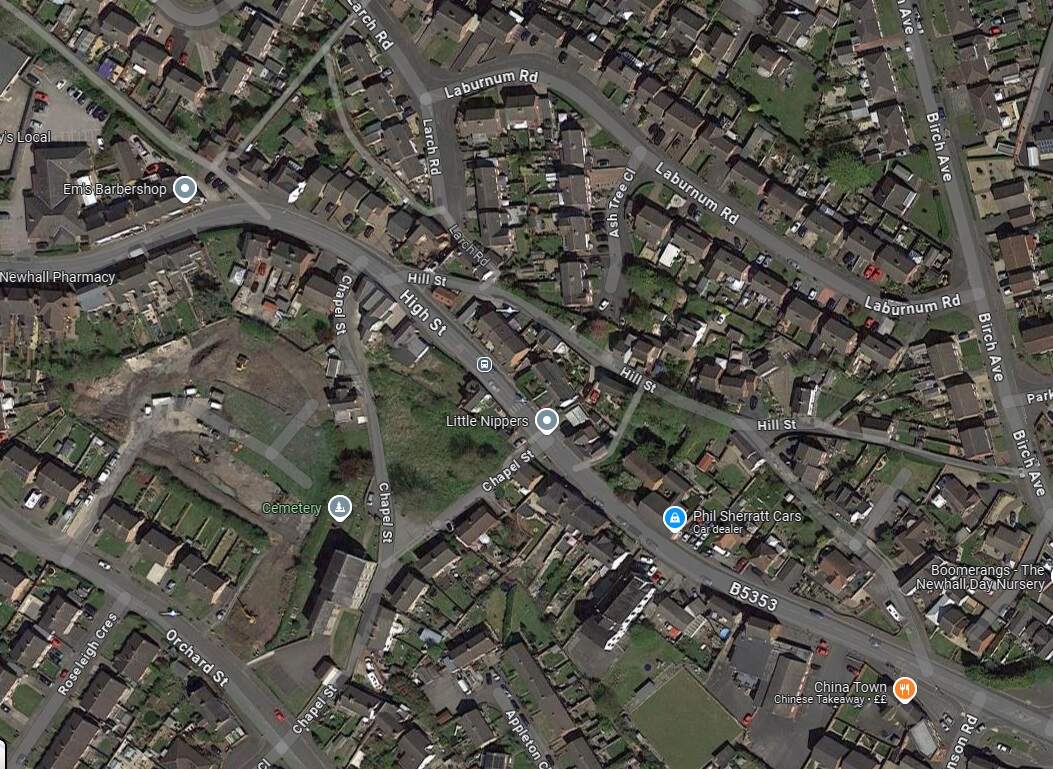
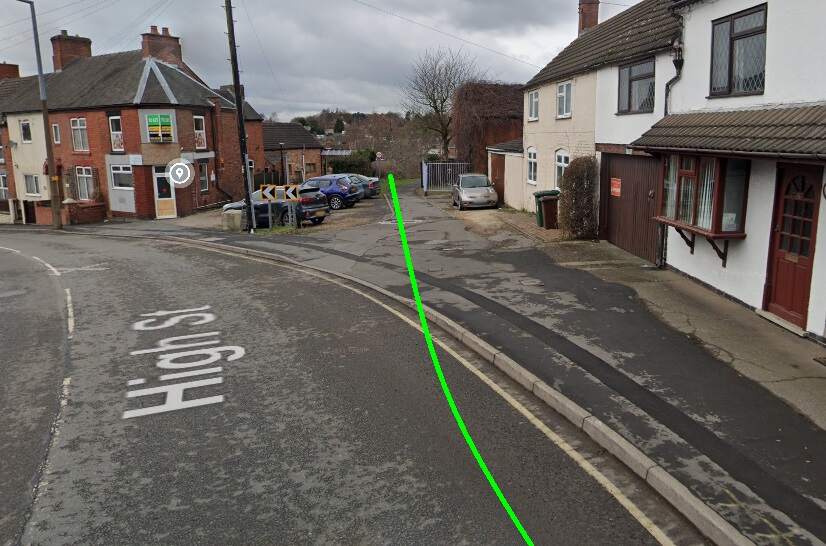
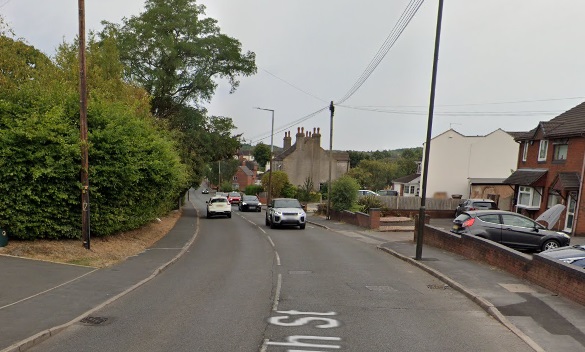
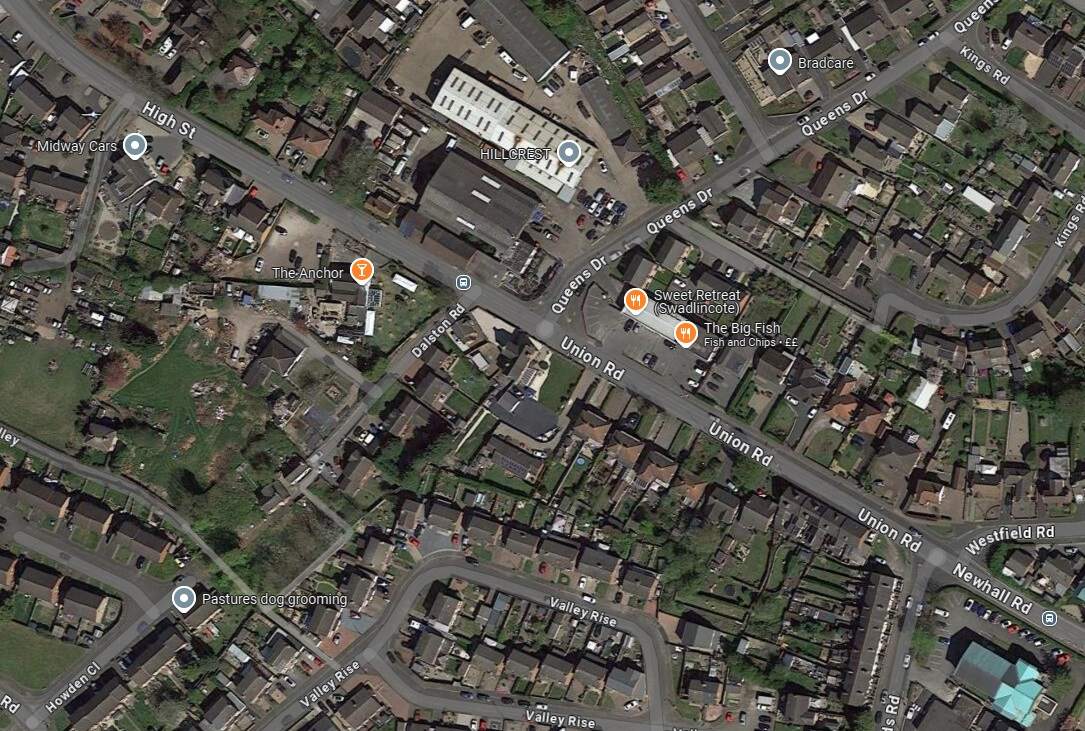
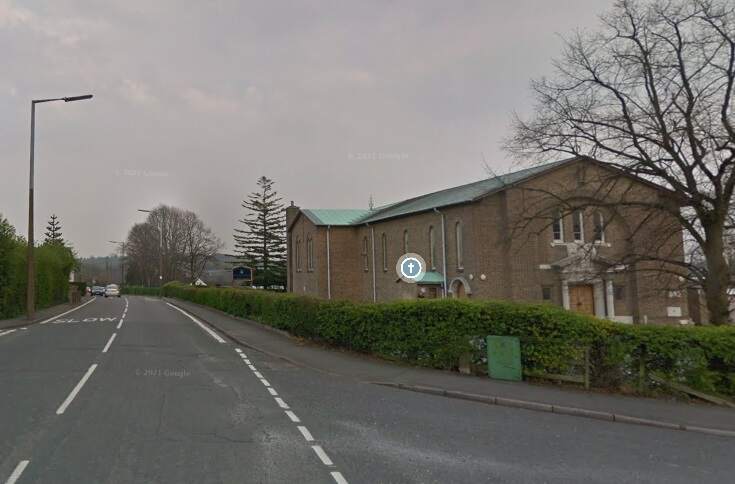
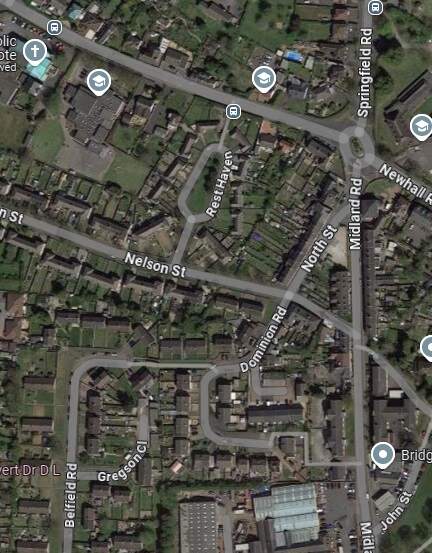
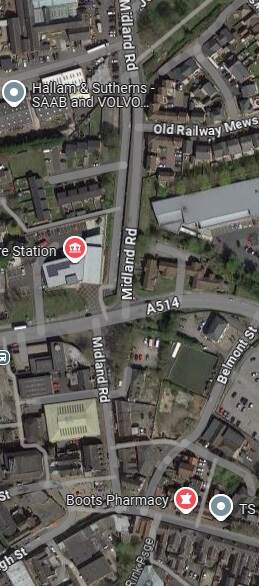
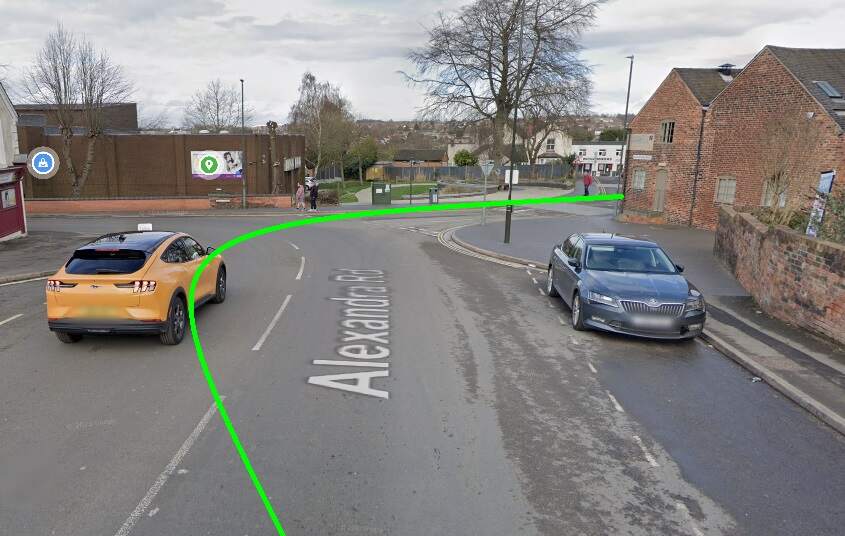
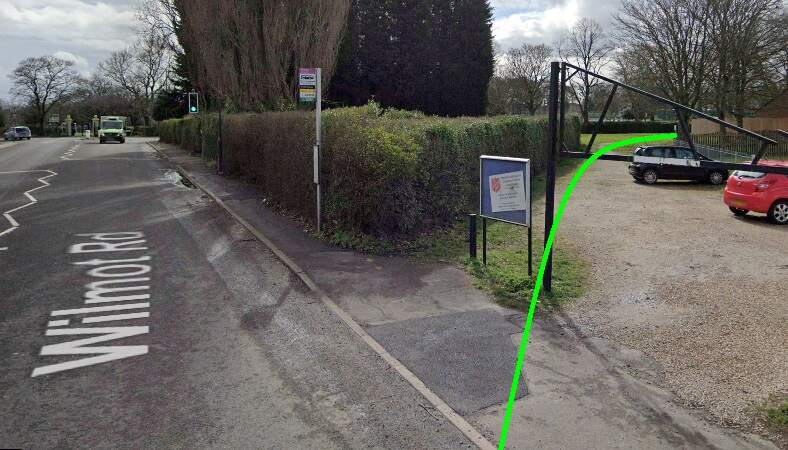
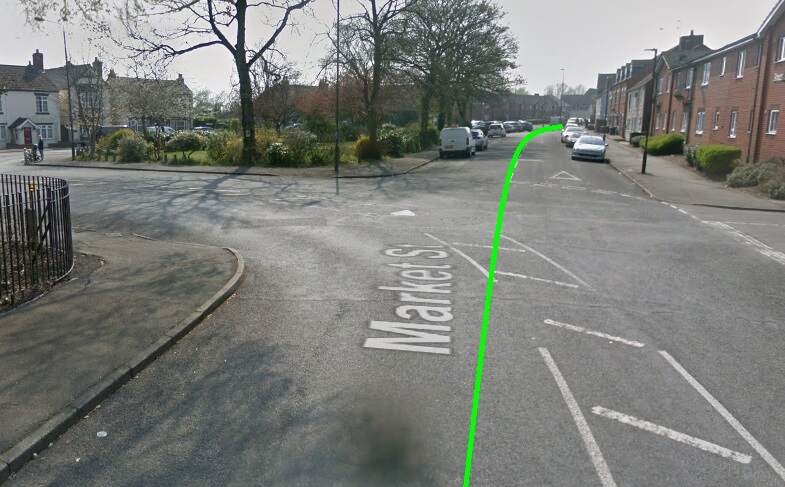
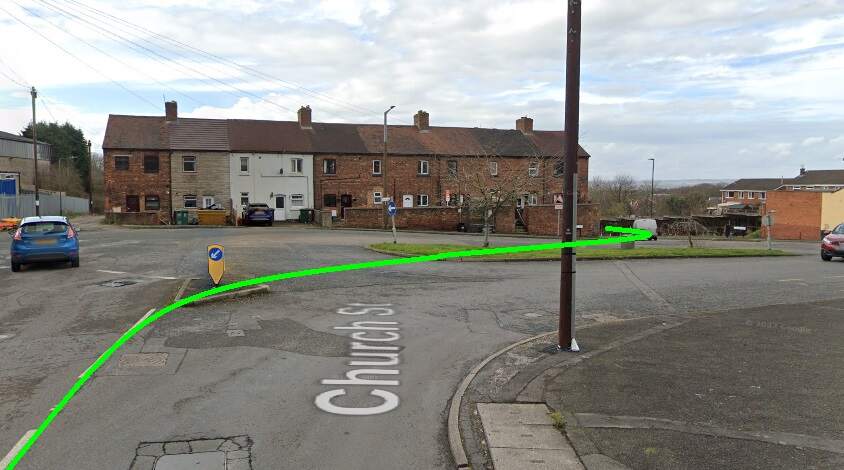
These two extracts from Google Maps satellite imagery cover the same length of the Light Railway as shown on the extract from the 1921 25″ Ordnance Survey above. The Southeastern length of what was Hill Street is now the A514 which bypasses the centre of the town. [Google Maps, October 2024]
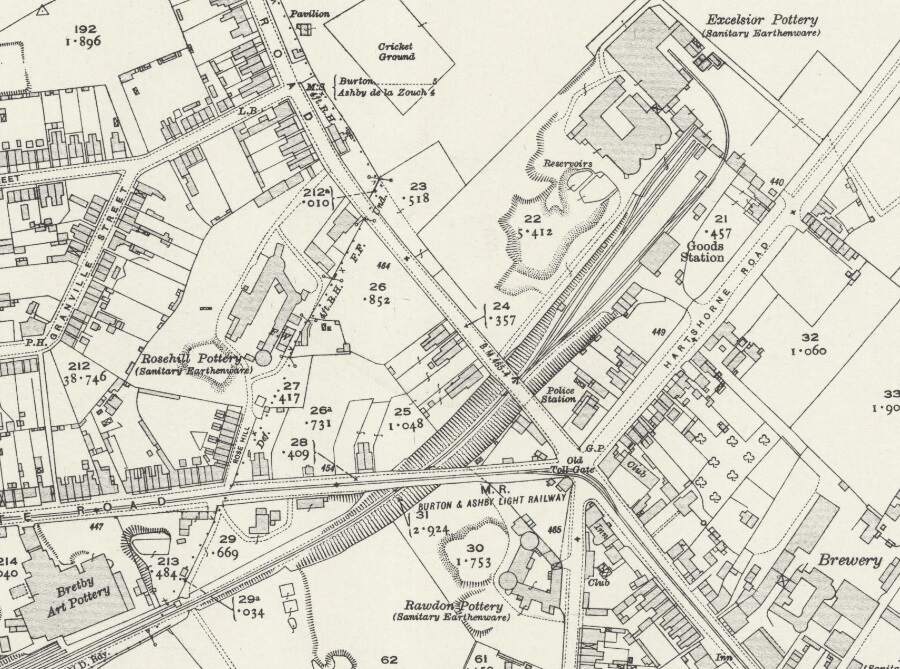
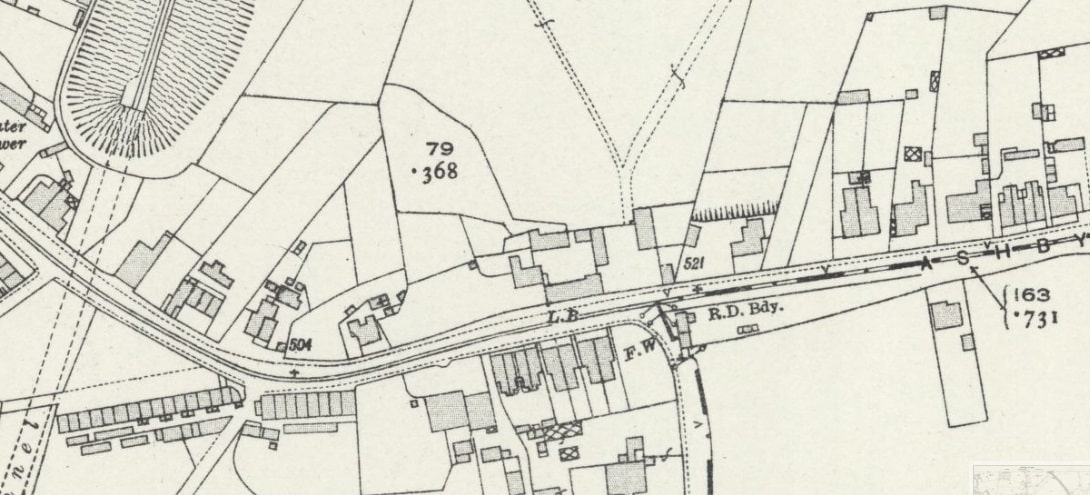

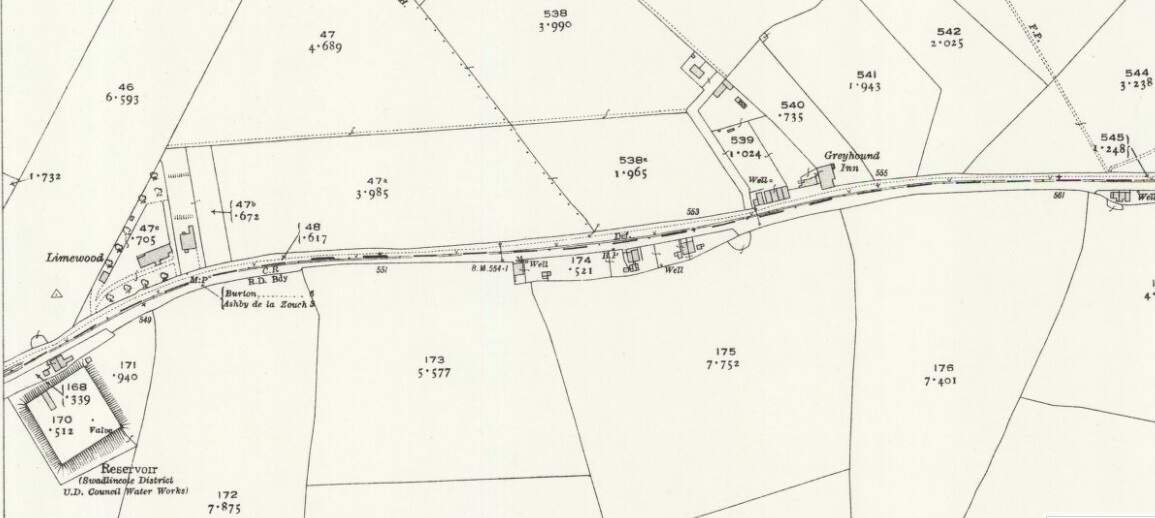
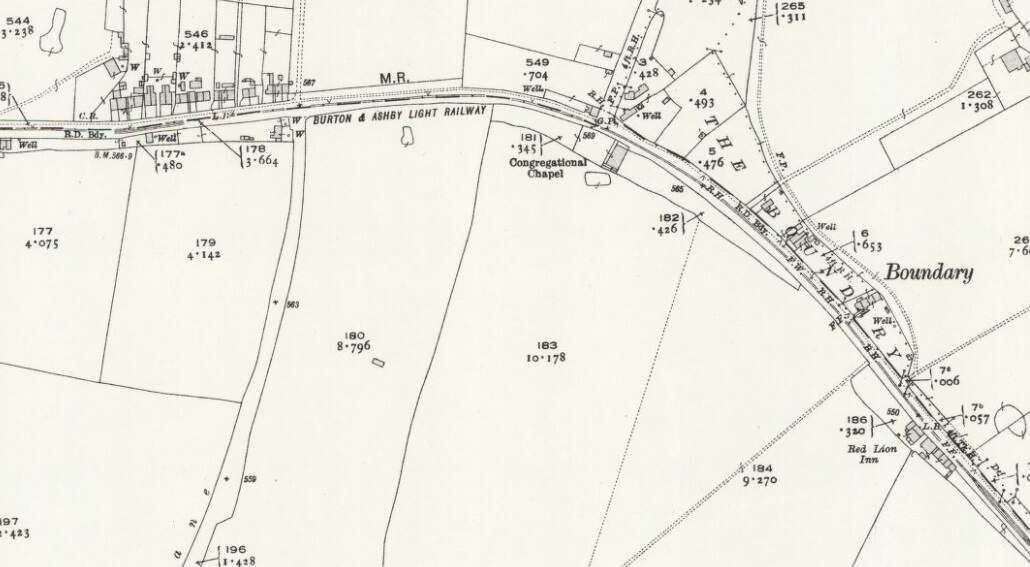
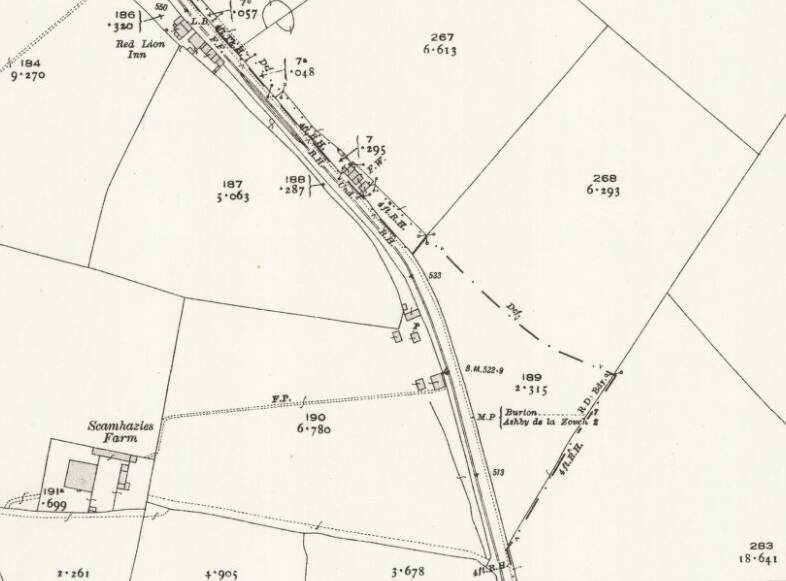
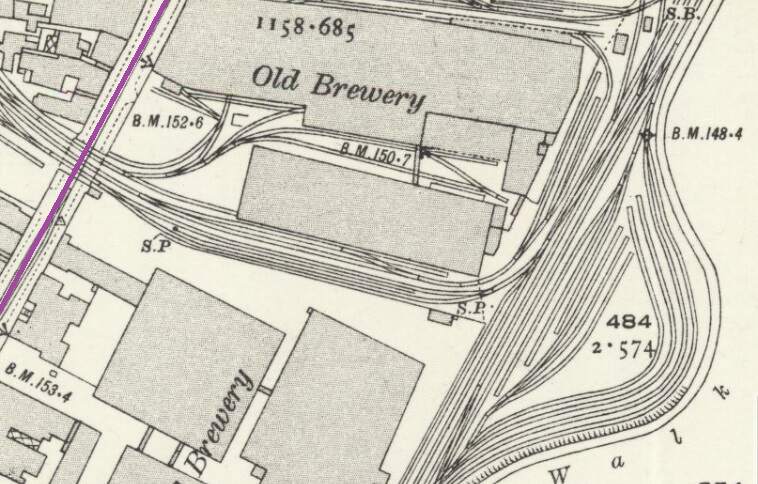
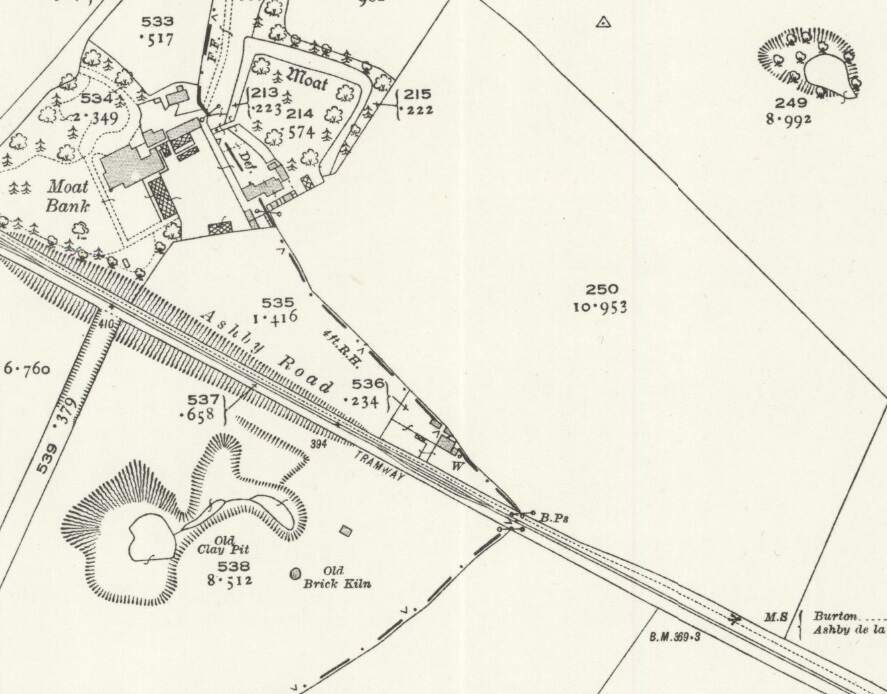
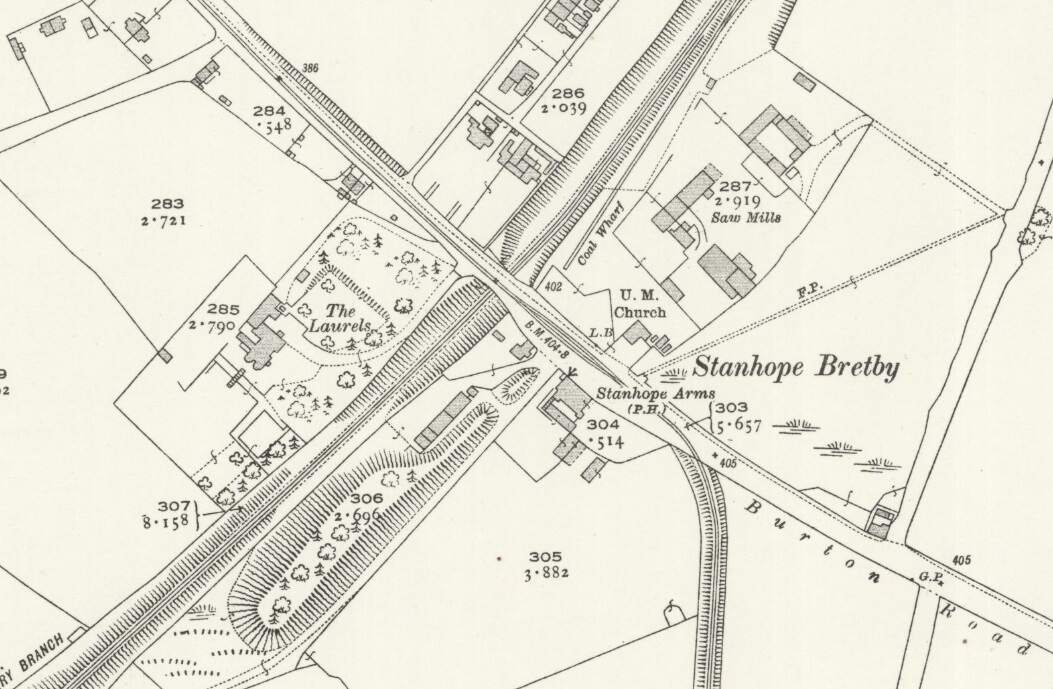
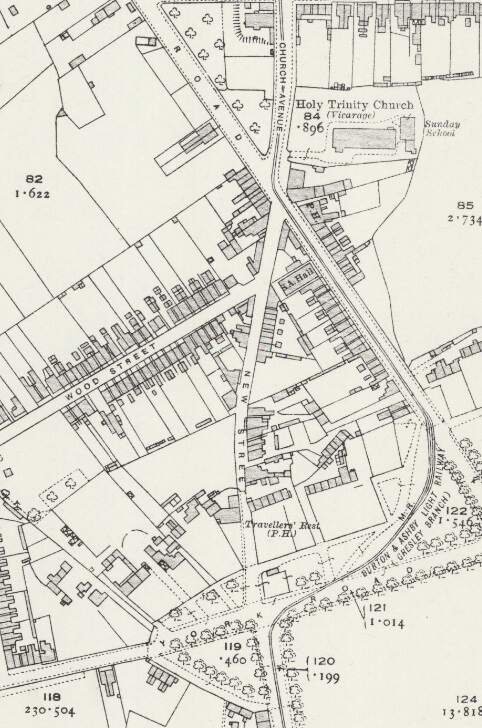
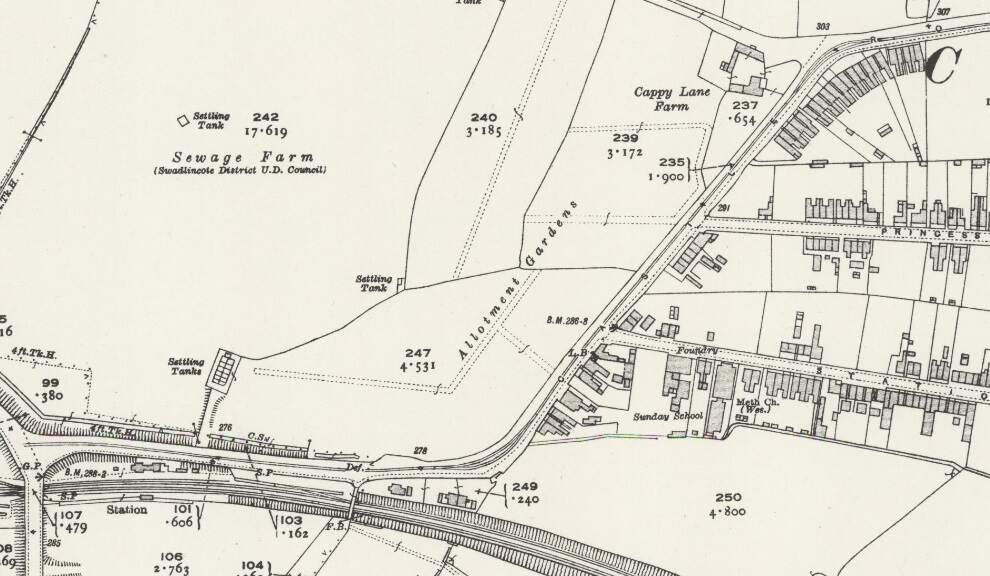
The next three extracts for the 1920 25″ Ordnance Survey follow the line across the next map sheet.
Glendenning continues:
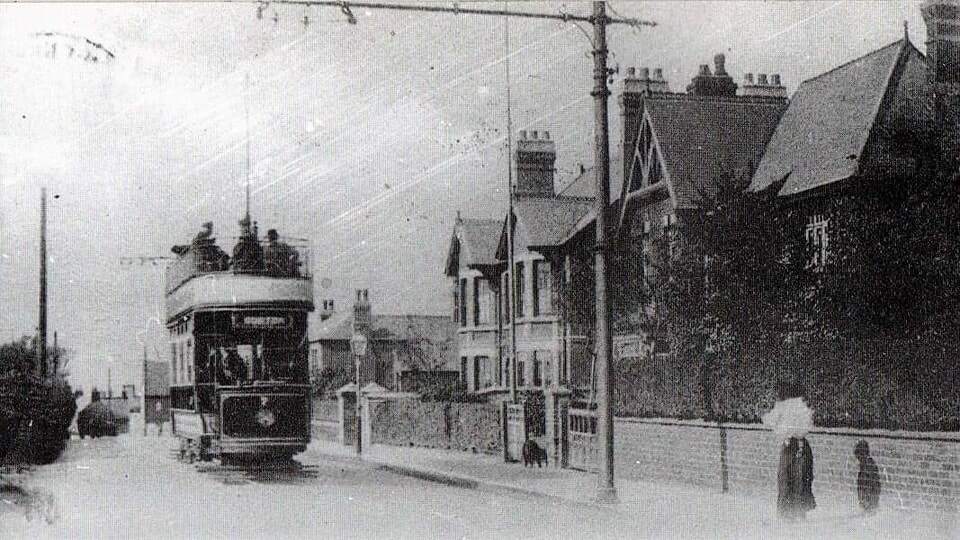
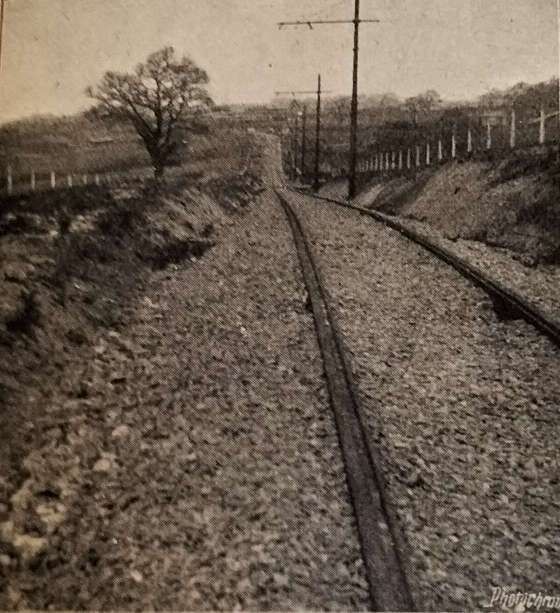
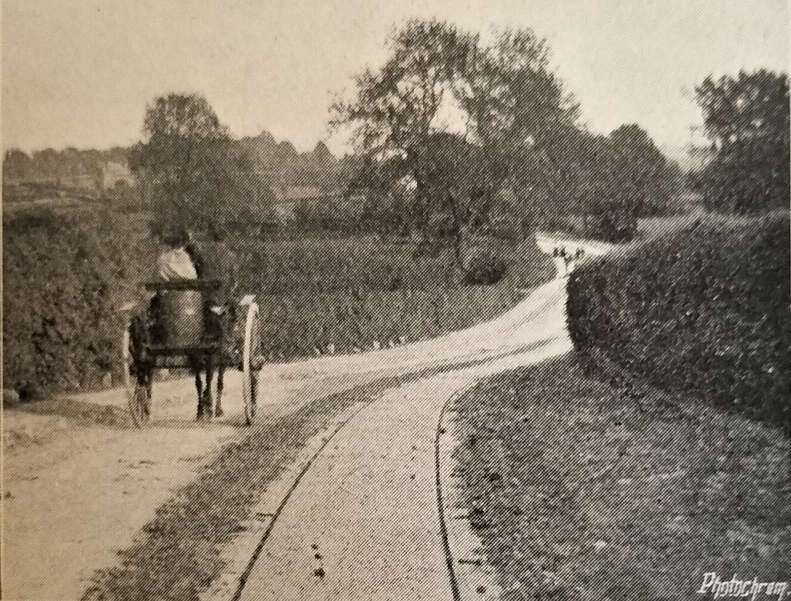
“After passing Swadlincote and Woodville, – the top of a hill is reached, 569 ft. above the sea level. Cornfields and meadows abound on either side, and there is also the magnificent landscape of Charnwood Forest. Then comes the hamlet of Boundary, so called, as it is a boundary of shires, parishes, and manors. Close by is the notable village of Smisby, set amongst fine park-like scenery.
It can still boast of its tournament field, which Sir Walter Scott made allusion to in “Ivanhoe.” The situation is very exposed at Boundary; severe storms rage there periodically, and the inhabitants say that anyone who can live winter and summer at Boundary could live anywhere. After entering Leicestershire, the new line makes a quick descent into Ashby-de-la-Zouch. The old town has the refined air of a fashionable inland watering-place, though its medicinal saline baths are not more than a century old. The fourteenth-century castle was wrecked during the seventeenth-century civil wars; but even the portions that remain are magnificent, alike in size, strength and beauty of architecture.” [1: p55-56]
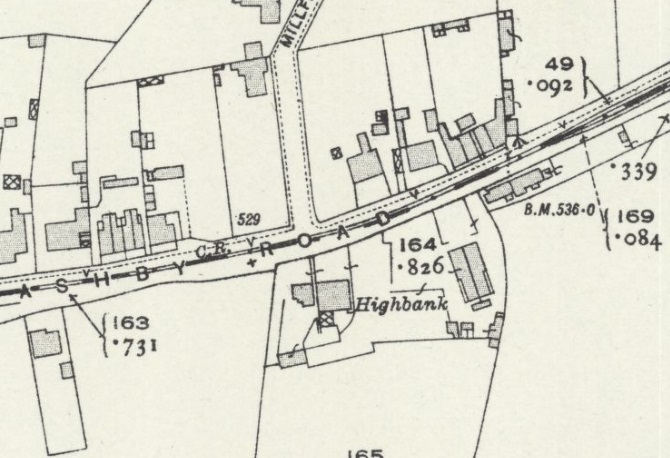
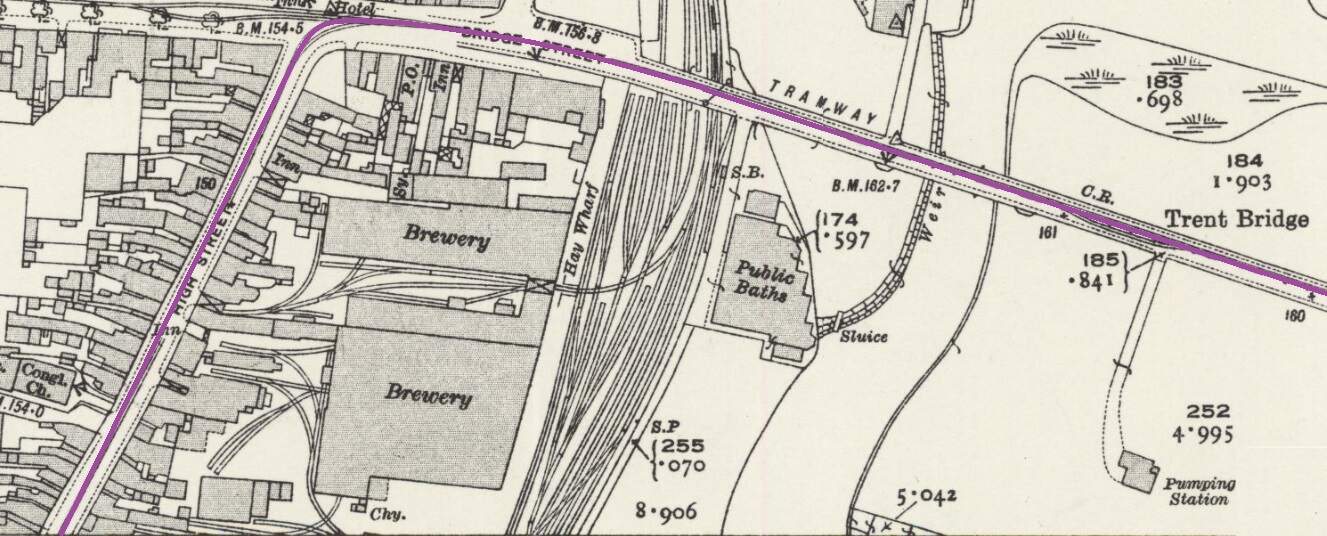
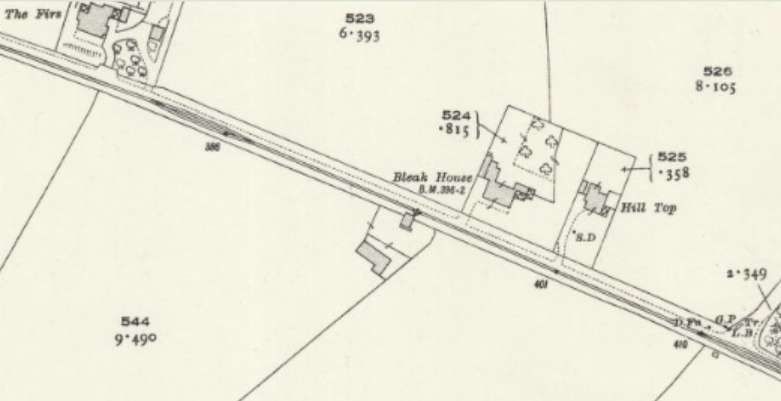
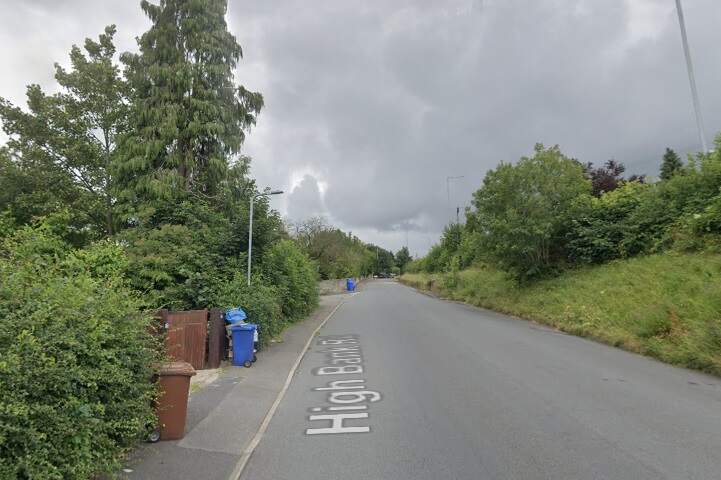
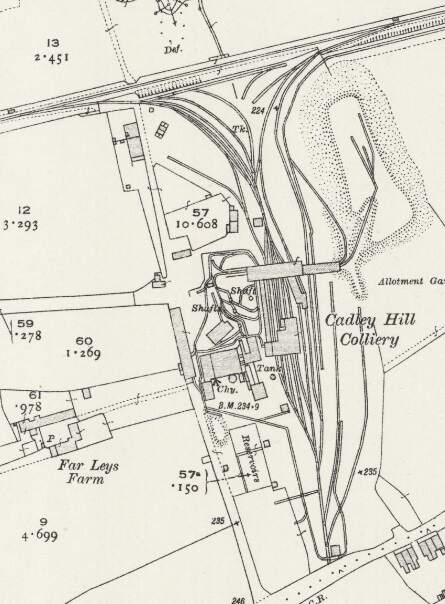
On its way down to Ashby-de-la-Zouch the road and light railway traverse another full 1921 25″ OS Sheet with little worthy of note. [21] The next image shows the line as it appears on the 25″ Ordnance Survey, much closer to Ashby-de-la-Zouch. [22]


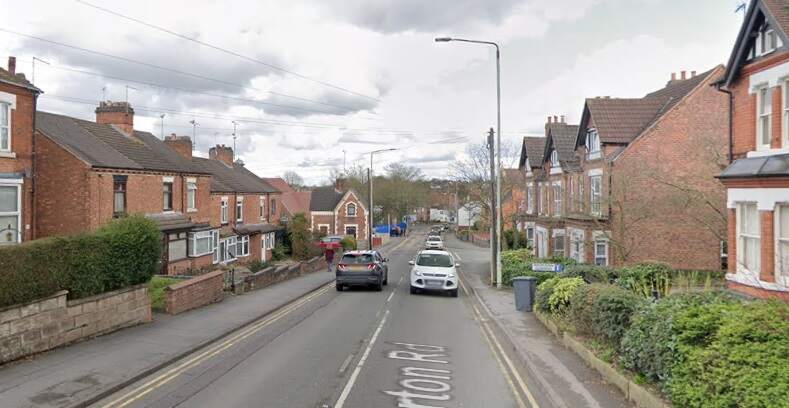
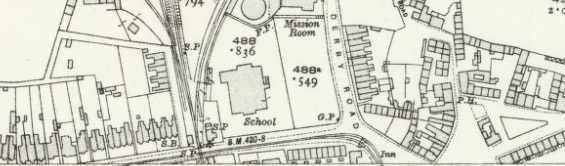
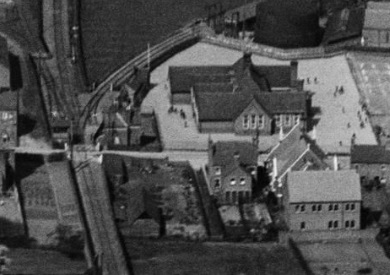
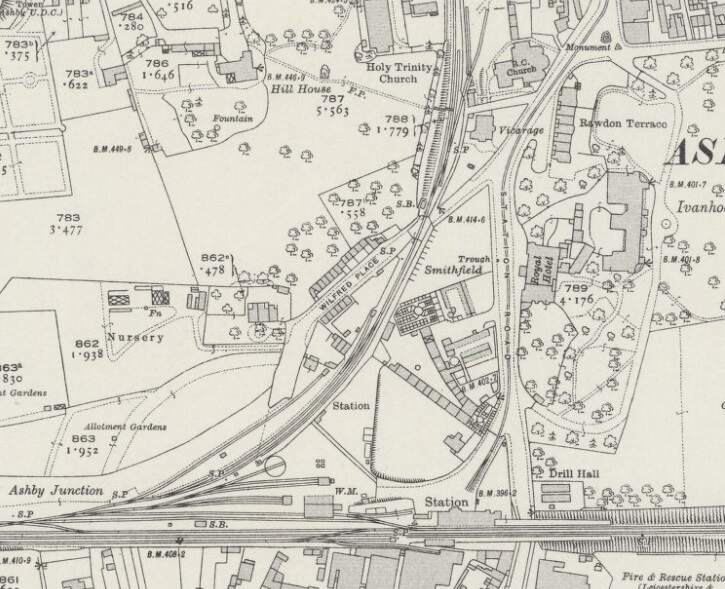
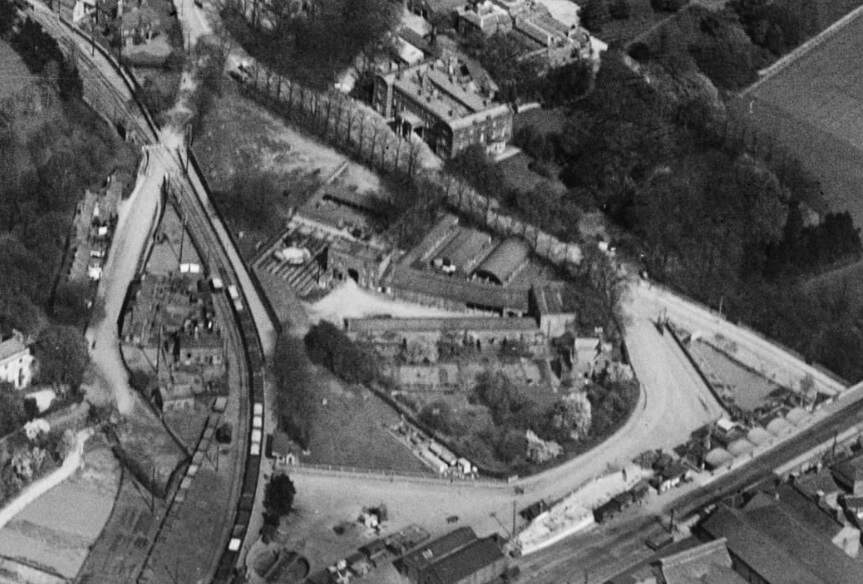
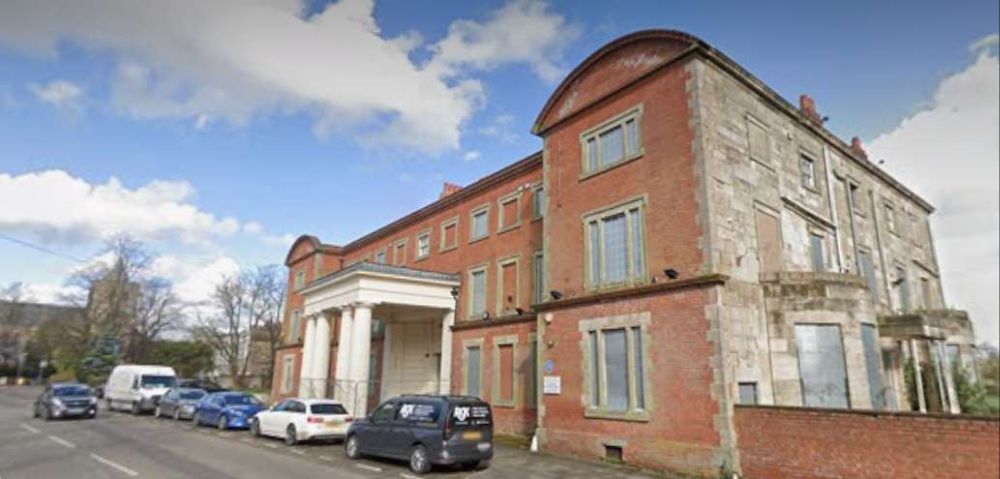
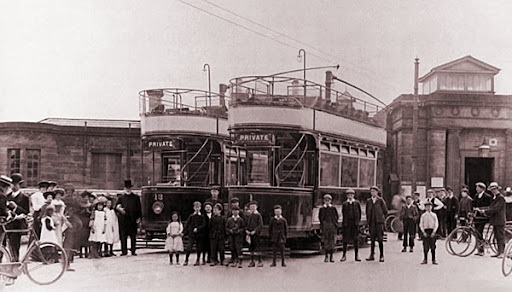
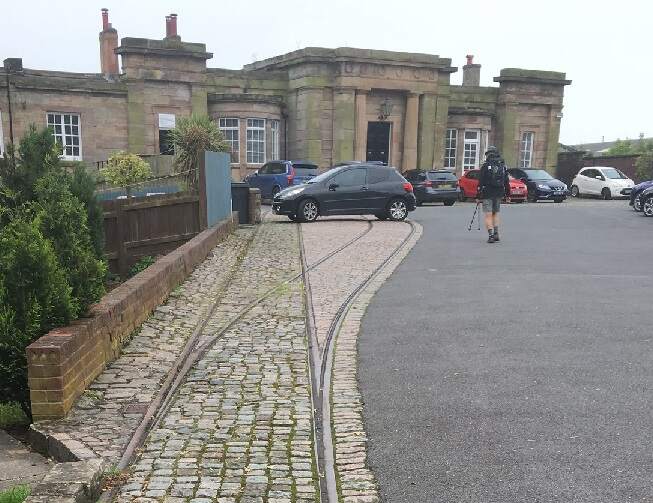
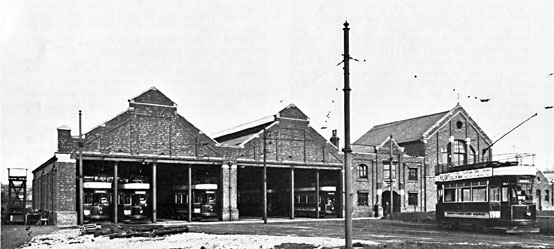
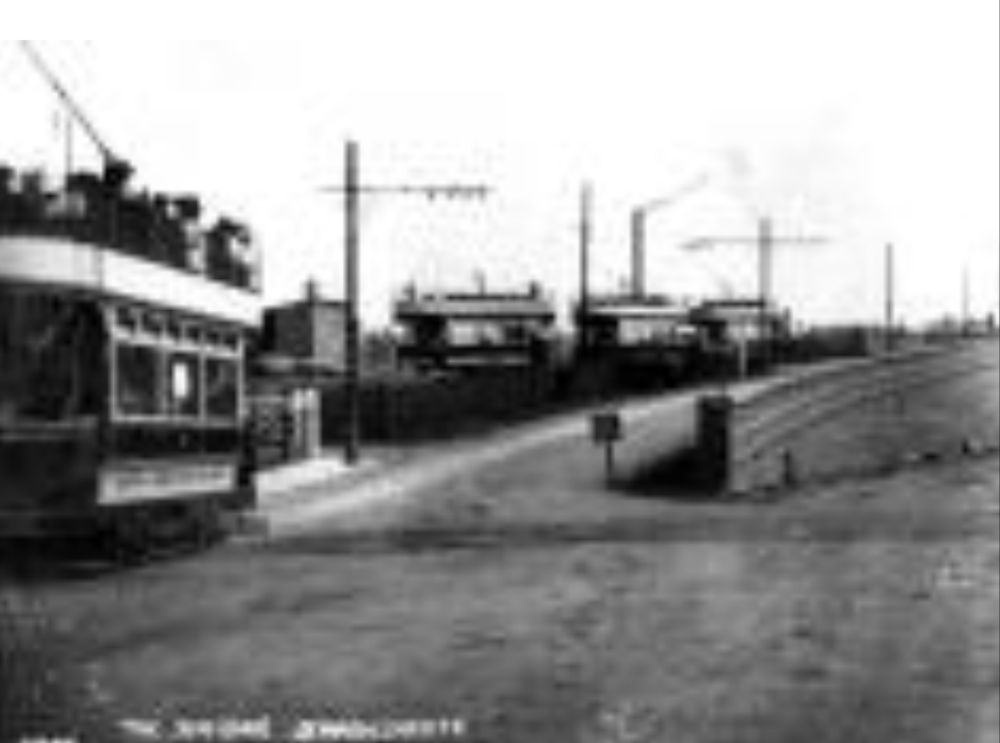
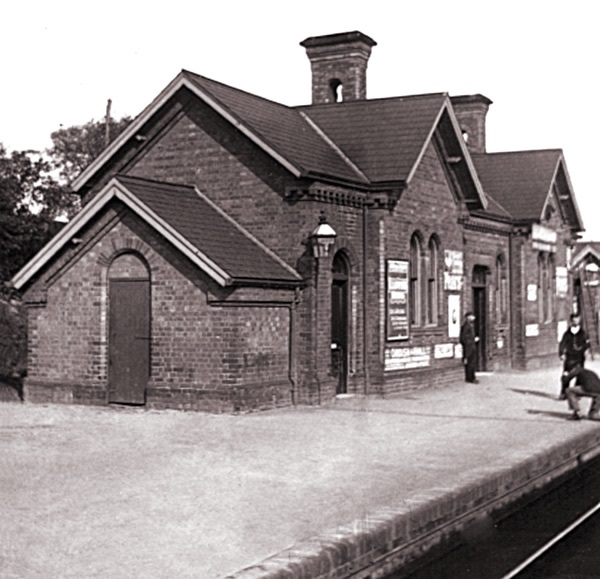
The Depot and Powerplant at Swadlincote
Glendenning tells us that:
“The power station and car shed have been built at Swadlincote, which is about midway between Burton and Ashby. These premises are designed to give every facility for convenient and economical working, with ample margins for any extensions that may be necessary in future. The shed has six lines of rails, and underneath there are pits about 4 ft. deep, like a railway engine shed, so that the motor machinery on the cars may be easily got at for the purpose of examination and repairs. Adjacent to the car shed is the spacious and well-equipped power station. Here we find that not only is steam out of date for light locomotive purpose, on a short track, but it is also being superseded as a prime-mover for the generation of electricity; at any rate, in comparatively small and isolated stations, where a varying and not very heavy load has to be dealt with.” [1: p56]
Perhaps for an audience unfamiliar with the use of electricity as a power-source for a railway, Glendenning spends quite a few words explaining the reason for the choice of diesel engines to create electricity for the network. Not initially the most obvious choice in a coal-mining area. He goes on to say that:
“There are two three-cylinder vertical engines of 240 18.1lp each with a huge fly-wheel weighing about nine tons, coupled direct to two cylinders, each capable of giving an output of 150 kilowatts.” [1: p57]
The Depot was “built with accommodation for 24 trams, 8 tracks x 3 deep but only 20 trams were owned.” [6]
Following closure of the system, “the tram sheds were used to accommodate Thomson’s Fair from 1935 into the 1940s and then for munitions during the Second World War.” [7]
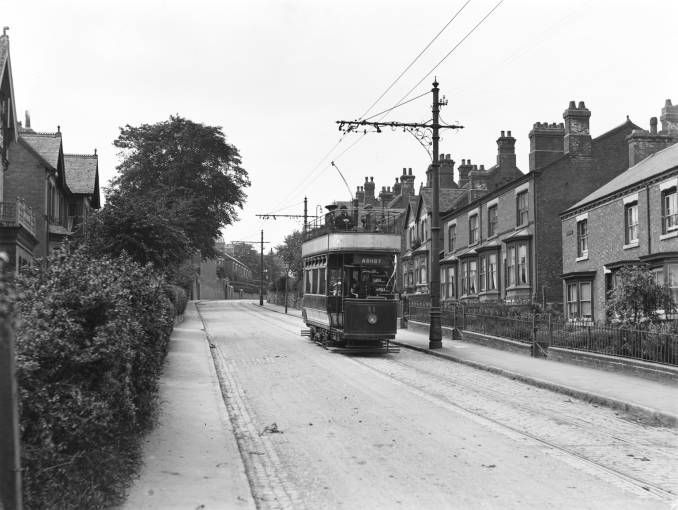
Rolling Stock
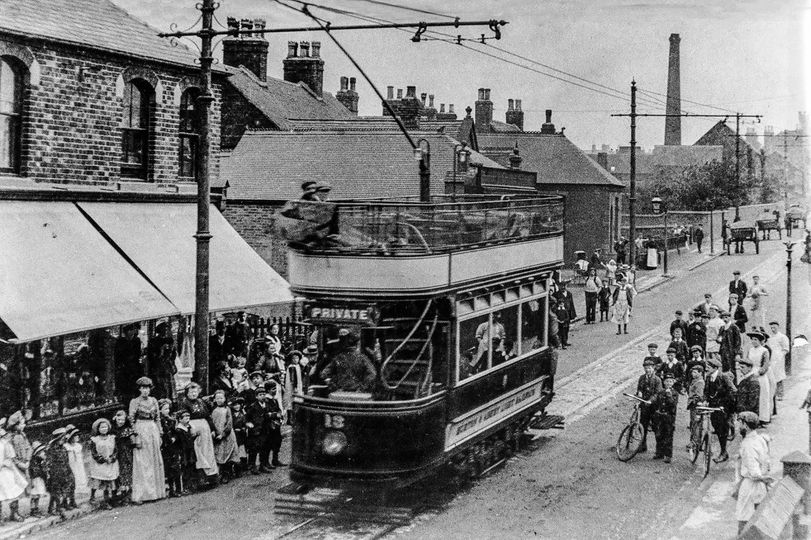
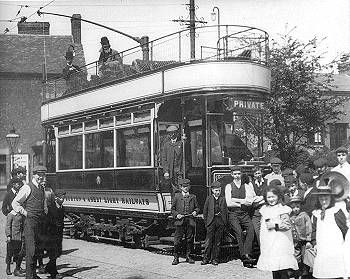
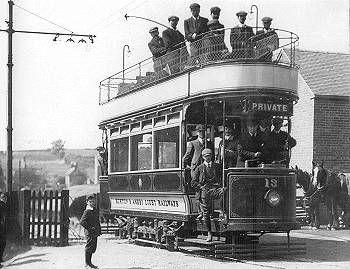
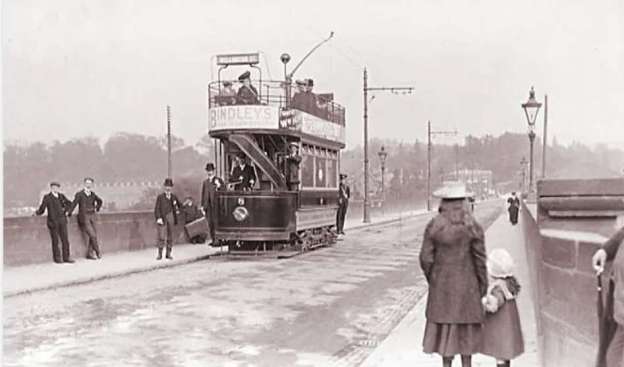
Glendenning reports that the new line was to be operated by open-topped cars “with all the latest possible improvements, … Built at the Brush Electrical Company’s Works, Loughborough.” [1:p57]
Glendenning goes on to describe the tramcars:
“They bear the Midland Railway Company’s coat-of-arms, and are designed to carry 57 passengers each, 22 inside and 35 outside. They are mounted on Brush rigid wheel base trucks, with steel tyred wheels, provided with Hudson-Bowring-lifeguards, and magnetic track brakes. The electrical equipments, powerful motors, etc., were furnished by the British Westinghouse Electric Manufac- turing Company, of Trafford Park, Man- chester. Accommodation has been provided for the carrying of a limited number of parcels on the platforms of the cars, while, at a later stage, it is intended to carry booked parcels. Workmen’s cars, with special fares, will be run as soon after the formal opening of the line as possible.” [1: p57]
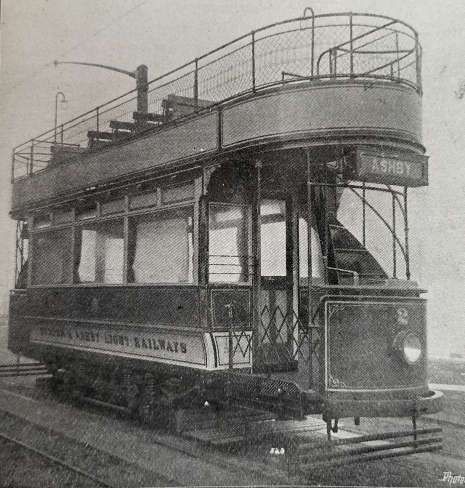
The LMS Society notes that: “The cars were in Crimson Lake and a white livery with ornate gold panelled lining and Midland crest. It was in this condition that the cars came into LMS ownership but all the cars were repainted in a simpler livery at Derby Works. The original white had weathered to a light cream and the later cream mellowed in a short life to a yellow. Although the method of tramsport to Derby Works is not certain the LMS owned bogie tramcar wagons and with an open top tramcar the bodies would almost certainly come within the loading gauge. The trolley pole, seats and wire screens were easily removed and so it is more than likely visits to works were by rail journey.” [6]
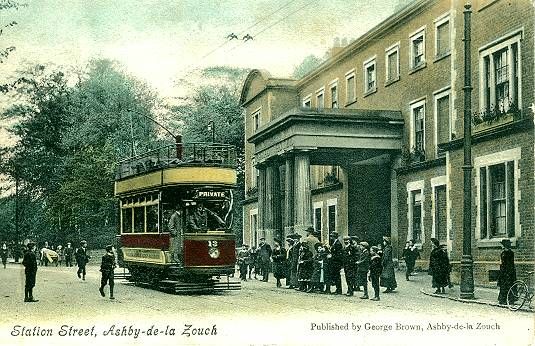
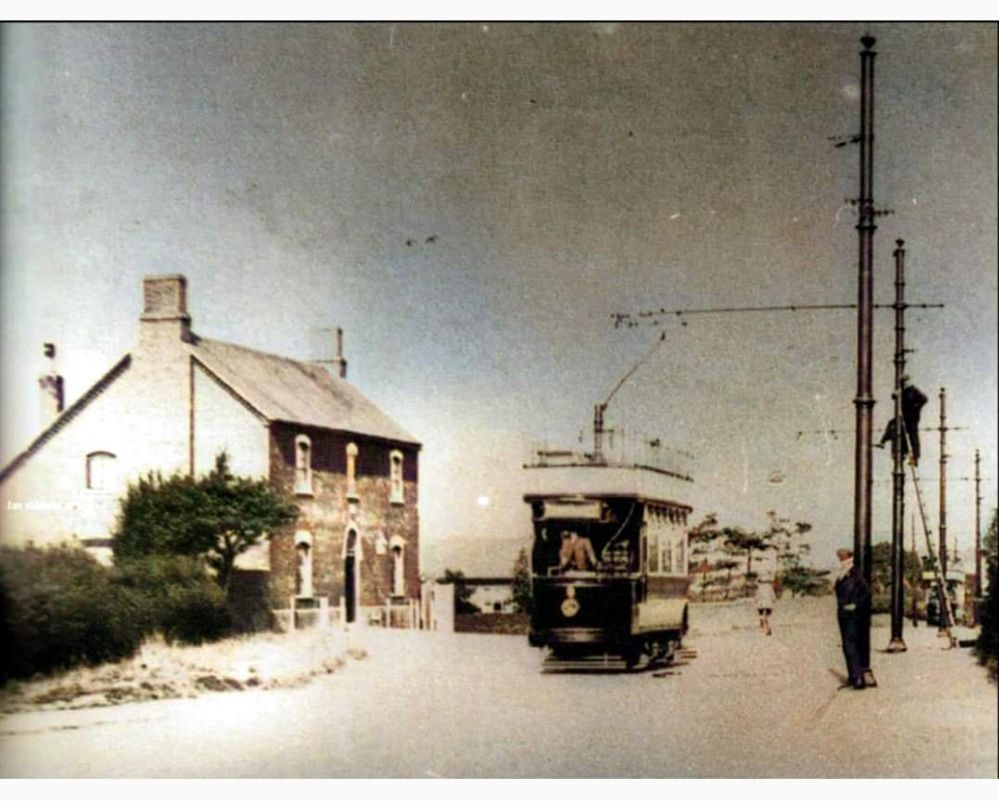
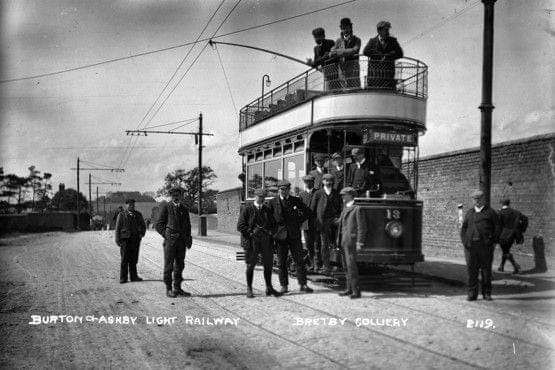
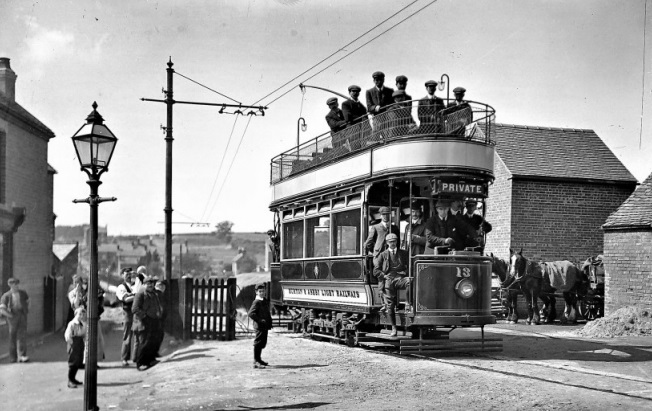
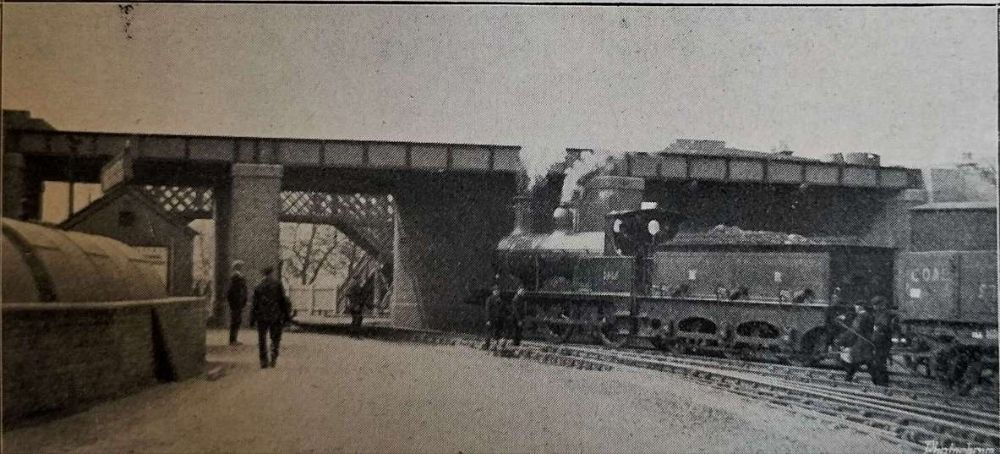
There was also a horse-drawn trolley tower/maintenance platform which can be seen in the photograph of the tram depot above.
The Service Provided
Glendenning notes that the frequency of service “between Ashby, Swadlincote and Burton [is] every half hour. … Between Woodville, Swadlincote, Newhall and Gresley, every 15 mins. … Ordinary service commences at 8 am. … Passengers between Ashby and Gresley change at Swadlincote Market Place or Woodhouse Road.” [1: p57]
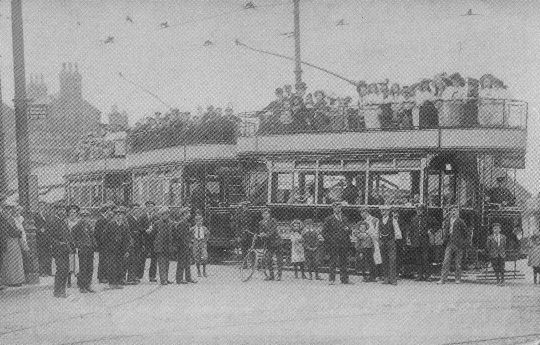
The LMS Society goes on to tell us that:
“Special services were often run, Sunday School Outings and other Club Outings, and even a Railway Club on 8th July, 1909 hired three trams for a return trip from Burton to Ashby. Special services to feed passengers to excursions from Burton Station before normal services, and upon their return after the last train, were another feature.
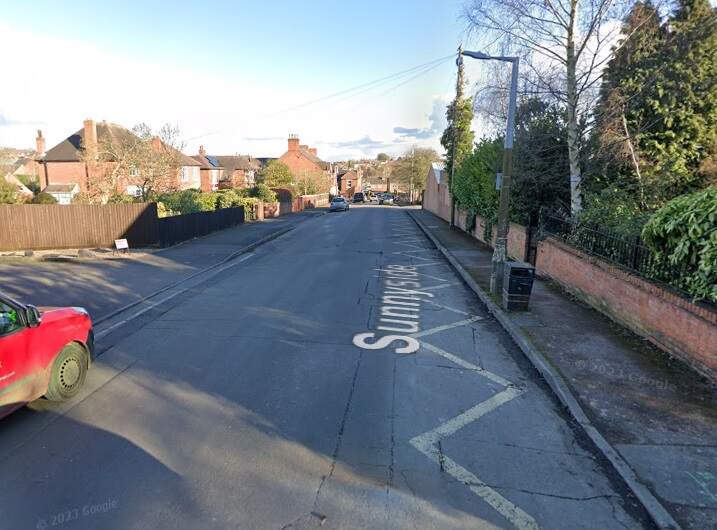
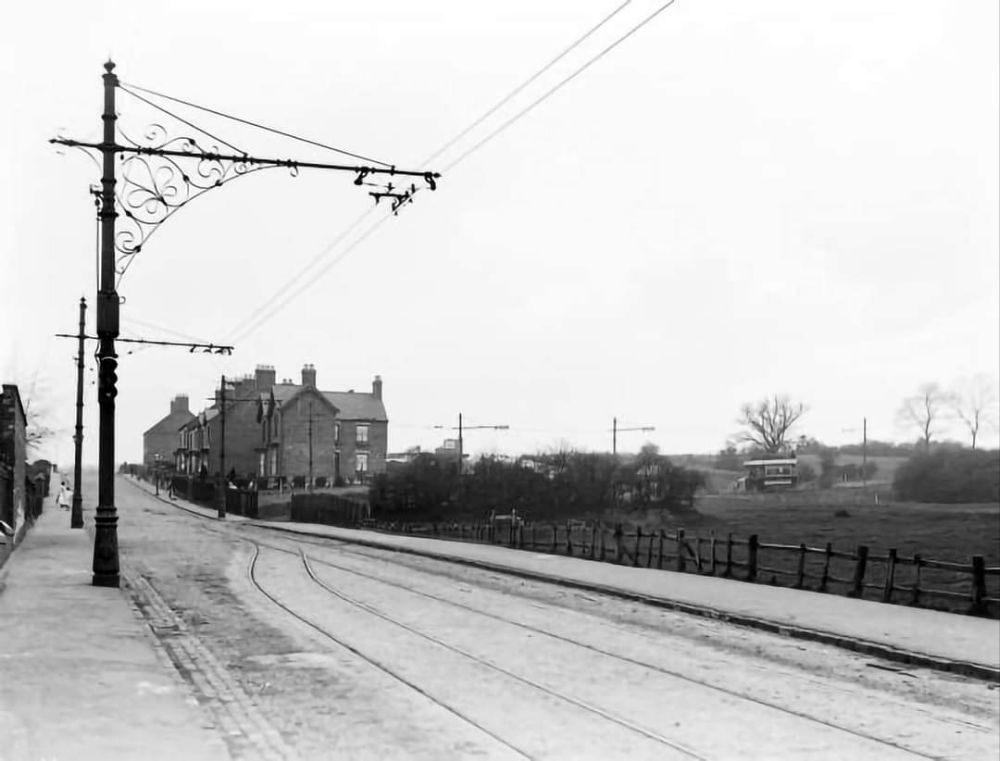
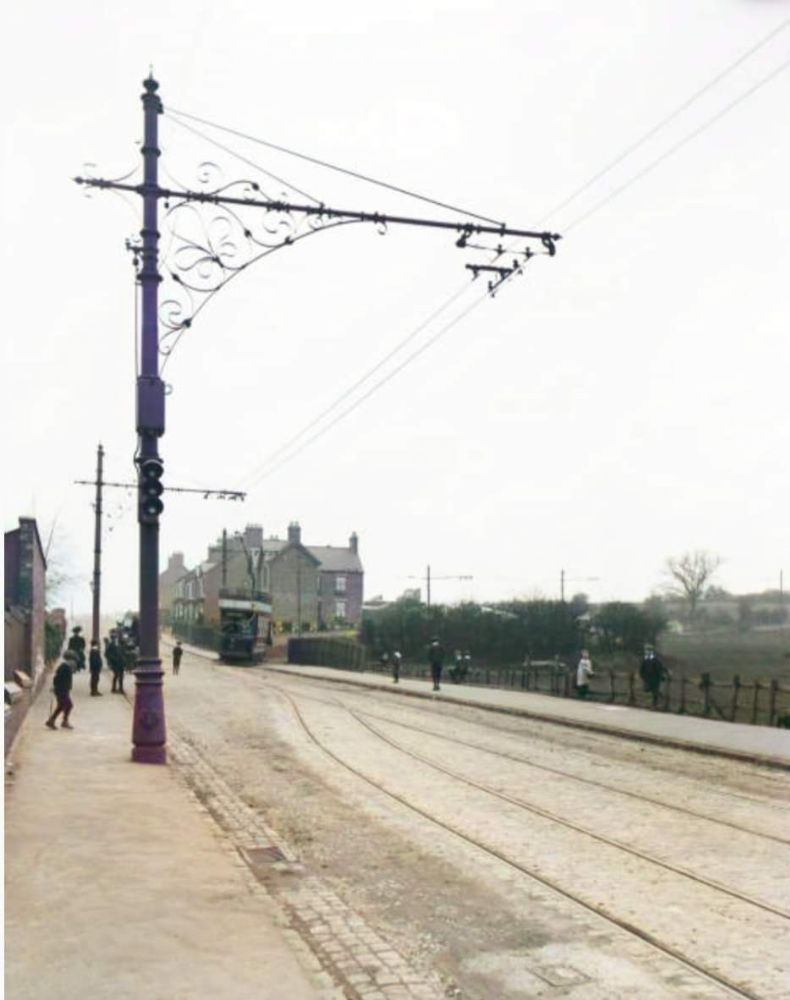
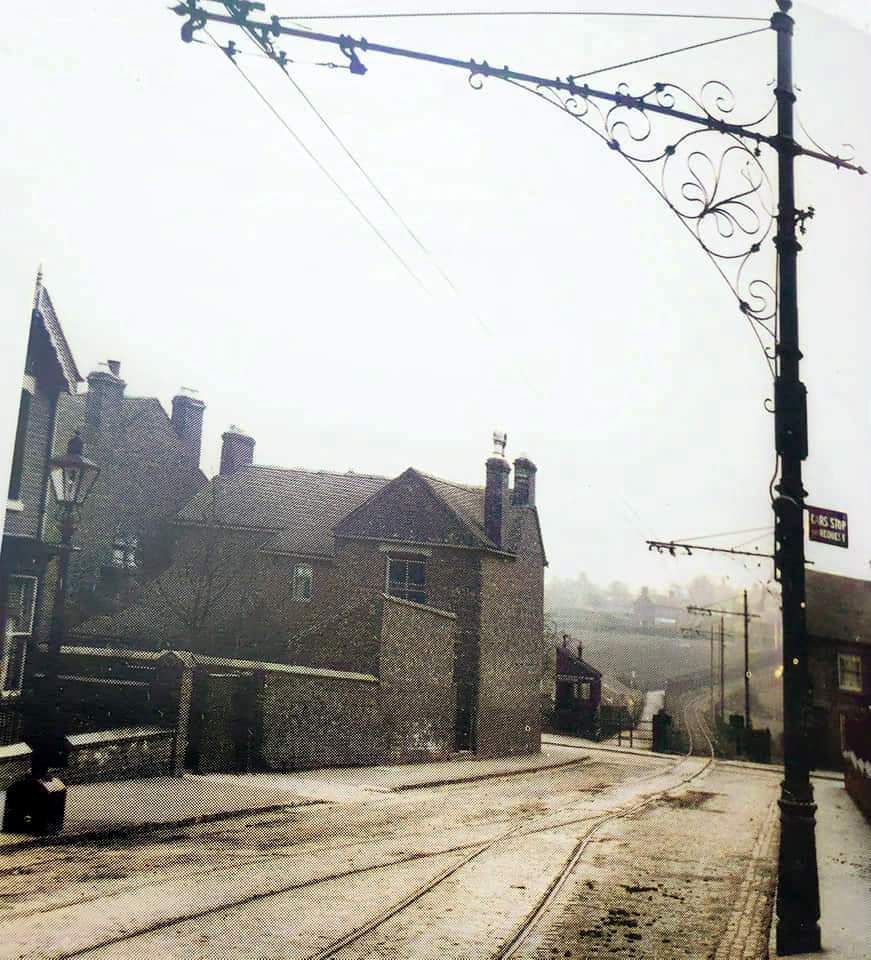
Three Aspect Colour light signalling was installed on the reserved country stretch between Stanhope Bretby and Sunnyside, Newhall where the line traversed the brow of a hill and the west passing loop was out-of-sight from both sides. The lights were operated by a trolley wheel contact on a solenoid, a system devised and installed by a firm, Bracknell, Munro and Rogers.” [6]
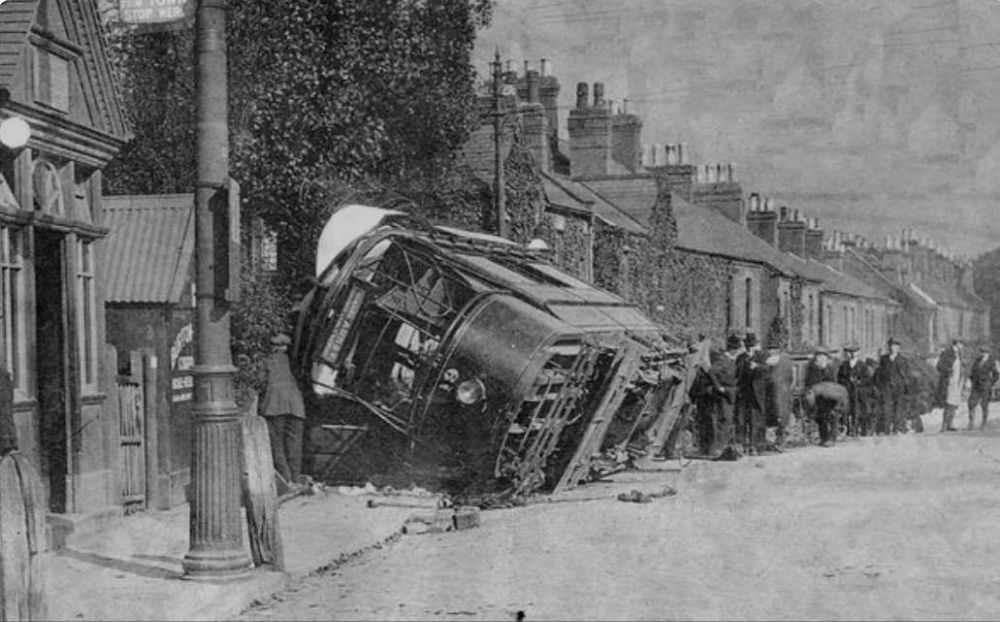
The safety record of the Light Railway “was marred by only one serious accident. No. 19 ran away and overturned at the foot of Bearwood Hill in 1915 but there were few injuries.” [6] Another source says that there was an accident in 1919 which resulted in the death of two people. [10]
The line was completed in 1906 and was assumed locally and by Glendenning to have a bright future. It was, in fact, short-lived:
“The Burton and Ashby Light Railway Company had a fleet of 20 tramcars and these operated until early in 1927. … With the increasing use of the motor bus, competition for passengers was intense and the tramway services were reduced to rush hours only. With costly maintenance required on the now 20 year-old trackwork, the tramways were beset with problems and finally the doors were closed on 19th February 1927.
Rail passenger services were still running through Castle Gresley, Swadlincote, Woodville and Ashby and motor buses took over the tram services.
The major undertaking ‘Midland Red’ or the Birmingham and Midland Motor Omnibus Co. Ltd., to quote its full title, in which the LMS had a controlling interest, took over the main services. Other local operators, Victoria Motorways, Regent buses, Brooks Blue buses ran alongside the trams for a period.” [6]
References
- Seymour Glendenning; The Burton and Ashby Light Railway; in The Railway Magazine, London, July 1906, p53-57.
- https://en.m.wikipedia.org/wiki/Burton_and_Ashby_Light_Railway, accessed on 12th October 2024.
- https://www.midlandrailwaystudycentre.org.uk/twochainplans/small/RFB00809sm.pdf, accessed on 16th October 2024
- https://rogerfarnworth.com/2024/10/19/the-burton-and-ashby-light-railway-part-1/
- https://maps.nls.uk/view/114591362, accessed on 17th October 2024.
- https://lmssociety.org.uk/topics/tramways.shtml, accessed on 18th October 2024.
- https://www.southderbyshire.gov.uk/our-services/things-to-do-and-places-to-visit/arts-and-culture/heritage-trails/midway-heritage-trail, accessed on 18th October 2024.
- https://www.tramwayinfo.com/Tramframe.htm?https://www.tramwayinfo.com/trampostcards/Postc200.htm, accessed on 18th October 2024.
- https://www.dfhs.org.uk/filestore/2019_June_137.pdf, accessed on 17th October 2024.
- https://www.derbytelegraph.co.uk/burton/man-who-job-righting-tram-2345427, accessed on 19th October 2024.
- https://www.facebook.com/share/p/2R6vHdibthqy15xd, accessed on 18th October 2024.
- This image was shared on the Newhall, Stanton & Bretby Yesteryears Facebook Group by Kevin Hallam on 19th February 2023, https://www.facebook.com/groups/1074190616309168/search/?q=tram, accessed on 18th October 2024.
- https://gsq-blog.gsq.org.au/travel-on-my-mind/swadlincote-tram_ed/, accessed on 17th October 2024.
- https://www.southderbyshire.gov.uk/assets/attach/5004/Swadlincote-Heritage-Trail-Town-Centre-leaflet-FINAL2.pdf, accessed on 19th October 2024.
- https://maps.nls.uk/view/114591365, accessed on 19th October 2024.
- https://www.facebook.com/photo/?fbid=286971863140713&set=gm.3943789782373007, accessed on 19th October 2024.
- https://www.facebook.com/photo/?fbid=7921013811278470&set=p.7921013811278470, accessed on 19th October 2024.
- https://maps.nls.uk/geo/explore/#zoom=18.0&lat=52.76966&lon=-1.53509&layers=168&b=ESRIWorld&o=100, accessed on 19th October 2024.
- https://www.facebook.com/photo/?fbid=712114870626408&set=pcb.5768333646585269, accessed on 19th October 2024.
- https://maps.nls.uk/view/114591374, accessed on 20th October 2024.
- https://maps.nls.uk/view/114592296, accessed on 20th October 2024.
- https://maps.nls.uk/view/114592356, accessed on 20th October 2024.
- https://maps.nls.uk/view/114592383, accessed on 20th October 2024.
- https://www.facebook.com/photo/?fbid=1341193816054846&set=pcb.2997610126945848, accessed on 20th October 2024.
- https://freepages.rootsweb.com/~brett/genealogy/photos/eng/dby/scarratt/fwscarratt0099.jpg, accessed on 20th October 2024.
- https://www.britainfromabove.org.uk/image/EPW015157, accessed on 20th October 2024.
- https://www.britainfromabove.org.uk/image/EPW015158, accessed on 20th October 2024.
- https://uk.pinterest.com/stephen_baldwin/burton-ashby-light-railway, accessed on 20th October 2024.
- https://www.pinterest.com/pin/469359592409742050, (the original image appears to have come from the National Railway Museum but the link is broken), accessed on 20th October 2024.
- https://www.britainfromabove.org.uk/image/EPW015162, accessed on 21st October 2024.
- https://picturethepast.org.uk, accessed on 21st October 2024.
- http://www.burton-on-trent.org.uk/page/2?p=hkwnwgtg, accessed on 21st October 2024.
- https://www.facebook.com/photo?fbid=10213834165548649&set=pcb.2048907168550697, accessed on 21st October 2024.
- https://www.facebook.com/photo/?fbid=10221709102377148&set=gm.5146941508747232&idorvanity=356398021134962, accessed on 21st October 2024.


