

In January 1950, G. Charles published a short (2 page) article about the Duke of Sutherland’s railway interests. [1]
It was only the nationalisation of the British railways which brought to an end the Duke of Sutherland’s hobby of owning and running his own train with running powers over LMS lines.
Charles noted in 1950, that the Duke of Sutherland was the only individual owner of a private railway carriage in the UK. He notes that wealthy men in the USA owned private carriages until the 1930s.
We perhaps ought to remind ourselves that the royal family had access to a number of sets of rolling stock on different railway company lines. A tradition which remained in place once the UK railways were nationalised.
We should perhaps also note that the Duke of Sutherland was not alone in owning his own locomotive which ventured onto the main line railways of the UK. The story of the diminutive ‘Gazelle’ includes its first ownership by a wealthy businessman who took it out onto the main line. Its story can be found here. [2]
Since Charles article of 1950, we have become used to private owners being able to run stock (locomotives, carriages and wagons) on lines which belong to the nation in some guise or other. Indeed, the whole railway network began to operate in this way with privatisation in the 1990s.
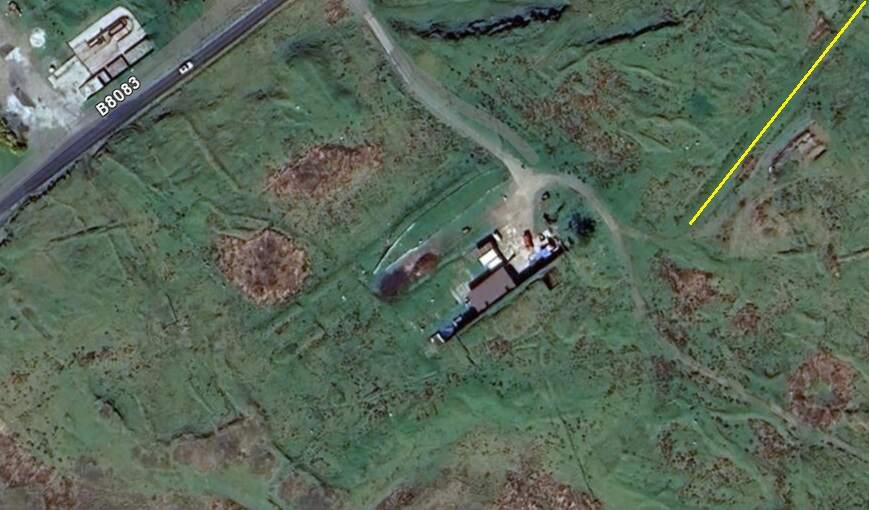
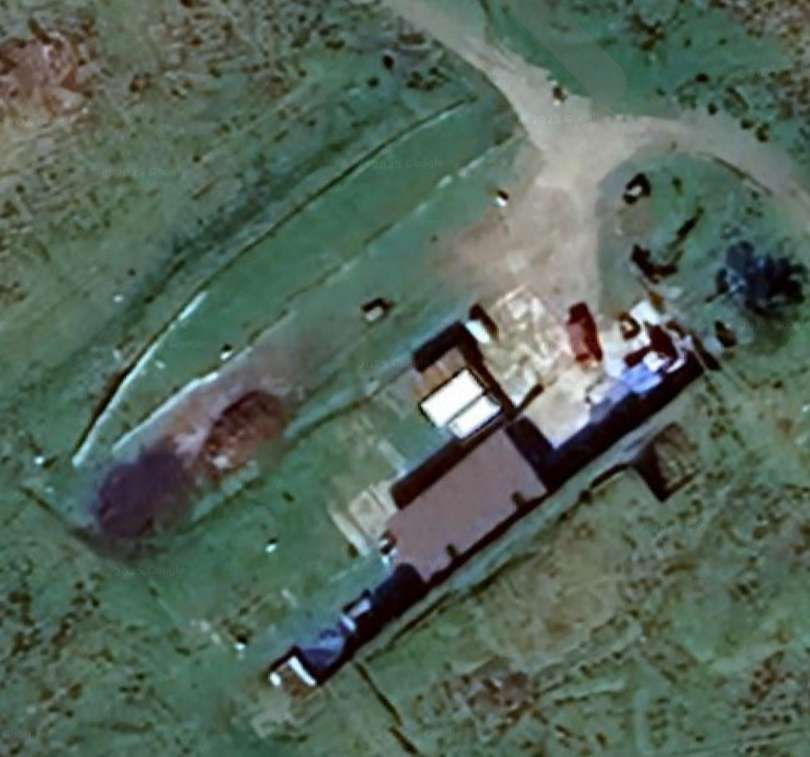
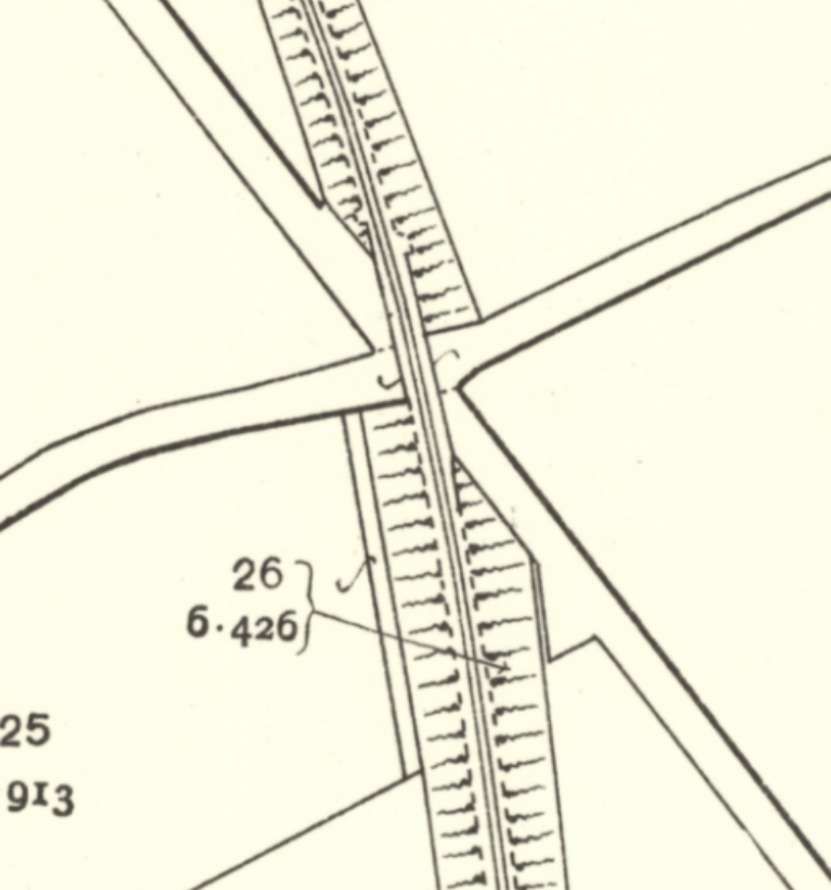
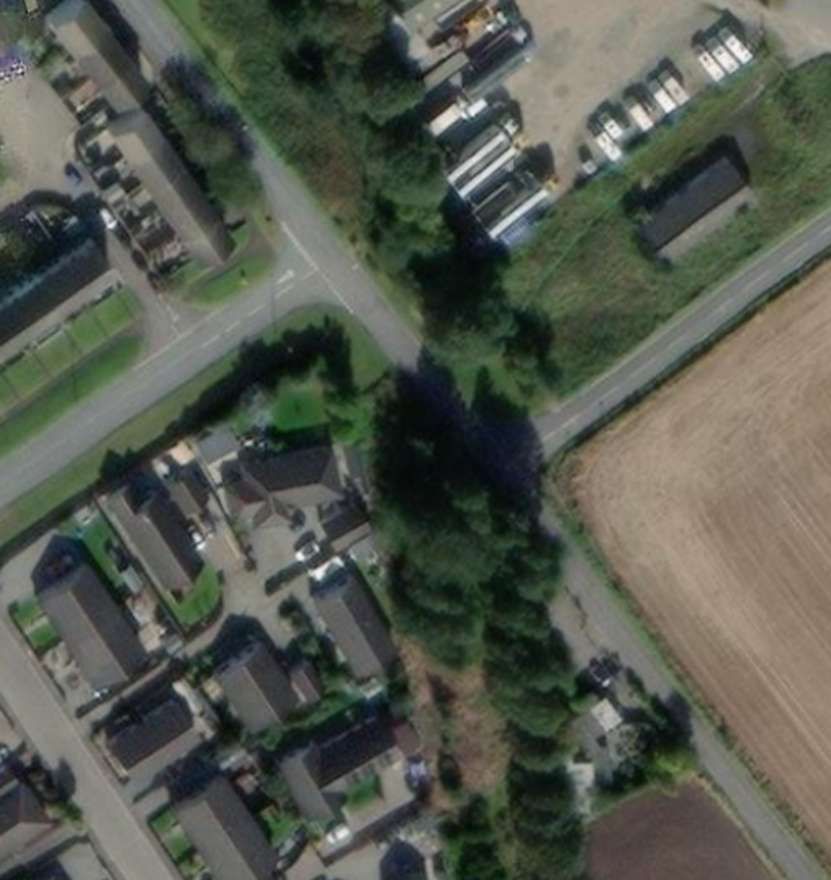
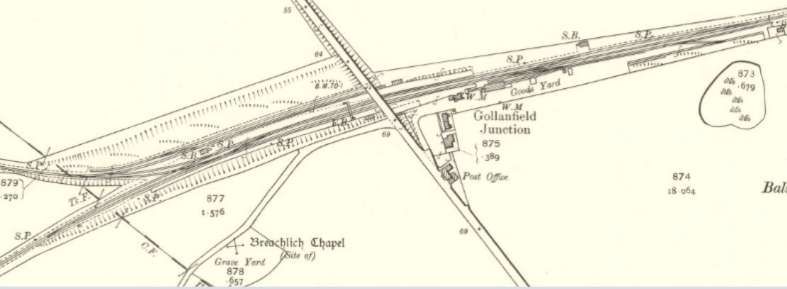
Charles continues to tell the story of the Duke of Sutherland’s railway involvement. … “The railway through Sutherland, from Golspie to Helmsdale (17.25 miles), was projected by the third Duke, and built at his own expense, after a local undertaking, the Sutherland Railway, had succeeded only in completing its line from Bonar Bridge to Golspie, 6 miles short of Brora, the intended terminus. The line was authorised on 20th June 1870, but construction already had been begun, and the railway was completed on 19th June 1871. A private station was provided, 2 miles north of Golspie, to serve Dunrobin Castle, the seat of the Duke. The railway from Golspie to Helmsdale was worked by the Highland Railway, but it was not until 28th July 1884, that the Duke sold his undertaking to that company, of which he was already a director. He was also a director of the London & North Western Railway.” [1: p9] Some notes about the Sutherland Railway are included below.
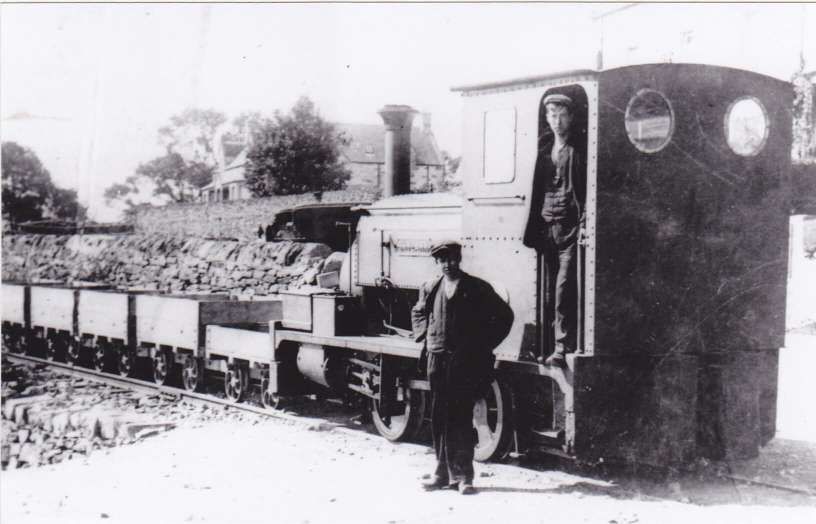
“To enable his railway to be opened before the connection with the Sutherland Railway, at Golspie, was completed, the Duke had purchased a locomotive and some coaches. After the Highland Railway took over the working of the line, the engine was used to haul the Duke’s private saloon between Inverness and Dunrobin, but south of Inverness, the saloon was attached to main-line trains. These arrangements were continued after the railways north of Inverness were amalgamated with the Highland Railway, and persisted after the grouping, in 1923.” [1: p9]
“The locomotive was a small 2-4-0 tank engine, built by Kitson & Company Leeds, and named Dunrobin. It had outside cylinders 10 in. diameter x 18 in. stroke, and coupled wheels 4 ft. diameter. The weight in working order was 21 tons.” [1: p9]

“The original Dunrobin was acquired by the Highland Railway, and rebuilt at the Atlas Works, with a larger boiler, and new cylinders. It was numbered 118, named Gordon Castle, and put to work on the branch from Orbliston Junction to Fochabers. Some years later, it was renamed Invergordon, and used for shunting at Invergordon Harbour. During the first world war, it was loaned to the Great North of Scotland Railway, and was scrapped in 1923. The second Dunrobin performed shunting duties at Invergordon, and at Rosyth, during the [second world] war.” [1: p9]
The second Dunrobin survived into preservation. Along with the four-wheel saloon it was sold to Captain Howey and initially preserved as static exhibits at New Romney on the Romney, Hythe and Dymchurch Railway in Kent.

Following Howey’s death in 1963, the locomotive and carriage were sold to Harold Foster, who had them transported to Canada. Foster was declared bankrupt in 1965, [15] and the locomotive and carriage were bought for $15,000 by the Government of British Columbia. Dunrobin was then overhauled at the British Columbia Hydro workshops, to enable it to take part in the Canadian railway centennial celebrations in 1966. [20] Dunrobin and its carriage (58A) became exhibits at Fort Steele heritage village, where Dunrobin was steamed occasionally. It was last steamed at Fort Steele in 2005. [16]

In 2010, both were declared surplus to requirements [15] and in January 2011, Beamish Museum announced that it had purchased both the locomotive and carriage which arrived back in the UK in May 2011. Dunrobin was taken to Bridgnorth on the Severn Valley Railway, where restoration work was undertaken. [17] Progress on restoration was slow as the condition of the locomotive was worse than had been anticipated. By 2020 work had made good progress but was halted by the pandemic. In 2021, Beamish Museum, received a grant of £150,000 to allow work to be completed. At that time, the Museum was anticipating that the project would be completed within 2 or 3 years. [20]
Heritage Railway Magazine No. 181 contains a feature article on Dunrobin which can be found here. [18] At present Beamish Museum is still expecting Dunrobin to be in steam at the Museum in 2025. [22]
The Two Carriages
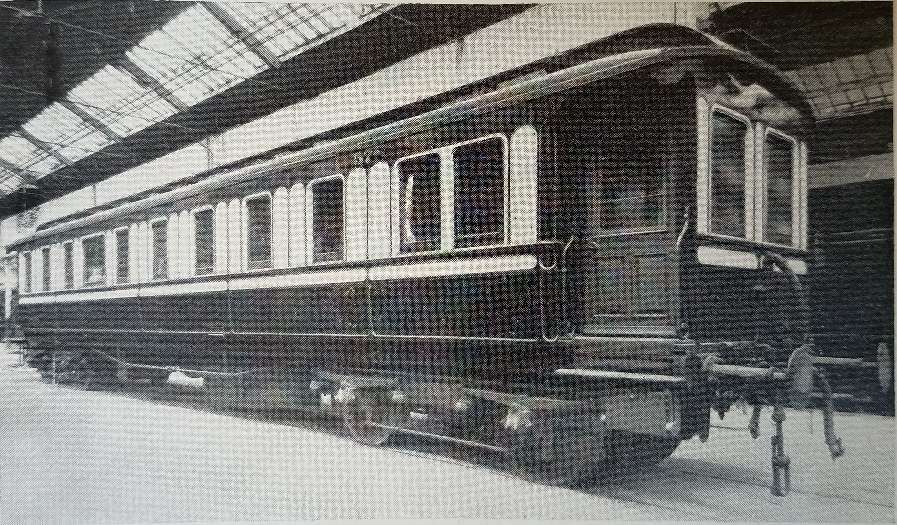
“In 1899, a large saloon was built for the Duke at Wolverton Carriage Works, London & North Western Railway. It was designed by Mr. C. A. Park, Carriage & Wagon Superintendent, L.N.W.R., who used it as the prototype for the royal train built in 1903 for King Edward VII and Queen Alexandra, an example of railway coachbuilding, decoration, and furnishing unequalled during the [first half of the 20th century]. This train was used subsequently by King George V and Queen Mary, and George VI and Queen Elizabeth, until 1941. King Edward VIII never used it, as he preferred the late Lord Stamp’s “President’s Car,” which also [was] used by the Princess Elizabeth and Princess Margaret.” [1: p9-10]
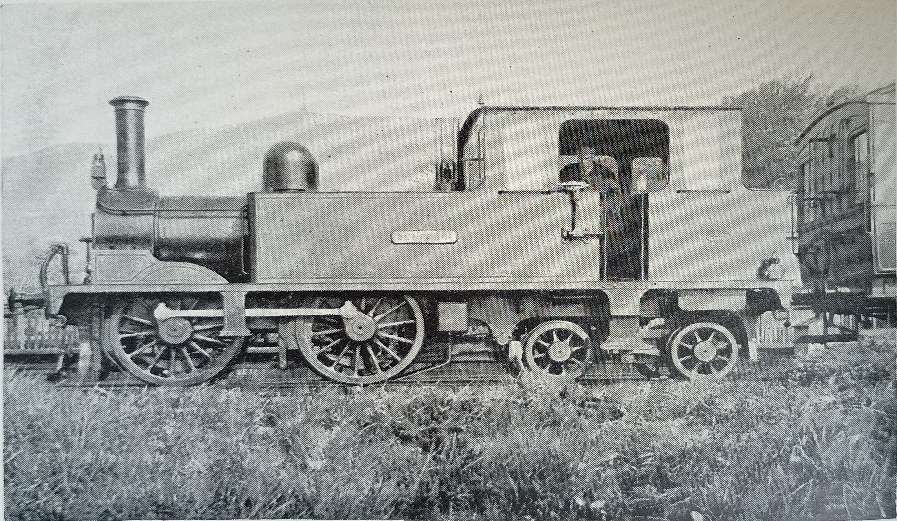
“After the death of the third Duke, in 1892, his son decided to have a more powerful engine, and David Jones, Locomotive Superintendent, Highland Railway, designed a 0-4-4 side tank engine, with 13 in. x 18 in. inside cylinders, and a boiler carrying a working pressure of 120 lb. per sq. in. The diameter of the coupled wheels was 4 ft. 6 in., and of the trailing wheels 2 ft. 6 in. This engine was built at the Atlas Works, Glasgow, in 1895. Like its predecessor, it was named Dunrobin, and was painted dark green, with black bands, and yellow lining. A seat with leather cushions, extending the full width of the cab, was provided over the coal bunker for passengers riding on the footplate. The front weather board was autographed by several illustrious travellers, who inspected the engine while they were guests of the Duke.” [1: p9][14]
“In February, 1949, the Duke of Sutherland advertised his saloon for sale, for conversion into a bungalow; but a Lincolnshire firm of coachbuilders recognised the vehicle from its description, and purchased it. The new owner, the Lincolnshire Trailer Company, Scunthorpe, intend[ed] to preserve the saloon as an example of the finest British coach work in existence. It … also acquired the Duke’s locomotive and smaller saloon, Arrangements [were] made with Capt. J. E. P. Howey, Chairman of the Romney, Hythe & Dymchurch Railway, for the engine and the saloons to be exhibited at New Romney.” [1: p10]
“The large saloon [was] 57 ft. long over headstocks, and 61 ft. over the buffers. The width [was] 8 ft. 6 in., and height from rail level to the top of the roof 12 ft. 7 in., and to the side cornices 10 ft. 9.5 in. The saloon [was] carried on four-wheel bogies with a wheelbase of 8 ft., and spaced at 39 ft. centres. It [was] fitted with the vacuum and Westinghouse brakes. …. The saloon [was] divided into a large lounge (13 ft. 10 in. long, and extending over the full width of the vehicle), a smoking room (7 ft. long) three single berth sleeping compartments, a pantry, and a luggage and attendant’s compartment. Two of the sleeping berths [had] separate toilets, and a third toilet adjoin[ed] the smoking room. The lounge [was] furnished with two movable settees, a round table, and four dining chairs; and the smoking room [had] four fixed armchair seats, convertible into two beds, and two folding tables. The vestibules at each end of the saloon [had] end observation windows, but no gangways to connect with other vehicles on the train. Complete privacy for the occupants [was] thus assured.” [1: p10]

“Stone’s system of electric lighting [was] installed, and there [were] electric bells to the attendant’s compartment, and electric fans for ventilation in hot weather. The fittings of the pantry include[ed] an oil cooker, a sink and a dresser. Steam heating apparatus, and a self-contained high-pressure hot-water system, [were] provided for warming the vehicle. … The interior decorations of the saloons and berths [were] of Spanish mahogany, white enamelled, and picked out in gold leaf, with solid silver lighting fittings. The ceilings [were] in figured lincrusta, finished in white and gold leaf. The couches and easy chairs [were] upholstered in green figured tapestry, with loose chintz covers, and the pelmets and curtains [were] of green silk and chintz to match. Turkey carpets [were] laid in the lounge and the smoking room, but elsewhere, Wilton pile carpets, underlaid with thick grey felt, [were] used. The external finishings of the saloon [were] dark Sutherland green, on the lower panels, and white, picked out with gold leaf, on the upper panels. The roof and the tyres [were] painted white.” [1: p10]
The bogie saloon is now part of the National Railway Museum’s collection. As of January 2011 it was under the care of the Scottish Railway Preservation Society at the Bo’ness and Kinneil Railway. [14] It remains on display in Museum Hall No. 2 in the Museum of Scottish Railways at the Bo’ness and Kinneil Railway. Further details can be found here. [23]

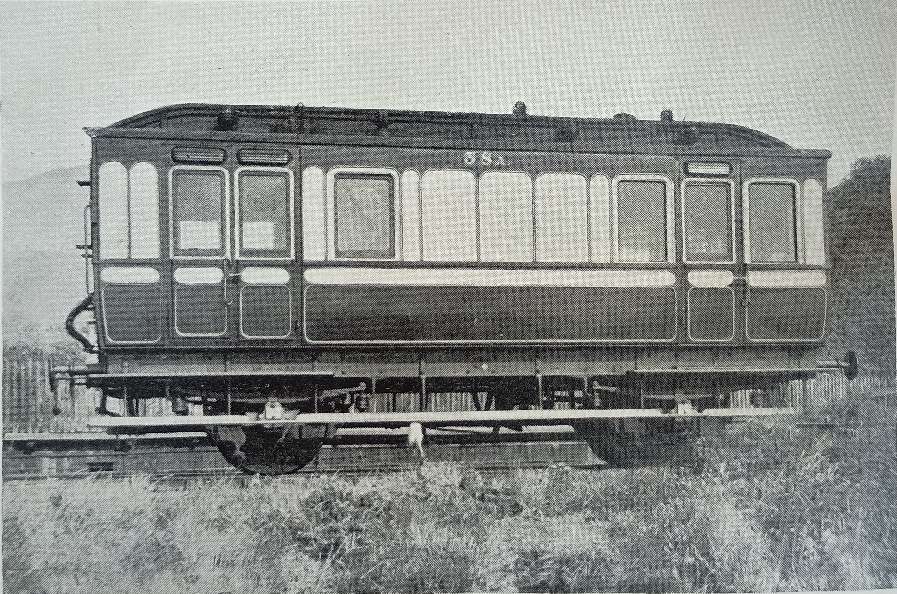
“The smaller saloon [ran] on four wheels, and [was] 25 ft. long and 8 ft. 6 in. wide. It [was] divided into a saloon, 14 ft. 3 in, long, with side and end windows, and a brake van, 10 ft. long. The saloon [was] furnished with six armchairs and a table, and there [were] three fixed seats in the brake van. The interior decorations [were] of mahogany and maple, and the external finish resemble[d] that of the larger saloon. When the Duke was travelling by special train, north of Inverness, the large saloon was steadied by having the smaller vehicle attached behind it.” [1: p10]
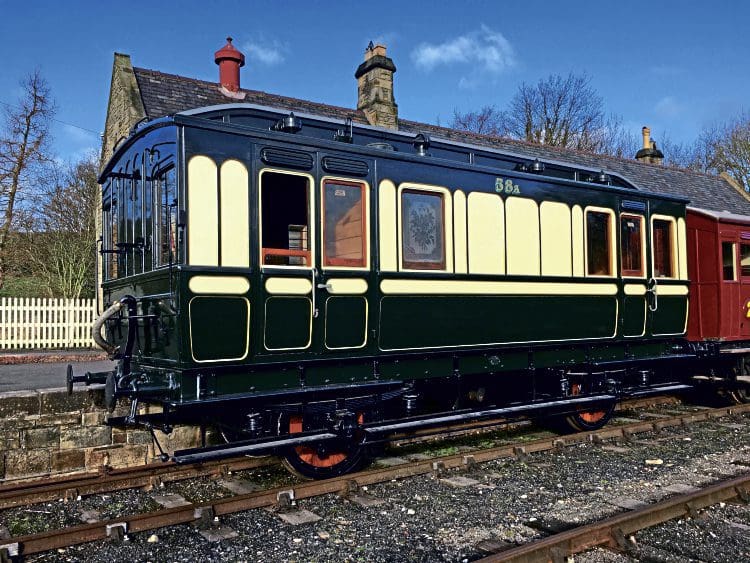
The smaller saloon is now at Beamish Museum. It travelled there in 2011 and underwent limited refurbishment to allow it to be placed in service at the Museum. In 2018 it saw its first use at the Museum. [20]
The Sutherland Railway and the 3rd Duke of Sutherland
“The Sutherland Railway had opened in 1868, terminating at Golspie. The Duke continued the line to Helmsdale from his own resources. It opened from a Dunrobin Castle station to West Helmsdale in 1870, and for some months the Duke had it operated as a private railway. In 1871 the line was completed from Golspie to Helmsdale, and operated as a part of the Highland Railway. … It was absorbed into the Highland Railway in 1884 and continues in use today as part of the Far North Line.” [3]
Various interests in Inverness and in Sutherland sought to extend railways to the North of Inverness. The first step in this was the Inverness and Ross-shire Railway which opened as far as a Bonar Bridge station on 1st October 1864. [4: p30]
“Next came the Sutherland Railway which obtained Parliamentary powers to build a line from Bonar Bridge to Brora in 1865. [5] This was assisted by the commercial drive and financial resources of The Duke of Sutherland.” [3]
The Sutherland Railway ran out of money when it reached Golspie. It was “unable to continue to Brora as authorised. By now the Inverness and Ross-shire Railway had been absorbed into the Inverness and Aberdeen Junction Railway, and it was only by the negotiating pressure of the Duke of Sutherland that the line reached Golspie. The Duke of Sutherland had a seat at Dunrobin Castle, which would have been on the Brora line, but was now not railway connected. … The Duke of Sutherland decided to build a line himself, and this became the Duke of Sutherland’s Railway. It obtained its authorising act of Parliament, the Duke of Sutherland’s Railway Act 1870 … on 20th June 1870. [4: p33-36] The act authorised a 17-mile line along the coast from Golspie to Helmsdale, on the borders of Caithness, taking over the Golspie to Brora powers of the Sutherland Railway.” [3][5]
“Engineering difficulties at both ends of the line delayed the completion of the line throughout, but the section from Dunrobin to a point just short of Helmsdale was finished by the autumn of 1870. The Duke decided that the railway should be opened forthwith, and a temporary station, known as West Helmsdale, was built at Gartymore. An engine and some coaches were purchased for working the line, but since there was as yet no physical connection with the Sutherland Railway at Golspie, the stock had to be placed on wagons and hauled along the road by a traction engine.” [3][4: p33-36]
“The opening ceremony was performed on 17th September 1870 by Princess Christian of Schleswig-Holstein. … From the date of the opening ceremony, the railway was privately operated, but after a Board of Trade inspection it was opened to the public on 1st November 1870.” [3][7]
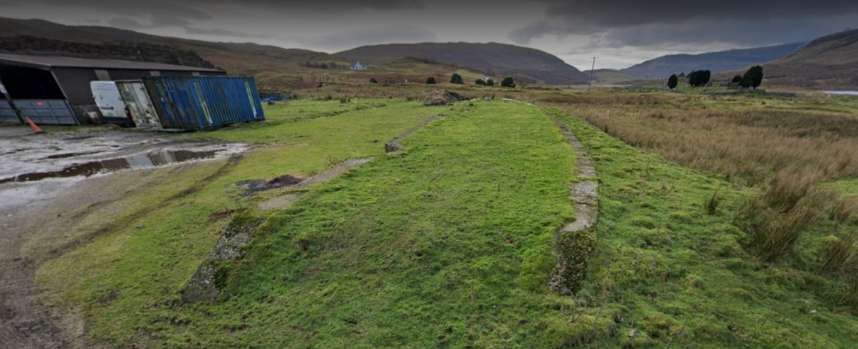
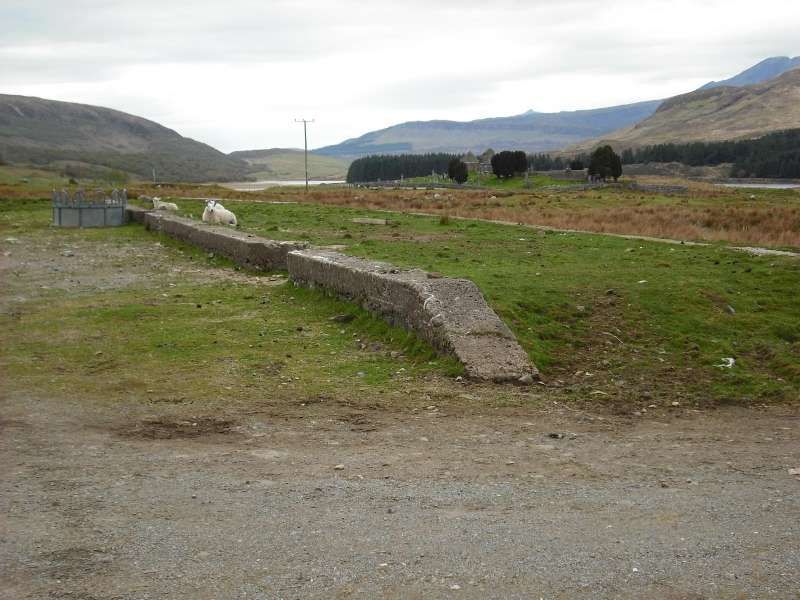
“After the public opening, a service of two trains a day in each direction was run. On 19th June 1871 the works were completed and the railway was opened throughout, and the Highland Railway took over the working. [4: p33-36] The temporary terminus at Dunrobin became a private station serving the castle, at which trains called by request to pick up or set down passengers. In 1902 the buildings were reconstructed to the designs of the estate architect.” [3]
On 28th July 1884 the Duke of Sutherland’s Railway was absorbed into the Highland Railway. [3][4: p40]
It is worth noting that the Duke of Sutherland made a significant loss in undertaking all this work. He later commented in 1870 that it might have been possible to have turned a small profit if he had chosen to undertake the work as a narrow gauge line. …
“The Duke of Sutherland said he wished he had known more of the Festiniog Railway six years ago. ‘I have expended’, said His Grace, ‘about £200,000 in promoting and making railways in the North. Had these lines been constructed on the narrow gauge, and had they in consequence cost only two-thirds of the sum that has been expended on them, I should have obtained a direct return on this large sum which I have laid out for the benefit of my estates and of the people in those remote districts. As it is I shall suffer considerable loss.” [8]
The expenditure in the 1860s of £200,000 is the equivalent of close to £31,077,000 in 2025! [9] It is astounding that the Duke’s holdings meant that expenditure of that sum of money did not bring about bankruptcy. “The pound had an average inflation rate of 3.11% per year between 1860 and 2025, producing a cumulative price increase of 15,438.46%! … A pound today only buys 0.644% of what it could buy back then.” [9]
George Granville William Sutherland-Leveson-Gower, 3rd Duke of Sutherland (1828-1882) had interests around the country but of particular interest to me is his involvement with developments in East Shropshire which became the Lilleshall Company. He also held shares in other industrial ventures, including coal and ironstone mines.
The 3rd Duke of Sutherland inherited significant wealth and estates, including those in West Midlands, which included the estate of Lilleshall. He was also known for his interest in industrial projects, like the Shelton Iron & Steel Co. where he was a principal shareholder. The Duke’s involvement with the Lilleshall estate and his other industrial interests demonstrate a broader pattern of wealth accumulation and investment within his family. The family’s influence extended beyond the specific “Lilleshall” company to include other industrial and land ownership ventures, particularly within the West Midlands region. [10][11][12]
In 1892, the 3rd Duke of Sutherland’s obituary included these words: “…The late Duke was keenly devoted to science as employed for the promotion of the prosperity and material comfort of the tenants on his vast estates. He did more than, perhaps, any other man in the world to utilise cultivation by steam, and at one period he used all the resources and talent of the firm of John Fowler and Co., of Leeds, in this direction. He constructed at his own expense a railway in Sutherlandshire. It is said that an admiring navvy, seeing him start from Dunrobin Station one day, exclaimed to his mate, ‘There, that’s what I calls a real Dook. Why? There he is a driving of his own engine on his own railroad and burning of his own blessed coals!’ One who knew him well has said of him: ‘He was ever ready to assist in the development of ingenious ideas in machinery, mechanical appliances, and the like’...” [12][13]
References
- G. Charles; The Duke of Sutherland’s Saloons and Locomotives; in The Railway Magazine, January 1950, Volume 96, No. 585, Transport (1910) Ltd., Westminster, London, p9-10.
- https://rogerfarnworth.com/2019/07/21/gazelle.
- https://en.m.wikipedia.org/wiki/Duke_of_Sutherland%27s_Railway, accessed on 6th June 2025.
- H. E. Vallance et al; The Highland Railway; David & Charles, Newton Abbot, 1938, (extended edition 1985).
- David Ross; The Highland Railway; Tempus Publishing Limited, Stroud, 2005, p47-49.
- Donald J Grant, Directory of the Railway Companies of Great Britain; Matador, Kibworth Beauchamp, 2017, p155.
- Anne-Mary Paterson; Pioneers of the Highland Tracks: William and Murdoch Paterson; The Highland Railway Society, 2013, digital edition not paginated.
- The Railways of the Future II; in The Times; 1st March 1870, p4.
- https://www.in2013dollars.com/uk/inflation/1860?amount=200000, accessed on 6th June 2025.
- https://en.m.wikipedia.org/wiki/George_Leveson-Gower,_1st_Duke_of_Sutherland, accessed on 6th June 2025.
- https://en.m.wikipedia.org/wiki/Duke_of_Sutherland, accessed on 6th June 2025.
- https://www.gracesguide.co.uk/George_Granville_William_Sutherland_Leveson_Gower, accessed on 6th June 2025.
- The Engineer; 30th September 1892, p286.
- https://en.wikipedia.org/wiki/Dunrobin_(locomotive), accessed on 6th June 2025.
- Tony Streeter; Dunrobin: Overlooked, outcast and unwanted – until now!; in Steam Railway No. 384; Bauer Media, Peterborough, (7 January – 3 February 2011), p7–8.
- Robin Jones; Steam comes home… twice; in Heritage Railway No. 151; Mortons Media Ltd., Horncastle, p24–25.
- Will Marsh; Steam Locomotive Notes; in Severn Valley Railway News. No. 220; Winter 2022, p18.
- http://beamishtransportonline.co.uk/wp-content/uploads/2012/11/Heritage-Railway-Dunrobin.pdf, accessed on 6th June 2025.
- https://beamishtransportonline.co.uk/wp-content/uploads/2021/05/500891.jpg, accessed on 6th June 2025.
- https://beamishtransportonline.co.uk/2021/05/dunrobin-ten-years-on, accessed on 5th June 2025.
- https://beamishtransportonline.co.uk/wp-content/uploads/2021/05/Dun3_1000x982.jpg, accessed on 6th June 2025.
- https://beamishtransportonline.co.uk/2025/05/dunrobin-attention-to-detail, accessed on 6th June 2025.
- https://museumofscottishrailways.org.uk/duke-of-sutherlands-saloon, accessed on 6th June 2025.
- https://www.heritagerailway.co.uk/wp-content/uploads/sites/22/2018/03/HR-239-p18.jpg, accessed on 6th June 2025.
- https://www.heritagerailway.co.uk/3869/dunrobins-carriage-back-in-service, accessed on 6th June 2025.


