One Person’s Identification with Miltown Malbay
A friend has sent me a copy of an old book by Gabriel Vaughan entitled ‘My Affair with Malbay’. [10] It is an anecdotal history of the western part of Co. Clare centred on the life and times of a series of generations of The Vaughan family. It has one chapter devoted to the West Clare Railway. [10:p26-36]
Gabriel Vaughan’s father, Paddy Vaughan, worked on the railway. Family life revolved around the station at Miltown Malbay. Gabriel Vaughan says:
“It was almost impossible for me to miss the train at 8.56 a.m. when going to school in Ennistymon every morning. Dad knew the benefit of the proverbial saying “Go to work or school on an egg.” A good breakfast was sacrosanct and I also had to be in time for the train. So often the refrain would go like this: “hurry up, take your time, and eat enough”. Sometimes the train would be held for me for a minute or two until I had safely boarded the train. Other times, I was put into the guard’s van with a mug of tea and a few slices of bread. No way was I going to miss school. Thanks Dad!
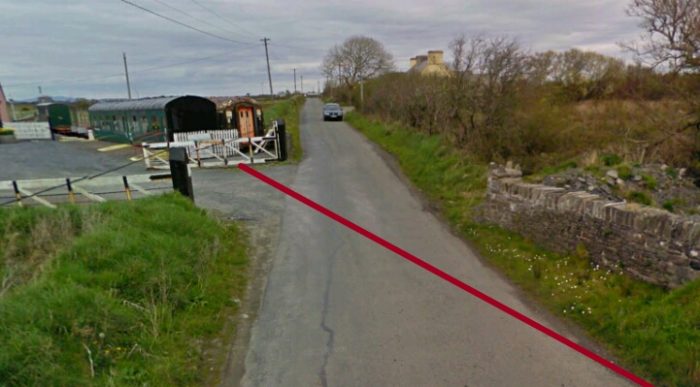
On one or two occasions when the porter Tommy Honan was absent and my Dad had slept it out, the train, after passing the Flag Road gates, could be heard from a distance, whistle blowing urgently, alerting the station master to have the gates across the line opened.
The train approaching Miltown in the morning carried a lot of girls from Doonbeg and Quilty going to work in The Malbay Knitwear Factory and was called “The Glamour Express”.
I had a privileged ticket because my father worked for the West Clare Railway Company and I travelled first class to school. Often the only other passenger with me was the local Protestant Minister, Rev. Cannon Elliot travelling up to Ennistymon to greet his flock there. Although he was a kind gentleman, I did not find it easy to converse with him.
Jackie Fox together with his horse called Friday, was the local carrier of goods from the railway station to the town. Every young boy in the town rode on his cart from time to time. A low sized good-humoured fellow was he and strong as an ox. Flour was then delivered in sacks weighing 280 lbs but this enormous weight proved no obstacle to Jackie as each sack was deftly swung onto his cart. I remember walking with Dad down Cloonboney way, when for the first time I heard peals of thunder. This noise, strange to my ears, was explained to me by my father, as Jackie unloading firkins of Guinness for subsequent delivery. Guinness was then delivered in wooden casks, the iron or aluminium lung had not yet arrived on the scene.” [10:p26]
“The railway station was a centre where the youth of the town gathered to play. The boys playing cops and robbers would split into two groups. One group had to seek the other in different hiding places throughout the station and lock them up in prison, cattle wagons being our “Mountjoy”. The hero was the lad who surprised the prison guards and released the prisoners, thus the game lasted longer. In the station yard we had a large flat concrete area, a disused cattle pen and we erected a tennis net made up of two poles and a rope. Mo Connolly, the American tennis star was our idol of the time.
When my father went fishing in the evening, we had a “swimming gala” in the water tank perched 20 feet on top of the engine shed. The tank was about 30 feet long by 12 feet wide and held about 10,000 gallons of water which was pumped up from Cloonboney river just 500 yards beyond the distant signal on the line to Lahinch. Needless to say there were wigs on the green when my father found out what was happening in his absence.
As well as tennis and swimming, other sports such as, running, jumping, golf and baseball were organised in the environs during the summer holidays. A novelty for us was playing baseball and this was made possible by Richard McMahon’s ball and bat sent to him by relatives in America. Paddy Griffin who lived on the Lahinch road near the White Strand, fell down between two wagons and managed to rip a bad gash in his thigh.
One day my brother Michael was heard screaming way down town by the local Garda Sergeant who post haste got on his bicycle and went to the station to investigate. Michael had been sitting on the track when Tommy Honan changed the points to be ready for the evening train. Luckily for Michael his position was about 2 yards from the tip of the points so no damage was done. It could have been very serious, as it was, he escaped with only a bruised backside.
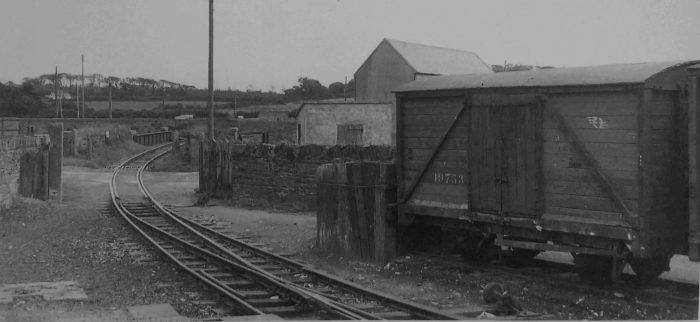
I can remember one fatal accident that occurred on Sunday the 25th August 1946. The unfortunate train driver Patrick O’Neill was killed. Early that day he was the driver on a “Special” to Lahinch, probably for Garland Sunday, a locally observed former pagan festival, now extinct. The light engine … was driven on its own to Miltown to be turned on the turntable for the return journey to Ennis later that evening from Lahinch. Patrick O’Neill who came from Limerick may not have been familiar with the layout of Miltown railway yard. When reversing past the points to drive off to the turntable, he had his head out the right hand cab window, not realising there was only 8 inches clearance between the engine cab and the goods store wall. He was squashed between the engine and the goods store gable wall. It was a horrific accident. Dad had gone to Ennistymon for the day not being on duty, and was immediately summoned by the Gardai to deal with the horrible stiuation.” [10:p27]
“As it happened, Tom Reidy, another driver was a passenger to Lachich that day and he was contacted and brought by road to Miltown to act as relief driver.” [10:p28]
Vaughan goes on to discuss some of the history of the line which we have dealt with elsewhere. He makes reference too to the Percy French song ‘Are Ye Right There, Michael?’ and then goes on to say:
“Why the line, one of the best loved of all the distinctive Irish narrow gauge railways, should have closed is a mystery. It’s chronic unreliability, perpetuated by Percy French’s song was a myth. In fact the line by today’s standard, was as well engineered as any in Ireland. It was well maintained by the staff, with no rubbish strewn about the line. Unfortunately, it lost money and in 1960 losses amounted to £23,000. In all my years travelling on The West Clare Railway, I have to say, it may have been colourful for all the wrong reasons, but it mostly ran on time.
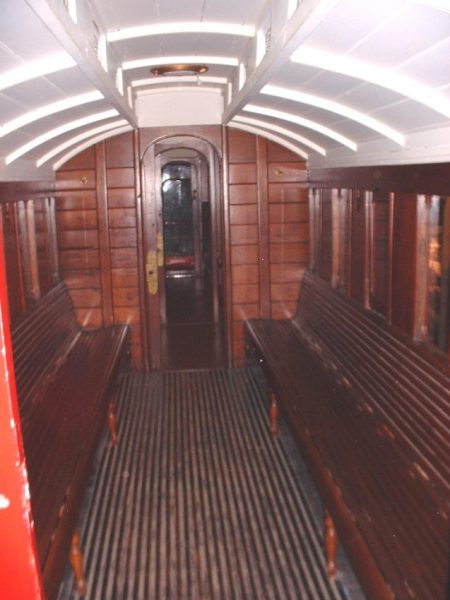
In the summertime they put tourist or saloon coaches on the line, these were panoramic coaches with large glass windows to allow for maximum viewing of the scenery. They are now all the rage with European railways … The West Clare tourist coaches, of which were four, were all constructed on six wheel bogies, in Ennis between the years 1905 and 1906. Each coach had seating for 32 passengers.
I remember early morning “specials” leaving Miltown at about 7.30am. These “specials” transported hundreds of matchgoers to Ennis, and pilgrims to Knock and to Croagh Patrick, who of course transferred at Ennis to the Great Southern Railway Company to finish out their journey.
Some say it’s a pity that the line wasn’t constructed in standard gauge instead of narrow gauge. This would have done away with the necessity of trans-shipment of goods at Ennis. The Swiss who are acknowledged expert rail builders have no problem conforming with both gauges. Their solution is to transfer the narrow gauge wagons, intact onto broad gauge bogies. Imagine all the work involved in transferring beet from one wagon to another at Ennis, for trans-shipment to the Tuam or Carlow sugar factories. A proposal was made in 1936 to widen the gauge from 3 feet to the standard 5 feet 3 inches, but this came to nothing despite much debate which carried on until the 1940’s. I think £23,000 of a loss in the 60’s was not an enormous loss to bear.
The fact that C.I.E. scheduled buses to leave Kilrush and Ennis at the same time as the train, did not help either. The door to door deliveries by ever increasing numbers of lorries, owned by the manufacturers of goods and providers of services, seemed more efficient than deliveries by train and horse cart by the local carrier. The outcome of all these changing trends, was that the business community did not give enough support to their railway.” [10: p31]
“At this time it was normal practice for maintenance at the stations to be carried our by a pool of C.I.E. tradesmen based in Limerick or Ennis. Picture the scenario, a burst pipe in Miltown has to be repaired. A plumber would leave Limerick at 9 a.m. and connect with the 11 a.m. West Clare at Ennis, arriving at Miltown at noon. After a long and slow trip from Limerick, tea is first the order of the day naturally. Work would begin at 1.30pm and cease at 3.30pm in order to wash and shave for the trip home on the 4 o’clock train. Of course if it were a big job the trades men stayed over- night in the town. Economy how are you? I could not understand the logic of it. For years my Dad tried to rectify this wastage of time and money by C.I.E., by getting this maintenance done by local tradesmen. It worked eventually when they saw light at the end of the “tunnel.” Actually we had no “tunnels” on the West Clare line! There is no use in crying over spilt milk!
Because Miltown was once a terminal station on the West Clare Railway, provision was made for engine drivers to sleep over- night at the station and so a bedroom and kitchen was provided for them. During my Dad’s term at Miltown there was no need for this facility, the line having been extended as far as Kilkee and Kilrush. The kitchen continued to be used to make that extraordinary, wonderful sweet tea in a billy-can by various tradesmen. A small double-sided tin containing on the one side tea and on the other side sugar was emptied into the boiling water in the billy-can together with milk. The ensuing beverage was out of this world to us as youngsters. Potatoes were often half boiled by us also in the billy-can and with a pinch of salt and lump of butter, those potatoes tasted far superior to anything cooked at home.
The bedroom, which at this stage was rough and ready was used to store the turf which came from Shragh bog. The wagon of turf arrived at Miltown station on the up-line on the 3.35 p.m. goods train. All hands were on the platform in a mad scramble to get the wagon emptied of it’s fuel before the passenger train’s arrival at 5.30pm.
The Shragh bog yielded sods of turf that were really massive, some were 4 inches square by 14 inches long and had to be broken with a hatchet in order to fit into the grate of the stanley range. In a way it was like the steam engine, as one had to have a really hot fire going, to get enough heat in the oven for baking, so you had to be a good stoker as well as a good cook. This breaking of the turf was one of the Saturday morning chores to be done by either my brother Michael or myself.
During and immediately after the 2nd World War, spare parts for the engines as well as fuel were in short supply. The steam locomotives were “rag order” for want of spending a bit of money on them. About this time saw anthracite for the first time being used on the locomotives. We called them “duck eggs” because of their shape.” [10:p32]
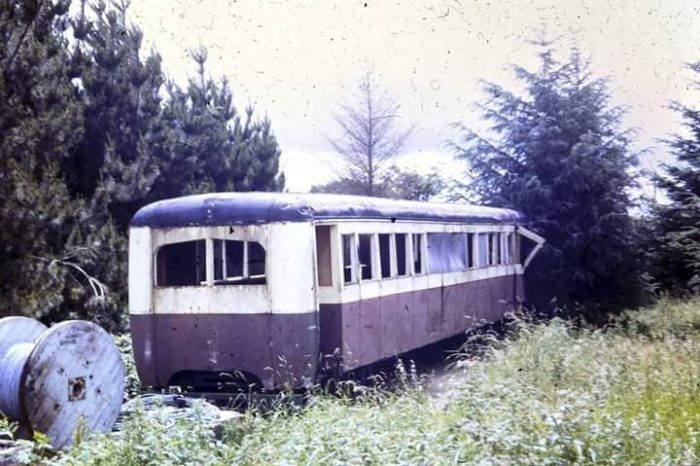
“In 1945, C.I.E. had taken over responsibility for The West Clare Line from The Great Southern Railway Company. A report first published in 1948 (Milne Report) gave the hint of possible closure of the West Clare branch of C.I.E. The closure was postponed and it was decided to modernise the roIling stock by dieselisation. This took place between the years 1952-1955. First to appear were 4 diesel rail-cars which resembled buses on railway wheels, and these were augmented by 3 diesel locomotive for goods haul. Thus, the West Clare was the only narrow-gauge railway in Britain or Ireland to be fully under diesel power.” [10:p32-33]
“I remember going for a trial run on the first railcar that was delivered. The railcar was driven by an engineer from Dublin, a Mr Curran whom Dad thought was going to derail the “blasted” thing it was going so fast. It handled very well and did not derail. About the age of ten or twelve, I often stood in the cab of the goods engine when the fireman, Joe Carmody was shunting and I remember the driver, John Hartney taking a break for his cup of tea. On the railway line down to Clonbony river having passed the distant signal, I would turn the wheel for reverse, ease the regulator gently forward to open and so begin shunting. Of course I threw the few shovels of coal into the firebox as well as helping to take on water, for they were all thirsty “old ladies” as locomotives were called.
I “worked” with Micko Conway and his gang of permanent way men, picking weeds and general cleaning up for a period of a few months after school in the evenings. Every Friday, I queued with the men for my wages. Dad had my name pencilled into the wages book, and paid me the wage of 6d a week, for which I was very grateful. I honestly believed I would not get any “wages” if I did not put in my stint with the men.
Generally the trains ran on time but from time to time the odd cow straying onto the line delayed us. It was deemed necessary to monitor wind speed in areas exposed to Atlantic gales. An anemometer was erected at Quilty for the purpose of measuring the wind velocity. If it exceeded 60 miles an hour, only stock that was ballasted could run. If winds were over 80 miles per hour, the trains were stopped. Ballasting took the form of large concrete slabs placed under the seats to weigh down the carriages. A gale of 112 mph was reportedly recorded here in January 1927.” [10:p33]
One evening, the 5.30 p.m. train approached the spot now occupied by the Rinseen Ambush Monument, a carriage door opened and a baby left on the floor near the door tumbled out. The distraught mother had to endure the next five minutes until the halt of the train on its arrival at Miltown station, where she reported the accident, was comforted by fellow passengers as she waited in agony for Dad and his search party to return. An hour elapsed and the party returned with the baby. As luck would have it, the baby, having fallen into a clump of bushes, luckily escaped with only minor superficial scratches and was re-united to the loving arms of its mother, no doubt to be minded and cosseted for the rest of its life after such a scare.” [10:p33-34]
“Amongst the droves of boys who went to “The Brothers” by train in Ennistymon for their daily dose of education, admittedly there were some adventurers in the bunch. I recall Eugene who could change carriages by walking on the running board outside the carriage while the train was in motion. Invariably this would happen on leaving the station at Ennistymon before the train had time to pick up speed. To the best of my memory none of the school-going boys had an accident except Paddy Griffin whom I previously mentioned.
One day I had the desire to be as good as the big boys and try my hand at smoking. I bought ten Woodbines to smoke on the way home on the train. Knowing I had about half an hour to experience the joy of being grown up, like the big boys, but there was one snag, I had to have them all smoked before I got home. In the process I got violently sick having almost “eaten the packet.” That experience cured me of the desire to smoke and thankfully I have never smoked since.
Dad was well liked by the travelling public and went out of his way to accommodate everybody especially those with sparse means. One old lady who travelled to Ennistymon to visit the dispensary and collect her pension used to sleep in one of the waiting rooms overnight because she was afraid of missing the train. A breakfast of tea and bread was often provided for her by Dad.
The senior schoolboys when they got good jobs on leaving school, were often canvassed later by Dad for private insurance. I remember being told after landing my first job to take out life cover but not to stretch myself. That I did, taking out a policy for £300 over a period of 30 years, a princely sum no doubt. The insurance inspectors who came from the Norwich Union Head Office in Galway were always remarking on Dad’s knowledge of the whereabouts of every man, woman and child and even the animals. They would jokingly say, that if he did not know where two bonhams (baby pigs) came from, he knew what creel they came from.” [10: p34]
“Michael Tynan, father of Maureen Ryan (nee Tynan), Ennis, and my father both worked in the Limerick Goods Department of G.S.R. and both applied for the position of Station Master in Miltown. My father got the position, but shortly after Michael Tynan was appointed to Kilkee.” [10: p34-35]
“Miltown Station, in common with all other stations on the West Flare did not have a telephone line to the outside world. Telephone communication only existed between stations, and only very important calls were made to Kingsbridge as this entailed making a trip to the local post office, which was run by Mrs Hynes.” [10: p35]
Gabriel Vaughan concludes:
“On January 31st 1961 the last train returned to Ennis, driven by Paddy Hanrahan whom at the time was I think one of the younger drivers on the line and so ended a history of 76 years. It was a very sad day for all Clare people and is looked back on with great regret. The much loved West Clare had a very short life and was mourned by many. It served its people well and I, like many others, retain many happy and much cherished memories of the West Clare. What a tourist attraction even a section of the restored line would be today!. Full marks to the Moyasta group headed up by Joe Taylor who intends restoring a section of the line.
It was sad indeed to come back from Switzerland in January 1961 to witness the end of an era – the closure of The West Clare Railway after 76 years.” [10: p35]
In reality, all of these rural lines had no long-term future once the motor-car and larger road-going vehicles began to hold sway. Co. Clare was still losing population and emigration was increasing. There was just not enough traffic and the line was eventually and inevitably closed on January 31st, 1961. [18]
Locomotives and Rolling Stock
The original estimated cost of the West Clare Railway was £176,000 which included £23,000 for rolling stock and repair shops. The Grand Jury allocated £170,000 and the Board of Works reduced the element for rolling stock and repair shops to £21,000. At ratepayers insistence the Privy Council then reduced the overall budget to £163,500.
The original estimate for the South Clare Railway was £127,300 which included £10,000 for rolling stock and repair shops. The Grand Jury and then the Privy Council whittled the principal sum down to £120,000. [1]
The net effect of this pairing back of the budget was the need for the board of the company to cut back investment on the infrastructure and rolling stock.
The issue was further exacerbated by some of the financial constraints placed on the operating company by the legislation under which the lines were built. The two companies ” were not allowed to issue fresh capital or to borrow money not form a reserve fund and carry forward from one half year to another. If a profit was made in one half year and a loss in the second half of the year they were not allowed to put profit of one against loss on the other. Expenditure incurred in increase to rolling stock, renewals or improved facilities at stations had to be charged to working expenses of the half year in which they were effected. This finally led to such an absurd position that the Treasury saw the force of objections to it and they agreed to a certain sum being put aside each year towards renewals. A further provision and the one that caused the most controversy was that each year was divided into two portions and returns had to be made for the half years ending on 30th April and 31st October and the profits, if any, divided equally between the Treasury and the Company. If, however, there was a loss in any half year’s working although there may have been a profit in the other half year, the Treasury was not liable for their share of the loss and unfortunately for both railways there was what was termed a fat half year and a lean half year.” [1]
When assessed by the Railway Commission (1906-10), net receipts since the opening of the line were about £24,200, net expenses were about £20,300. A balance of around £3,900 should have gone to the relief of the guarantee, but owing to the provisions above, the Treasury receive a figure of £12,000 and the County Council carried a debt of £8,000. [1]
These factors meant that the amount of rolling stock needed for the effective operation of the line had to be significantly reduced. The planned repair depot had to be abandoned and repairs had to be undertaken elsewhere. The result was a 25% increase in repair costs and a much longer period of downtime associated with each repair. The effect of all this was an over use of stock and reduced life-spans for locos and rolling stock. [4]
It was originally intended to purchase totals of rolling stock across the two companies of:
18 third class coaches
8 composite coaches
3 first class coaches
6 brake vans
2 horse boxes
28 open wagons
43 covered goods
40 cattle wagons
17 ballast wagons
3 timber wagons
This level of provision was not actually reached until 1913. [5]
Until then, wagons were in short supply which led to a loss of revenue in the conveyance of turf, slates, kelp and livestock. There were also disputes with various individuals over the deterioration of goods left too long awaiting transport. [5]
Carriages were also in short supply particularly for excursion traffic in the summer months.
Passenger traffic in the first year of operation of the South Clare Railway, across the two companies was about 177,800. Five years later it was 201,000 and by the turn of the century it was around 211,000. The gradual increase in traffic volumes continued to a peak in 1908 of close to 236,300. After the war traffic levels were much lower averaging around 100,000. Numbers declined significantly in the GSR era and only saw an increase when the CIE adopted diesel working in 1952. [5]
In the year immediately prior to the introduction of diesel traction only 41,000 people were carried. By 1960, this has risen to around 120,000. [6]
Goods and minerals traffic reached its peak in the 5 years before the Great War, averaging, in those years, around 45,000 tons. Livestock carried peaked in the first 10 years of the 20th century at an average of over 40,000 tons. [7]
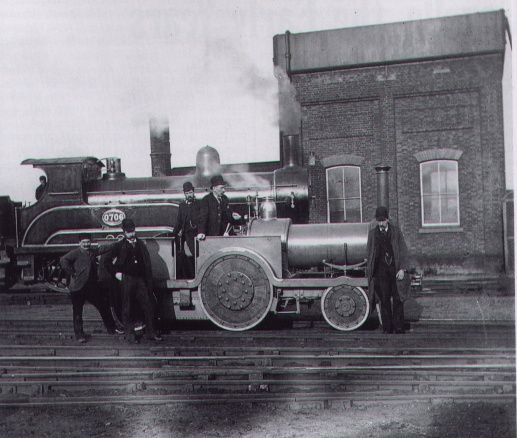
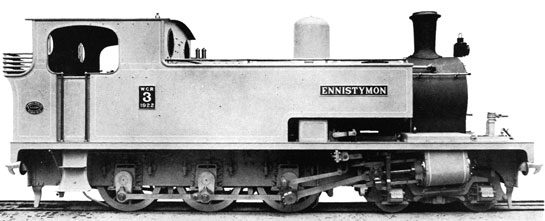
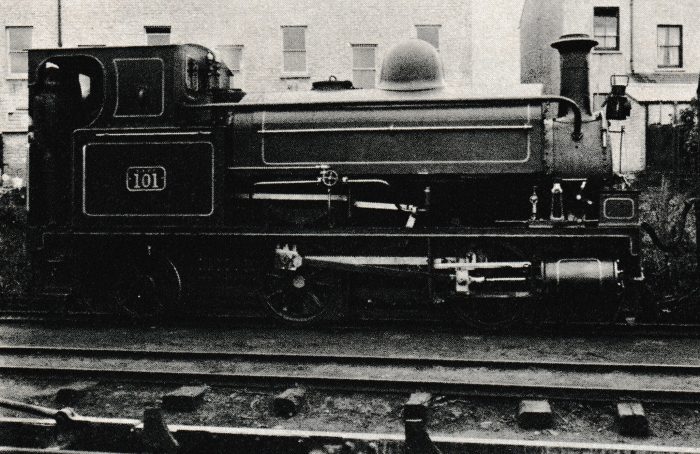
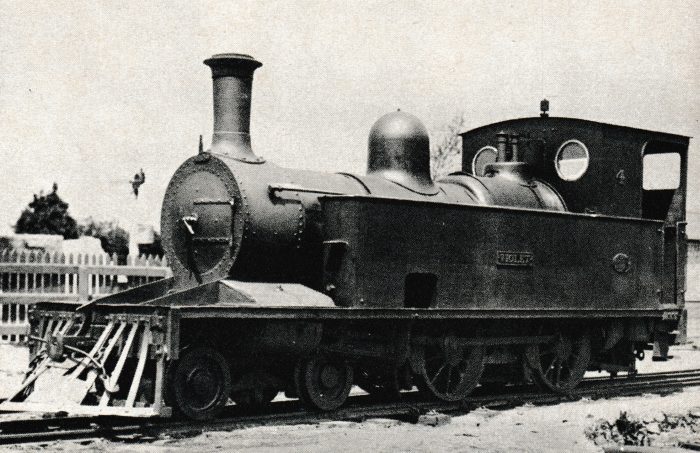
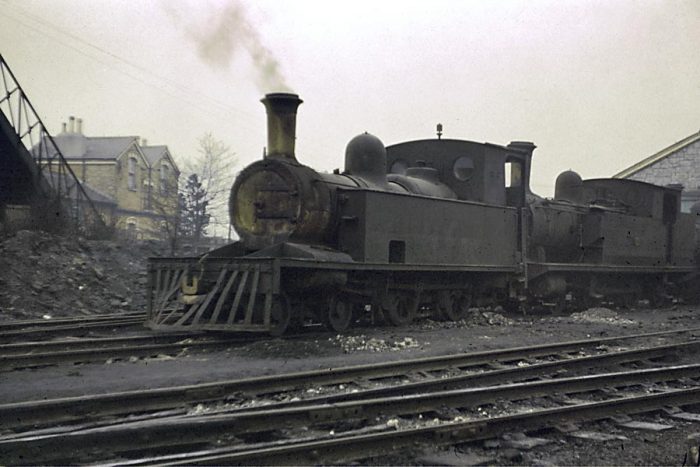
Steam Locomotives: There were a total of nineteen steam locomotives which worked on the West and South Flare Railways between 1886 and 1956. “Twelve were purchased by the West Clare Railway, four by the South Clare Railway, two came under CIE auspices from the Tralee & Dingle section, and one was a contractor’s engine.” [12] Loco 3C, Ennistymon, ex-Works. [19]
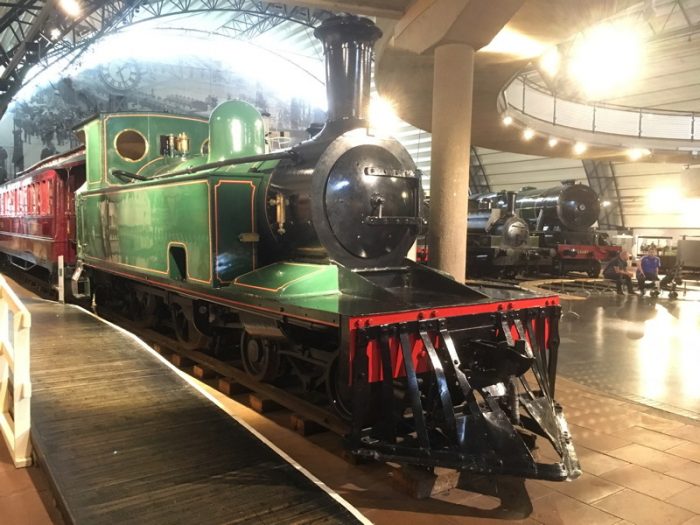
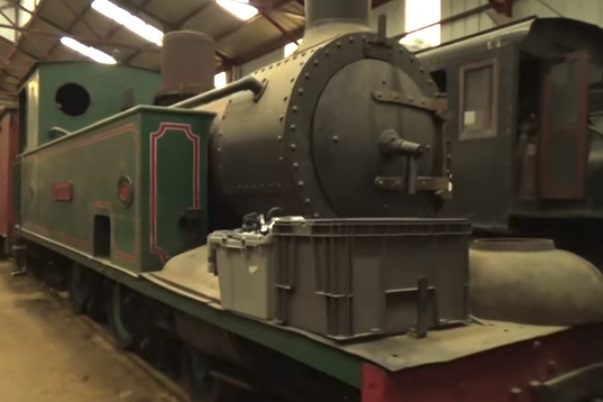
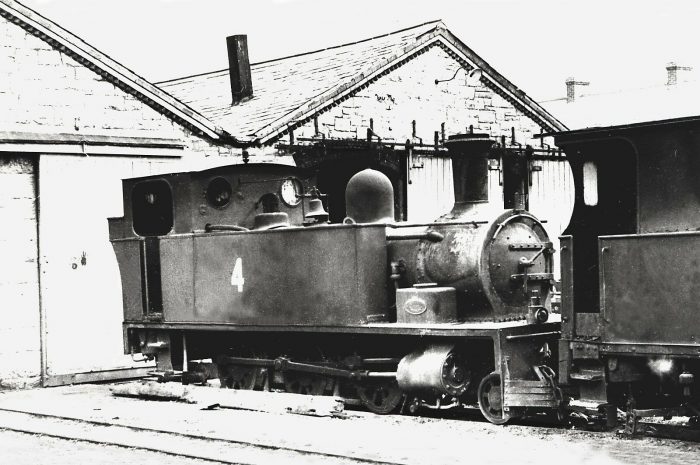
When writing in 1994, Patrick Taylor continued: “The average age of the steam locomotives when withdrawn was 40 years, but one had a very short life of only 13 years, and another lasted only one year longer. Two were still working after 64 years, when the system changed over to diesel. All were six-coupled tank engines, and with but two exceptions, originally carried both number and name. One has been preserved at Ennis.” [12] It remained at Ennis until 1996.
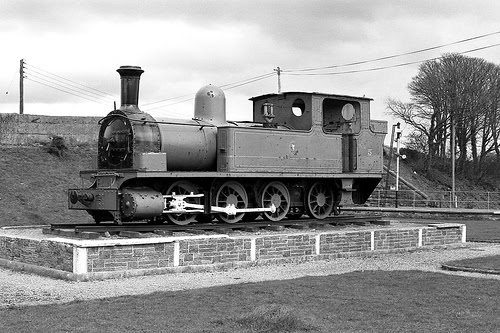
 Above, locomotive Slieve Callan on a plinth at Ennis Station. In 1996, in dramatic circumstances, the 40-tonne Slieve Callan was lifted off this plinth at Ennis railway station despite the efforts of protesters and taken to Moyasta in West Clare. [16][17]
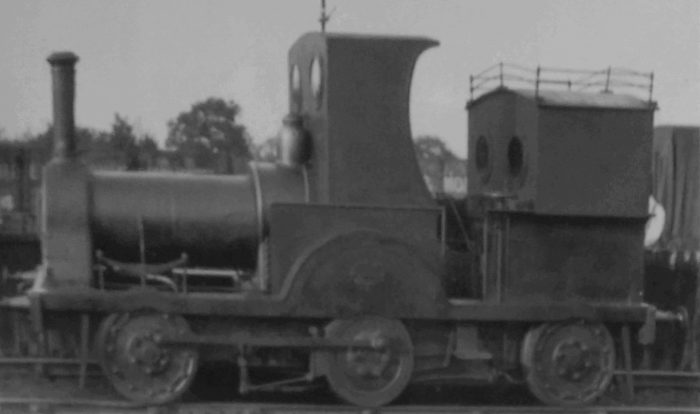
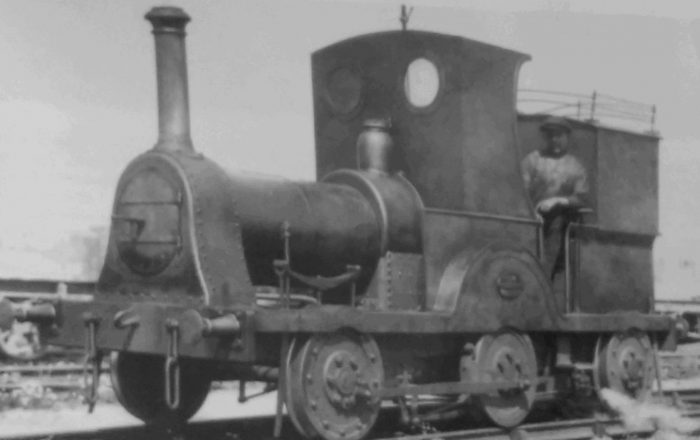
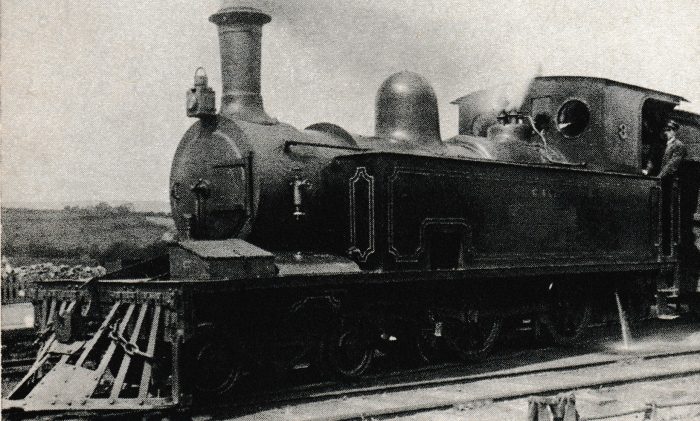
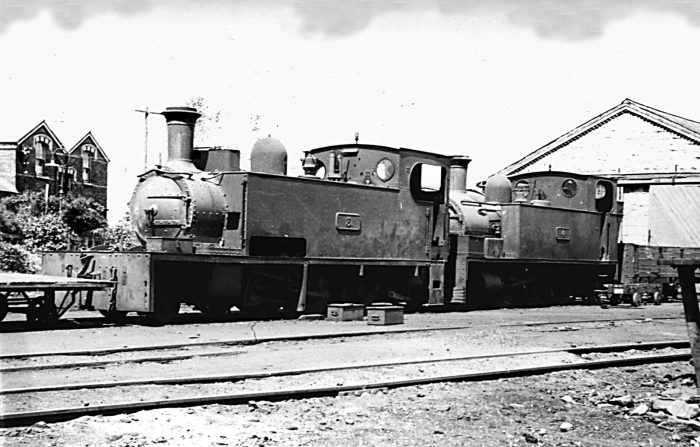
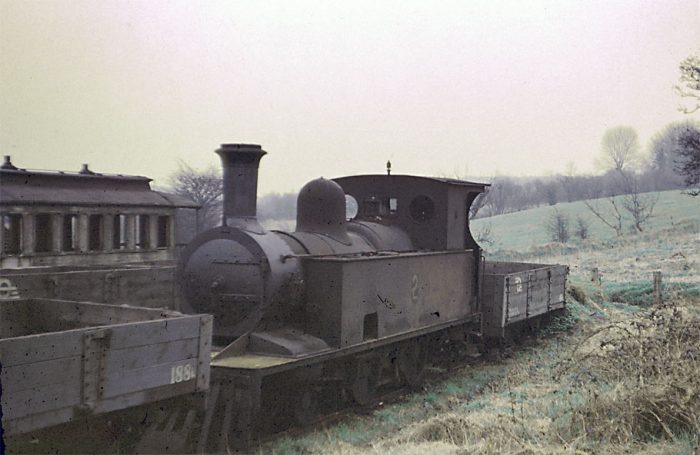
Adjacent, locomotive No. 2C at Ennistymon in 1940. [20]
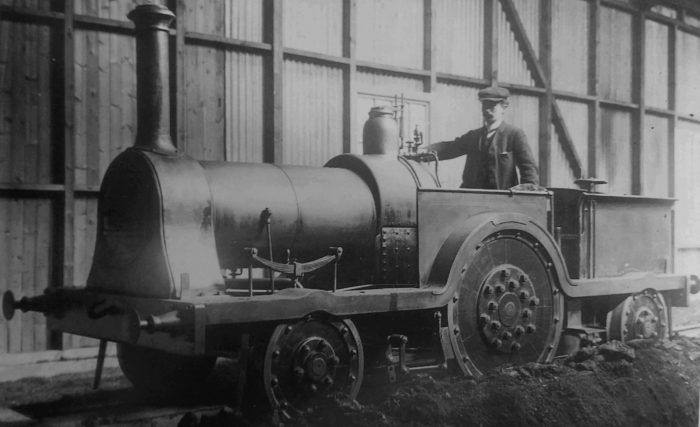
It appears that a contractor’s engine was not a six-coupled but a four-coupled engine. ‘Sponden’ was owned by Murphy’s contractors. It was built in 1878 at the Hunslet works in Leeds. Its original owners were Benton & Woodrow Contractors of Audenshaw, Manchester. This is a local connection for me, writing as I am at the moment in Ashton-under-Lyne. This loco arrived as deck cargo at Kilrush on 26 the April 1891, to assist on the construction of the South Clare line. previously, Murphy had been using one of the West Clare Bagnalls and continued to do so occasionally throughout the construction of the South Clare. [14]
Chapter 7 of Taylor’s book on the West Clare Railway [13] describes the locomotives on the West Clare in great detail. It would not be appropriate to reproduce that detailed work here, the book is easily purchased secondhand via a variety of sources.
Diesel and Other Traction: It has been suggested that the “West Clare had a self-propelled inspection car. However, the Great Southern Railway introduced one in 1925, and followed this with two passenger carrying railcars in 1927.” [12] It was the early 1950s which saw a major change in traction on the West Clare – three diesel locomotives and four diesel railcars were purchased by the CIE. These were:
3386 diesel railcar by Walkers of Wigan 1952.
3387 diesel railcar by Walkers of Wigan 1952.
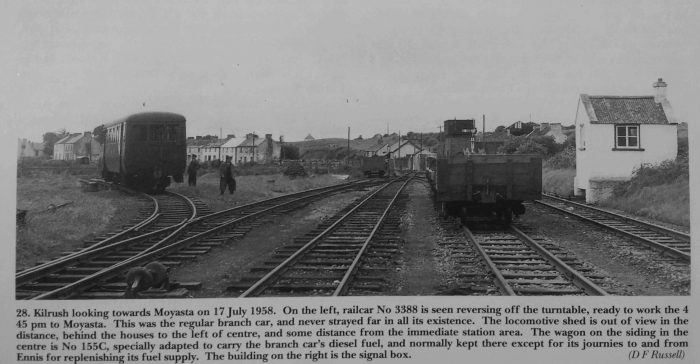
3388 diesel railcar by Walkers of Wigan 1952.
3389 diesel railcar by Walkers of Wigan 1952.
F501 Bo-Bo diesel locomotive by Walkers of Wigan 1955.
F502 Bo-Bo diesel locomotive by Walkers of Wigan 1955.
F503 Bo-Bo diesel locomotive by Walkers of Wigan 1955. [3]
Before focussing on diesel traction it is worth giving some thought to petrol! Proposals were considered in West Clare days to make use of ‘motors’. These came to nothing, although late in January 1907 estimates were obtained for a motor and parcels van. In 1927 the GSR authorised the purchaseof two petrol cars for the West Clare section. They initially intended these to be 25-30hp but this was increased after advice from their builder to 40-45hp because of the gradients on the line. The cars were ordered from the Drewery Car Company Limited (Order No. 2800 of 20th April 1927), but were made by Baguley Engineers Limited of Burton-on-Trent, through a working agreement between the two Companies. These four-wheel cars were numbered 395 and 396. [15]
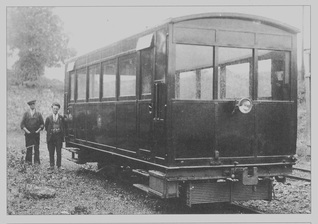
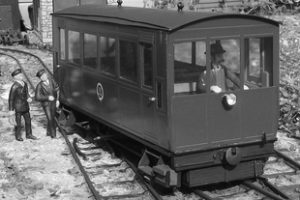
 The Drury Petrol Railcars (above) entered service for the GSR in October 1927 and ran the Kilkee branch services on the West Clare section until they were both withdrawn in 1936. They were transferred to the GSR works at Inchicore in 1939 and scrapped in 1943. [21] No. 396 is shown above at Kilkee in around 1930. The crew are Frank O’Brien and M. Jinan © A.W. Croughton, Real Photographs. [28] The adjacent image shows the excellent model made by Dirk Shrapnel for the Trawbreaga Bay Light Railway. [21]
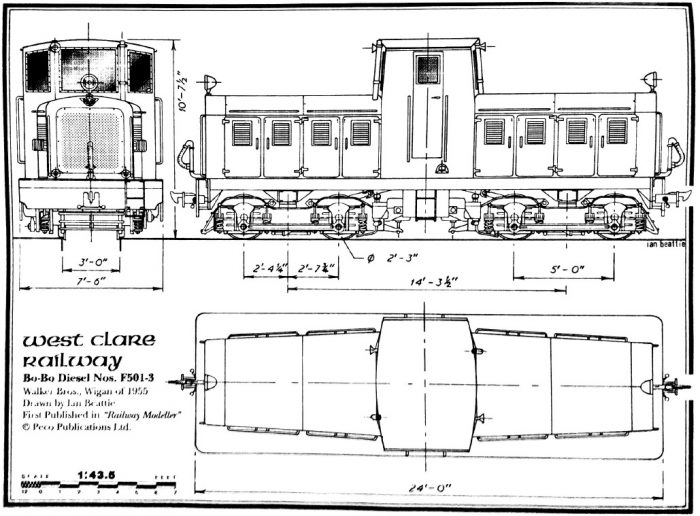
The Walker Bo-Bo Diesel locos: These locos became the standard motive power for goods trains in the last years of the West Clare Railway and could also be seen at the head of mixed/passenger services. “These Córas Iompair Éireann (CIE) 501 Class locomotives were built in 1955 by Walker Brothers Limited of Wigan, Lancashire for use on the narrow gauge (3 ft or 914 mm) lines on the West Clare section of CIÉ. They were small diesel mechanical locomotives, of 0-4-0+0-4-0 wheel arrangement. Controlled from a central cab the locomotives had two Gardner engines of 224 hp (167 kW), one under each end casing, driving through a fluid coupling and Wilson gear box the inner axle of the opposite bogie, through a spiral-bevel-reverse and reduction gear box. Unusually the locomotives were driven from a seat mounted sideways to the direction of travel giving a clear field of vision both ways by a mere turn of the head. The locomotives were fitted with vacuum brakes, emergency braking coming from a “deadman’s” pedal, one at the driving position and two others, one mounted on each side of the cab. When used on freight services their maximum speed was 40 kilometres per hour (25 mph), but with an overdrive fitted, released by a key, this was raised to 51 kilometres per hour (32 mph) for passenger trains.” [22] The F501-503 Bo-Bo series built by Walker Bros of Wigan. The drawing was undertaken by Ian Beattie and first produced in the Railway Modeller Magazine, (c) Peco Publications Ltd. [30]
“They were originally numbered C31-C33 in the West Clare steam locomotive series, but were subsequently renumbered into the diesel locomotive series as F501-F503. They were withdrawn in 1961 when the West Clare lines were closed and stored at Inchicore Works for seven years. The Isle of Man Railway made an offer for the locomotives which was rejected by CIÉ who subsequently made less money by selling them for scrap in 1968.” [22]

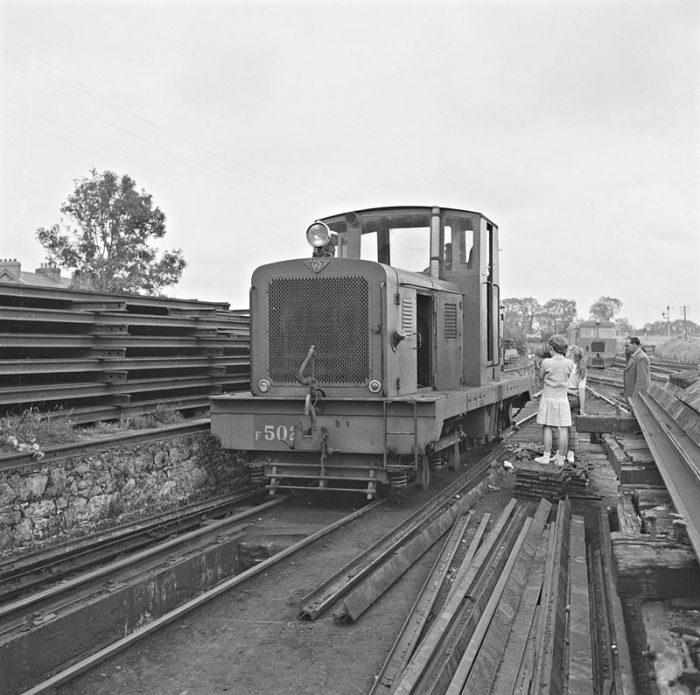
 Above, F502 at Ennis in 1962. [22]
Adjacent, F503 (c) Colour-Rail. [23]
Below right, all three locos F501 to F503 at Inchicore in 1966. They were broken up in 1968. (c )Peter Excell.[24]
J. Scarisbrick Walker and Brothers of Pagefield Ironworks, Wigan were iron-founders and general engineers. The company was founded by J.S. Walker in the 1870s and later joined with his two brothers, T.A. & E.R. Walker to form Walker Bros. (Wigan) Ltd in 1880.
About twenty steam locomotives were built. The company subsequently manufactured diesel railcars. [26] 4mm model of Walker Diesel as used on the West Clare Railway built from a Worsley Works NG kit by Robin Winter. [8]
 A similar model of F501. [23]
The “three diesel locomotives were put into service to haul goods,turf, beet and livestock trains, and finally eliminate working. When passenger traffic was heavy, as on Fair days for example, they were also employed on passenger and excursion trains, and a small fleet of locomotive hauled coaches were retained for this purpose.” [31]
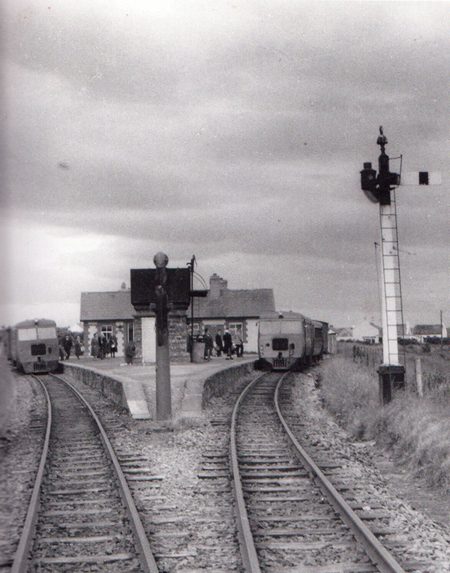
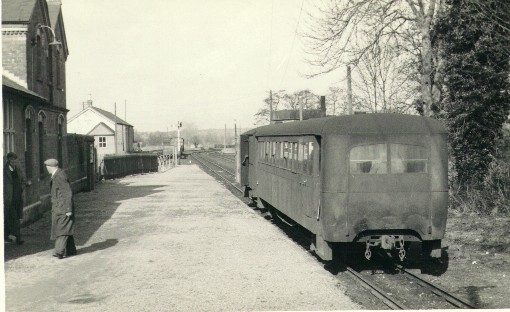
Walker Railcars: The four railcars in use on the West Clare were designed and built by Walker Bros (Wigan) Ltd. The same company supplied railcars/railmotors in a variety of gauges around the world. These included 40 railmotors supplied to Victorian Railways in Australia. [27] On 24th June 1959, two diesel railcars sit at the junction station at Moyasta. The one on the left has travelled from Kilrush, that on the right from Kilkee [11]
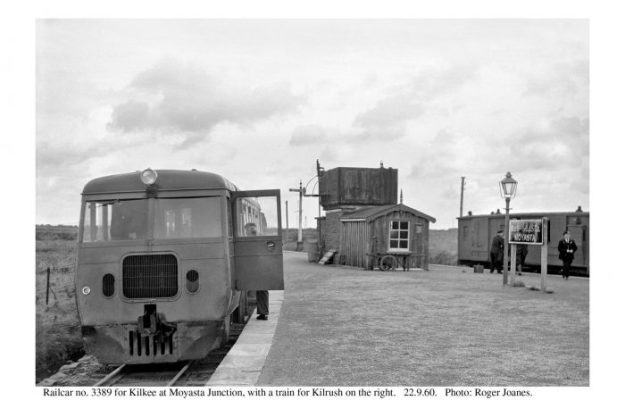
  Railcar 3389 at Moyasta in 1960 (c) Roger Joanes. [24]
The railcars were powered by “a Gardner 6LW diesel engine, driving through a ‘Don-Flex’ plate clutch, four speed Meadows gearbox, and thence through a Hardy-Spicer propeller shaft, to a Meadows worm gear final drive gearbox, on the rear axle of the bogie, the two pairs of wheels being coupled by conventional coupling rods. The bogies had inside frames.” [29]
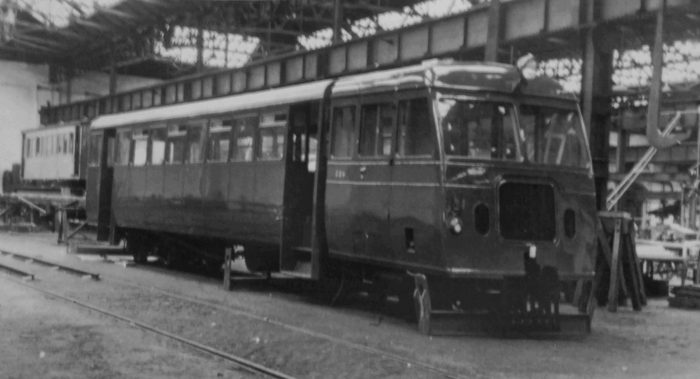
“Each car had a maximum speed of 38.5 mph in top, 23.8 in third, 14.2 in second and 8.3 in first gear, the engines developing 107 bhp at 1700 rpm. Except at very slow speed (7 mph), the cars would work forwards only.” [29] New turntables had to be installed to turn the railcars. “Heating was from the engine cooling system, and this was the first time West Clare passengers had anything better than simple footwarmers. The cars weighed 11 tons in working order, and were capable of hauling, when necessary, a standard passenger coach, and a lightly constructed four wheel luggage car.” [29] Walker diesel railcar No. 286 – renumbered 3386 before entering service. The picture was taken during the final preparations for the railcar to be shipped from Inchicore to Ennis (c) Patrick Taylor. [29]
Carriages: for the opening of the West Clare Railway, “thirteen … coaching stock vehicles were purchased from the Bristol wagon & Carriage Works Company of Lawrence Hill, Bristol oder, which in its entirety was left in the hands of William Martin Murphy, as had been the case with the locomotives, consisted of three composites, six thirds and four brake vans. The original passenger carrying coaches were six-wheelers, 30ft long and of James Cleminson’s patient, with the three sets of wheels and axles mounted on separate trucks, the central one of which was given considerable side play, being mounted slides. This truck was connected to its outer sisters by radius rods, themselves being pivoted about their centre. … There were only three other narrow gauge railways in Ireland that used the principle, the Ballycastle, West Donegal and the Londonderry & Lough Swilly, and only the latter continued to purchase such vehicles after the West Clare; doing so as late as 1899. After 1894, although continuing the use of six-wheelers, the West Clare abandoned building on the ‘Cleminson’ principle.” [32]
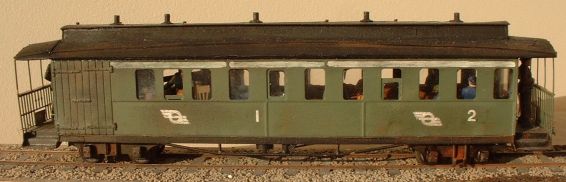
“The livery of the coach sides was green and the roofs white, the West Clare heraldic device being displayed in gold leaf on the second and fifth doors of the thirds, and the second and fourth of the composites, and on each door the class was clearly denoted. On the panelling between the roof, and the doors and windows, immediately under the cant rail, the words West Clare Railway appeared.” [32]
Of the four brake vans, two were 30ft long with an under-carriage to match the six-wheel coaches, and two were four-wheelers.
As the latter years of the 19th century unfolded, it became clear that the passenger stock needed to be augmented. Eight additional items were ordered. Five arrived before the South Clare was opened, three after. The first five consisted of two thirds, one composite and two brake vans. The remaining three were two composite coaches and one third.
For the South Clare, six more carriages were purchased. All coaches came from the Bristol company and apart from their lettering were almost identical to those built for the West Clare.
About the turn of the century, around the time Grand Juries gave way to County Councils, there were complaints about inadequate provision for excursion traffic. The Metropolitan Carriage & Wagon Company were commissioned to build two coaches. These were the last ordered from outside contractors.
In 1904, the Company workshops in Ennis were commissioned to build a brake-third and one third class coach. In 1905, a further three coaches, two thirds and a first, were commissioned. Ennis completed all five coaches in a little under 15 months. [33]
In 1909, Ennis built another six-wheel brake van, this time for use on ballast trains. In 1910, two more brake-third were built. “In addition, … two service vehicles were built at Ennis. … In 1905, four wheeled brake van No. 12 was rebuilt as a cattle wagon, taking a new number, No. 93, in the wagon list. A new No. 12 in the coaching stock list was built at Ennis. … In 1908, the other four wheeled brake van No. 2, was rebuilt as another wagon, and took the No. 143 in the wagon list. The new No. 2, also a four wheeler, … was a Directors Inspection Saloon.” [34]
“For the remainder of it independent existence, the railway had 38 coaching stock vehicles, but it was common practice at times of heavy demand, race meetings and the like, to provide additional seating in the brake compartments, and sets of forms were kept for this purpose.” [35]
When the Tralee and Dingle closed to passenger traffic in 1939, the GSR moved 12 bogie coaches to the West Clare. They were number 39C to 50C respectively. The bulk were third class coaches.
In 1951, when CIE introduced diesel railcars, three coaches, Nos 46C, 47C and 48C were converted at Inchicore into railcar trailers. They were given old omnibus bodies and had electric lighting fed from a 12V battery. Three four wheel light weight luggage vans were also built for use with the railcars. These were given Nos 187C, 188C and 190C. [35]
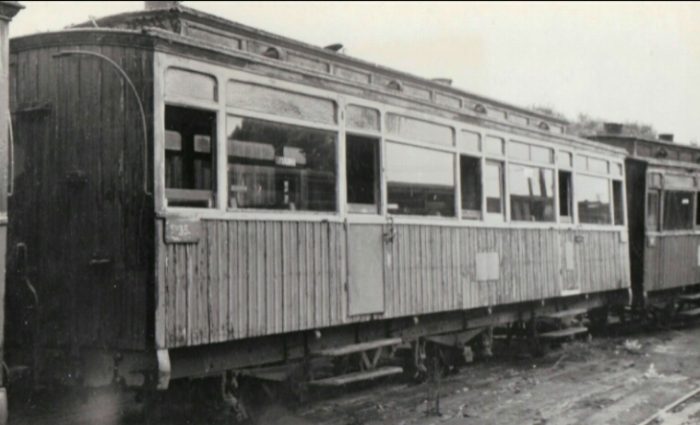
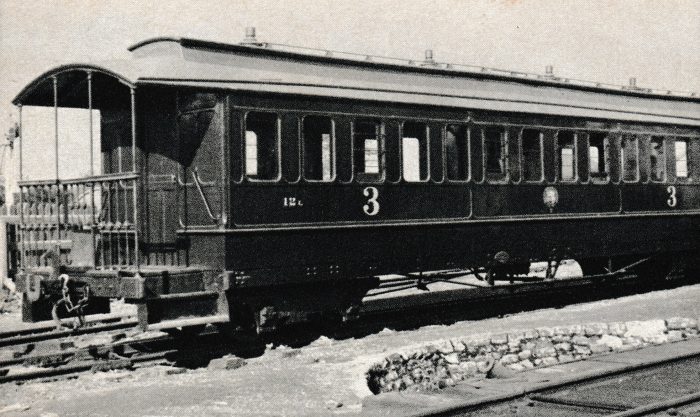
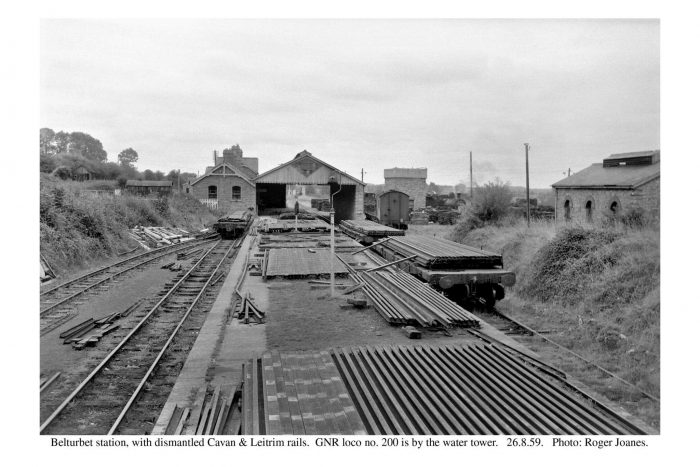
In 1953, the Tralee & Dingle closed completely and two brakevans arrived on the West Clare from the Tralee & Dingle. In 1954, two West Clare coaches were transferred to the Cavan and Leitrim (Nos. 42C and 52C. In 1957, 18 vehicles were withdrawn. In 1958 brake vans Nos 38C and 41C were withdrawn. In 1959, three four wheel vehicles and brake No. 36C were withdrawn. Further minor changes occurred before full closure of the West Clare in 1961, specifically including the transfer of two coaches from the Cavan & Leitrim (one of which was 42C). [36] 6-wheel tourist coach No. 35 [9]
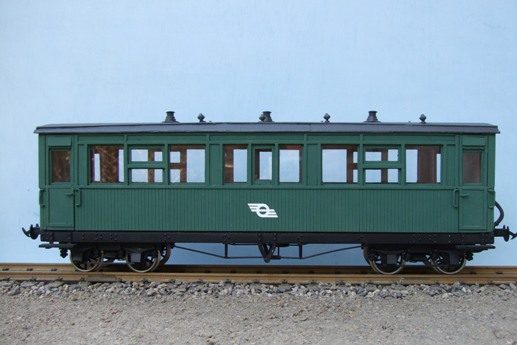
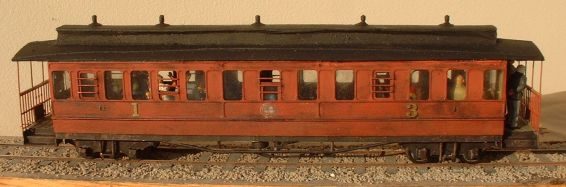
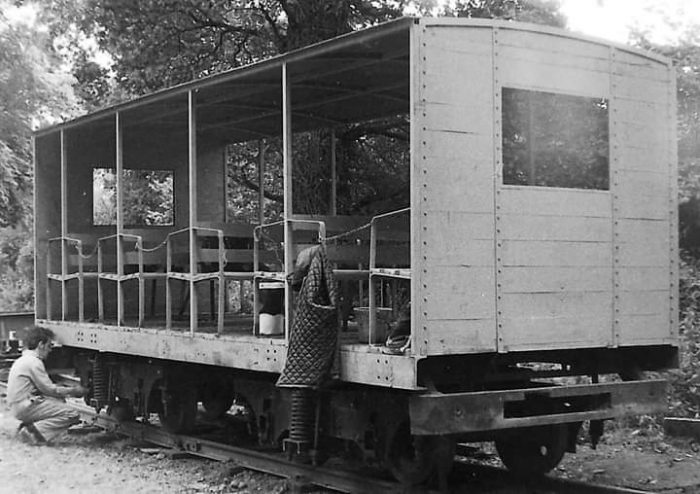
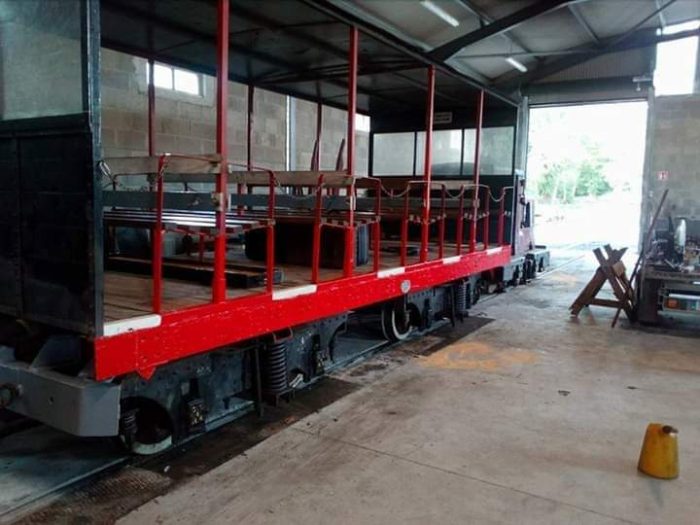
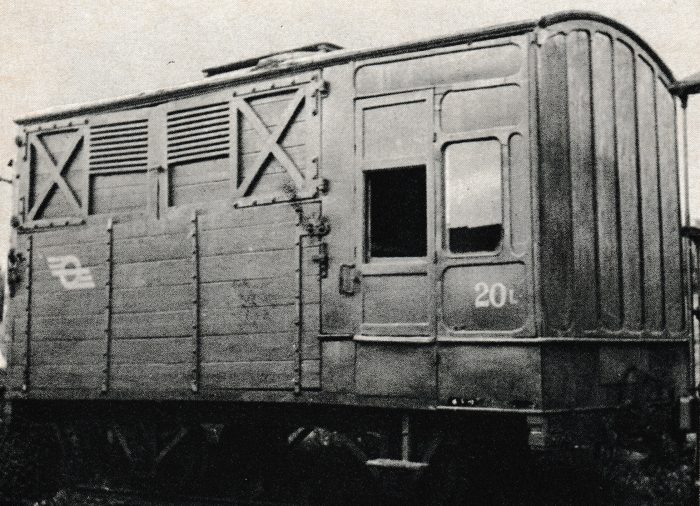
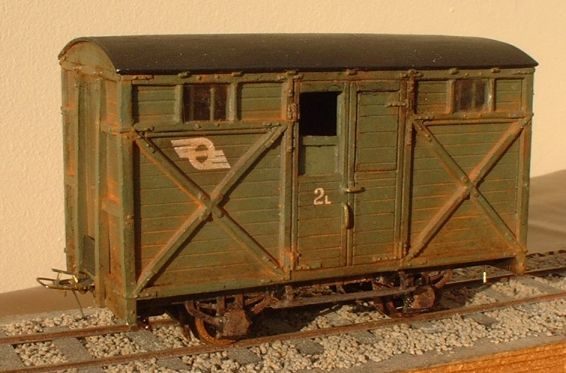
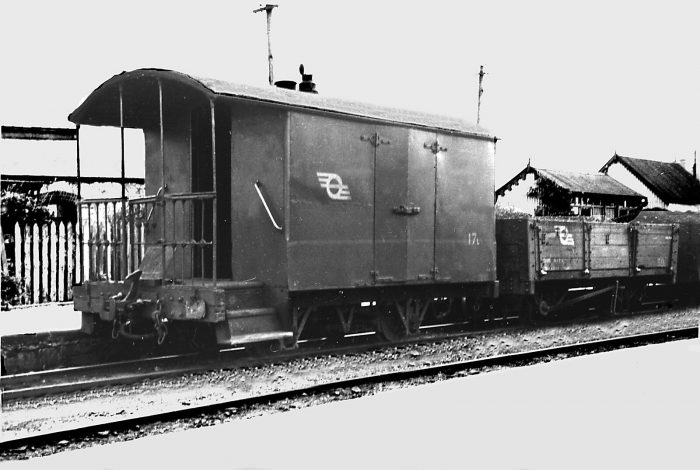
 1:22.5 model of West Clare Railway Brake Van 17c. [2]
 1:22.5 model of West Clare Railway Bogie- Coach No. 42c. [2]
Wagons: The wagon stock for the opening of the line was also ordered by Murphy and supplied by the Bristol Company. [36] 65 wagons were ordered (15 low side open, 25 covered, 10 covered cattle, 12 ballast and 3 flats). Ten wagons were ‘convertible’ which meant that they had an open centre-portion to the roof which could be covered by canvas.
For the opening of the South Clare in 1892, the Bristol Company supplied a further 21 wagons (6 convertible and 15 cattle). [36]
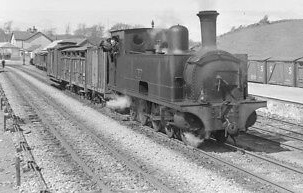
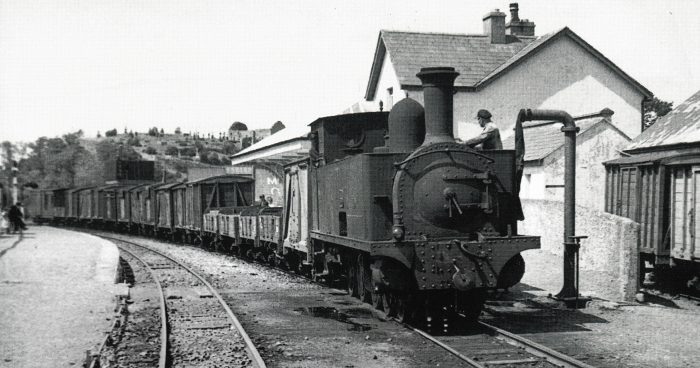
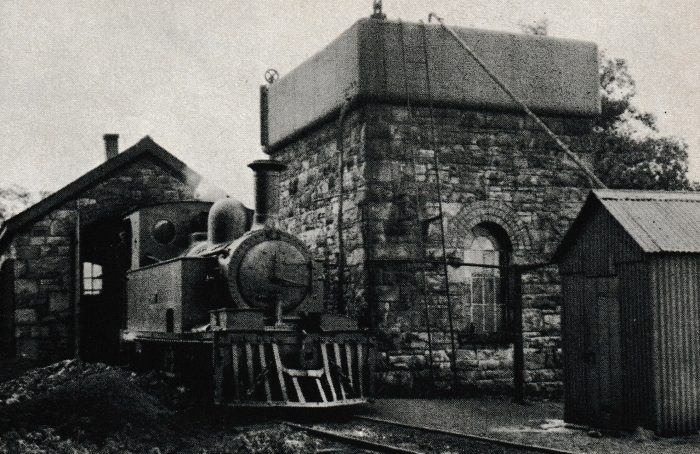
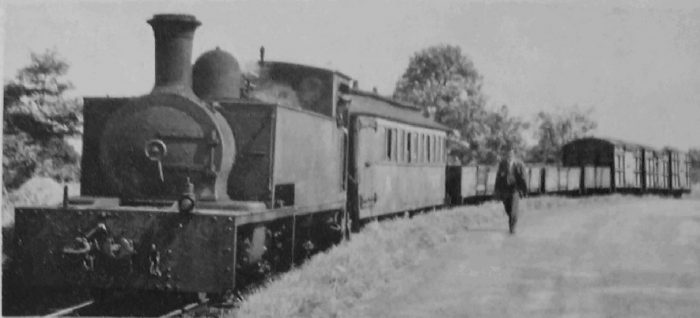
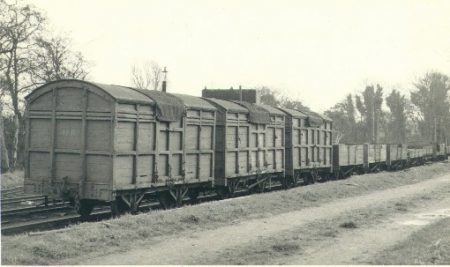
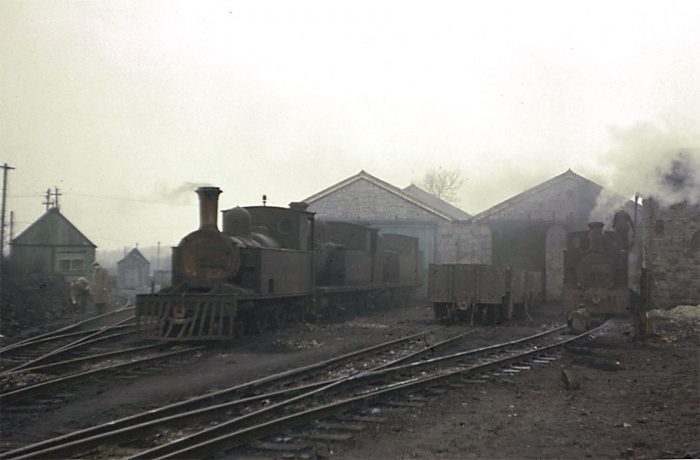
The next increase in stock came in 1899, when 10 covered wagons were supplied by the Bristol Company. With the opening of the workshops at Ennis, wagon construction started. The first wagons were built in 1902 (6 large open wagons suitable for cattle and turf. In 1904, a further 17 wagons were built for the cattle traffic. Then, one covered cattle wagon in 1905 and two large open wagons in 1907. In 1908, six luggage vans were built for passenger trains and a further cattle wagon was provided. In 1911, another six covered goods wagons were built. Then six open coal wagons in 1912 and a further 5 covered wagons. In 1913, the last batch of wagons was built while the Company was independent – 10 covered cattle wagons. [37] At Ennistymon on 28 July 1952, locomotive No 9C is on the 9:58 am goods from Kilrush with a typical rake of wagons. The loco is taking water. Driver Tom Reidy is on the engine, (c) C.L. Fry. [38]
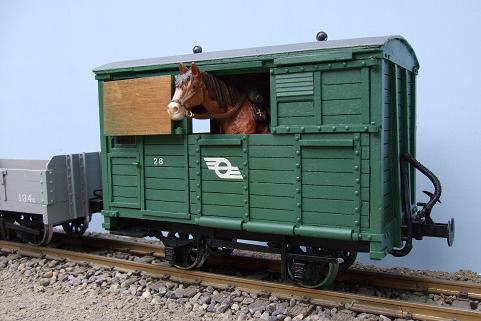
 1:22.5 model of West Clare Horsebox No.28c. [2]
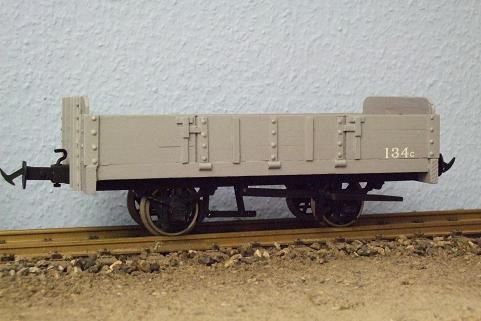
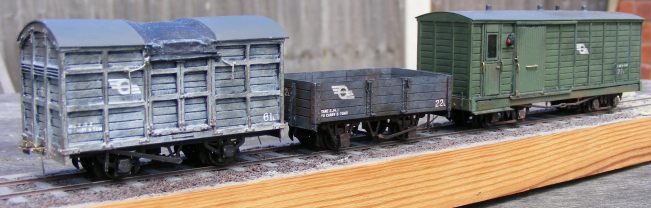
 1:22.5 model of West Clare Railway open Wagon 134c. [2]
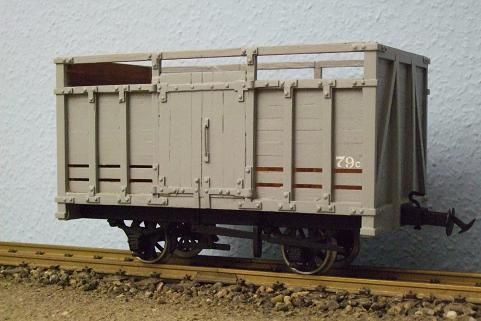
 1:22.5 model of West Clare Railway open Cattle Wagon 79c. [2]
The GSR closed the Ennis workshops soon after it took over the West Clare. Between 1925 and 1929, 46 wagons were withdrawn (15 covered, 10 cattle, 19 open, 1 flat and 1 timber). 50 new wagons commissioned from Inchicore started to arrive on the West Clare in April 1929. These were 17 covered, 15 cattle and 18 open wagons. After the closure of the Cork & Muskerry in 1934 13 open goods wagons were transferred to the West Clare – the first foreigners! These had non-standard couplings and so were semi-permanently coupled in rakes. [39]
On closure of the Cavan & Leitrim in 1959, 25 wagons arrived on the West Clare, 18 open and 7 covered. All surviving wagons were scrapped on closure of the West Clare, with the exception of a few sold to Bord na Mona. [39]
References
- Patrick Taylor; The West Clare Railway; Plateway Press, 1994, p53.
- https://largescaleworld.hpage.com/west-clare-railway-ireland.html, accessed on 10th July 2019.
- http://www.narrowgaugerailwaymuseum.org.uk/collections/public-carriers/west-clare-railway, accessed on 10th July 2019.
- Patrick Taylor; op.cit., p55
- Ibid., p57.
- Ibid., p58
- Ibid., p59.
- http://www.worsleyworks.co.uk/Image-Pages/Image_NG_Irish_WCR2.htm, accessed on 10th July 2019.
- https://www.ebay.co.uk/itm/fg-irish-ireland-plain-back-postcard-6-wheel-tourist-coach-west-clare-railway-/401499456892, accessed on 10th July 2019.
- Gabriel Vaughan; My Affair with Malbay; ColourBooks Ltd, 2000.
- http://forum.e-train.fr/viewtopic.php?f=5&t=88663, accessed on 10th July 2019.
- Patrick Taylor; op.cit., p77.
- Ibid., p77-122.
- Ibid., p107.
- Ibid., p111.
- http://www.skibbereeneagle.ie/ireland/west-clare-railway, accessed on 12th July 2019.
- https://www.irishtimes.com/news/restored-steam-engine-back-on-the-tracks-after-57-years-1.691033 (2nd July 2009), accessed on 12th July 2019.
- http://www.westclarerailway.ie/about/history, accessed on 12th July 2019.
- https://orion.math.iastate.edu/jdhsmith/term/sleiwcr.htm, accessed on 12th July 2019.
- https://www.ebay.co.uk/itm/362292119376, accessed on 13th July 2019.
- http://www.trawbreagabaylightrailway.com/railcars.html, accessed on 16th July 2019.
- https://en.wikipedia.org/wiki/CIE_501_Class, accessed on 16th July 2019.
- http://www.stephenjohnsonrailways.co.uk/F501%20Class.htm, accessed on 16th July 2019.
- https://www.flickr.com/photos/110691393@N07, accessed on 5th May 2019.
- http://www.irishtractiongroup.com/withdrawn.html, accessed on 16th July 2019.
- https://www.gracesguide.co.uk/J._Scarisbrick_Walker_and_Brothers, accessed on 16th July 2019.
- https://en.wikipedia.org/wiki/Walker_railmotor, accessed on 16th July 2019.
- Taylor: op.cit., p111.
- Ibid., p124.
- Ibid., p119.
- Ibid., p117.
- Ibid., p123.
- Ibid., p128.
- Ibid., p132.
- Ibid., p134.
- Ibid., p139.
- Ibid., p143.
- Ibid., p60.
- Ibid., p148.

 The LCC Tram Body: the first was a London County Council tram body on another chassis. The tram having been cut down from a double-decker to serve on the railway. [15]
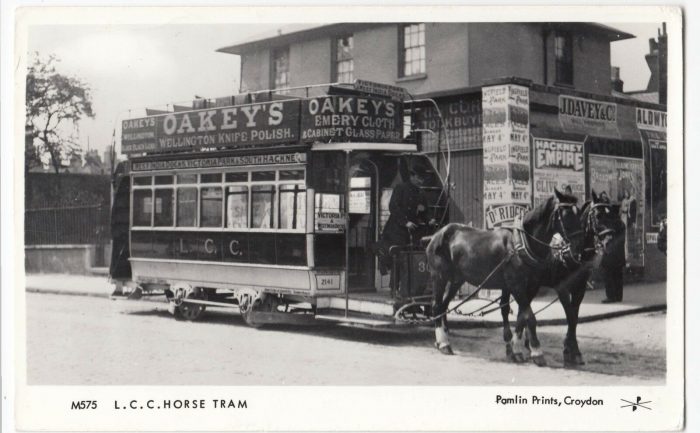 Horse-drawn London tram of the type converted by Colonel Stephens. [18]
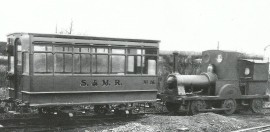
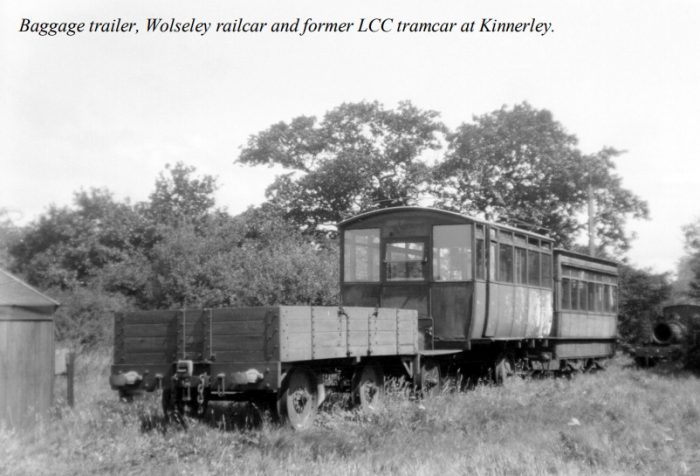 The first trailer car sits at the back of the siding at Kinnerley. [19]
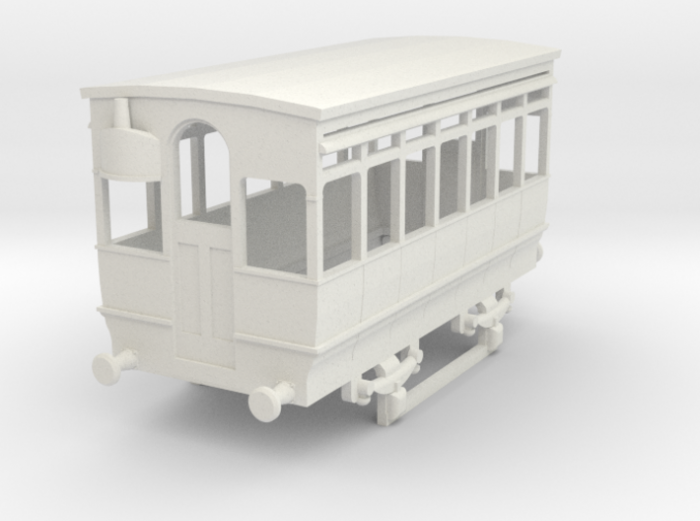 A Shapeways 3D print of the Gazelle’s first trailer on the S&MLR. [20]
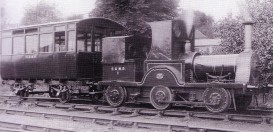 The Wolseley-Siddeley Railcar Body: the second [15] utilised the body of a Wolseley Siddeley railcar and reused the chassis of the older trailer. Wolseley and Siddeley worked together building motor cars from 1905 to 1910. Grace’s Guide [2] says that in 1905, the Wolseley Tool and Motor Car Co purchased the Siddeley Autocar Co, with founder John Davenport Siddeley in charge. Siddeley took control of the merged concern, renaming the marque Wolseley-Siddeley. The company made the stately Wolseley-Siddeley motorcars. They were used by Queen Alexandra and the Duke of York, the later King Edward VII.
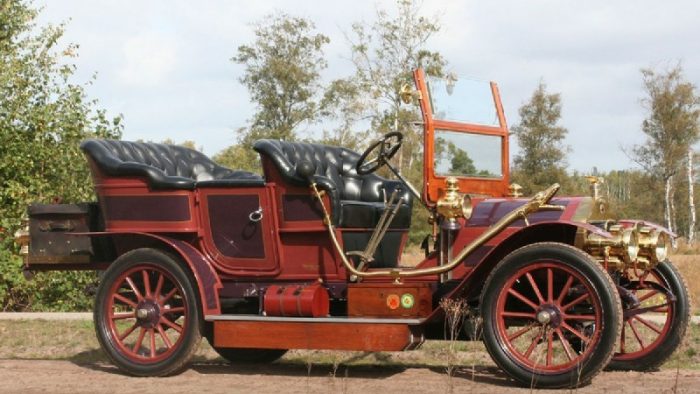 A Wolseley-Siddeley Pheaton from 1908. [4]
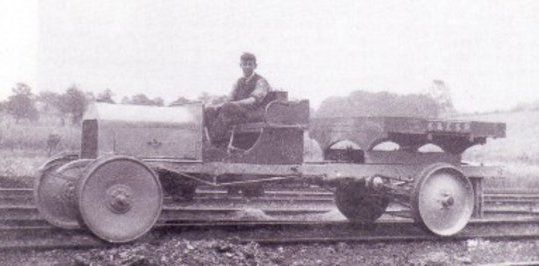 The Wollesley and Siddeley chassis at work on the K&ESR. [7]
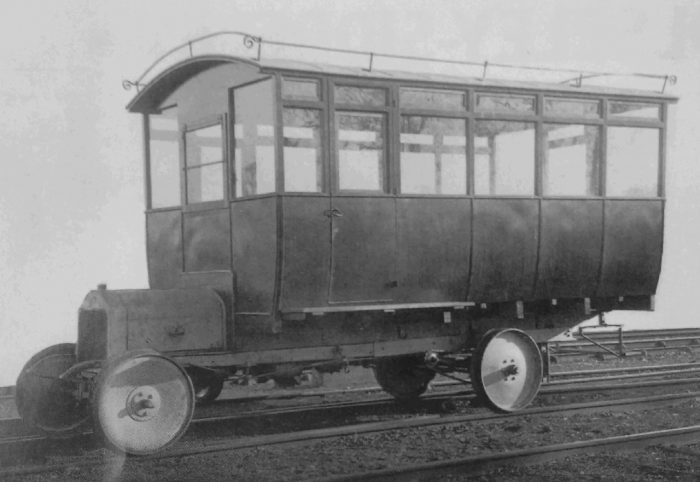 The official photograph of the Wolseley-Siddeley Railcar (c) Colonel Stephens Railway Museum. [1: p16]
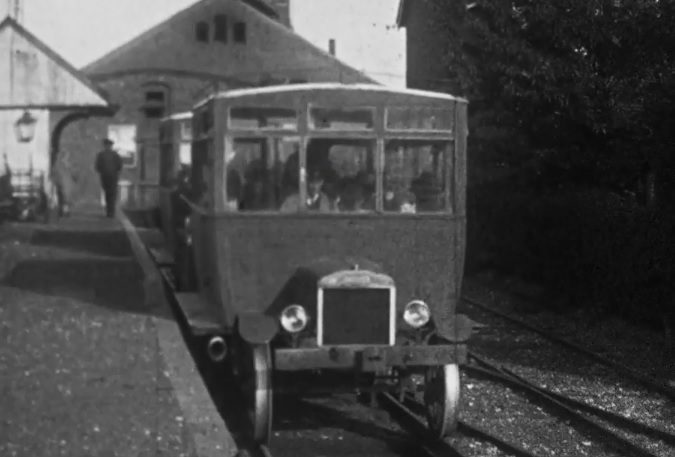 A still from the above short film taken in 1928. This shows a different but very similar railcar to the Wolseley-Siddeley, but this one was made by the Shefflex Motor Company standing at the platform at the station in Chichester. [8]
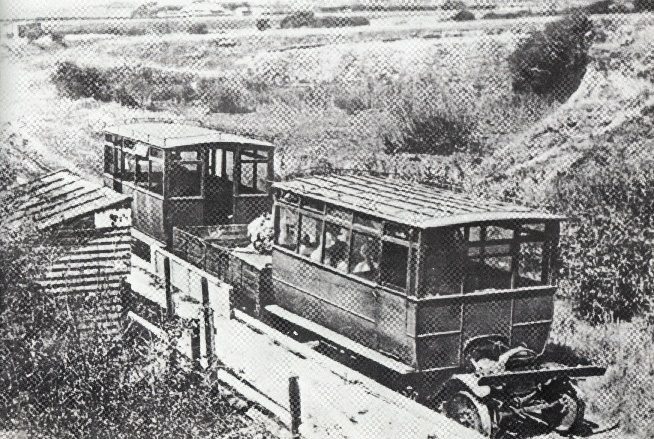 Shefflex Railcars in train at Selsey Bridge Station. [9]
 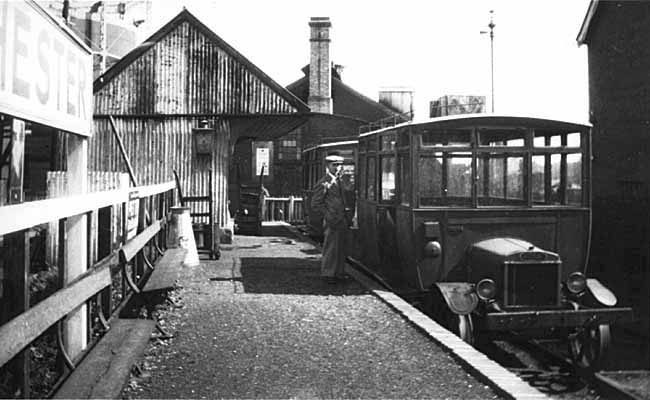 Shefflex Railcars in train at Chichester Station. [9]
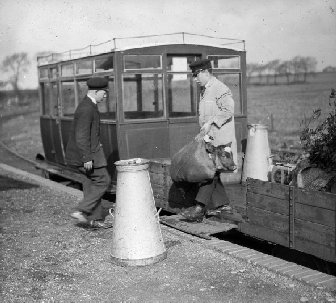 Shefflex Railcar in train at Hunston Station. [9]
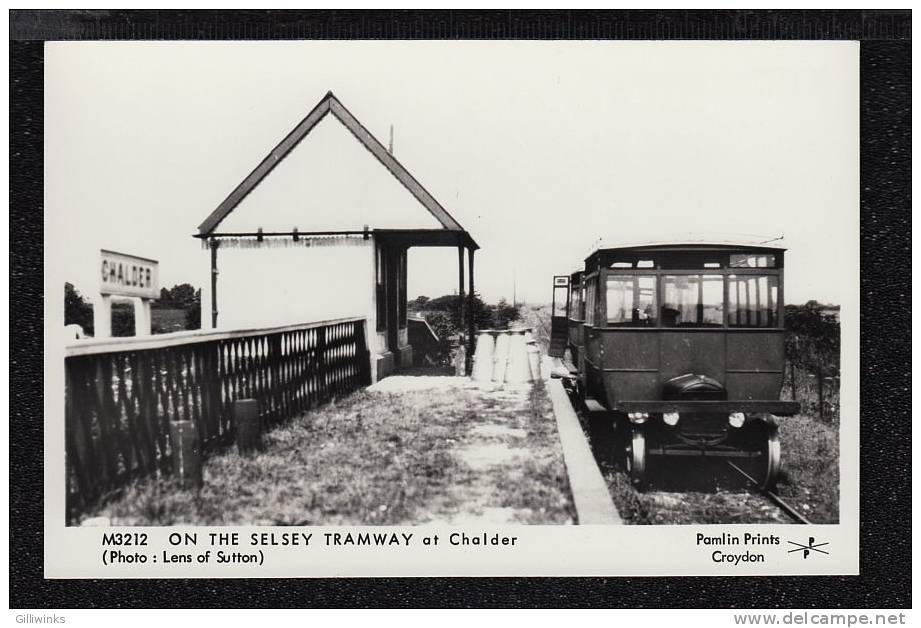 Shefflex Railcars in train at Chalder Station. [9]
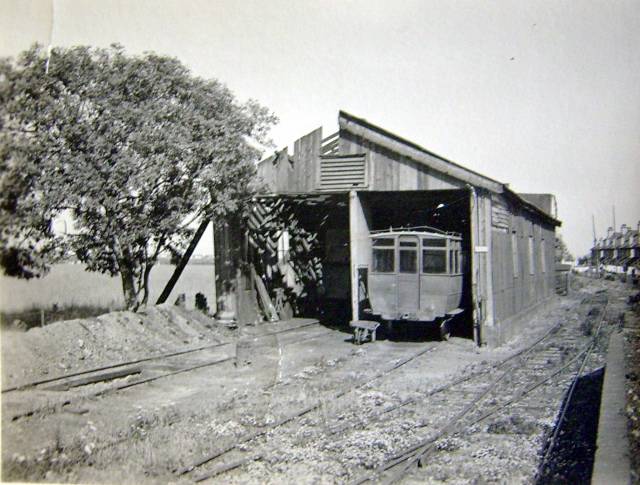
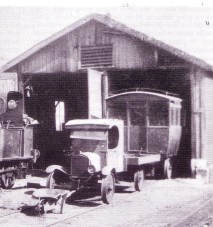 The above image purports to show Wolseley-Siddeley Railcar at Selsey Shed. [9]
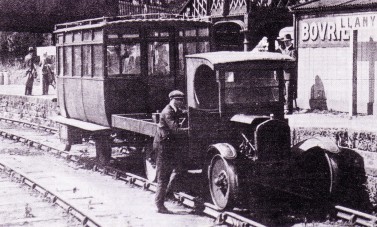 This change in roof profile in all three pictures and the arrangement of the top-lights and the end of each carriage may well be significant. The running board also runs the full length of the body in the bottom photograph which was not the case on the Wolseley-Siddley Railcar (see above). All of this suggests that Colonel Stevens might have rung the changes between the different railcars available to him on the Shropshire & Montgomery Light Railway in the period before removing one of the railcar bodies to create the second version of the tram paired with Gazelle. The rail lorry, it seems, was paired in a push-pull fashion with the railcars and so avoided the need for a turntable at the end of any chosen service.
 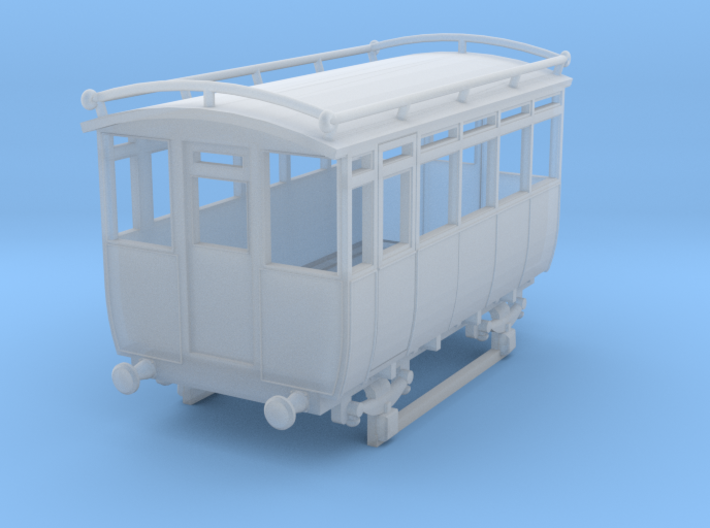 This Shapeways O-Gauge 3D print shows clearly the more curved profile of the Wolseley-Siddeley body compared to the picture above which probably shows on of the ‘Ford’ railcars. [13]
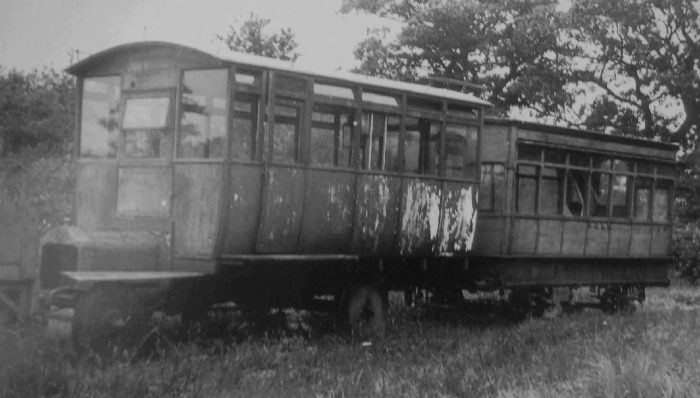 The Wolseley-Siddley Railcar and the original trailer built from the LCC tram sit alongside each other on the Shropshire and Montgomeryshire Light Railway at Kinnerley, (c) Lens of Sutton. [1: p16]
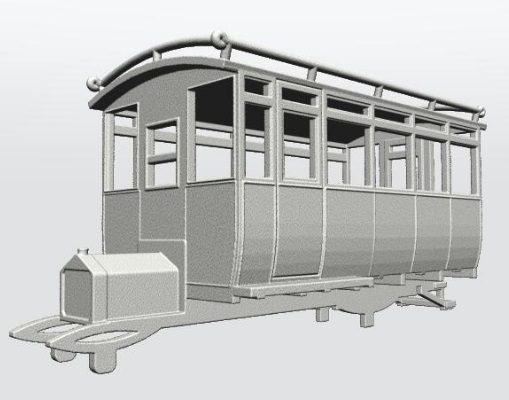 The Shapeways O-gauge body kit for the Wolseley-Siddeley Railcar! [14]
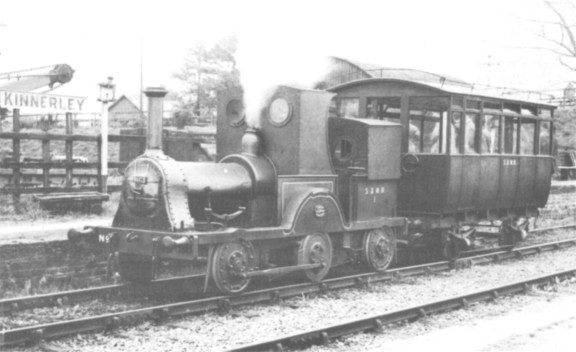 The Wolseley-Siddeley after its conversion to the second trailer car, seen at Kinnerley behind the diminutive Gazelle, (c) L.W. Perkins. [16]
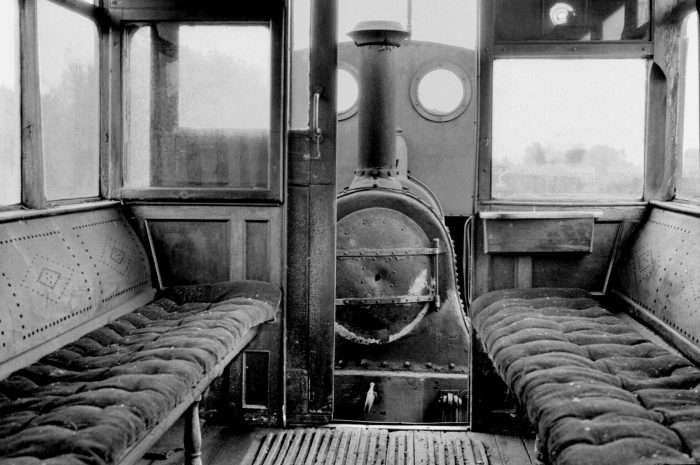 An excellent view of Gazelle from within its first trailer car! [17]
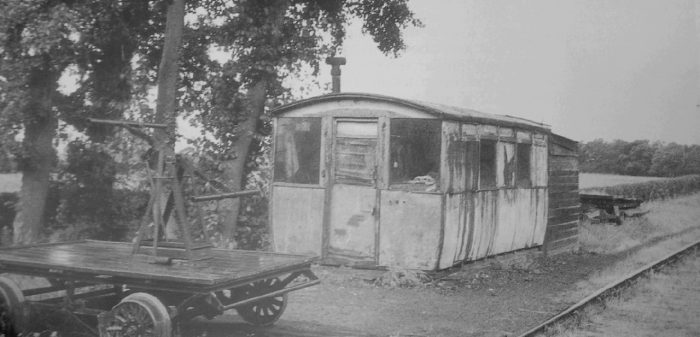 The Wolseley-Siddeley trailer in its final guise as a permanent way hut on the Shropshire and Montgomeryshire Light Railway. [10]
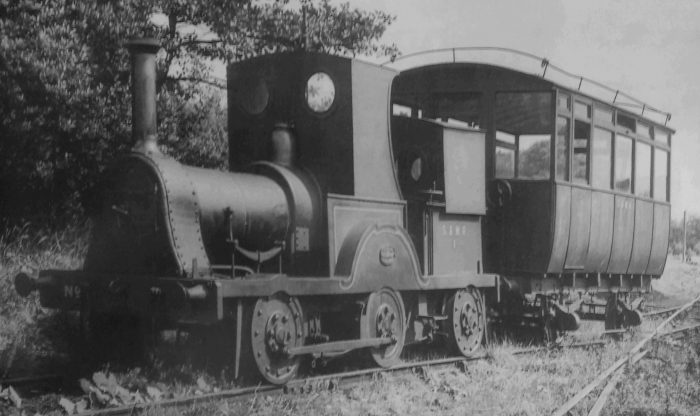
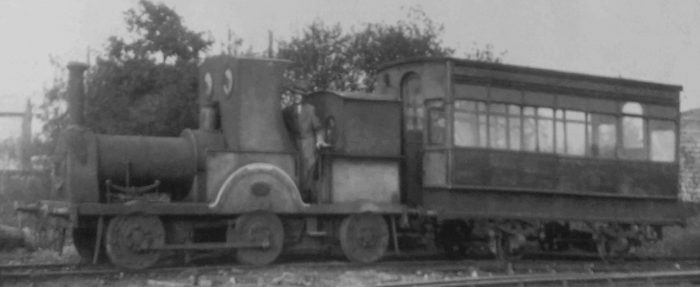
 Possibly the strangest locomotive operated by Colonel Stephens was the tiny tank engine Gazelle. This had been built in 1893 by Alfred Dodman & Company of Kings Lynn [9] for the private use of Mr William Burkitt (shown in the adjacent photograph), [2][8] a prominent local businessman, who was able, at least on one occasion, to persuade the main-line railway companies to let him travel over their lines using it. It was a 2-2-2WT with seats for four passengers fitted where the coal bunker would normally he found. The footplate had no cab or weather-board and the passenger ‘compartment’ was also without any sort of roof. Its dimensions were: Driving wheels, 3ft. 9in. diameter; Leading and trailing wheels, 2ft. 3in. diameter; Wheelbase, 10ft. 6in.; Cylinders, 4ft. by 9in.; Height to top of chimney. 7ft. 9in.; Length over buffers, 17ft. 2in.; Weight, 5 tons 6 cwt. The only concession to comfort was that the wheels were of the Mansell type with wooden centres to reduce noise. [1]
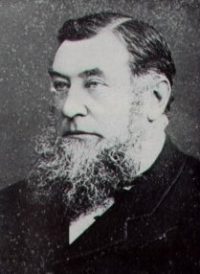


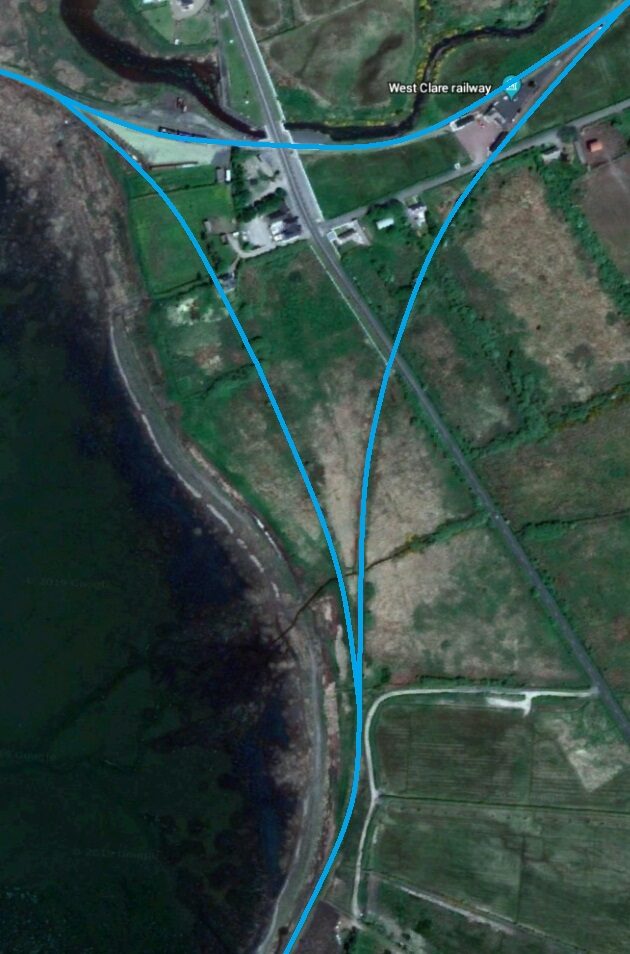


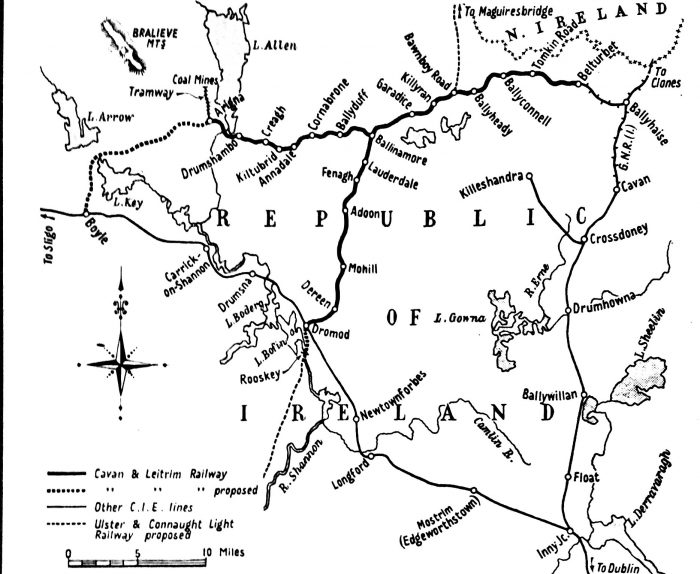


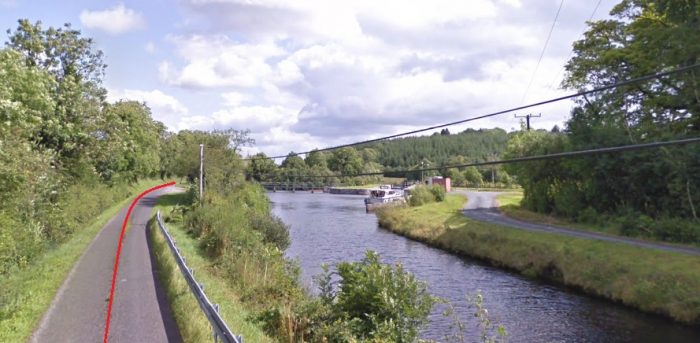
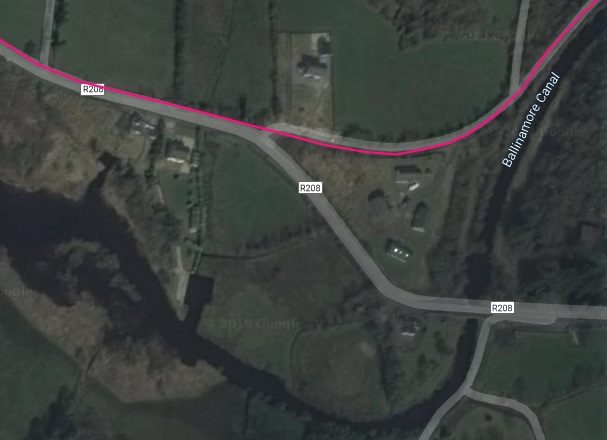

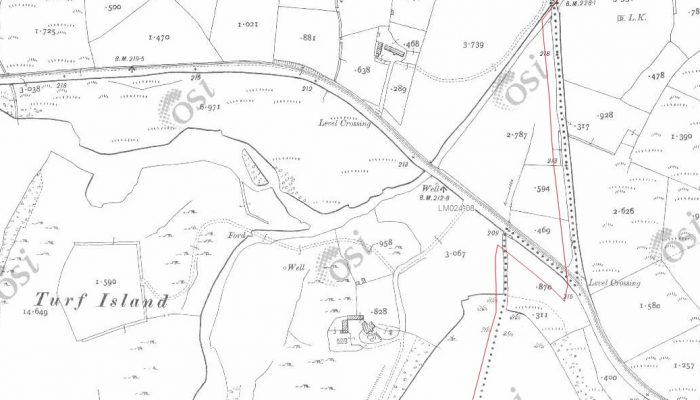
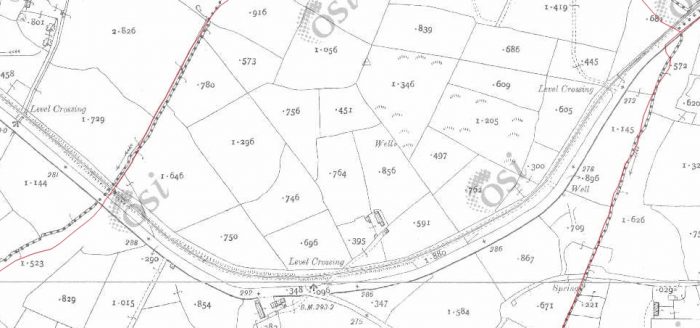

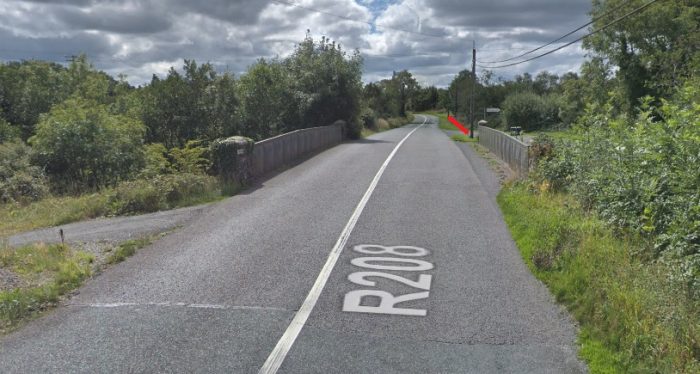

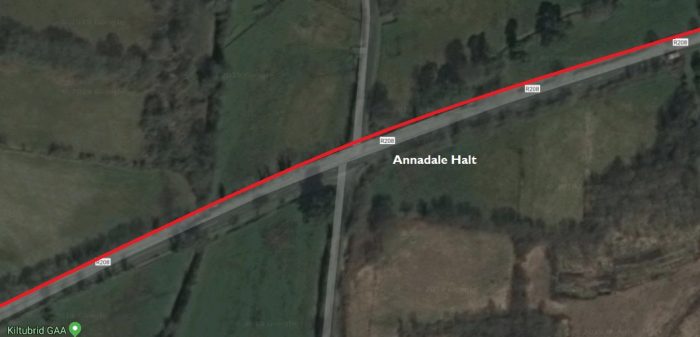
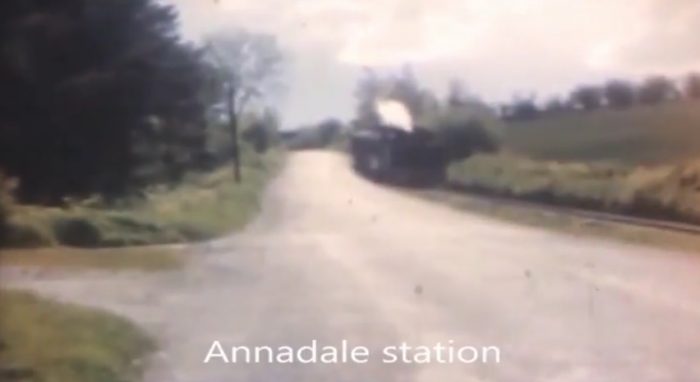
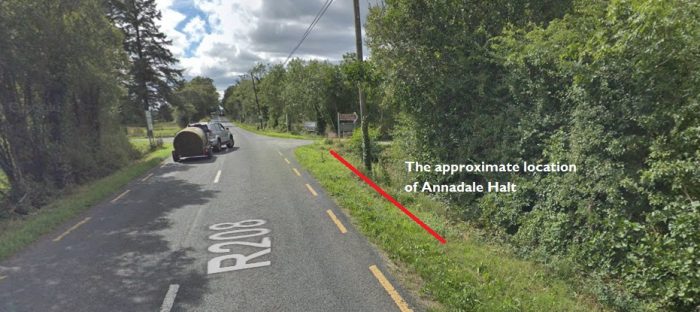
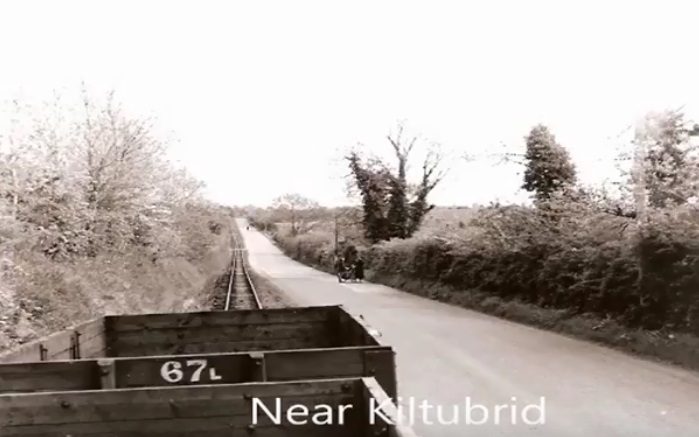
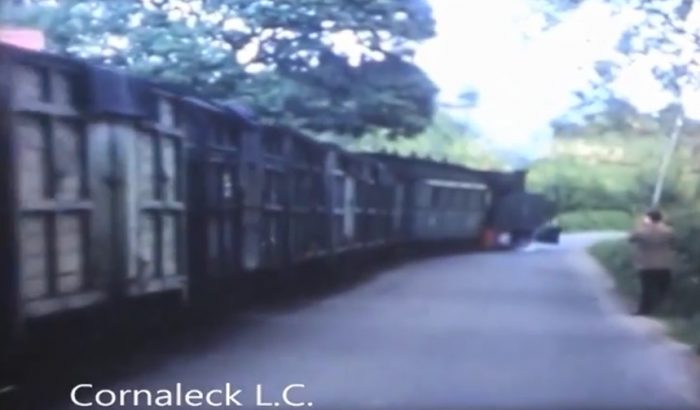
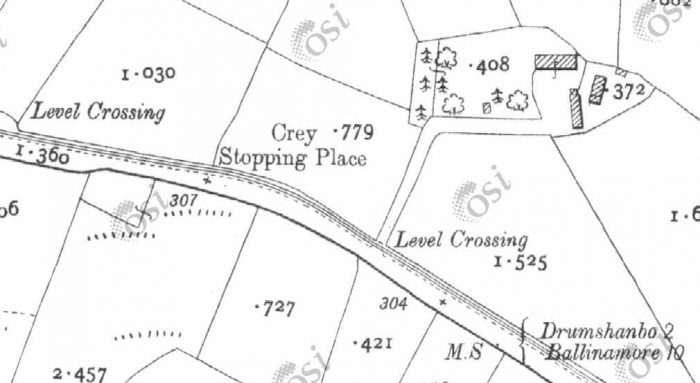
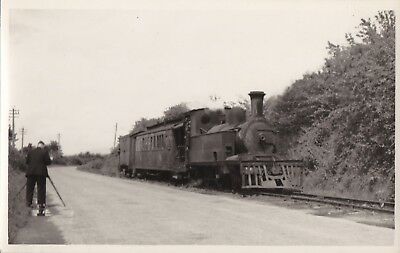
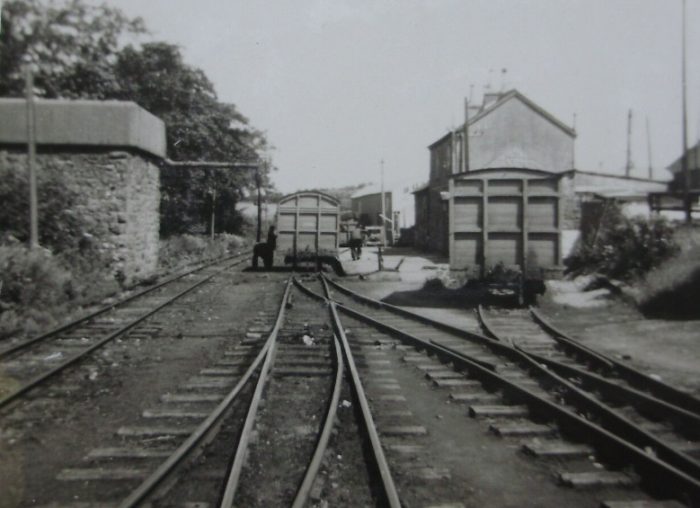
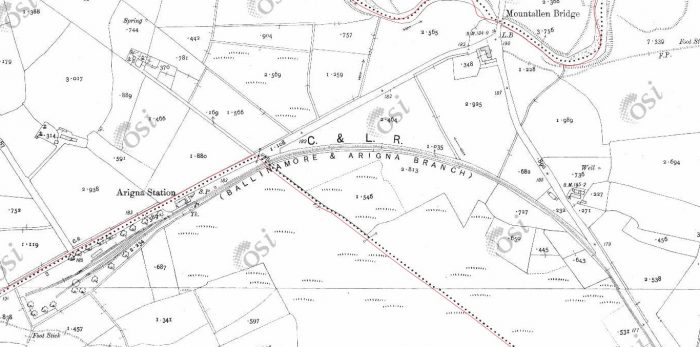
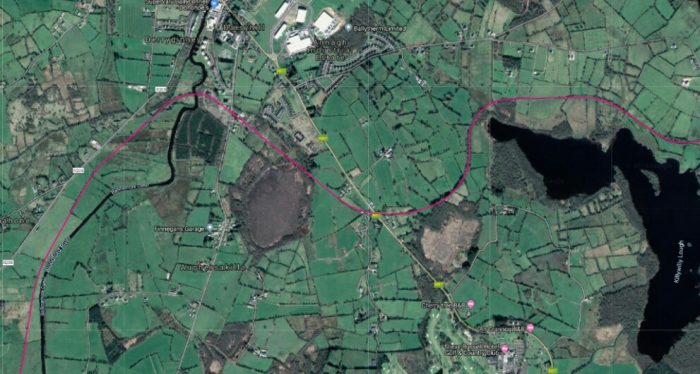
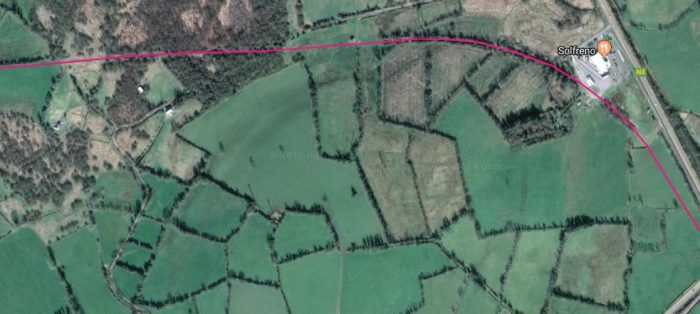
 The image above shows the length of tramway between Annadale Halt and Kiltubrid.

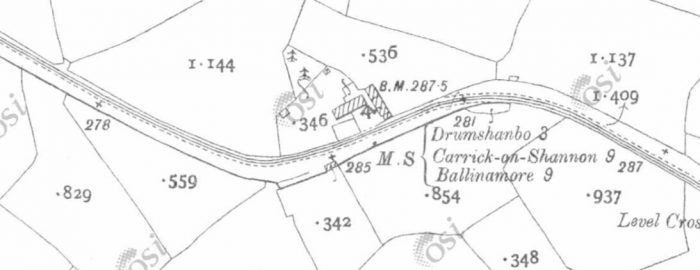
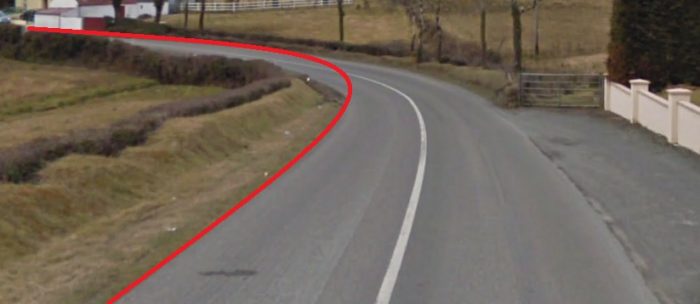
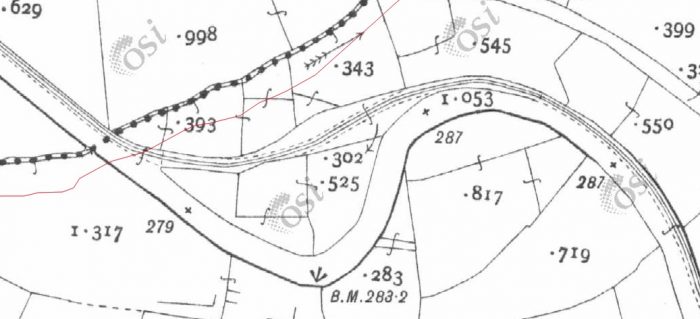
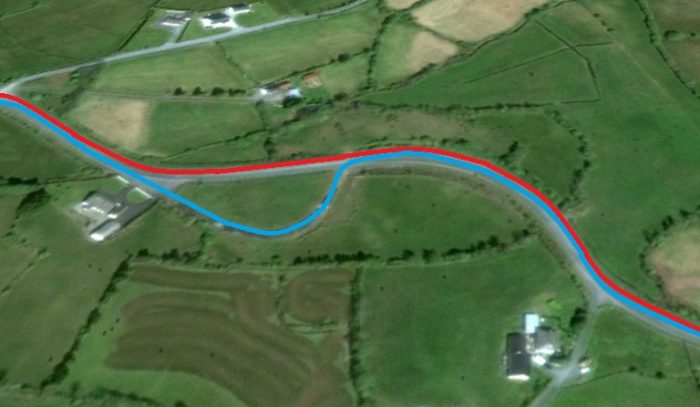
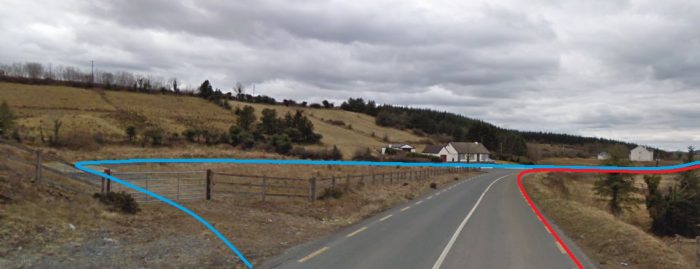
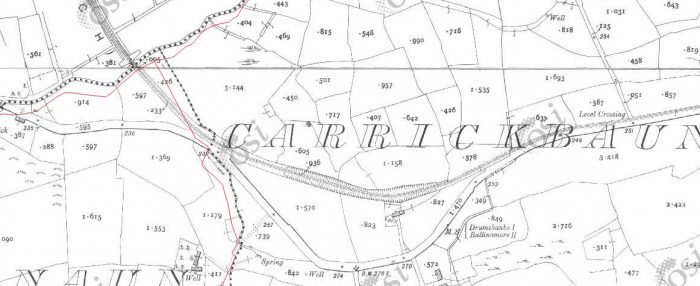
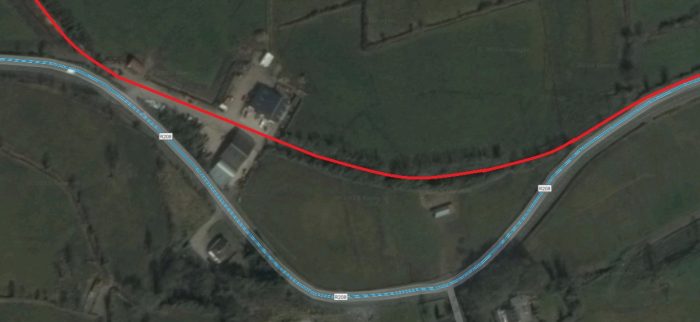
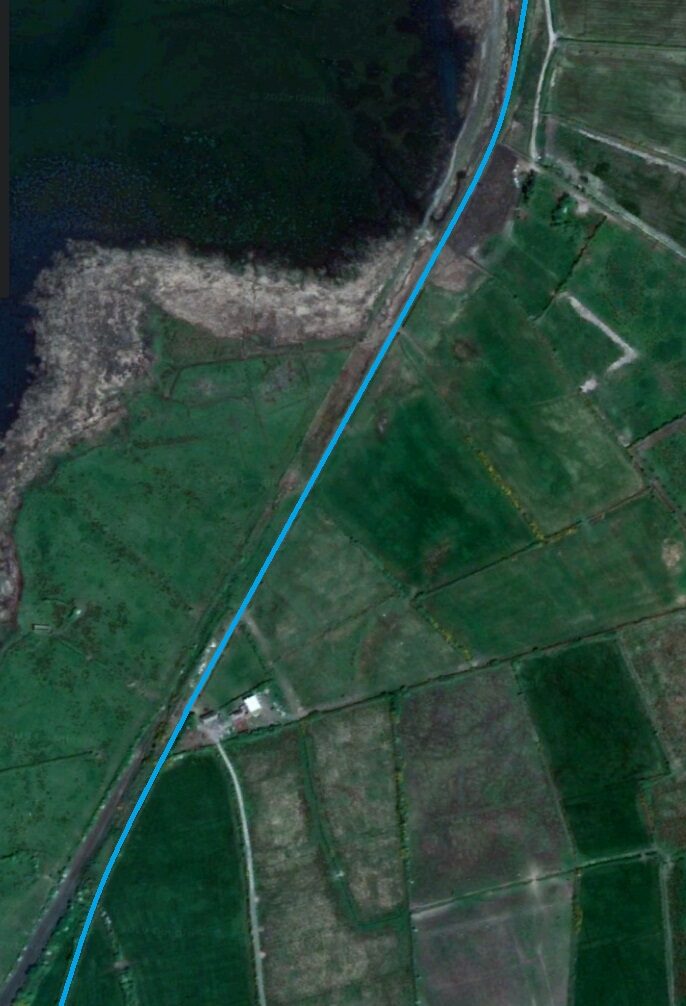
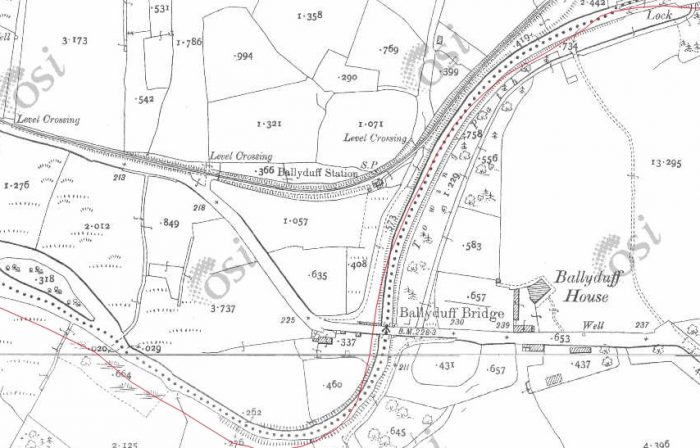
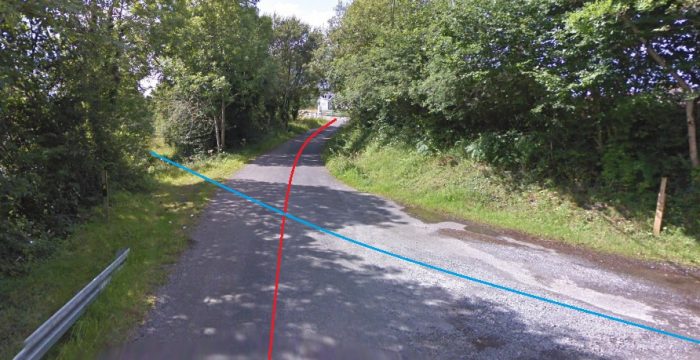
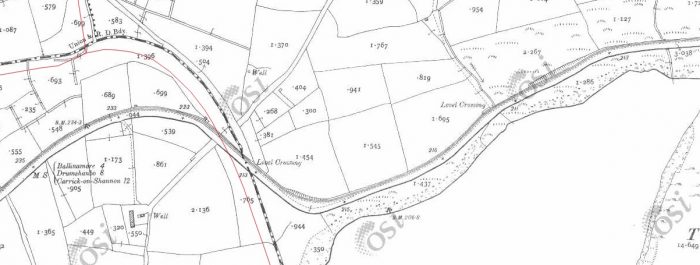
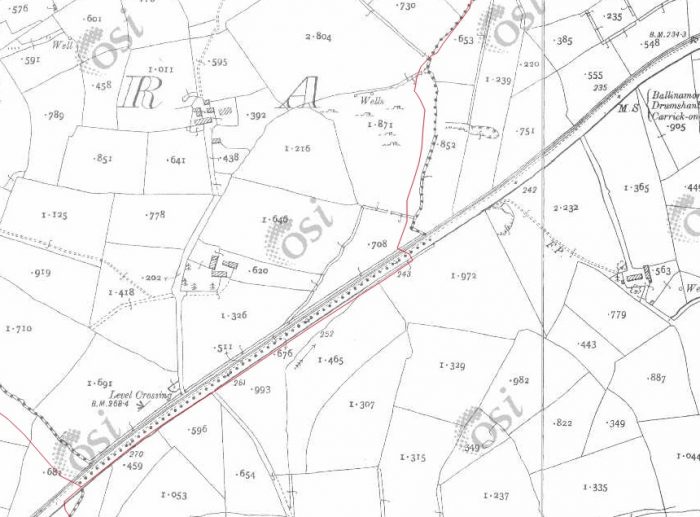
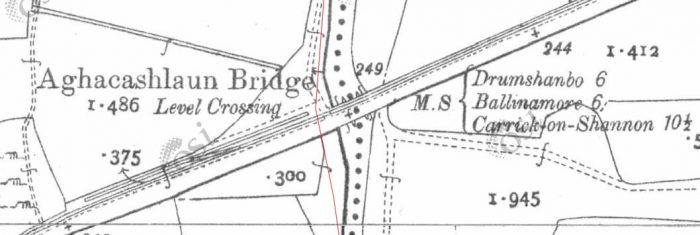
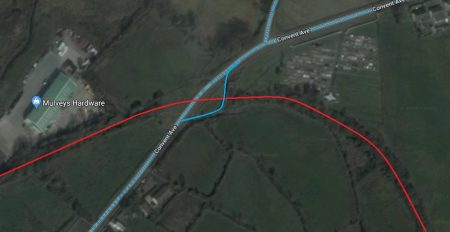
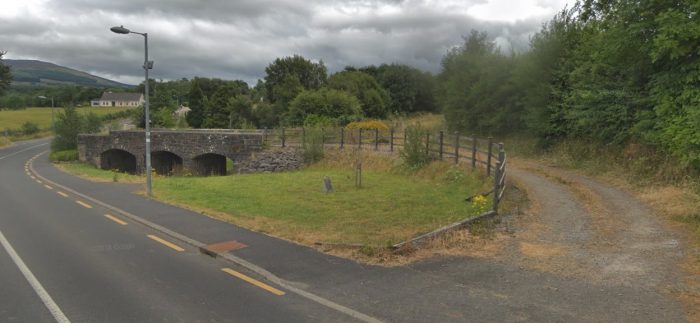
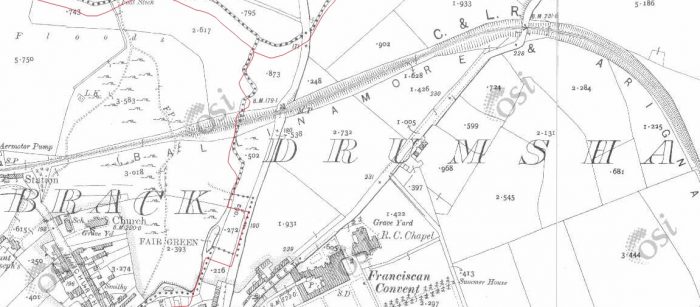
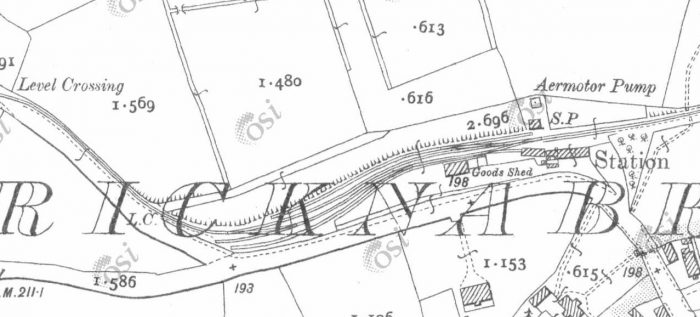
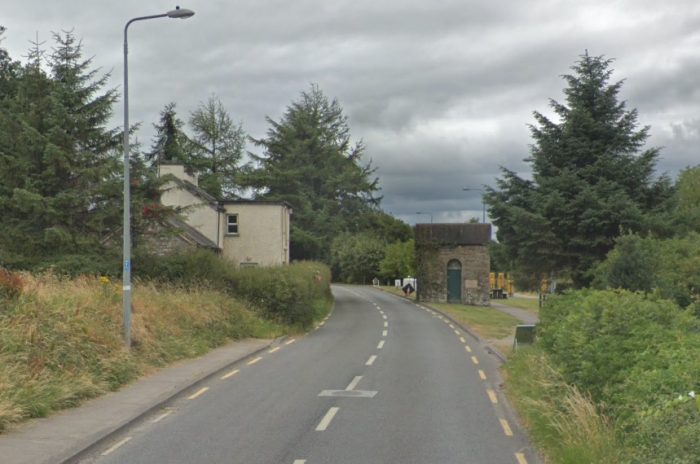
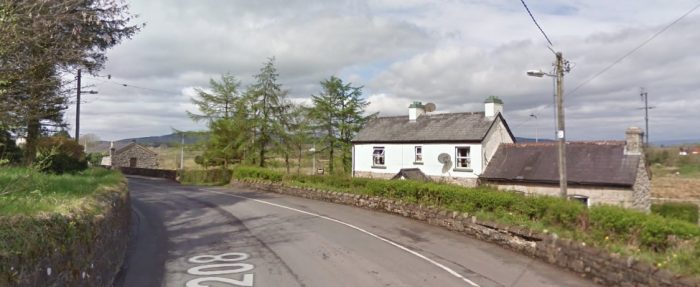
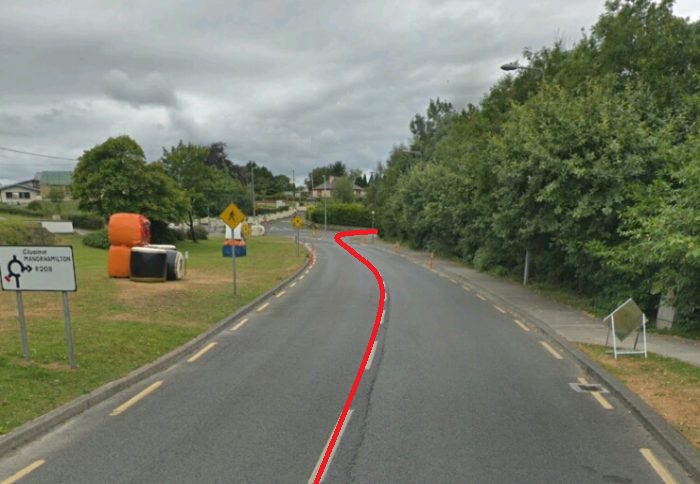
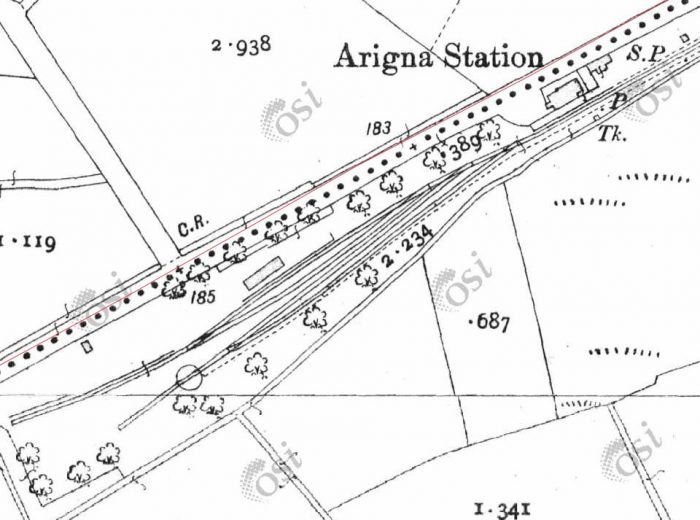
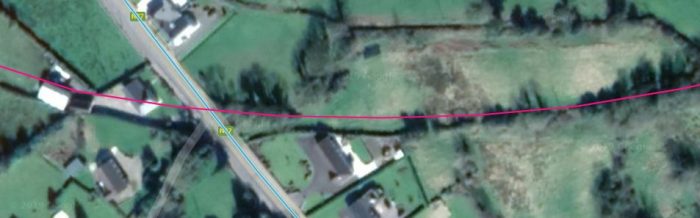
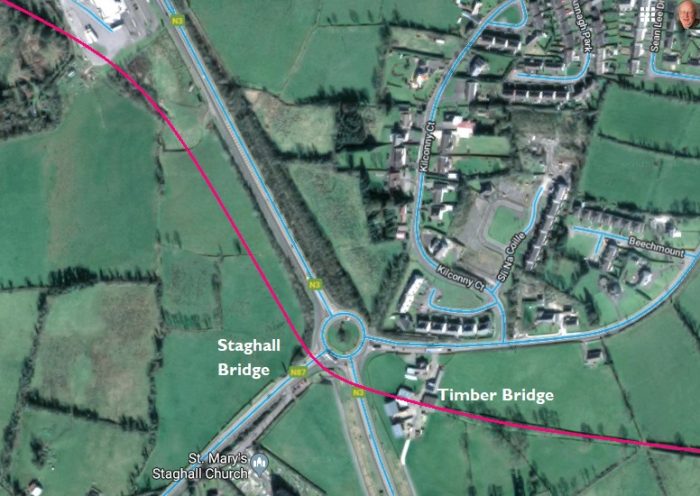
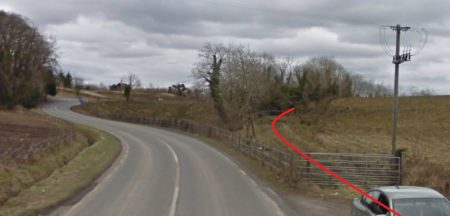 The old railway leaves the line of the new road (above) and heads north, running across the North side of Drumshanbo to the Station. After Fallon’s cutting road and rail converge and then diverge as shown above.
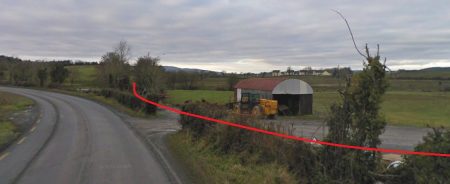


