P.W. Gentry wrote about Stockport’s trams in the July 1949 issue of Modern Tramway.
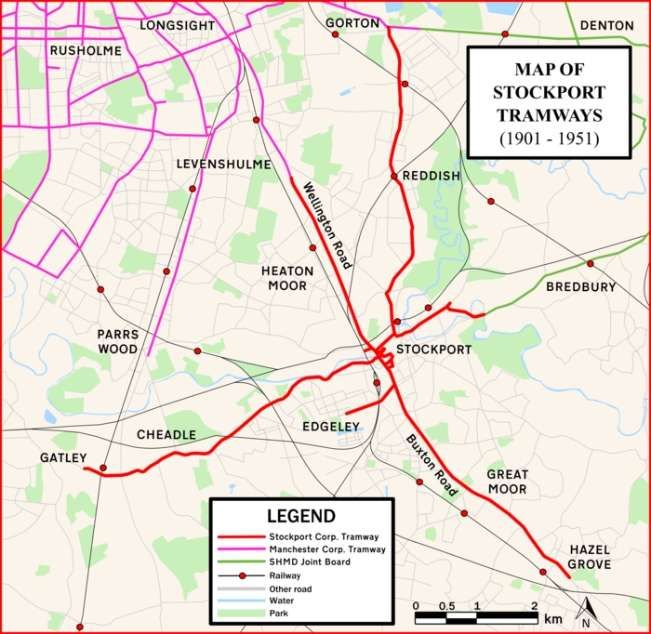
He says: “Besides possessing several interesting features of its own, the Stockport system today commands added attention as the last last surviving member of that once network of standard gauge undertakings encircling Manchester. It is an unusually pleasing system by virtue of its compact and simple arrangement, its focal point being Mersey Square.” [1: p123]
The article in Modern Tramway caught my attention because for about 9 years I worked in Stockport as a highway engineer.
This is a second article looking at Stockport Corporations Tramways. The first article which looked at the history of the network and followed one axis of that network can be found here. [2]
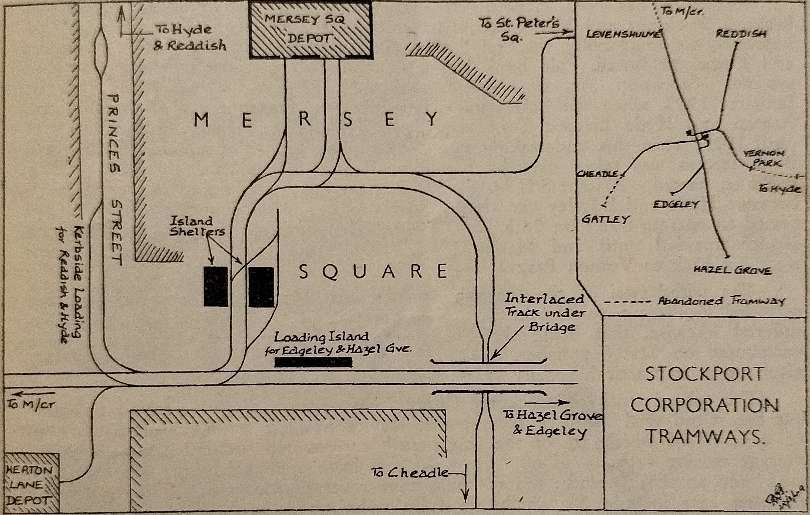
Mersey Square was the main hub of Stockport’s tramway network and appeared as a schematic plan in Gentry’s article in The Modern Tramway. …
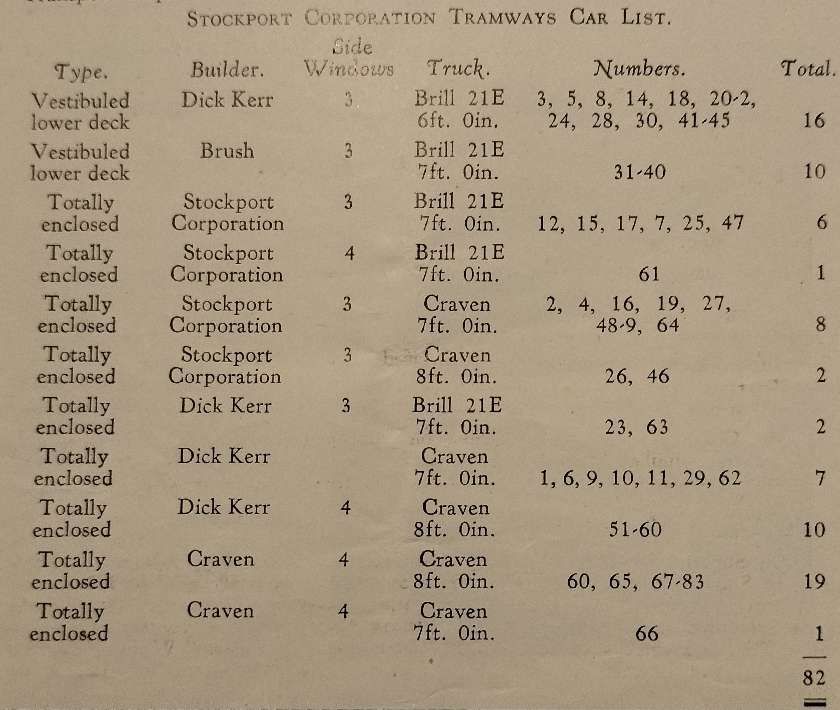
Before looking at the remaining tram routes operated by Stockport Corporation it is worth noting the trams which Stockport Corporation used to operate the network. P.W. Gentry listed these as follows:
This table is taken from Gentry’s article. [1: p126]
Edgeley to Mersey Square and Mersey Square to Reddish andGorton
This first axis of the network was covered in my first article about Stockport Corporation Trams, here. [2] Two further axes are worth our attention: the first, below, that between Gatley and Bredbury; the second that between Manchester and Hazel Grove.
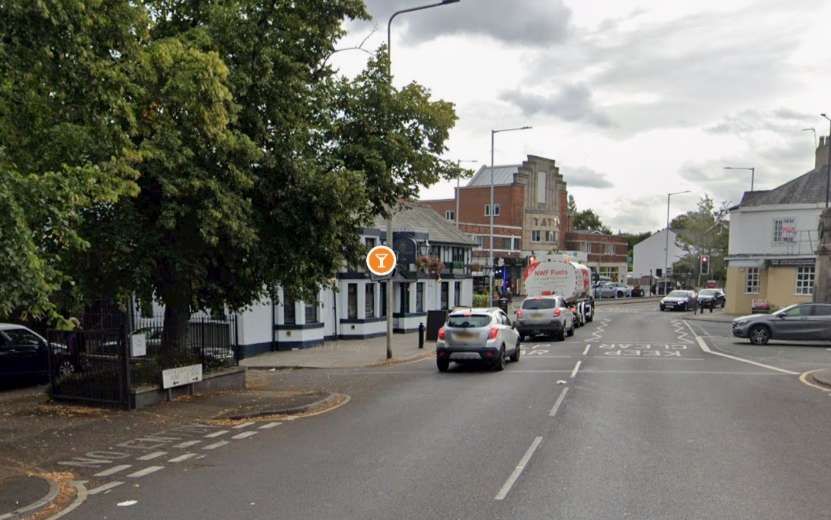
Gatley to Mersey Square and Mersey Square towards Bredbury
Tram services entered Mersey Square and crossed the Mersey. Services to the West of the town commenced here and ran along Princes Street to Bridge Street. That length of the network is covered in an earlier article which can be found here. [2]
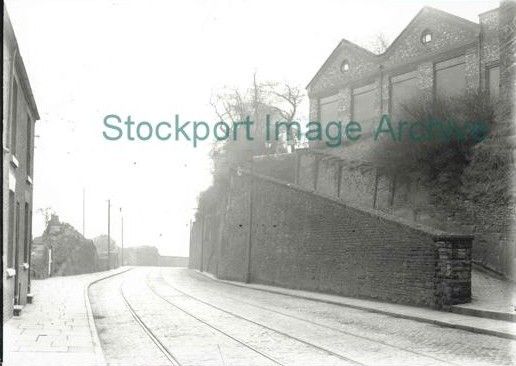
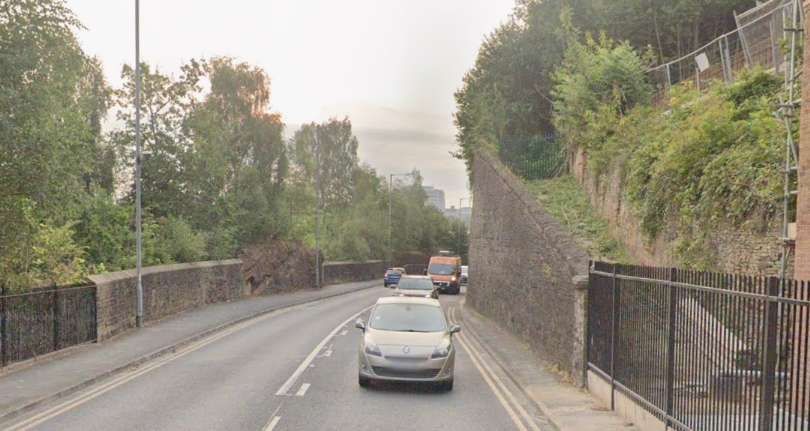
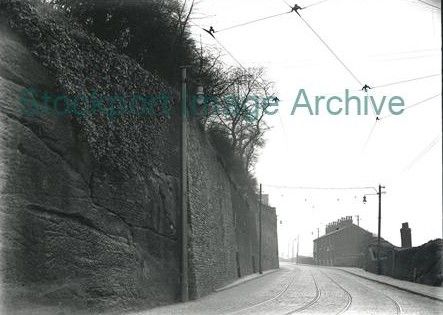
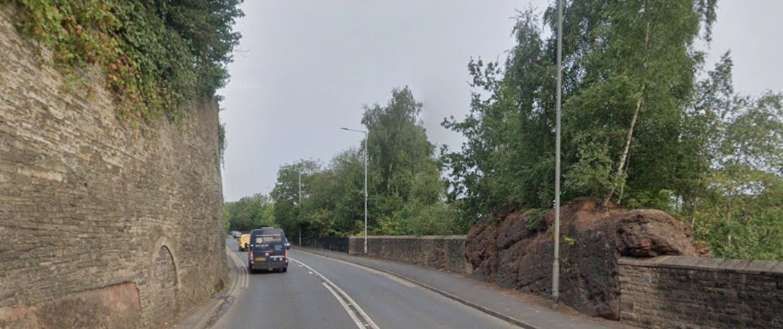
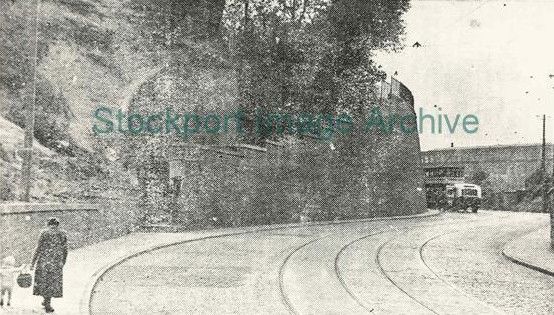
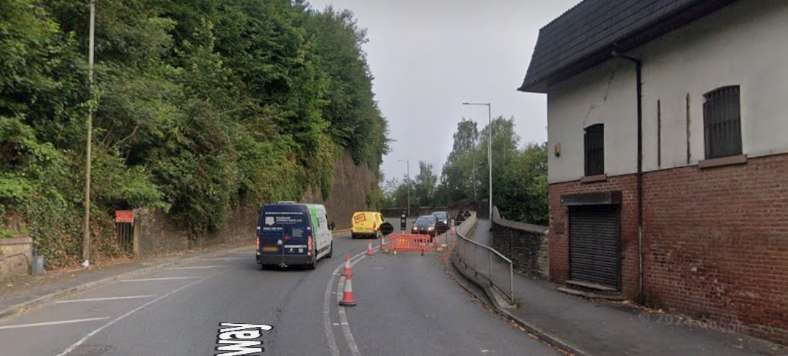
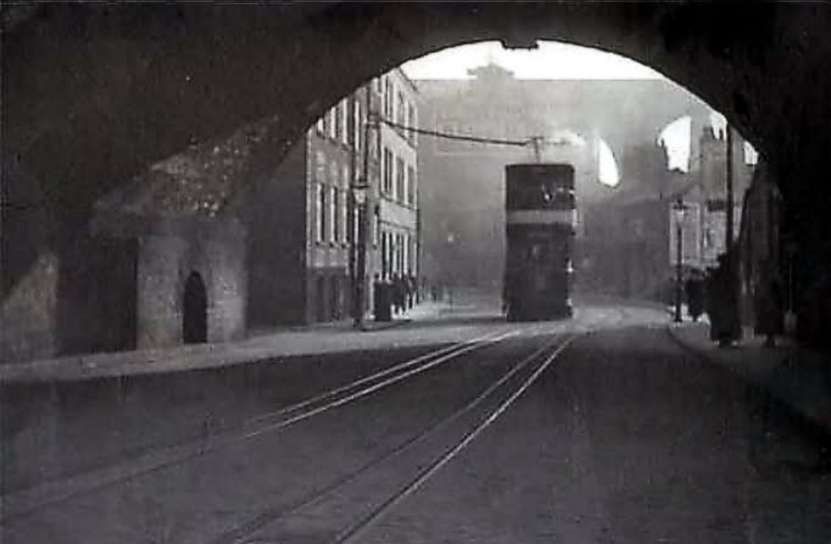
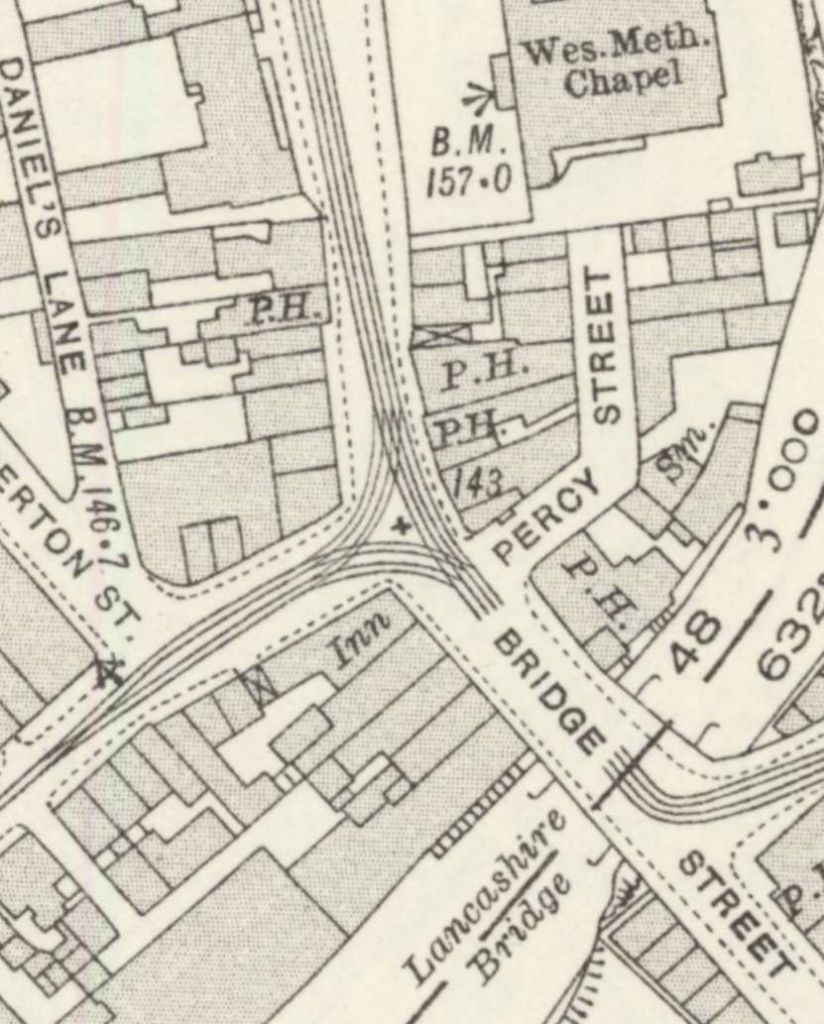
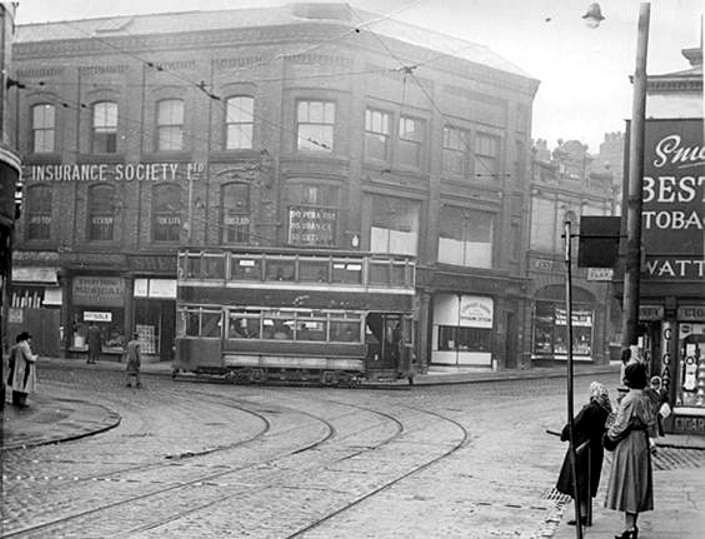
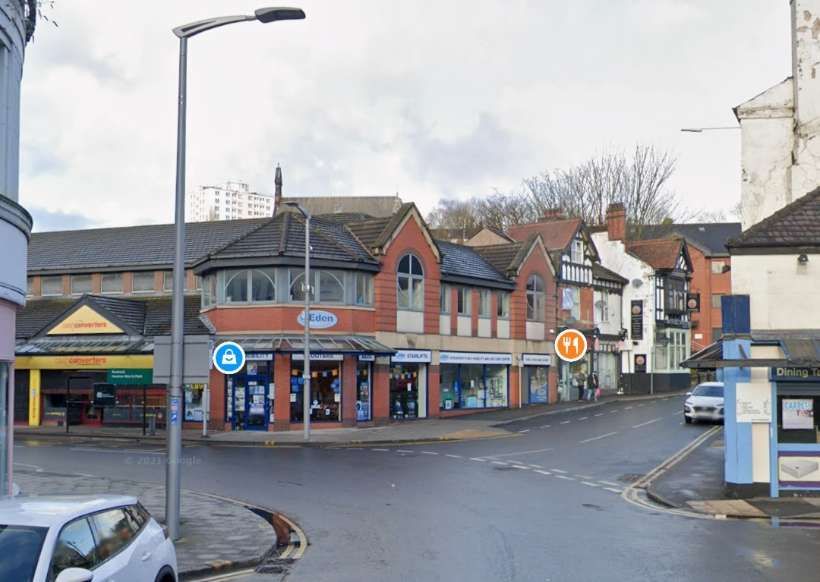
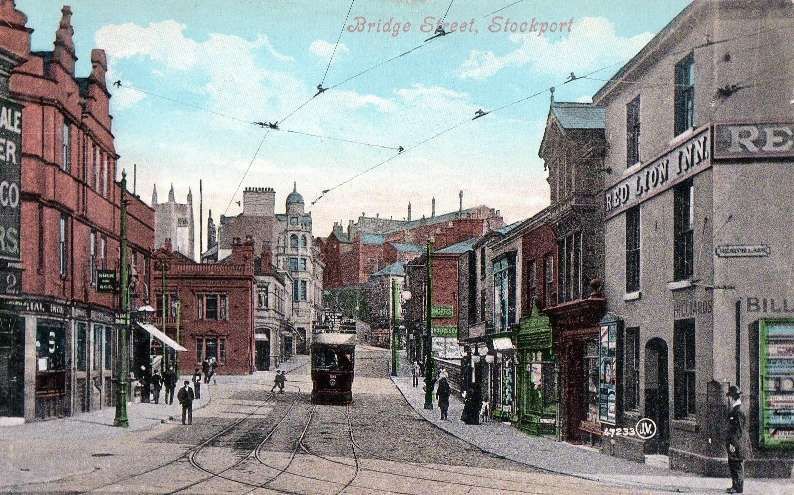
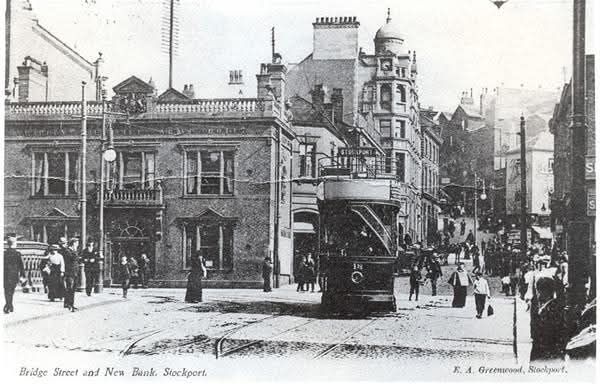
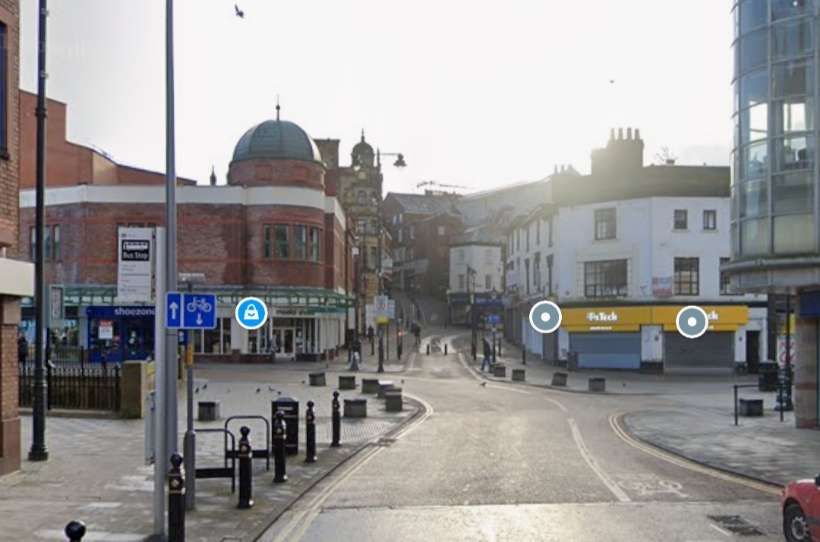
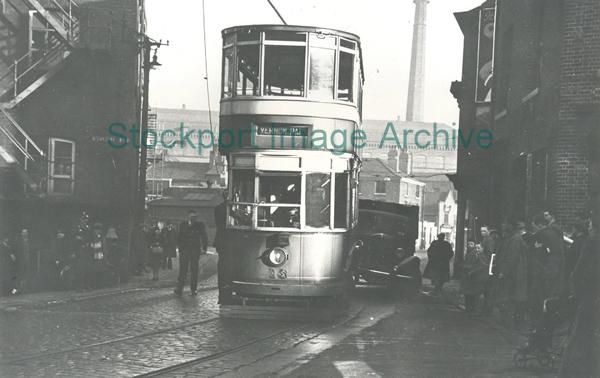
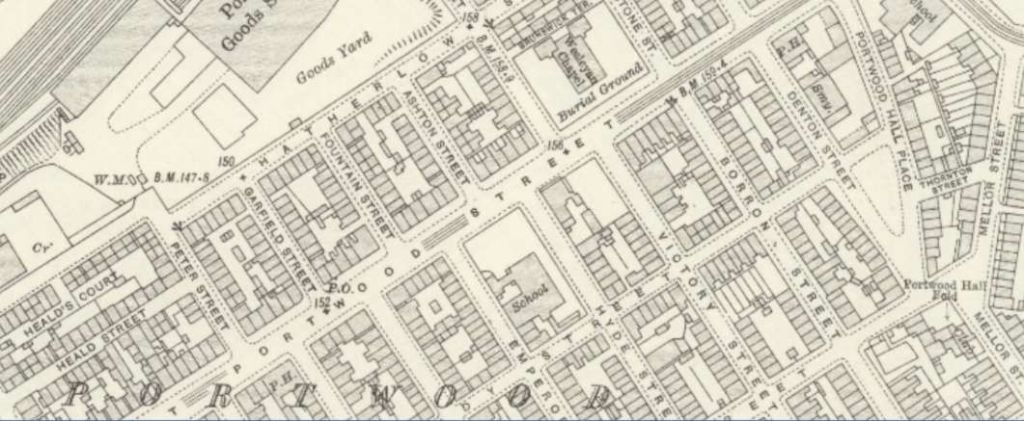
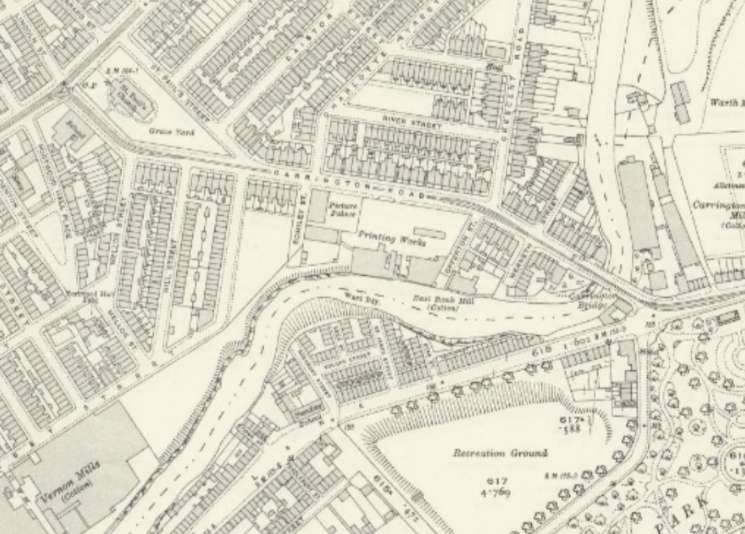
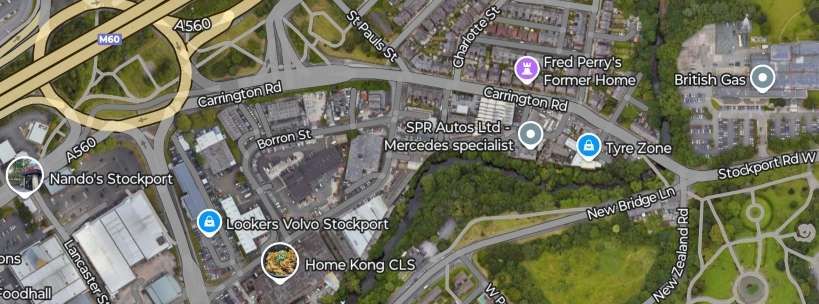
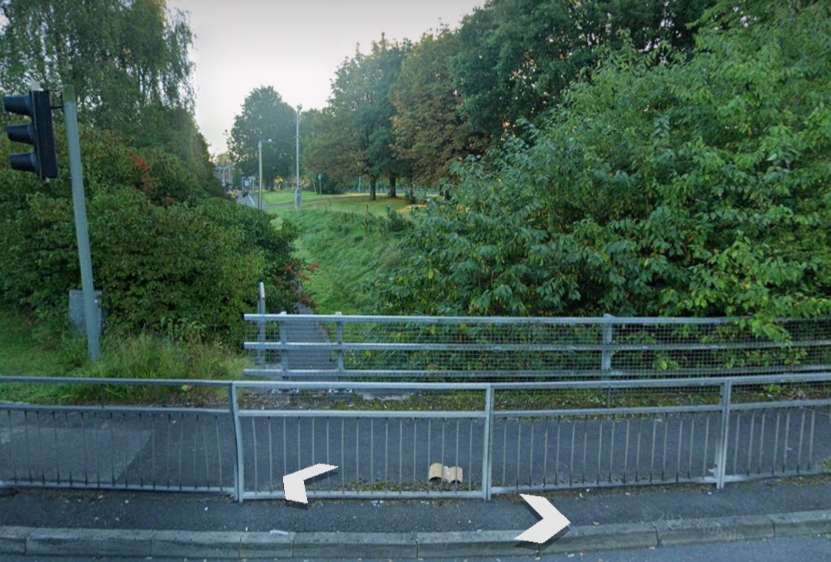
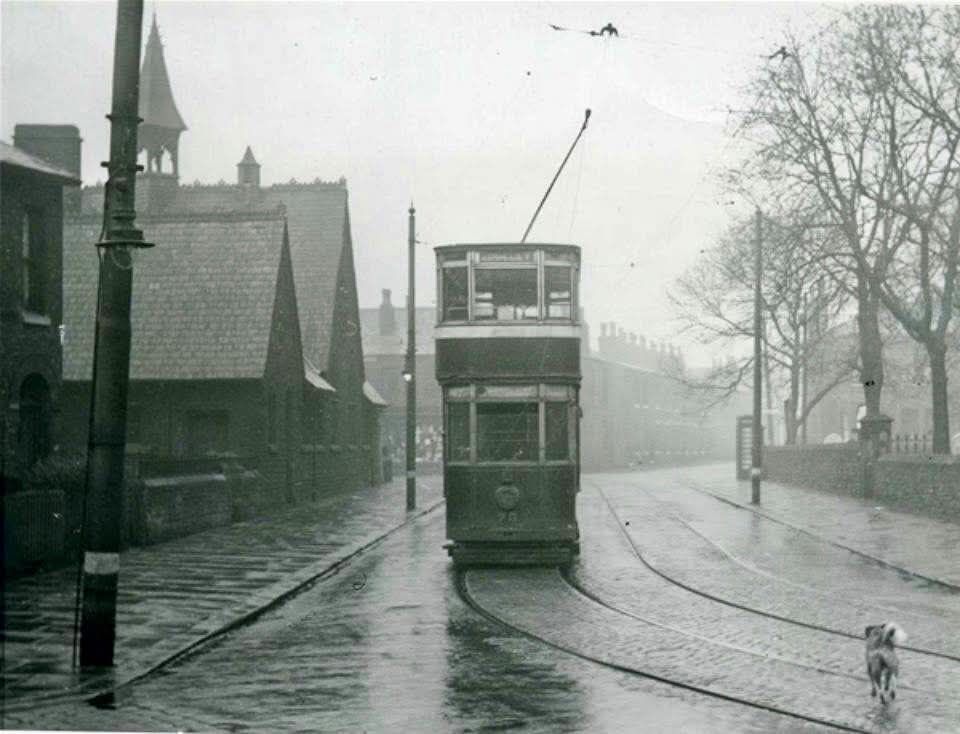
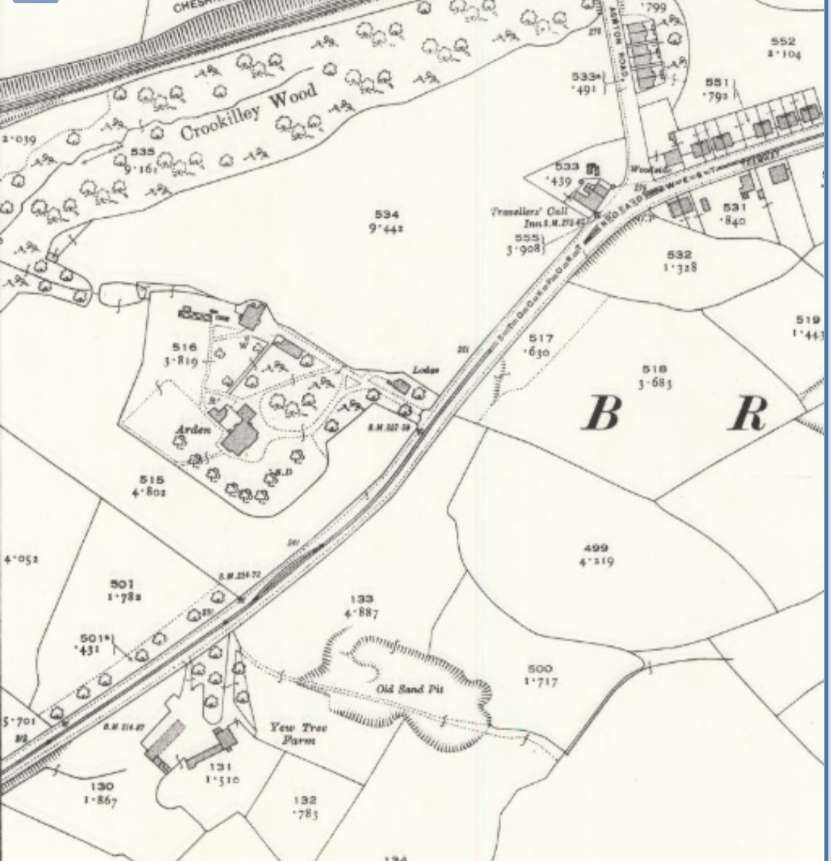
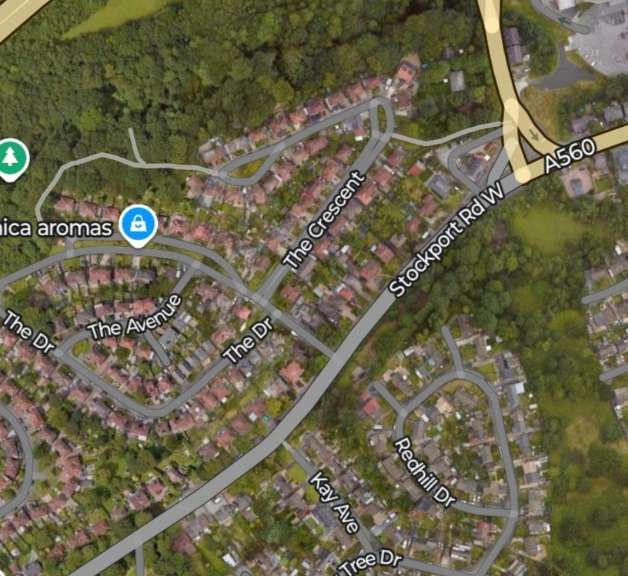
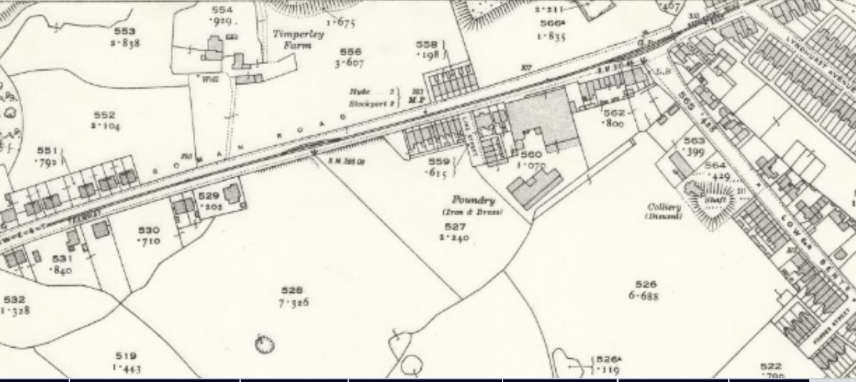
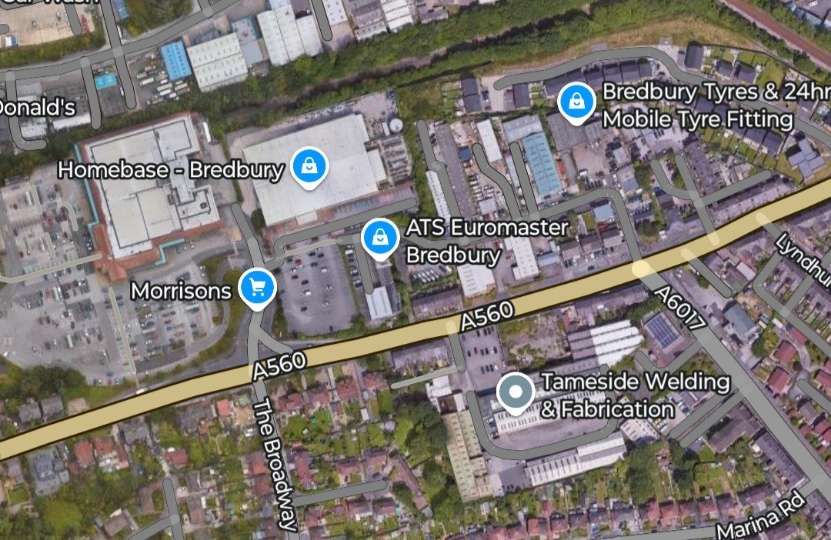
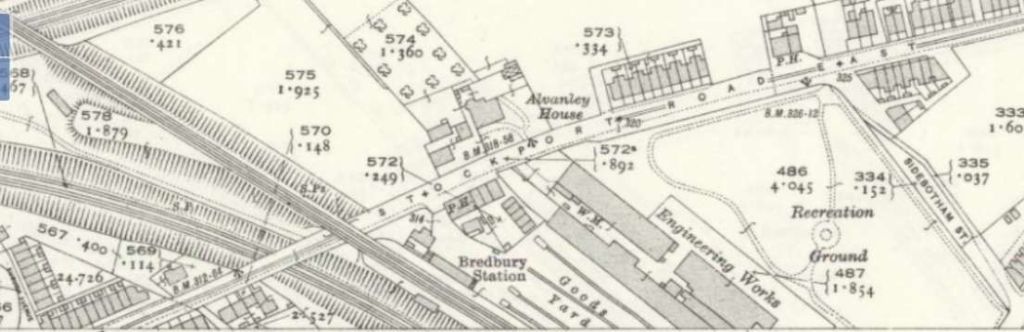
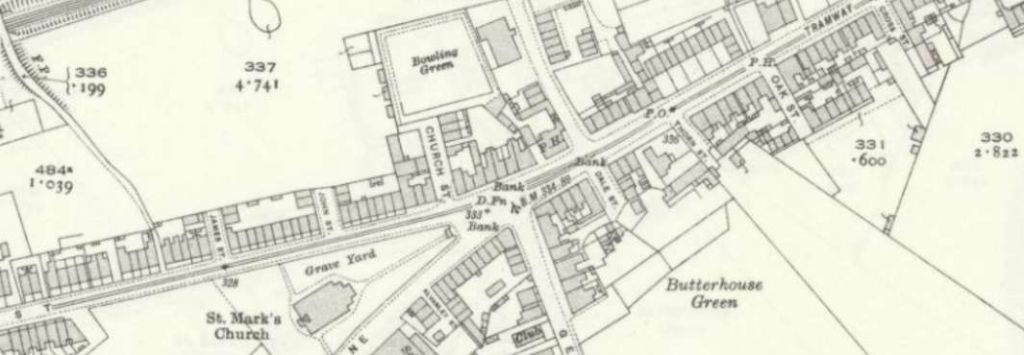
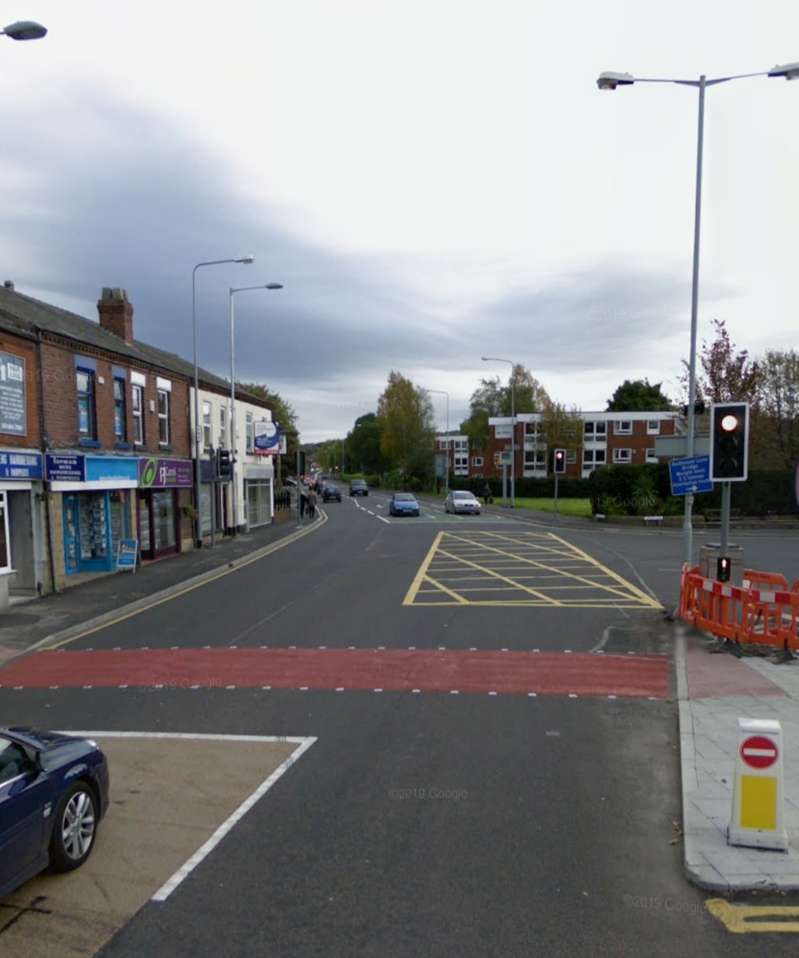
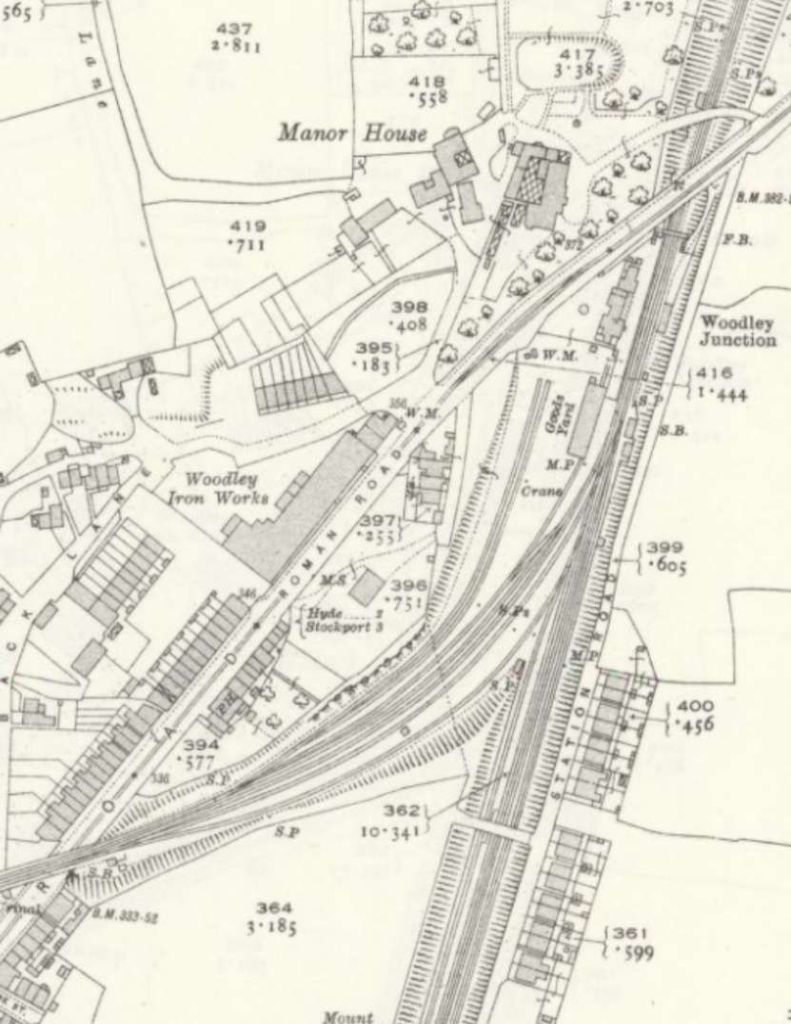
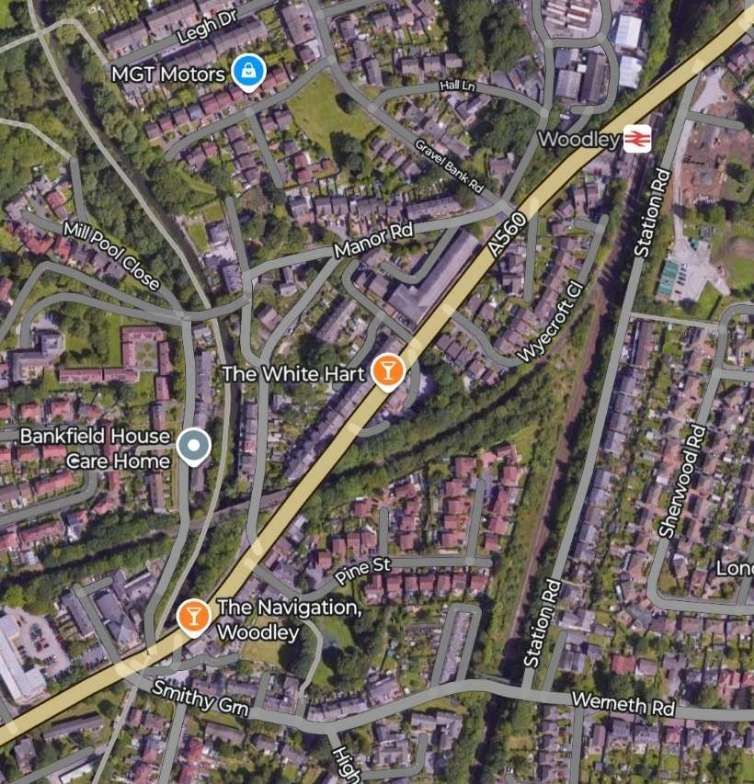
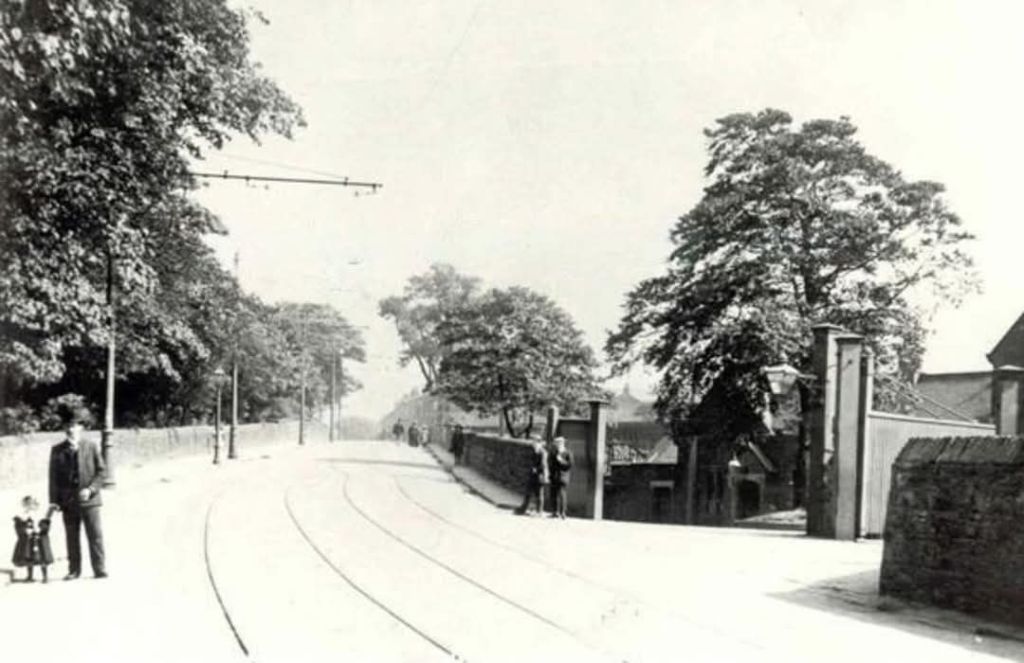
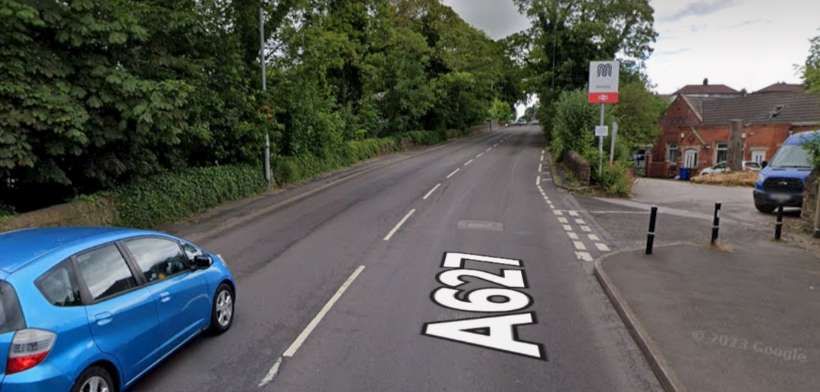
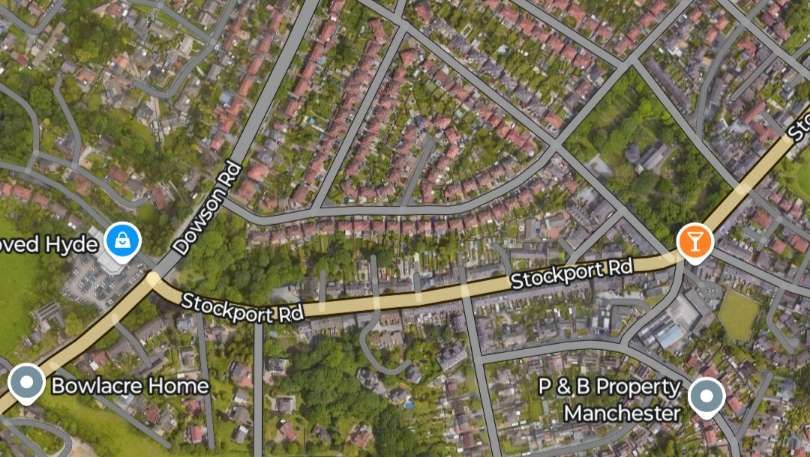
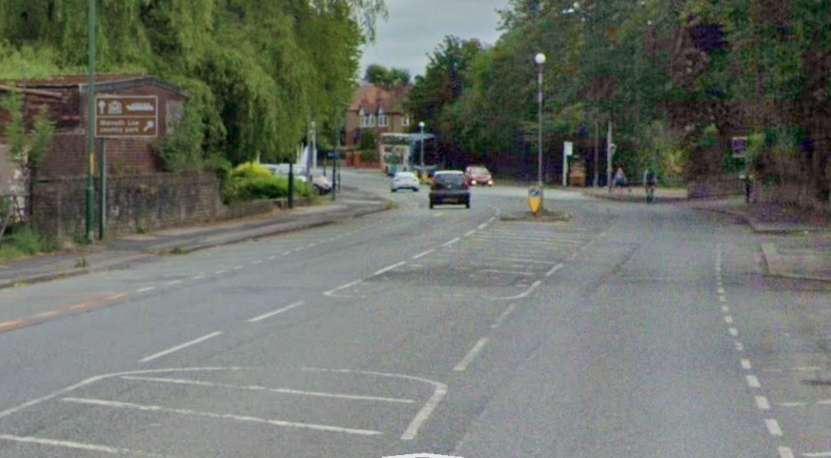
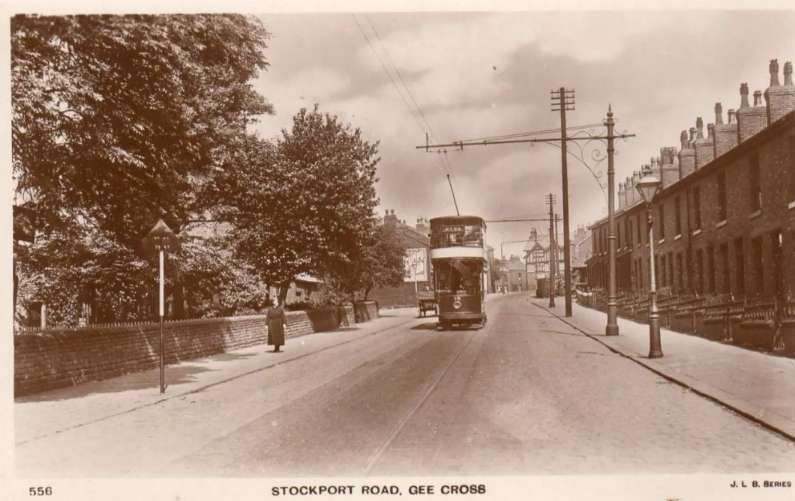
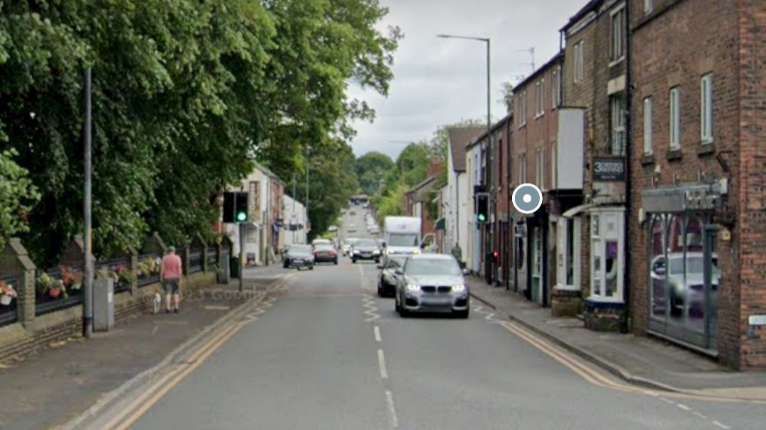
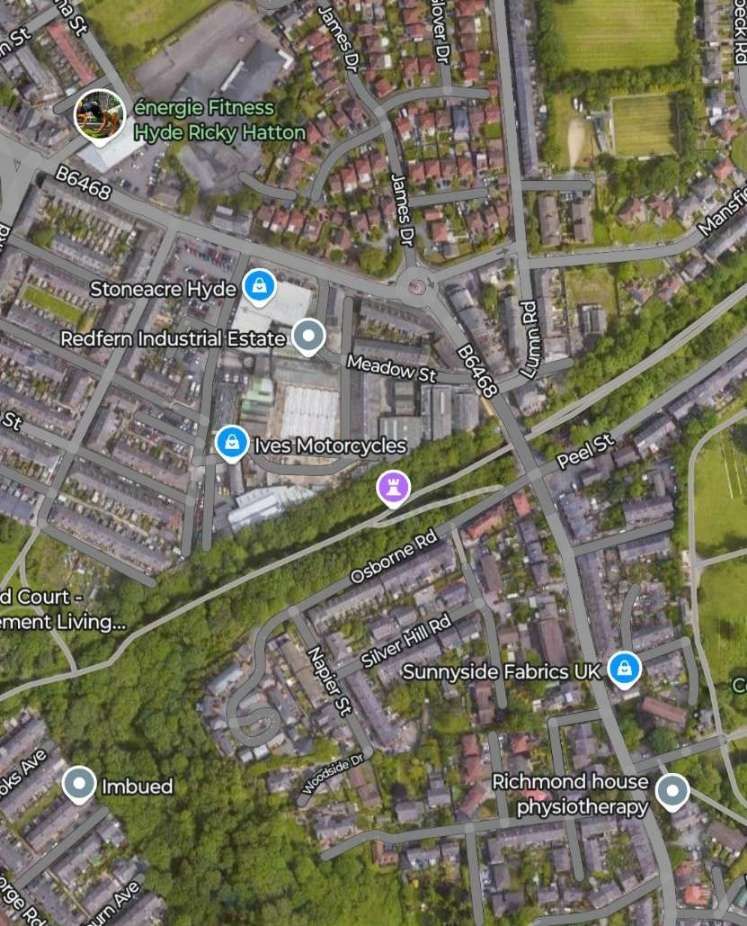
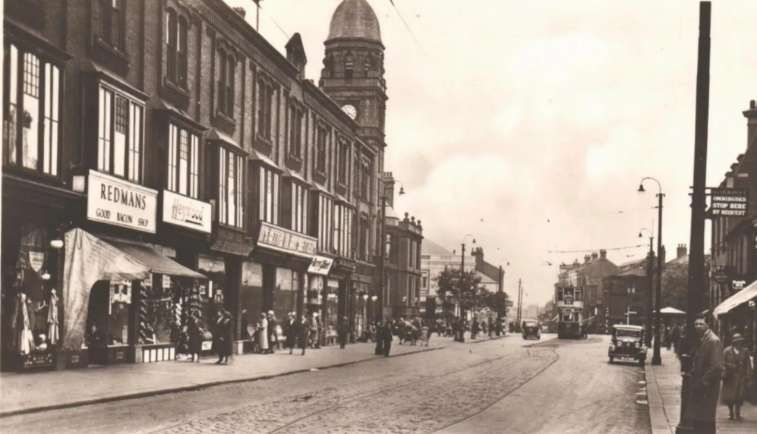
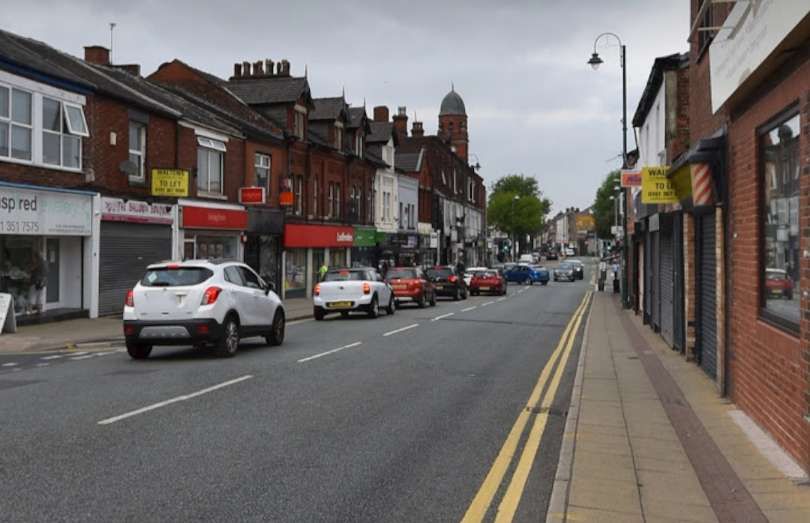
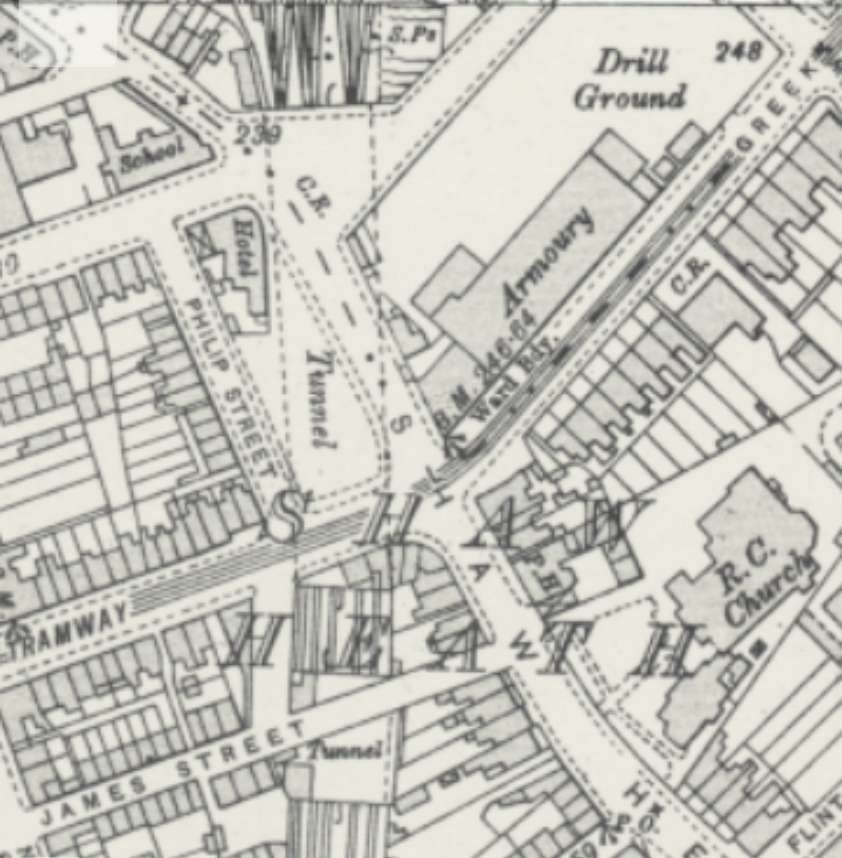
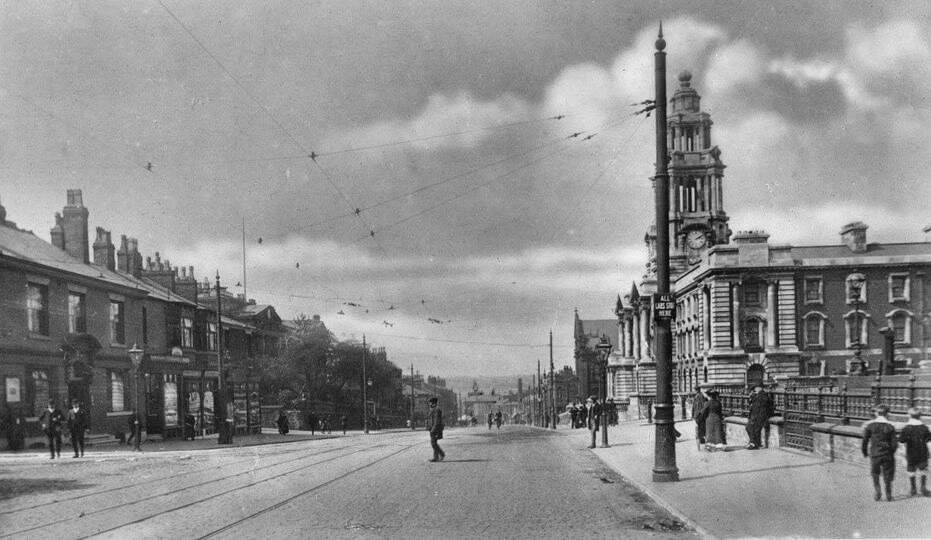
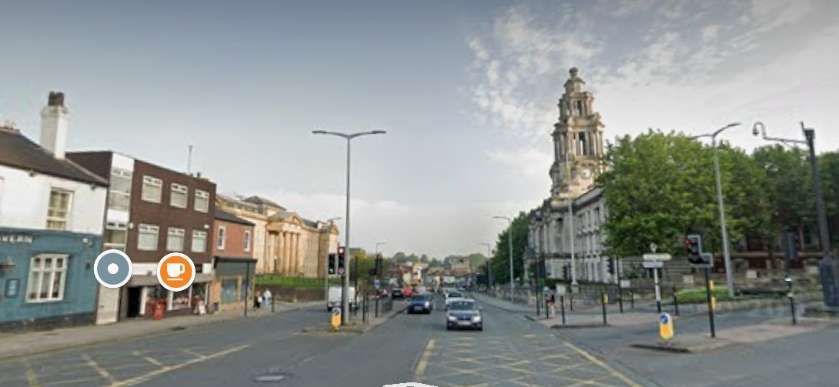
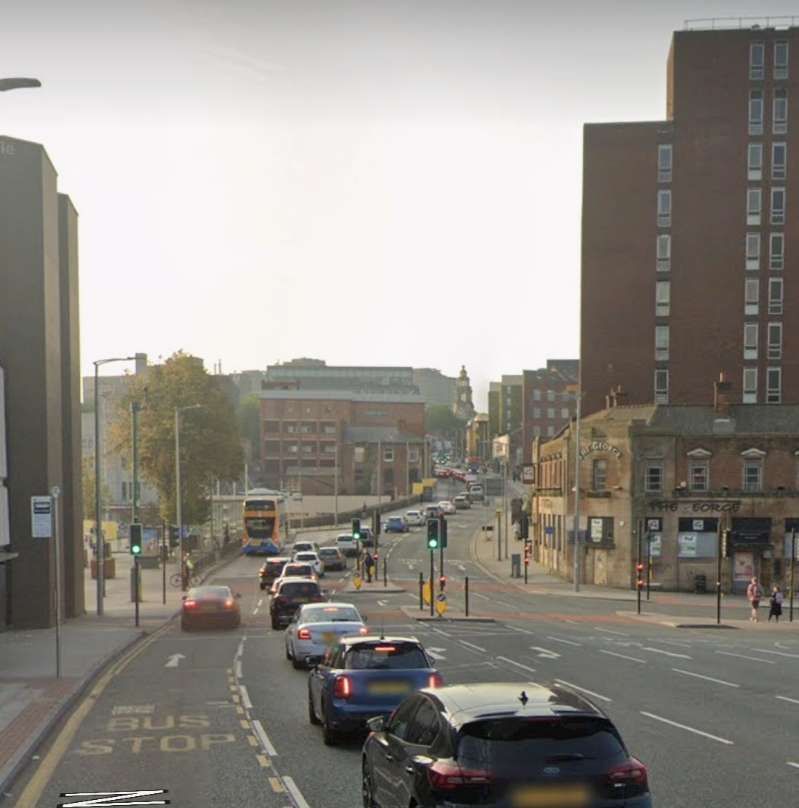
We resume this article at the Northeast end of Princes Street and its junction with Bridge Street and then follow the route to Hyde.
This completes the length of the tramway from Stockport to Hyde. The next article in this short series will cover the line from Manchester to Hazel Gri
References
P.W. Gentry; Stockport Corporation Tramway; Modern Tramway, Vol. 12 No. 138, June 1949, p123-126.
Harry Postlethwaite, John Senior & Bob Rowe; Super Prestige No. 14, Stockport Corporation; Venture Publications, Glossop, Derbyshire, 2008. This document is made freely available by MDS Books as a .pdf: https://www.mdsbooks.co.uk/media/wysiwyg/Stockport_Download_1.pdf, accessed on 14th January 2025.
P.W. Gentry wrote about Stockport’s trams in the July 1949 issue of Modern Tramway.
He says: “Besides possessing several interesting features of its own, the Stockport system today commands added attention as the last last surviving member of that once network of standard gauge undertakings encircling Manchester. It is an unusually pleasing system by virtue of its compact and simple arrangement, its focal point being Mersey Square.” [1: p123]
This article in Modern Tramway caught my attention because for about 9 years I worked in Stockport as a highway engineer.
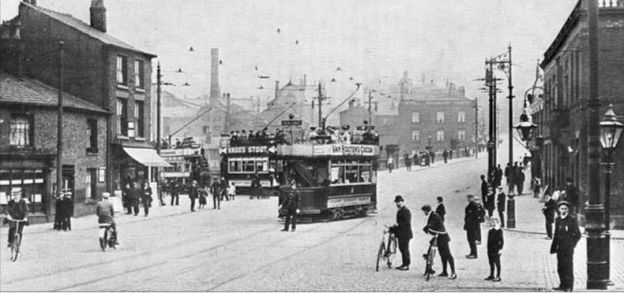
We know that tramways arrived in Stockport in the 1880’s from the Manchester direction when “the Manchester Tramways and Carriage Co, Ltd., [opened] a horse-car service into Mersey Square via Levenshulme.” [1: p123]
In 1889, the Stockport and Hazel Grove Carriage and Tramway Co. Ltd. was formed and “instituted horse car services southwards to Hazel Grove and Edgeley at Easter 1890.” [1: p123]
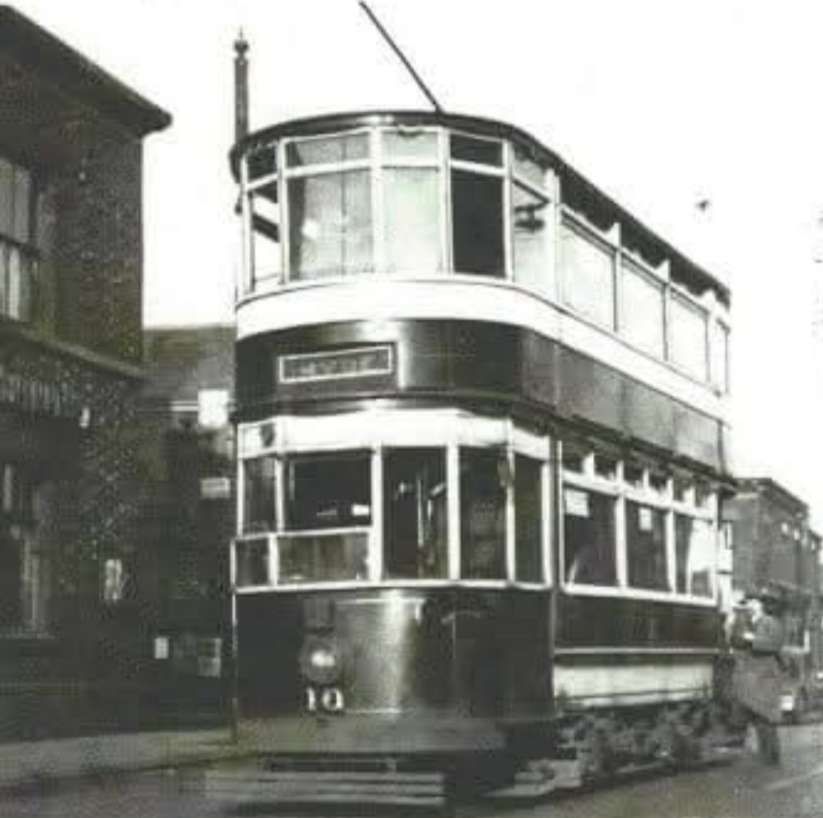
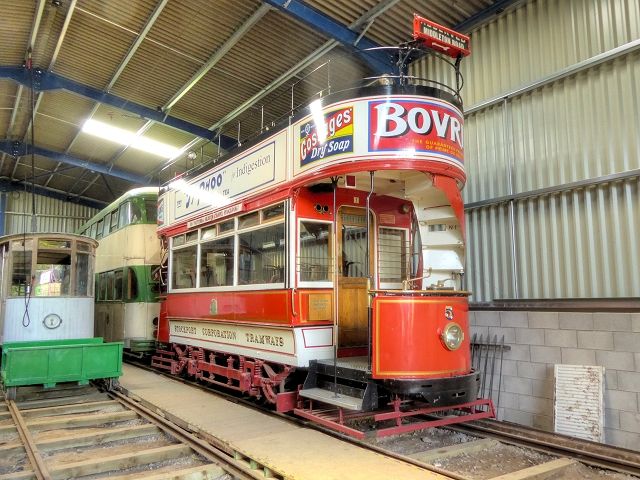
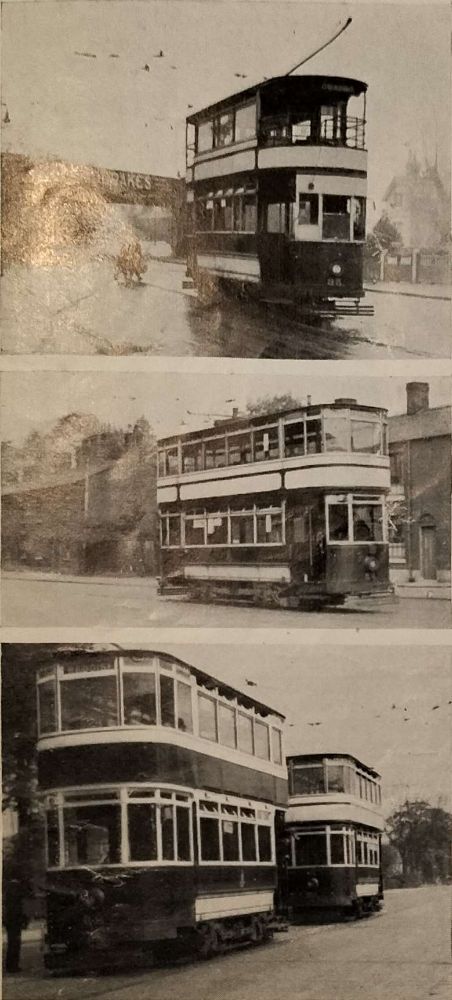
Stockport tramcar No. 5, dating from 1901, is preserved at the Heaton Park Tramway. The lower saloon of tramcar No. 5 was recovered from a field, where it had been used as a hen house, in 1971. It was restored by the ‘Stockport 5 Tramway Trust’. It now runs on the Heaton Park Tramway, a tramway museum in Heaton Park, Manchester. [2]
Stockport Corporation began tramway operations when, in 1890, “an Order under the Tramways Act was obtained for the construction and operation of electric tramways. Work commenced in Sandy Lane on 12th February 1901 and the three routes projected were opened in stages.” [1: p123]
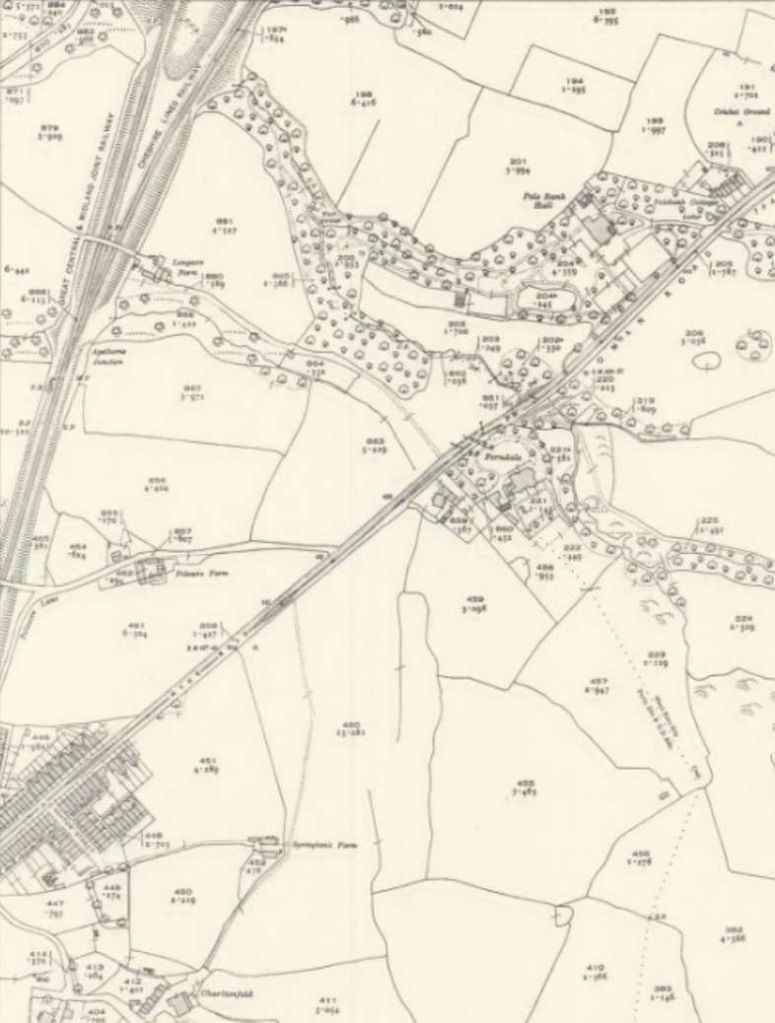
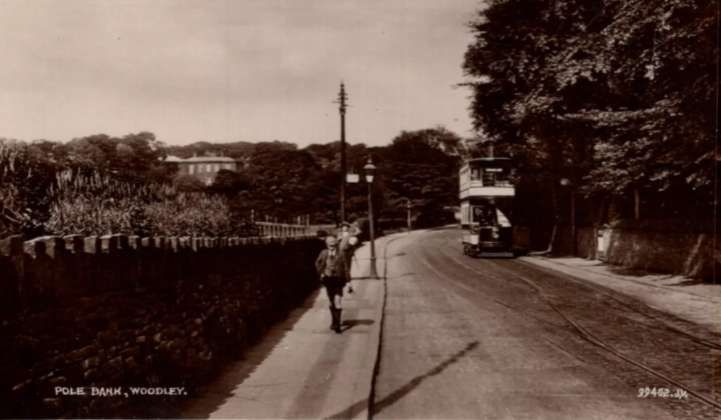
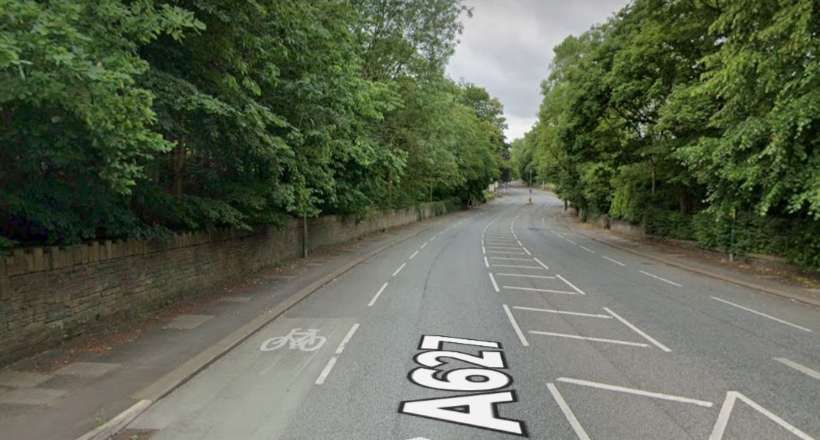
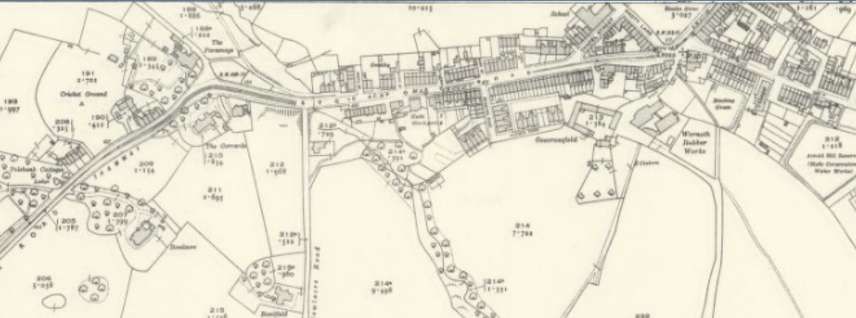
Woodley Route: to Woodley Station by 26th August 1901; and Pole Bank by 30th May 1902.
Reddish Route: to Sandy Lane by 3rd September 1901; to Holdsworth Square by 30th May 1902; and to the Bull’s Head in Reddish by 25th November 1903.
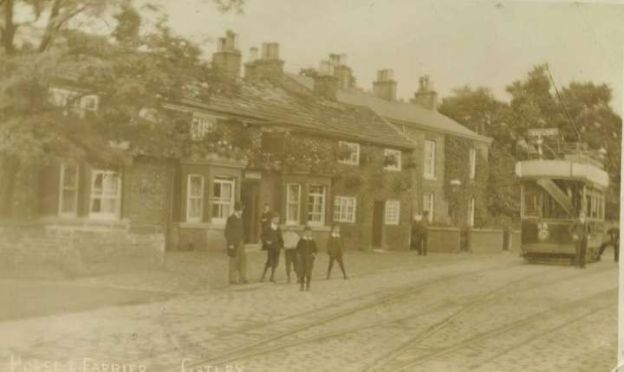
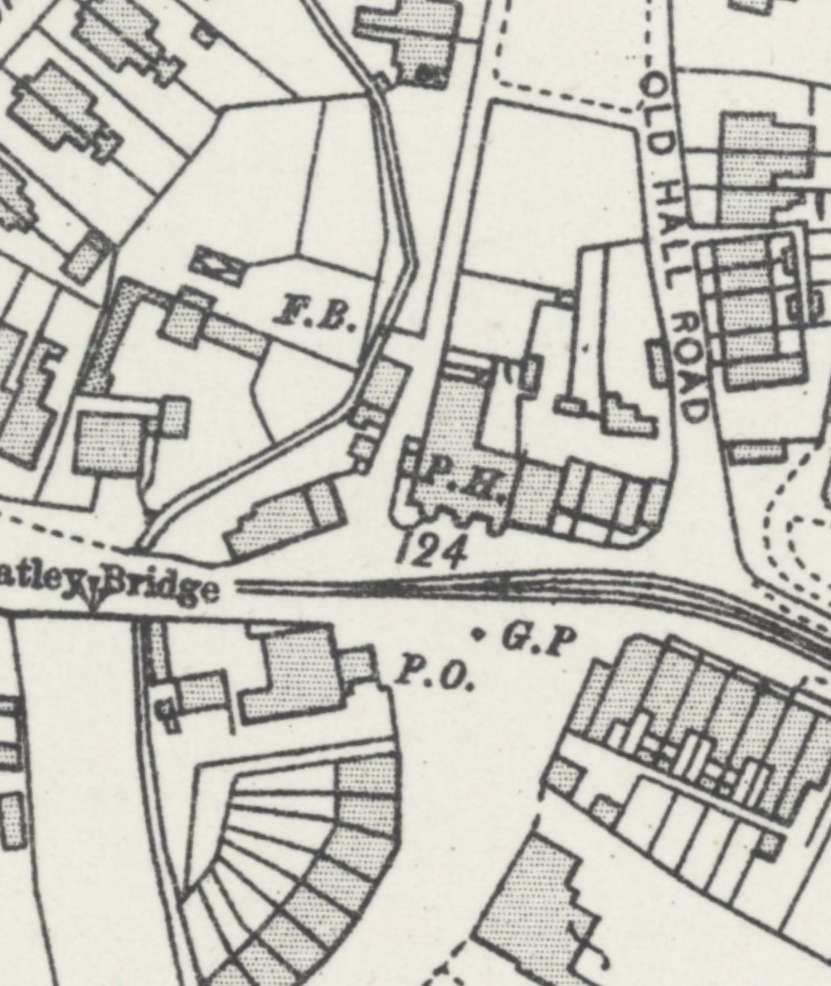
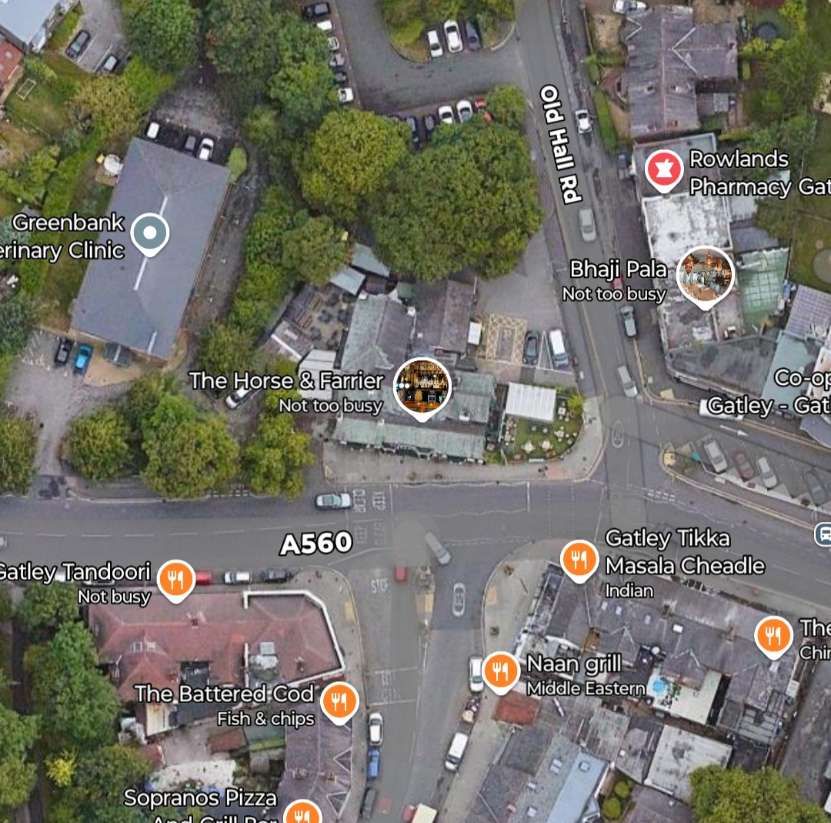
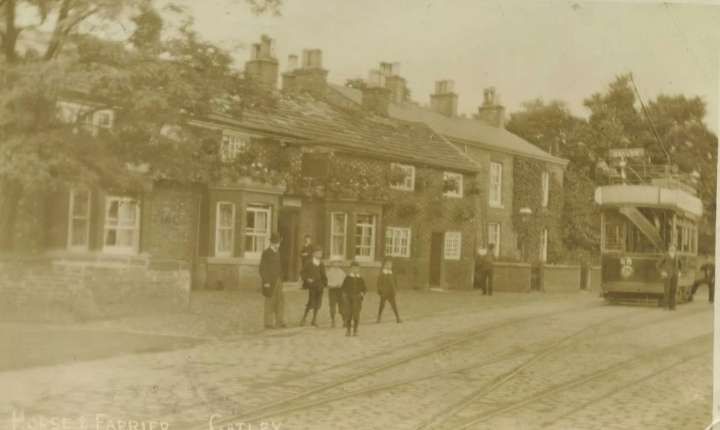
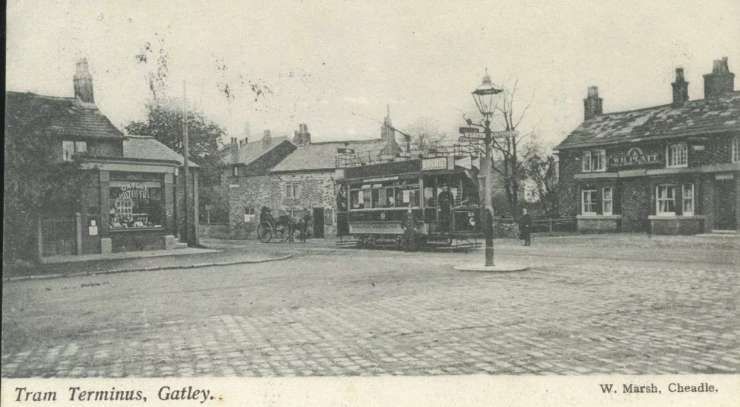
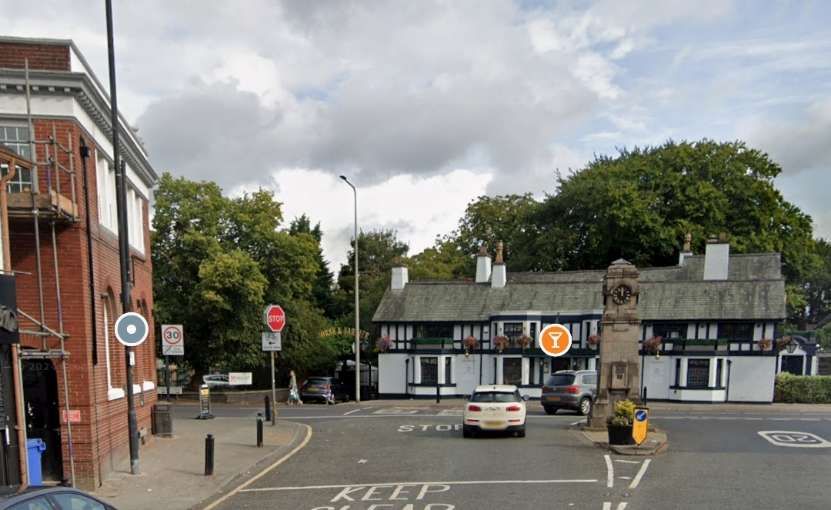
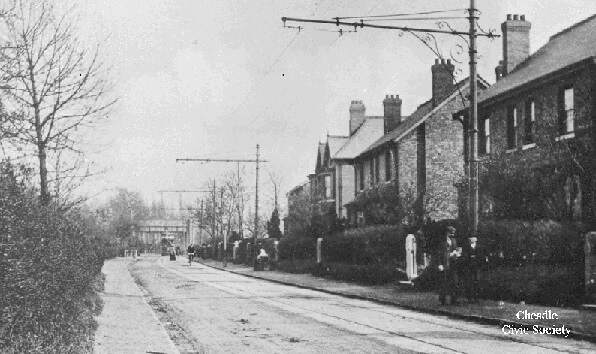
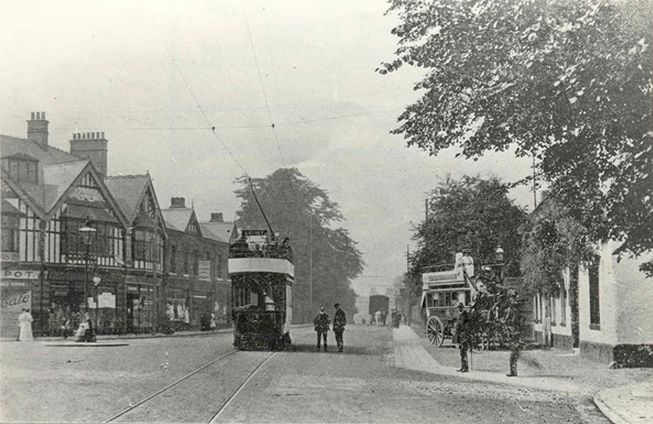
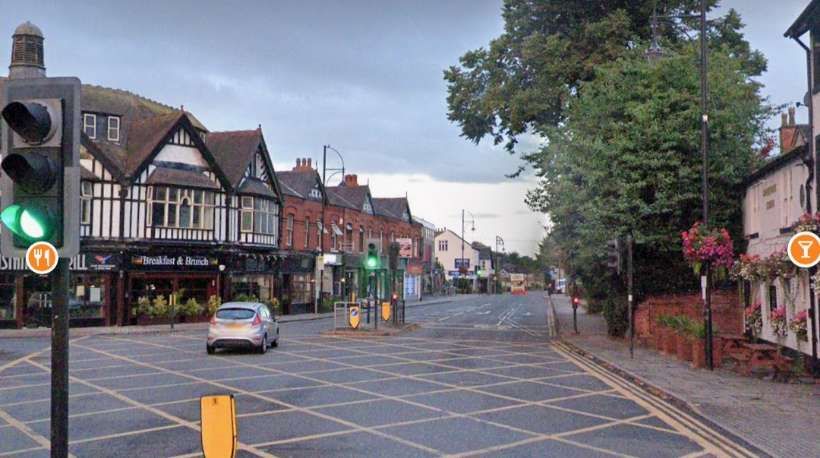
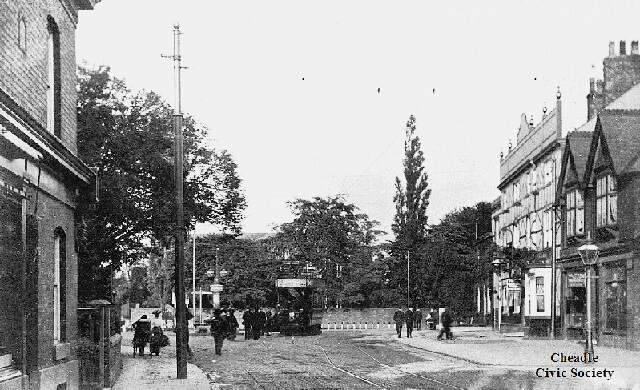
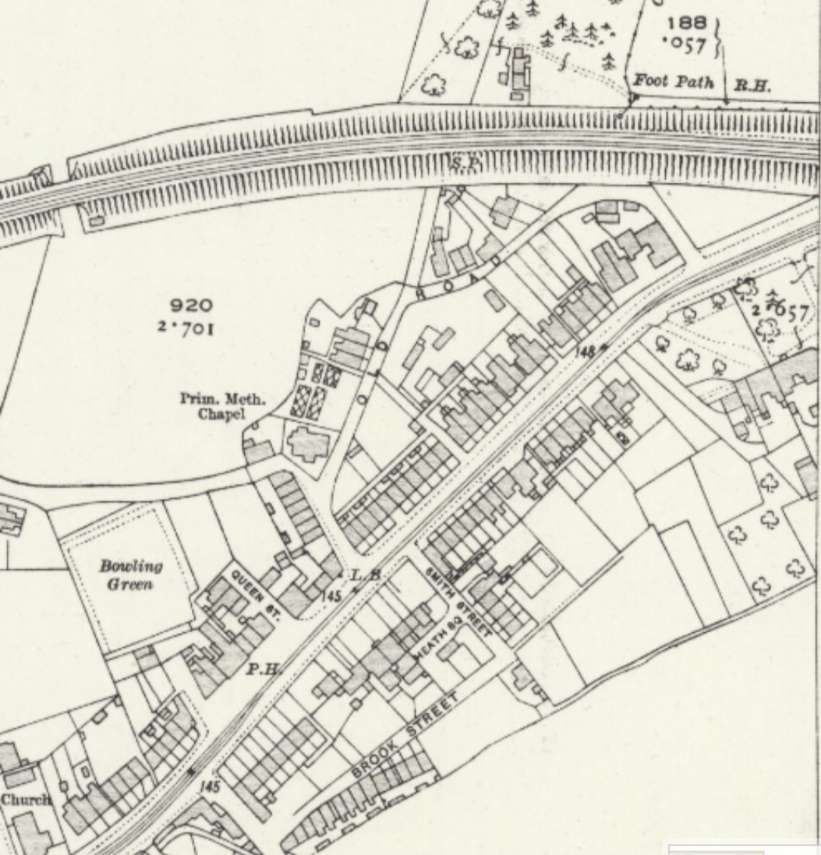
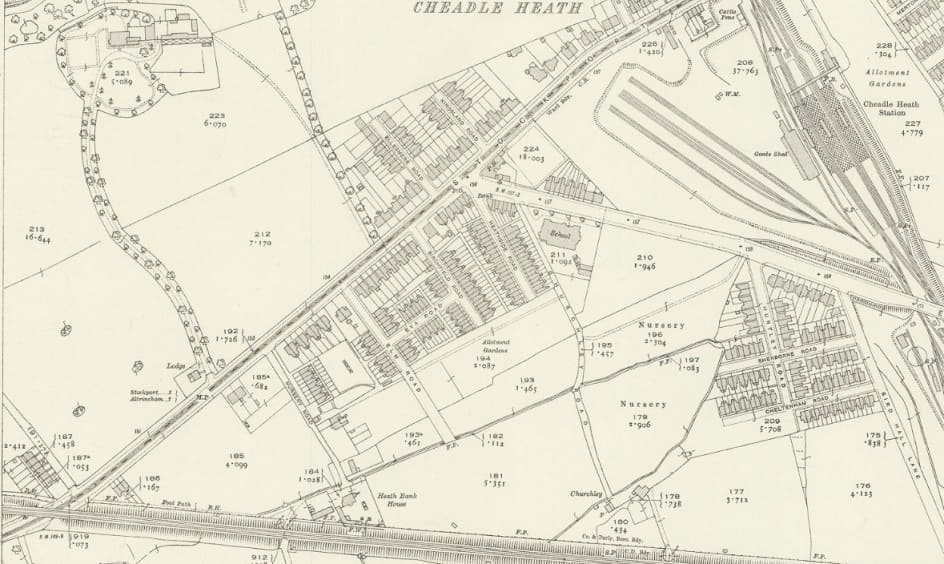
Cheadle Route: to the Robin Hood on Brinksway by 23rd January 1902; to Cheadle Heath Bridge by 25th July 1903; to Cheadle Green by 5th May 1904; and to the Horse & Farrier, Gatley Green by 24th May 1904.
In parallel, negotiations secured the purchase of the horse tramways. First, the Levenshulme line (which was electrified by Manchester Corporation by 1903 and maintained by them). The Stockport & Hazel Grove undertaking was purchased in 1994 for £14,000 and electrified by 5th July 1905.
Tram service No. 35 was by then running from Manchester to Hazel Grove.
Mersey Square was the main hub of Stockport’s tramway network. …
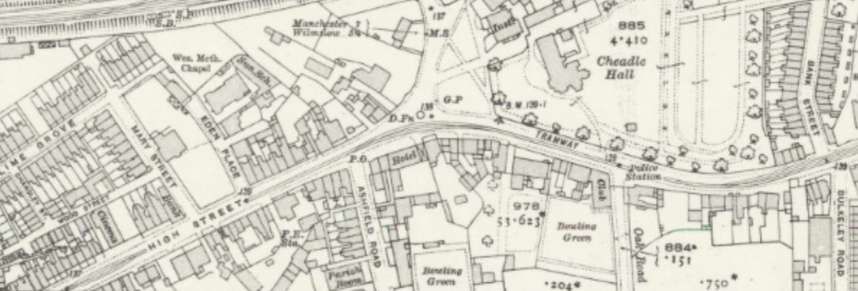
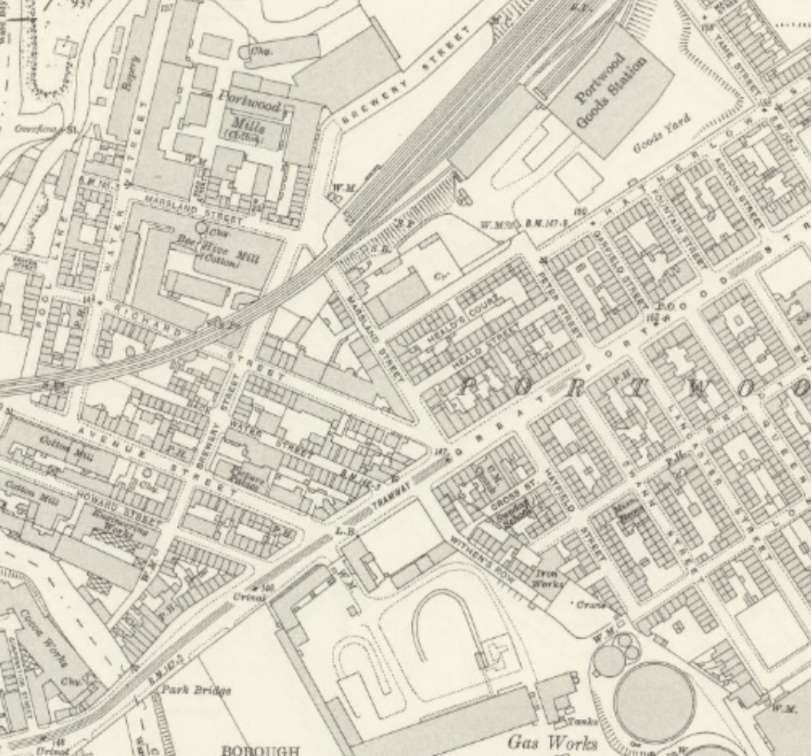
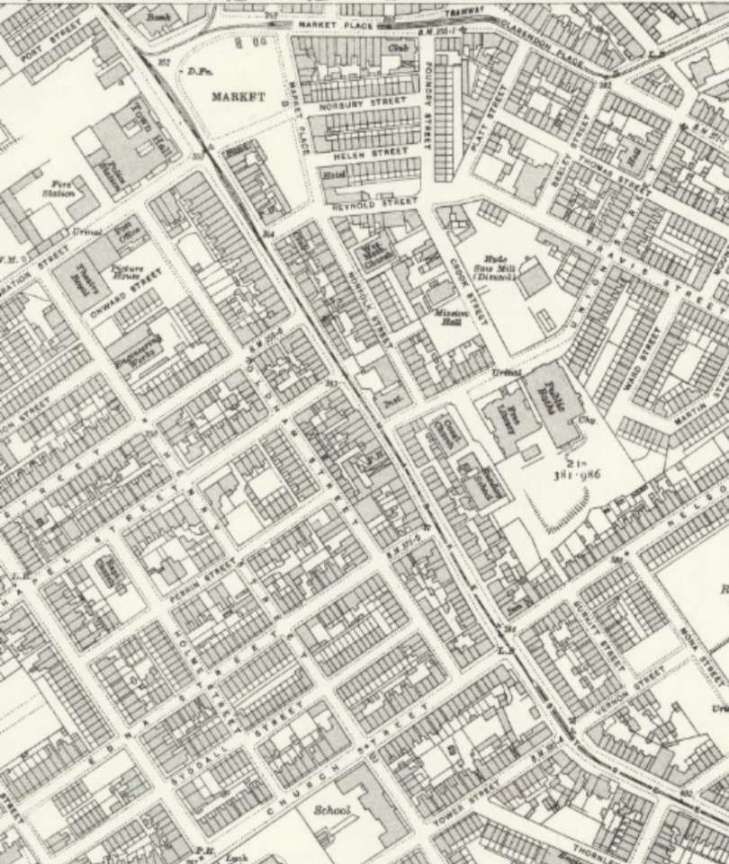
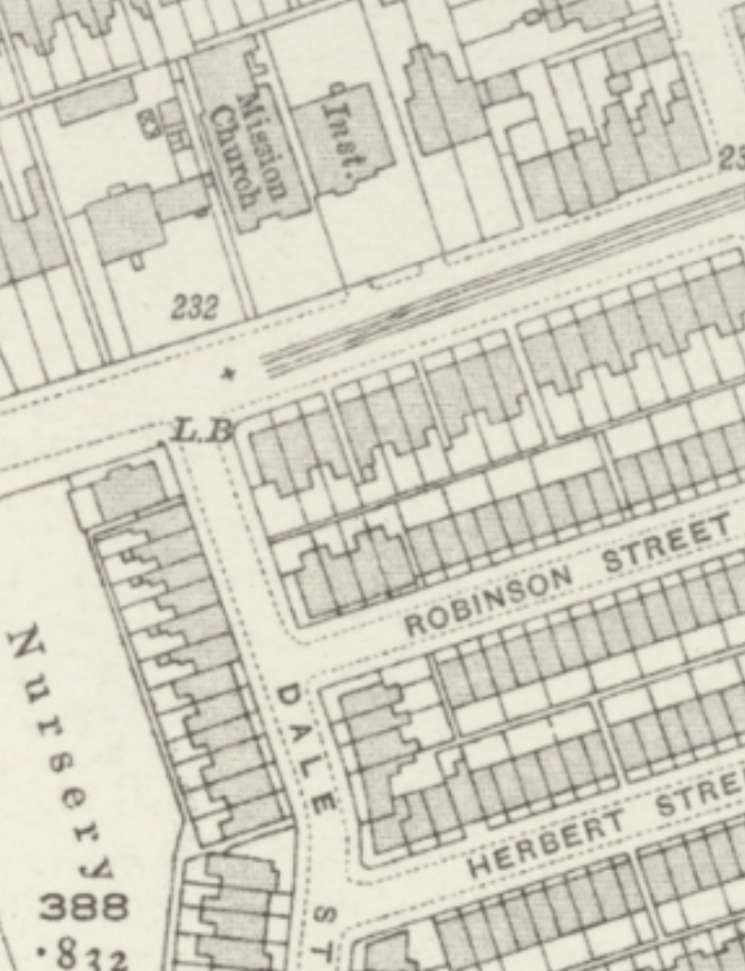
The National Library of Scotland retains three digital versions of the OS 25″ mapping:
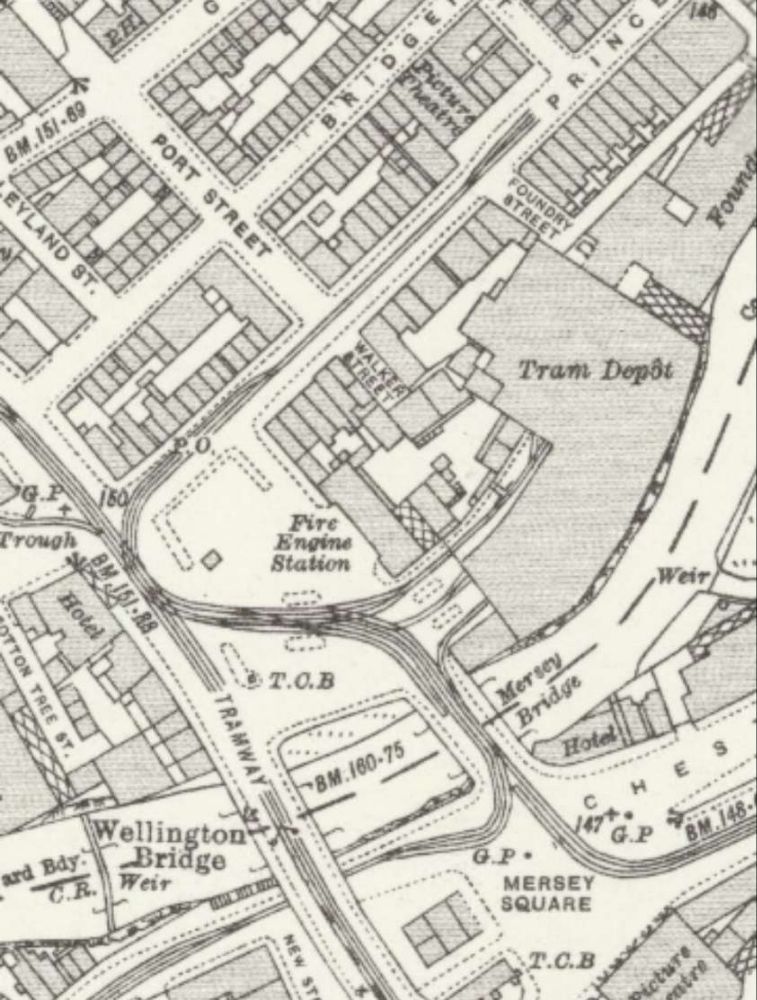
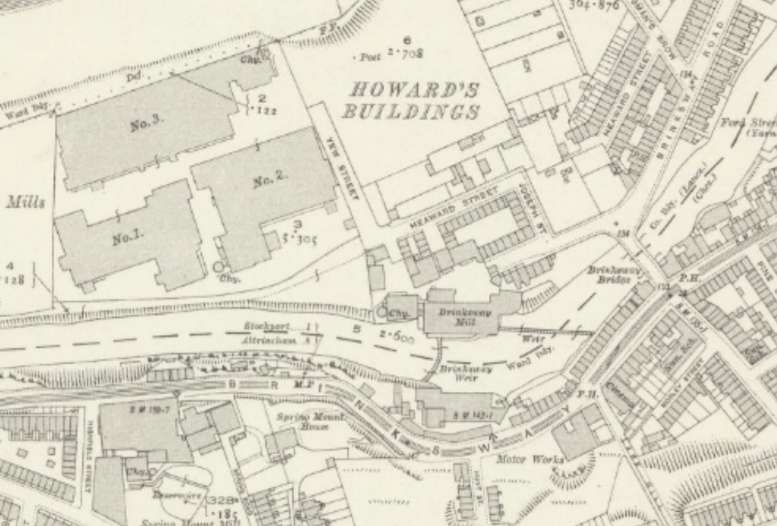
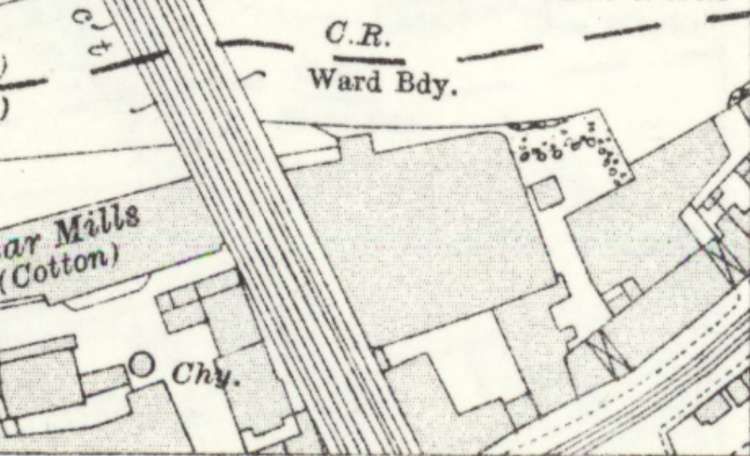
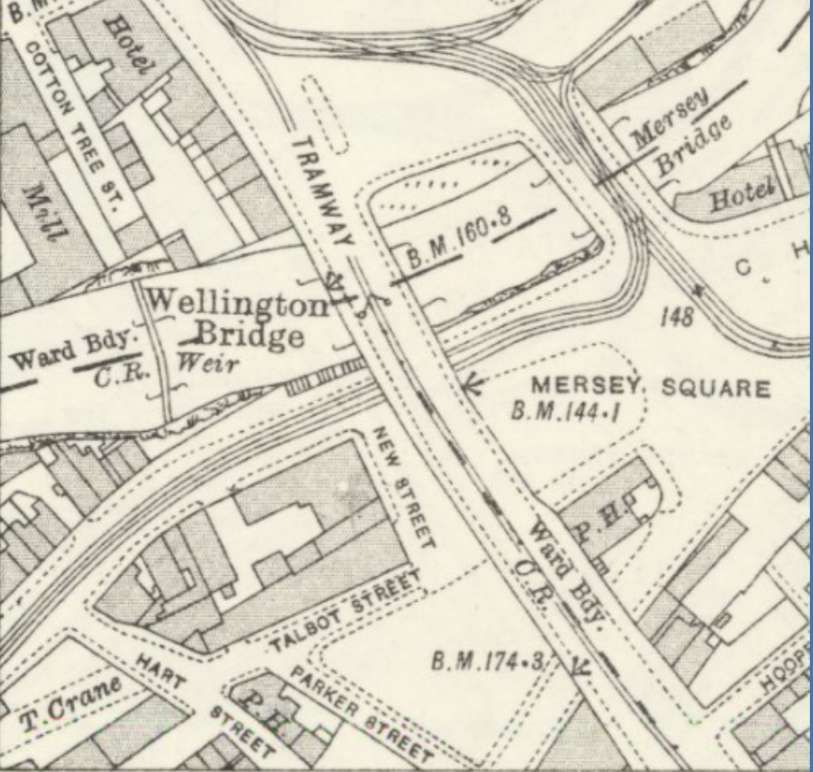
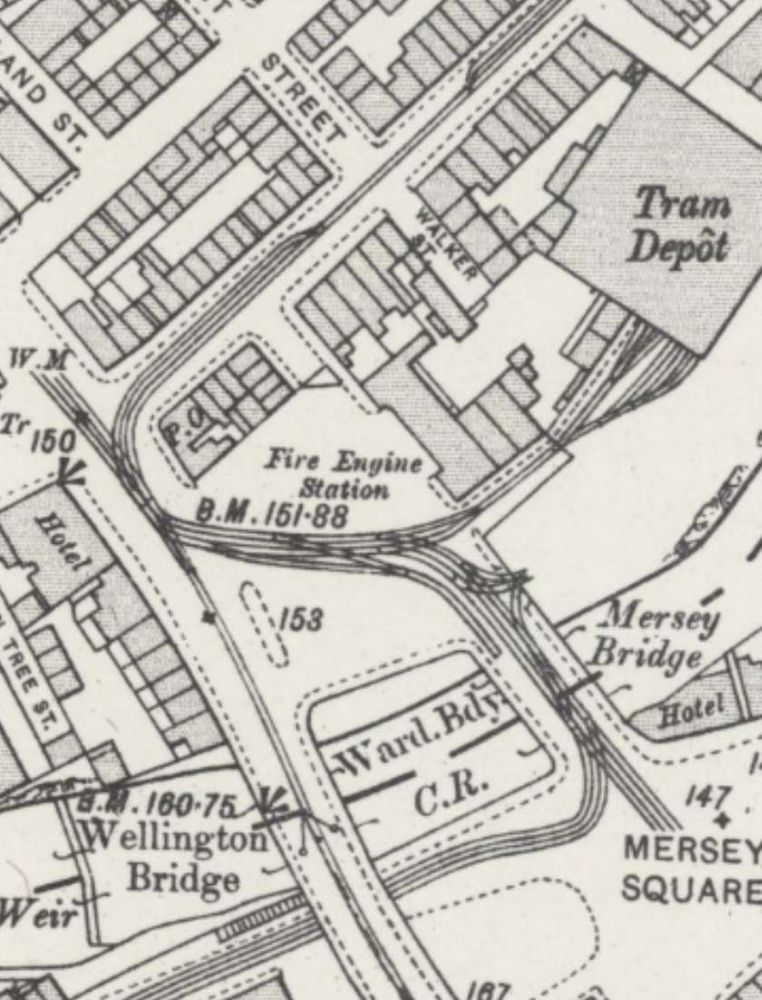
An extract from Map: Cheshire X.15; Ordnance Survey, 25 inch to 1 mile; revised: 1907; published: 1932 which shows Mersey Square as it was in 1907. It seems as though publication of this map was delayed for 25 years! [6]An extract from Map: Lancashire CXII.9; Ordnance Survey, 25 inch to 1 mile; revised: 1917; published: 1922, which shows Mersey Square as it was in 1917. [7]An extract from Map: Lancashire CXII.9; Ordnance Survey, 25 inch to 1 mile; revised: 1934; published: 1936, showing Mersey Square as it was in 1934. The tram depot has been enlarged and the additional depot on Heaton Lane constructed. Heaton lane Depot is accessed via the branch West off Wellington Road. [8]
The sequence of extracts from the Ordnance Survey’s 25″ series of maps shows the development from 1907 to 1934. The most significant changes in that period were: the dualling of the trackwork on the A6 South of the Square; and the development of the Tram Depot. As can be seen from the map extracts, the main depot building was widened to reach the river bank and then extended Southwest towards Mersey Square. A surprising change appears in the latest extract – the conversion of the dual track work on Chestergate where it passes under the A6, Wellington Road to a stretch of single track.
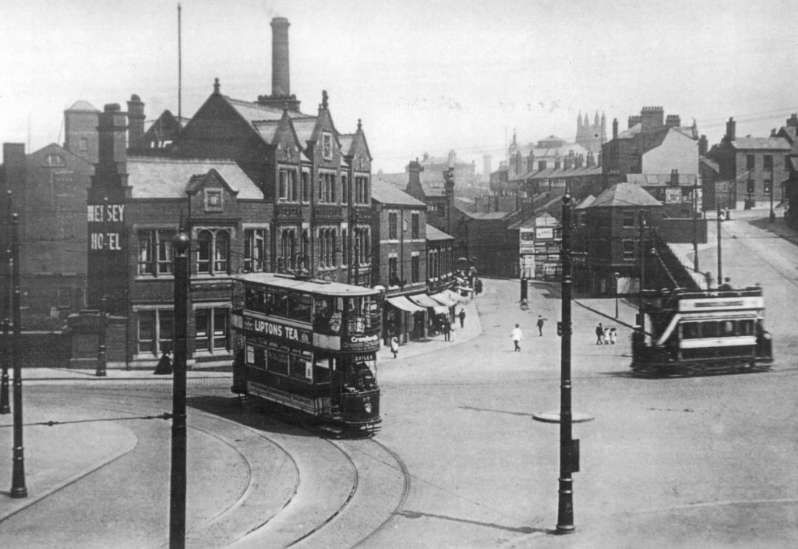
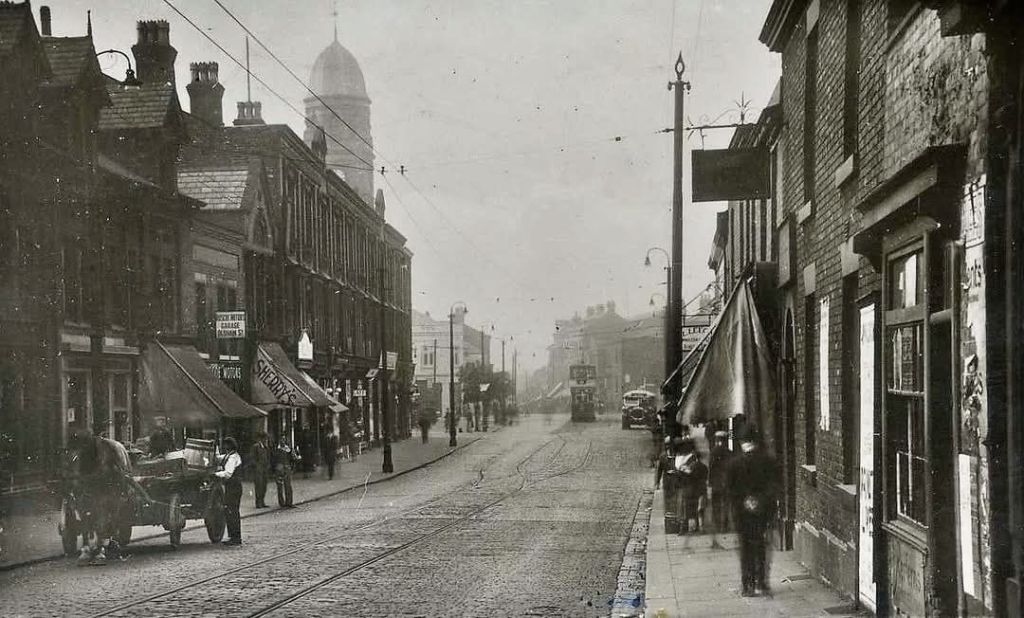
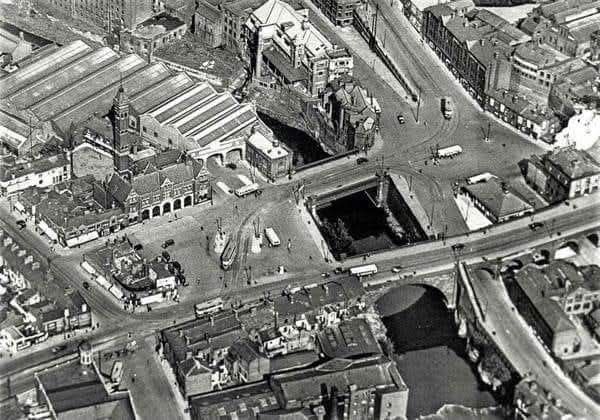
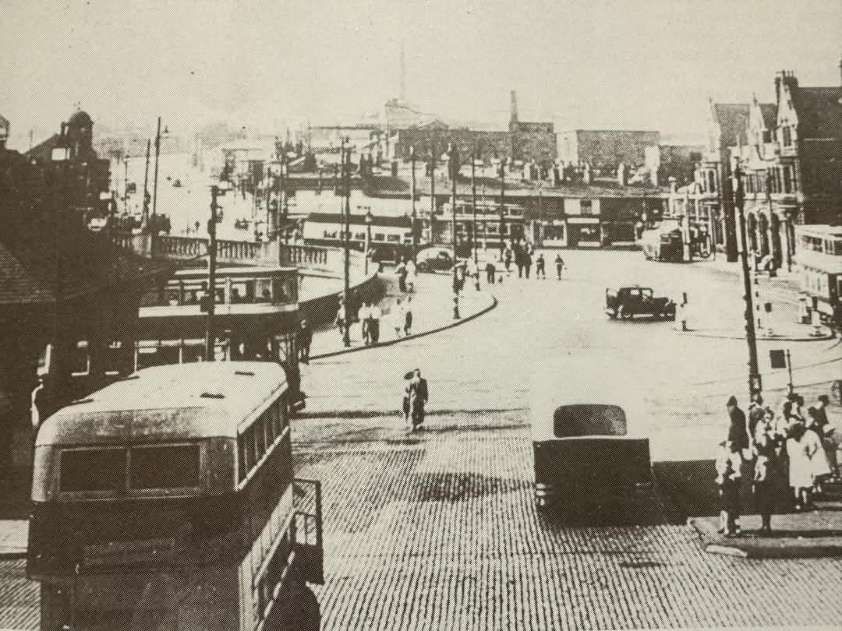
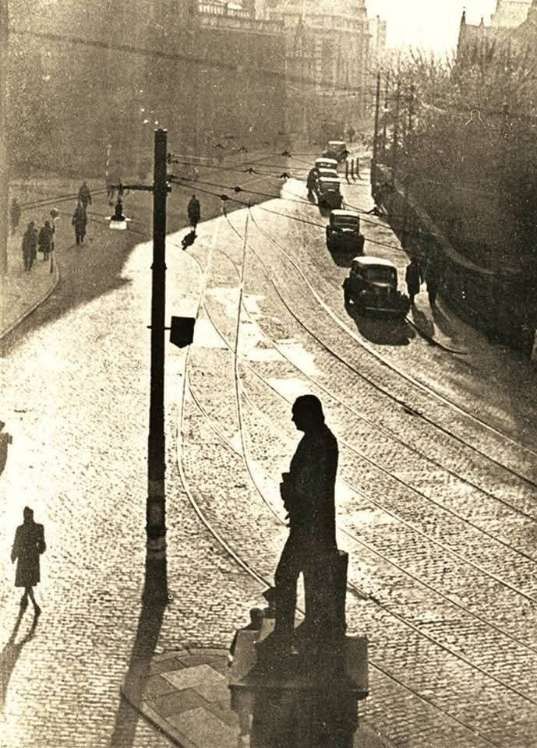
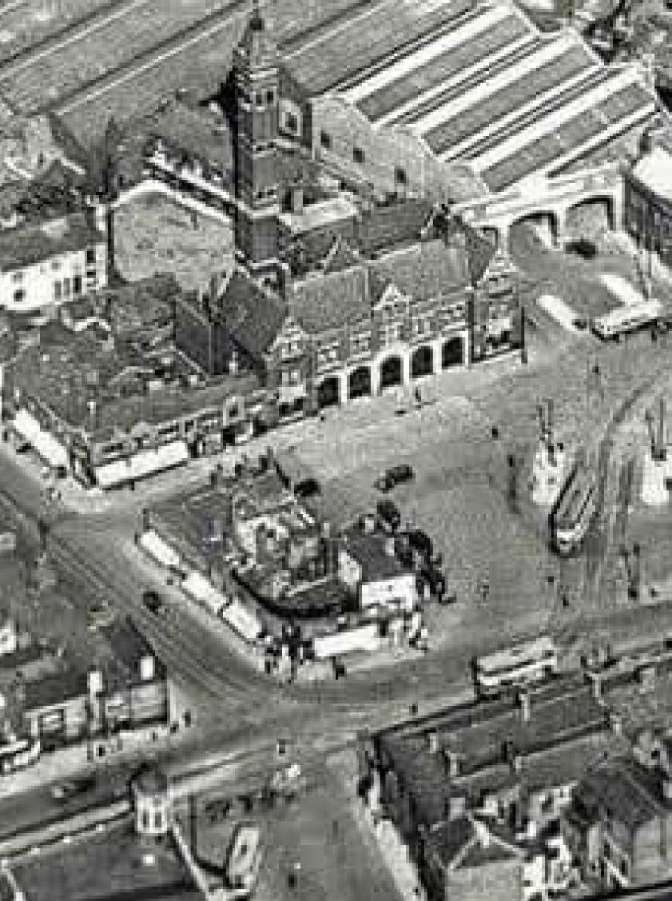
Mersey Square in 1932, seen from the West. This image was shared on the Memories of Stockport Facebook Group on 19th January 2021 by Chris Paul. [13]
The 1930s to the 1970s saw major changes to the centre of Stockport. The River Mersey was culverted from Mersey Square, Northeast to Bridge Street and a dual carriageway road was created along the line of the River Mersey. This new road was not used by trams but it altered traffic arrangements at Mersey Square while it was in use.
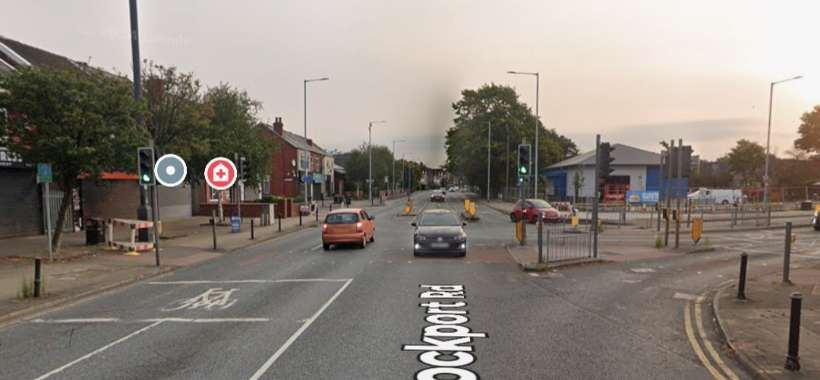
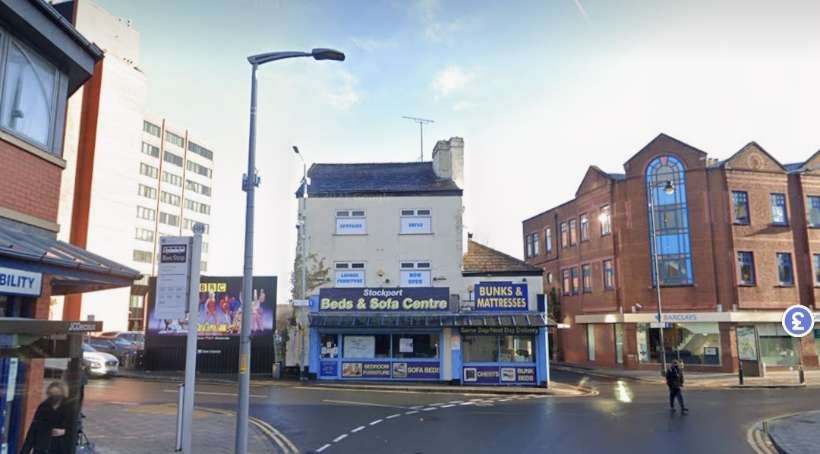
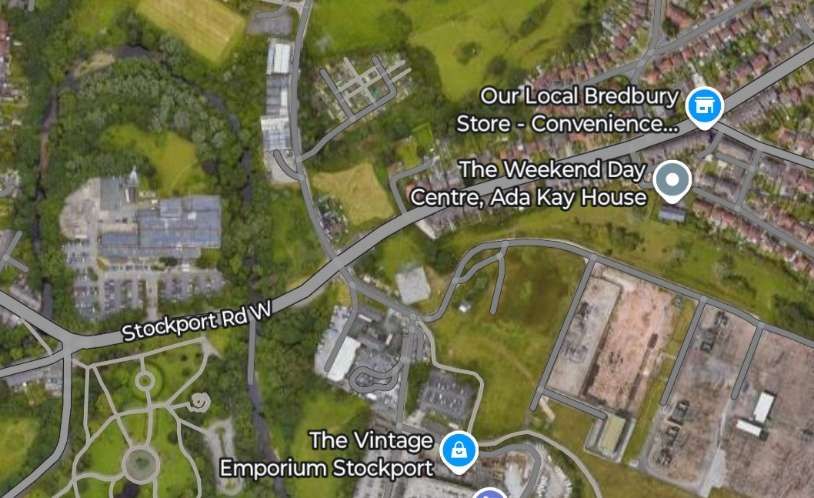
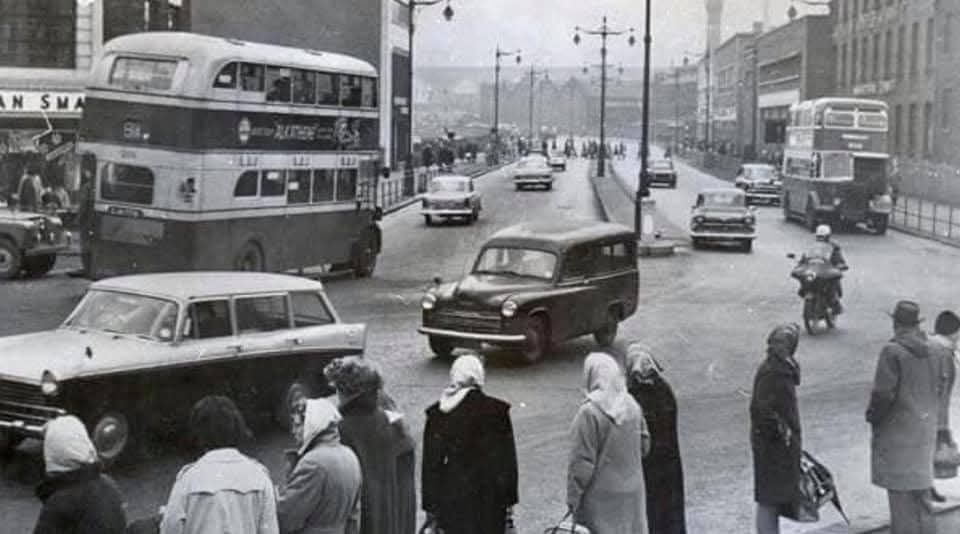
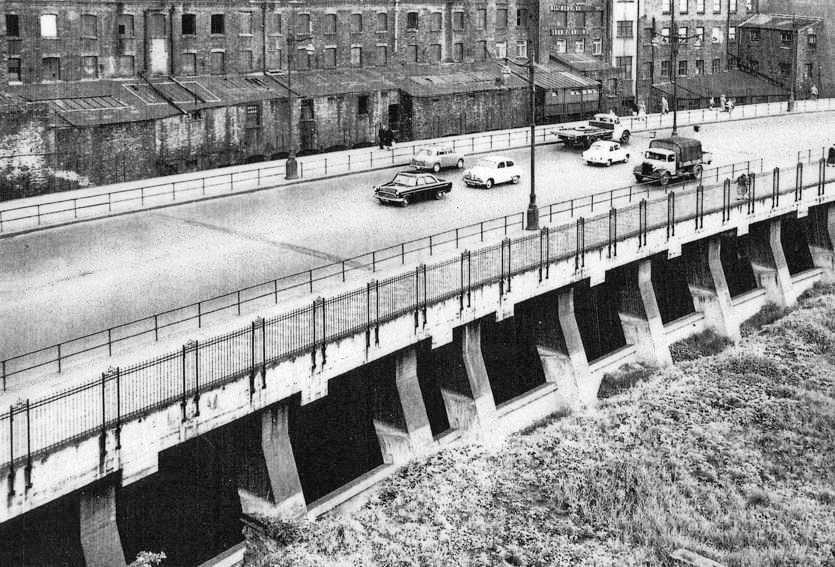
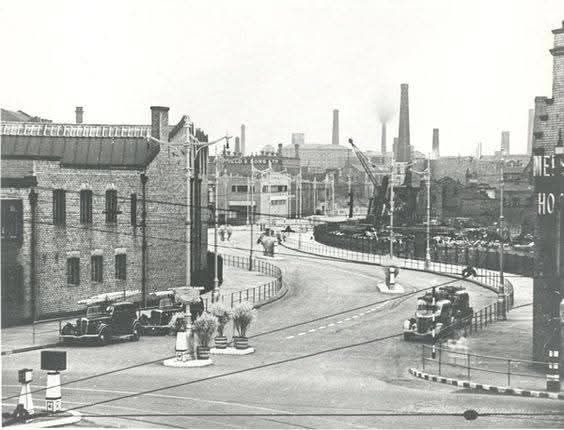
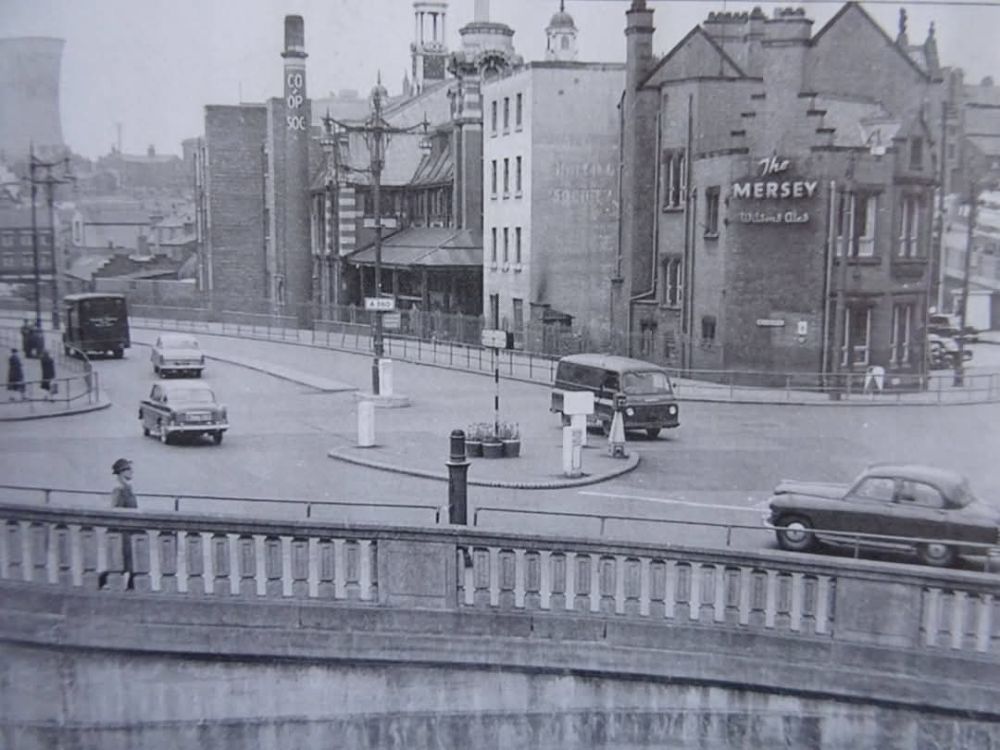
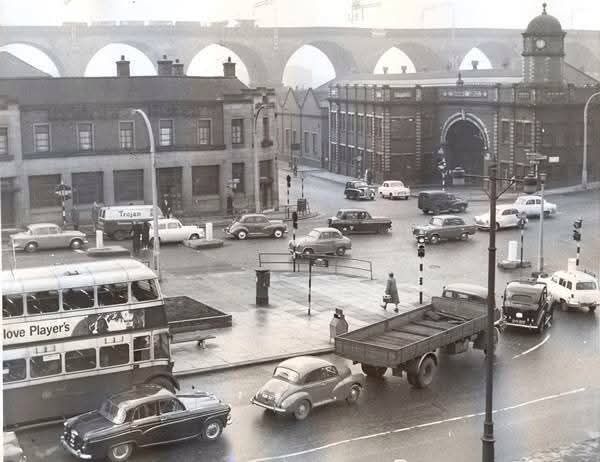
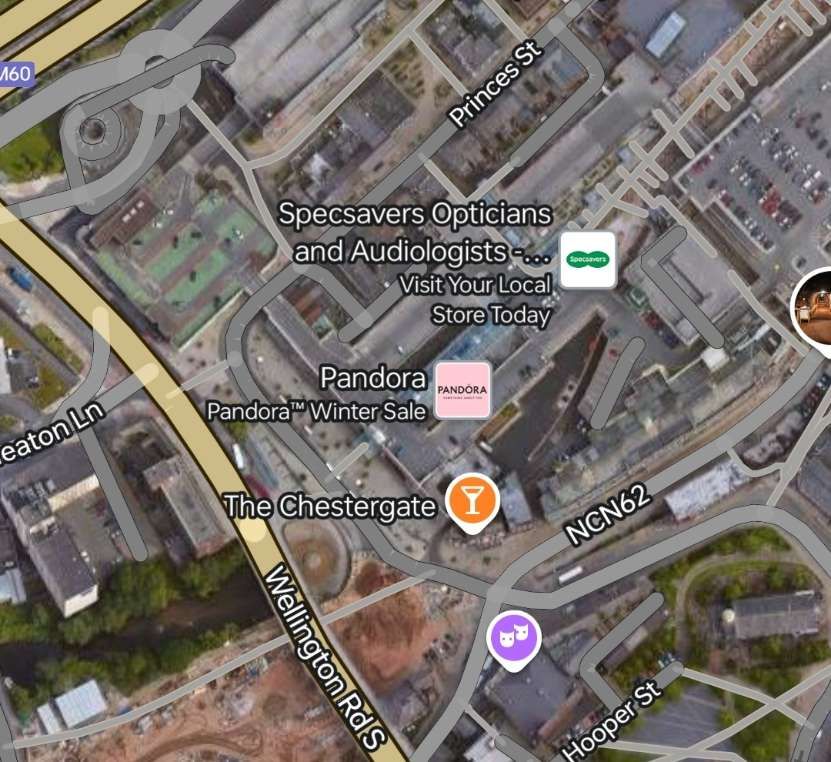
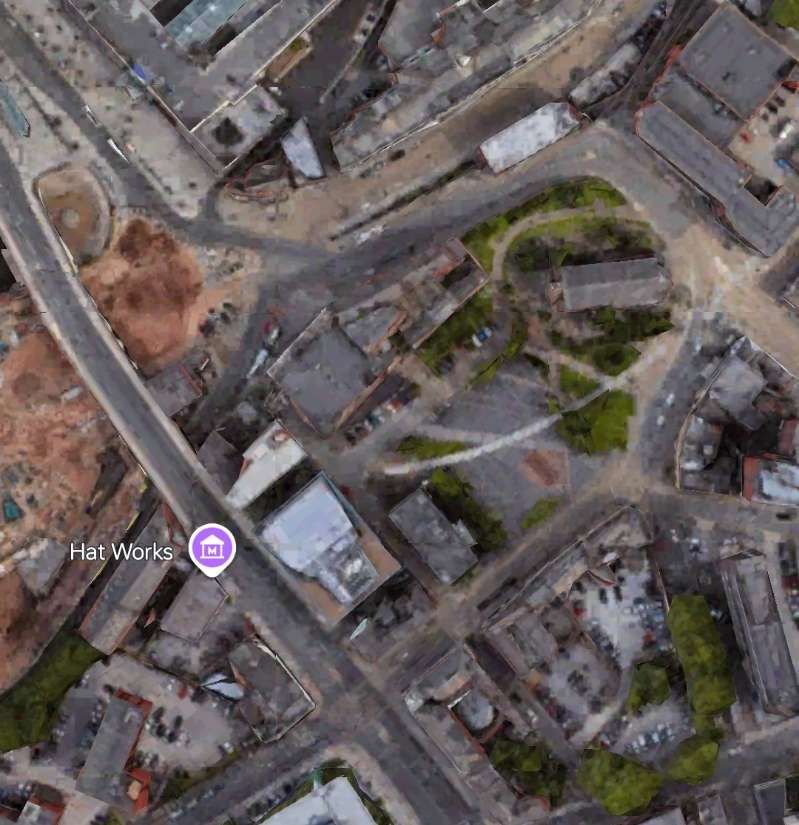
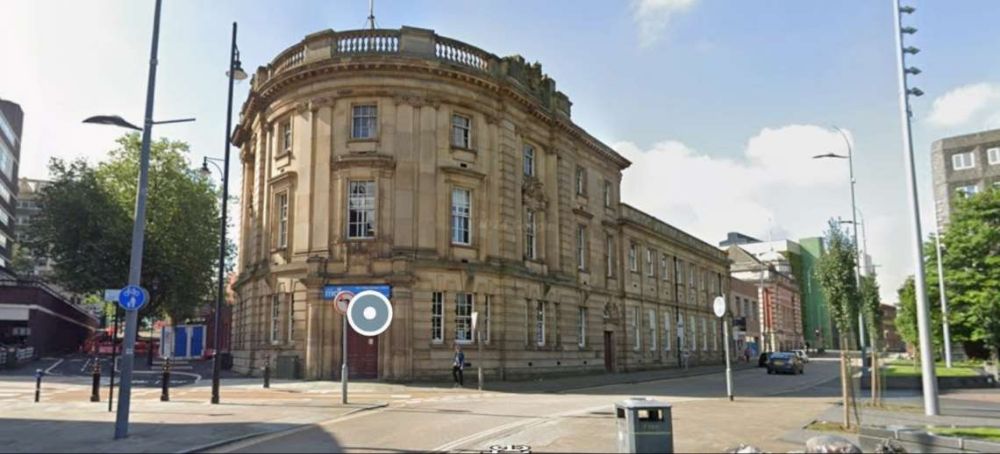
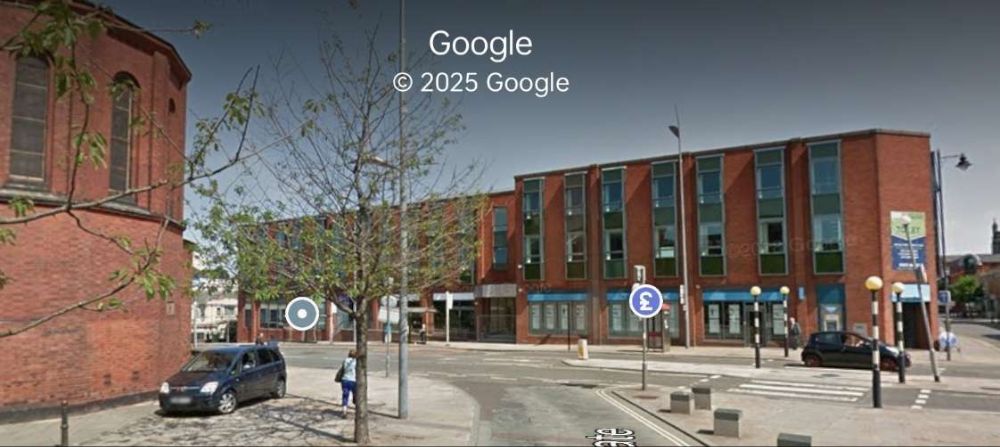
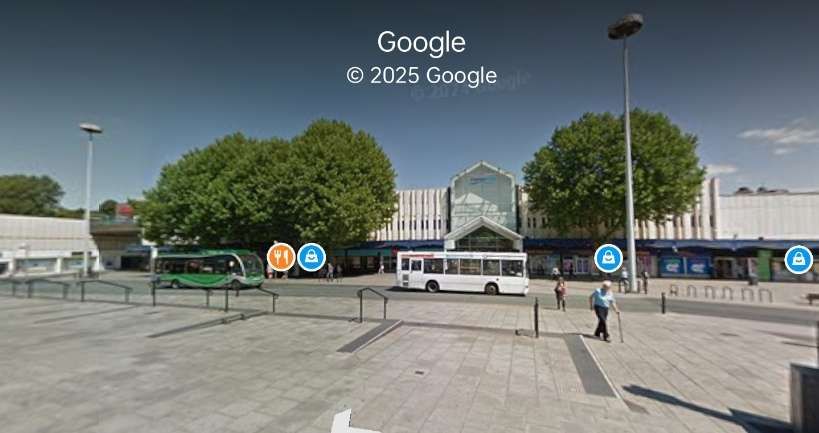
The construction of Merseyway in the 1930s is nearing completion in this photograph which was shared on the Memories of Stockport Facebook Group on 18th October 2020 by Dave Moran. [12]The view Southwest from Bridge Street, showing the dual carriageway over the River Mersey in the mid-20th century. This image was shared on the Memories of Stockport Facebook Group on 26th June 2020 by Julian Ryan. [9]Merseyway was built on a series of reinforced concrete portal frames spanning the river. Given the positioning of the vehicles on the structure, this image probably comes from while the road was closed. The image was shared on the Memories of Stockport Facebook Group on 26th September 2018 by Marilyn Ann Cronshaw. [11]Merseyway is seen from the Southwest, looking Northeast in the mid-20th century. The tram depot is on the left. This image was shared on the Memories of Stockport Facebook Group on 10th August 2020 by Keith Povey. [10]A final view of Merseyway as a road across the roundabout at its Southwest end in Mersey Square. The photograph was taken from Wellington Road and it was shared on the Memories of Stockport Facebook Group on 6th October 2020 by Mark Lloyd. [14]Mersey Square seen from the Southeast in 1948. The oddly shaped roundabout at the end of Merseyway is on the right with the old fire station above it. This image was shared on the Memories of Stockport Facebook Group on 28th August 2023 by Michael Sidebottom. [15]Traffic emerging from Mersey Square onto Wellington Road (A6). Manchester is away to the right, Hazel Grove to the left. Heaton Lane Tram Depot is beyond Wellington Road on the right of the image. This photograph was shared by Marilyn Ann Cronshaw on 24th June 2015. [16]Mersey Square, Stockport in the 21st century. [Google Maps, January 2025]
By July 1905, the network was “in its final shape, with a total route mileage of 19.46. Of this, however 2.51 route miles (Vernon Park Pole Bank) was the property of Bradbury and Romiley Urban District Council, 1.64 miles (Cheadle Heath Bridge Gatley Green) belonged to Cheadle and Gatley U.D.C. and 0.88 miles to Hazel Grove and Bramhall U.D.C., all these sections being leased to Stockport Corporation for operating purposes. The total length of track over the system as a whole was 34.03 miles, and the cost of track construction averaged the modest figure of £7,227 per route mile.” [1: p124]
In addition to joint working with Manchester Corporation, a similar arrangement was made with “The Stalybridge, Hyde, Mossley and Dukinfield Transport and Electricity Board, Pole Bank being the point of connection between the two systems. Stockport cars were operated through to Hyde Town Hall from 1st January, 1903, when the Pole Bank Hyde line was the property of the Oldham, Ashton and Hyde Electric Tramways, Ltd., a B.E.T. subsidiary, but it was not until 1923, when this undertaking sold out to local authorities and the Hyde – Pole Bank section was taken over by the Joint Board, that mutual through running could be started. A joint S.H.M.D.-S.C.T. service was introduced in March 1925, between Hyde and Edgeley via Mersey Square and continued until the Joint Board ceased to operate trams on 26th May, 1945. Thereafter, Stockport maintained the service unaided until 2nd March, 1947, when buses took over and the trams were cut back to Vernon Park.” [1: p124]
The withdrawal of the through services into Manchester occurred in the late 1940s but, Gently says, “luckily, only one section of the purely local system [had] suffered likewise, that being the Cheadle-Gatley section, on which buses were substituted on 21st September 1931. An early trolleybus route to Offerton was given up as impracticable many years [earlier].” [1: p124]
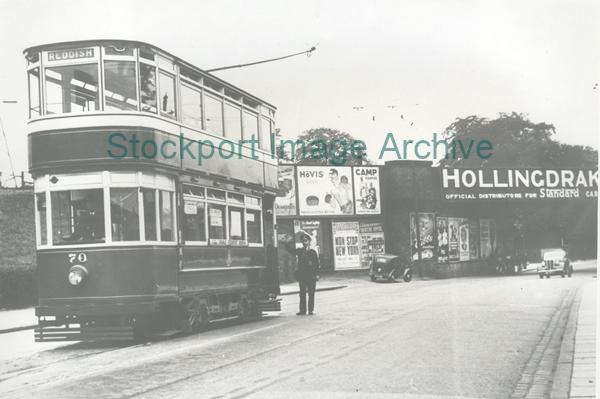
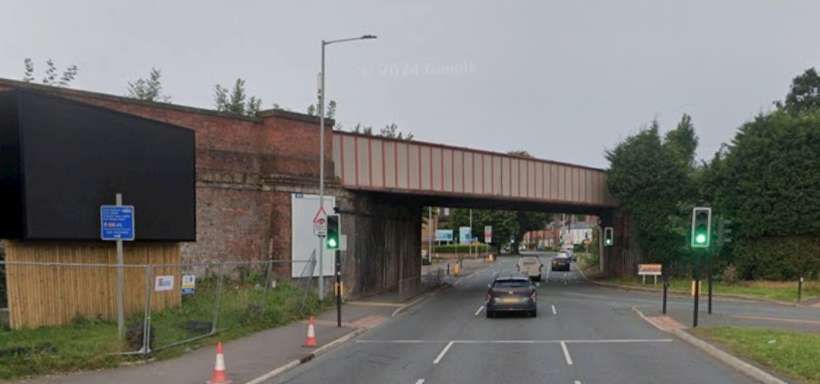
Wikipedia tells us that the fleet of tramcars steadily increased, with the Corporation owning a total of 87 double-deck electric tramcars through the life of the system, [3] although the highest number at any one time was 85 [4] and numbers settled down at 82, “all of which [were] of the single-truck top-covered vestibuled type with an average seating capacity of 60. Only 26 cars [had] open balconies, and these [were] used only at peak periods; ten of them [had] reversed staircases. The 56 totally enclosed cars [included] 30 which [were] fully upholstered on both decks, the seats being particularly deep and comfortable. The car [equipment comprised] Westinghouse, DK.30 or DK.35 motors and Dick, Kerr DB.1 (form K3) controllers, and hand-operated track brakes [were] fitted on account of the steep gradients. In 1944, the fleet numbering was re-arranged with the primary object of grouping together between 1 and 29 all those cars which, on account of a low bridge near Bredbury, had low-built top-covers, these being identified by a large H (denoting “Hyde,” the route concerned) on either side of the headlamp.” [1: p124] This was needed until abandonment of the lines beyond Vernon Park rendered this unnecessary. [5]
Most of the network survived the Second World War but was progressively closed in 1950 and 1951, only surviving for a short while after the Modern Tramway article of 1949. … “The Crossley Road to Hazel Grove route was the first to go, on 14th January 1950, followed by the Edgeley to Vernon Park route on 3rd March 1951, the Cheadle route on 10th April 1951 and finally the Reddish line on 25th August 1951.” [3]
Wikipedia also explains that: “The Corporation also ran a small trolleybus line, using three vehicles which collected current from the overhead lines using the German Lloyd-Kohler system, the only use of this system in Britain. The route opened in 1913, but the onset of the First World War made obtaining spare parts from Germany impossible, and it ran intermittently, due to maintenance problems. It was replaced by motor buses in 1920.” [3]
It is interesting to note that the deals made with adjacent networks “allowed long journeys to be made by tram, with the route from Hazel Grove to Seaforth Sands near Liverpool being 51.5 miles (82.9 km). One lady is known to have travelled between Liverpool and Stockport for pleasure on several occasions, although it took almost a whole day to reach her destination.” [3]
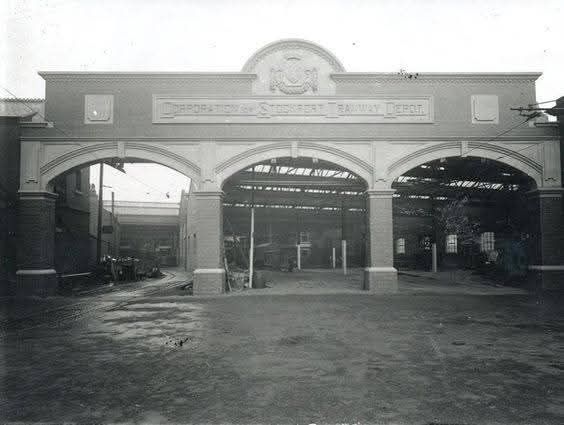
Gentry noted that Stockport’s track was “double throughout on the Levenshulme, Cheadle Heath, Edgeley and Hazel Grove routes and mostly so on Reddish except between the top of Lancashire Hill and Clare Road; this latter section, together with Princes Street and most of the Vernon Park route [was] single-and-loop. The rail used [weighed] 101 lbs. per yard. The chief depot [was] located in Mersey Square, with a subsidiary depot nearby in Heaton Lane.” [1: p124]
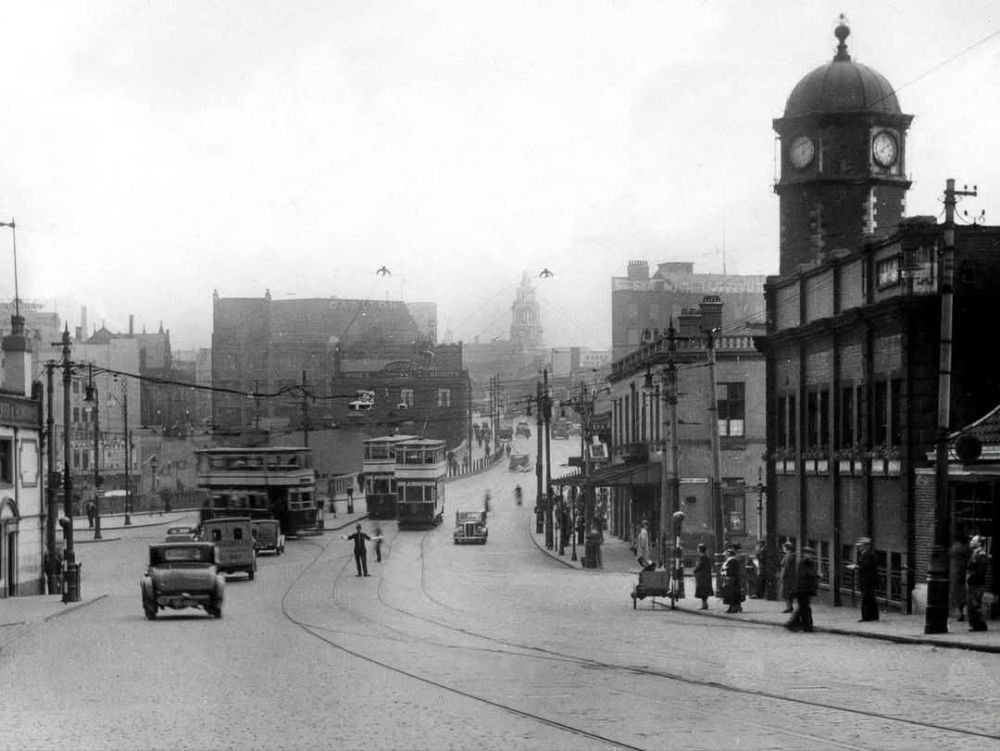
Trams ran through St. Peter’s Square and down the ramp into Mersey Square. The tram stop was in the centre of the paved area with both the Tram Depot and the Fire Station close by.
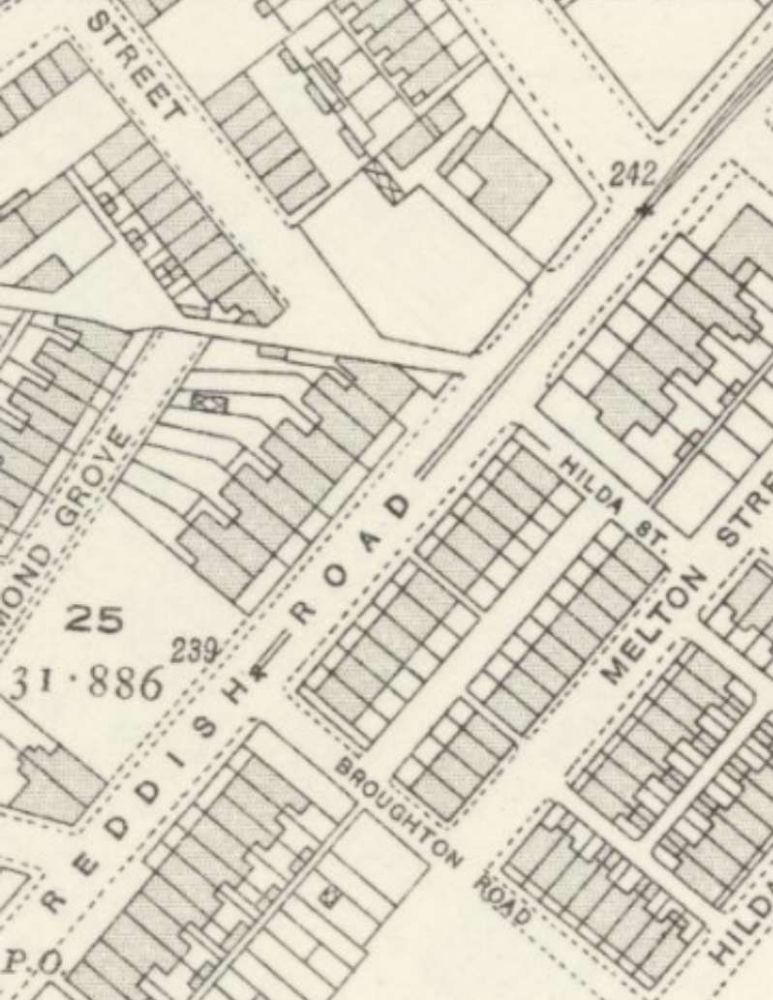
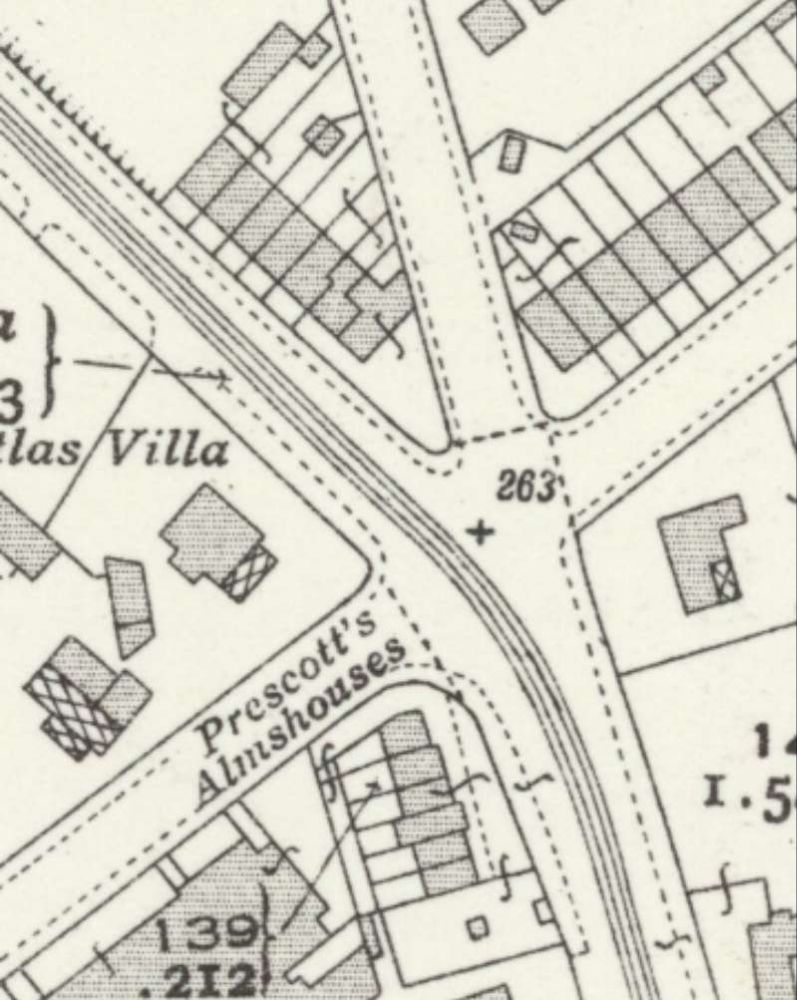
Reddish Road then turns to the North and later to the Northwest.
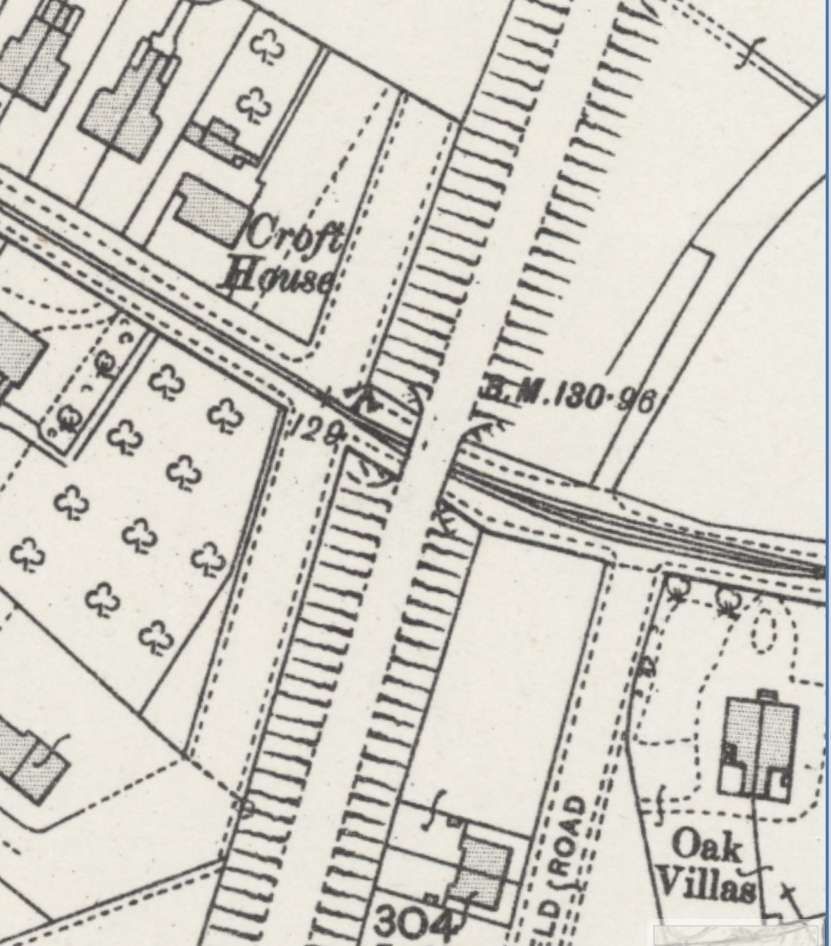
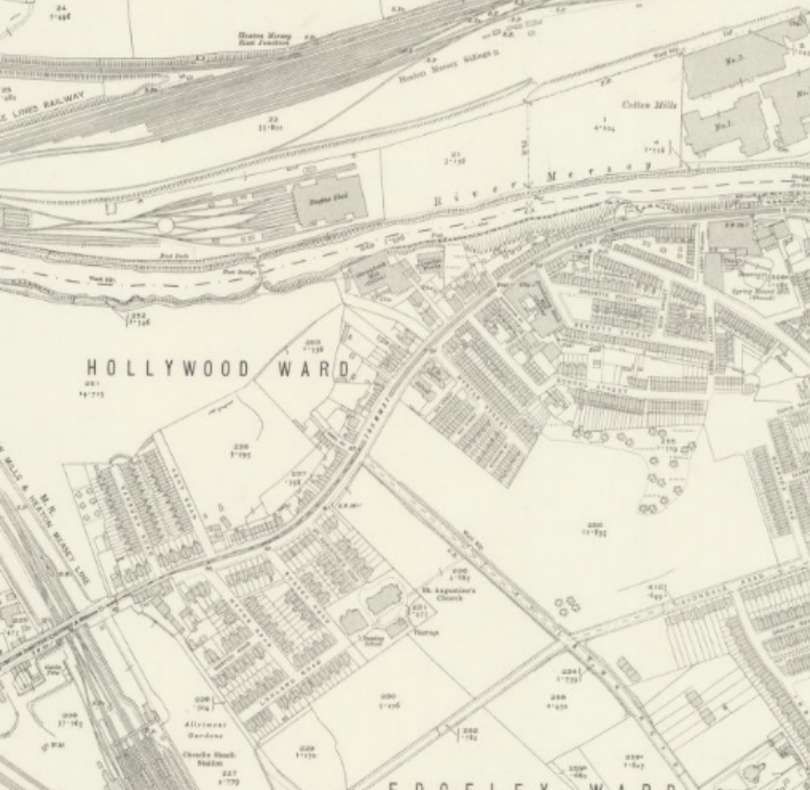
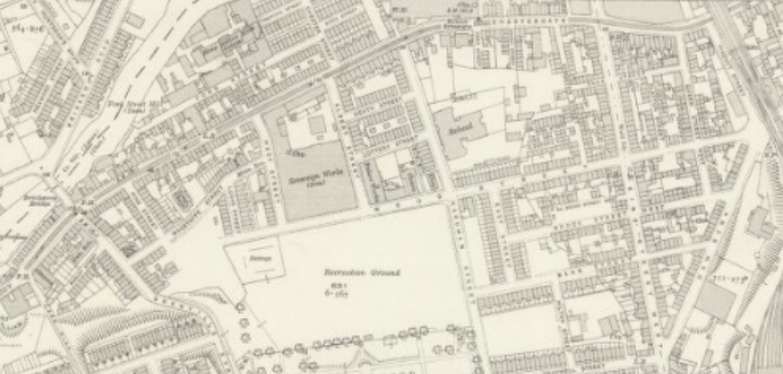
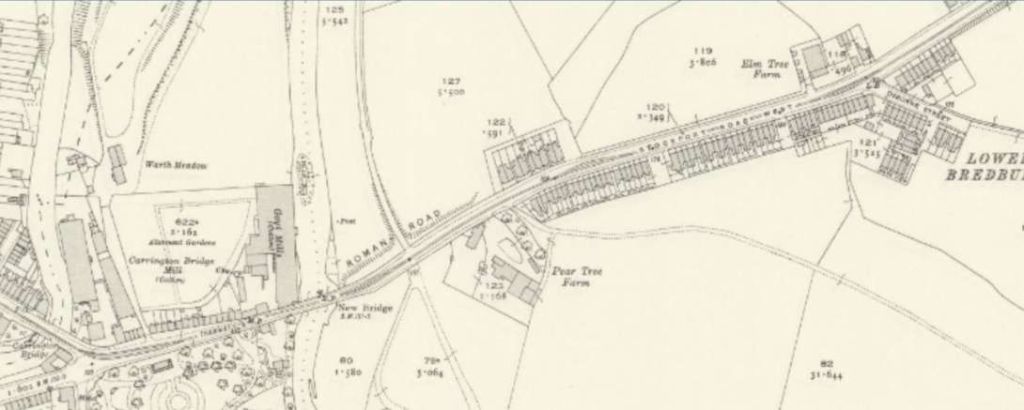
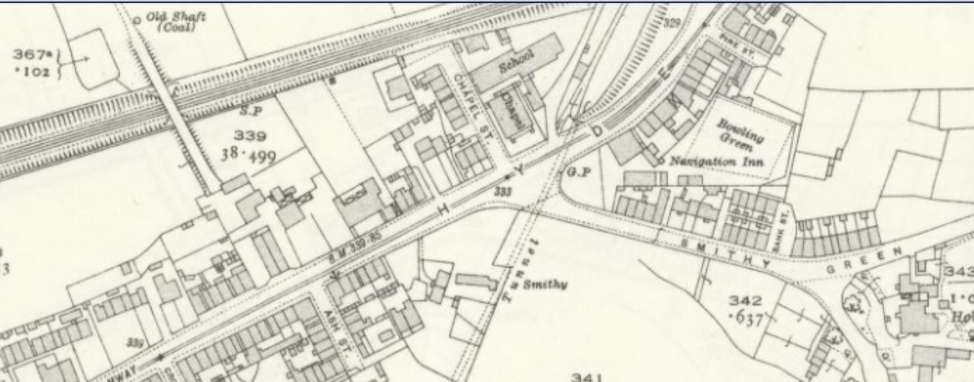
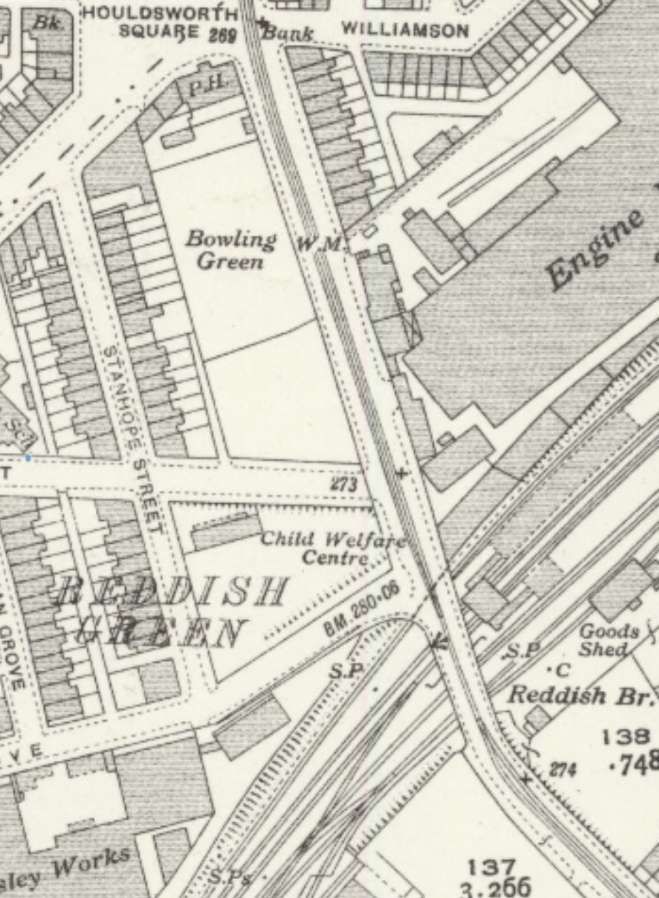
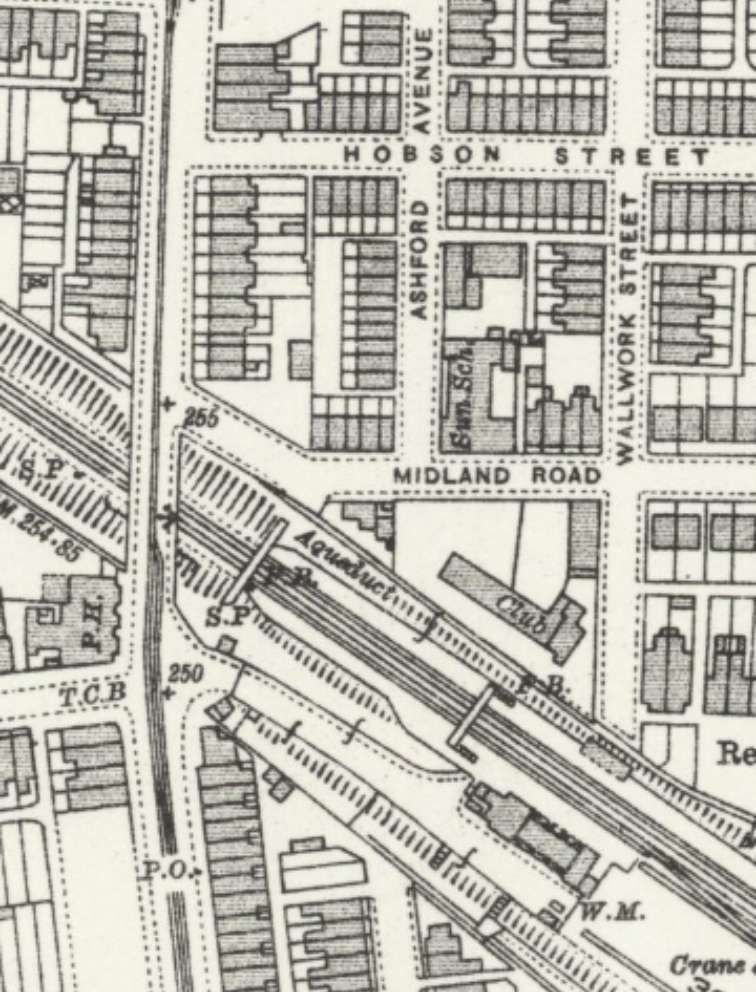
Another extract from the 25″ Ordnance Survey of 1934 (this sheet published in 1935). The tram tracks turned with Reddish Road as the road ahead led to Reddish Station forecourt. [36]As this next extract from the 25″ Ordnance Survey of 1934 shows, trams followed Reddish Road over the railway via Reddish Bridge and on to Holdsworth Square. [36]North of Holdsworth Square trams ran North along Gorton Road crossing the LMS & LNER Joint Railway between Manchester and Hayfield adjacent to that line’s Reddish Station. The location is shown on this extract from the 1934 25″ Ordnance Survey. [37]
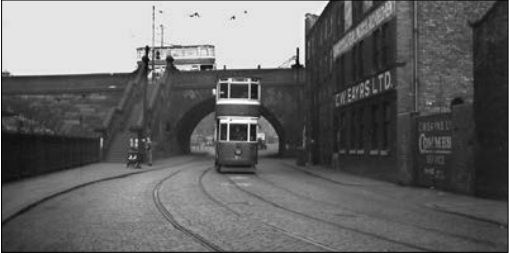
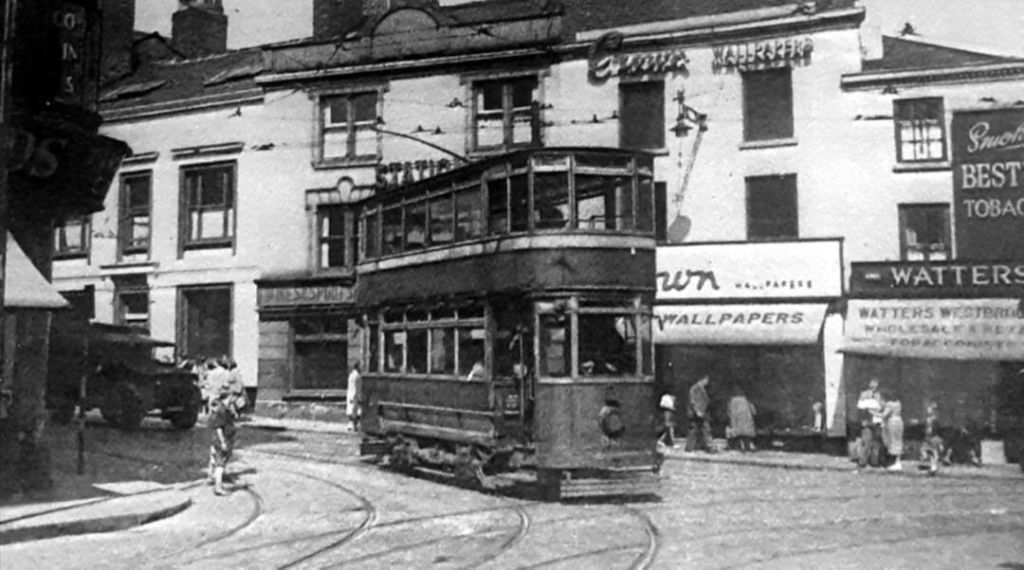
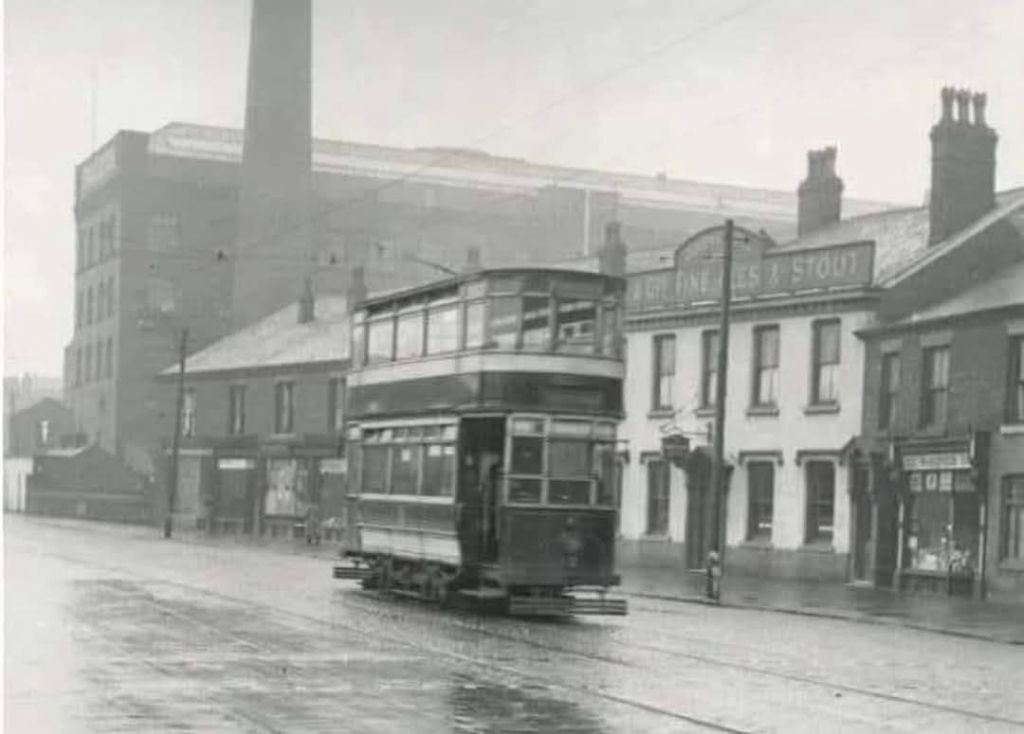
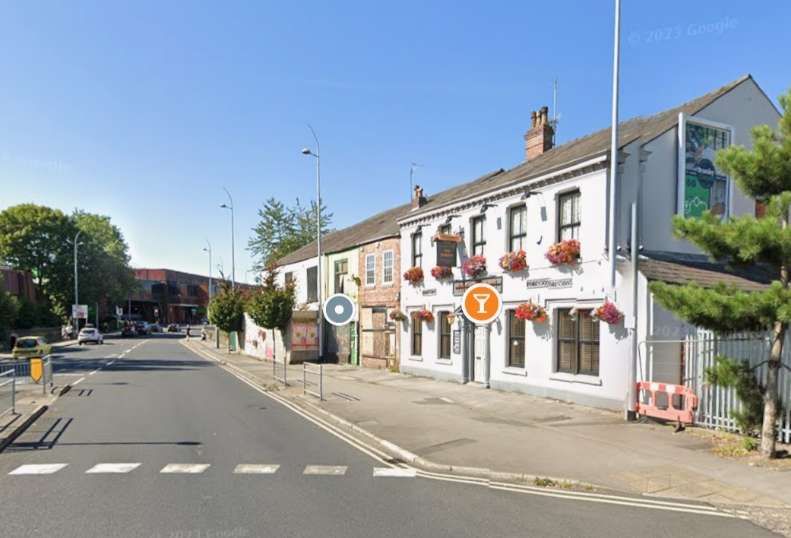
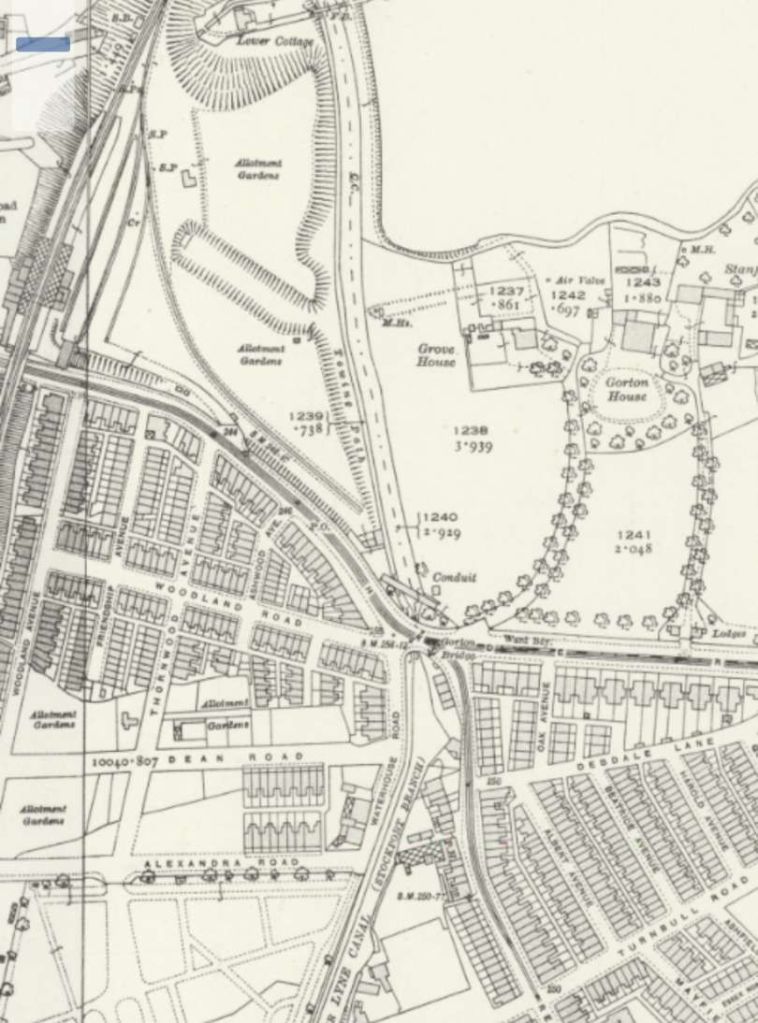
The next map extract and photograph show the terminus of the route we have been following from Mersey Square to Gorton. …
This first article has looked at the history of Stockport Corporation’s Tramways and has highlighted two of the tramway routes operated by Stockport Corporation. The line from Edgeley to Mersey Square and the line from Mersey Square to Gorton. Subsequent articles will look at other routes operated by the Corporation.
References
P.W. Gentry; Stockport Corporation Tramway; Modern Tramway, Vol. 12 No. 138, June 1949, p123-126.
Harry Postlethwaite, John Senior & Bob Rowe; Super Prestige No. 14, Stockport Corporation; Venture Publications, Glossop, Derbyshire, 2008. This document is made freely available by MDS Books as a .pdf: https://www.mdsbooks.co.uk/media/wysiwyg/Stockport_Download_1.pdf, accessed on 14th January 2025.


.jpg)