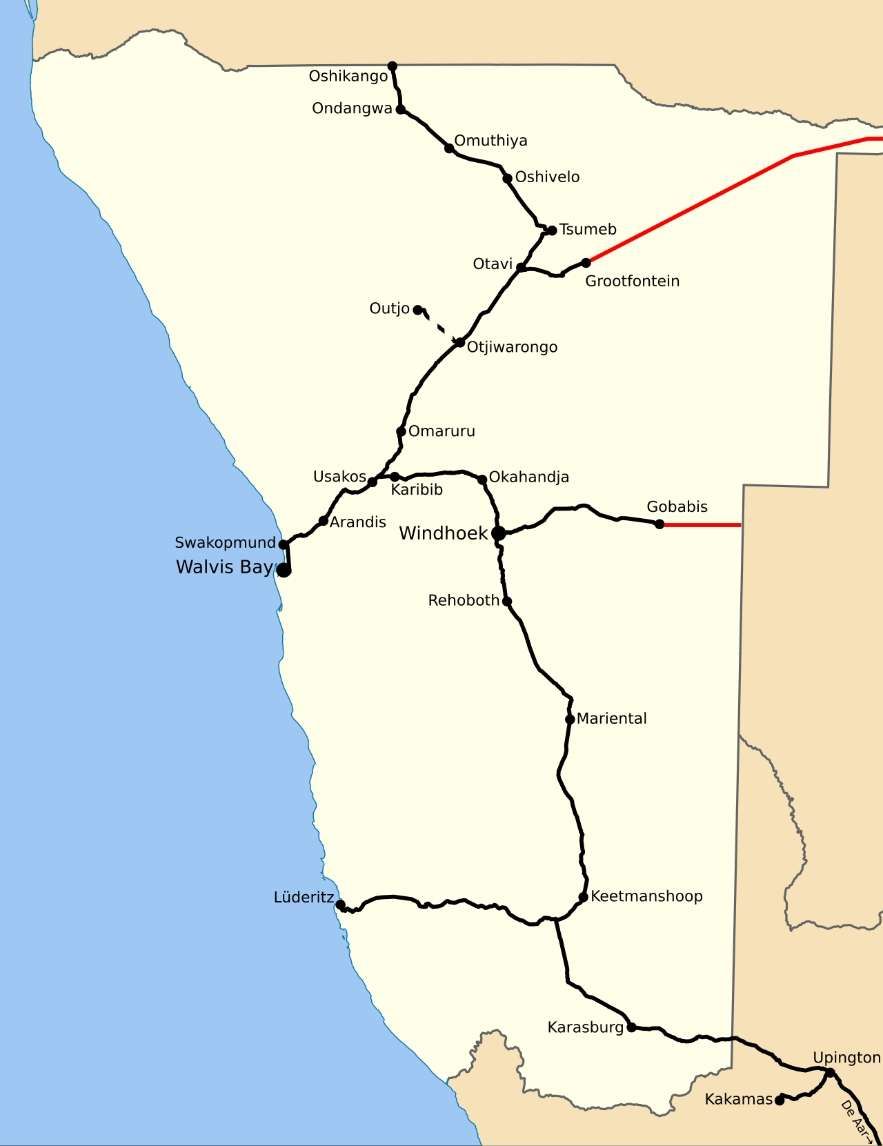
In Part 1, we looked at the railways in the North of Namibia, that article can be found here. [4] This article covers lines which left Windhoek and covered the South of the country.
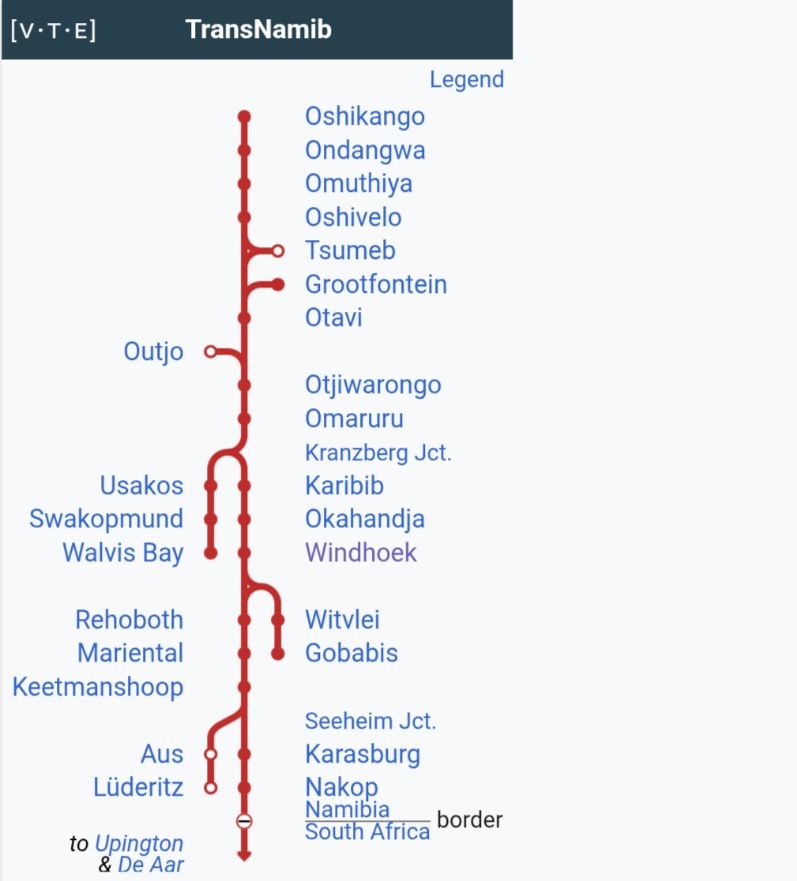
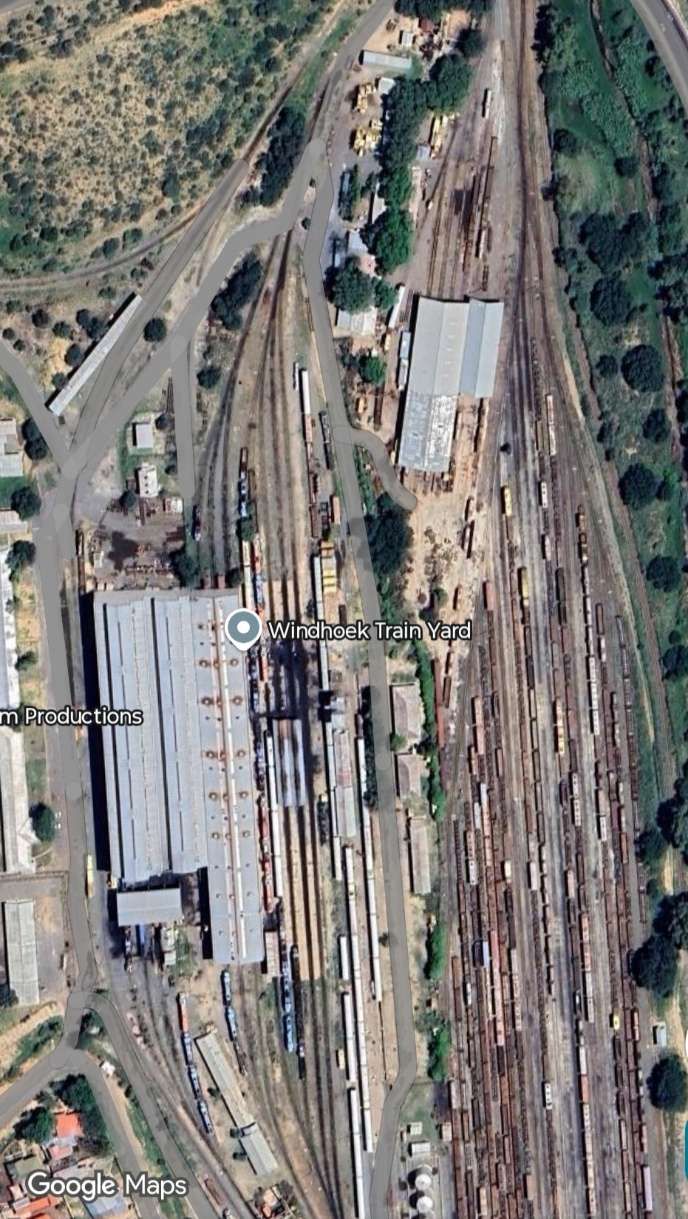
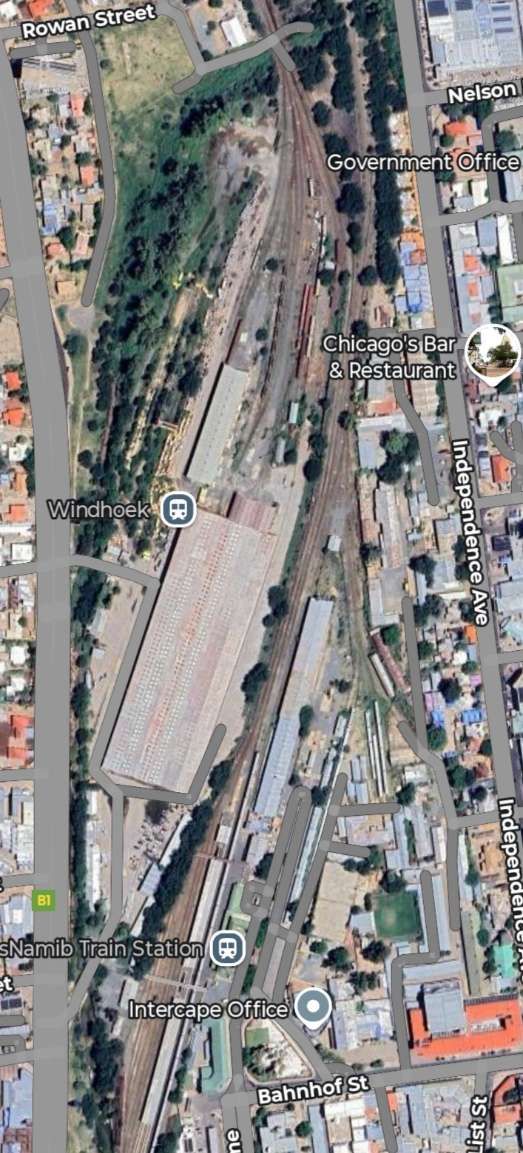
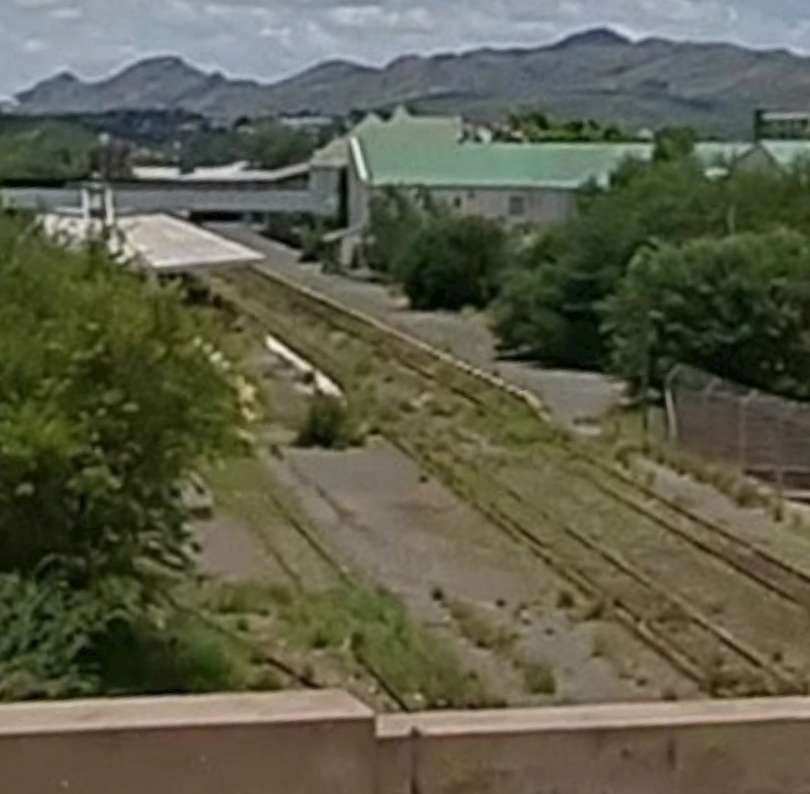
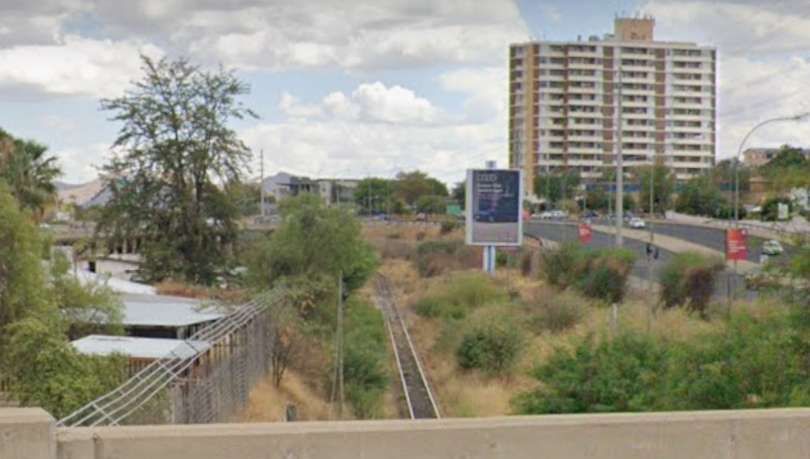
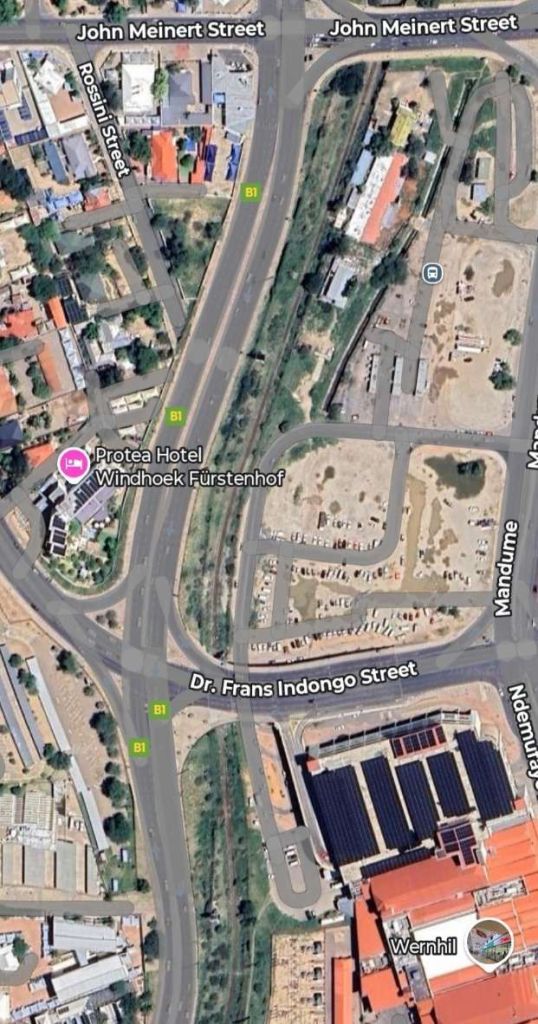
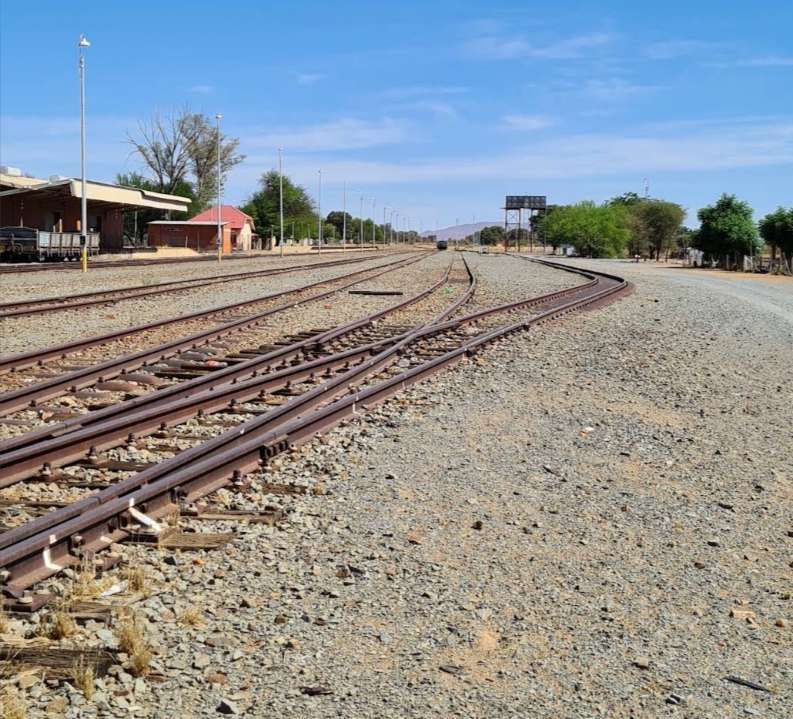
After the aerial image immediately below, the next three images form a kind of ‘tryptic’ which shows the TransNamib train yard and station at Windhoek. Taken together they show the full site. …
The railway line from Windhoek to Nakop is 869 kilometres (540 miles) long. The section between Karasburg and Keetmanshoop was completed in 1909. In 1912, the 500 kilometres (310 miles) connection between Karasburg and Windhoek was completed, and the extension to Upinhton (South Africa) was built in 1915.
Windhoek
Aris
Rehoboth
Tses
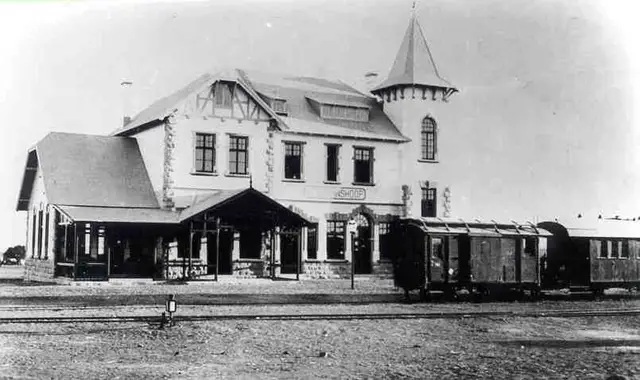
Keetmanshoop
Karasburg
Nakop (border)
Upington
We start our look at the main line to the South, in Windhoek at the South end of the Railway Station site. …
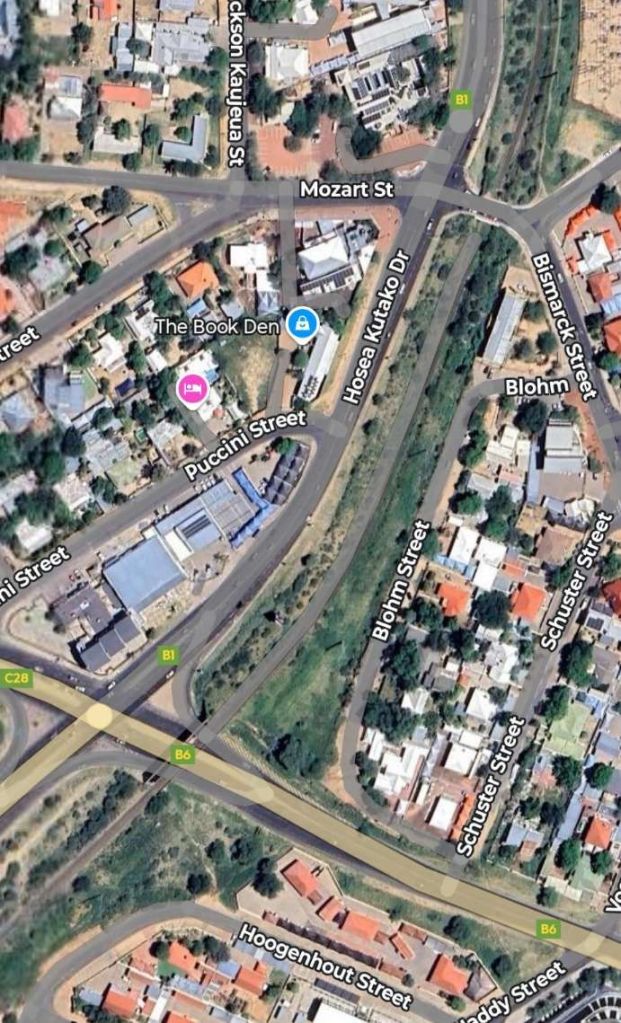
The southern end of Windhoek Railway Station, seen from John Meinert Street. [Google Streetview, 2023]The line South, from John Meinert Street. [Google Streetview, 2023]A satellite image showing the railway South of John Meinert Street. [Google Maps, June 2025]The next length of the line to the South, to a point South of the B6. [Google Maps, June 2025]The bridge carrying the railway across the B6. [Google Streetview, 2024]
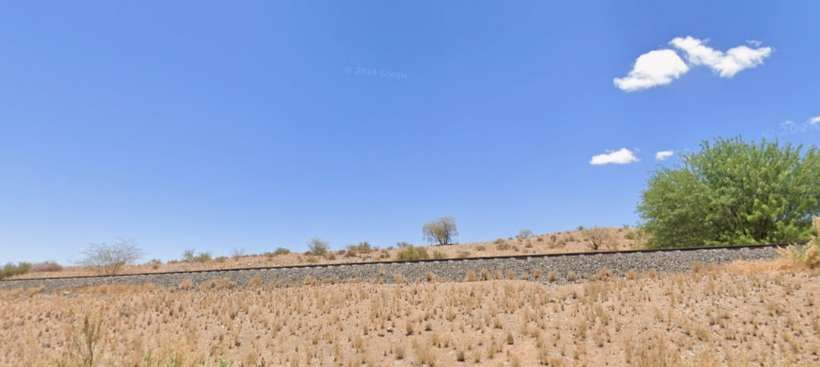
Although it does not look like it as yet, the line South of Windhoek Railway Station climbed relatively steeply as it meandered South. … As we will soon see, the landscape South of Windhoek is different to that to the North of the city.
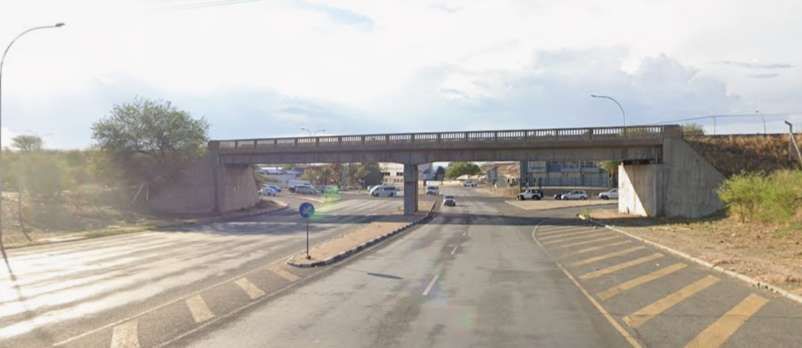
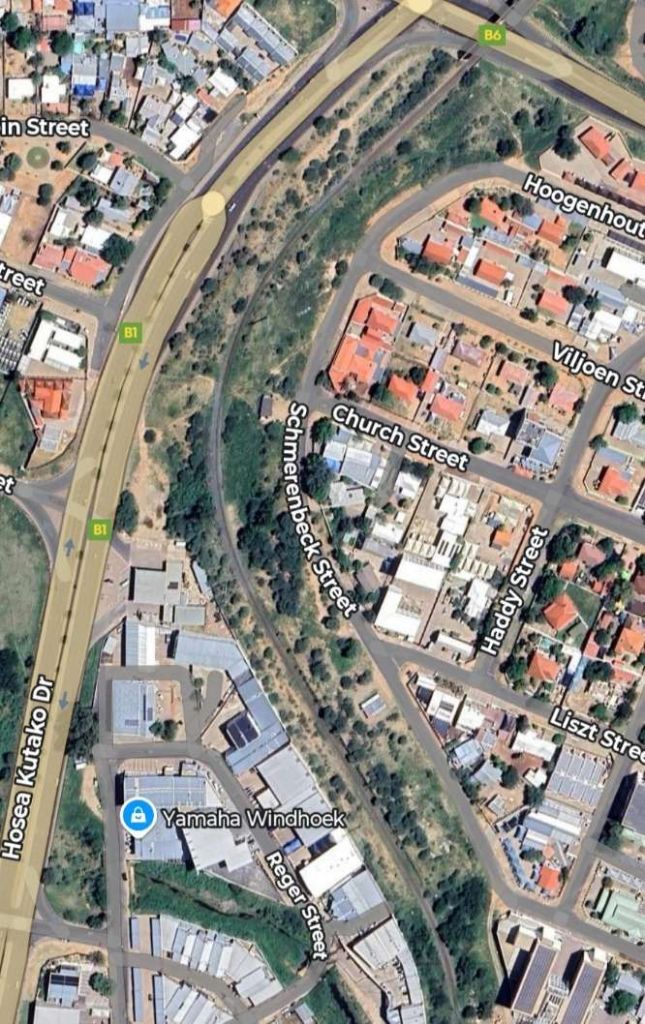
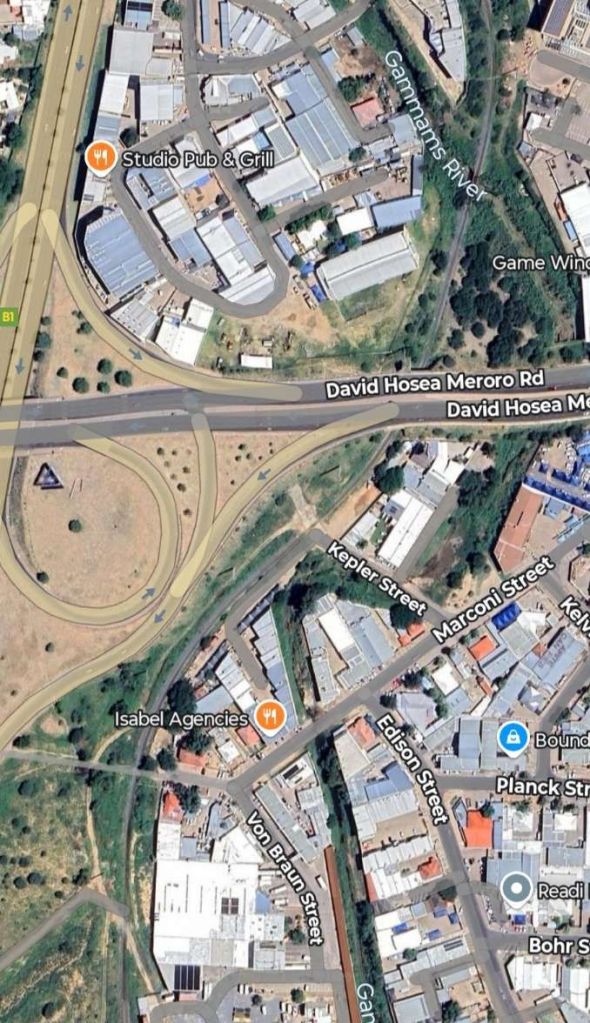
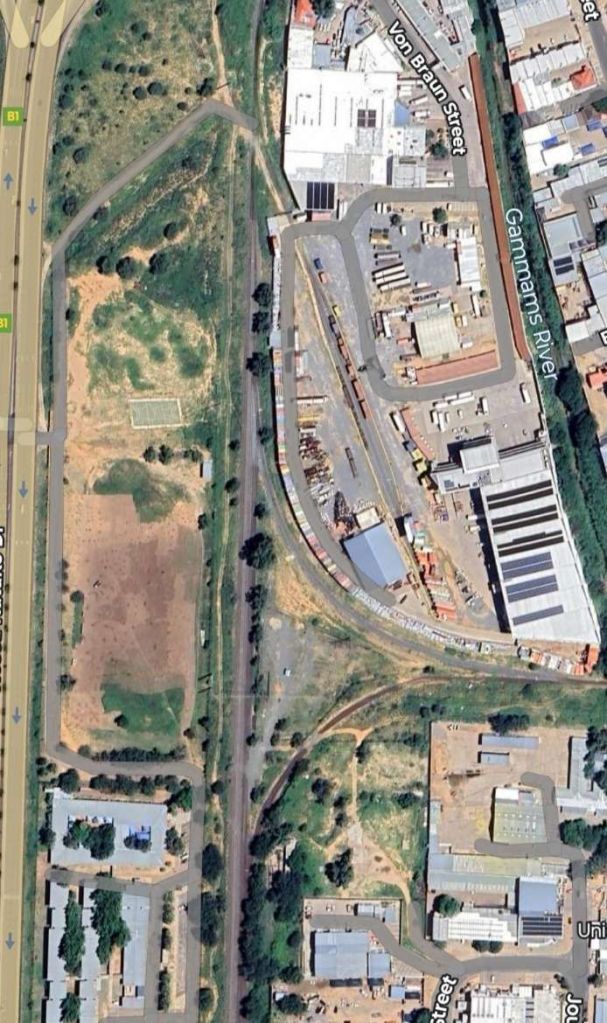
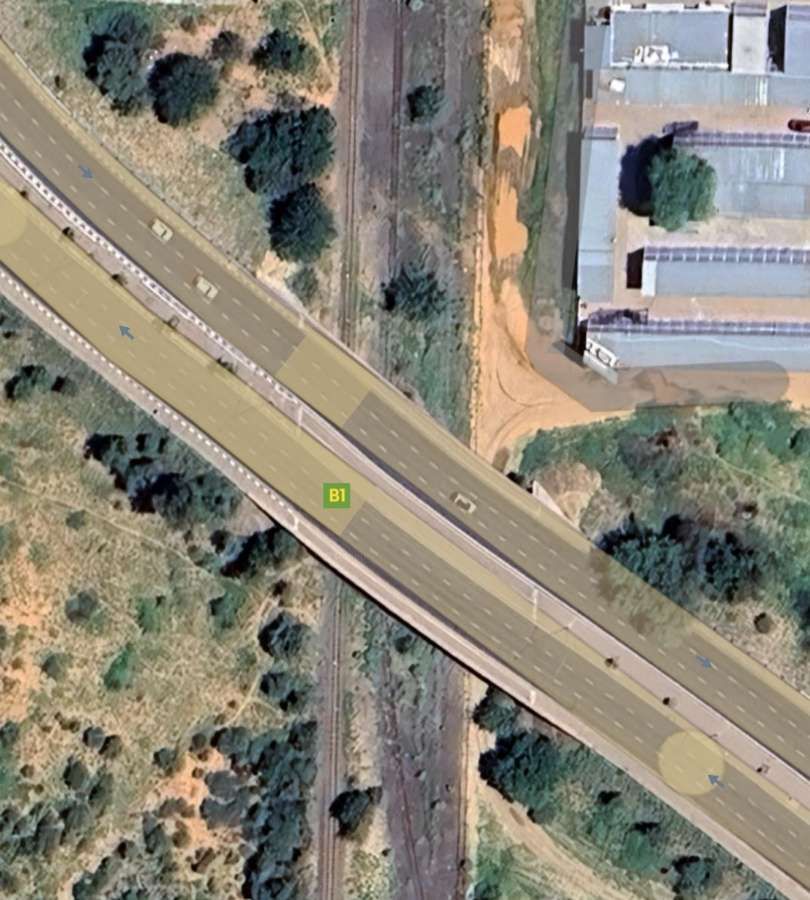
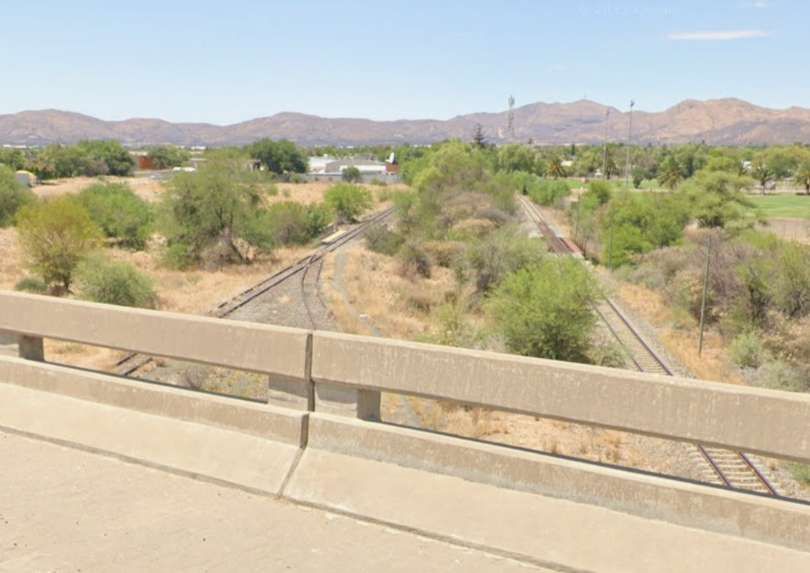
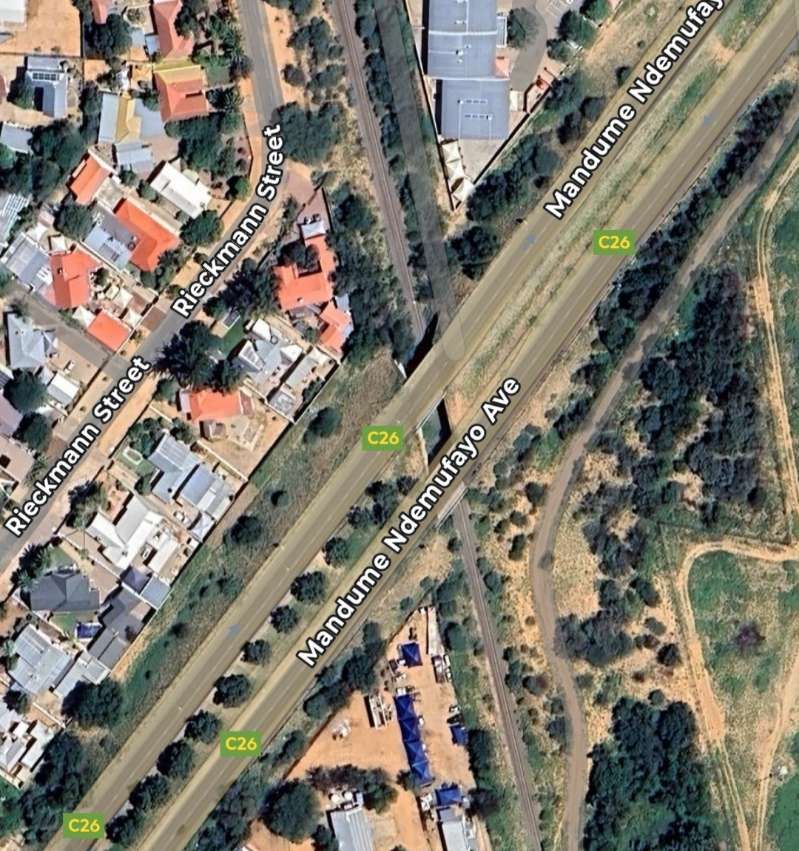
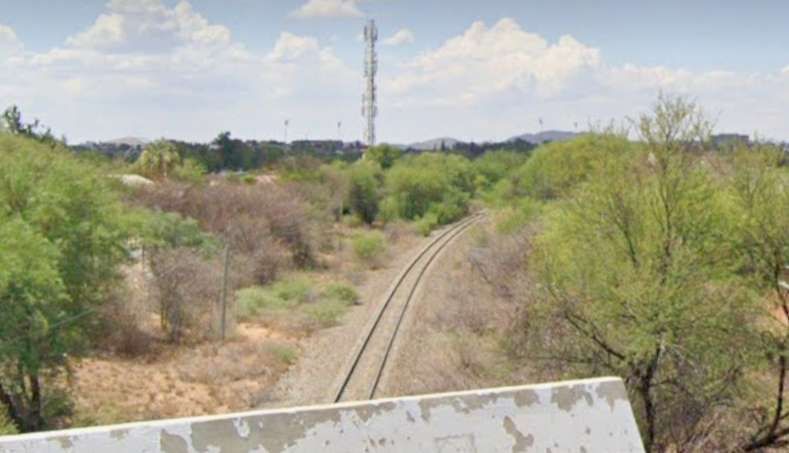
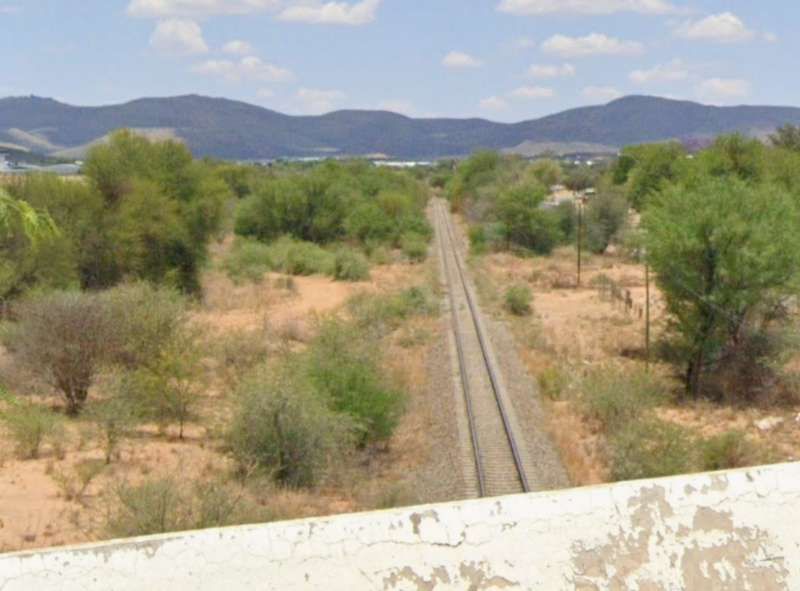
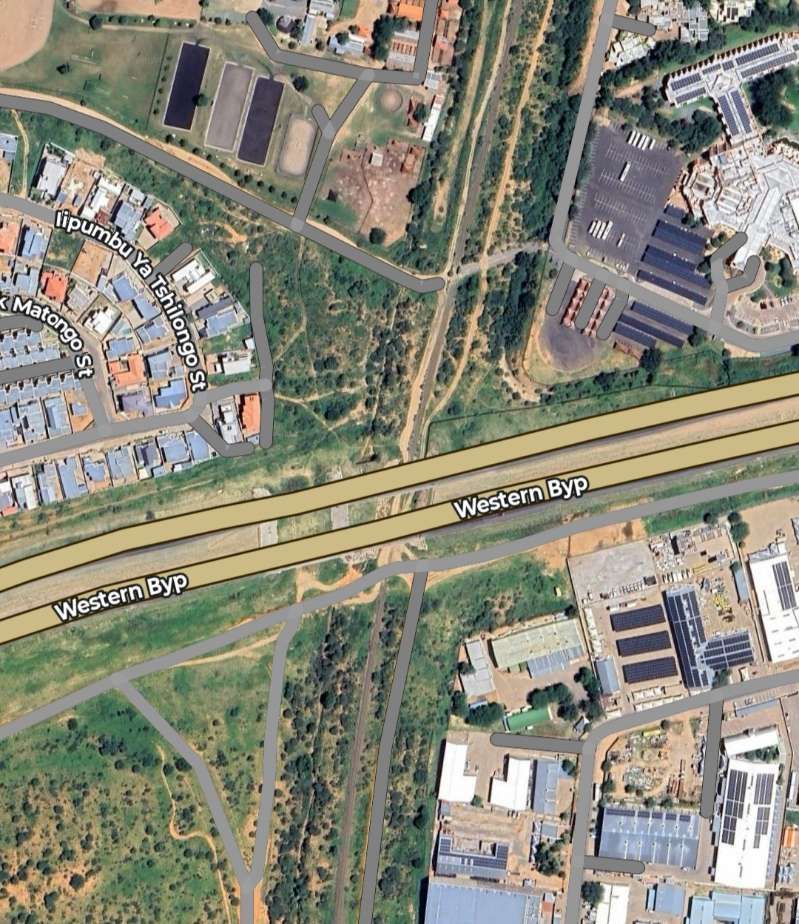
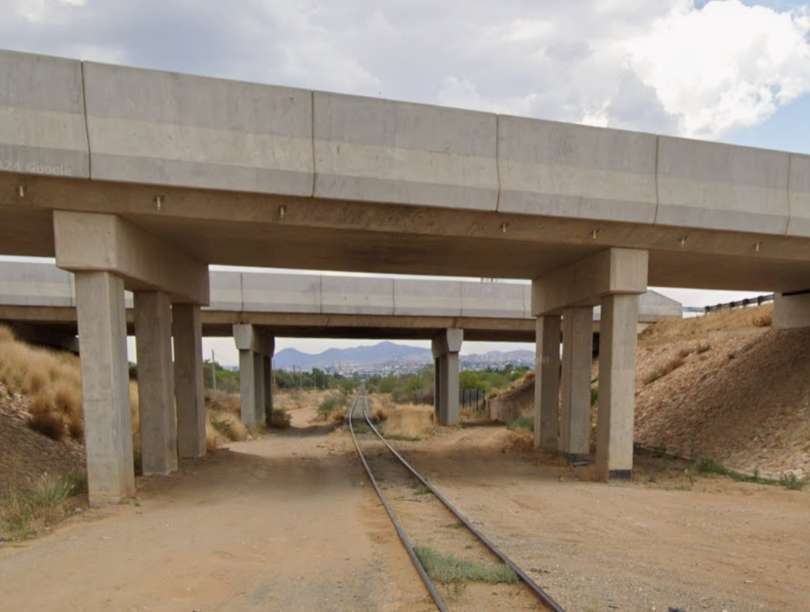
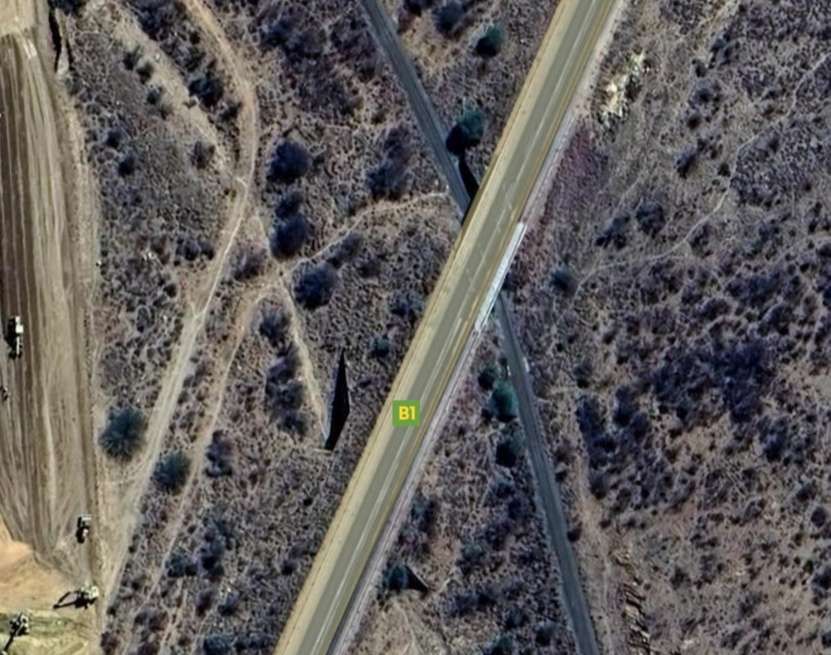
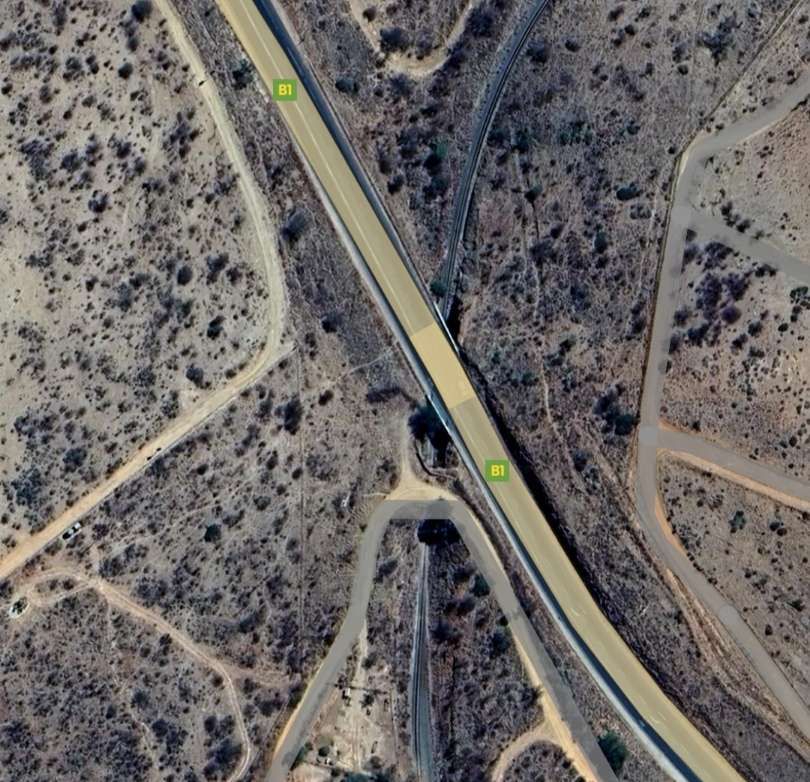
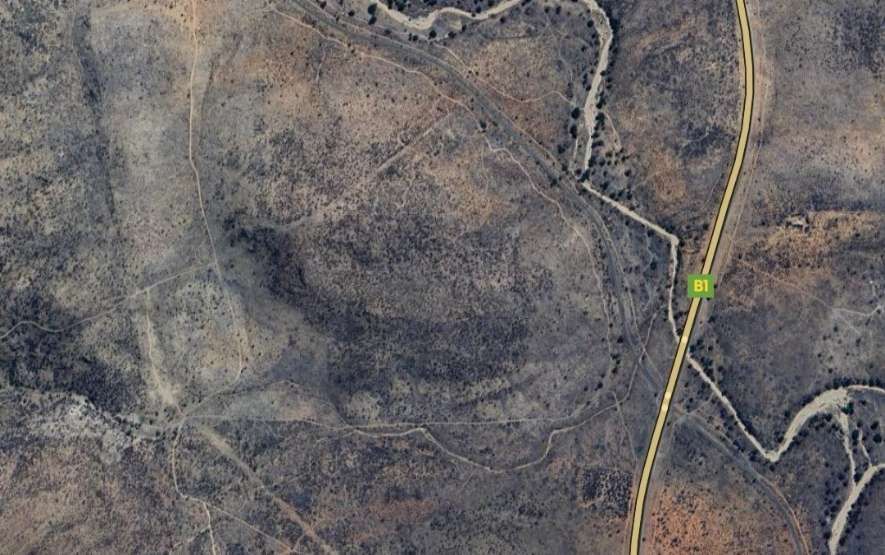
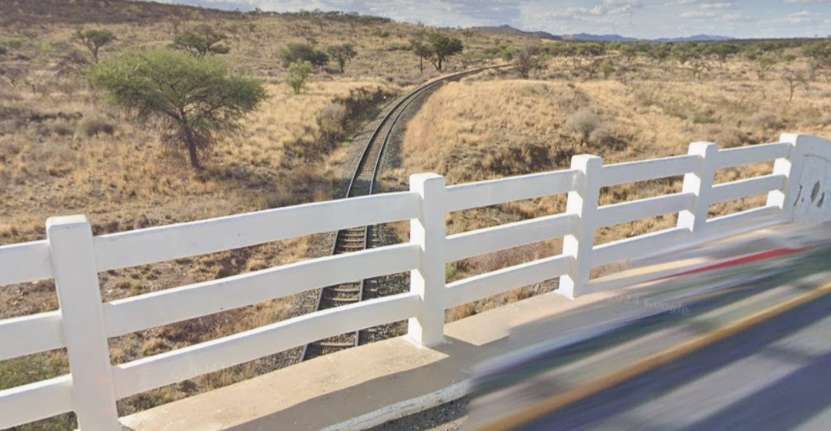
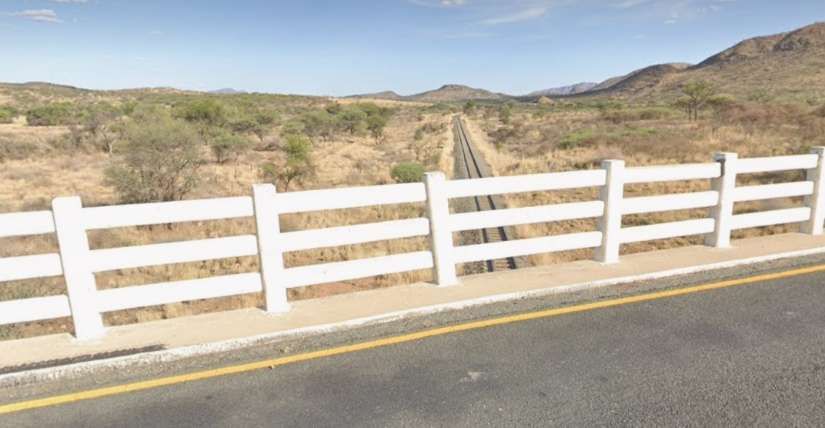
The line to the South of the B6 curves round the residential area of Schmerenbeck Street. [Google Maps, June 2025]The line then crosses the Gammams River and under David Hosea Meroro Road. [Google Maps, June 2025]The triangular junction visible in this image gives access to the branch line to Gobabis. [Google Maps, June 2025]The line then passes under the B1. [Google Maps, June 2025]Looking South from the B1. [Google Streetview, 2024]Then the line(s) cross the Arebbusch River. [Google Maps, June 2025]The next road to bridge the line is the C26. [Google Maps, June 2025]The view from Mandume Ndemufayo Avenue (C26) back towards Windhoek Railway Station. [Google Streetview, 2024]The view South from Mandume Ndemufayo Avenue towards the hills. [Google Streetview, 2024]The line passes under the city’s Western Bypass. [Google Maps, June 2025]This view looks North-northeast under the Western Bypass towards Windhoek Railway Station. [Google Streetview, 2024]Looking South from the Western Bypass. [Google Streetview, 2024]The line passes once again under the B1 as the hills draw closer. [Google Maps, June 2025]The view South-southeast along the line from the bridge carrying the B1. [Google Streetview, 2022]
The line continues to wind its way into the hills passing under the B1 once again.
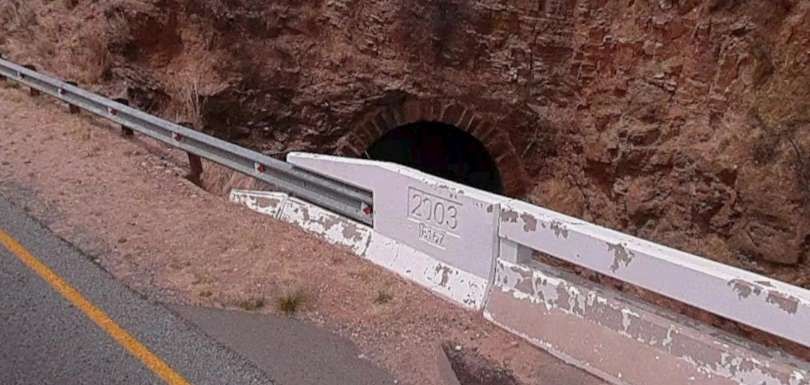
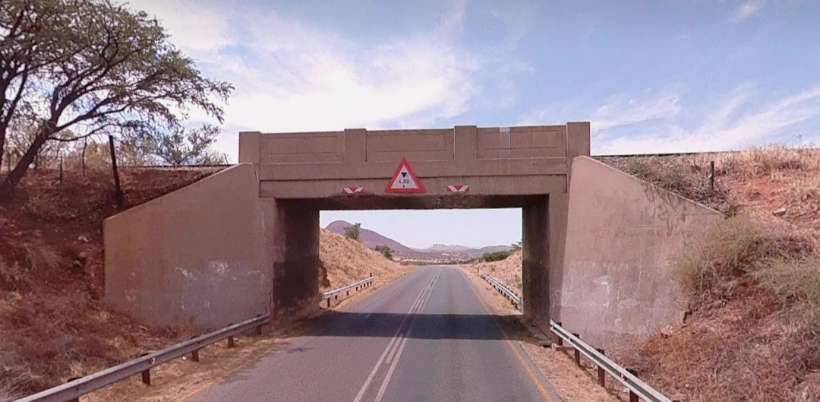
The line has deviated away from Birmingham as it finds its own way into the hills. It returns to pass under the modern road again. [Google Maps, June 2025]The view South from the bridge carrying the B1. The line enters a very short tunnel just to the South of the modern road. [Google Streetview, 2022]The B1 continues to climb as it heads South. The railway takes a different path as it gains height. It crosses over the B1 by means of this bridge. [Google Streetview, 2022]
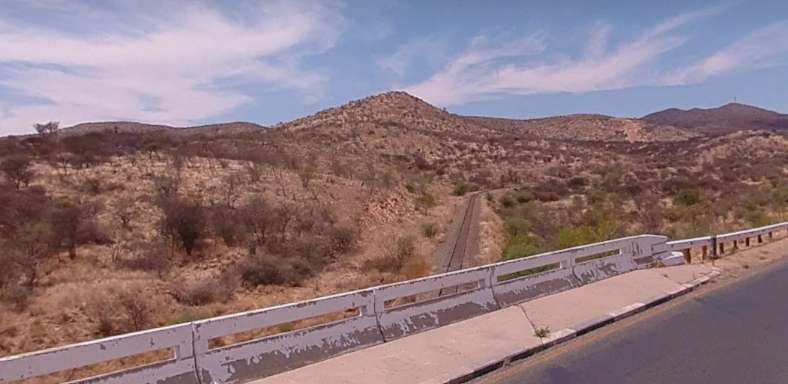
Some kilometres further along the line it again crosses the B1. This time the road bridges the line. …
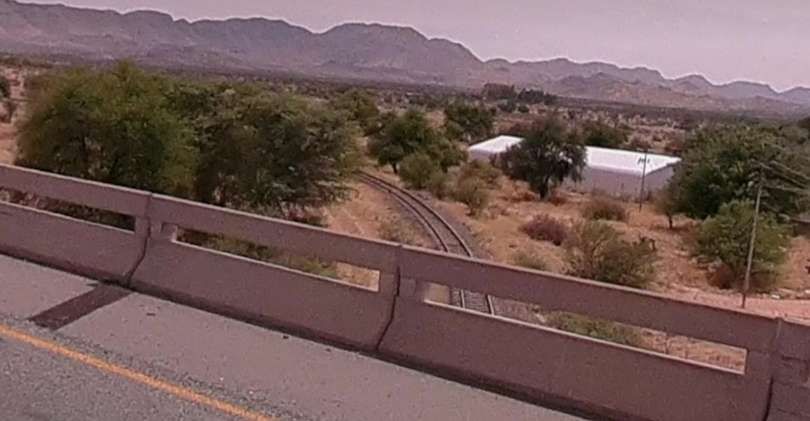
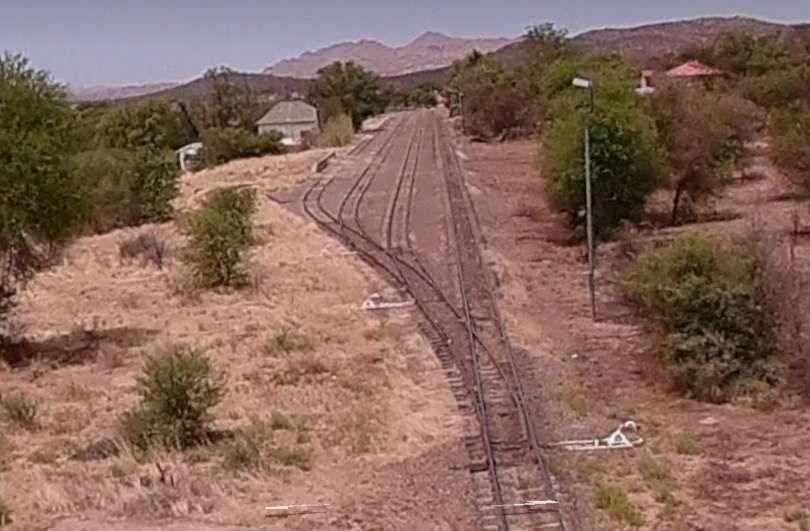
Both road and railway continue their journey South. Here their paths cross once again close to Aris Railway Station. [Google Maps, June 2025]Looking back along the line to the North from the bridge carrying the ,B1 over the line. [Google Streetview, 2022]And from the same bridge looking Southwest into Aris Railway Station. [Google Streetview, 2022]
The community of Aris and its railway station are shown in a YouTube video. …
Aria Railway Station. [9]
South of Aris Railway Station,two tracks run in parallel as far as Aris Quarry.
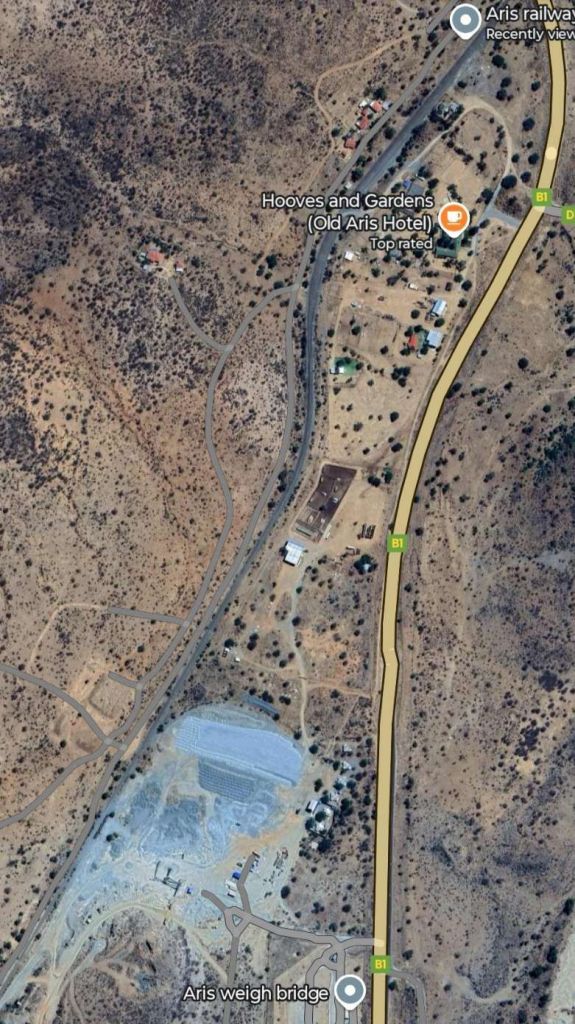
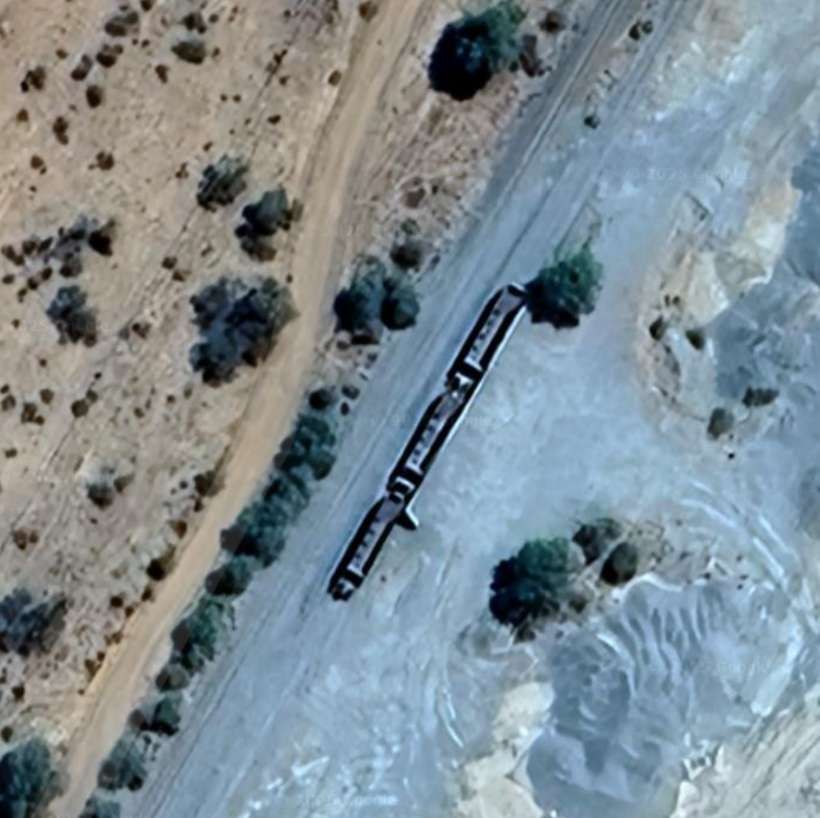
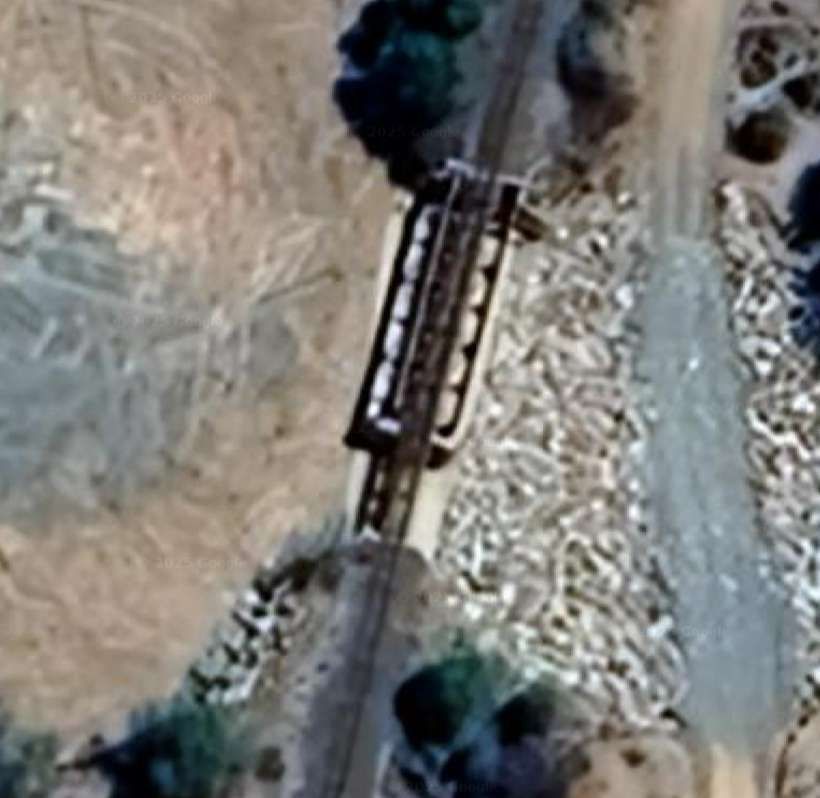
Part of Aris Quarry appears at the bottom left of this satellite image. The other significant part of the Quarry sits to the Southeast on the East side of the B1. [Google Maps, June 2025]At Aris Quarry Google Maps shows three bogie hopper wagons at a short wharf. [Google Maps, June 2025]T
The line continues South towards Rehoboth. …
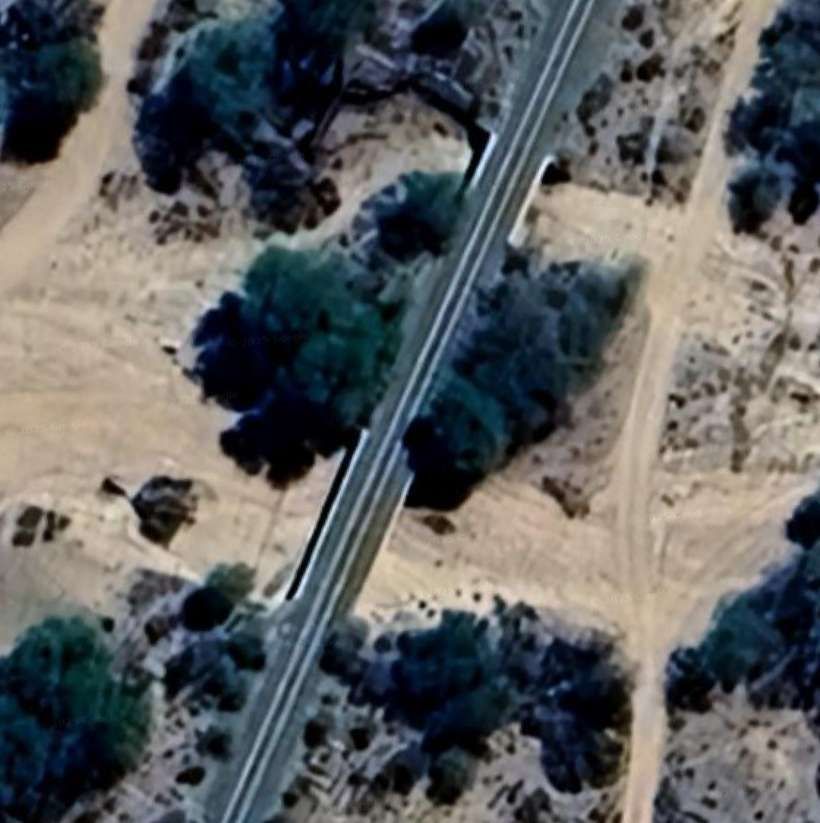
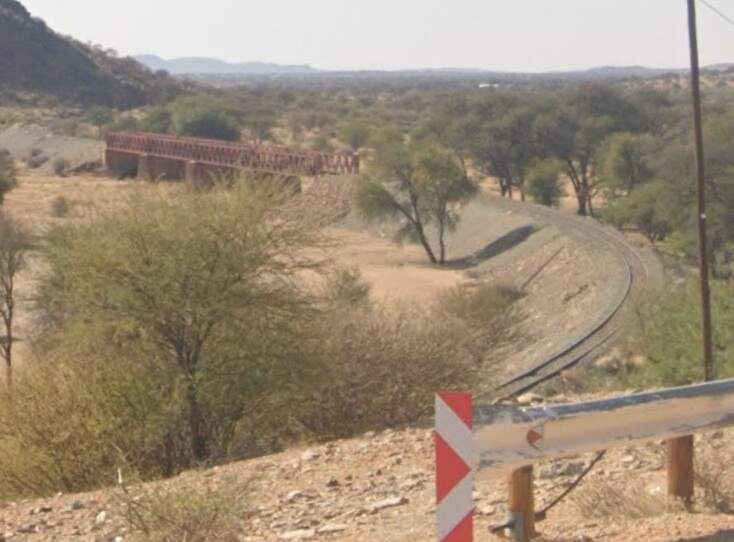
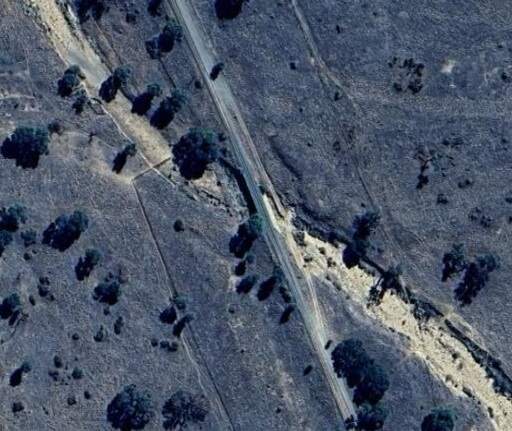
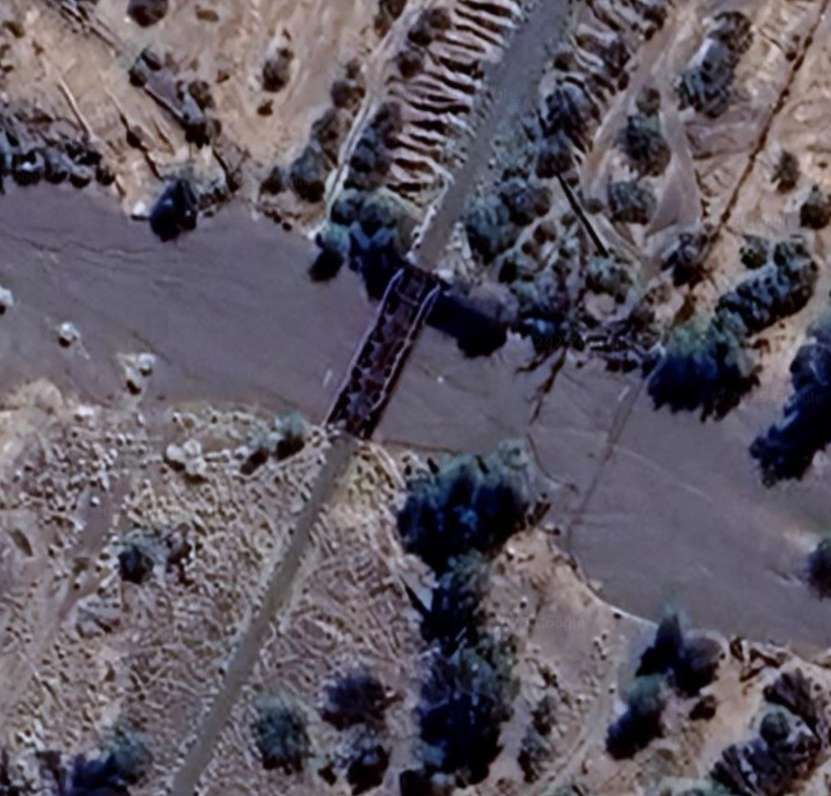
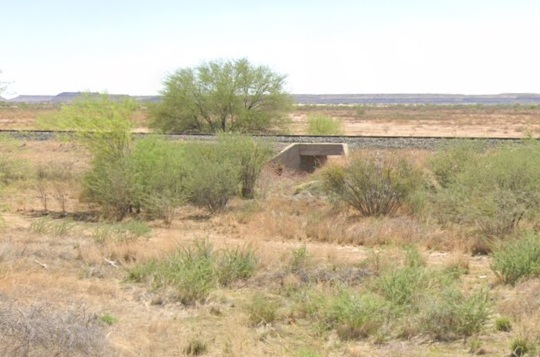
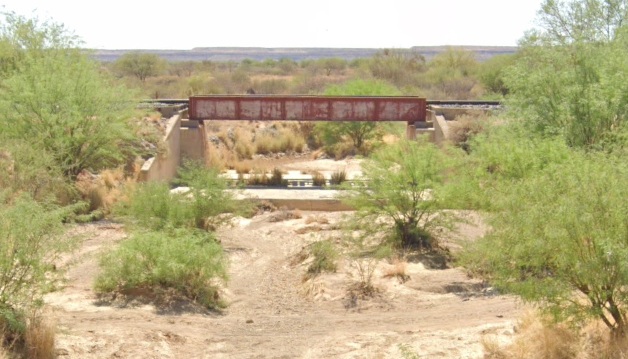
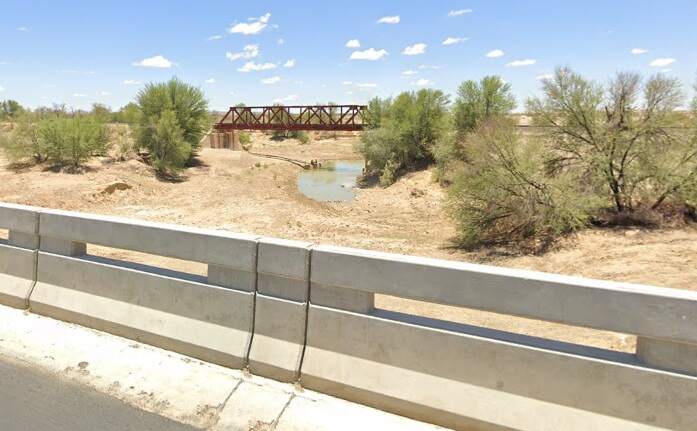
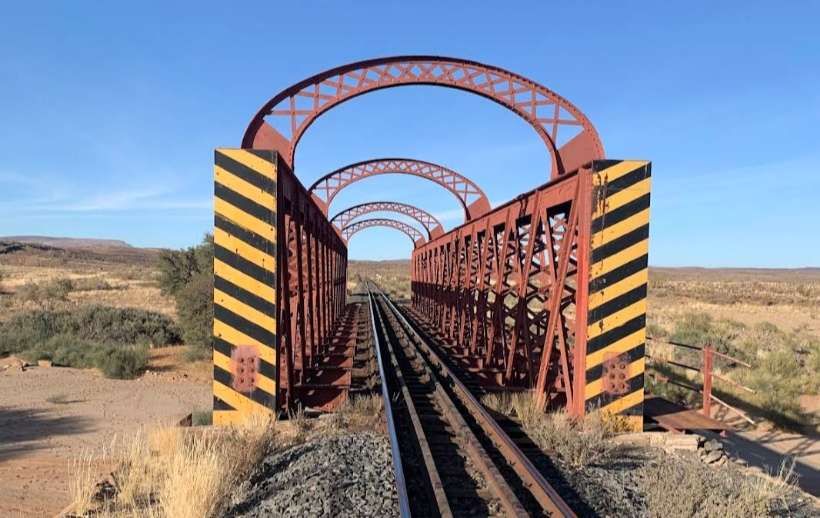
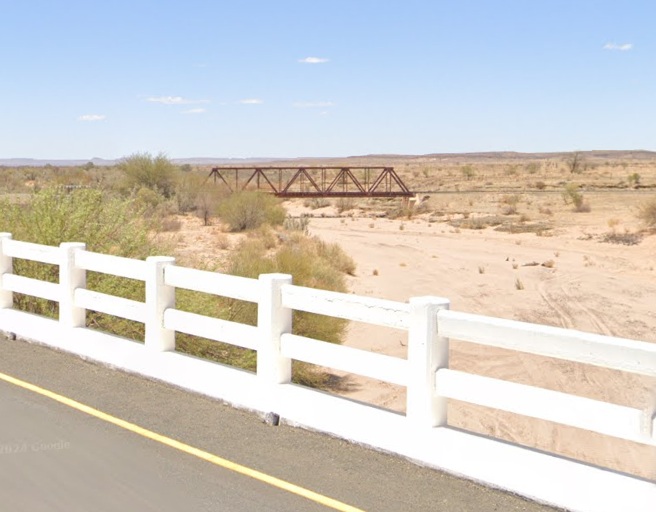
Quarry land sits on the East side of the line at the top of this next satellite image. A dry water ourselves can be seen across the image. It is bridged by the line. [Google Streetview, June 2025]A closer image of the truss girder bridge crossing the dry river bed. [Google Maps, June 2025]
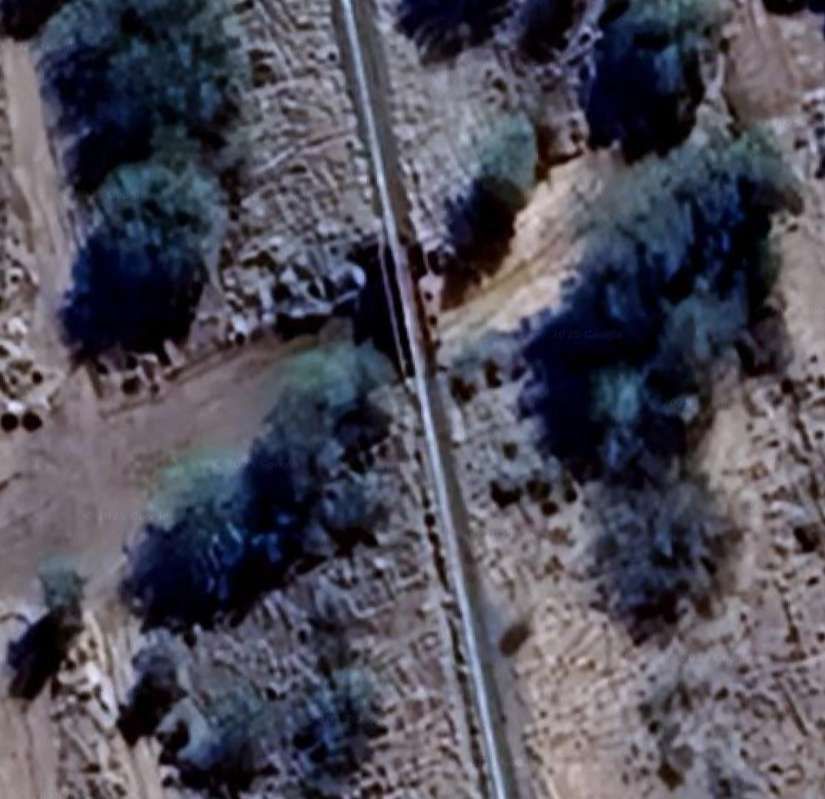
The next two satellite images show the line heading further South. …
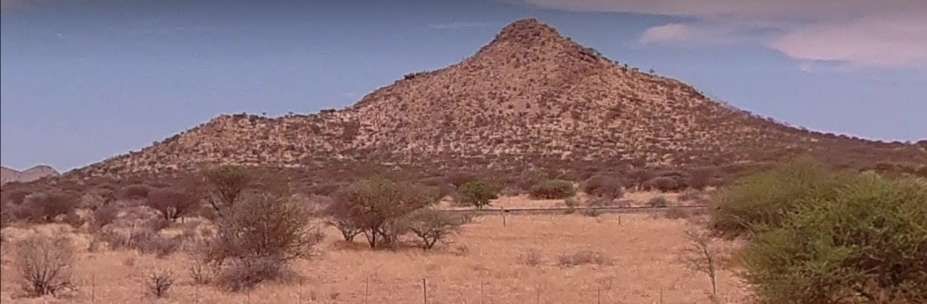
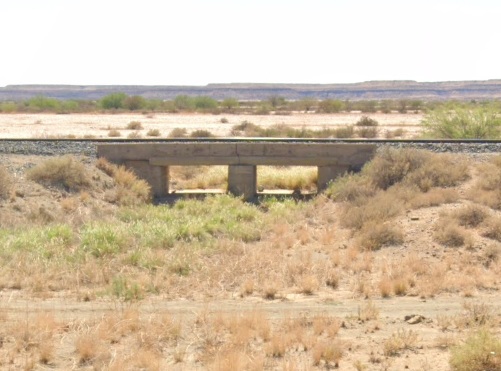
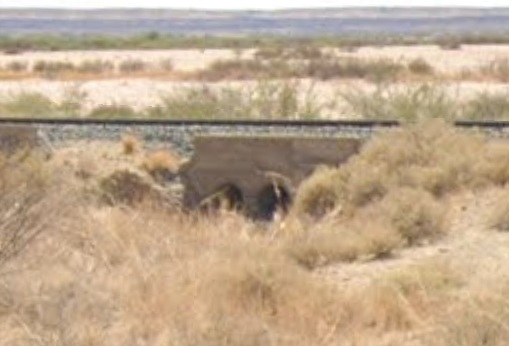
For a short distance the B2 runs close to the railway. The railway then crosses two more dry watercourses. [Google Maps, June 2025]The view from the B1 at the top of the satellite image immediately above looking West. The railway line can be seen between the road and the mountain. [Google Streetview, January 2024]The bridge over the first dry river. [Google Maps, June 2025]The bridge over the second of the two watercourses. [Google Maps, June 2025]
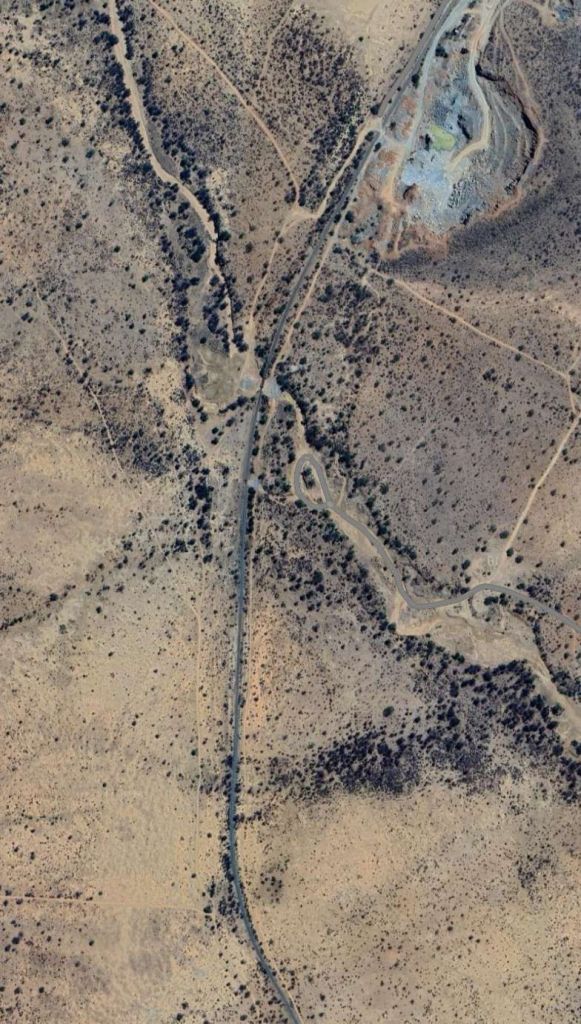
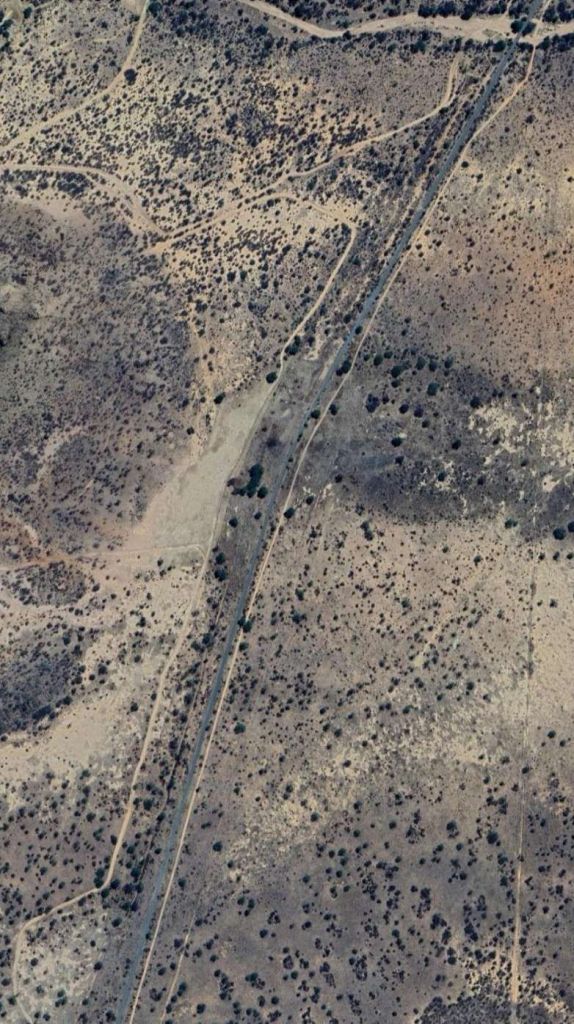
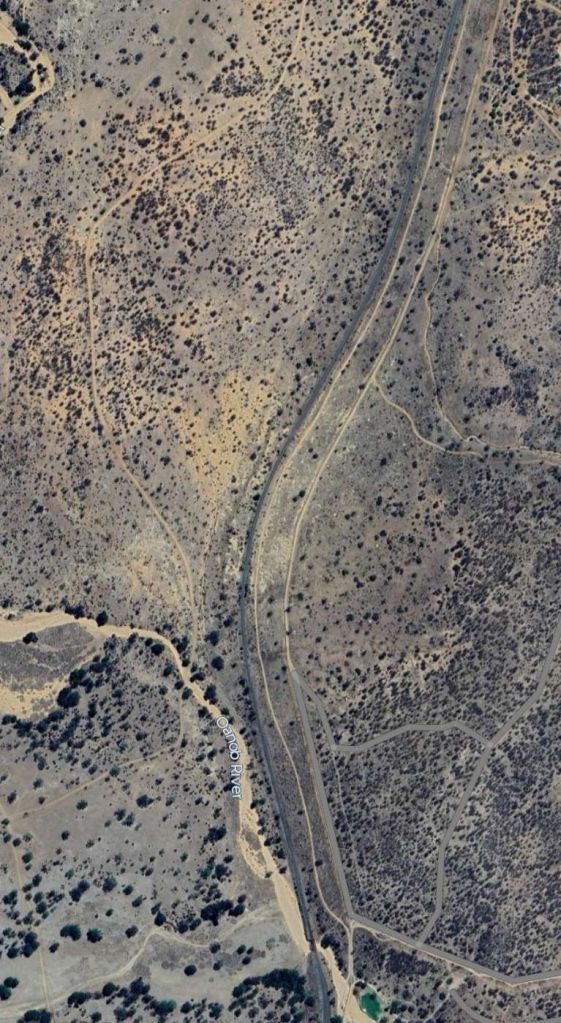
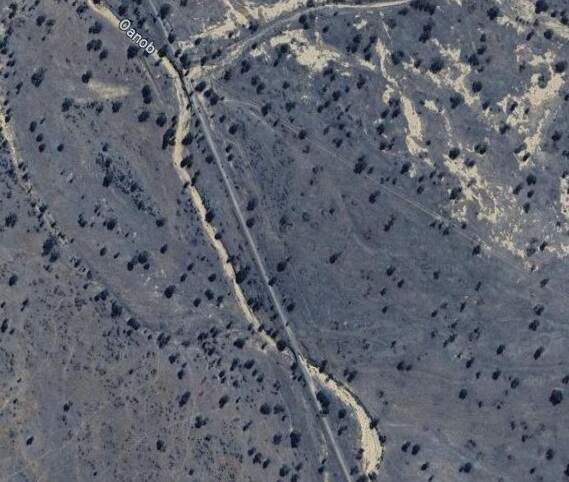
The next three satellite images take the line further South, running on its own course with the B1 away to the East. …
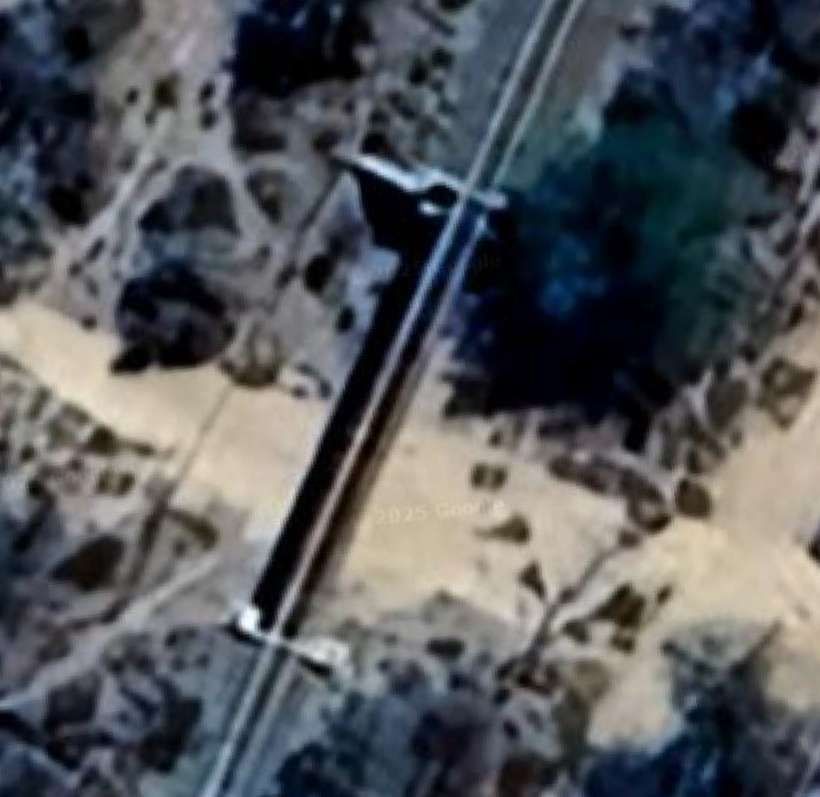
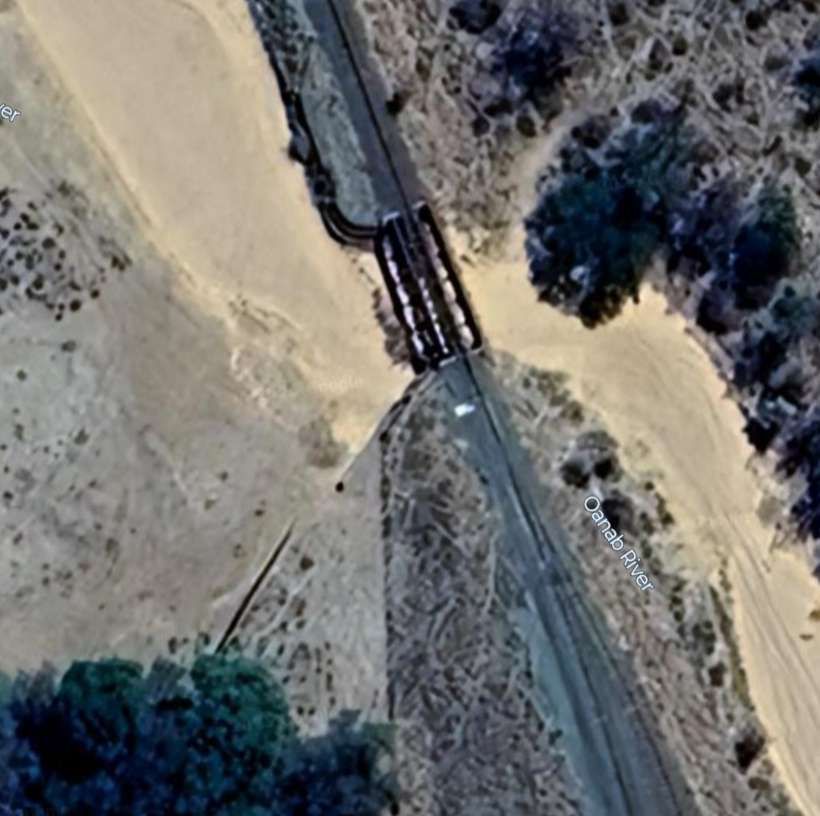
Close to the bottom of this image the railway crosses the Oanob River’s watercourse on a causeway with a short trestle bridgeThe truss girder bridge over the dry watercourse of the Oanab River. [Google Maps, June 2025]
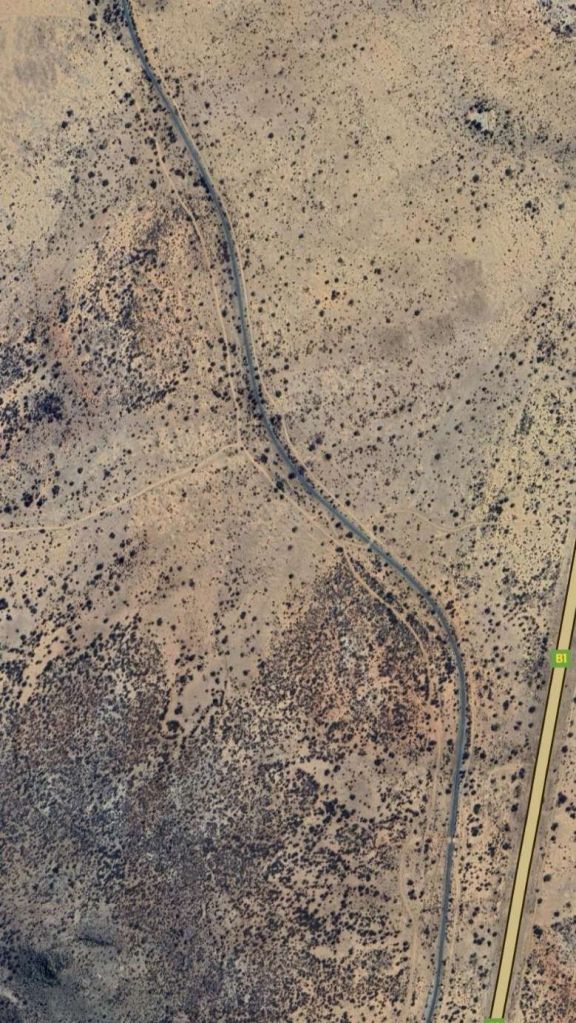
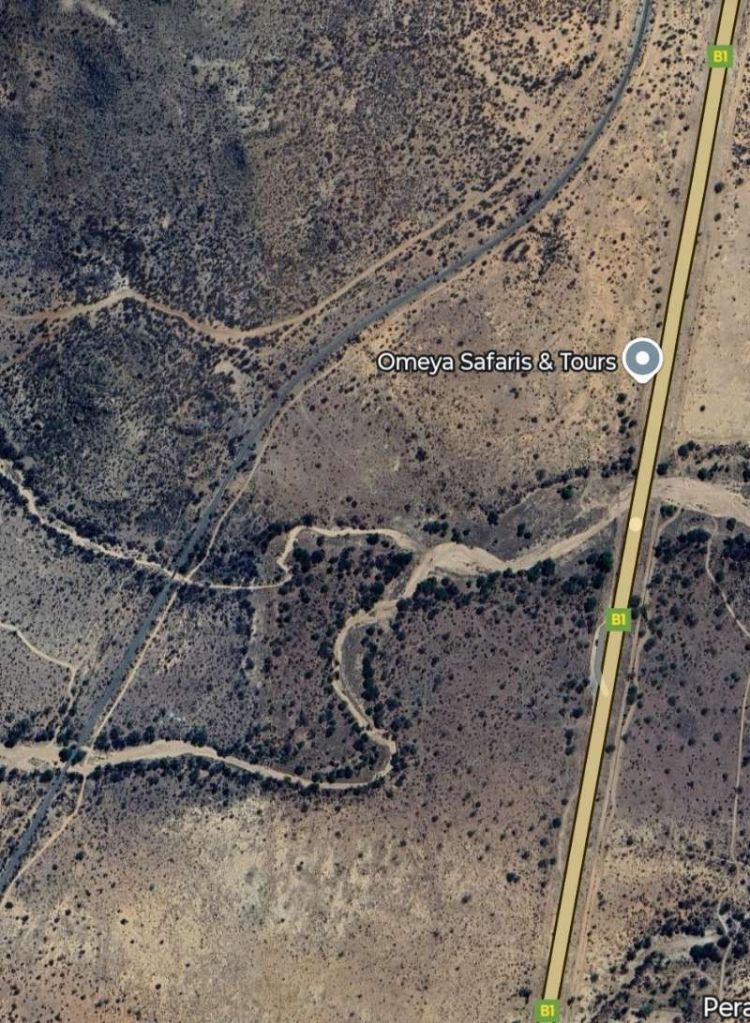
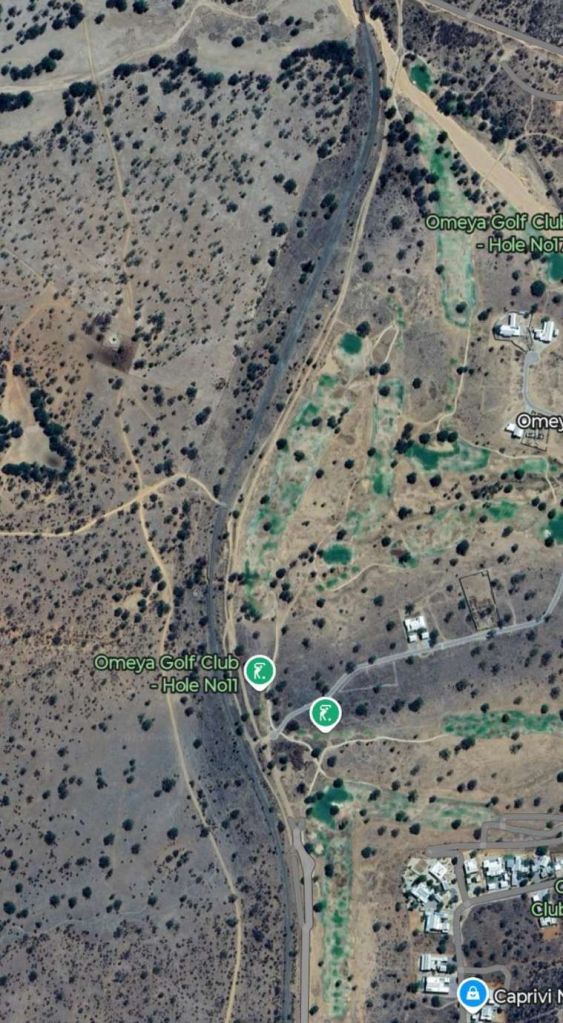
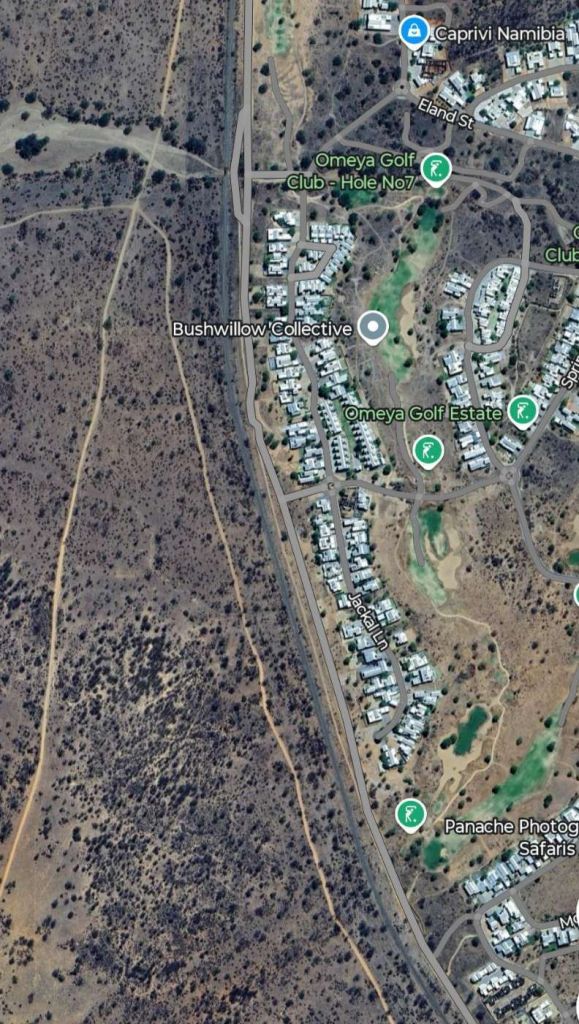
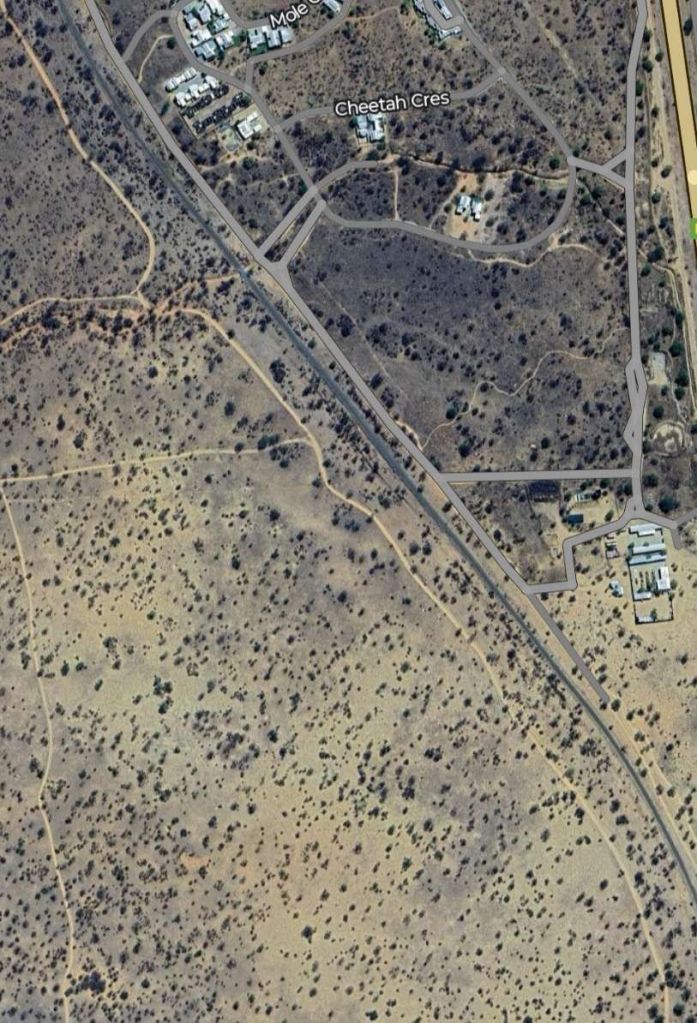
More satellite images take us further South. The first two of these extracts from Google’s satellite imagery shows the line running past the Omeya Golf and Residential Oasis. More about this relatively recent development can be found here [6] and here. [7]. The second of these is a sales video produced to attract investors and house sales.
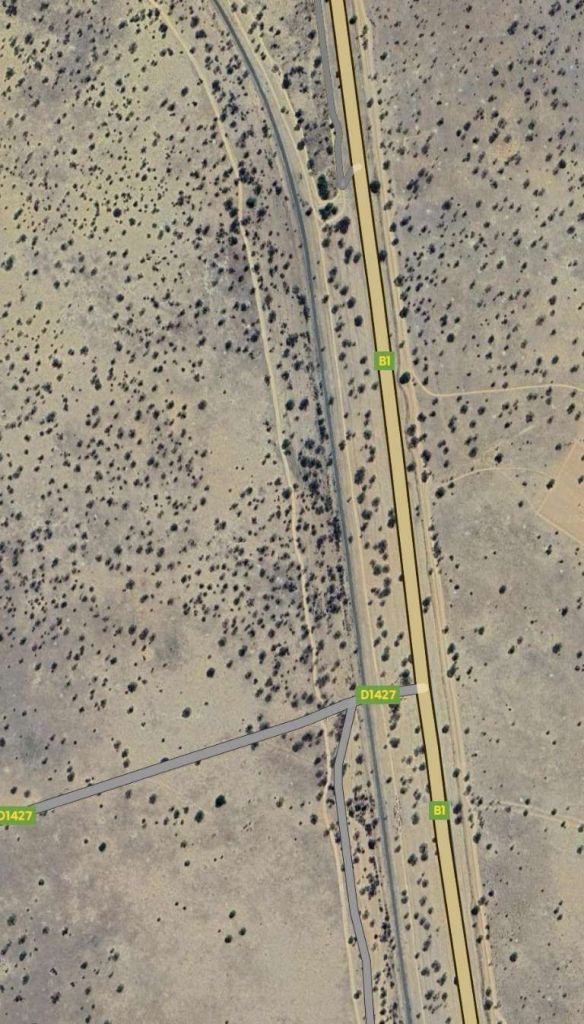
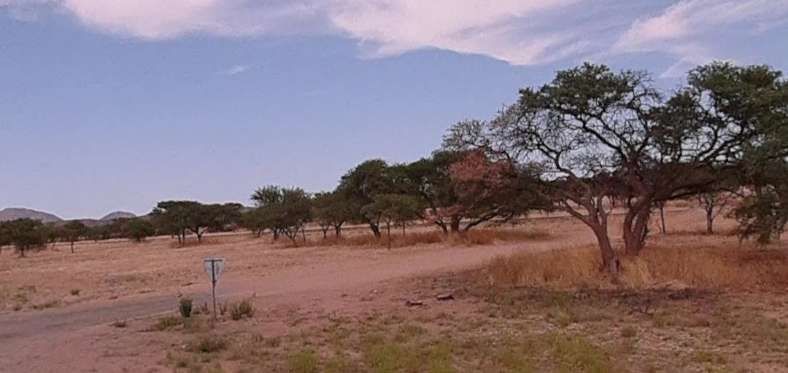
Four satellite images take the line South to a point where it once again runs alongside the B!. [Google Maps, June 2025]Looking Southwest from the B1 just to the North of its junction with the D1427. The railway can be seen in the background behind the closest trees. [Google Streetview, 2022]
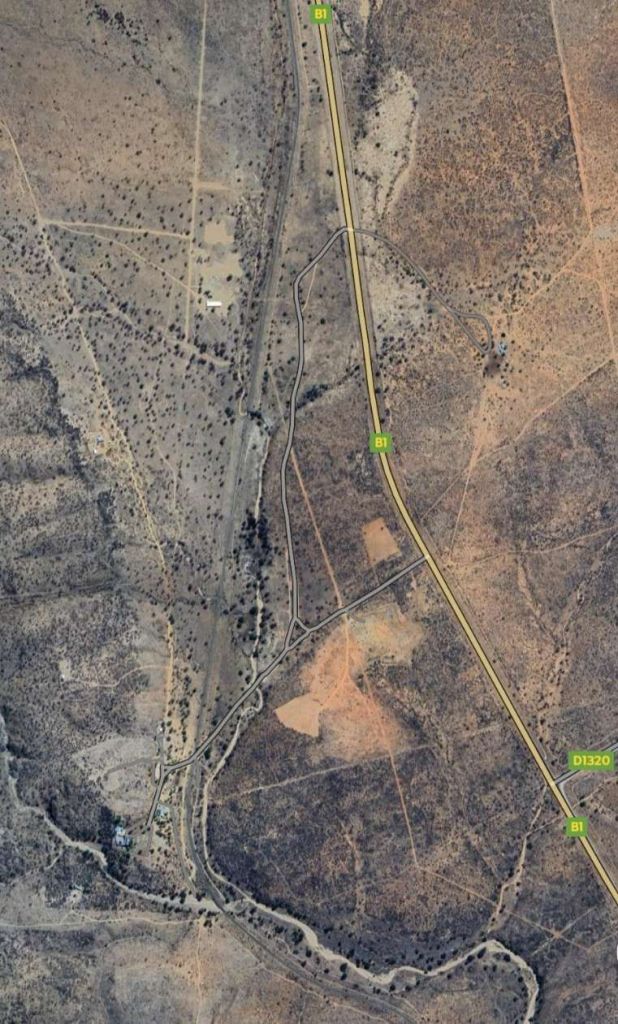
Over the next 3 or 4 kilometres the line and the road run in parallel, with little worthy of note, Before the railway moves away to the West of the road once again. …
The line crosses four dry watercourses before turning towards the East. [Google Maps, June 2025]Running Southeast the line follows the fourth of the watercourses and passes under the B1. [Google Maps, June 2025]Looking North-northwest along the line from the bridge carrying the B1. [Google Streetview, November 2023]Looking Southeast from the same bridge towards Rehoboth. [Google Streetview, November 2023]
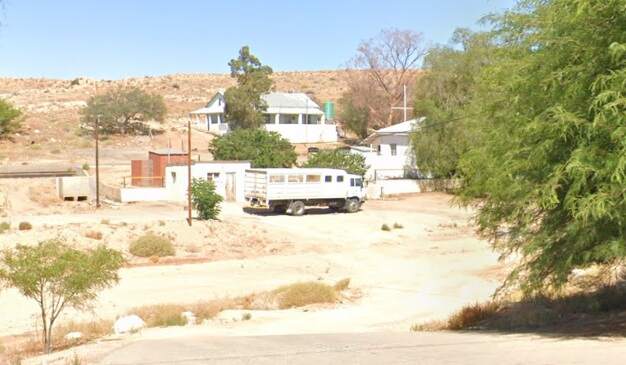
The line wanders its way through the hills to the East of the B1 passing from the Khomas Region of Namibia into the Hardap Region. It runs through a number of small townships close to the Usip River before entering Vogelpan where Rehoboth Railway Station was sited.
Just a short distance to the South of Vogelpan, the railway turns East to cross the Usip River. ….
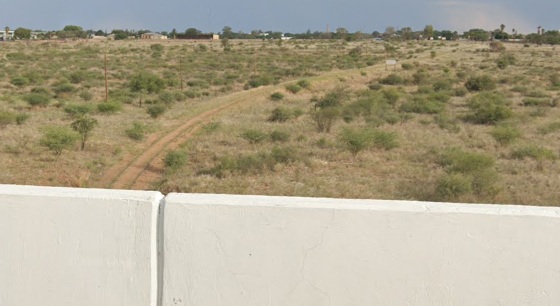
Looking East from the C25, the line can be seen curving away to the East and crossing the channel of the Usio River. [Google Streetview, August 2024]
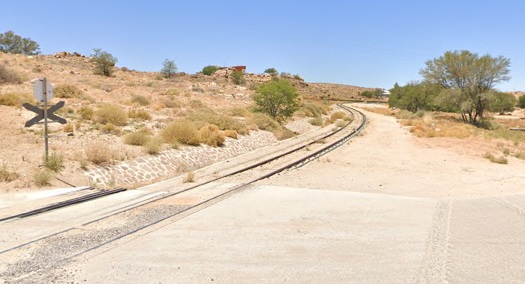
Just to the South of the location of the photograph immediately above, the C25 itself turns East and crosses both the Usip River watercourse and then the railway.
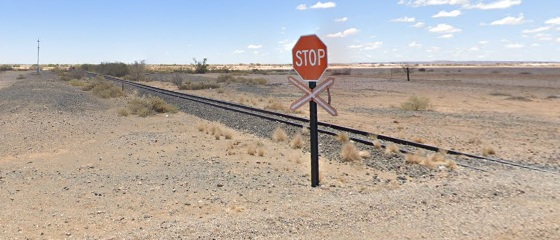
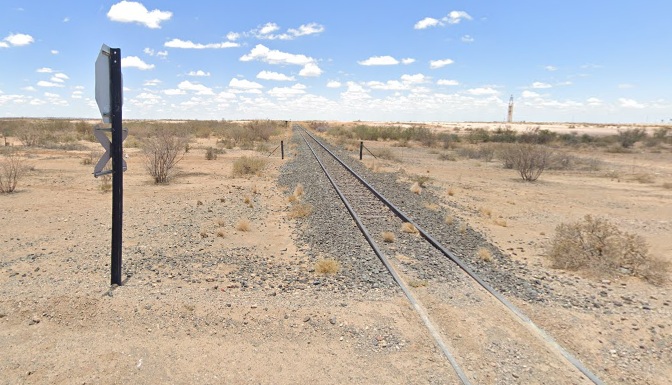
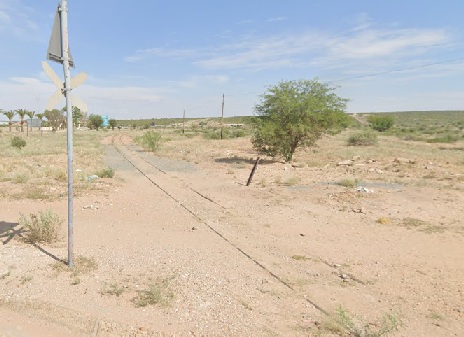
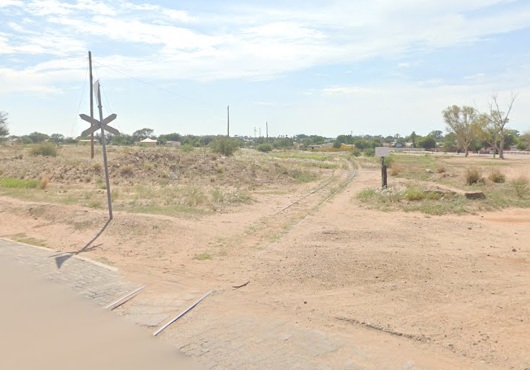
Looking North-northwest from the ungated crossing on the C25, along the railway back towards Vogelpan. [Google Streetview, August 2024]Looking Southwest from the same crossing on the C25, along the railway. [Google Streetview, August 2024]
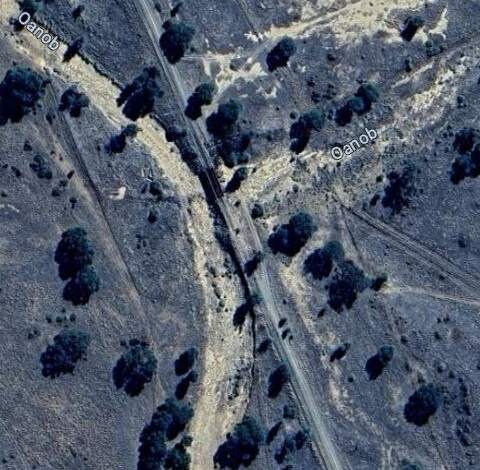
The railway runs down the East side of the River Usip passed its confluence with the Oanob River. It then continues alongside the Oanob (less than 1 kilometre to the East of the river).
The railway then crossed the Oanob River and a tributary in quick succession. [Google Maps, June 2025]
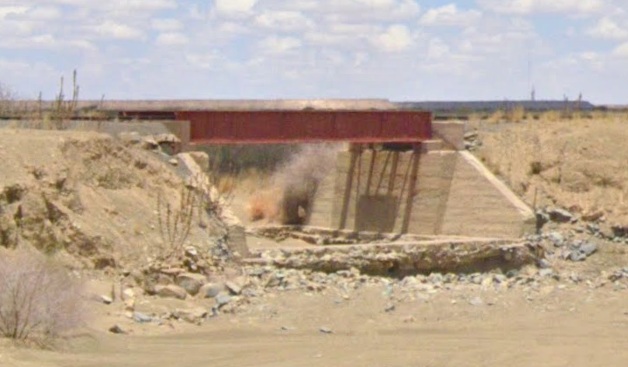
The first bridge (on the left) crosses the Oanob, the second (on the right, crosses the tributary). [Google Maps, June 2025]
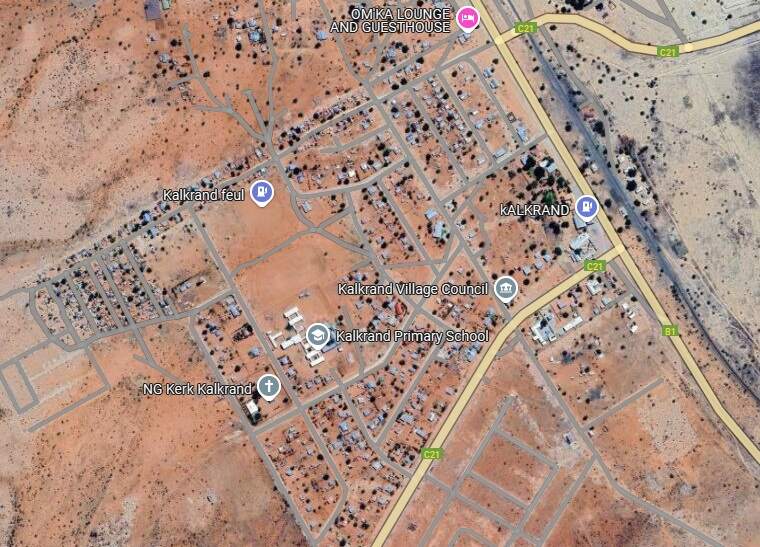
The line then continues, pretty much in a South-southeast direction for some considerable distance with little to remark on. It passes close to Duinevelde on its way South before reaching Kalkrand.
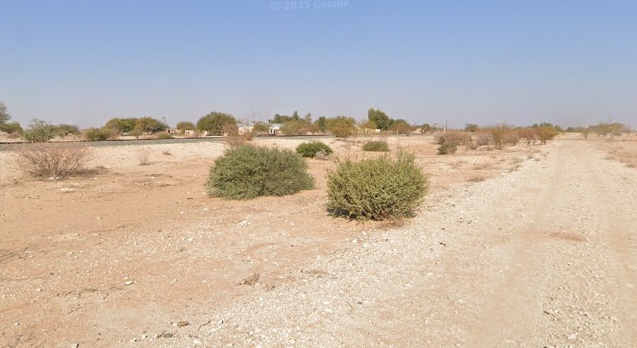
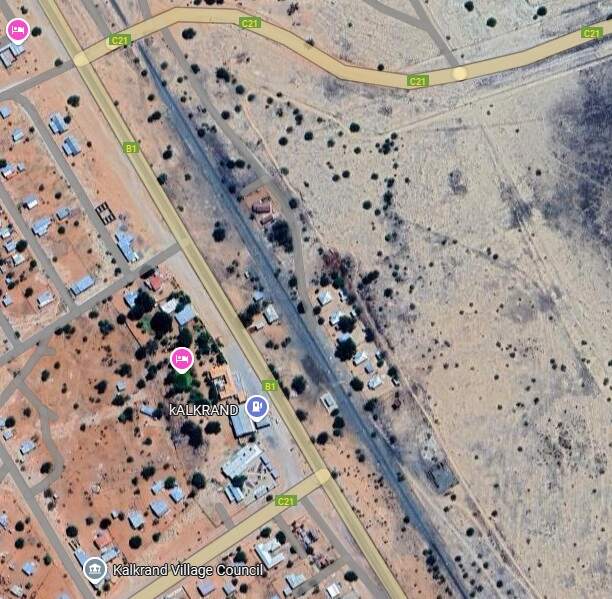
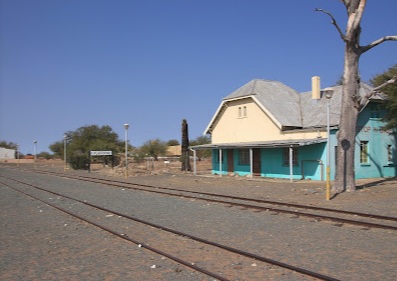
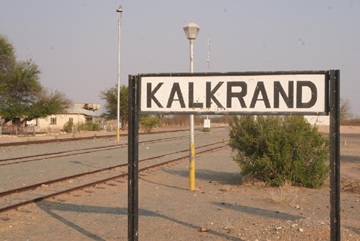
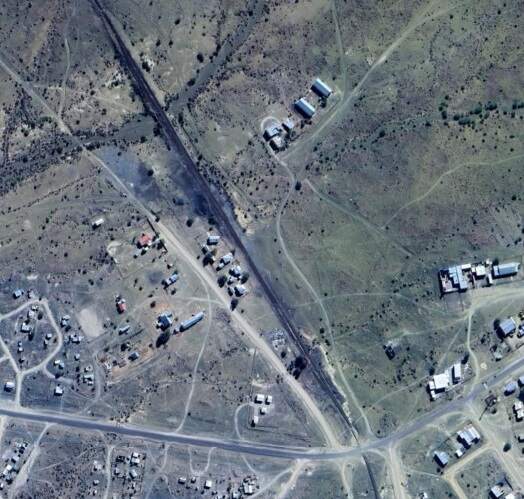
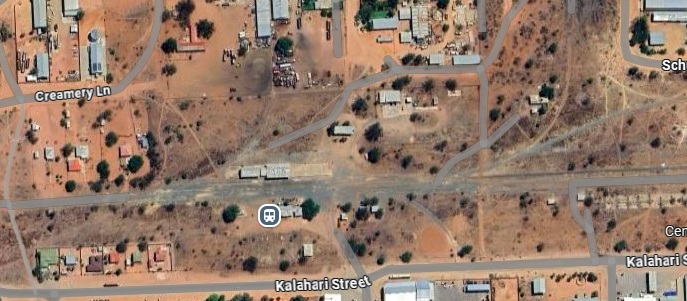
The railway is seen here (from a minor road to the West of the line) approaching Kalkrand from the North. [Google Streetview, August 2024]Kalkrand and its railway Station. [Google Maps, June 2025]Kalkrand Station and passing loop. [Google Maps, June 2025]
Southeast of Kalkrand the line and the B1 run in parallel. …
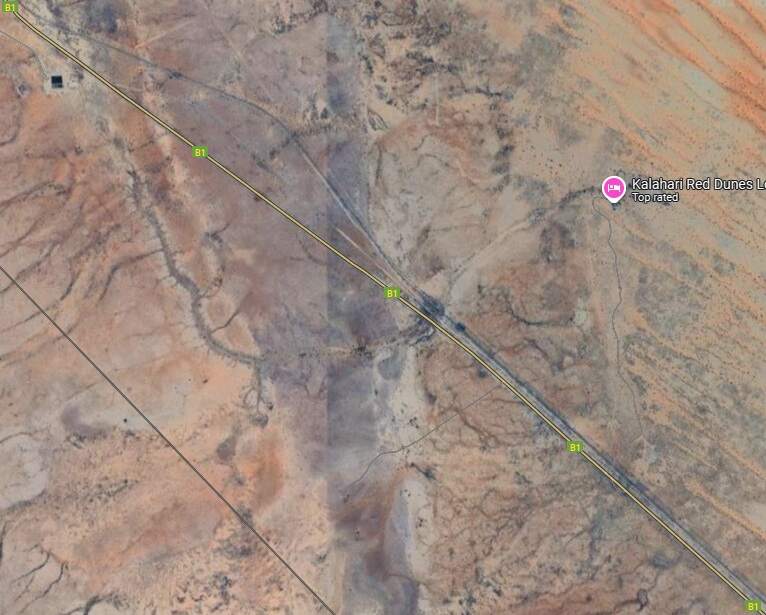
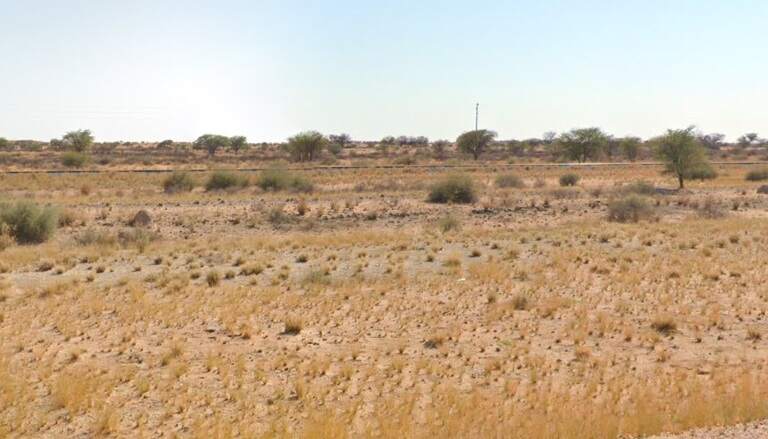
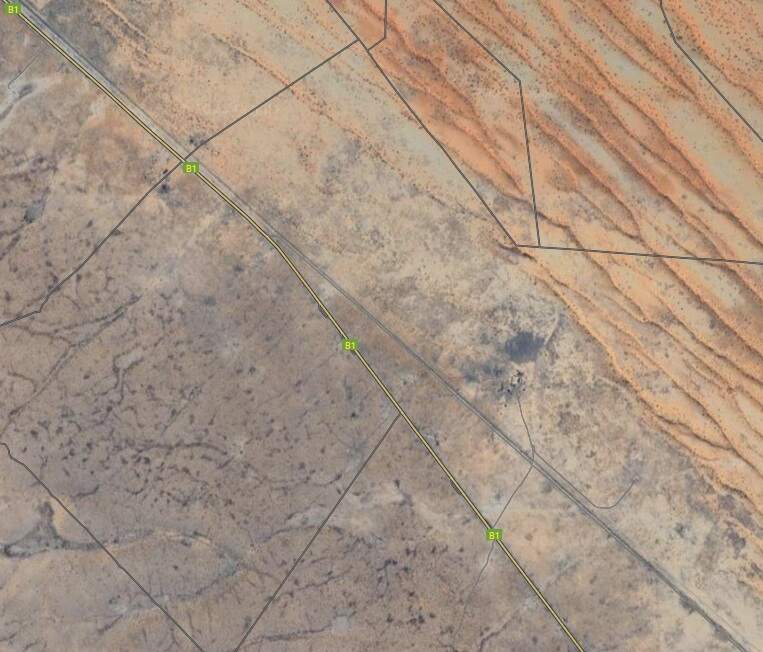
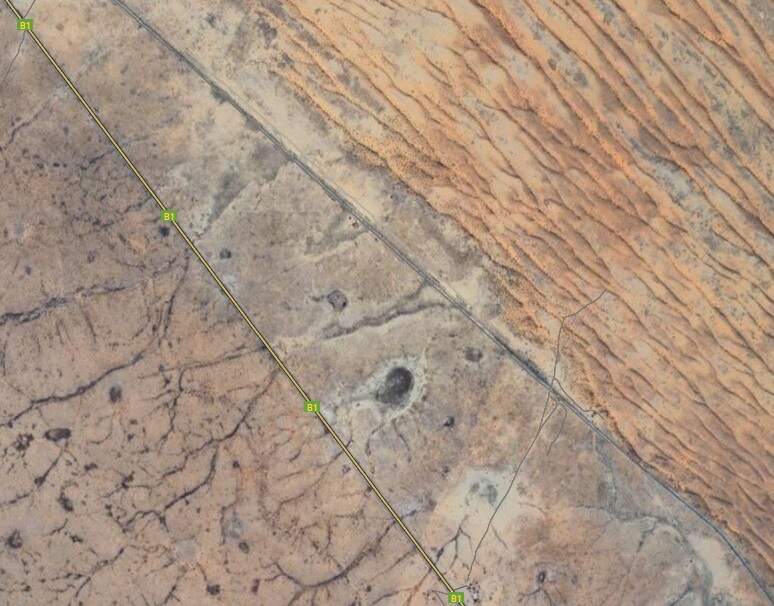
Road and rail together head Southeast. [Google Maps, June 2025]Looking East from the B1, the railway can be seen on a parallel course. [Google Streetview, December 2023]The dunes of the Kalahari desert appear in the top right of this satellite image. [Google Maps, June 2025]The railway flirts with the edge of the dunes. [Google Maps, June 2025]
The line continues in a generally Southeasterly direction along the edge of the Kalahari Desert before beginning to swing round to the South and heading into rougher terrain where its route is dictated by the contours. …
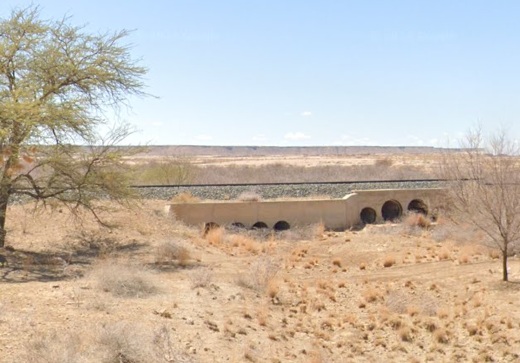
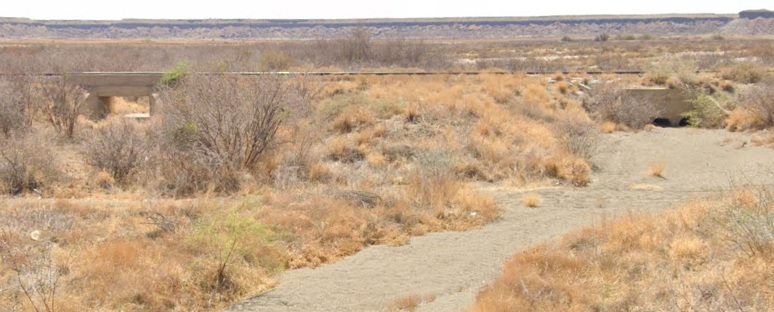
Sidings some distance to the South of Kalkrand. [Google Maps, June 2025]These two structures carry the line over watercourses in the hills [Google Maps, June 2025]
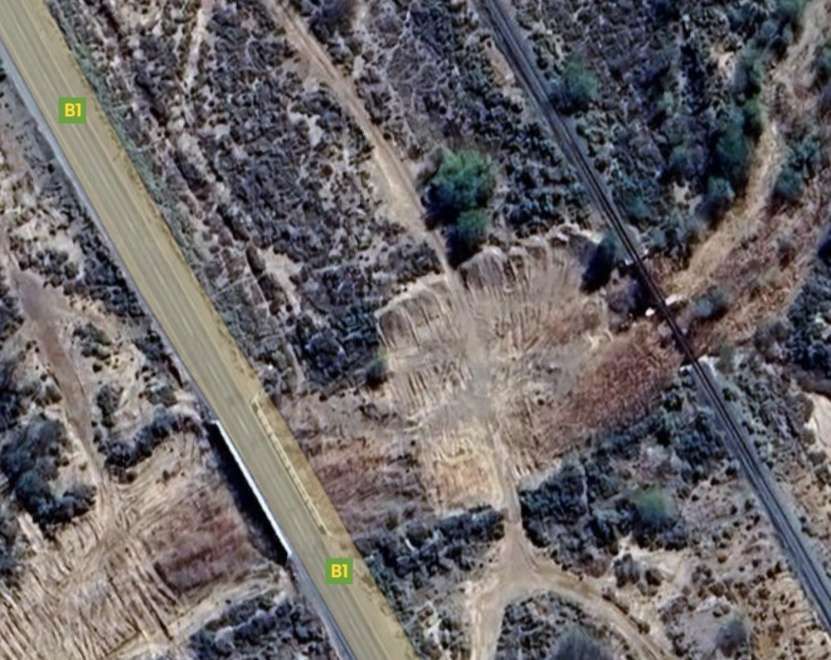
Further South and again on flatter terrain the line passes under the C20. …
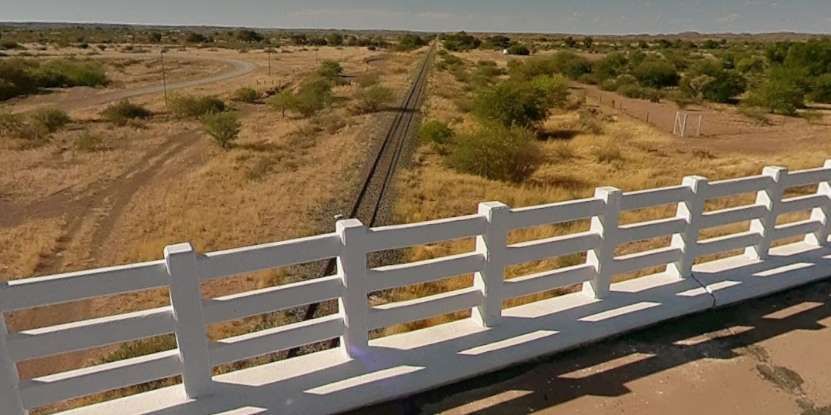
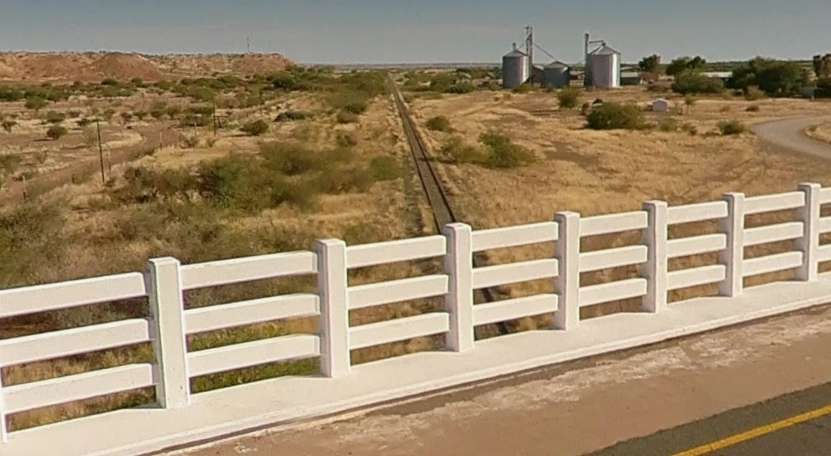
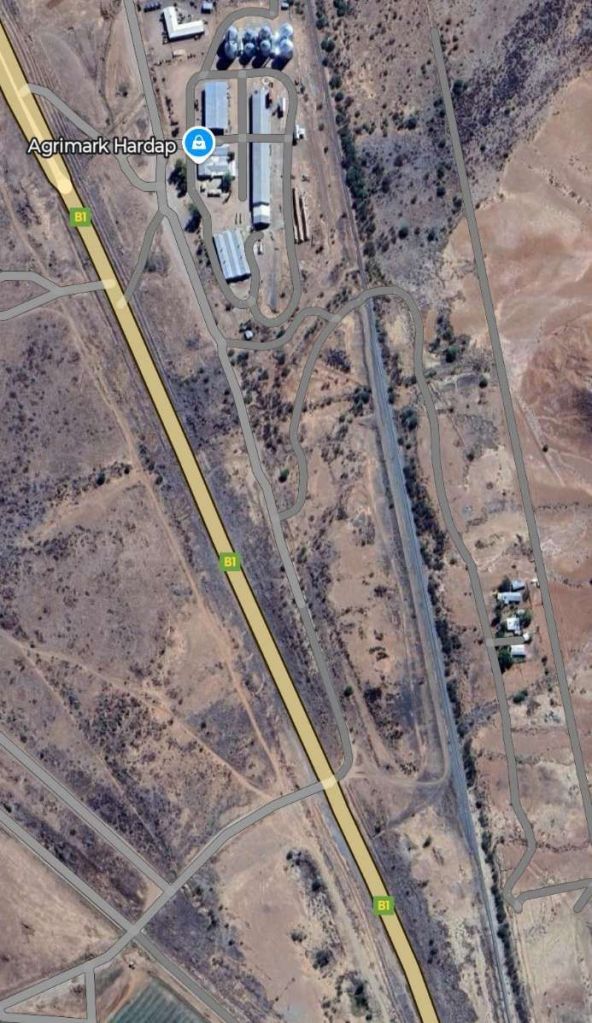
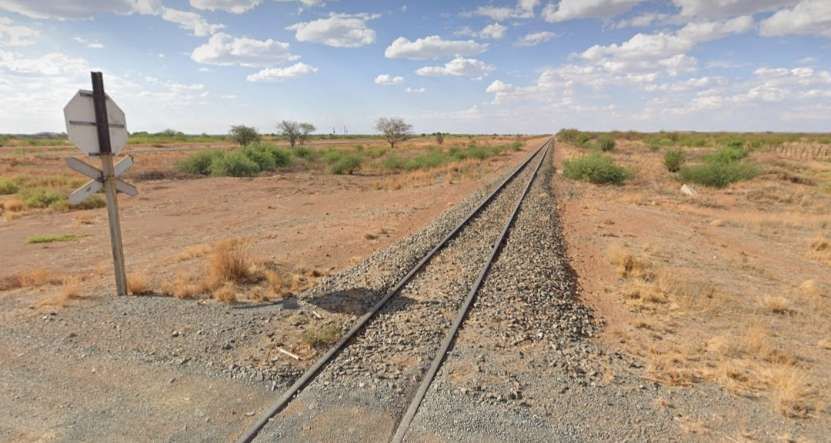
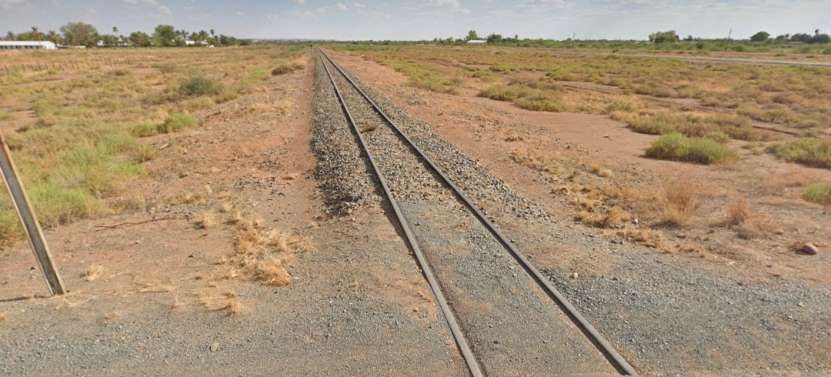
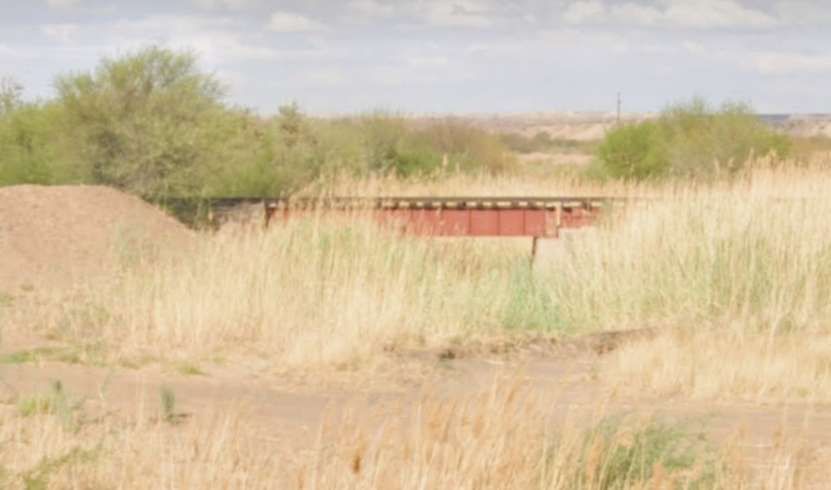
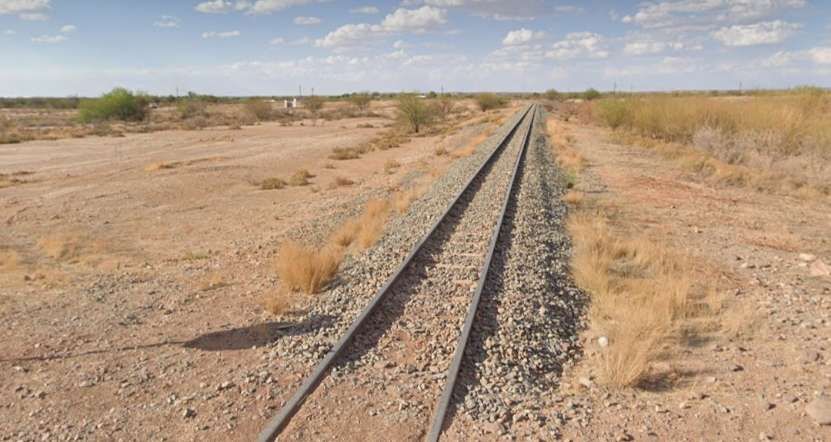
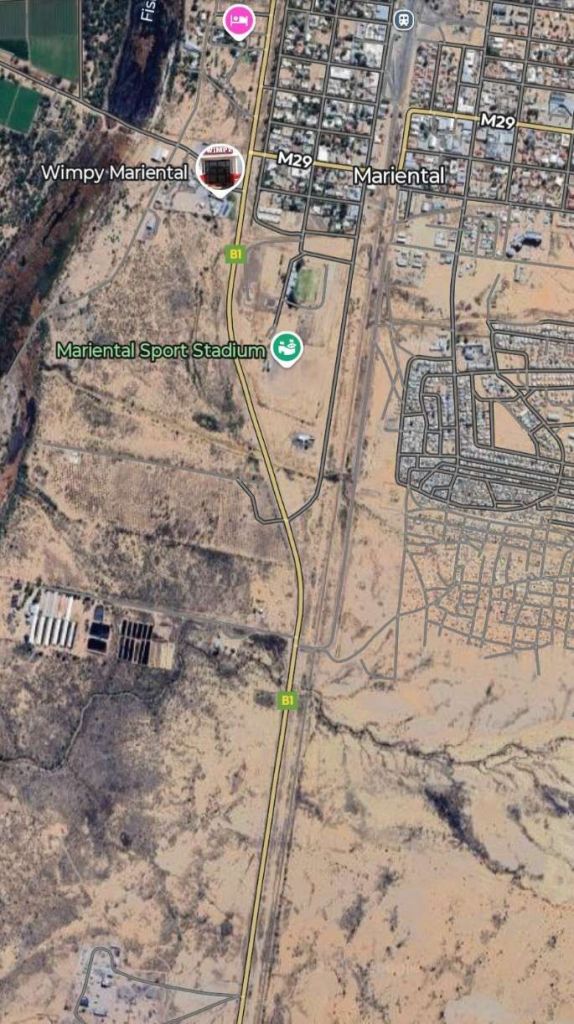
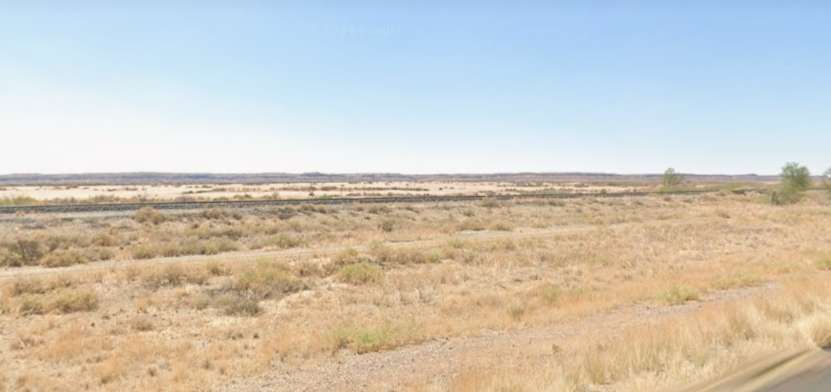
Looking North-northwest along the line from the bridge carrying the C20. [Google Streetview January 2018]Looking Southeast along the line from the same bridge. The various storage tanks on the horizon are associated with Agrimark, an agricultural and retail store, part of the Agrimark, Namibia network. Adjacent to it, between the Fish River and the B1 and on the West side of the Fish River is an area of irrigated fields. [Google Streetview, January 2028]Agrimark’s storage facility heralds the arrival of Southbound strains in the town of Mariental. [Google Maps, June 2025]Looking North from an ungated crossing on a minor road North of Mariental. [Google Streetview, December 2023]Looking South from the same crossing. [Google Streetview, December 2023]Further South, the line bridges a dry watercourse which is a tributary of the Fish River. [Google Maps, June 2025]The bridge in the above satellite image as seen from the B1. [Google Streetview, December 2023]Immediately North of Mariental, the crosses another minor road at an ungated crossing. This view looks North along the line. [Google Streetview, December 2023]Looking South towards Mariental from the same crossing. [Google Streetview, December 2023]Mariental Township with the Railway Station at the centre of the satellite image. [Google Maps, June 2025]
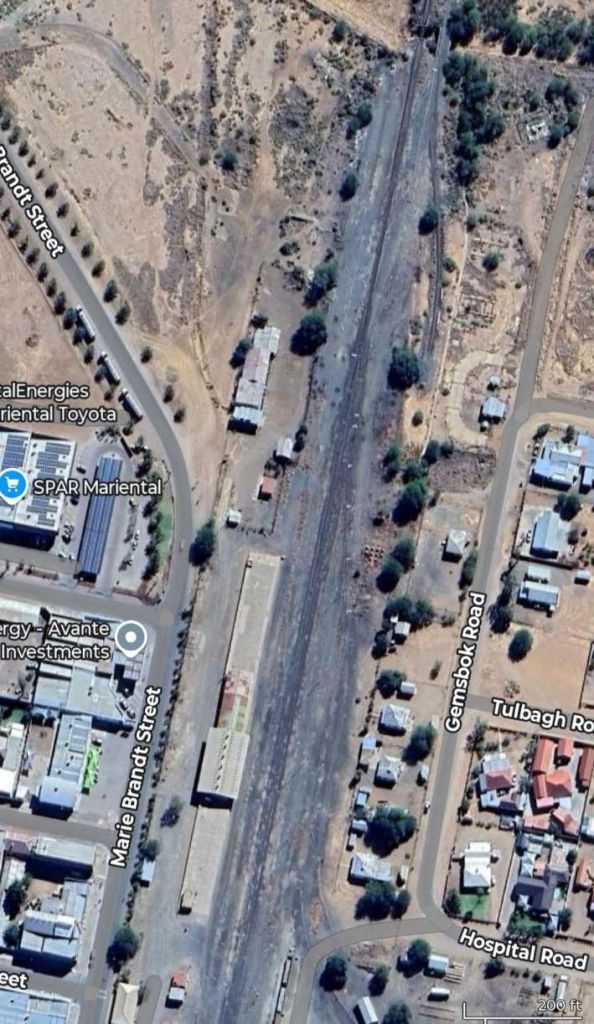
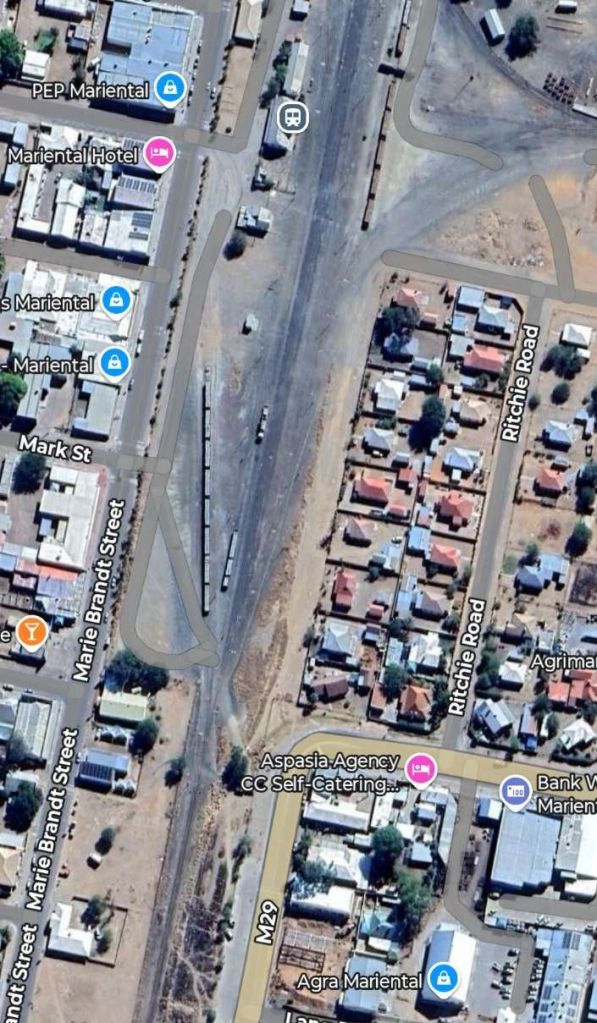
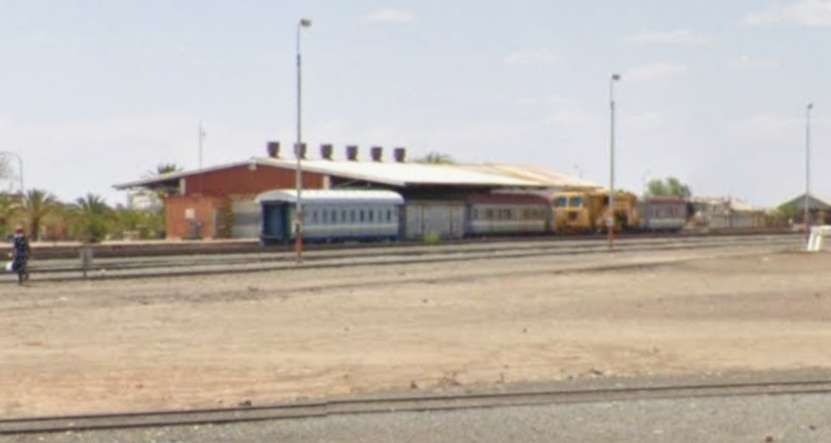
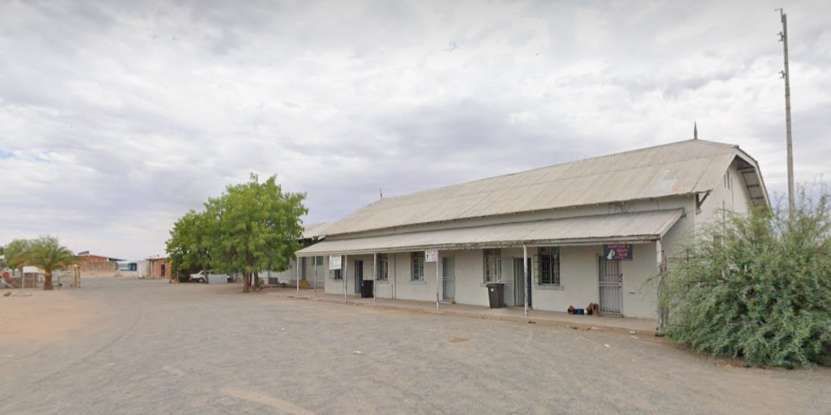
The next two extracts from Google Maps satellite imagery cover the length of the railway station site. …
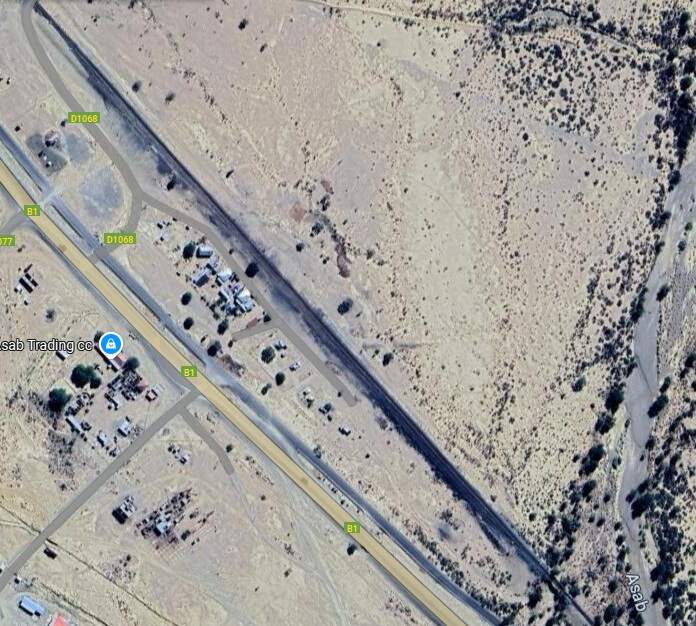
These two images show the station site at Mariental. [Google Maps, June 2025]Mariental Station building. [Google Streetview, December 2023]The station building at Mariental seen fromt he Southwest. [Google Streetview, December 2023]Immediately South of Mariental, the B1 and the railway run South side by side. [Google Maps, June 2025]The railway seen from the B1 to the South of Mariental. [Google Streetview, January 2018]A series of different culverts and bridges support the line over historic channels most of which are dry. [Google Streetview, December 2023]The next road crossing is that for the C18. It is another ungated crossing and this is the view looking North along the line. [Google Streetview, August 2024]And this is the view South along the line at the same crossing. [Google Streetview, August 2024]Looking Northwest from the ungated crossing over the D1068 at Asab. [Google Streetview, December 2023]Looking Southeast from the D1068 into the station at Asab. [Google Streetview, December 2023]Asab Trading CentreSidings/Station and River. [Google Maps, June 2025]Looking North from the B1 along the Asab River watercourse with the railway bridge close to the centre of the image. [Google Streetview, December 2023]
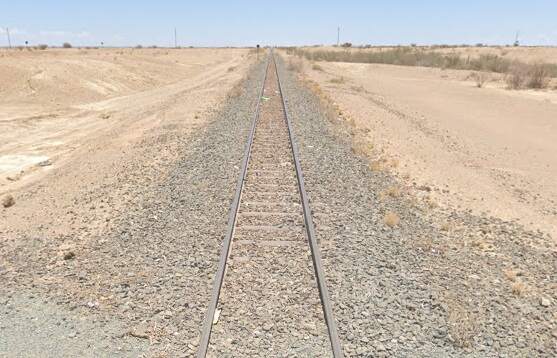
The line continues Southeast from Asab. …
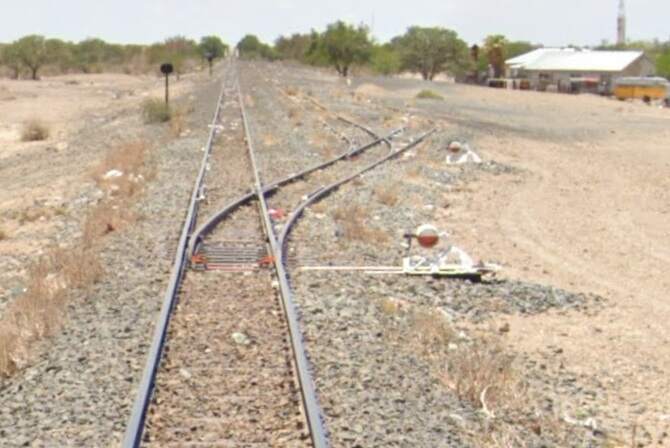
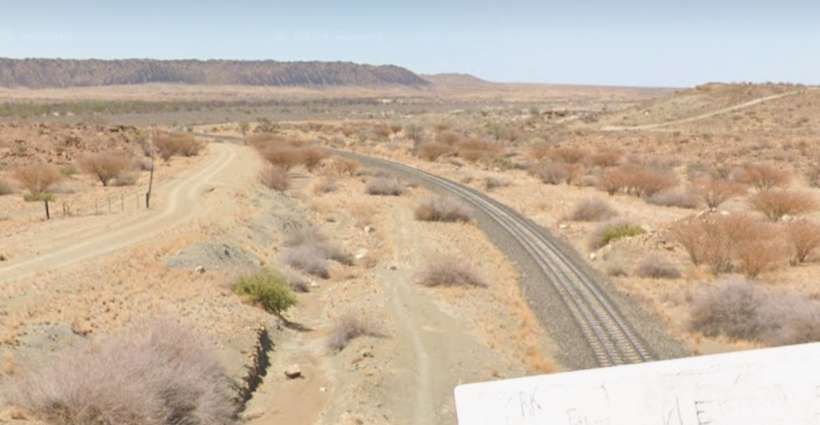
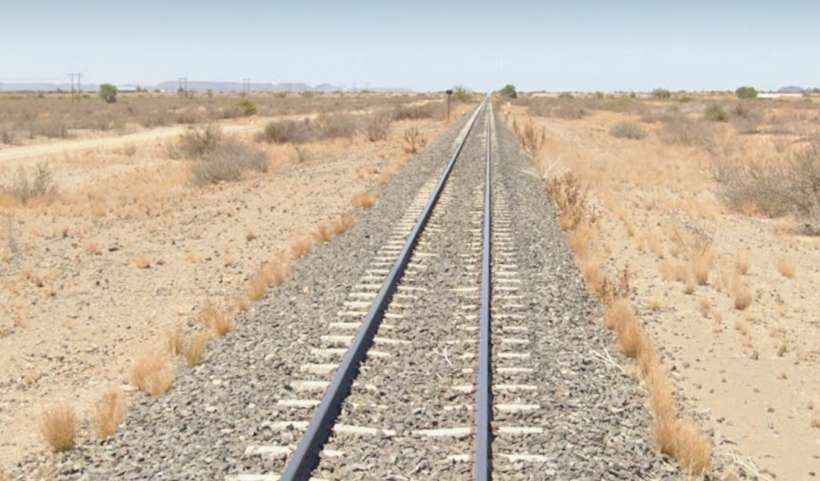
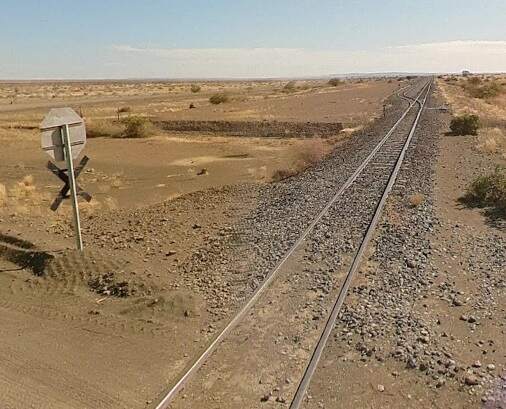
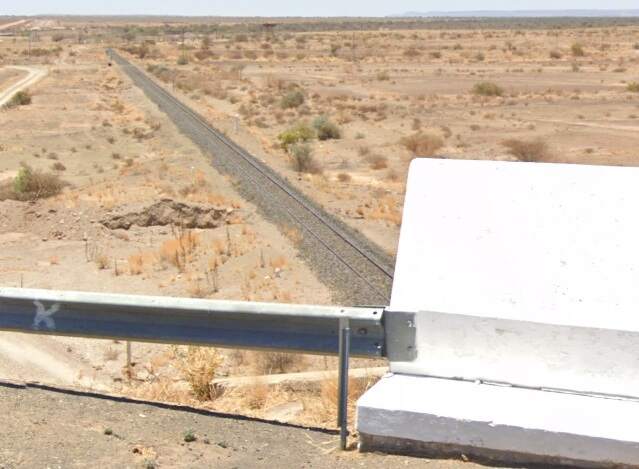
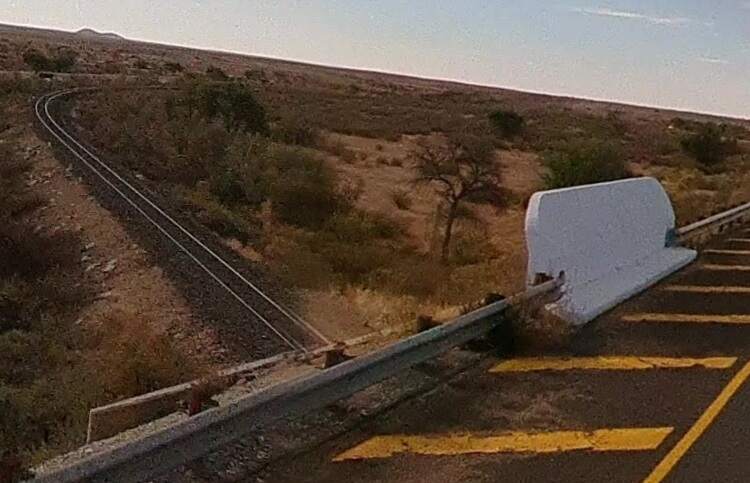
Looking North from the D3919Looking Southeast from the D3919The line continues Southeast towards Tses on a shallow embankment with bridge openings for run-off water over dry watercourses. [Google Streetview, December 2023]Tses Township, the B1 and the railway. [Google Maps, June 2025]Tses Station and Sidings. [Google Earth, June 2025]Tses River Bridge. [Google Earth, June 2025]Looking Northeast from the bridge carrying the B1 along the line, back towards Tses. {Google Streetview, December 2023]Looking ahead to the Southwest from the same bridge. [Google Streetview, December 2023]
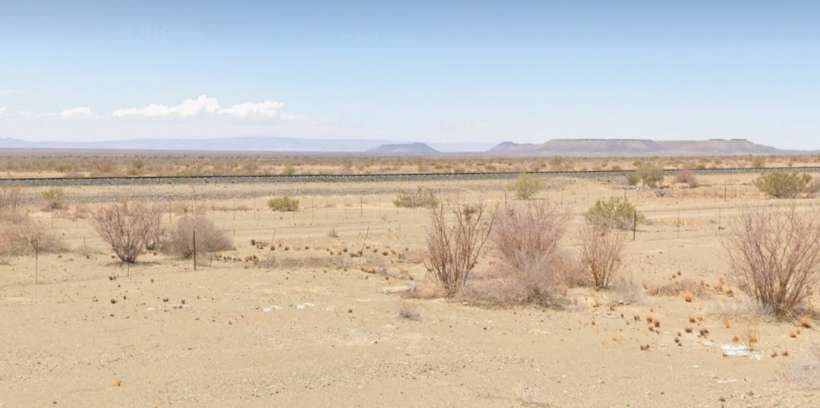
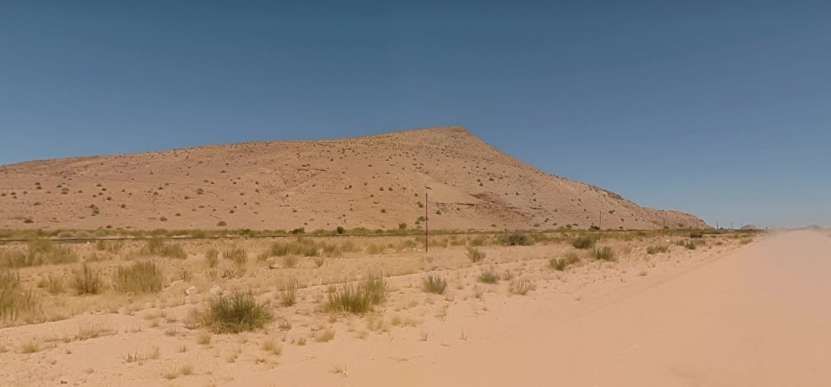
The line continues in a generally Southwards direction. Again, when hills are encountered it curves its way along the contours to limit gradients. …
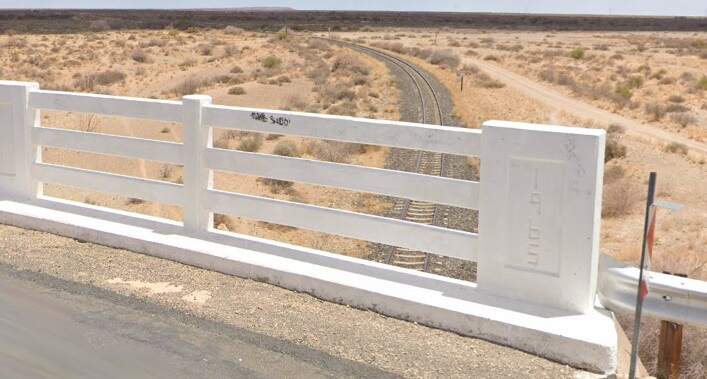
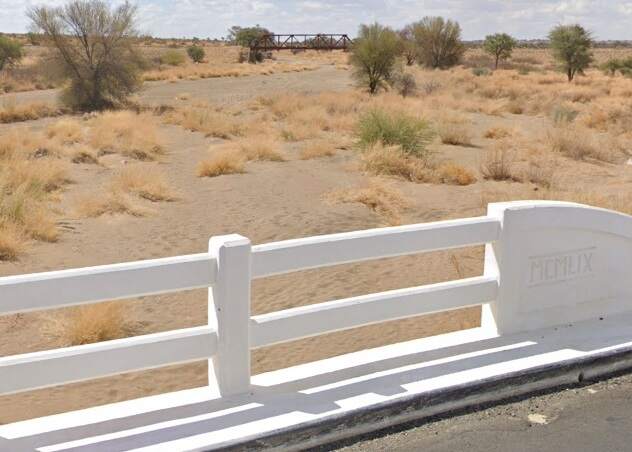
Another glimpse of the line from the bridge carrying the B1 across the outfall channel from the Van Rym Dam on the approaches to Keetmanshoop. [Google Streetview, December 2023]
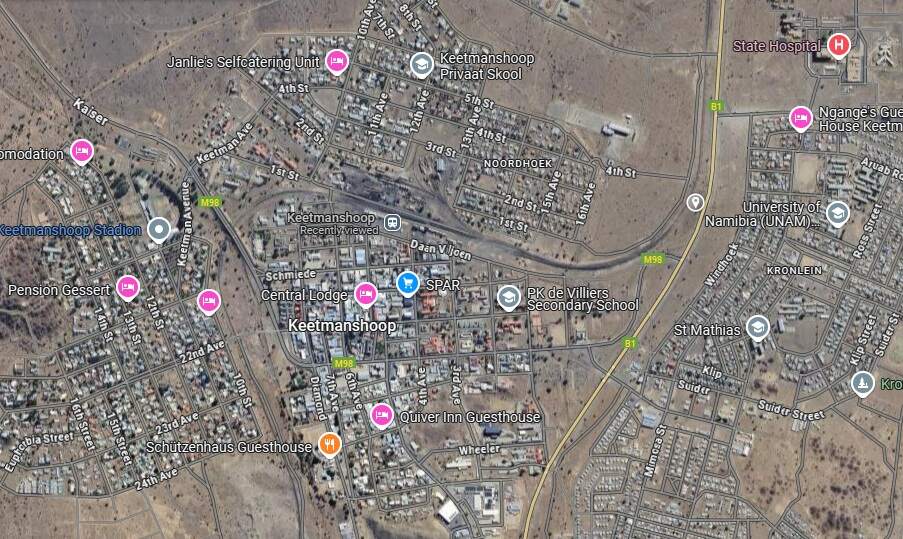
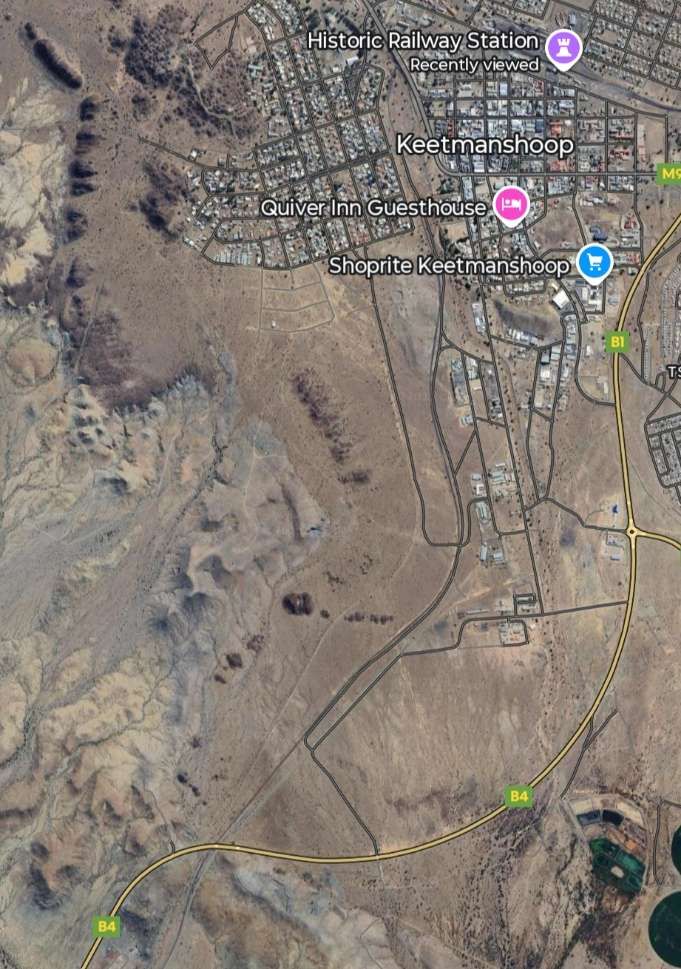
Keetmanshoop is the next significant settlement on the line. …
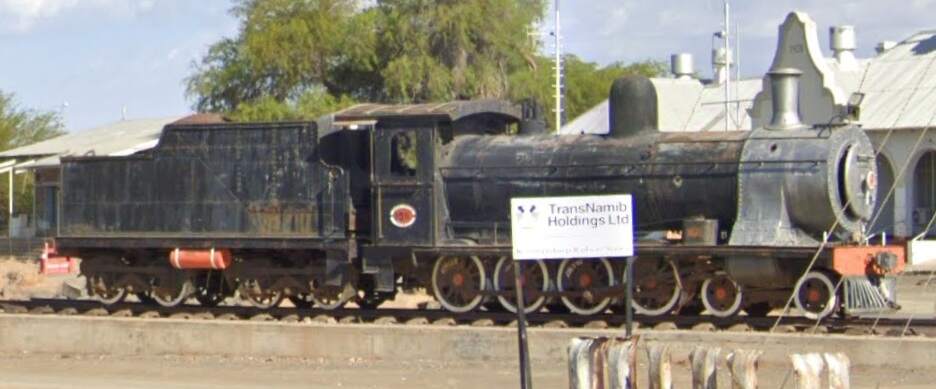
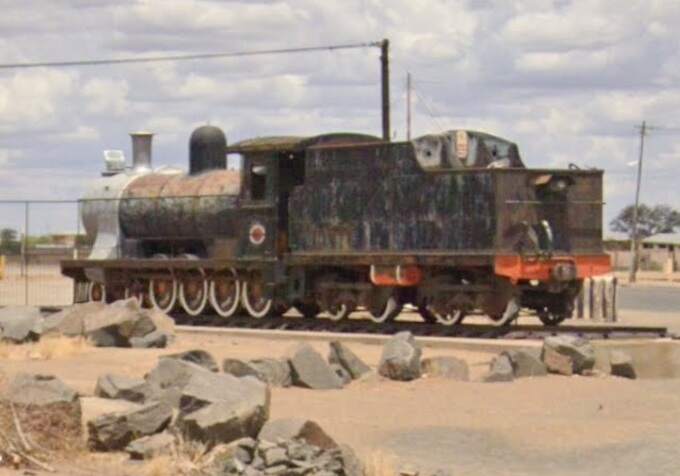
4-8-0 Locomotive Class 7A, No. 1011 was built by Neilson & Co, of Glasgow, Scotland, as works no 4930 in 1896, it was brought to Keepmanshoop in 1980 to be plinthed. The first Class 7 locomotives were commissioned by the Cape Government Railways and delivered by Dübs & Co of England in 1892. Follow-up batches were built by Sharp, Stewart & Co, Neilson, Reid & Co, and North British Locomotive Company. They had a wheel arrangement of 4-8-0, coupled wheels of 3’6 3/4″ (1086mm diameter) and Stephenson link valve gear. The engines were originally powered by saturated steam, but many were later reboilered and converted to use superheated steam. Modifications such as larger boilers, increases in cylinder diameters and larger cabs resulted in the reclassification of the locomotives as Class 7A, 7B, 7C, 7D, 7E and 7F. More information and photographs can be seen here. [16]
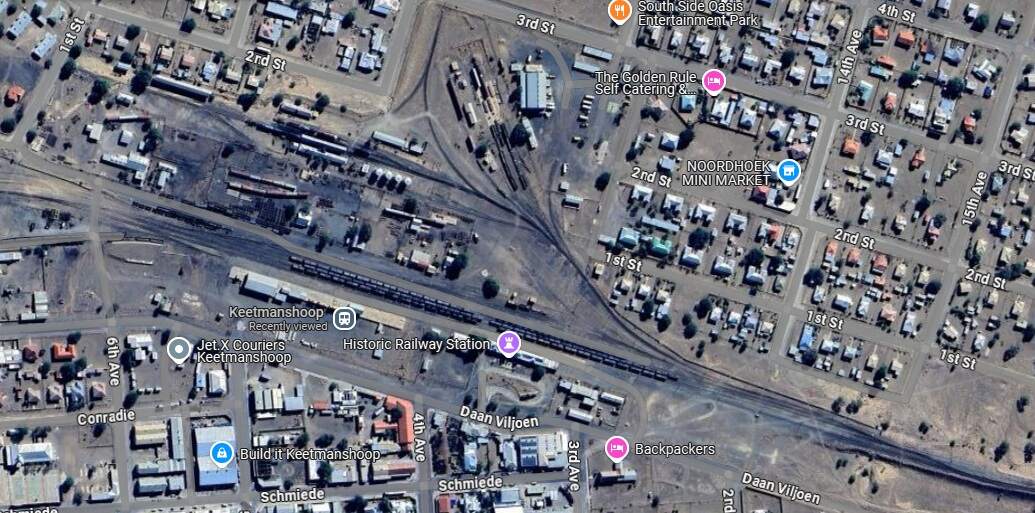
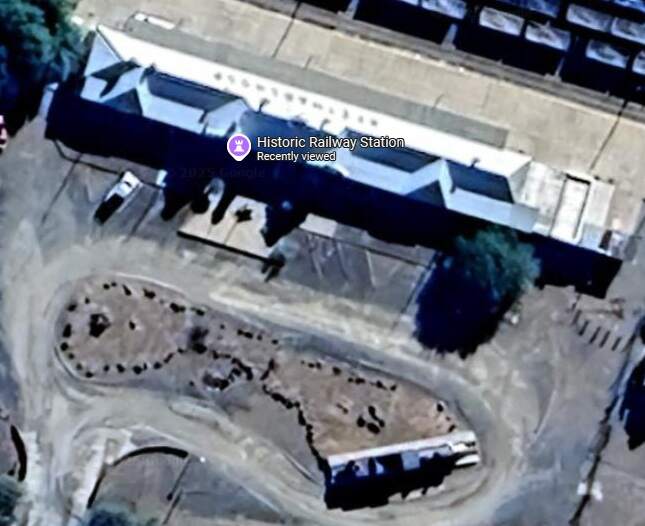
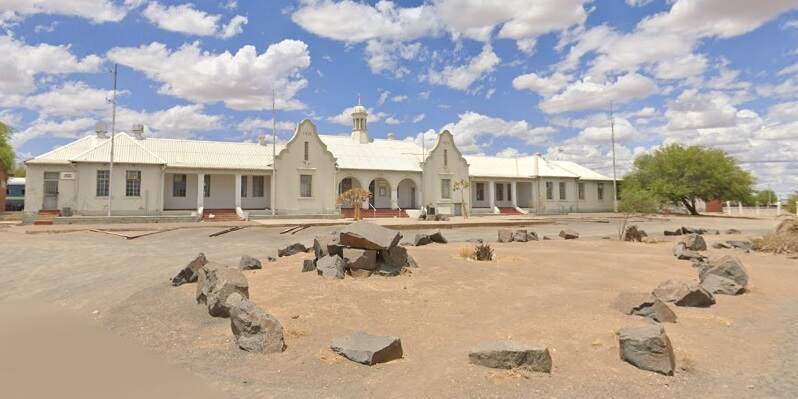
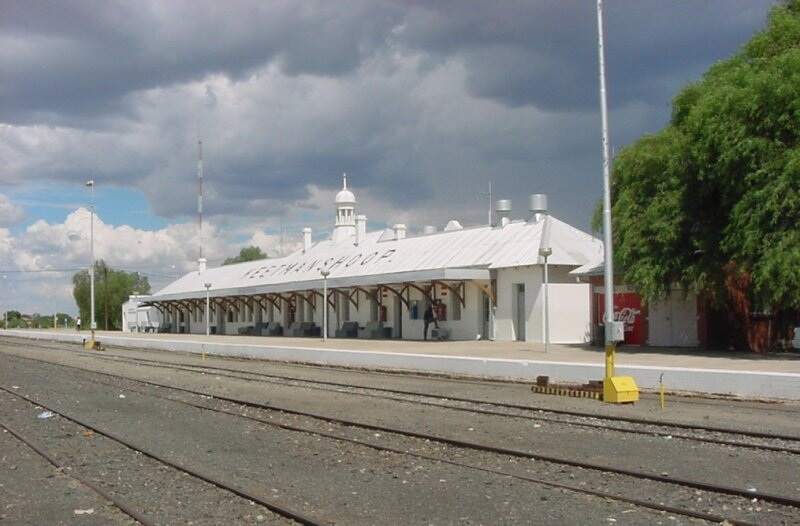
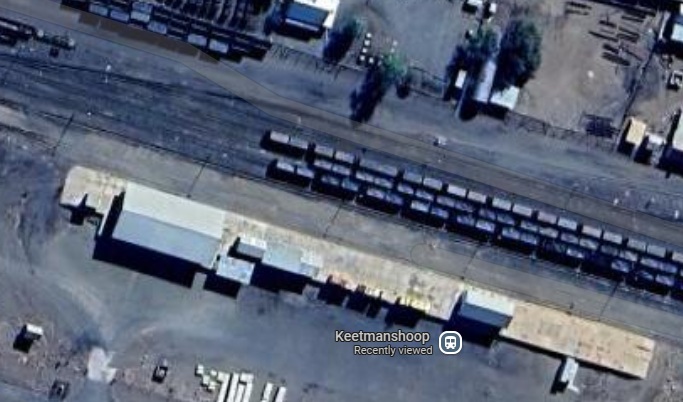
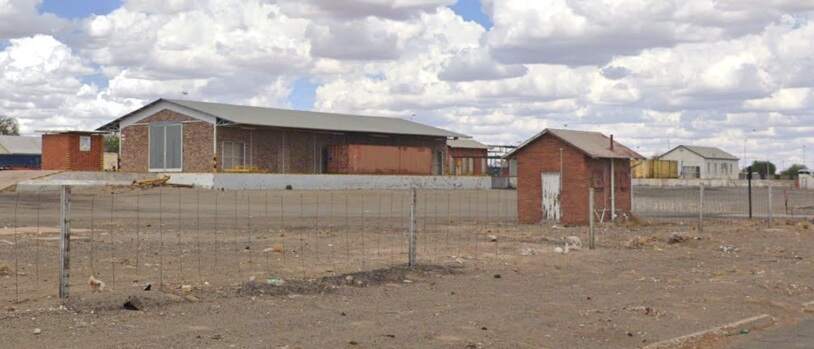
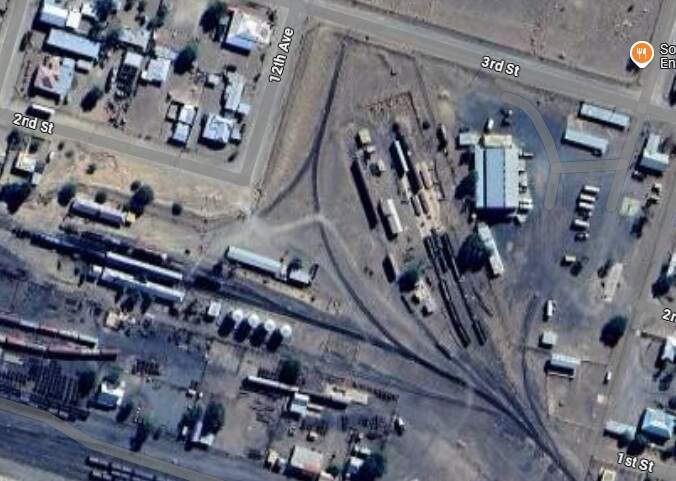
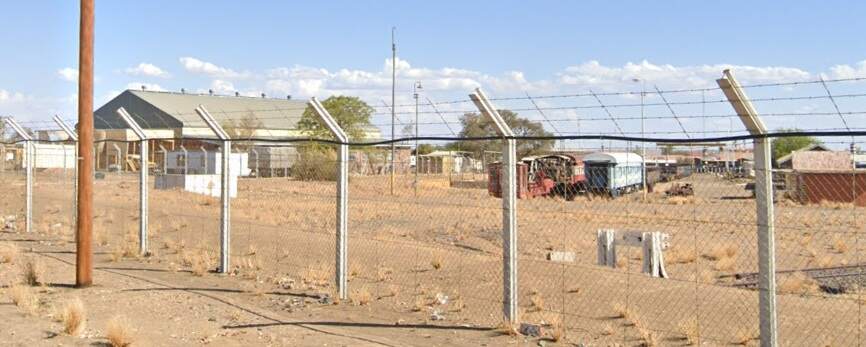
More modern facilities at Keetmanshoop Railway Station. [Google Maps, June 2025]A view of these modern facilties from the Southwest on Darn Viljoen. [Google Streetview, December 2023]The yard and turning triangle at Keetmanshoop Station. [Google Maps, June 2025]The view of the yard from the corner of 3rd Street and 12th Avenue. [Google Streetview, December 2023]
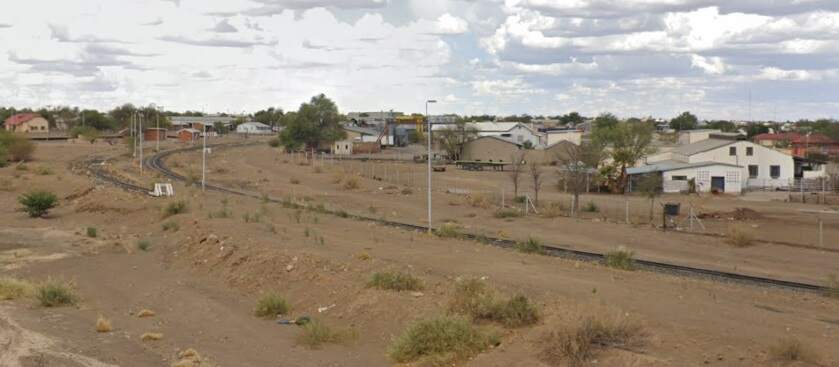
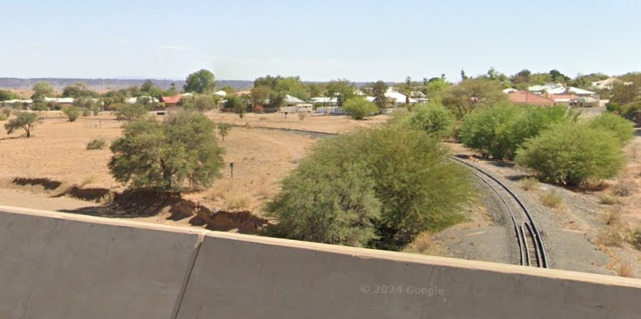
While Keetmanshoop railway Station sits approximately on an East-West alignment is is approached bey means of a sharp curve from the North and trains leaving to the South take a sharp curve to the South within the township.
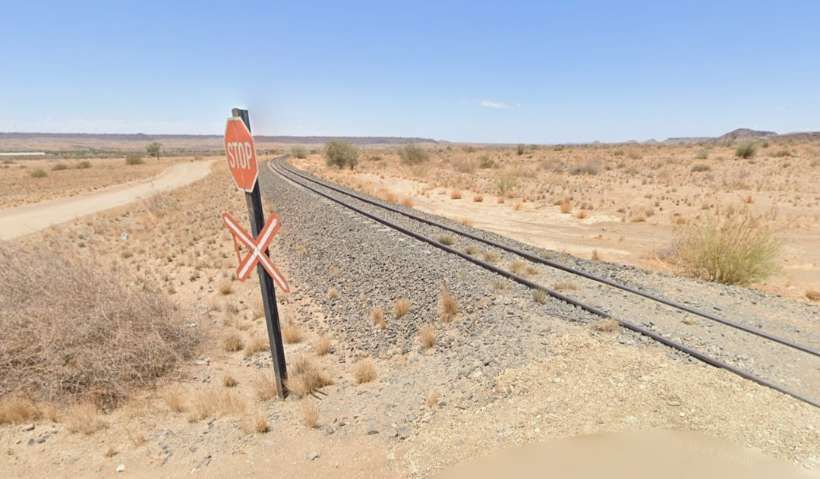
The line continues to the South. … First five images following the line South and Southwest as far the point where the B4 bridges the line.
A series of five images following the line, first along Railway Street and then at an ungated crossing, all photographs are taken looking Southwest. [Google Streetview, December 2023]The length of line covered by the images above. The B4 crosses the line at the bottom of the image. [Google Maps, June 2025]
Two pictures now taken from the bridge carrying the B4 over the line.
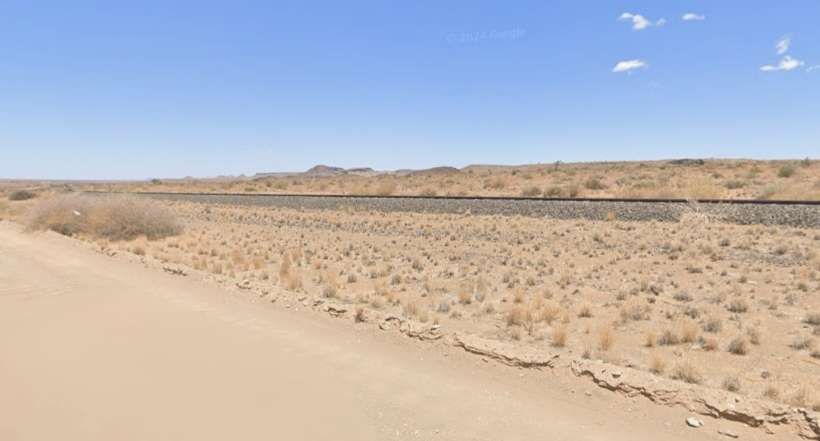
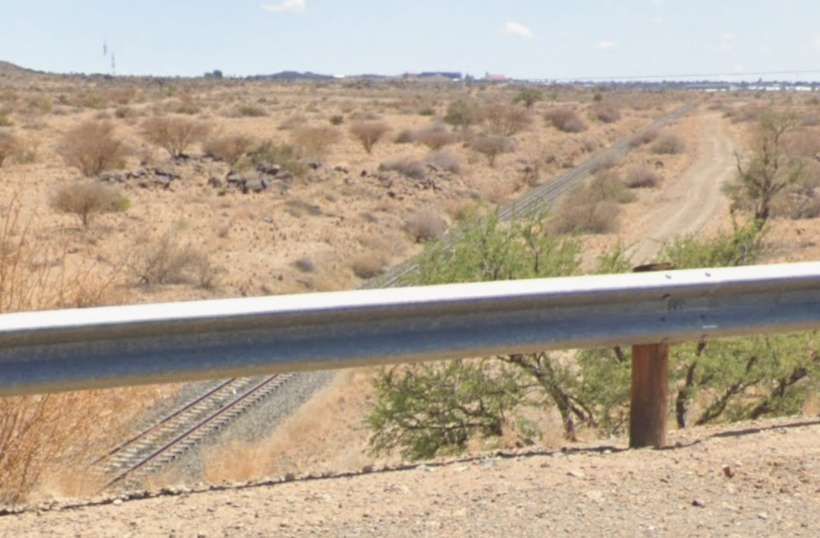
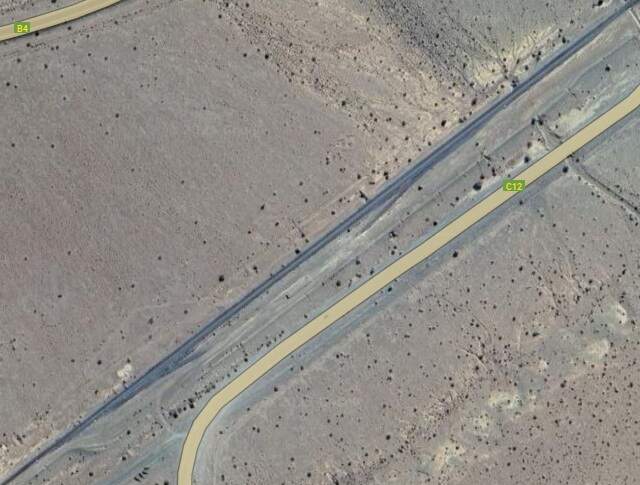
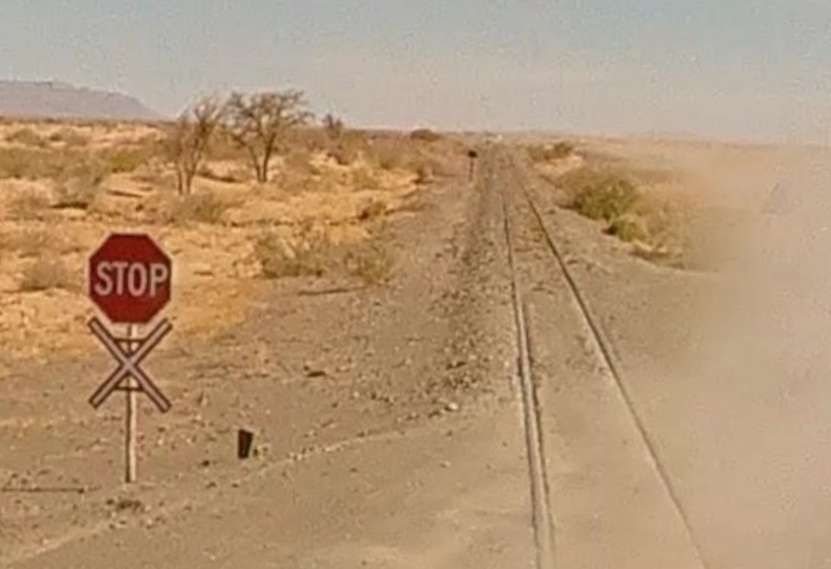
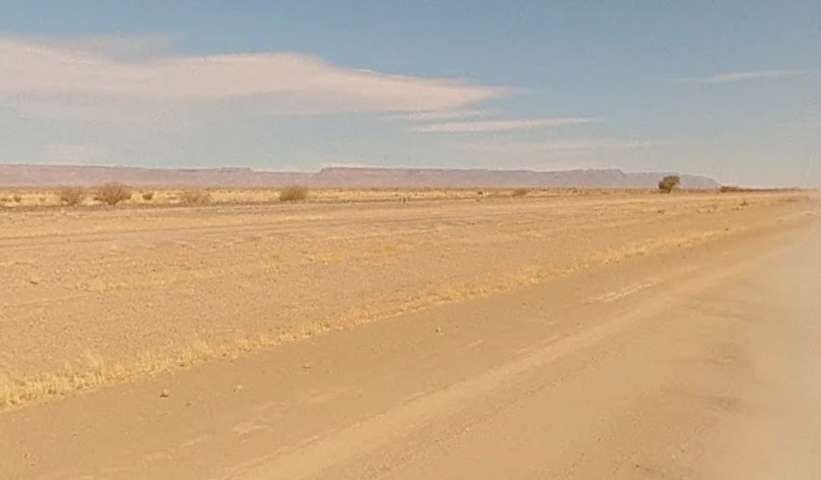
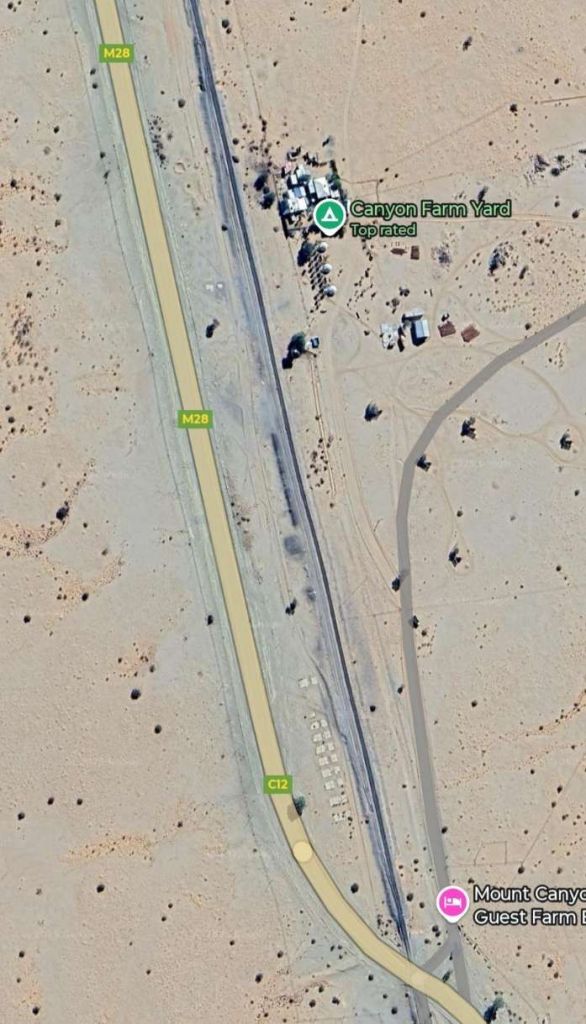
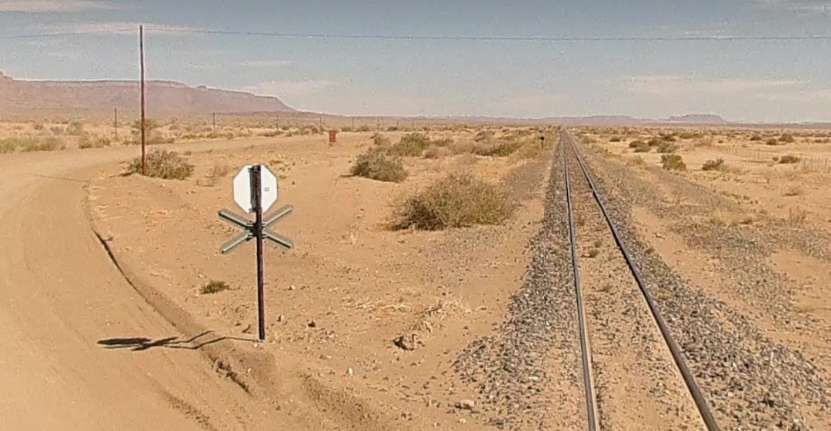
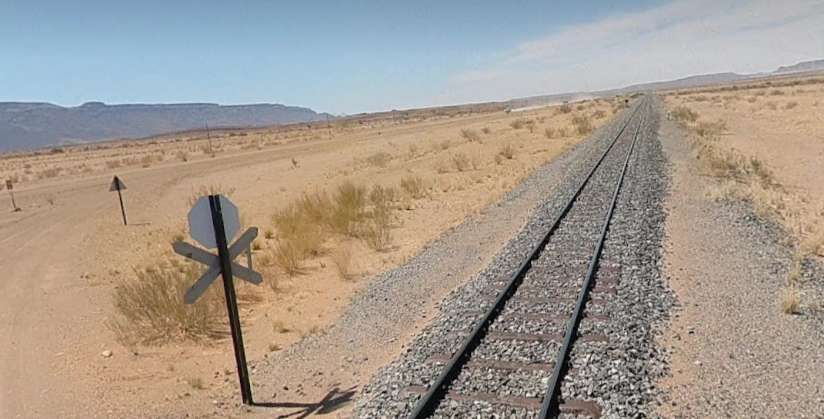
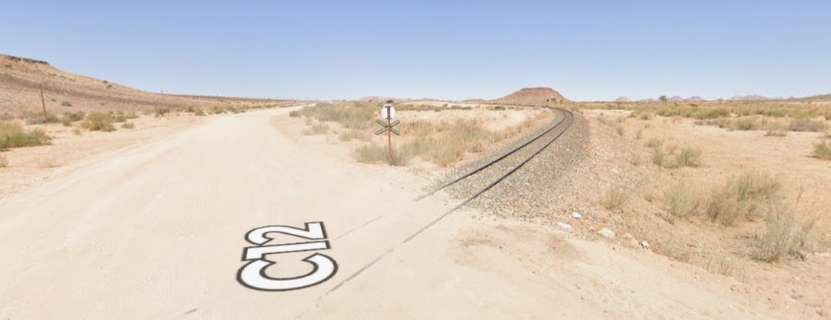
Looking North from the B$ towards Keetmanshoop. [Google Streetview, December 2023]Looking South along the line ahead. [Google Streetview, December 2023]Looking Southwest along the line from an ungated crossing to the South side of the B4. [Google Streetview, December 2023]Looking Southwest along the line from another ungated crossing to the South side of the B4. [Google Streetview, December 2023]The B4 and the railway run parallel, perhaps around 100 metres apart. This photograph shows the line running parallel to the road. Google Streetview, December 2023]Another view looking Southwest, this time from the ungated crossing which takes the C12 dirt road over the line. [Google Streetview, January 2018]The last image showed a passing loop to the Southwest of the C12. This satellite image shows the full length of the loop. [Google Maps, June 2025]
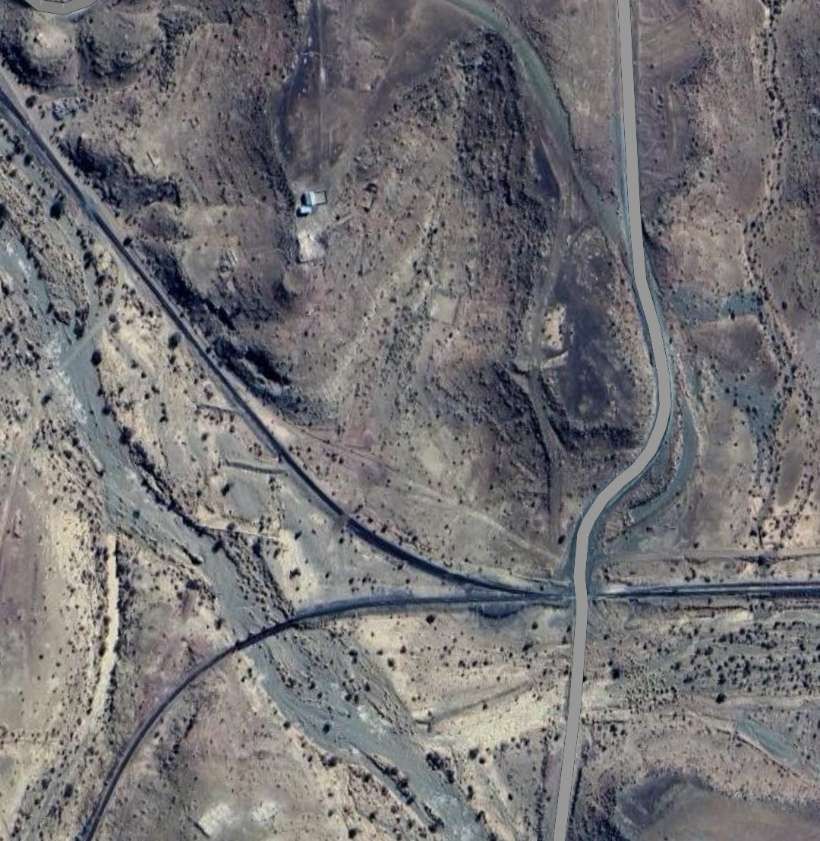
The railway turns to the West as it approaches the junction at Seeheim.
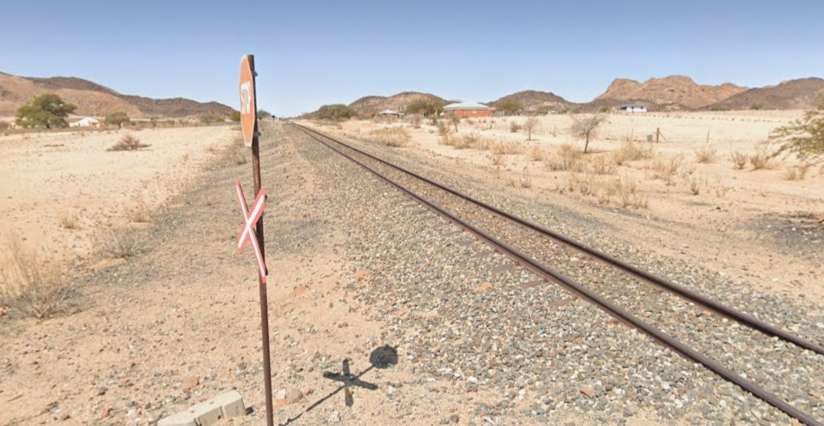
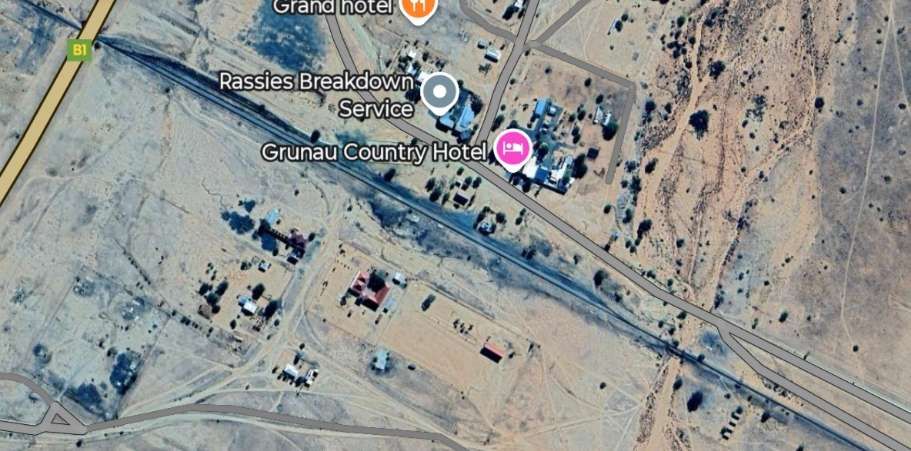
The railway continues to run parallel to the C12/M28 for some considerable distance. Close to Grunau the C12/M28 meets the B1 which crosses the line at 90°.
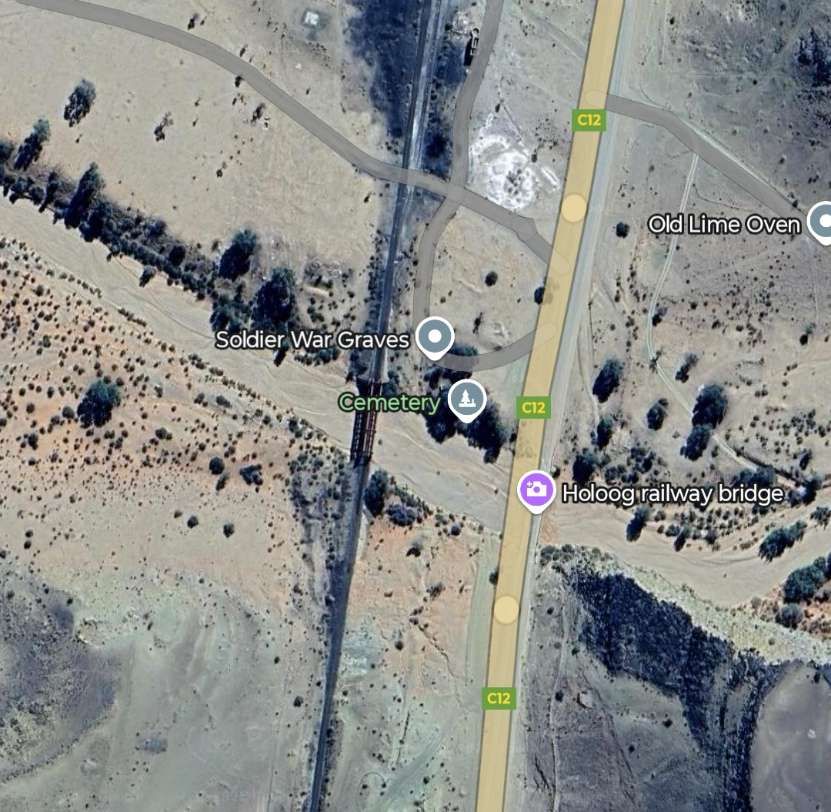
Looking East-southeast from the bridge carrying the B1 over the railway, the passing loop at Grunau is just ahead. [Google Streetview, 2024]The railway station/passing loop at Grunau to the East of the B1. [Google Maps, June 2025]Grunau Railway Station, (c) Pgallert (2010) and licenced for reuse under a Creative Commons Licence (CC BY-SA 3.0). [17]
East of Grunau, the line runs parallel to the B3 in a southeasterly direction. …
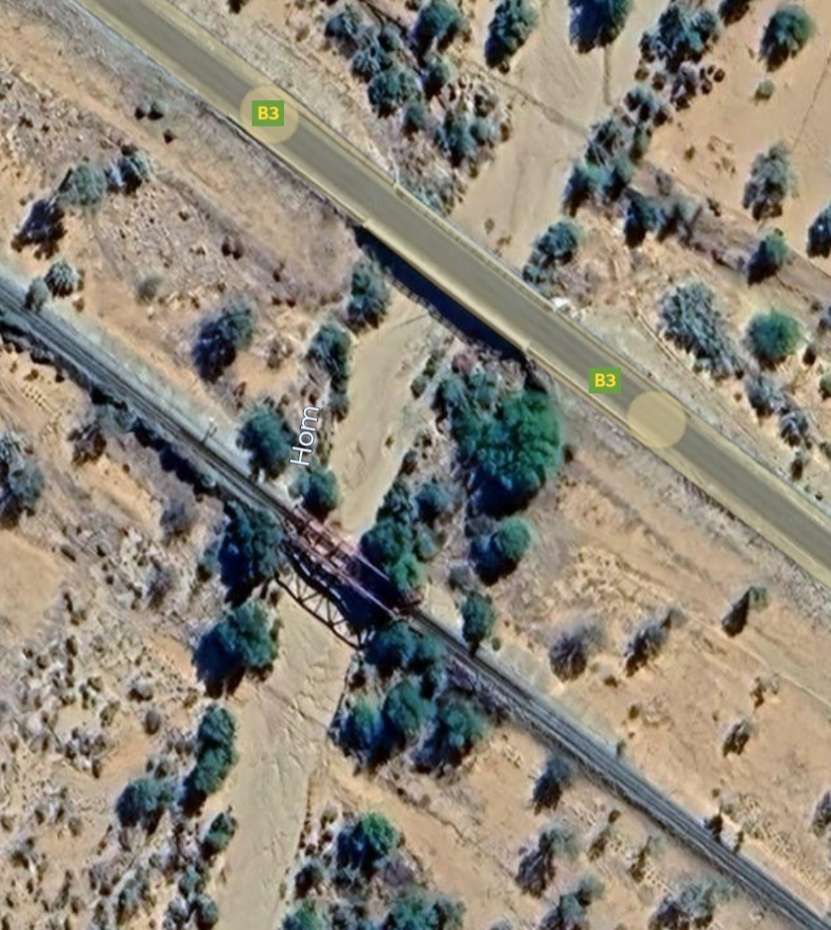
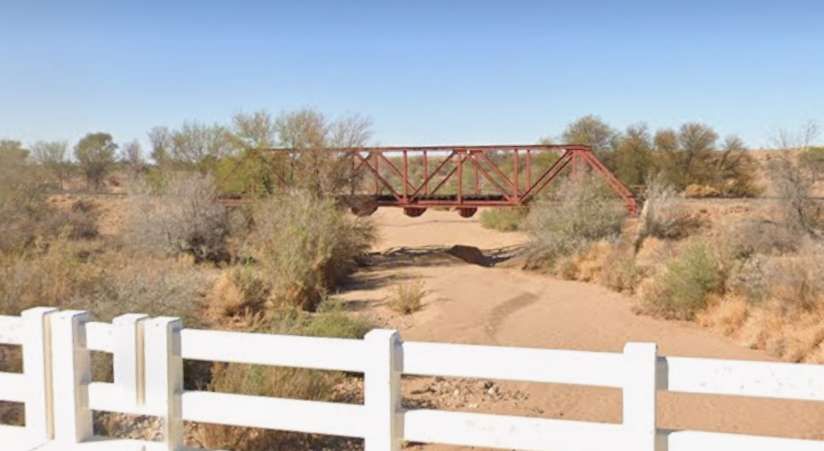
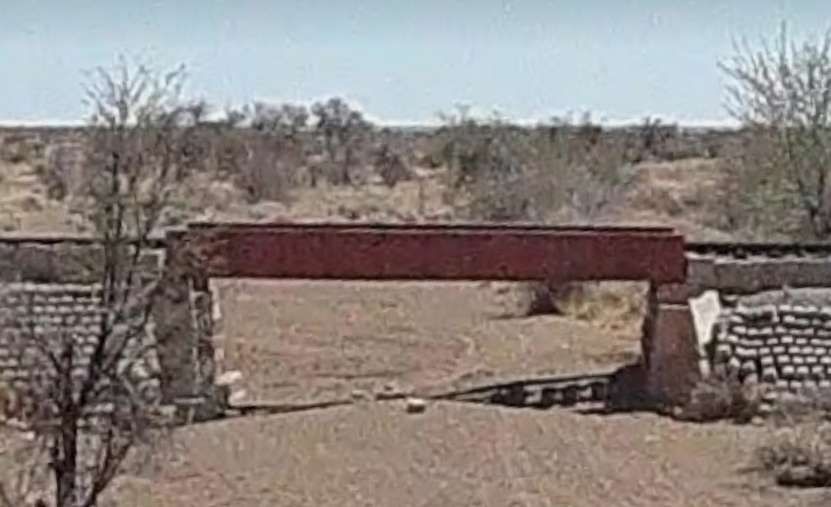
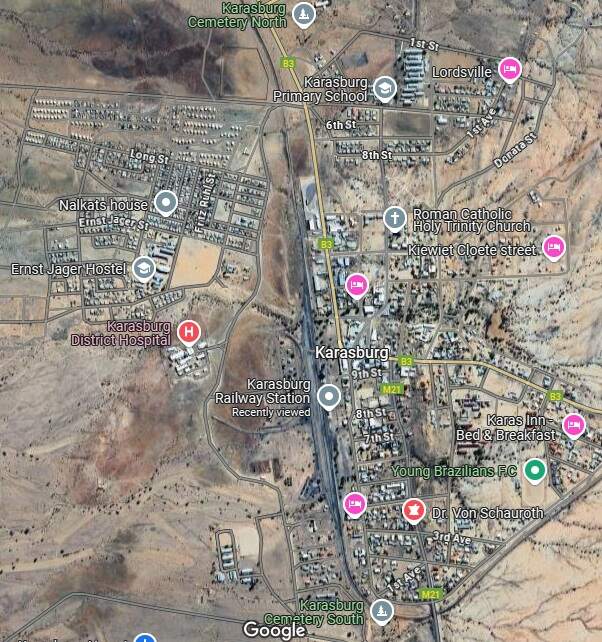
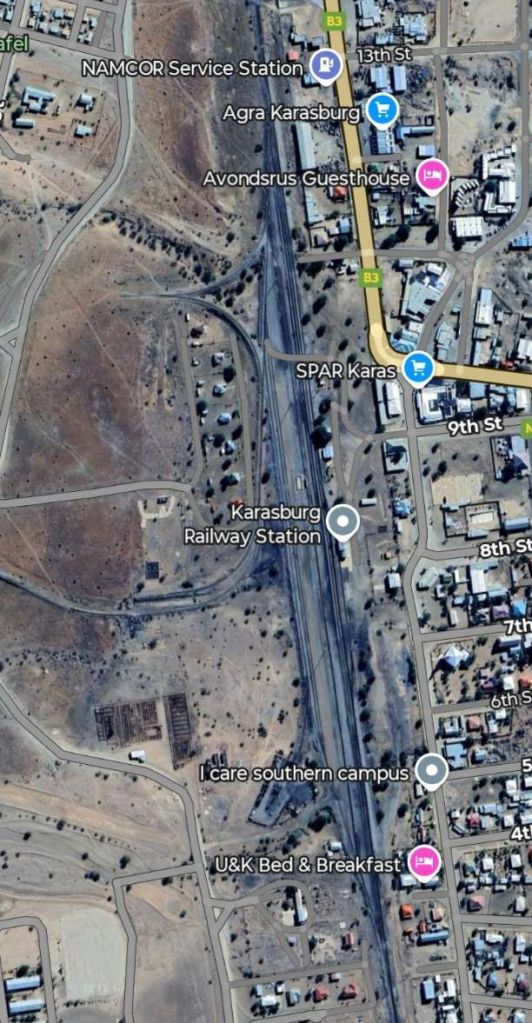
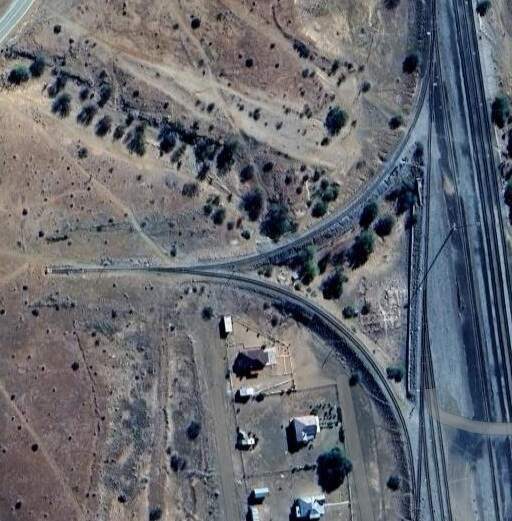
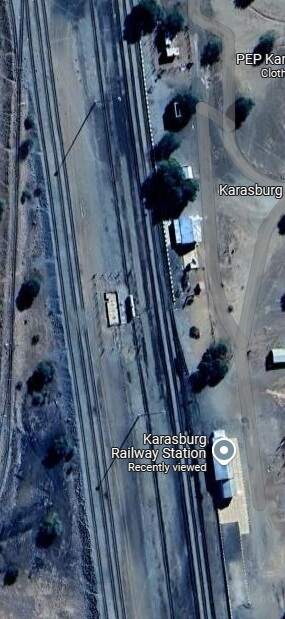
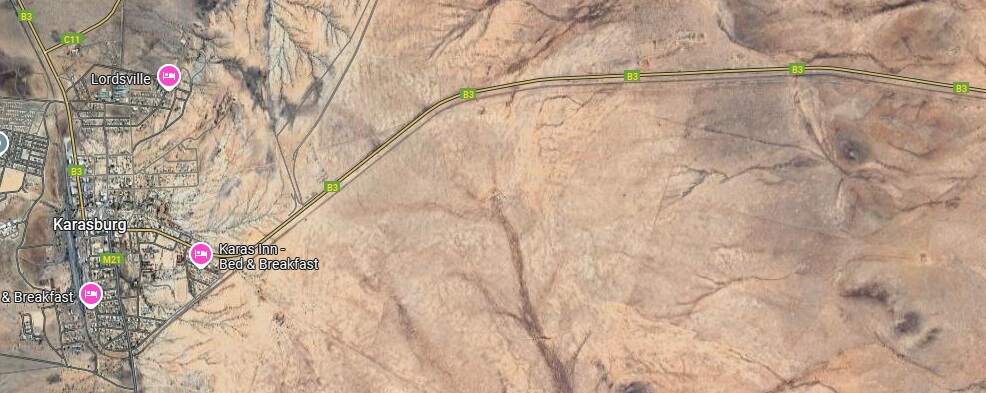
The line bridges the dry watercourse of the Hom River and other watercourses as it head Southeast. [Google Maps, June, 2025]The Hom River Railway Bridge, seen from the B3 Bridge over the same watercourse. [Google Streetview, 2022]Two further structures carry the Railway over dry watercourses on the run into Karasburg. [Google Streetview, The railway enters Karasburg from the North West, curving round to close to a North-South alignment through the railway Station and then sharply curving round to the Northeast as it leaves the town. [Google Maps, June 2025]The view South towards Karasburg Railway Station from the ungated crossing at Hendrik Snyman Street. [Google Streetview, January 2024]Karasburg Railway Station. [Google Maps, June 2025]The turning triangle at Karasburg. [Google Maps, June 2025]
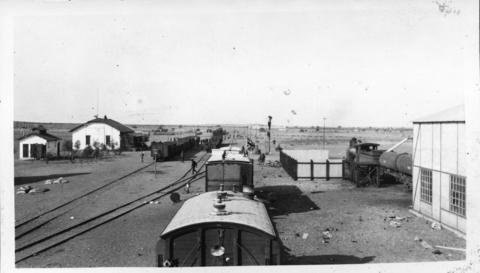
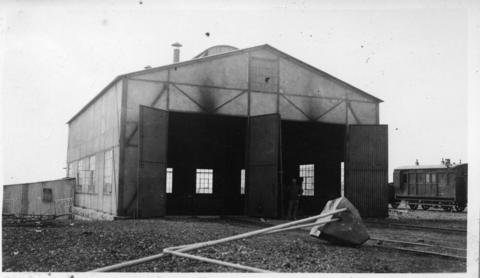
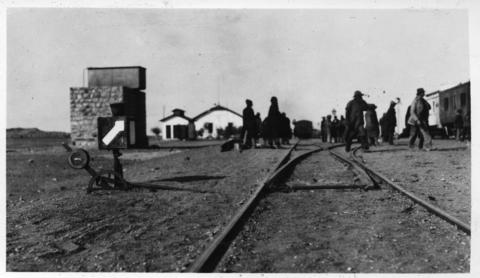
Karasburg Railway Station: passenger platform/building (note the painted edge of the platform) and goods shed. The pictures below come from 1914/1915 and show different aspects of Karasburg Railway Station at that time.
Karasburg Railway Station in 1914/1915. [18]The engine shed in 1914/1915. [18]Pointwork at Karasburg Railway Station. [18]
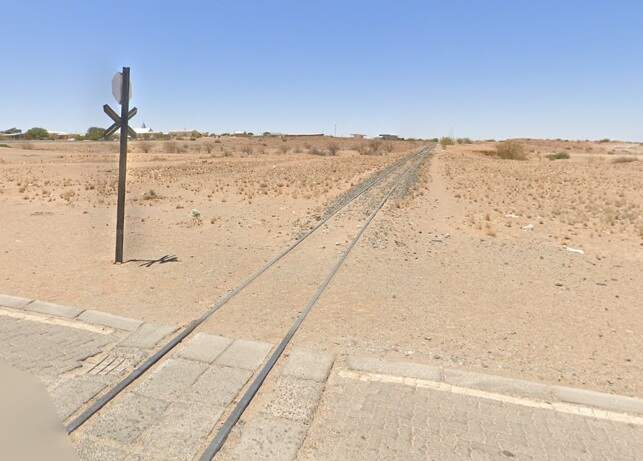
As we have already noted the line South of Karasburg Station curves sharply to the Northeast and passing under the M21.
Looking West from the bridge carrying the M21 over the railway at Karasburg. [Google Streetview, September 2024]Looking East from the bridge carrying the M21 over the railway at Karasburg. The curve shown on the last image continues as the railway turns to the Northeast. [Google Streetview, September 2024]East of Karasburg the line runs Northeast alongside the B3 before head East on the South side of the road. [Google Maps, June 2025]
For some distance the line runs along the South side of the B3. separating from it close to Nuwefontein. The B3 crosses to the East side of the Ham River, with the railway remaining on the West side of the river, before crossing it close to De Villiersputs. Near Grondorner, the line crosses the D237 and bridges a tributary of the Ham River before running alongside the D237 in a Southeasterly direction. After a number of kilometres, the D237 turns away to the South and the line continues in a generally easterly direction.
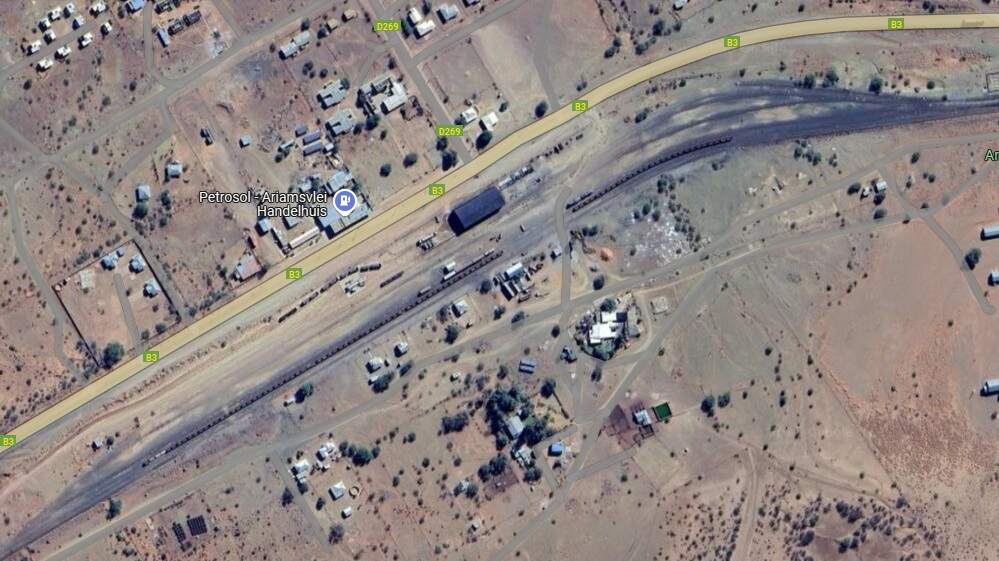
Meandering to the north and then again to the East the line of the B3 once again and runs on its South side towards Ariamsvlei, the border with South Africa and Nakop, beyond the border in South Africa.
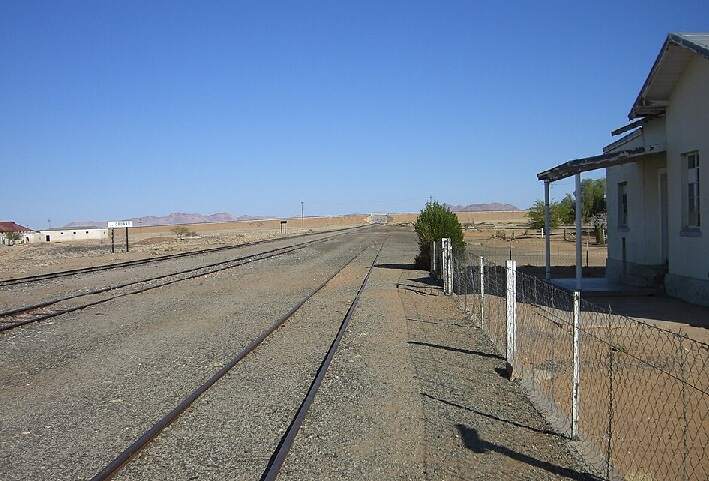
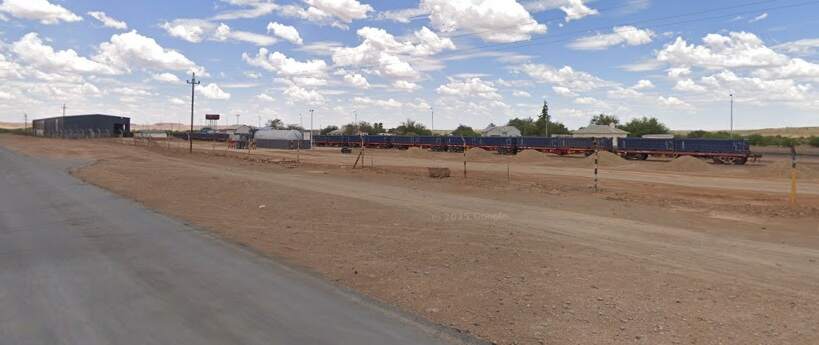
Ariamsvlei Railway Station and marshalling yard. [Google Maps, June 2025]The view East into the site from the B3. Google Streetview, January 2024]Ariamsvlei turning triangle and border post which is just about 10 kilometers from the border with South Africa. Nakop is beyond the border. [Google Maps, June 2025]
Beyond Ariamsvlei is the border crossing at Nakop and the South African town of Upington.
Windhoek-Gobabis
Next we look at a line which ran East from Winhoek. … The railway line from Windhoek to Gobabis is 228 kilometres (142 miles) long and was completed in 1930. [10]
Windhoek (capital – junction)
Neudamm
Omitara
Gobabis (branch railhead)
The line to Gobabis leaves the Windhoek-Nakop line at a triangular junction and headed East.
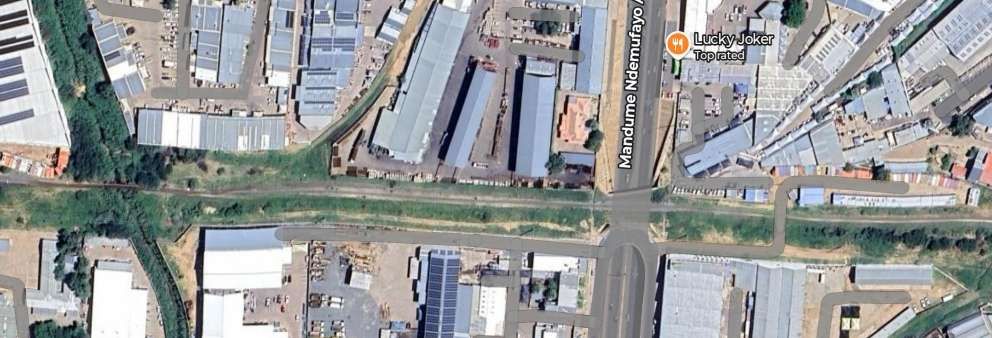
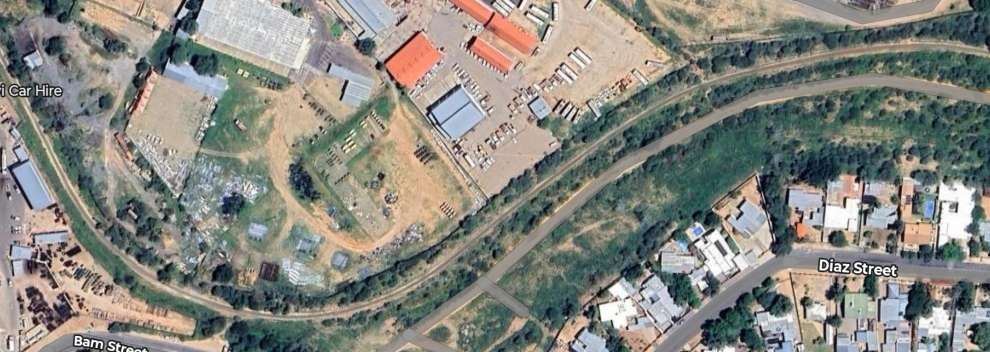
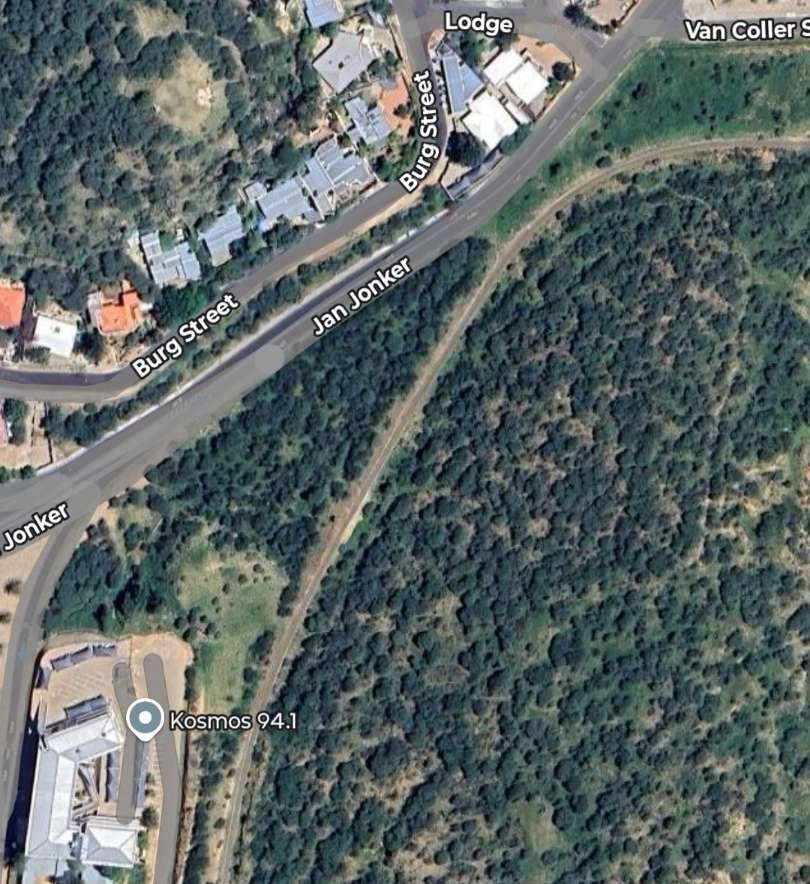
The Windhoek-Gobabis line leaves the line to Nakop in the Southern suburbs of Windhoek. [Google Maps, June 2025]
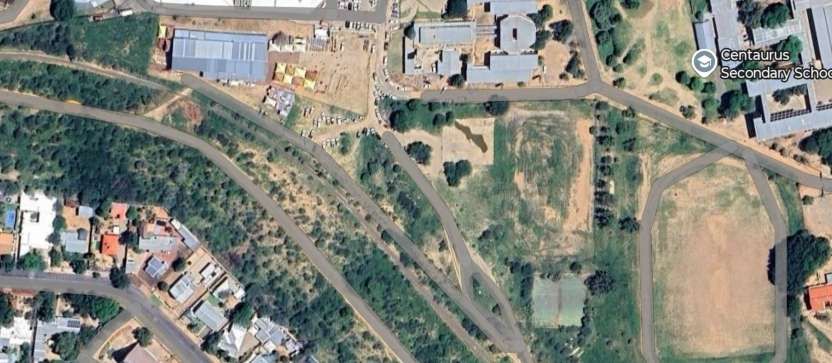
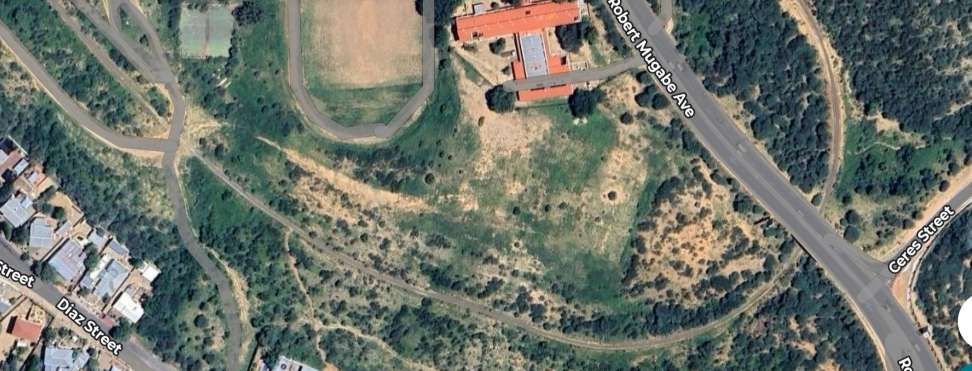
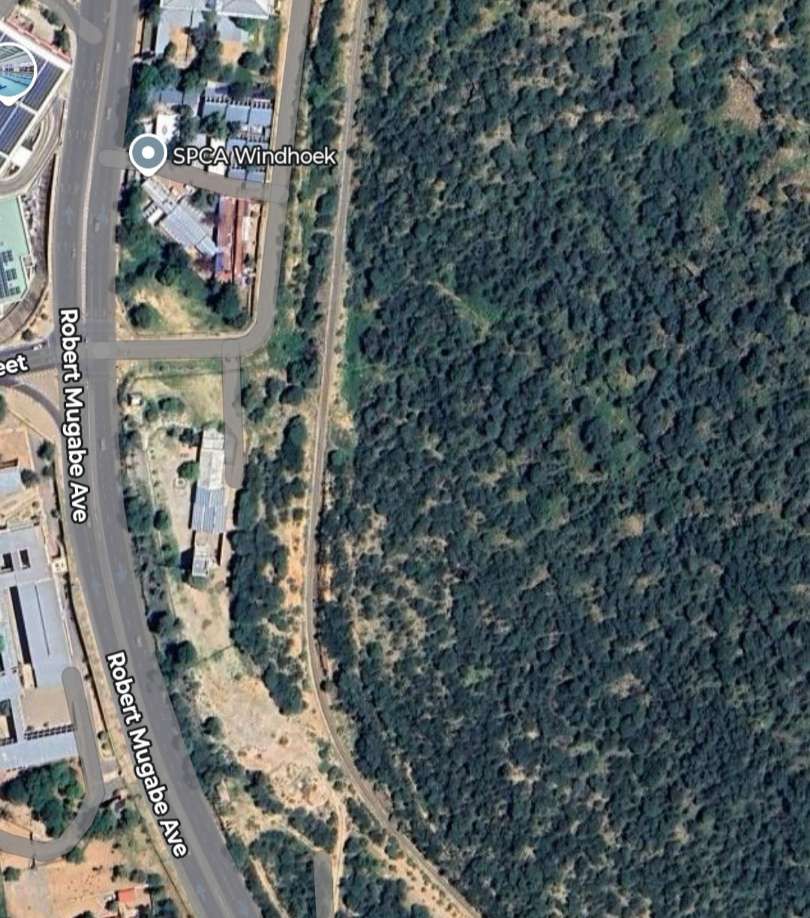
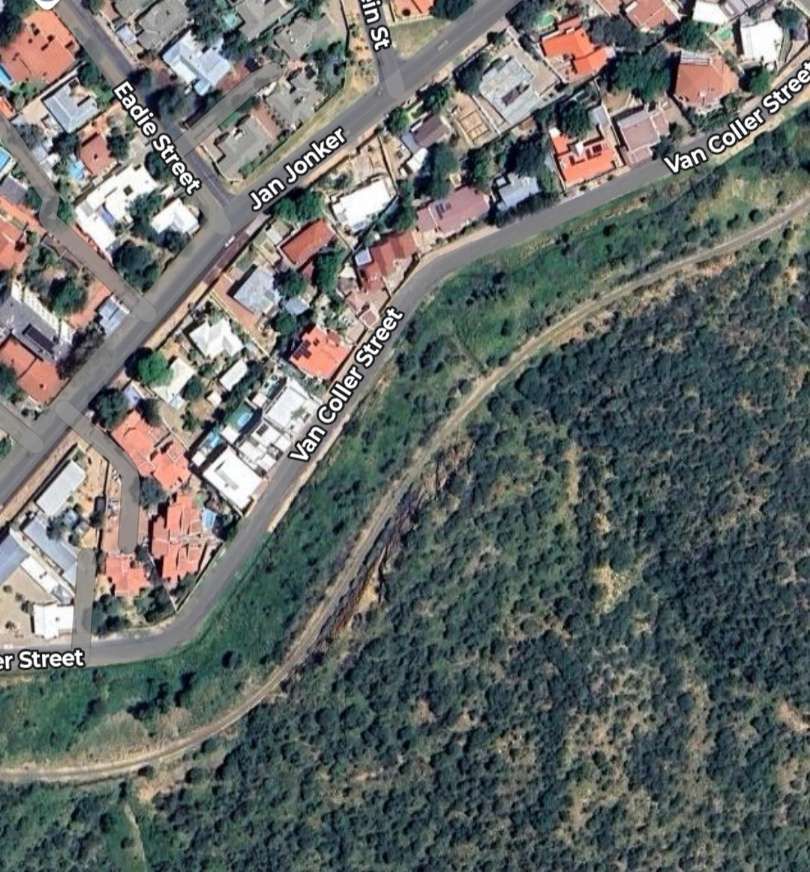
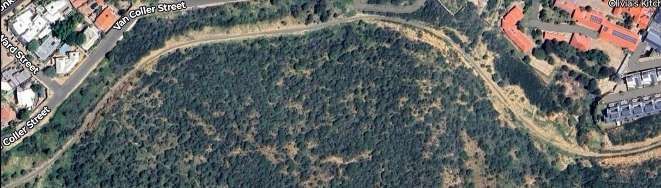
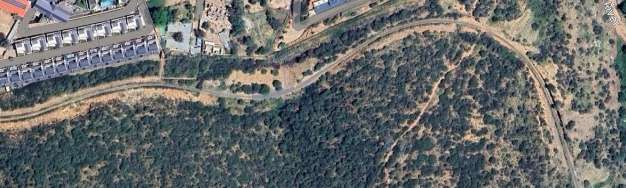
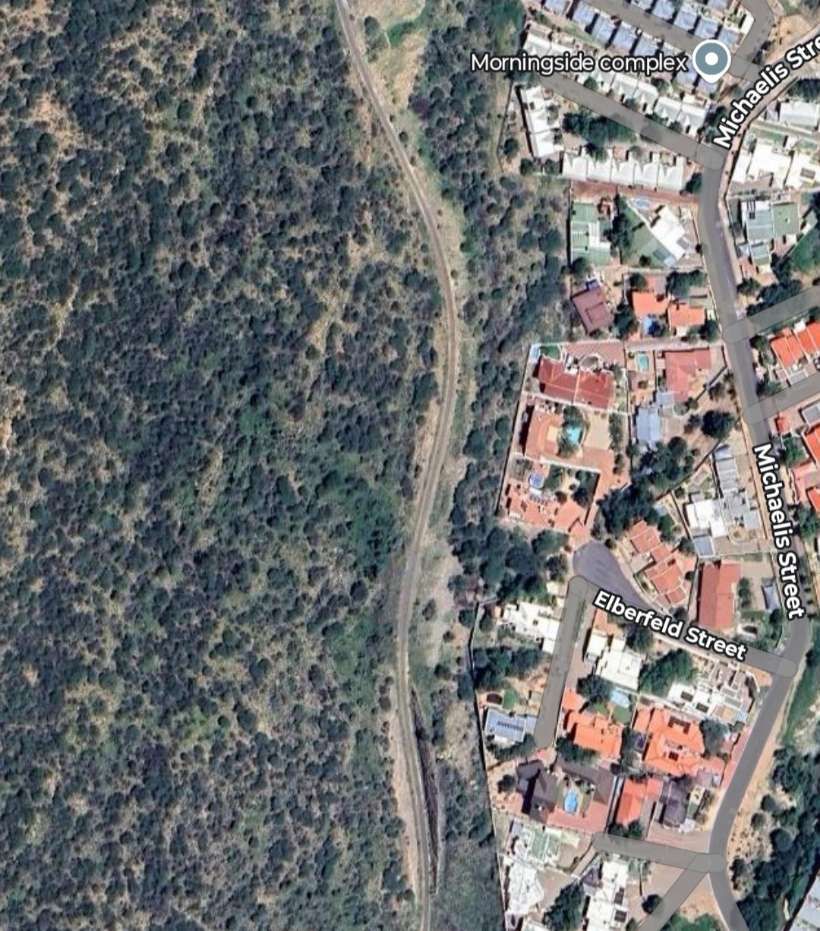
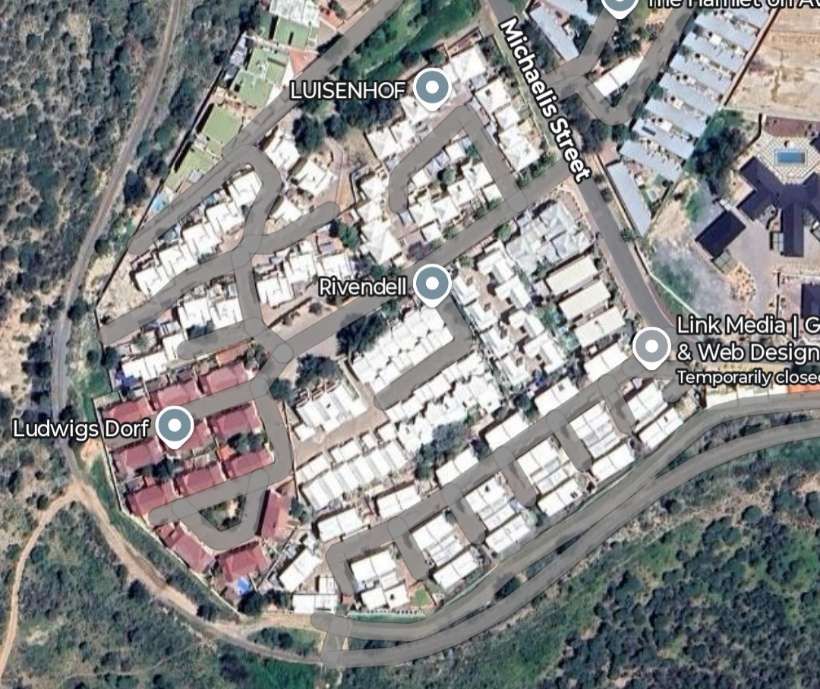
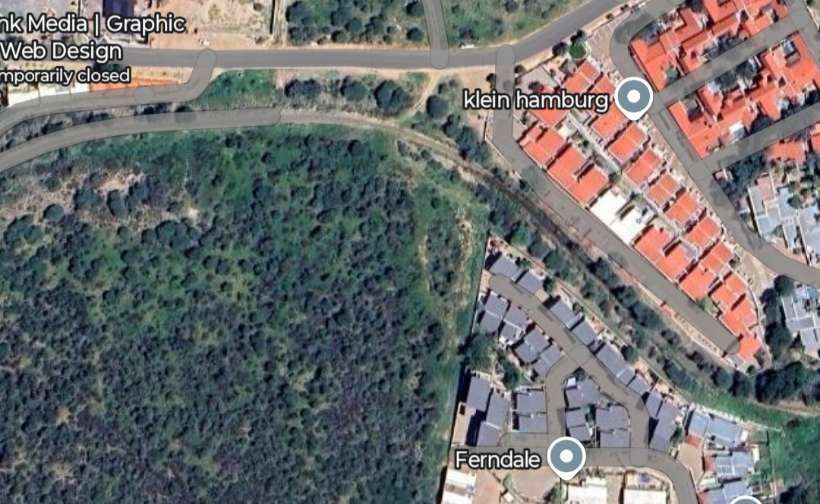
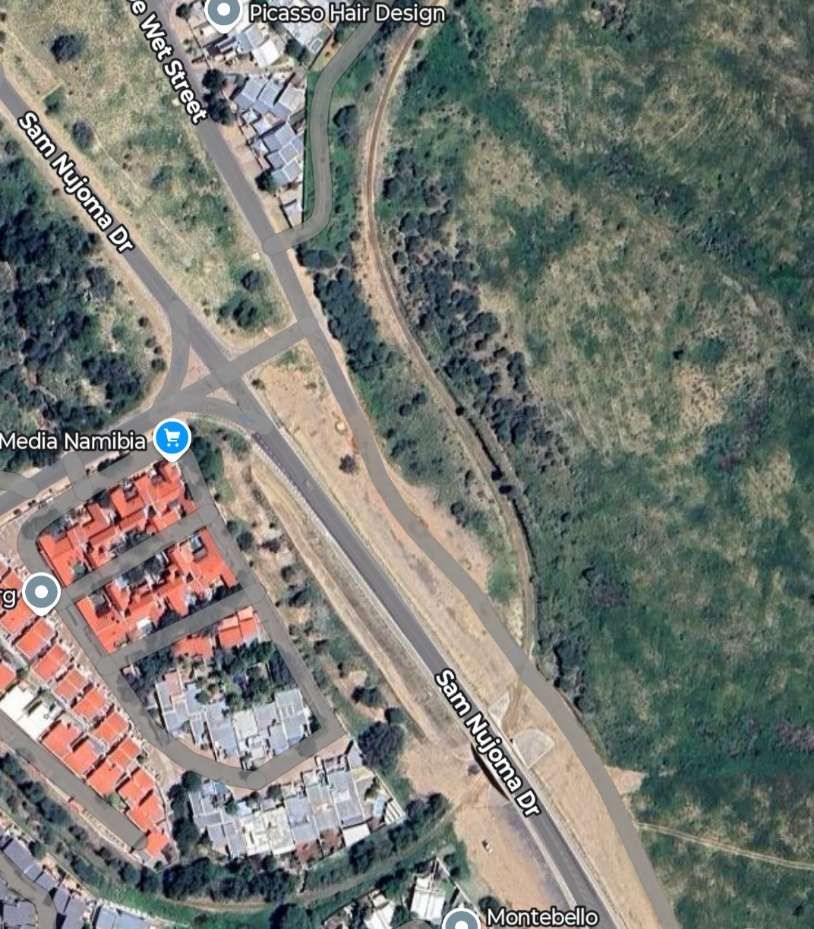
These next fourteen satellite images show the line wandering back and forth through the Windhoek suburbs. …
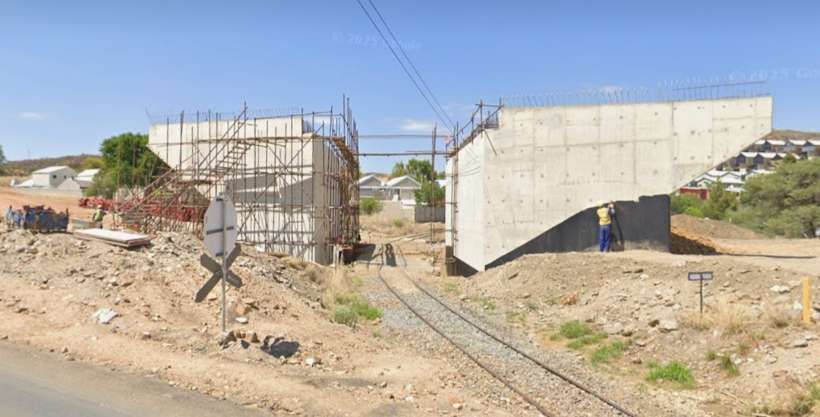
These fourteen extracts from Google’s satellite imagery take the Gobabis line to a point to the East of Sam Nujoma Drive. [Google Maps, June 2025]Looking South-southwest from Andries de Wet Street along the line of the railway towards Windhoek Railway Station, showing the substantial bridge under construction in 2024. [Google Streetview, 2024]
The journey beyond Andries de Wet Street continues, the next satellite images cover larger areas than the ones above. ….
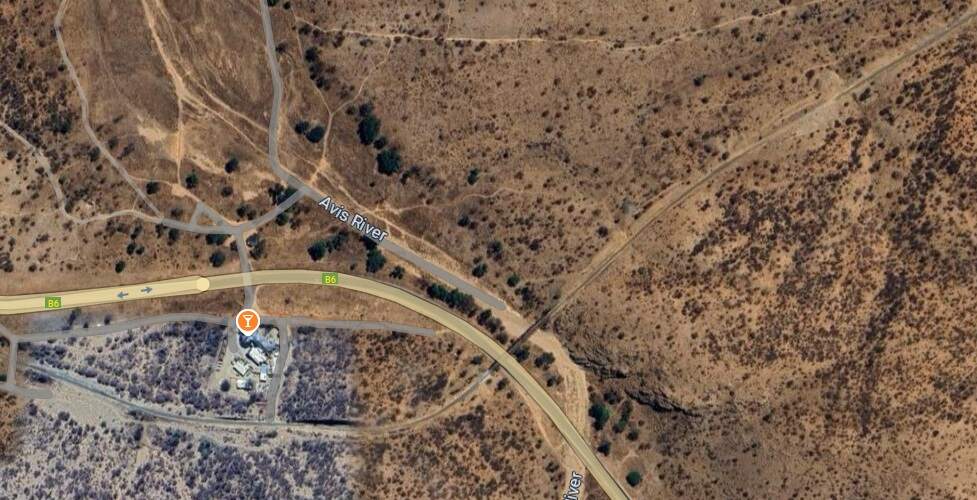
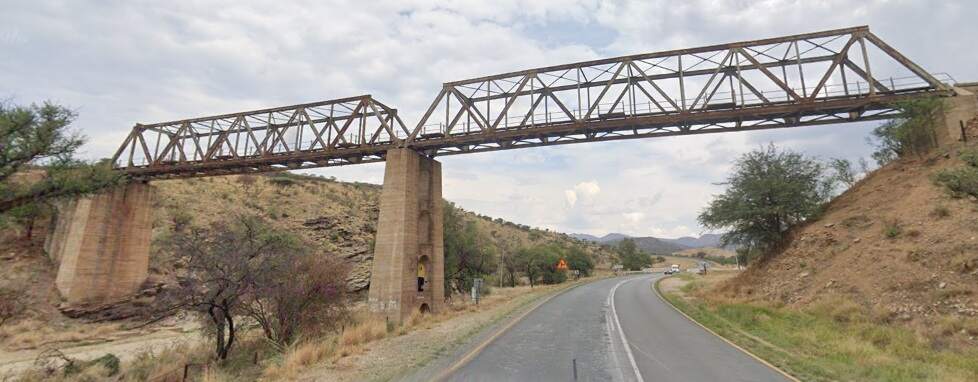
This sequence of three images takes the line out into open country beyond the Avis River. [Google Maps, June 2025][The truss girder bridge which carries the railway over the B6 and the channel of the Avis River. [Google Streetview, January 2024]
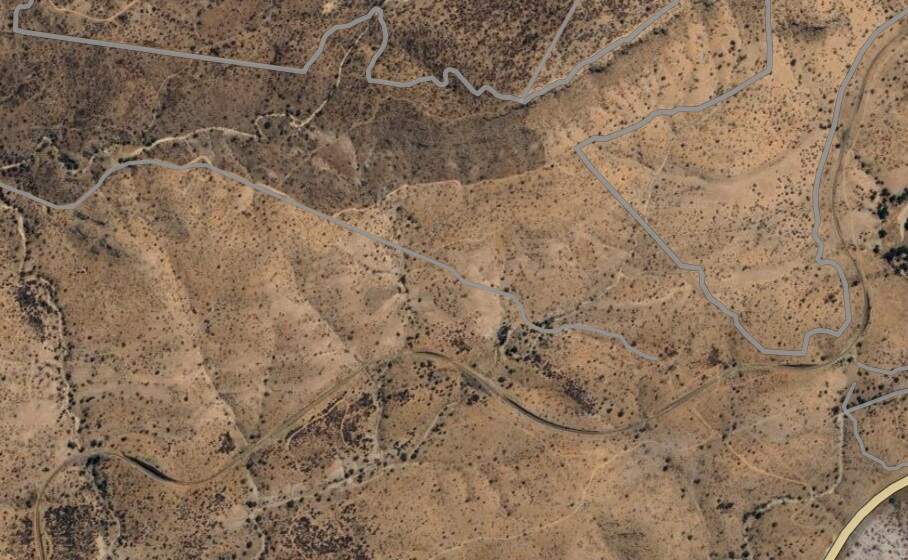
The line continues in a generally easterly direction, although the contours of the terrain mean that the railway has to meander back and forth to find the most advantageous route. These next extracts from Google’s satellite imagery show the way that the line picks its way through the landscape. …
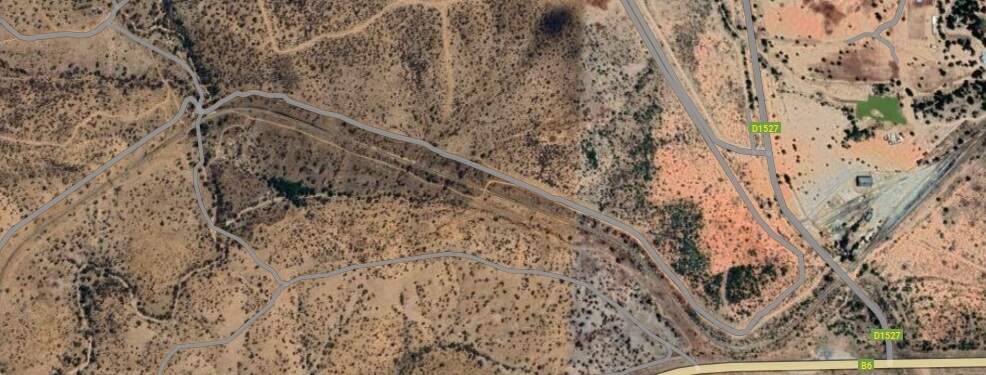
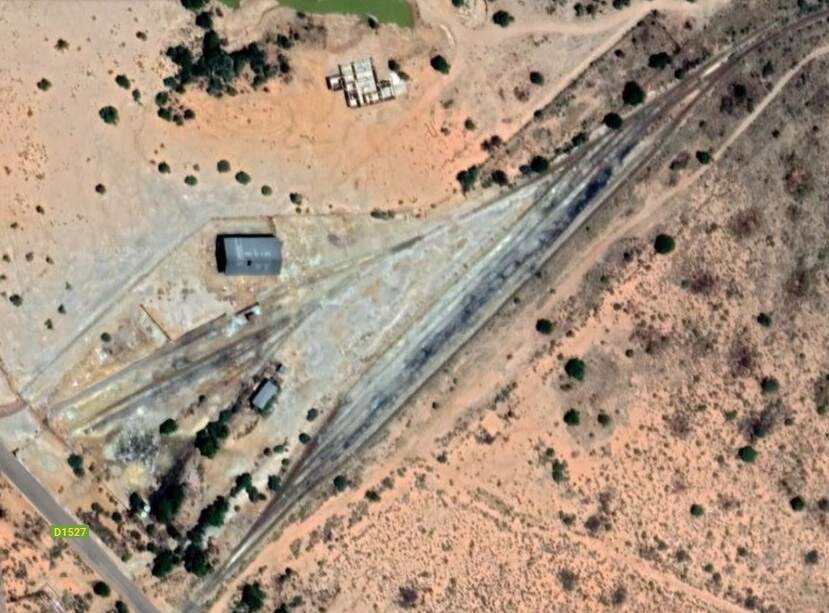
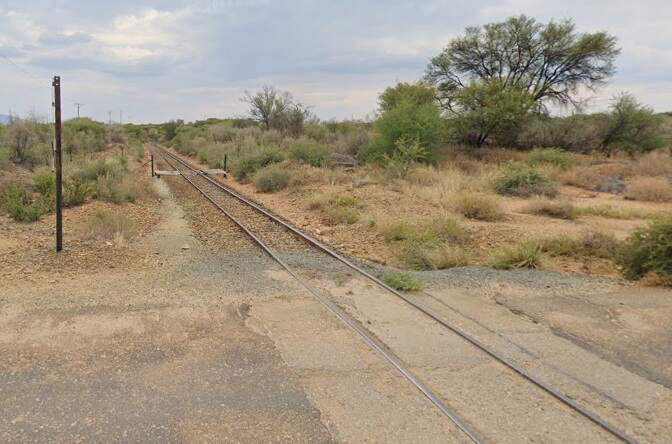
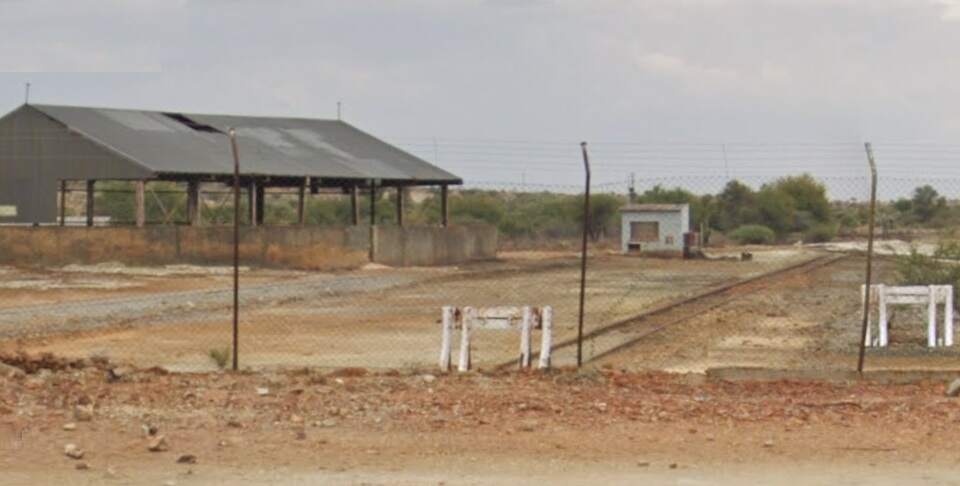
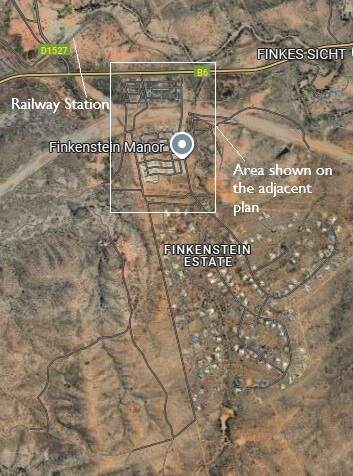
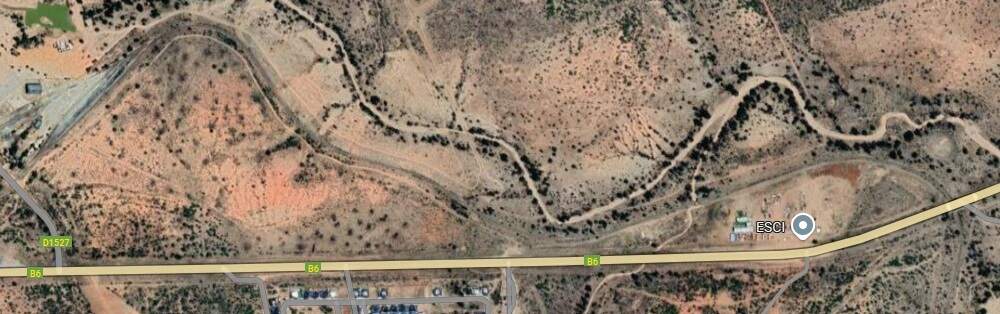
This sequence of four extracts from Google’s satellite imagery takes the line as far as Finkenstein. [Google Maps, June 2025]The railway station close to Finkenstein Estate/Village. [Google Maps, June 2025]The view Southwest from the D1527 along the railway towards Windhoek. Google Streetview, January 2024]Looking Northeast into the railway station site from the D1527. [Google Streetview, January 2025]A little further to the Northwest on the D1527, this is the view looking Northeast into the goods yard at the station. [Google Streetview, January 2024]
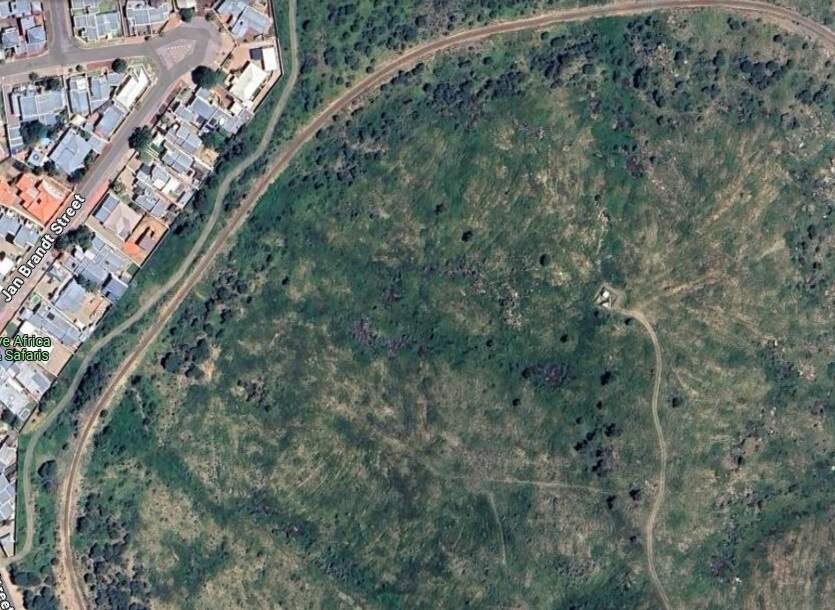
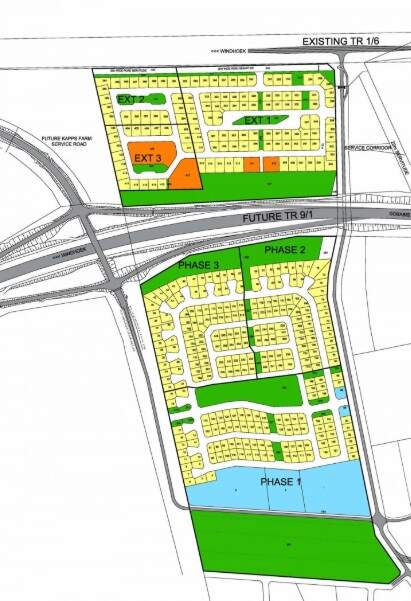
These two images indicate the area of the Finkenstein Estate/Village and current proposals for new housing and a new major road.The location of the railway Station can be seen at the top-left of the satellite image. The lighter swathe of ground curving across the top half of the satellite image is the construction site for the new road. [5][Google Maps, June 2025]
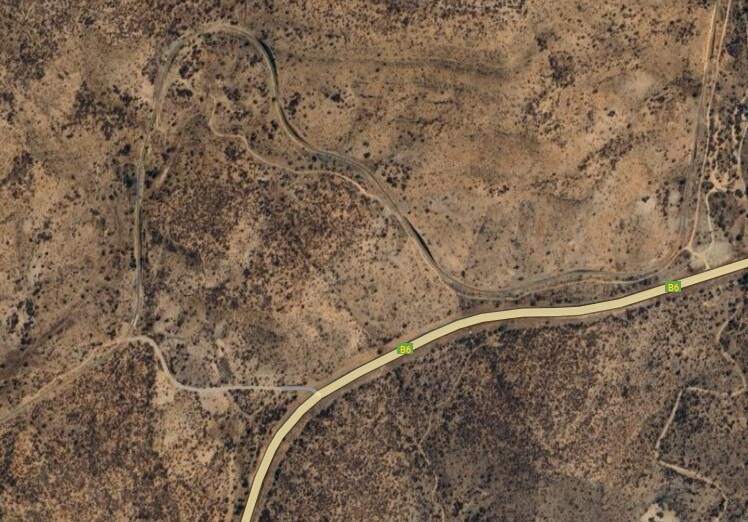
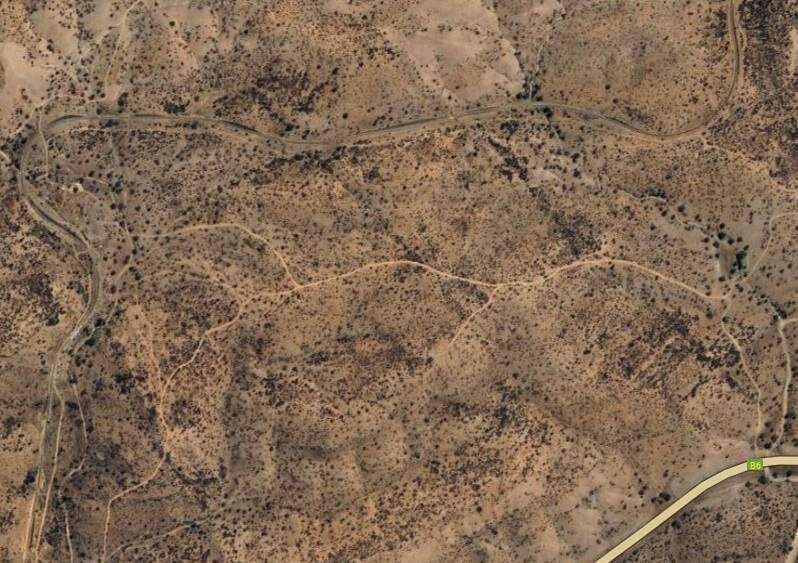
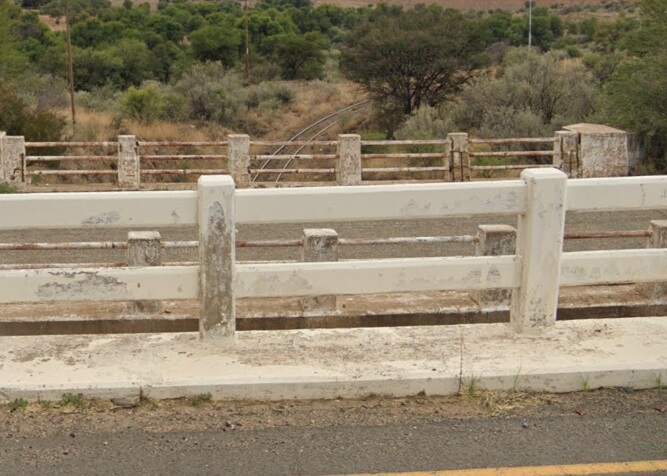
The line continues East from Finkenstein. At the right side of this satellite image the railway passes under the B6. [Google Maps, June 2025]Looking Northwest from the B6 along the line towards Finkenstein Station and Windhoek. [Google Streetview, January 2024]Looking Southeast from the B6 the line is curving to the South. The older road bridge is visible alongside the B6. Not too far ahead, out of shot are the construction works for the road that will replace the B6 as a main artery. [Google Streetview, January 2024.
Almost immediately after passing under the B6, the line begins to swing round from a Southwestern trajectory to the Northeast and then the East before passingunder the B6 again.
Looking Northeast from the bridge carrying the B6 over the line. The line can be seen curving round to the East. [Google Streetview, January 2018]
The line heads generally in an easterly direction and after some kilometeres runs alongside the Seeis River. …
The railway bridges the Seeis River and then runs alongside both the river and the B6. [Google Maps, June 2025]
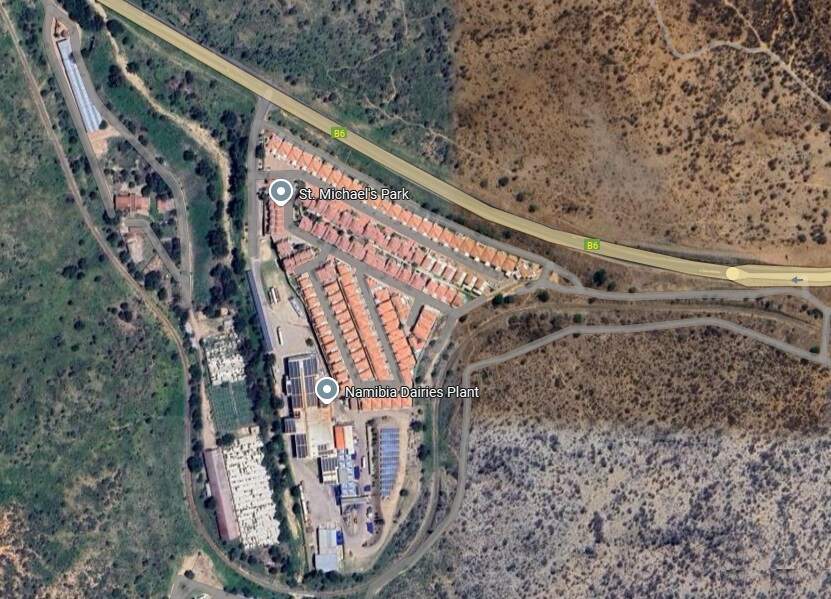
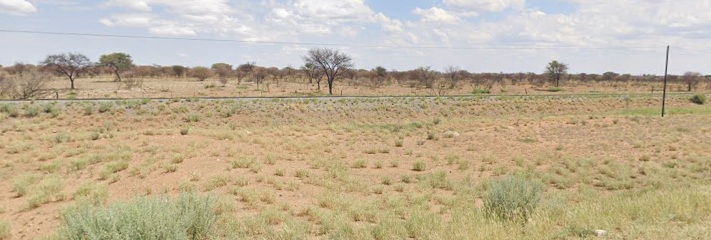
Stocking close to the South bank of the Seeis River, the line passes to the North of Sonnleiton Village before rejoining the B6 close to Windhoek Airport, and passing to the South of the airport and then running immediately alongside the B6.
The railway seen looking North from the B6. [Google Streetview, January 2024]
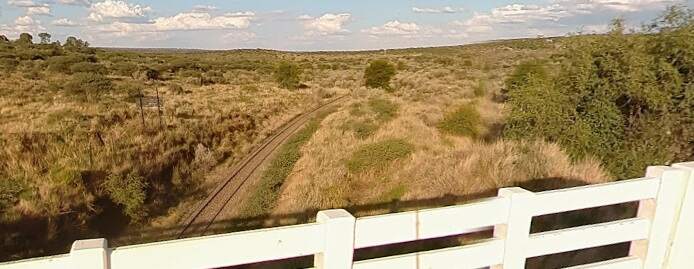
Both road and rail pass just to the North of the settlement of Seeis where an old railway station was sited, and then over the River Seeis.
The Seeis River Railway Bridge seen looking North from the B6. [Google Streetview, January 2024]
The video below shows the settlement, its station and its bridge. ….
YouTube video of Seeis and its station and railway bridge. [19]
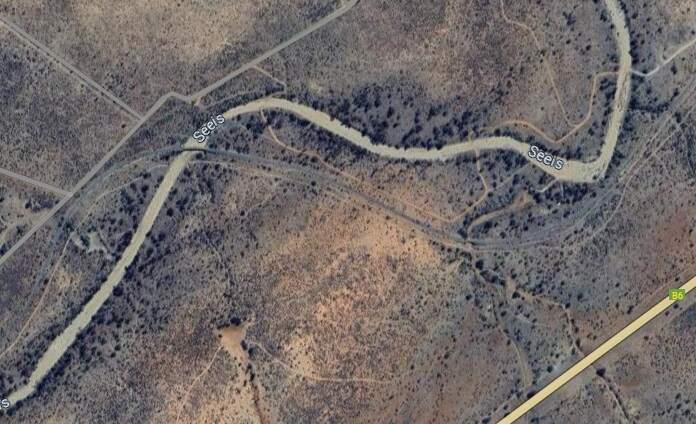
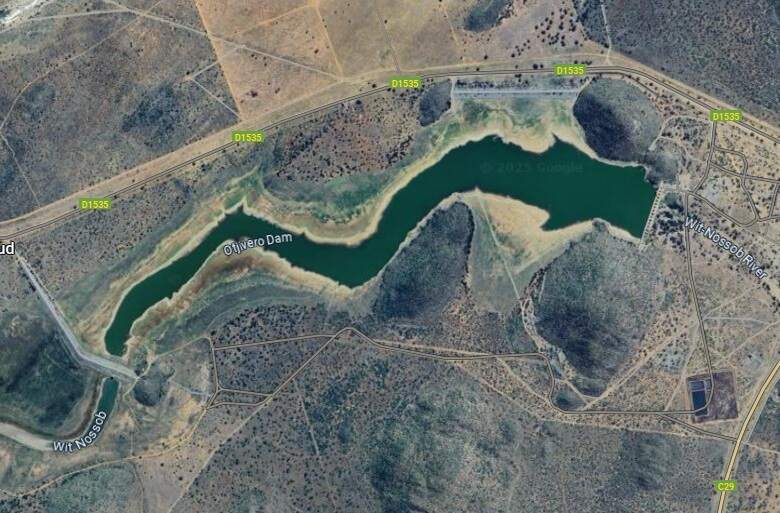
Beyond Seeis the railway continues alongside the B6 in a Northeasterly direction. The railway then turns further Northwest and leaves the B6, finding its own path towards Gobabis. It crossed the D1535 at an ungated crossing. The D1535 then runs alongside the railway heading Northeast before crossing the railway again at another ungated crossing. Both road and railway cross the Wit Nossob River and run along its North bank, crossing tributaries enroute before passing to the North of the Otjivero Reservoir and Dam.
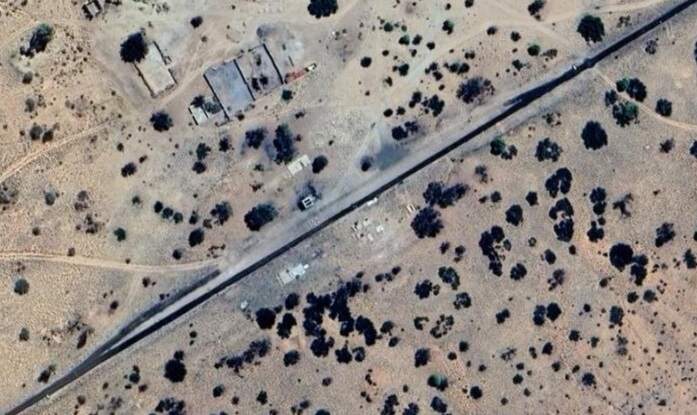
The Otjivero Reservoir and Dam. The railway runs on the North side of the D1535. [Google Maps, June 2025]
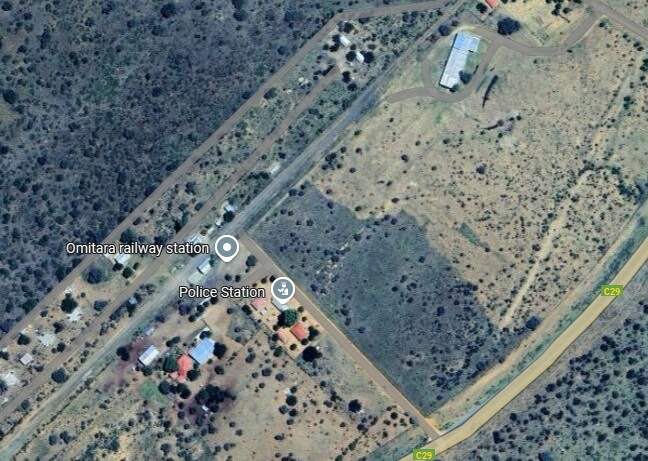
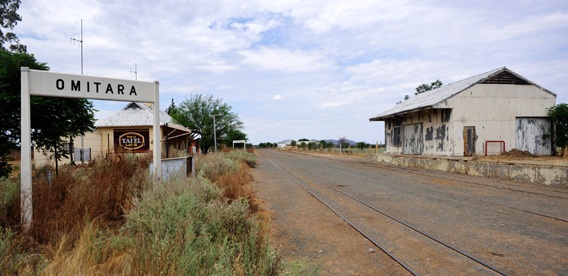
Beyond the Dam, the railway follows the C29 heading East. it pulls away a little to the North to create room for Omitara Railway Station.
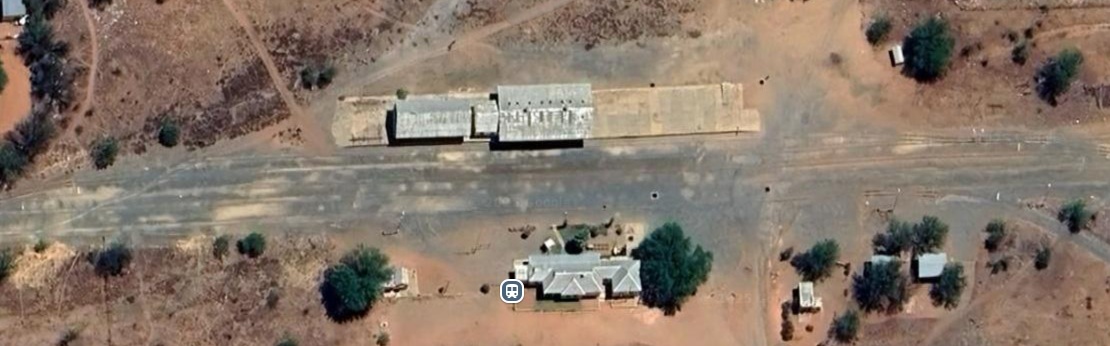
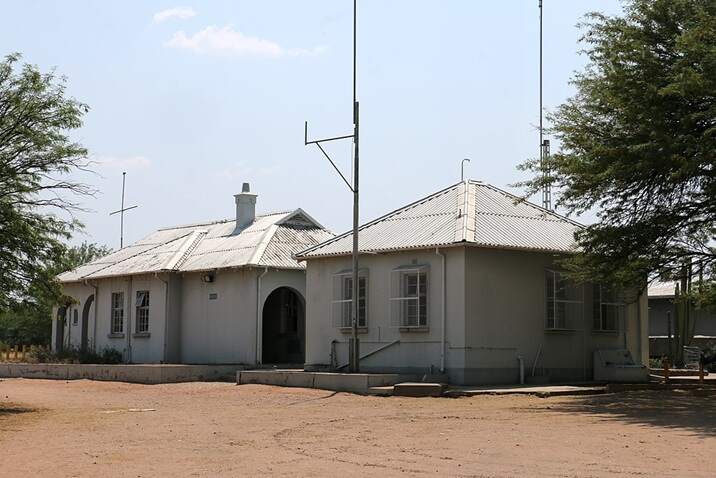
Omitara Railway Station. [Google Maps, June 2025]Omitara Railway Station, (c) Arche-foto, Burkhart Rüchel, and licenced for reuse under a Creative Commons Licence, (CC BY-SA 3.0). [20]
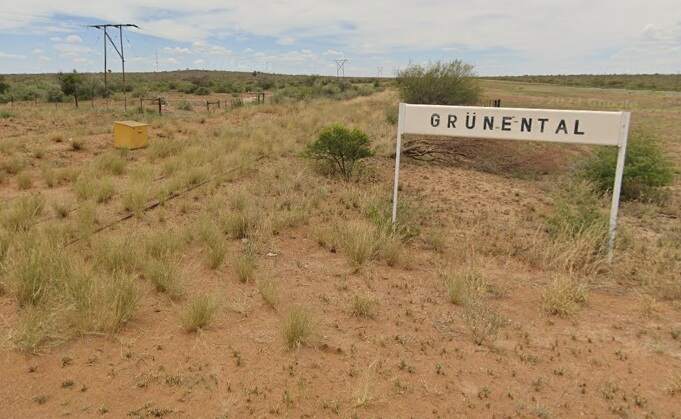
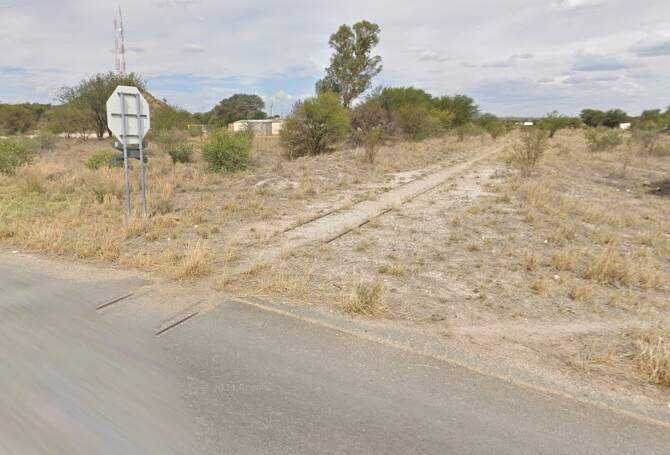
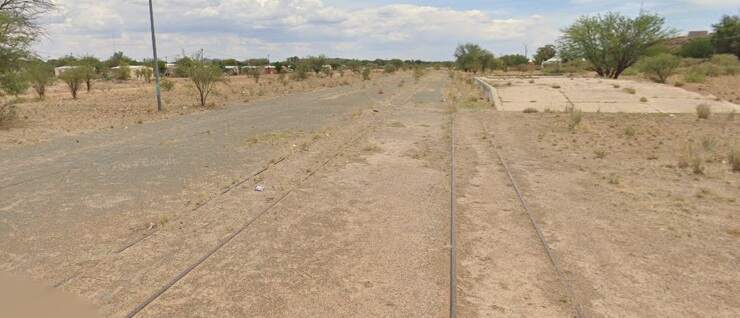
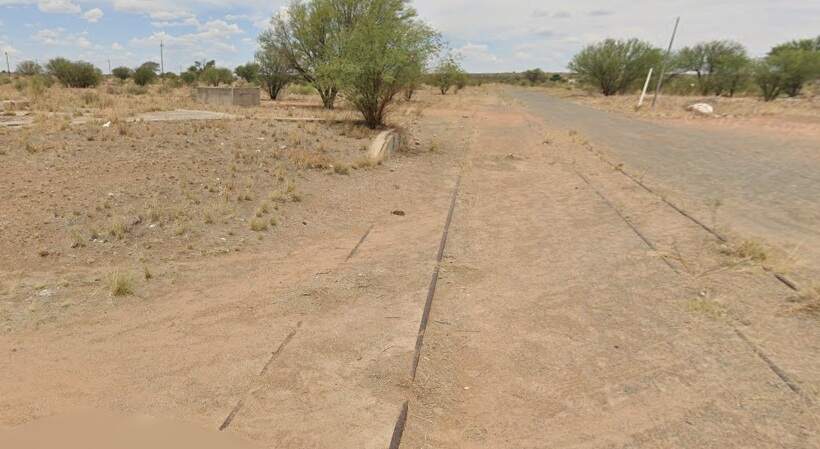
Northeast of the station the railway passes under the C29, continuing to run East-northeast and then East, and then Southeast, before returning to run alongside the B6 once again. Following the line on satellite images has become increasingly difficult.
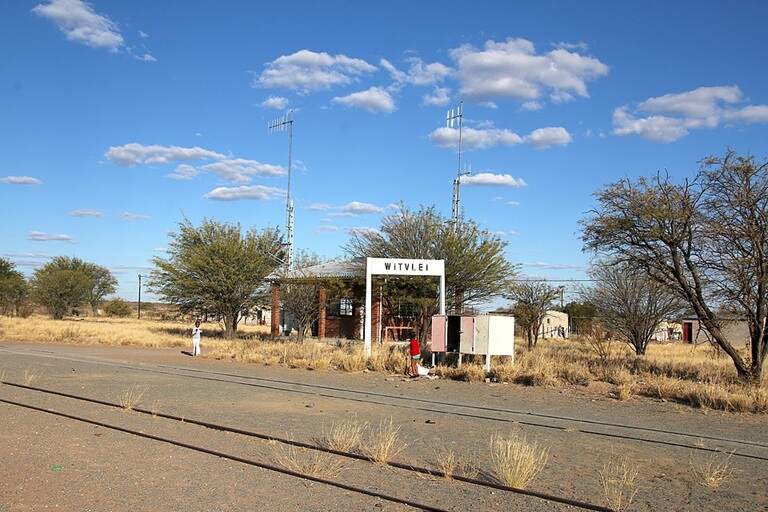
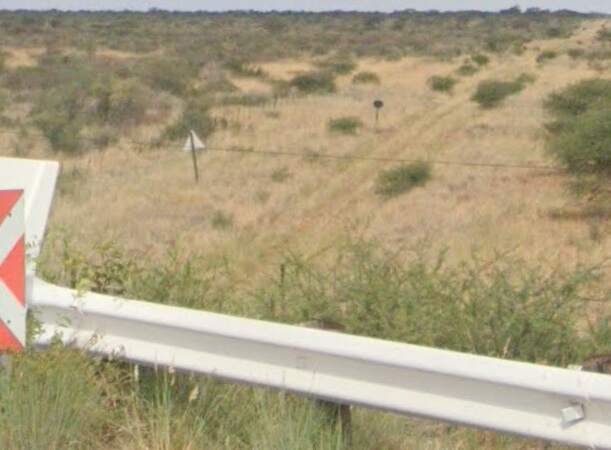
This photograph looks along the line to the East from the ungated crossing over the D1658 at Grunental. As can be seen the line is significantly over grown by grasses. [Google Maps, June 2025]Looking East at the ungated crossing over the D1663, the line seems to be disappearing into the sand. {Google Streetview, January 2024]Looking West at the old station site at Witvlei. [Google Streetview, January 2024]Looking East at the old station site at Witvlei. [Google Streetview, January 2024]Witvlei Railway Station in 2018, (c) Hp.Baumeler and licenced for reuse under a Creative Commons licence, (CC BY-SA 4.0). [21]Looking back West along the apparently little used line towards Windhoek from the bridge carrying the B6 across the line. [Google Streetview, January 2024]Looking East from the same bridge, the line is almost indistinguishable from the surrounding grassland. [Google Streetview, January 2024]
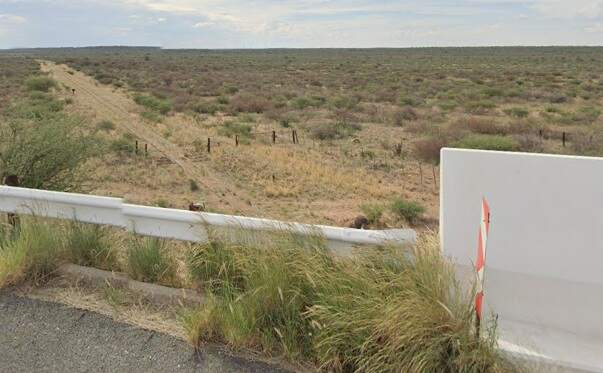
The railway continues to the East, with the B6 running parallel to it on the North side.
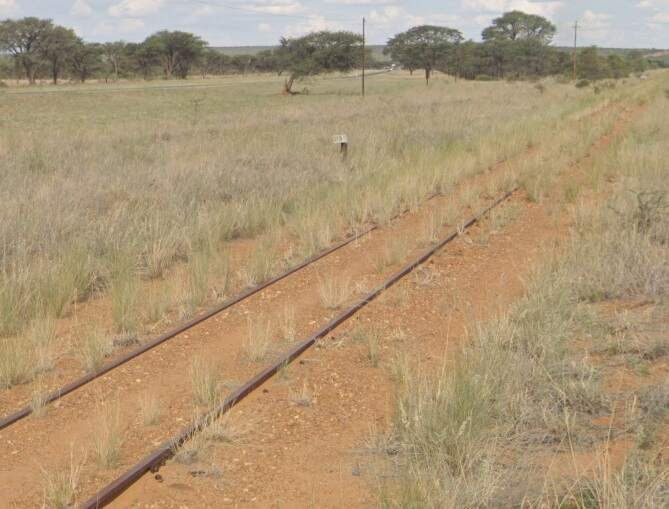
Looking East along the line at an ungated crossing on a minor road.The B6 can be seen over to the left. [Google Streetview, January 2024]
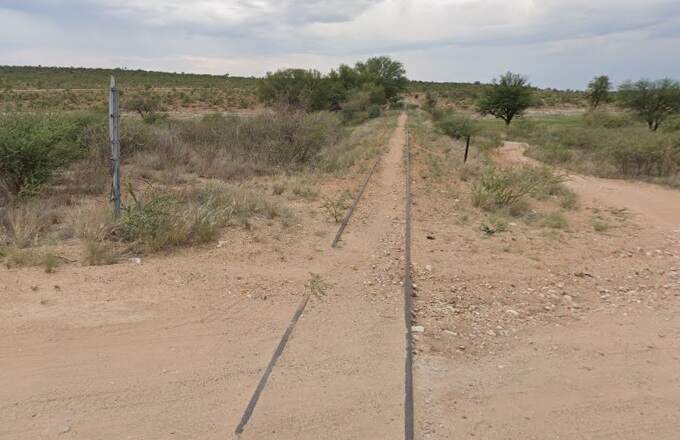
The line begins to turn to the Southeast before crossing the Black Nossob River. …
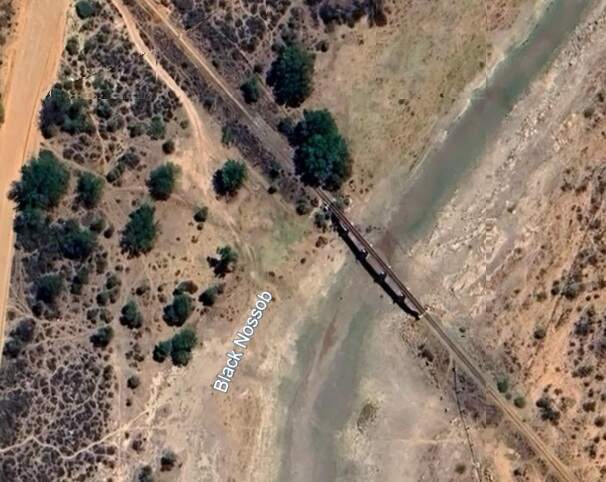
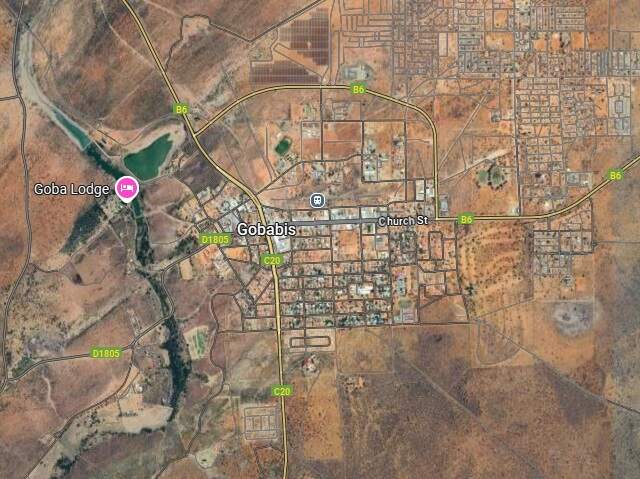
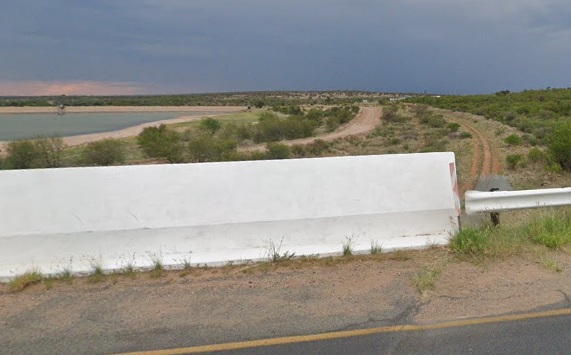
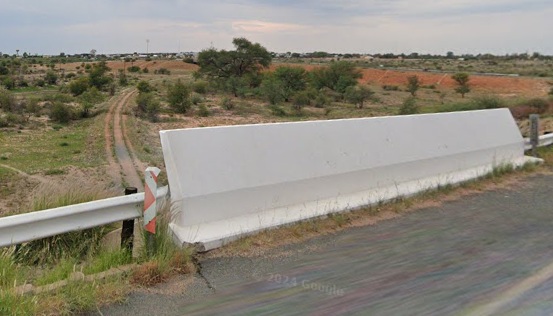
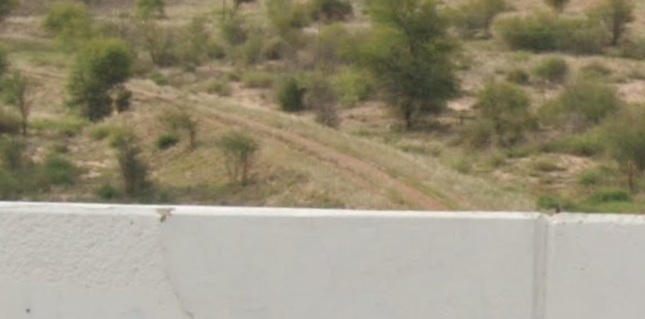
Looking Southeast from the C30 along the line towards the Black Nossob River. [Google Streetview, January 2024]The railway bridge over the Black Nossob River close to Gobabis. [Google Maps, June 2025]Gobabis: the Black Nossob River, Reservoir and Dams are on the left side of the satellite image. The railway bridge over the Black Nossob can just be picked out in the extreme top left of the image. The railway flanks the reservoir and lake before passing under the B6 and then, after the B6 has turned through 90, under the B6 (Gobabis Bypass).Looking West from the B6 bridgeLooking East from the B6 BridgeLooking Northwest from the Gobabis Bypass (B6).Looking Southeast from the Gobabis Bypass (B6).Looking Northwest from Heroes Lane/Creamery Lane, GobabisLooking Southeast from Heroes Lane/Creamery Lane, Gobabis
The 6 images immediately above show the railways approach to Gobabis Railway Station.
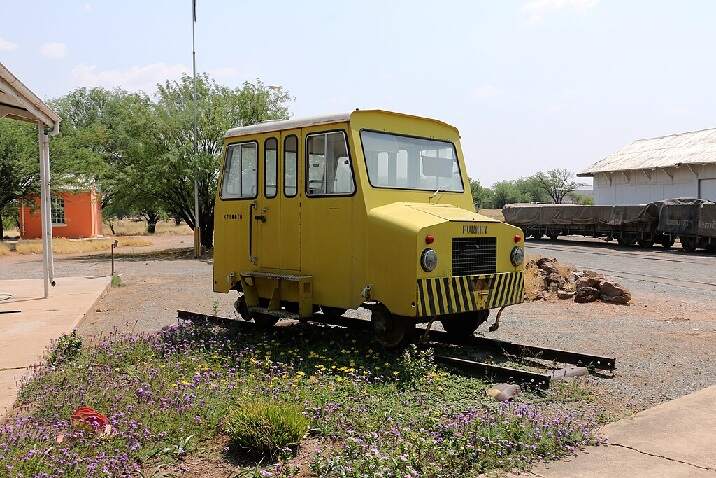
Gobabis Railway Station. Its turning triangle can be seen at the right side of this satellite image. A series of sidings are the end of the line, these are just Southeast of the turning triangle. [Google Maps, June 2025]Gobabis Railway Station Buildings. [Google Maps, June 2025]Gobabis Railway Station Building, (c) Hp. Baumeler and licenced for reuse under a Creative Commons Licence (CC BY-SA 4.0). [22]Plinthed at Gobabis Railway station is this 5 man railway inspection car (c) Hp. Baumeler and licenced for reuse under a Creative Commons Licence (CC BY-SA 4.0). [23]Also plinthed at Gobabis Railway station is this small flatbed wagon, (c) Hp. Baumeler and licenced for reuse under a Creative Commons Licence (CC BY-SA 4.0). [24]
Gobabis is the end of the line. There are plans on the drawing board for a Trans-Kalahari Railway Line which would extend East from the current livestock railhead at Gobabis and may well be electrified. [25][26][27]
Seeheim-Lüderitz
The final length of line to be looked at is that from Seeheim to Lüderitz. The railway line from Seeheim to Lüderitz is 318 kilometres (198 miles) long. The connection between Lüderitz and Aus was completed in 1906, and the extension to Seeheim was completed in 1908. [1] The service between Aus and Lüderitz was decommissioned in 1997, due to poor track condition, and there is no regular passenger service between Seeheim and Aus. … The line to Lüderitz was rehabilitated in the 2010s and was scheduled for reopening in 2017. Test trains ran to Lüderitz in 2014 and Lüderitz Harbour in 2018. [2]
We begin this journey from Seeheim Railway Junction. …
Seeheim Railway Junction. [Google Maps, June 2025]
Just a short distance Northwest along the line from the junction is Seeheim Railway Station.
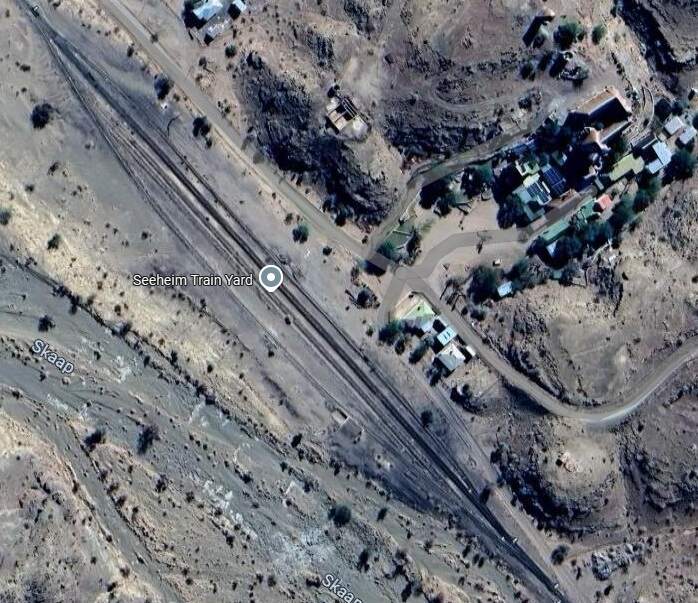
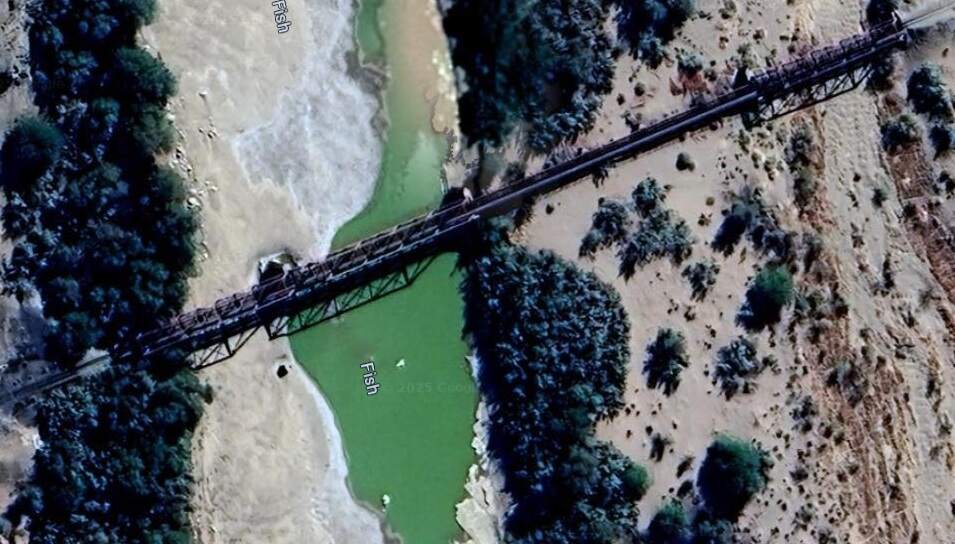
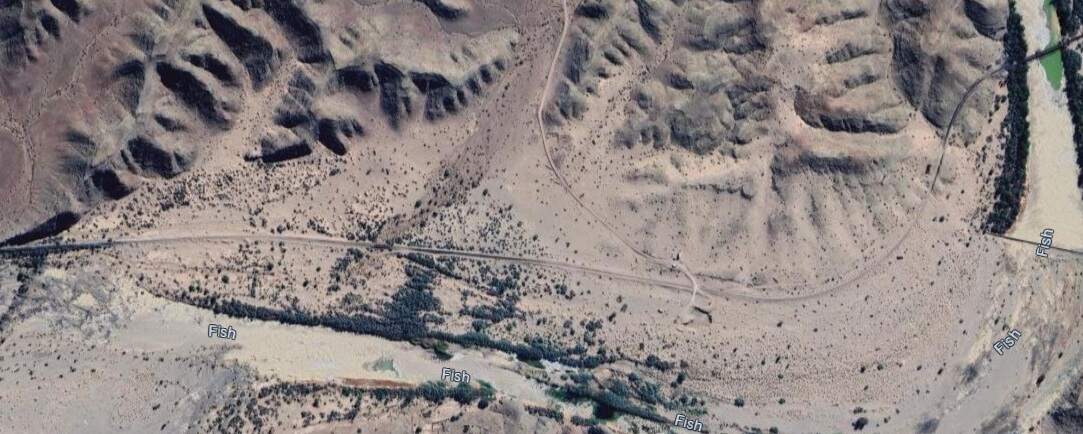
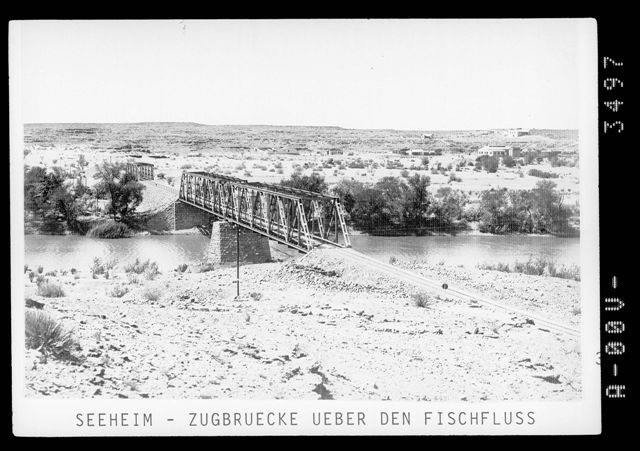
Seeheim Railway Station in very early days. [30]The train yard at Seeheim in the 21st century. The Skaap River is just to the South of the Yard. [Google Maps, June 2025]A short distance beyond the limits of the old railway station the line crosses the Fish River close to its confluence with the Skaap River. This is a very early postcard image of the railway bridge over the river. A modern image of the bridge in the distance on this postcard can be seen here. [29] [30]The bridges over the Fish River in the 21st century. [Google Maps, June 2025]After crossing the Fish River the railway follows its North bank. [Google Streetview, June 2025]It crosses a couple of tributaries before heading away from the river into the hills. [Google Streetview, June 2025]
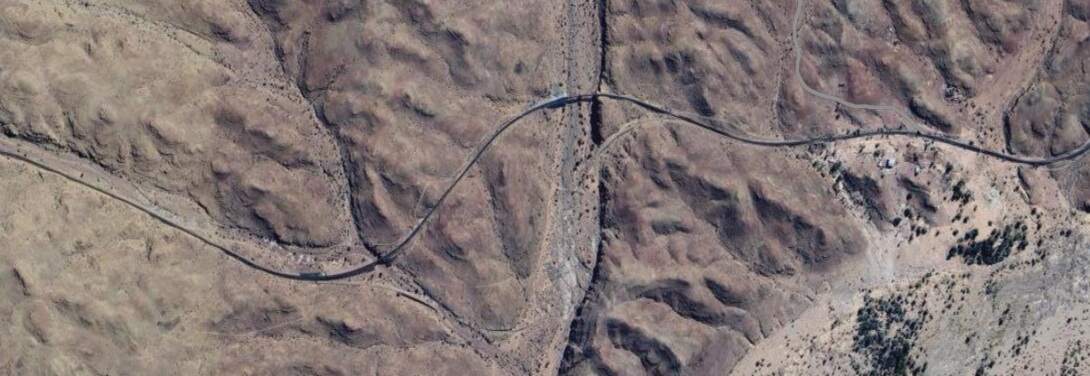
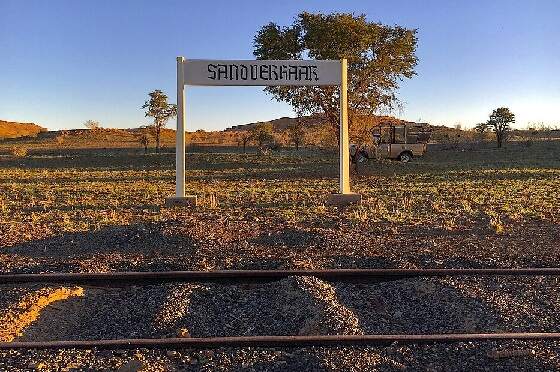
After some distance winding through the hills, the railway line crosses the D463, bridges a dry watercourse and crosses an open area of sand before again winding its way through more hills, heading Northwest. The next image shows the location of Sandverhaar Railway Station and Bridge.
Sandverhaar Railway Station and Bridge. [Google Maps, June 2025]Sandverhaar Railway Station, (c) Matthias Bruhin & Hp.Baumeler and licenced for reuse under a Creative Commons Licence (CC BY-SA 4.0). [28]
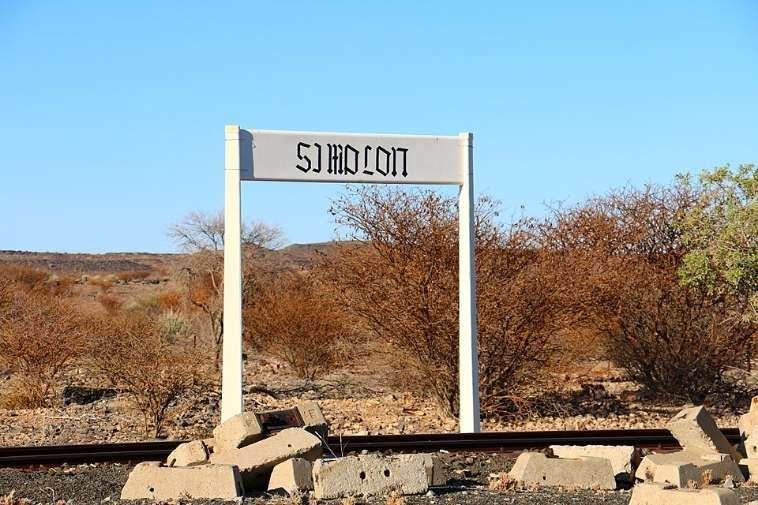
A little further West the line crosses the dry watercourse of the Gurib River and close to Alte Kalkofen Lodge passes through the site of what was Simplon Railway Station.
Immediately to the West of Simplon Station, the line crosses the D462 and then, for a short while runs alongside the B4.
At Goageb, the line passes under the B4 before entering the Railway Station.
Looking Northwest from the first bridge at Goageb carrying the B4 over the line. [Google Streetview, December 2023]
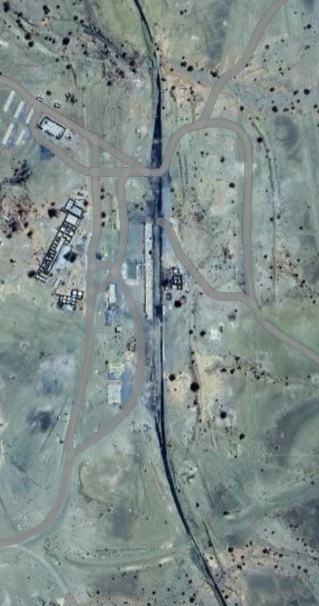
Goageb Railway Station. [Google Maps, June 2025]
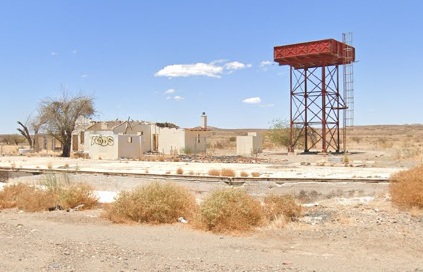
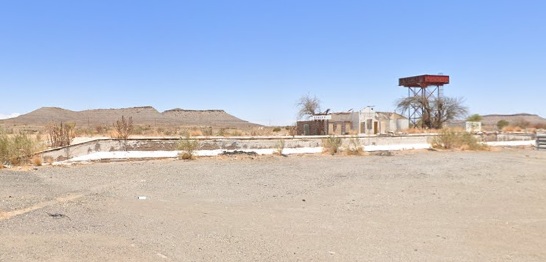
The Station building and water tower at Goageb, seen from the Southwest. [Google Streetview, December 2023]The platform, station building and water tower at Goageb, seen from the Northwest. [Google Streetview, December 2023]
The bridge carrying the railway over the Konkiep River, seen from the bridge carrying the B4 over the river. [Google Streetview, December 2023]Looking back towards the railway’s bridge over the river. [Google Streetview, January 2018]Looking Northwest from the bridge carrying the B4, along the line of the railway. [Google Streetview, January 2018]
After passing under the B4 the railway turns North-northwest and runs alongside the B4 for a few kilometres before the road turned away toward the North. The railway then turns to the Southwest.
A relatively short passing loop is provided seemingly in the middle of nowhere! [Google Maps, June 2025]
These next few pictures give a sequence of satellite images or views in sequence along the line.
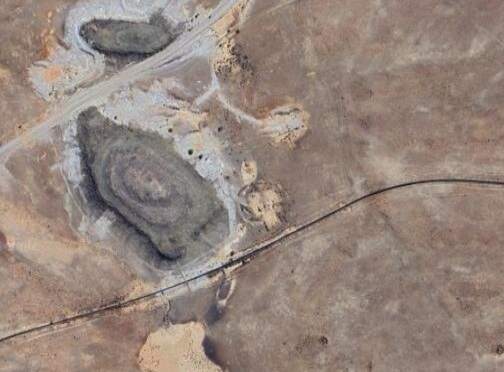
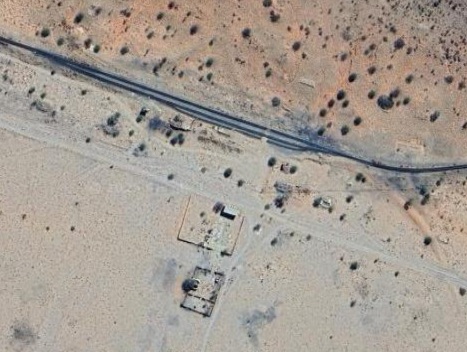
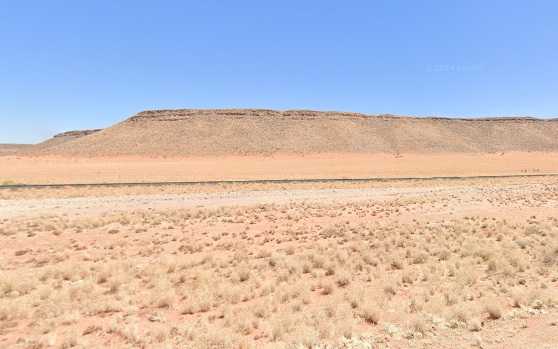
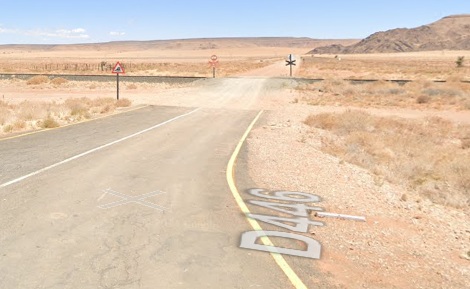
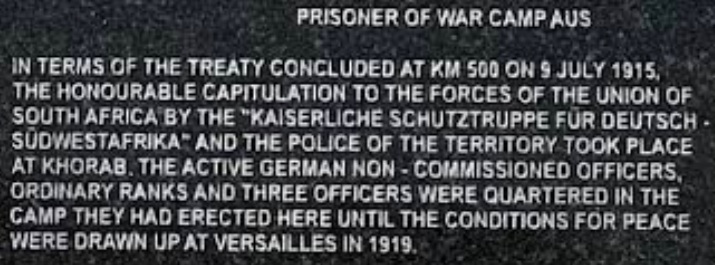
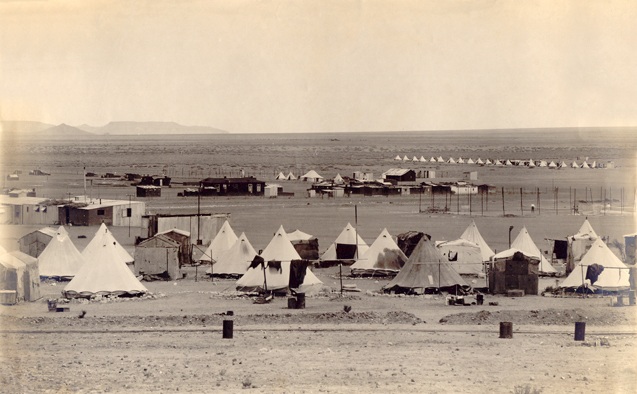
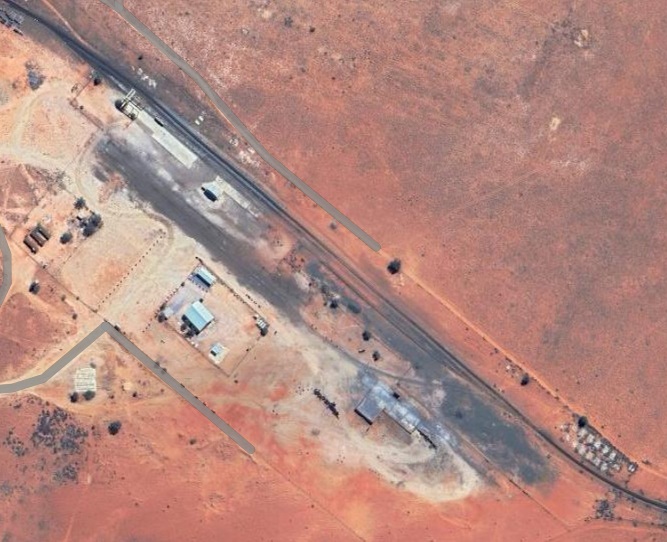
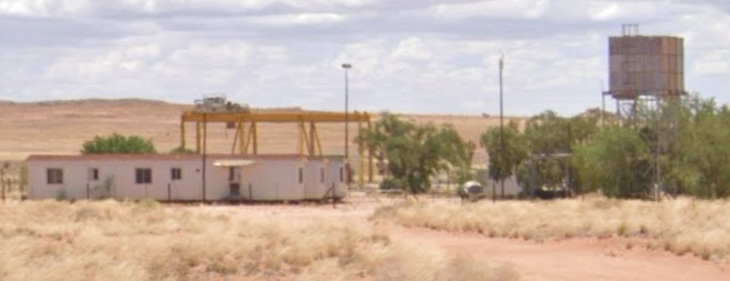
An igneous rock intrusion alongside the lineA dramatic S-curve on the line. Another unnamed passing loopThe line running South of and close to the B4Looking South from the B4 along the D446 we can see an ungated crossing . The railway is around 100 metres from the B4 at this location.A memorial has been placed at the site of a prisoner of war camp from the First World War to the East of the town of Aus.The Camp near Aus for German prisoners of war 1915-1919, (c) Public Domain. [31]Immediately to the South of the Kriegsgefangenen Denkmal, the war memorial, there are a series of sidings/passing loop on the railway as shown here. [Google Maps, June 2025]A gantry crane, cabins and water tower are present at this location. [Google Streetview, January 2024]
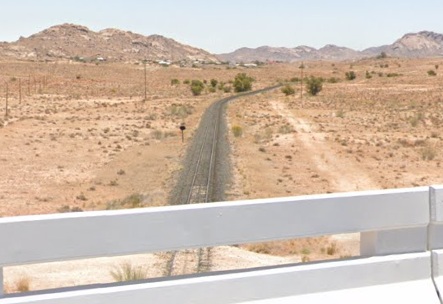
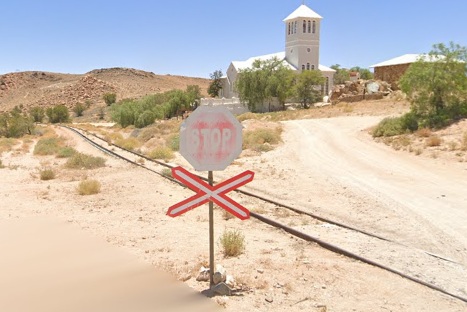
It is only a short distance from this location to the township of Aus. The railway passes, first, under the C13 and then into Aus.
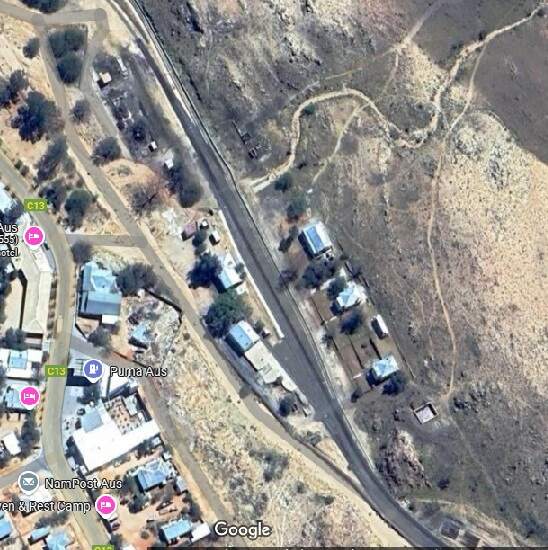
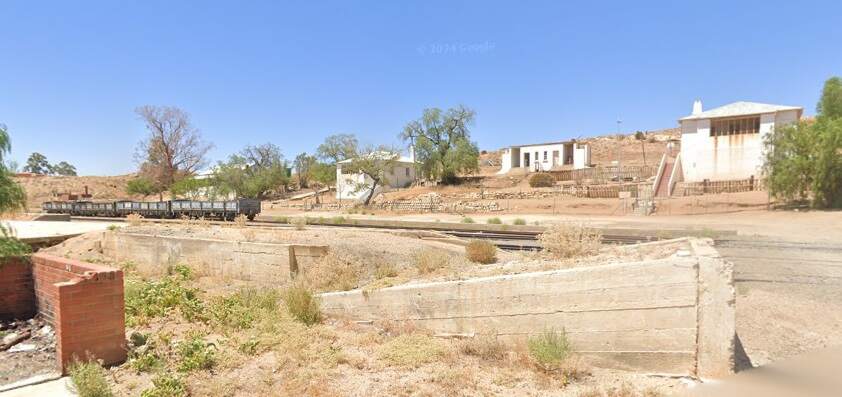
The view Northwest from the C13 towards Aus. [Google Streetview, January 2024]Aus Railway Station. [Google Maps, June 2025]Looking Southeast, this photograph shows the railway line curving round into Aus Railway Station. [Google Streetview, December 2023]The Southeast end of Aus Railway Station site. [Google Streetview, December 2023]The station approach at Aus. [Google Streetview, December 2023]
Northwest of the railway station, the line crosses the C13 again, this time at an ungated crossing.
Looking Southeast from the ungated crossing on the C13 towards Aus Railway Station. [Google Streetview, December 2023]Looking Northwest along the line from the ungated crossing on the C13 – Aus church is prominent in this photograph. [Google Streetview, December 2023]
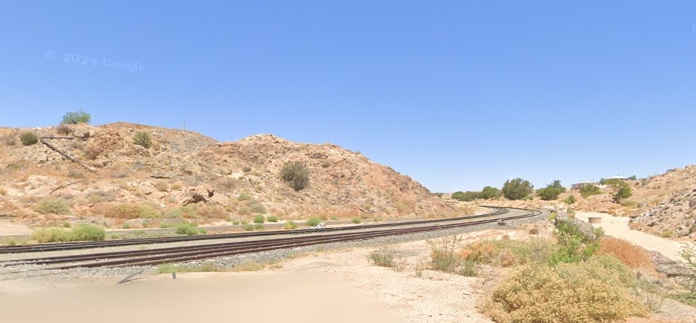
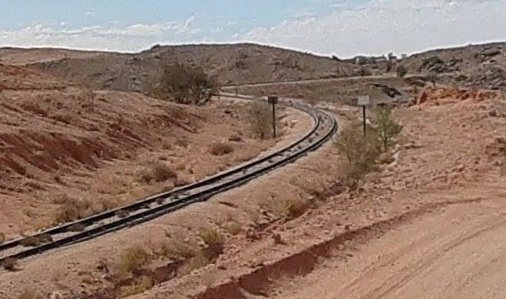
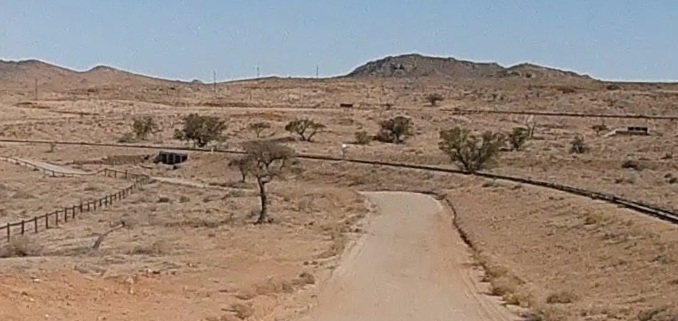
West of Aus the railway passes through the hills. The next image looks backthrough those hills towards Aus.
Looking back towards Aus we can see the line meandering through the hills. [Google Streetview, November 2021]Looking ahead along the railway line from the same location. [Google Streetview, November 2021]
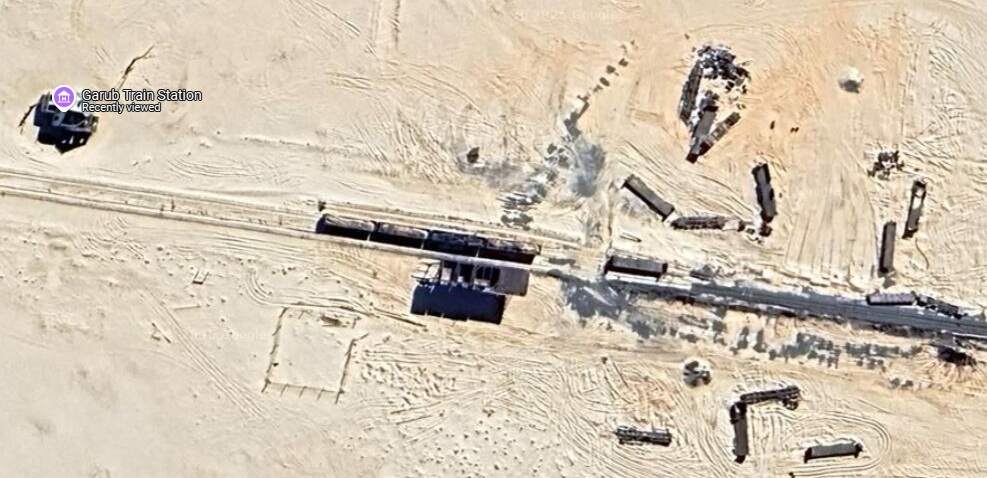
The next station on the line was at Garub. The station is no longer in use.
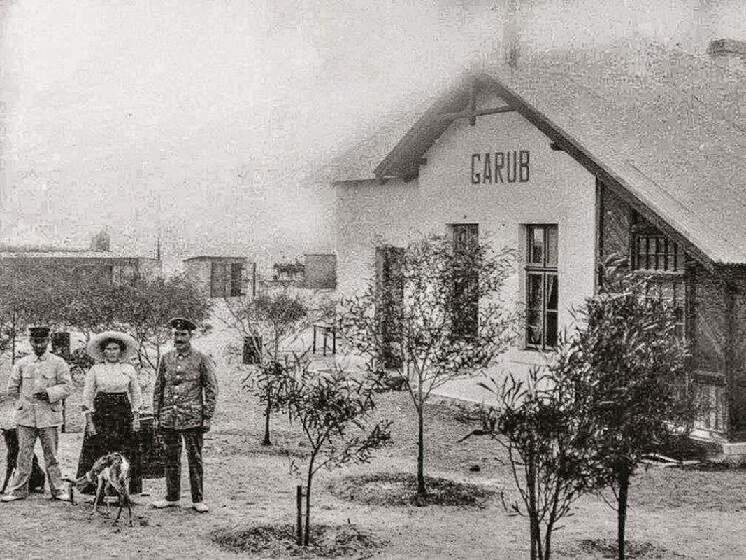
Garub Railway Station: the station hose and water tower remain standing. [Google Maps, June 2025]Garub Railway Station building in the early 1900s, (c) Public Domain. [32]
This image of Garub station house and water tower is embedded here from fineartamerica.com. [33]
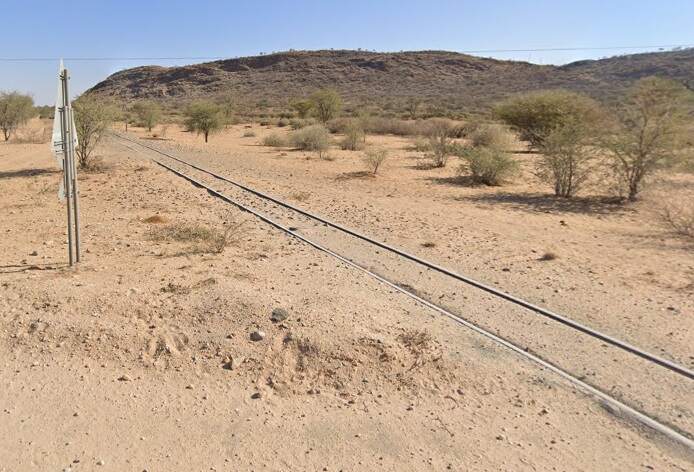
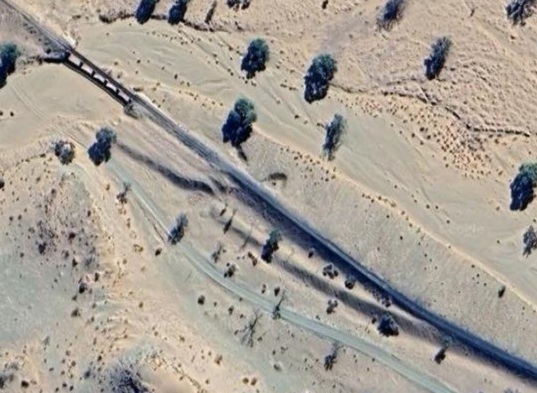
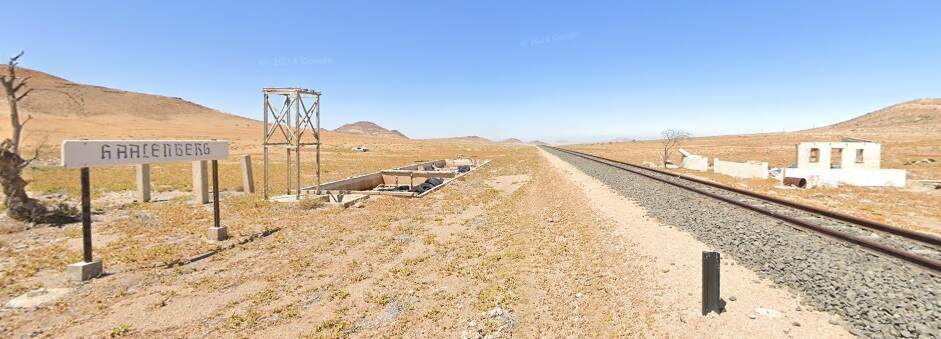
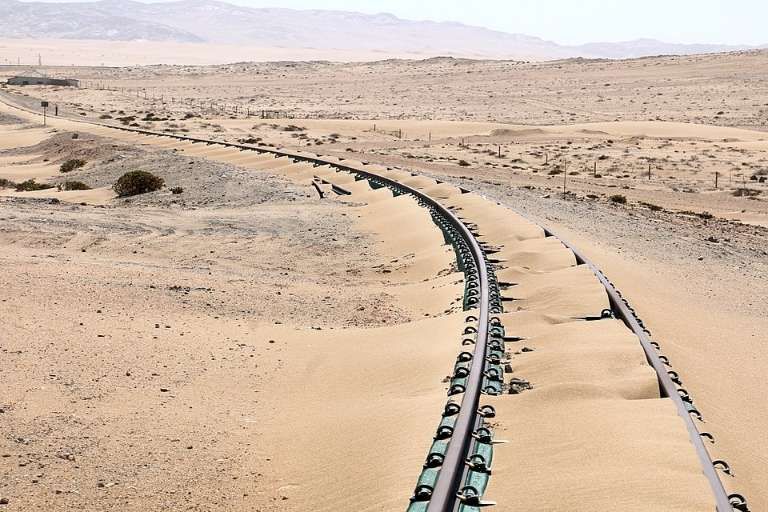
To the West of Garub the B4 and the railway run in parallel. The line passes through another abandoned stations at Tsaukaib, Haalenburg, Rotkop and Grasplatz.
The abandoned Railway Station at Haalenburg, looking West. [Google Streetview, December 2023]The abandoned Railway Station at Grasplatz, looking West. [Google Streetview, December 2023]
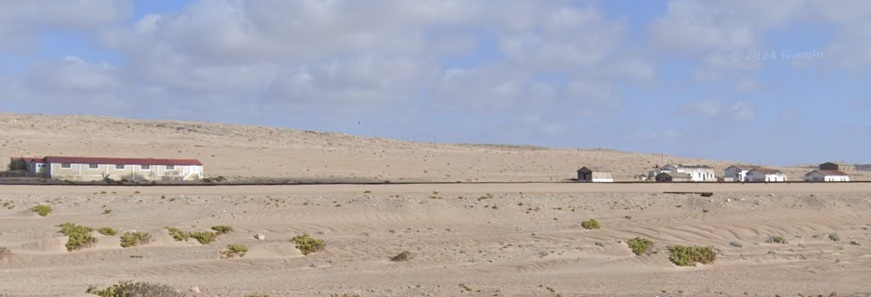
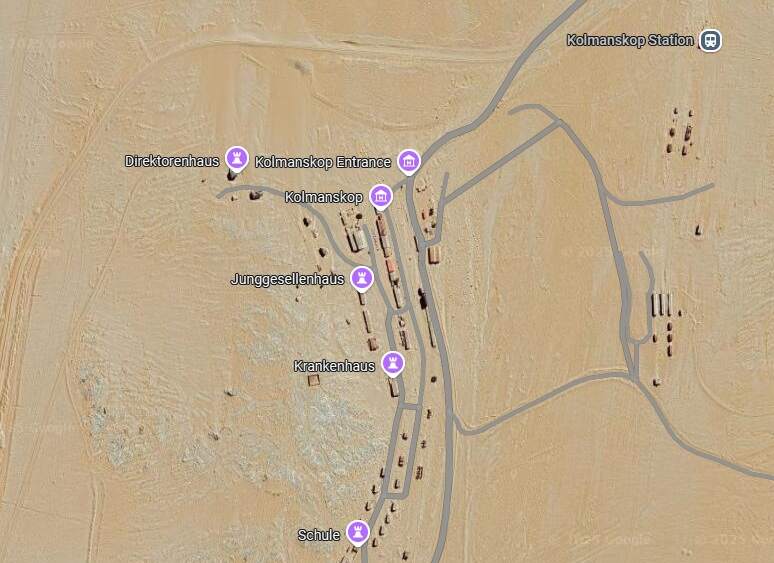
At Kolmanskop there is an entire derelict mining station which once had its own railway station.
Kolmanskop seen from the B4 with the railway visible in front of the buildings.Kolmanskop mining village. The diamond mine was to the South of the village. [Google Maps, June 2025]
As well as its railway link to Lüderitz, Kolmanskop was “the terminus of two private narrow-gauge electrified railway lines that served the diamond mining industry further south. One ran 119 kilometres (74 mi) via Pomona to Bogenfels. It was completed in 1913 but destroyed during World War I in 1915 by South African troops. The other railway line, 7 kilometres (4.3 mi) long and completed in 1920, led to Charlottental. Both were powered by a 1.5 megawatts (2,000 hp) power station in Lüderitz, then assumed to be the largest in Africa.” [1][34][35]
Kolmanskop is only a short distance from the Atlantic Ocean. The B4 and the railway find their own way down to the coast at Lüderitz.
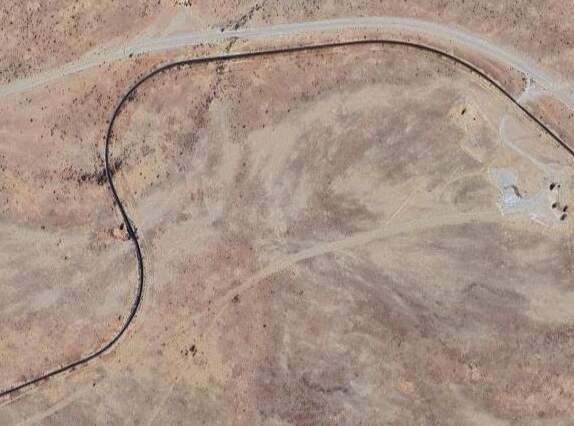
The railway meanders down to the coast following the contours to keep the gradient to a minimum. On the way it passes through a turning triangle. It not obvious why the turning triangle is located at this point on the railway. However, not far beyond the triangle there are a series of sidings/loops which are shown in the image below.
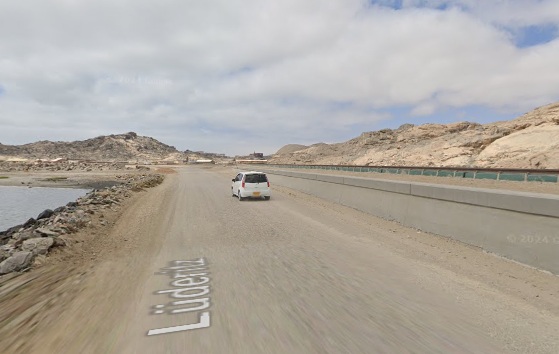
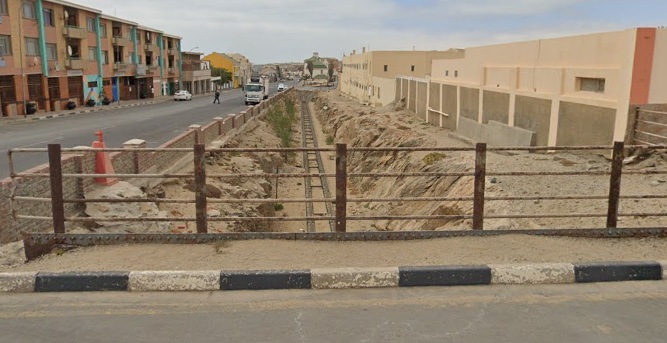
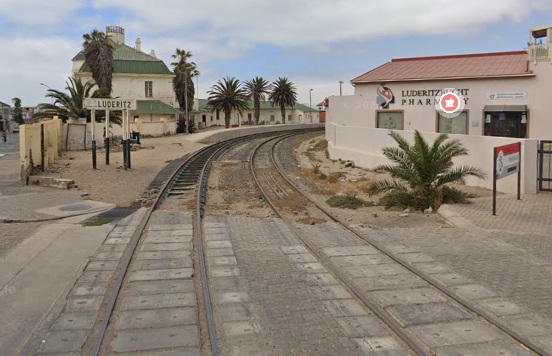
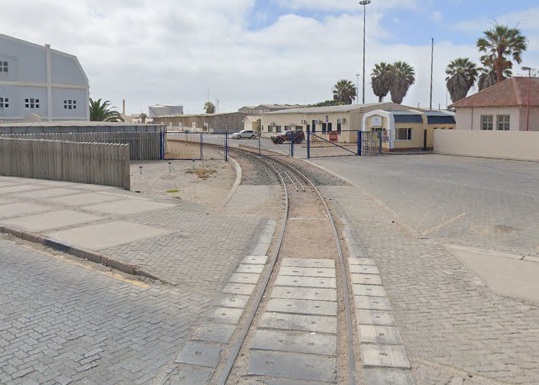
Goods transfer sidings/loops close to Lüderitz. [Google Maps, June 2025]Just short of Lüderitz, the Atlantic is on the left of this photograph, the railway on the right. [Google Streetview, January 2024]Looking West along the railway towards the centre of Lüderitz. [Google Streetview, January 2024]Further along the line and looking North. [Google Streetview, January 2024]Looking North from the ungated crossing at Bay Street. The platform of the passenger station is just ahead. [Google Streetview, January 2024]
A photograph looking Southwest through the station can be viewed here. [37]
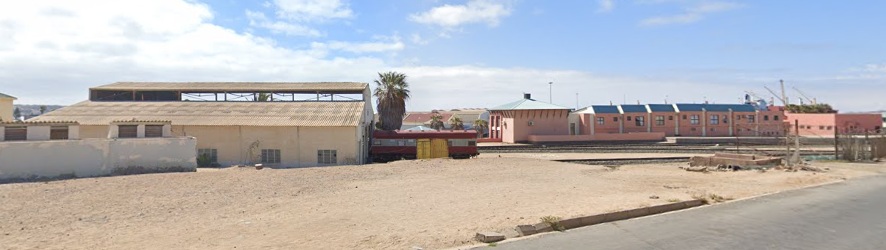
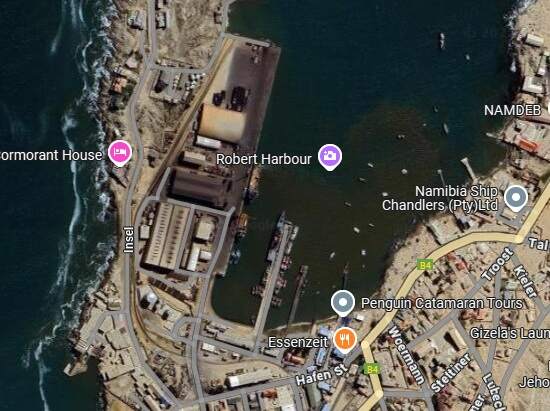
The engine shed and yard in Lüderitz are to the Northeast of the station platforms. [Google Maps, June 2025]The gates to the port at Lüderitz seen from Hafen Street. [Google Streetview, January 2024]The Port of Lüderitz. [Google Maps, June 2025]An aerial view of the port. [36]


.jpg)
.jpg)
.jpg)