The featured image at the head of this article shows BR No. 54445 with an permanent way train passing Culloden Moor Viaduct travelling towards Aviemore. [54]
The Inverness and Aviemore Direct Railway was built by the Highland Railway to provide a shorter and more direct route between Inverness and Aviemore, carrying its main line traffic to Perth and the south.
Earlier articles about the Highland Railway can be found here, [7] here, [8] here, [9] here, [10] and here. [11]
The original route via Forres and Dava, built by the Inverness & Perth Junction Railway (I&PJR), “ran over wild and remote terrain as far as Aviemore, and then on to Dunkeld. From there trains used the Perth and Dunkeld Railway to Stanley Junction, and from there the Scottish North Eastern Railway to Perth. This was a considerable improvement [over the only previously available route via Aberdeen], although operation of the line over the mountainous route was difficult. The traffic from east of Forres proved to be lighter than anticipated, and at the same time traffic from Inverness and from the Inverness and Ross-shire Railway became increasingly dominant. The deviation to Forres before turning south was now a serious liability.” [1]
It was also clear that the Great North of Scotland Railway (GNSR) was planning its own independent line between Elgin and Inverness and the West Highland Railway was known to be considering a line along the Great Glen connecting from Fort William to Inverness. “The Highland Railway was alarmed at both of these competitive encroachments into what it considered to be its own territory. It anticipated that Parliament would look favourably on them, if it could be shown that the Highland Railway was not taking adequate steps to improve its own line and its service to passengers and goods customers.” [1][2: p44][3: p103-104]
“The solution was a new line of 34 miles running directly south from Inverness, rejoining the existing Perth line at Aviemore. This became the Inverness and Aviemore Direct Railway, informally known as the Carr Bridge line, or later the Carrbridge line. Its authorising Act of Parliament was passed on 28th July 1884.” [1][3: p104][4: p175]
As Acworth noted in 1890, the Highland Railway “could never face a Parliamentary Committee and maintain that the existing facilities to Inverness were sufficient, when it had taken no steps to supply the additional accommodation whose necessity it had itself asserted only a few years before … The construction of the new road will mean to [the Highland Railway], in the first place, a capital expenditure of some hundreds of thousands of pounds; secondly the cost of working some thirty additional miles; thirdly no additional traffic whatever; and lastly, the reduction of the passenger fares by as many pence as the new road will be shorter in miles than the old.” [1][5:p74-75]
“Having received the authorisation, the Highland Railway did nothing to hasten actual construction, no doubt believing that the danger of encroachment had been staved off. In any event, for the Highland Railway this was the most important development of the decade. … The cut-off was 34 1⁄2 miles of new line between Aviemore and Inverness. For six years from obtaining the necessary Act on 28 July 1884, the company managed to stave off any real action, although by 1886 agreements about land acquisition were made with proprietors. Altogether four extensions of time to complete the line were granted: two before and two during construction.” [1][2: p44][3: p103-104]
The Inverness to Aviemore Direct Railway was opened in stages: the first, from Aviemore to Carr Bridge, opened on 8th July 1892 as a branch line operated by a tank engine, and carrying very little traffic. [1][3: p103-104] The line from Carr Bridge to Daviot opened on 19th July 1897.
The route was completed for through running by the opening between Daviot and Millburn Junction, Inverness, on 1st November 1898. [1] Ot should be noted that there is some ambiguity over the dates. [1: Note 1]
In October 1897, it was decided to install double track on the as-yet unopened section between Inverness and Daviot. This involved widening some completed single-track bridges. [1][2: p8]
“The new line incorporated the Highland Railway’s second-highest summit: Slochd at 1,315 feet. The Strathnairn Viaduct near Culloden Moor is Scotland’s longest masonry viaduct at 600 yards in length; there are 29 arches. [1][3: p133-134][4: p197] Major enlargement of the track facilities was also carried out at Millburn Junction in Inverness. The total cost of the line was almost a million pounds.” [1][2: p46]
From the opening of the direct line from Aviemore… “the traffic planners had to cater for two main lines into Inverness from the south. In the summer of 1909, seven scheduled trains ran each day between Perth and Inverness. The night train from Perth left at 12.50 a.m., with sleeping car from Glasgow, and travelled via Carrbridge, arriving at 5.10 a.m. A connecting train left Aviemore for Forres at 4.00 a.m., arriving also at 5.10 a.m. Nairn passengers went on to Inverness and changed trains there. At 5 a.m. another train left Perth, conveying sleeping cars from London and through carriages from southern railways, running via Carrbridge and arriving at Inverness at 8.35 a.m. This ran only from 1 July to 11 August. Fifteen minutes later the ‘normal’ night train from London left Perth, and arrived in Inverness at 9.08 a.m. This train was also noted as conveying Sleeping Carriages Euston to Strathpeffer.” [3: p184-185]
“A Forres connection left Aviemore at 8.25 a.m., arriving at 9.35 a.m. The Mail left Perth at 6.15 a.m. and reached Aviemore at 8.33 a.m. Here it divided, the direct Inverness portion arriving at 10.10 a.m., and the Grantown portion arriving in Inverness at 11.15 a.m. A Saturdays-only train left Perth at 9.25 a.m., reaching Inverness at 1.50 p.m.; its Forres connection left Aviemore at 12.45, arriving 1.56 p.m. A train for Inverness via Forres still left Perth at 11.50 a.m., running non-stop to Newtonmore, which it reached at 1.44 p.m.; Forres was reached at 3.25, and Inverness at 4.15. Only ten minutes later, the old Parliamentary left Perth, stopping at all stations (five on request only) and reaching Inverness via Carrbridge at 4:36 p.m.” [3: p185]
The Route
Inverness Railway Station was covered in the first article in this series. [7]
A single extract from the 6″ Ordnance Survey undertaken at the turn of the 20th century will suffice here. Note the Lochgorm Works at the top of the extract on either side of the loop which allowed East/West movements without trains needing to enter the station. The locomotive facilities centred on the roundhouse which can be seen on the right side of the extract. [12]This 21st century ESRI satellite image, provided by the NLS shows that non-rail uses now sit over the site of the old locomotive shed and turntable. The basic layout of the railway infrastructure remains as does part of the Works. [12]Heading East from Inverness Railway Station, two lines ran in parallel. Somewhat counter-intuitively the lines to Forres and beyond ran on the South side of the lines which will bear away South. [13]Both lines continue to be used in the 21st century, although it is difficult to make out the detail on this extract from the ESRI satellite imagery provided by the NLS. [13]This next extract from the 6″ Ordnance Survey of 1901 shows the more northerly set of lines rising up to bridge the lines to Forres. [14]On this next extract from the ESRI satellite imagery it is slightly easier to make out the two lines. [14]This extract from Google Maps shows the two lines crossing as they both pass under the modern A9. [Google Maps, June 2025]Looking West from the Harbour Road Crossing along the Forres line towards Inverness Railway Station. [Google Streetview, 2022]Looking East along the Forres line from the Harbour Road Crossing. [Google Streetview, 2022]Harbour Road looking North. The Inverness to Aviemore Direct Railway is bridging the road. [Google Streetview, 2022]This time looking South through the bridge. [Google Streetview, 2022]
The Inverness to Aviemore Direct Railway curves round to the Southeast.
Away from the coast line, the railway is in cutting. [18]The modern satellite image illustrates the growth of Inverness. The presence of the A9 is a significant change to the landscape. [18]Looking back round the curve towards Inverness Railway Station from the A96. [Google Streetview, 2023]Looking ahead along the Inverness to Aviemore Direct Railway from the bridge carrying the A96 over the line. [Google Streetview, 2023]For the first part of this journey along the line, each map extract overlaps with the previous extract. That is true for this and two further extracts. After that just discreet locations are featured. [15]The same area in the 21st century. [15]A further length of the line takes it as far as Caulfield Road North. [16]The same length of line in the 21st century. [16]Caulfield Road North is now National Cycle Route No. 7, this view looks Northeast along the cycleway through the bridge carrying the railway. [Google Streetview, 2022]The line continues East, at the turn of the 20th century its route was through open fields. [17]The same location in the 21st century. [17]
The line begins a wide curve round to the South to cross Culloden Moor. The line is initially in cutting, then on embankment and then in cutting on its approach to the site of Culloden Moor Railway Station.
The view Northeast along the railway from the bridge carrying Tower Road. [Google Streetview, 2022]The view Northwest along Culloden Road. The railway is carried over the road on a stone arch bridge. [Google Streetview, 2022]As the line curves around towards the Southeast it bridges a million nor road by means of another stone arch bridge.b[Google Streetview, 2022]By the time that the line passes under the B9006 it has already run through platform faces of the old Culloden Moor Railway Station to the North side of the road. The line is, by this time, almost on a North-South alignment. This view looks back North along the line from the bridge. [Google Streetview, 2022]Turning through 180°, this view looks South through the old station site towards the Strathnairn Viaduct (alternatively, the Nairn Viaduct or the Culloden Viaduct). [Google Streetview, 2022]Culloden Moor Railway Station as it appears on the 6″ Ordnance Survey undertaken at the turn of the 20th century. [19]The location of Culloden Moor Railway Station in the 21st century. [19]The 25″ Ordnance Survey from the turn of the 20th century. The footbridge was removed when it was realised that the road bridge was perfectly adequate for pedestrian access between platforms. The railway workers’ cottage and the Stationmaster’s House are on the West side of the line. [23]
Culloden Moor railway station served the village of Culloden from 1898 to 1965 (1967 for general goods). It was a two platform station just to the north of the Nairn Viaduct. Its location was closed too to the site of the Battle of Culloden. The platforms remain but the station buildings have gone.
The roadbridge at Culloden Moor Railway Station site, seen from what was once the station forecourt. The site to the East of the railway is, in the 21st century, occupied by Iain Cowie Plant Hire and Groundworks Ltd. [Google Streetview, 2008]
Both platforms at the station had a water column, with the water tank on the northbound platform. There was a bitumen depot adjacent to the station and in later years the goods sidings at the station could be seen filled with bitumen tank wagons. The depot closed towards the end of the 20th century. [22]
Another photograph of the station can be seen here. [25] South facing photographs of Culloden Moor Railway Station have the Culloden Viaduct appearing in the distance.
Culloden Viaduct (Nairn or Strathnairn Viaduct) as it is shown on the 6″ Ordnance Survey from the turn of the 20th century. [26]The same viaduct as it appears on the modern ESRI satellite imagery provided by the NLS. [26]Culloden Viaduct looking North-northwest from the minor road at the South side of the river valley. [Google Streetview, 2022]BR steam locomotive 54445 with up permanent way train passing Culloden Moor Viaduct. It should, of course, be noted that No. 54445 was an ex-Caledonian Class 113 4-4-0 locomotive. These locomotives were classed 3P by the LMS. Introduced in 1916, these locomotives worked to a boiler pressure of 175 psi, had 20″ x 26″ cylinders and driving wheels of 6′ 6″ diameter. The locos without their tenders weighed in at 61 tons 5 cwt and produced a tractive effort of 19,833 lbs. [54][55]
The viaduct was designed by Chief Engineer Murdoch Paterson and built by The Highland Railway. Twentynine arches carry the line over the valley of the River Nairn. It opened in 1889 and it remains the longest masonry viaduct in Scotland at 1800ft (549m) long and is a Category A listed building. [27}
South of the viaduct the railway head for a short distance to the Southwest before turning Southeast as it arrives at Daviot Railway Station.
En-route the line crosses a minor road and
Looking Northeast along the next minor road to be bridged by the line. [Google Streetview, 2022]Looking back towards Culloden from a bridge carrying the National Cycle Route No. 7 over the line. [Google Streetview, 2022]Turning through 180° and looking forward along the line towards Daviot Railway Station with the gorse in full bloom. [Google Streetview, 2022]Daviot Railway Station at the turn of the 20th century. The double -track line from Inverness became a single line to the Southeast of Daviot. [28]The same location in the 21st century. [28]
Daviot Railway Station opened on 19th July 1897.Ot was, for a short time the Northern terminus of the line from Aviemore until Culloden Moor Railway Station opened in 1898. Wikipedia tells us that, “on the northbound platform was the station building and to the southwest was the goods yard. There were two signal boxes: one to the north which was built, but never opened. The other signal box was to the south in between the goods sidings. It was relocated slightly to the north in 1952. The station closed on 3rd May 1965. The signal box closed in 1969. Only the platforms remain.” [29]
Ernie’s Railway Archive has an excellent photograph of the station which can be viewed here. [30]
Moy Railway Station was further to the Southeast and is shown here in an extract from the 6″ Ordnance Survey from the turn of the 20th century. [31]A satellite image of the same area in the 21st century. The A9 is the most significant change visible (running diagonally across the bottom third of the image). [31]
Wikipedia tells that Moy Railway Station opened on 19th July 1897. “The station building was situated on the southbound platform. Goods facilities were handled at the northeast. There were two signal boxes: north and east. Despite their names, they were both situated to the west. The station closed to both passengers and goods traffic on 3rd May 1965.” [32] The station building at Moy was of a very similar design to that at Culloden Moor and Daloit.
AmBaile has a monochrome image of the station at Moy. This image can be seen here. [34]
The modern A9 crosses the line of the railway to the East of Moy. The next two images are taken from the A9 road bridge.
Looking back along the railway from the A9 overbridge towards Moy. [Google Streetview, June 2022]Looking forward towards Tomatin from the A9 overbridge. [Google Streetview, June 2022]
Further Southeast we teach Tomatin Railway Station. …
The next station along the line was Tomatin Railway Station. [33]The same area in the 21st century. [33]
AmBaile has a few photographs of Tomatin station. These can be seen here, [35] here, [36] and here. [37]
Findhorn Viaduct is around 500 metres East of Tomatin village. …
The next significant location on the line is the Findhorn Viaduct which is approximately 500 metres East of the village of Tomatin and carries the line over the valley of the River Findhorn. [38]The same area as shown on the ESRI satellite imagery from the NLS. [38]
“The Findhorn Viaduct was designed and built for the Highland Railway between 1894 and 1897 by Murdoch Paterson, their chief engineer, and John Fowler, who was the consulting engineer and who also worked on the design of the Forth Rail Bridge. The viaduct was Fowler’s suggestion in order to create a more direct route; the railway company had originally planned a more circuitous route around the valley, over a mile longer. The steel for the lattice work was supplied by the Butterley Iron Company in Derbyshire, England. The granite for the piers was supplied by Kemnay Quarry in Kemnay, Aberdeenshire, which also supplied materials for the Forth Bridge. … It was opened to traffic on 19 July 1897. The viaduct is a Category B listed building, first listed in 1971, a status which grants it legal protection.” [39]
The highest point on the line between Inverness and Aviemore is at Slochd. The Slochd Summit “is a mountain pass on the A9 road and the Highland Main Line Railway. It is the highest point on the line between Inverness and Aviemore. An old military road and National Cycle Network Route No. 7 also go over the summit, the latter largely following the old A9. … Both the road and the railway have signs marking the spot – the A9 is at a height of 1,328 feet (405 m), while the railway reaches 1,315 feet (401 m). The Slochd Summit is the second highest place on the route from Inverness to Perth – the Pass of Drumochter at 1,500 feet (460 m) is higher and bleaker.” [41]
Close to Slochd the railway crosses the Allt Slochd Music on a high viaduct. [42]The same area in the 21st century. [42]The listed building record for the Allt Slochd Music Viaduct. [43]
A very short distance to the East of Slochd, the old A9 (now National Cycle Route No. 7 crosses the old railway. …
This photograph is taken from the old A9 road bridge and looks back along the railway towards Slochd. The modern A9 flyover sits above both the old road and the railway. [Google Streetview, June 2022]Looking ahead to the Northeast and Carrbridge from the old A9 bridge. [Google Streetview, June 2022]Bird’s eye view of the railway and old and new A9s at the same location. This image was shared on the Carr-bridge Past and Present Facebook Group by James Ross on 11th June 2024. [52]
East of the old A9 the railway curves round from a Northeasterly direction to a Southeasterly one. It runs down the valley of the Bogbain Burn crossing the stream a number of times on its descent. The modern A9 runs a little to the South of the railway. The Bogbain Burn joins the Allt nan Ceatharnuch and flows to the North of the railway before crossing under both the railway and the modern A9. It then flows into the River Dulnan to the West of the A9 and the railway.
The River Dulnan flows under the A9 and the railway and then flows down through Carrbridge. The railway station sits about 1.5 km Southwest of the village close to the river. It remains open in the 21st century.
An historical photograph of the railway bridge over the river can be seen here. [53]
The River Dulnan Railway Bridge, seen from the A9 to the South. [Google Streetview, 2023]Carrbridge Railway Station at the turn of the 20th century. The Dulnan River features in the top-left of the image. [44]The same area in the 21st century. The modern A9 runs parallel to the railway rather than through Carrbridge. [44]
Carrbridge Railway Station was opened on 8th July 1892 when the Highland Railway opened the line from Aviemore. For five years Carrbridge was the terminus of the line from Aviemore.
Northbound services commenced on 8th July 1897 when the line to Daviot was opened, the line through to Inverness opened on 1st November 1898. … The station was built with a passing loop on the otherwise single track railway, a signal box (automatic token-exchange apparatus was used) and several sidings on the north side of the line. The station building is thought to be by the architect William Roberts, dating from 1898. A camping coach was positioned here by the Scottish Region from 1954 to 1965. [46]
Southeast of Carrbridge Railway Station, the line curves through a heavily wooded landscape towards the South. It continues to be closely followed by the modern A9.
This wintery scene was recorded in March 2023 looking Northeast from the A9. The lack of foliage means that the railway can be seen close to the road. The location is the Knock of Kinveachy. The old A9 is still in use beyond the road as the B9153 and then the A95. [Google Streetview, March 2023]
The A9 begins to turn away from the railway to the South of Kinveachy. The A95 passes under the railway as it heads South, along the route of the old A9.. A new skew bridge carries the railway over the road in the 21st century.
This view looks Northeast along the A95 under the railway bridge. [Google Streetview, March 2023]The location of the old railway bridge over the A9, (the A95 in the 21st century). [47]The same location in the 21st century: the new A9 can be seen in the top-left corner of this satellite image. The A95 (the old A9] can be seen to the right of the railway at the top of the image,then passing under the railway before leaving the image bottom-left. [47]
The railway heads due South towards Aviemore, before drifting towards the West … Three small lochans were in the path of the railway. …
Now on the final run down to Aviemore. The old A9 can be seen on the left of this extract from the 6″ Ordnance Survey from the turn of the 20th century. The railway crosses the small Loch nan Carraigean.[48]This modern image shows that by the 21st century the lochans have almost completely disappeared. Just a small pool remains at the location of Loch nan Carraigean. A quarry has been opened up between the railway and what is now the A95. [48]Aviemore Railway Station at the turn of the 20th century. The River is the River Spey. There was very little to Aviemore at the turn of the 20th century – the Station and Hotel and a few private dwellings. [49]This 21st century satellite image of the same area shows a considerable amount of development to the North of the Railway Station. [49]This wider view shows just how significant the development over 125 years has been. The modern A9 can be seen on the left of this image. [49]
In the 21st century the journey between Inverness and Aviemore takes less than 45 minutes. The older main line through Forres was abandoned as part of the cuts which followed the Beeching Report in the mid-1960s. As we noted when looking at the route via Forres and Dava, a preservation railway is active at the southern end of that line and shares Aviemore Railway Station with ScotRail. The line is followed by walkers and cyclists on The Dava Way. [50]
An article about the Gorres/Dava route can be found here. [8]
The featured image at the head of this article (above) is Highland Railway No. 79, ‘Atholl’, a 4-4-0 Clyde Bogie, built Jun 1886. Renumbered 79A in Mar 1917. Only one of this class survived into LMS days No. 14278. It originally carried the name ‘Fife’ and was ‘Hughland Railway No. 82. Renamed ‘Durn’ in 1900, a name it retained until 1916, it was renumbered 82A in March 1917. It continued in service until being withdrawn in April 1930. [30][31]
Trains Illustrated No. 18 which was published in 1976 focussed on The Highland Railway. [1] The introductory article, ‘Highland Retrospect’, was written by Paul Drew. [1: p4-11]
The Highland Railway (HR) Company was based in Inverness. It was formed by merger, absorbing over 249 miles (401 km) of line. It continued to expand, reaching Wick and Thurso in the north and Kyle of Lochalsh in the west, eventually serving the counties of Caithness, Sutherland, Ross & Cromarty, Inverness, Perth, Nairn, Moray and Banff. Southwards, it connected with the Caledonian Railway at Stanley Junction, north of Perth, and eastward with the Great North of Scotland Railway at Boat of Garten, Elgin, Keith and Portessie. [6][7][17: p29]
The direct route to Perth eliminated the need for a change of trains at Aberdeen (and for some time a half mile journey between two railway stations). “It gave a route virtually under one ownership between Inverness and Perth. The greatest benefit lay, however, in the shortening of the journey. Previously the distance by rail from Perth to Inverness had been 198 miles; it now became 144. This represented a saving of about 24 hours in travelling time, and a corresponding reduction in fares.” [17: p27]
Earlier articles about the Highland Railway network can be found here, [15] here, [3] and here. [16] In this article:
we follow the line from Forres via Dava to Perth
We follow the line from Forres via Dava to Perth.
We look at the Highland Railway’s locomotive superintendents and at least some of its locomotives.
The First Direct Line Between Inverness and Perth (via Forres) – the Dava Line
H. A. Vallance tells us that “The proposed new railway through the Central Highlands left the Inverness & Aberdeen Junction Railway at Forres, 24 miles East of Inverness, and turning sharply to the south, rose steeply for several miles to cross the hills separating the valley of the Findhorn from Strathspey. Beyond the summit at Dava, 1,052 ft above sea level, the approximate course of [a] route surveyed … in 1845 was joined, and the line proceeded by way of Grantown and the west bank of the Spey to Kingussie. There followed a long, steep climb up the northern slopes of the Grampians to the head of the Druimuachdar Pass, and a corresponding descent to Blair Atholl and the Pass of Killiecrankie. Crossing the Tay near Dalguise, the line reached Dunkeld, where it made an end-on junction with the Perth & Dunkeld Railway.” [17: p24]
The enabling Act of Parliament was passed in July 1861 and authorised the Inverness & Perth Junction Railway to take control of the Perth & Dunkeld Railway. That amalgamation took place in February 1864.
Work on the line commenced in October 1861. The first 13 miles (Dunkeld-Pitlochry) opened at the beginning of June 1863. The length from Forrest to Aviemore opened in early August of the same year. The last length (Aviemore-Pitlochry) was completed in September, just a month or so later. Vallance notes: “The chief engineering works on the line were the seven-span masonry viaduct over the Divie, near Dunphail, 477 ft long and 105 ft high; the girder bridge across the Tay, near Dalguise, 515 ft long and 67 ft high; and the ten-span masonry viaduct, 54 ft high, over a deep ravine in the Pass of Killiecrankie. Smaller masonry bridges were required to carry the railway over the Bran, north of Dunkeld, and the Garry, at Struan. The latter was remarkable in that its main span crossed not only the river, but also the stone bridge carrying the Rannoch Road over the Garry at the same point. At Blair Atholl the Tilt was crossed by a single-span lattice-girder bridge. … Only two short tunnels were found necessary-one in the Pass of Killiecrankie (128 yd long), and the other north of Dunkeld (350 yd long). South of Dunkeld there was a third tunnel (310 yd long), but this had, of course, been constructed by the Perth & Dunkeld Railway. (These, incidentally, were the only three tunnels on the Highland Railway.)” [17: p25]
“Some time elapsed before all the stations were ready to be opened, a few of the smaller ones being left until communication between Forres and Perth had been established. Thus accommodation was not provided at Dava until 1864, and Killiecrankie and Dalnaspidal until 1865.” [17: p25]
We have already looked at the line from Keith to Inverness. The original station at Forres was not suited to becoming a significant junction station. Valance provides a sketch of the revisions at Forres. …
A sketch of the new Station and railway junction at Forres. A double junction was provided with the line from Inverness to Keith, so that trains could be run in each direction without reversing. To give each train platform accommodation, the new station was triangular in form and built to the south of the existing one. A new line was provided for the trains from east to west, leaving the original route as an auxiliary loop for goods trains and light engines. The old station building became the stationmaster’s residence. [17: p26-27]The junction at Forres as it appeared on the 25″ Ordnance Survey of 1868, published in 1870. The original alignment of the Inverness &Aberdeen Junction Railway runs diagonally across the top of the map extract. The old station was in the top right quadrant. The new triangular junction and accompanying station/platforms is at the centre of the image. [18]The same area in the 21st century as depicted on the ESRI satellite imagery from the NLS. [19]
Before following the route below, you may well enjoy watching a video about The Dava Way. … [28]
South of Forres, the line ran close to the Dallas Dhu Distillery which had its own sidings, before climbing to Dunphail Railway Station.
A short distance Southeast of Dunphail Railway Station, the line crossed the Divide Viaduct (over the river of the same name). The viaduct still stands in the 21st Century and carries the Cava Way footpath.
Some distance further South the line reached Dava Railway Station. … The NLS records of the 35″Ordnance Survey do not cover the line heading South, so we now use the 6″ Ordnance Survey. …
Dava Station, as recorded on the 6″ Ordnance Survey from the turn of the 20th century. [25]The same location in the 21st century, as recorded on the ESRI satellite imagery provided by the NLS. [25]
Wikipedia tells us that, “At 985 feet above sea-level, Dava was the third highest station on the Highland Railway network. The summit that followed south of the station (Dava Summit) reached 1,052 feet. … The station was located in sparsely populated moorland, along a dirt track near the junction of the A939 and A940 (OS Grid Reference NJ008389). The purpose of a station at this location was to provide a passing loop with water columns (15 miles from Forres and 16 miles to the first junction at Boat of Garten), although the station did provide some facilities for the area, such as a post office. … The surrounding area is wild moorland (The Dava Muir).” [26]
Goods services at Dava were first to end; the date of closure was 27th January 1964. A passenger service continued until 18th October 1965, when the station closed completely. The station building, stationmaster’s house, and platforms still remain. The stationmaster’s house is a private residence.
South of Dava the line ran almost due South and continues to provide the formation for the Dava Way [43] which reaches a summit between the locations of Dava Railway Station and Castle Grant Platform.
The 6″ Ordnance Survey shows the old military road and the railway line in close order. [45]Railmaponline.com shows the route of the old railway in green approaching Dava Way Summit. This is also the long distance footpath known as the Dava Way. [42]The route of the old railway runs alongside the A939 over Dava Summit an area of open moorland. In this South facing view, the fenceline beyond the Scots Pine marks the route [Google Streetview, June 2023]The route of the railway and that of the Old Military road sit side-by-side. [44]Further South the line of the old railway is very close to the modern road. [42]Looking Southeast from the A939, The fence line marks the line of the old railway. [Google Streetview, June 2023]
The line snaked back and forth following the contours as it travelled South.
The adjacent map shows two bridges close together and both associated with the Castle Grant Estate. The first we encounter travelling South along the line is a bridge carrying an estate road over the old railway. A picture of that bridge can be seen here. [50]
The adjacent map shows two bridges close together and both associated with the Castle Grant Estate. The first we encounter travelling South along the line is a bridge carrying an estate road over the old railway. A picture of that bridge can be seen here. [50] The second bridge is shown below.The old railway bridged the Old Military Road on its way down towards Grantown-on-Spey. [46]This extract from railmaponline.com shows the same area in the 21st century. [42]The bridge which carried the old railway over the Military Road remains in place carrying the Dava Way over the A939. This is the view looking South along the line of the old Military Road (A939). [Google Streetview, June 2023]The same bridge seen looking North. The building adjacent to the railway combined as a station building and a lodge for the Castle Grant estate. There was a platform on the East side of the line included at the railway’s expense as a private platform for the estate.At Lynmacgregor the railway bridged a minor road connecting the small hamlet to the Old Military Road. [48]
The same location is shown here on railmaponline.com’s satellite imagery. A length of embankment has been removed to allow a better alignment of the access road to Lynmacgregor. [42]
Close to what is now Grantown-on-Spey Caravan Park the railway crossed another minor road by means of a stone arch.
The area to the East of this bridge is now a Caravan Park. [47]The same location in the 21st century. [42]The view of the West face of the stone-arched bridge. [Google Streetview, August 2021]Grantown West Railway Station sat to the Southwest of the village. This was one of two stations serving the town. Grantown East Railway Station on the Great North of Scotland Railway (Strathspey Section) was on the South side of the River Spey at Speybridge. [49]
Photographs of the Station while in use can be found here [52] and here. [53]
This extract from the Ordnance Survey 1 inch to 1 mile 3rd Edition (surveyed between 1866 to 1870; revised: 1906; and published: 1908) shows the relative positions of the town/village and its two stations. [54]
This extract from railmaponline.com’s satellite imagery shows the location of Grantown West Railway Station in the 21st century with the line of the old railway superimposed. The village/town of Grantown is to the Northeast of this location. The station site is now an industrial estate. [42]
Looking South-southwest through the industrial estate which sits on the site of Grantown West Railway Station. [Google Streetview, August 2021]Looking North-northeast through the industrial estate which sits on the site of the old station. [Google Streetview, August 2021]
The Strathspey Steam Railway has an ambition to extend its line to the site of the old station. [55]
South of Grantown-on-Spey West Railway Station the line continued on embankment before crossing a minor road and stream as shown on the map extract below.
This extract from the OS 6″ mapping shows the location of the bridge mentioned above and shown in the photograph below. [56]The structure shown on the map extract above, seen from the East. A single span crosses both the road and the watercourse. [Google Streetview, August 2021]The line continued in a South-southwest direction. Its route is easy to make out on modern satellite imagery. [Google Maps, June 2025]The modern A95 crosses the line of the old railway which can be seen curving round towards the Southwest. [Goole Maps, June 2025]
This extract from the 6″ Ordnance Survey mapping which was surveyed in 1868 and published in 1873 shows the esrtwhile bridge which carried the railway over what was to become the A95. As can be seen above, the closure of the line permitted the road alignment to be considerably improved. [57]
A short distance further Southwest, the old line crossed the River Dulnain close to its confluence with the River Spey as this next extract from the 6″ Survey mapping surveyed between 1867 and 1871 and published in 1873/75 shows. [58]
The line continued on through Broomhill Station before it was met by the Great North of Scotland (Strathspey Section) line which had just bridged the River Spey. [59]
Broomhill Railway Station or Broomhill for Nethy Bridge Railway Station [60: p46] is a reconstructed railway station on the former Highland Railway main line [61] which was originally built to serve the small villages of Nethy Bridge and Dulnain Bridge in Strathspey. It is at present the eastern terminus of the heritage railway, the Strathspey Steam Railway. [55][62]
Boat of Garten railway station was a significant junction on the Highland Railway, and is now the headquarters of the Strathspey Railway. The station served as a link between the Highland Railway’s main line (Perth to Forres) and the Great North of Scotland Railway’s branch to Craigellachie. Today, the Strathspey Railway operates heritage steam trains between Aviemore, Boat of Garten, and Broomhill, using part of the original Highland Railway line.
In the 21st century, Aviemore Railway Station is owned by Network Rail and managed by ScotRail, is on the Highland Main Line, 83 miles 31 chains (134.2 kilometres) from Perth, between Kingussie and Carrbridge, and is also the southern terminus of the Strathspey preserved railway. [68]
The modern main line to the North of Aviemore, the later Highland Railway main line, will be covered in Part 3 of this series of articles.
South of Aviemore, the Highland line continued more than 83 miles South to Perth.
The line follows the River Spey southwards, passing to the East of Loch Alvie, through Kincraig Railway Station and then passing to the West of Loch Insh and through Kingussie Railway Station.
Southwest of Kingussie the railway continues to follow the River Spey. It bridges the Spey southwest of Newtonmore Railway Station and just to the East of Spey (Road) Bridge and then continues climbing alongside first the Spey and then a tributary, the River Truim, towards Dalwhinnie Distillery.
Beyond the confluence of the Spey and the Truim the railway runs Southwest up Glen Truim towards Dalwhinnie Distillery. Just a short distance Northeast of the Dalwhinnie Distillery the Truim splits into two. Google Maps records the name of the two arms being the River Truim. Both arms of the Truim pass under the railway.
It is worth noting before we travel on towards Perth that one of the most significant improvements to the journey to Perth “came with the doubling of sections of line, designed by the engineer Alexander Newlands, beginning with Blair Atholl to Dalnacardoch (8.25 miles (13.28 km)) in 1900, extended to Druimuachdar (8.5 miles (13.7 km)) in 1901 and Dalwhinnie (5.5 miles (8.9 km)) in 1909. [83] In the 1960s, many sections of the line were converted from double track to single track. In 1976, 23 miles (37 km) from Blair Atholl to Dalwhinnie was redoubled. [84][85] In March 2019 Network Rail completed a programme of works to increase capacity on the line and support the introduction of InterCity 125 sets on ScotRail services, with passing loops and platforms extended.” [82][86]
A few kilometres South of Dalwhinnie, the railway crosses a minor road just to the West of its junction with the A9,then crosses a small tributary of the River Truim, before it crosses the River Truim again.
Looking South from the minor road crossing. [Google Streetview, 2024]The bridge over the River Truim. [87]The same location in the 21st century. The unfenced road shown on the map extract is now the A9 trunk road [87]The same bridge, seen from the A9. [Google Streetview, 2023]
Continuing southwards the line crosses the River Truim again. …
The next bridge over the river. [88]The same location in the 21st century. [88]The best view of the bridge from the A9. [Google Streetview, 2024]
The line crosses the watershed and begins the drop down towards Perth.
The next bridge crosses the first of a series of streams which form the headwaters of the River Garry. [89]The same location in the 21st century. [89]The bridge on the map and satellite image above. [Google Streetview, 2024]
Over the next kilometre a number of such streams are crossed and the line passes through the location of Dalnaspidal Railway Station which closed in 1965.
Killiecrankie Railway Station in the years before closure. [110]
To the Southwest of Killiecrankie Railway Station the line passed through the Pass of Killiecrankie. First there was a short tunnel, then a viaduct over a tributary of the Tummel.
The tunnel can be seen to the top-left of this extract from the 6″ Ordnance Survey. The viaduct is towards the centre of the image. [103]The viaduct can easily be seen on this extract from the ESRI Satellite imagery from the NLS. [103]The East tunnel mouth sits immediately above the Northwest end of the viaduct. [111]The Viaduct sits alongside the River Garry. A plaque sits beneath the viaduct which reads: The National Trust for Scotland: Railway Viaduct – This 510′ long-viaduct, which was designed for the Inverness and Perth Junction (The Highland Railway from 1865) by Joseph Mitchell was completed in 2864;at a cost of £5,730. The ten masonry arches are each 35′ span and the extreme height to the parapet wall is 54′. [111]
The railway has followed the River Garry over some distance. The confluence of the River Garry with the River Tummel is just a short distance South of the Pass of Killiecrankie. From that point the railway follows the River Tummel through Pitlochry.
To the Southeast of Pitlochry the main line of the Highland Railway is met by the Aberfeldy branch which has just crossed the River Tummel. The Aberfeldy branch ran along the South side of the River Tay from Aberfeldy to close the confluence of the Tummel and the Tay. It bridged the Tay and soon also bridged the Tummel as shown in the OS extract below.
The River Tummel joins the River Tay a short distance South of Balliinluig Junction and the railway continues down the valley of the Tay, through what was Guay Railway Station and bridging the River Tay a little further South.
Images of Dalguise Railway Station can be seen here, [121] here [122] and here. [123]
Beyond Dalguise, a tunnel opposite Dunkeld House across the Tay, a bridge over the River Braan, a significant embankment and a length of cutting bring the line to a point across the Tay from Inverness. The line continues through the railway station at Birnam which serves Dunkeld and Little Dunkeld.
Opposite Dunkeld House and on the South side of the Tay, the line passes through a short tunnel and over the River Braan. [109]The same location on the 21st century ESRI satellite imagery from the NLS. The bridge is easier to make out than the tunnel to its West.[109]
Historic Environment Scotland describes Inver Viaduct, the bridge over the River Braan, as being a “large single segmental arch, flanked by crenellated refuges [with] large masonry approaches pierced for footpaths, octagonal flanking features.” [124]
Beyond Dunkeld and Birnam Railway Station, the line continues along the South side of the River Tay. Rail and river separate to make room for Murthly Castle. The line, first in tunnel and then skirting the South side of the Murthly estate.
“Murthly Castle has been owned by three families since the original tower house was built in 1450. The Stewarts of Grantully acquired the property in 1615 and the present owner is Thomas Steuart Fothringham, who lives at the property with his family. The castle was developed gradually over a 450-year period, with the latest addition dating from 1893. Consequently, there is a wide range of architectural styles both inside and outside.”[127]
The 6″ Ordnance Survey of 1901 shows the Murthly estate, the River Tay and the railway. The tunnel can be seen bottom-left of this map extract. [128]A similar area in the 21st century. [128]Murthly Village, Station and Asylum in 1901. [129]The same location in the 21st century. The station closed in 1965. [129]Murthly Railway Station close to the turn of the 20th century. [130]Abandoned signal box and level. Rossing at the closed Murthly Railway Station site. [131]The Highland Railway (HR) line met the Caledonian line at Stanley Junction. HR trains covered the remaining miles into Perth on Caledonian metals. [132]The same location in the 21st century. [132]
Stanley railway station was located around half-a-mile Southwest of Stanley Junction Station. It was opened in 1848 by the Scottish Midland Junction Railway which linked Perth and Arbroath. It closed in 1857, when the new station of Stanley Junction was built at the location where the Perth and Dunkeld Railway diverged from the Scottish Midland Junction Railway running between Perth and Arbroath. Stanley Junction Station closed to passengers in 1956 and to goods in 1965. [133][134]
Stanley Junction Railway Station. This image was shared on the Perth & Kinross Archive Facebook Page on 9th November 2022. [135]
Highland Railway trains ran through to Perth on the Caledonian Railway under an arrangement agreed by predecessor companies (the Perth and Dunkeld Railway and the Scottish Midland Junction Railway). The line ran through Stratford and Luncarty stations, before passing through Almond Valley Junction before the final approach to Perth General Railway Station.
Strathord Railway Station. [136]The same location in the 21st century. [136]Luncarty Railway Station and Bridge. [137]The same location in the 21st century. [137]Almond Valley Junction in 1901. Lines from Crieff and Methven met up the valley of the Almond. [138]The branch line’s route is marked by the narrow line of trees curving towards the top-left of this extract from the ESRI satellite imagery from the NLS. [138]The approach to Perth from the North in 1901. [139]The same area in the 21st century. [139]Looking North from the bridge carrying Long Causeway over the railway. Nothing remains of what was once a busy railway scene. [Google Streetview, 2022]Looking South from the same bridge. The bridge in the distance appears on the next map extract and satellite image. [Google Streetview, 2022]The final approach to Perth from the North in 1901. [139]The final bridge over the line before Perth Railway Station appears just below centre in both the map extract above and this satellite image. [139]Looking South into Perth Railway Station from the bridge carrying Glasgow Road over the station approach from the North. [Google Streetview, 2021]Perth Railway Station in 1901, as it appeared on the 6″ Ordnance Survey. [140]Perth Railway Station in the 21st century. [140]
Having travelled to the most southerly point on the Highland Railway’s network and having already noted that a more direct route from Inverness to Perth was to be constructed. We complete this particular article by acknowledging that the rivalry between the Highland Railway and the Great North of Scotland Railway (GNSR) was intense. Various schemes were developed by the GNSR, but none more significant than the GNSR backed abortive scheme of the Strathspey Strathdon & Deeside Junction Railway Co. (SS&DJ) to construct a 30-mile line from Ballater, terminus of the GNSR Deeside branch from Aberdeen, to Nethy Bridge on Speyside, on a GNSR branch from Craigellachie; the GNSR “was then to build its own line from Nethy Bridge directly to Inverness. The terrain was difficult on both sides of Nethy Bridge, especially to the east, where the alignment cut across a northern ridge of the Cairngorms that would have meant a 2000ft summit (compared with Druimuachdar’s 1484ft) or a long tunnel.” [1: p7] It is difficult to determine whether this route was ever a serious proposition, but “one effect of the SS&DJ proposal was to frighten the HR into building the costly Perth-Aviemore cut-off over Slochd so as to cut the Perth-Inverness passenger transit by reducing the distance compared with the route via Forres and Dava.” [1: p7]
However, the end of the 19th century saw the end of the more absurd, wasteful and expensive rivalry between the Highland and the Great North of Scotland Railway.
North and Northwest of Inverness
Drew comments: “True to its purpose of helping in the economic development of the Highlands, the I&AJR (as it was until it became the HR in 1865) started, in the early 1860s, … pushing north from Inverness. Once again local men and women co-operated. By means of working and eventually taking over lengths of line originally built as independent undertakings, the Farther North line of the HR reached Thurso, Britain’s most northerly town and 20 miles from Duncansby Head, in 1874; Penzance had been linked with London some years before, so that the British railway system extended from (near) John o’ Groats to (near) Land’s End in less than 50 years from the opening of the Stockton & Darlington.” [1: p7]
The Farther North Line or the Far North Line
In Drew’s opinion, “The Farther North line is unique in Britain. The distance by rail from Inverness to Wick, its terminus (Thurso being at the end of the branch) is 161 miles, because the line avoids expensive bridges over the sea lochs, serves as many population centres and even isolated estates as possible, and runs inland from Helmsdale roughly in a semicircle through some desolate country to near Wick. The object was partly to serve the population (sometimes by means of lonely roadhead stations) and partly to avoid the cliffs along the coast north of Helmsdale. By bridging the narrower sea lochs and keeping nearer to the coast the distance from Inverness to Wick could have been only a little over 100 miles; but that would have left many places in Ross & Cromarty, Sutherland and Caithness even farther from a railhead than they are. Less than 10 miles of the more direct route along the coast beyond Helmsdale would have been really difficult construction, probably involving some tunnelling under cliffs.” [1: p7]
Drew notes the problems encountered with snow on the Farther North line, particularly the problem of drifting snow on relatively open expanses of moorland and its propensity to collect in narrow railway cuttings. He highlights the resources needed and the logistics involved in clearing lines that were remote from highway links.
He also highlights the sterling efforts of the Highland Railway in maintaining supplies and communication to the Royal Navy in Inverness and at Scapa Flow during the first world war, over a line not built for such traffic flows. “One of the hardest tasks was the working of trains of coal, largely high-quality steam coal for the Fleet from South Wales, to Invergordon and Thurso; well over 200 miles of the journey was over the HR and most of that distance was single track. The HR had of course to borrow engines and wagons from other railways. The difficulties included lack of the running loops needed for such heavy two-way traffic.” [1: p9]
A daily scheduled service ran from Euston to Thurso during both world wars. Officially ‘The Euston to Thurso Naval Special’, this was known colloquially as the Misery Express or more positively, ‘The Jellicoe Express’. “It was named after Admiral Sir John Jellicoe and carried service personnel to and from Naval bases around the country, including Scapa Flow. WW100 Scotland reports that in WW1 it ran 15th February 1917 – 30th April 1919.” [9]
It was estimated to have transported some half a million service personnel during the two wars. (Helmsdale says half a million in each war). It was the longest scheduled rail service ever to run in the UK.
Crewe Station was one of the few scheduled stops on the 717-mile 21h 30m journey. This was a major refreshment stop, where over 300 women volunteers worked around the clock to provide refreshments in a canteen on Platform 6. Helmsdale was another refreshment stop.
From Royal Naval Association: “Although seen as a crucial piece of Naval infrastructure, the train also carried thousands of soldiers and airmen over the years.Travelling on it was usually a nightmare – invariably overcrowded, most passengers were unlikely to get a seat, and only the shortest of them could hope to get any sleep (if they could find an empty wire luggage-rack). In the Great War it left London at 6pm, arriving at Thurso at 3.30pm the following day. The southbound service took an hour longer …”
The Far North/Father North Line will be covered in detail in a future article. The early involvement of the 3rd Duke of Sutherland in the development of the line is covered here. [51]
The Skye Line from Dingwall to Kyle of Lochalsh “was also built to develop rural areas. Whereas the purpose of the Farther North was to help the mainland northerly counties (though the promoters had Orkney traffic via Scrabster in mind), the Skye line was regarded also as a means of helping economically depressed Skye and Lewis and Harris and such others of the Hebrides as sent fish and the products of sheep farming to the south.” [1: p9]
Drew tells us that “the line began as an independent undertaking, the Dingwall & Skye, and was to run for 63 miles across Ross & Cromarty and over the watershed between the Moray Firth and the Atlantic to Kyle of Lochalsh, terminus of the shortest ferry crossing to Skye and a site for berths for seagoing steamers to Lewis and other islands. Construction was delayed by opposition at Strathpeffer, which little spa had to be bypassed by a costly deviation. Consequently the line only reached Strome Ferry, at the head of the sea inlet, Loch Carron, in 1870. This remained the terminus and point of embarkation until 1897, when the Skye line eventually reached the Kyle, which became an admirably designed minor packet port, complete with a hotel.” [1: p9]
Drew explains that the HR absorbed the Dingwall & Skye (D&S) in 1880. “For 10 years from the opening of the railway to Strome Ferry the D&S and later the HR operated the shipping services between Strome Ferry and Skye and the Hebrides. They were eventually taken over by David MacBrayne and [then] … by Caledonian MacBrayne Ltd. … The HR later had high hopes of Strathpeffer; it built a special two-mile branch (now closed) thither from Fodderty Junction and during the season a Strathpeffer Spa express was run non-stop from Aviemore to Dingwall and on to the branch.” [1: p9]
The line to Skye and the Strathpeffer Branch are covered in detail elsewhere. The Strathpeffer Branch is dealt with here. [3] An article about the line to Kyle of Lochalsh will follow in due course.
Locomotives and Rolling Stock
To conclude this article we take a look at the notes Drew provides on the locomotives employed by the HR and further, at its locomotive superintendents: “The Jones Goods, placed in service from 1894, is one of the best-known types of engine of any British railway, famous as the first instance in the UK of the 4-6-0 wheel arrangement. … Experience with the Jones Goods helped their designer David Jones in developing the Castle Class express passenger 4-6-0s, which did not, however, enter service until 1906, after Jones had retired, and details were finalised by his successor Peter Drummond. … Struck by the magnificent work of the Castles on the HR main lines, the French State Railways in 1910 ordered 50 from the North British Locomotive Company. As illustrations show, Jones’s designs, despite the louvred chimneys, were handsome, and most were highly efficient. In view of the many steep gradients it might be asked why Jones did not develop six-coupled engines before. Indeed the HR and its constituents seemed to prefer Alexander Allan single drivers (successful on lines in flat country) long after greater adhesion became necessary.” [1: p11]
“Having developed successful goods and passenger 4-6-0s, the HR went ahead with others. The best was F. G. Smith’s River Class of 1915, which were not allowed to work on the HR after delivery, because of Smith’s failure to consult the civil engineer, and had to be sold to the CR. His successor Cumming was responsible for two fine designs of 4-6-0, the Cumming Goods and the Clans, but there was little opportunity for those engines to show their paces before grouping.” [1: p11]
William Barclay was HR locomotive superintendent from 1855 until 1965. “During Barclay’s incumbency, … various 2-2-2 and 2-4-0 locomotives were built, along with a solitary 0-4-0T. An 0-4-0ST was also inherited from the Findhorn Railway. Many of Barclay’s locomotives would later be rebuilt by Stroudley or Jones – most of the 2-2-2s ended up as 2-4-0s and one became a 2-2-2T, a pair of 2-4-0s became 4-4-0s and the 0-4-0T became an 0-4-2T. Only 4 much rebuilt Barclay locomotives (all 2-4-0s) were still in stock at the time of the Grouping.” [35]
William Stroudley was HR locomotive superintendent from 1865 to 1870. “His main achievement was high standards of maintenance and cleanliness that continued to be achieved long after his departure to the LB&SCR. He did much to rationalise the HR Lochgorm Works at Inverness.” [1: p11]
Stroudley was also responsible for the design of a small HR 0-6-0ST which, with modifications, was to become the well-known Terrier Class A1 of the LB&SCR. The HR 0-6-0STs were the first locomotives to be built at the Highland Railway’s Lochgorm works in Inverness. The design was the only new design of locomotive brought in during William Stroudley’s spell as the company’s locomotive superintendent. Only three of engines were built. [4] All three, built in 1869, 1872 and 1874, “started life with second hand boilers, shortened to suit, with the dome over the firebox. The side tanks had extra capacity in the form of an arched tank placed over the boiler. The cab was typical of Stroudley but there was no coal bunker; it was carried on the right hand side in the space alongside the firebox between the cab and the side tank, both sides having extended lower cab sides meeting the tanks.” [39]
“To the end the three engines showed strong Stroudley features, although they were not entirely identical, the oldest acquiring a larger side tank during rebuilding in 1917 and the rear toolbox was replaced by a small bunker on all three. Typically for HR engines all three were named: No. 56 – Balnain when new, then Dornoch in 1902; No. 57 – Lochgorm; No. 16 – St. Martin’s when new, then Fort George in 1899. … The later names reflect the move of the engines to those branches. Latterly in HR days they were nameless. The LMS correctly placed Nos 56 and 57, by then with duplicate list numbers as 56B and 57A, with similar powered tanks as Nos 16118 and 16119, by which time the former was working the Strathpeffer branch, but the third was numbered 16383 at the end of the other 0-6-0T classes this may have been due to mistaken identity. All three were soon running with LMS numbers, Inverness having applied LMS numbers and livery rather quickly, but they were condemned in 1927-32.” [39]
Until 1869, all locomotives were painted dark green. After that, passenger locomotives were painted yellow ochre , and freight locomotives were painted Scottish green (very dark green). From 1885, all locomotives were painted pea green with red and white trim. From 1903, the green became darker again, and the tenders now bore the inscription “Highland Railway.” [5]
David Jones was Locomotive Superintendent from 1870 to 1896. He “designed several classes of 4-4-0, and was also notable for introducing the 4-6-0 wheel arrangement to the UK. He also produced small numbers of 0-4-4ST, 2-4-0, 2-4-0T and 4-4-0T locomotives. Of 88 engines built to Jones’ design (including 3 built as late as 1917), 74 passed to the LMS in 1923. A small 2-4-0T purchased secondhand from the Duke of Sutherland also made into LMS ownership.” [35]
“Both the Highland Railway and the Glasgow & South Western Railway initially put [4-4-0 locomotives] on the line during 1873, the first in June, the latter in July – however the important distinction was that the former was produced by fitting a bogie to an outside cylinder 2-4-0 locomotive dating from 1858. The need arose from problems encountered on the recently opened (1870) line from Dingwall to Strome Ferry, the long fixed wheelbase of the six-wheelers sent there not taking kindly to the sharp curves. The first convert was No 10, followed by No 7, another 1858 engine, in 1875. The immediate result for the HR was the introduction of a new 4-4-0 type in 1874, the ’60’ class, which however was for main line work, ten being supplied by Dübs, and at the same time the most powerful passenger engines in Britain. For some years the Lechatelier counter pressure brake was fitted, later replaced by vacuum. With these engines came the well known louvred chimney, a feature of David Jones’ Highland engines. Seven more were built by the company at their Lochgorm Works in 1876-88, generally similar apart from boiler dimensions. Eight others, Nos 76-83, dated 1886, were the first products of the Clyde Locomotive Works of Glasgow (soon absorbed by Sharp, Stewart); the first engine of this batch was displayed at the 1886 Edinburgh Exhibition. The type was perpetuated in 1892 when Nos 89-100 were completed, essentially the same class, apart from further boiler enlargement. As main line engines all of these 4-4-0s were named, but confusion arises from numerous changes of names. Several lasted into LMS days, but only one of the Clyde built and six of the 1892 engines were allocated LMS numbers.” [10: p5]
“A smaller wheeled version of these classes for the Strome Ferry line, hence its popular title ‘Skye Bogie’, was only slowly multiplied, one engine in 1882, followed by eight in 1892-1901, the last four appearing after Peter Drummond had succeeded Jones in 1896. With the completion of No 48 in 1901 the use of the “Crewe” pattern of front end frames and cylinders on new building ceased. Unlike the ’60’ class these engines were not named. All passed into LMS stock but one was not given a new number. However one of them was a combination, identified as a ‘Skye Bogie’ because of its smaller coupled wheels, the frames originating from No 70, the 1882 engine, other components being derived from No 67 of the ’60’ class, the assemblage being completed in February 1923 and identified as No 67 Cromartie. Useful in their later days on branch lines it was 1930 before the last was condemned.” [10: p5]
“Despite introducing a large six-coupled goods in 1894 Jones retained the 4-4-0 wheel arrangement for the next express locomotives. Again the new class, ‘119’ or ‘Lochs’, were some of the most powerful passenger engines in the land. Most of the established features of Inverness engines were retained, the louvred chimney, the Stroudley cab but the frames and cylinders were conventional, not of the “Crewe” type. An early form of piston valves were used, not successfully for they were soon replaced by balanced slide valves. All were named after ‘Lochs’ in the Highland area. There were few changes in HR days although No. 130 ran with a feed water heater. Even after displacement as the premier main line engines by Drummond’s 4-6-0 ‘Castle’ class in 1900, the ‘Lochs’ remained almost confined to the HR main line right up to the Grouping. When further engines were urgently required during World War I the need was partly met by obtaining in 1917 three more of the class from North British in Glasgow, time and expenses being saved by using existing patterns and drawings.” [10: p5]
The ‘Lochs’ were Jones’ final design for the Highland Railway. 15 were originally built by Dubs & Co. in July-September 1896. [10: p16] With the 3 built in 1917, this meant that a total of 18 members of this class were built.
“Drummond brought about a complete transformation of Highland engine power, such that it seemed that his brother Dugald, and Eastleigh Works of the London & South Western Railway had taken over, for many of Peter Drummond’s classes corresponded to L&SWR designs. The first of two Drummond 4-4-0 classes appeared in 1898 and were slightly smaller than the ‘Loch’ class, being intended for services from Inverness to Aberdeen and Wick. The eight initial engines were supplied by Dübs in 1898, followed by a further nine built at Inverness in 1899-1901. Three more came from Glasgow in 1906, having tenders with a little more water capacity. Six-wheeled tenders had been supplied with the class but at times a few engines ran with eight-wheeled tenders from other classes. There was an important change from the previous Inverness adherence to Allan’s straight link valve gear to Stephenson link motion. Another change was the introduction of steam reversing gear, although the initial eight had lever reverse until modified. Nos 2 and 13-7 were dual braked and Nos 2 and 7 later ran with Smith’s feed water heaters. Named after Scottish mountains these engines were inevitably known as the ‘Ben’ class. The first engine arrived at Inverness with the name Ben Nevis to the embarrassment of the HR for that mountain is far away in rival North British Railway territory so a hurried change was made to Ben-y-Gloe.” [10: p5]
Highland Railway ‘Ben’ Class Locomotive No. 1, ‘Ben-y-Gloe’ was originally named ‘Ben Nevis’ but hastily changed to be named after a mountain in Highland Railway territory. There were actually two separate ‘Ben’ classes, usually referred to as the ‘Small Bens’ and the ‘Large Bens’: Highland Railway C and U classes. The designer was Peter Drummond, the builders were: Dübs & Co. (8 Small); HR Lochgorm Works (9 Small); and North British Locomotive Co. (3 Small, 6 Large). Serial numbers were: Dübs: 3686–3692 (Small); NBL: 17398–17400 (Small); 18269–18272 (Large); 18803–18804 (Large). Build dates were: 1898–1906 (Small); and 1908–1909 (Large). In total 20 small and 6 large ‘Bens’ were produced. [33]
Rowledge continues: “A further six 4-4-0s engines, intended for Inverness and Wick trains, were provided by North British in 1908-9, using the frames, etc., of the ‘Ben’ class but carrying a larger boiler, becoming the ‘New Ben’ class, using more mountain names. All had steam reversers and three, Nos 60, 61 and 63, were dual braked. Smith’s feed water heaters were fitted in 1914-5, feed water initially being heated by exhaust steam in a heat exchanger placed alongside the smokebox on the right hand side and then further heated by another set of tubes inside the smokebox. The four 1908 engines started with the same size 3,185 gallon tenders as the last three ‘Bens’, but two, Nos 61 and 63 soon received 3,200 gallon double bogie tenders taken from 0-6-0 tender engines, while the final pair had even larger 3,600 gallon bogie tenders.” [10: p5]
“Despite wartime conditions a new design appeared in 1916 after Cumming had replaced Drummond as Locomotive Superintendent, larger and heavier than any previous HR 4-4-0 class. Nos 73 and 74 were the first two-cylinder engines of this wheel arrangement in Britain to have outside cylinders and valve gear. Apart from the rejected ‘River’ class 4-6-0 engines this pair were the first on the HR to have superheaters, Drummond not having taken to this development while at Inverness. Both were built for the ‘Far North’ line but they also saw use between Inverness and Perth.” [10: p5]
From the late 1920s ‘Snaigow‘ and ‘Durn‘ were found mostly working from Aviemore Shed on goods or piloting work, having been replaced on the Far North line by Drummond ‘Castle’ 4-6-0s which were in turn displaced by new LMS ‘Crabs’ and Caledonian ‘Rivers’ sent to the Highland Railway. The arrival of Stanier ‘Black Fives’ sealed their fate and both were withdrawn in the mid-1930s. [10: p25]
“The LMS inherited 78 4-4-0s from the HR – this is the official figure contained in a document at the Public Record Office, Kew – but two others were still extant and are usually included in the initial LMS total. Only 61 were allotted new LMS numbers, the rest being written off during 1923. Despite early withdrawal of pre-1896 examples several of them, Nos 14271/2/5-9/82-5, appeared in the LMS red livery with large numerals on the tender.” [10: p5-7]
“The Highland [4-4-0] engines lasted rather better than those of the G&SWR, twelve passing into British Railways stock.” [10: p7] The last of these was ‘Small Ben’ No. 54398 ‘Ben Alder‘ which was scrapped in the second half of 1952.
Having followed the various 4-4-0 classes employed by the Highland Railway we return to look at David Jones’ other locomotive designs. As we noted above, he “was also notable for introducing the 4-6-0 wheel arrangement to the UK. He also produced small numbers of 0-4-4ST, 2-4-0, 2-4-0T and 4-4-0T locomotives. Of 88 engines built to Jones’ design (including 3 built as late as 1917), 74 passed to the LMS in 1923. A small 2-4-0T purchased secondhand from the Duke of Sutherland also made into LMS ownership.” [35]
David Jones Goods class “was notable as the first class with a 4-6-0 wheel arrangement in the British Isles. Fifteen were built, and one has survived to preservation.” [36]
Jones Goods locomotive, HR No. 103 survived into preservation. It is seen here at the Riverside Museum (replacing the preceding Glasgow Museum of Transport), Partick, Glasgow. [36][37]
Fifteen ‘Jones Goods’ locomotives “were built by Sharp, Stewart and Company and delivered between September and November 1894, numbered 103 to 117. At the time, these were the most powerful main line engines in the country. Originally intended principally as freight engines, they were often called upon for passenger duties during the wide fluctuations of traffic which occurred on the Highland Railway, particularly during the summer season.” [36]
“Although the type was a notable success for Jones, an accident while testing one of the locomotives caused one of his legs to be severely scalded. Although he recovered, he was permanently affected and by the end of December 1896 had retired due to ill-health.” [36]
Peter Drummond was Locomotive Superintendent of the HR from 1896 to 1912. Under Peter Drummond, new 0-4-4T, 0-6-0T, 0-6-4T, 0-6-0, 4-4-0 and 4-6-0 designs emerged. All 72 of his locomotives passed to the LMS. [35] Among those 72 locomotives were the class ’18’ 0-6-0s – these were the only class of 0-6-0 employed by the HR. The class was introduced on the network in 1900. [38: p9]
“Originally intended to be 15 in number the initial order was for only six when placed in 1899, Dübs supplying Nos 134-9. They were followed by Nos 18-21 in 1902, also from Dübs, and finally Nos 36 and 55 (the latter renumbered 37 in 1921) in 1907 from North British. The class replaced an assortment of small and old 2-4-0 locomotives. The 1902 engines had Drummond water tube fireboxes, but otherwise the “Barneys” (just how the class became so named is lost in the mists of the past) were quite conventional. The first six had double bogie tenders, the rest six wheeled, the former being exchanged with six wheeled tenders from the 4-4-0 ‘Ben’ class (LI No 117) in 1902-13.” [38: p9]
“Most of the ’18’ class, as far as is known, were used on goods trains to east and north of Inverness rather than the main line to Perth. Despite not having steam heating pipes there was some use on passenger trains, especially excursions. In LMS ownership the class was numbered 17693-17704. In 1938 Nos – 17693-5/7, 17703 were moved to the Glasgow area to assist with extra traffic to the Glasgow Exhibition, when more engines with vacuum brakes were needed, working from Dawsholm, – Motherwell and Hamilton. One No 17694, was even seen on an excursion train at Edinburgh which also crossed the Forth Bridge to Burntisland. Although returned to Inverness later that year five were again used in Glasgow during 1939, but not for long. A longer stay in that area began at the end of 1946 when the eight survivors moved to Corkerhill, some later being transferred to Ayrshire sheds. Seven passed into British Railways stock, the last being withdrawn in 1952.” [38: p9]
Generally, the HR had little use for shunting tank engines, but “In 1903/04 the Highland Railway built three powerful 0-6-0 tank engines at its Lochgorm works in Inverness. Numbered 22, 23 and 24 they were used for shunting duties. The boilers and wheels were taken from older locomotives that had been scrapped and this led to the engines being referred to as ‘Scrap Tanks‘.” [40] These outside cylinder engines were, “quite unremarkable except that the boilers were recovered from obsolete 2-4-0 locomotives together with re-usable wheels and other parts. The result was a class with rather larger wheels than usual for shunters. Normally there were two working at Inverness with the other at Perth. Once the boilers were no longer listed as a standard type their survival was limited and they were condemned in 1930-2.” [39: p9]
Frederick George Smith was Locomotive Superintendent from 1912 to 1915, his “brief tenure was cut short by a dispute over his sole design, the ‘River’ Class 4-6-0. Six locomotives were built, but they were (wrongly) considered to be too heavy for the Highland Railway, and were sold to the Caledonian Railway without being used.” [35]
Christopher Cumming was Locomotive Superintendent from 1915 to 1922. He designed one class of 4-4-0 and two types of 4-6-0, totalling 18 locomotives, which all passed to the LMS. [35]
The Future
One feature of Drew’s article, written at the end of 1975, was the palpable concern expressed over the security of rail services in the remote areas of Scotland and particularly from the Farther North Line and the Kyle of Lochalsh line. With hindsight, we can say that (although justified in the mid-1970s, with the bias of the time towards road transport) what was feared has not come to pass. [1: p8] Passenger rail services on both these lines (and on the West Highland line) continue, although we should note that Scotland’s Railway receives some of the highest public subsidy anywhere in the UK: two thirds of the costs come from the Scottish Government; and on average, tickets are 20% lower than the rest of the UK. [2]
References
Brian Stephenson (ed.); The Highland Railway; Trains Illustrated No. 18, Ian Allan, Shepperton, London, 1976.
J. W. P. Rowledge; The 4-4-0 Locomotives of the Glasgow & South Western and Highland Railways; in Brian Stephenson (ed.) Locomotives Illustrated No 117, January-February 1998, Ian Allan, Berkhamsted, Herts, 1997.
J. W. P. Rowledge; Scottish 0-6-0 and 2-6-0 Classes of the LMS; in Brian Stephenson (ed.), Locomotives Illustrated No 133, September-October 2000, Ian Allan, Berkhamsted, Herts, 2000.
J. W. P. Rowledge; LMS Scottish Goods Tank Locomotives; in Brian Stephenson (ed.), Locomotives Illustrated No 154, July – September 2004, Ian Allan, Berkhamsted, Herts, 2004.
Mike Bridge, ed.; TRACKatlas of Mainland Britain: A Comprehensive Geographic Atlas Showing the Rail Network of Great Britain (3rd ed.); Platform 5 Publishing Ltd., Sheffield, 2017, p94.
John Thomas & David Turnock; A Regional History of the Railways of Great Britain. Volume 15 North of Scotland; David St John Thomas, Newton Abbott, 1989, p236.
Highland doubling; in The Railway Magazine Issue No. 902, June 1976, p277.
Highland doubling starts; in The Railway Magazine Issue No. 905, September 1976, p476.
H.A.Vallance notes that in the years prior to the coming of the railways to the North of Scotland there was a series of different initiatives intended to improve transport links. The first were the roads built by General Wade (250 miles of military roads) which “were quite unsuited to the requirements of trade operating under peace-time conditions.” [17: p11] The biggest contribution to raid development was made by Thomas Telford. He “was appointed to survey for new roads and for the improvement of existing highways. In the course of … 17 years he constructed about 920 miles of road, and built some 1,200 bridges.” [17: p11] But it was the coming of the railways to the Highlands, that most effectively addressed the regions transport problems.
Earlier articles about the Highland Railway network can be found here, [3] and here. [4] These two articles cover the Strathpeffer Branch and the Fortrose Branch repectively.
Trains Illustrated No. 18 which was published in 1976 focussed on The Highland Railway. [1] The introductory article, ‘Highland Retrospect’, was written by Paul Drew. [1: p4-11]
Paul Drew commences his article with a short reflection on the excitement of waking on one of the sleeper services heading North into the Scottish highlands. Two routes provide an intensely enjoyable experience in the right weather: “The awakening on the West Highland line at Garelochhead, perhaps, or on Rannoch Moor … winding in a generally northward direction towards Fort William, Mallaig and Skye and the Hebrides; and daybreak on the Highland line proper, the Perth-Inverness main line of the old Highland Railway, somewhere between Blair Atholl and the outskirts of Inverness, following the old coach road up to Druimuachdar summit, at an altitude of 1484ft, or dropping down the hills between Spey and Findhorn and Findhorn and Moray Firth.” [1: p4]
Drew expresses his opinion that the Highland Railway (HR) route offers the greatest diversity of scenery but whether “you travel from Euston to the Highland or from Kings Cross to the West Highland line the contrast between the [suburbs of London] … and the glories seen on waking – even, for devotees, in a Scotch mist – is one of the attractions of the journey. Before World War II one could start an overnight journey to a Highland line station from Kings Cross as well as Euston, and up to 1914 from St Pancras also with, on a summer evening, a daylight exit from London.” [1: p4]
He seems to like the route taken by trains from St. Pancras best. Their route “was via Leeds, the magnificent MR route across the Pennines, Carlisle, the North British Railway’s Waverley route through the best parts of the Lowlands to Edinburgh, and so by the East Coast route over the Forth Bridge to Perth, the beginning of the HR main line – all far better traversed in daylight.” [1: p4]
He notes too that it was common practice not to disturb a passenger’s sleep which meant that sleeper services on the HR were normally made up of “HR vehicles and through coaches and sleeping cars from England (LNWR, West Coast Joint Stock, GNR, North Eastern, East Coast Joint Stock, Midland, and probably Midland & North British joint stock) and from Scotland (Caledonian and North British) but also of privately hired ‘family’ saloons, horseboxes, flat wagons conveying carriages and, from the turn of the century, motorcar vans, all supplied by a wide variety of English and Scottish railways.” [1: p4]
Occasionally, these trains would also include the “private saloon of the Duke of Sutherland, who owned not only one or two passenger vehicles but a 2-4-0 tank engine, Dunrobin, and its successor, an 0-4-4 tank of the same name, which he ran – often driving himself – on his private railway. It was in Sutherland, and ran from Golspie via his seat, Dunrobin Castle, to Helmsdale. The line was eventually taken over by the Highland and forms part of the Farther North line from Inverness to Wick and Thurso. Both Dunrobins were allowed to work (within limits) over HR tracks, even south of Inverness, but not, it seems on public passenger trains – at least not expresses.” [1: p4]
Drew notes that, “The marshalling of the heterogeneous caravans at Perth, where vehicles were made over by the CR and NBR, was a frequent cause of unpunctuality and indeed chaos. Besides, most of the trains tended to run late during the summer, especially on the HR main line, which even after the central portion south of Druimuachdar has been double-tracked in the 1890s, tended to be congested; a high-season shortage of HR motive power aggravated matters, and reliance on telegraphy for many years before introduction of the telephone did not make for flexibility in train operation. Disgruntled Sassenach passengers in Perth, Edinburgh Waverley and other big Scottish stations would mutter that they ordered this matter better in England.” 1: p4]
It would be easy to take the perspective of a southerner when considering the HR, seeing it “mainly as a means of moving tourists and sportsmen from England, and such consumer goods and other freight as the impoverished Highlands could afford to import.” [1: p4] But it would be quite wrong to do so. “The Highland Railway was conceived by Highlanders, in the Highlands, as an outlet for the fish and agricultural produce of the Highlands from northern Perthshire to John o’ Groats and from Inverness eastwards to the Aberdeenshire border and westwards to Wester Ross, a region that in the 1840s was still only slowly recovering from the oppression and impoverishment that had followed the Forty-Five insurrection a century before. The HR was the creation not of middle-class businessmen but of country landowners who ranged from the rich Duke of Sutherland to poor lairds who could afford little more than to encourage, rather than to oppose (like many landowners in the south) building the railway over their land, often asking for a station to serve their tenants.” [1: p4]
With a route mileage of more than five hundred miles, H. A. Vallance tells us, “the Highland occupied third place among the five fully-independent pre-1923 main line railways of Scotland. Its popularity with those who love railways arise from the scenic charm of its terrain, and also from the way in which the small company succeeded in working its traffic in the face of natural difficulties, and with limited financial resources, over routes that were largely single track.” [17: dust-jacket]
Prior to the 1850s, “there was already a trickle of summer tourists from the Lowlands and England, who used a surprisingly well-developed system of stagecoaches or drove in their own carriages; but it was not until the 1850s, after Queen Victoria and the Prince Consort had ‘invented’ Highland tourism by establishing Balmoral, that the trickle began to grow into a flood. Deerstalking, grouse-shooting and fishing, at least by rich people from south of Perth, developed slowly. For 20 years after the HR Inverness-Perth line, by the original route via Forres, was opened in 1863 the management adopted a take-it-or-leave-it attitude to passengers, though by the 1880s receipts from through passenger traffic from England, including much first class in the summer, were considerable. And for long afterwards the HR left the provision of really comfortable passenger vehicles to the English railways and the Caledonian.” [1: p4-5]
Drew continues: “To promoters seeking a route for a railway from Inverness to the south there were three options. The first was a relatively easy alignment along the flat coast via Forres to Elgin, thence through undulating but not mountainous country to near Inverurie and on through Lowland Buchan to Aberdeen. Second was the route of the old coach road via Kingussie, Druimuachdar and Blair Atholl to Perth, and the third was through [the] Great Glen to the area of Fort William, beyond which progress to Glasgow was through a region of mountains and lochs which had long been thought impassable for a railway – or at least to involve too many major civil engineering works – until it was traversed by the West Highland line towards the end of the century, some years after the threat of a Glasgow & North Western Railway over an even more difficult route than the West Highland.” [1: p5]
The disadvantages of the route via Aberdeen were it’s circuitous route and, at the time particularly, there being no bridges crossing the River Tay and the Firth of Forth and the failure of any such route to serve inland Invernessshire. Also significantly perhaps, was an innate suspicion (perhaps too strong a word) amongst highlander promoters of a railway that there was any need to serve the lowland city of Aberdeen.
“Nevertheless,” says Drew, “the first train to reach Inverness from the South, in 1858, was from Aberdeen, over the Great North of Scotland [Railway (GNSR)] as far as Keith and then over the Inverness & Aberdeen Junction line, which later became part of the HR.” [1: p5]
The Aberdeen to Inverness Railway Line, (GNSR – Aberdeen to Keith)
The GNSR was “floated to build a railway from Aberdeen to Inverness. … It obtained its Act on 26th June 1846. It is estimated that [this] cost £80,000 and the company was at once in financial straits, … accentuated by the crash which followed the ‘Railway Mania’s, then at its height. … [Eventually, work] started on 25th November 1852. … The railway was opened from Kittybrewster (1½ miles from Aberdeen) to Huntly, a distance of 39 miles, on 19th September 1854. Four years previously, the railway had been completed from Perth to Aberdeen. A through journey was then made possible between England and the south of Scotland, and Huntly. From this latter point coaches, running in connection with the trains, continued the journey to Inverness.” [17: p12-15]
The line was extended into Aberdeen to Waterloo Quay in 1855, and in October 1856 it reached Keith around halfway between Aberdeen and Inverness. The GNSR had overstretched itself and could not fund the remaining 55 miles of line to Inverness.
The original Great North of Scotland Railway terminus in Aberdeen opened on 1st April 1856, and closed to passenger service on 4th November 1867 with the opening of Aberdeen Joint Railway Station. This extract from the 25″ Ordnance Survey undertaken between 1864 and 1867, published in 1869 shows the station as it was in its prime. [15][18]The next significant location on the line was the station at Kittybrewster which is shown here as an extract from the 25″ Ordnance Survey undertaken between 1864 and 1867, published in 1868. [19]Dyce Railway Station was opened (along with the line) in 1854 by the Great North of Scotland Railway (GNSR). It later became a junction for the Formartine and Buchan Railway (F&BR) which diverged here and headed north to Peterhead and Fraserburgh; this opened to traffic in 1861 and had its own platforms alongside the main line ones. Passenger services over the F&BR ended as a result of the Beeching Axe on 4th October 1965 but the station remained open until 6th May 1968. [15] Freight continued to Peterhead until 1970 and to Fraserburgh until October 1979. There is still evidence on the ground of the old branch platforms which sat on the site of the station car park. The former branch lines are now a long distance cycle path, accessible from the western end of the car park. The station was reopened by British Rail on 15th September 1984. This extract from the 25″ Ordnance Survey of 1865, published in 1866 shows the station soon after it became a junction station. [16][20]
The GNSR left Dyce and followed the southern edge of the River Don’s floodplain, passing through Kintore before bridging both the Aberdeen Canal and the River Don just to the North of Port Elphinstone Railway Station.
Kintore Railway Station acted as a junction station for the Alford Valley Railway which branched off the GNSR line just to the Northwest of Kintore Railway Station. The Alford Valley Railway opened in 1859. It had stations at Kemnay, Monymusk, Tillyfourie, Whitehouse and Alford. The line also served Kemnay Quarry and three other granite quarries in the area. The train took just over an hour for the 16-mile (26 km) journey. [27][28]This next extract from the 25″ Ordnance Survey of 1864 to 1866, published in 1867, shows Port Elphinstone Railway Station and the bridges over the Aberdeen Canal and the River Don. As can be seen on this extract a short branch line served the canal wharves at Port Elphinstone. [21]Inverurie Railway Station was the next significant location on the GNSR and appears on this extract from the 25″Ordnance Survey of 1864 to 1866, published in 1867. [22]Further to the Northwest, the line bridged the River Urie (Ury). This extract is from the Ordnance Survey of 1866 & 1867, published in 1867. [23]
To the West of Keith, the Highland Railway held sway. The Inverness &Aberdeen Junction Railway was one of the constituent parties that formed the Highland Railway in 1865, as noted below.
The line crossed the River Urie (Ury) once again further to the Northwest. This extract comes from the 25″ Ordnance Survey of 1867, published in 1868. [24]
Beyond this viaduct the line ran along the South side of the River Ury and then to the South side of the Gadie Burn. It crossed the Burn just to the West of the village of Oyne and its railway station.
The village of Oyne, its railway station, and both road and railway bridges over the Gadie Burn. This extract is taken from the 25″ Ordnance Survey of 1867, published in 1868. [25]Insch Railway Station at Rothney, as it appeared on the 1867 25″ Ordnance Survey. [26]The next station on the line was Wardhouse Station. [29]And then Kennethmont Railway Station. [30]And Gartly Railway Station. [31]North of Gartly the railway bridged the River Bogie twice in short succession before arriving at Huntly. [32]Huntly Railway Station sat on the East bank of the River Bogie with Huntly to the West of the river. Huntly was the temporary terminus of the GNSR from 19th September 1854 until an extension was opened taking the line as far as Keith in October 1856. [17: p15-16] This extract is from the 25″ Ordnance Survey of 1871, published in 1872. [33]
North of Huntly, on the extension to Keith the line. Missed the River Deveron and ran through Rothiemay Railway Station.
This extract from the 25″Ordnance Survey of 1870 and 1871, published in 1872 shows the viaduct over the River Deveron and Rothiemay Railway Station. [34]Further West the line passed through Grange Station which three years after opening in 1856 became the junction station for the Banff, Portsoy and Strathisla Railway which opened a branch to Banff and Portsoy. [35][36]This next extract from the 25″ Ordnance Survey of 1867 & 1868, published in 1869, shows Keith Railway Station which was the terminus of the GNSR line from October 1856 until the Inverness & Aberdeen Junction Railway reached Keith from Nairn in 1858. . [37][38]
The Keith and Dufftown Railway ran Southwest from Keith to Dufftown. It can be seen curving away from the station at the left of the OS map extract above. At Dufftown, the line made an end-on connection with the Speyside Railway at Dufftown, and the Morayshire Railway connected to the Speyside Railway at Craigellachie, this ultimately gave the GNSR access to Elgin. [39]
The Aberdeen to InvernessRailway Line(HR – Keith to Inverness)
The GNSR’s protracted/torturous efforts to reach Inverness created space for others to act. Interests in Inverness sought to provide a different link to the South via Druimuachdar to Perth but were thwarted by its rejection by Parliament (in 1846), nonetheless they “obtained authority for a short line from Inverness to Nairn with a view both to blocking a GNSR approach to Inverness and also the Inverness route which eventually branched off from the Inverness-Aberdeen route at Forres, Nairn, and ran via Dava summit (1052ft), Grantown-on-Spey, Aviemore and on to Perth via Druimuachdar. (Only in the 1890s was the direct line built from Inverness via Slochd summit and Carr Bridge to Aviemore, affording the shortest route to the South.)” [1: p5-7]
Drew continues: “The Inverness & Nairn railway took only a year to build (1854-55). The eastward extension of the Inverness-Nairn line was the Inverness & Aberdeen Junction, which ran via Forres and Elgin to Keith, to which point it was opened in 1858, met the GNSR and provided the Inverness-Aberdeen through route. Two years later the Inverness & Perth Junction Company was formed. Construction of the Forres-Perth line made quick progress from both ends, despite the need to take the line for 100 miles through the central mountain tract of Scotland. The through route from Inverness via Forres to Perth was completed in 1863. The Inverness & Aberdeen Junction, which had absorbed the Inverness & Nairn, and the Inverness & Perth Junction, were amalgamated in 1865 to form the Highland Railway.” [1: p7]
West of Elgin the line bridged the River Lossie before passing through Mosstowie Station, then passed a connection to a mineral railway serving Newton Quarries and on to Alves Station.
After Alves Station it was only a short distance to the junction for the Burghead & Hopeman Branch. The line then continued on to Kinloss.
The 25″ Ordnance Survey shows the junction with the HR’s Burghead & Hopeman Branch and the adjacent roads and bridge at around the turn of the 20th century. [58]The same location in the 21st century. The road has been realigned. The route of both railway lines are still easily made out! [58]The old road bridge still crosses the railway adjacent to the newer A96 road bridge. [Google Streetview, May 2023]Looking West along the line from the A96. [Google Streetview, May 2023]Kinloss Railway Station opened on 25th March 1858 by the Inverness and Aberdeen Junction Railway. It was re-sited on 18th April 1860, to the east, but it was moved back to its original location in May 1904. It closed to passengers on 3rd May 1965nand completely on 7th November 1966. [59][60]The same area in the 21st century. [59]Kinloss Railway Station in the 21st century, looking East from the level-crossing. [Google Streetview, May 2023]Looking West from the level-crossing at Kinloss Station site. [Google Streetview, May 2023]
After leaving Kinloss trains for Inverness next ran into Forres Railway Station. Over the years the railway infrastructure at Forres has seen significant changes.
In 1858, the first railway station at Forres was located at the end of Market Street which became known as Old Station Road. The station building was demolished in the 1950s. It had been used as the stationmaster’s house since the junction opened.
A route to the South from Inverness was finally completed in 1863. It met the line running between Elgin and Inverness at Forres. Forres was chosen as the junction for the new mainline south, since it was the half-way point on the Inverness & Aberdeen Junction Railway between Inverness and Keith. Keith was also an important railway junction and the point where the line joined the GNSR and branches to the coast and Strathspey. [62]
A new ‘triangular’ station wastl constructed to allow all trains entering Forres, from either the East or West, to access the new line directly on a curve. The three curved platforms, and three junctions, gave the new Forres station its distinctive layout. [62]
The location of the new station was south-west of the existing Inverness-Aberdeen line. The original line was retained as a goods loop, with trains now leaving and re-joining the line (east-west) on a curve. Services from Inverness to Perth curved to the south on a junction at the west of the station, to arrive at the southbound platforms. [62]
Three individual signal boxes controlled the junctions at each point of the triangle: Forres East, Forres West, and Forres South. [62]
The closure of the link to the South from Forres occurred as part of the cuts following the Beeching Report in the 1960s. Further remodelling of the whole area took place in the 21st century. This saw much of the existing infrastructure removed and a new functional station built by 2017. [62]
West of Bodies the line ran on through Auldearn Station, bridged the River Nairn and entered Nairn Railway Station.
Auldearn Railway Station on the 35″ Ordnance Survey from the turn of the 20th century. It opened on 9th December 1895 and was closed by 6th June 1960. [72]The site in the 21st century – all evidence of the station has disappeared. [72]Looking West from the overbridge at the East end of the site of Auldearn Railway Station. [Google Streetview, May 2022]The bridge over the River Nairn as it appears on the 25″ Ordnance Survey from the turn of the 20th century. [73]The same location in the 21st century. [73]
Nairn Railway Station opened on 7th November 1855. In 1885, the Highland Railway Company agreed to improve the facilities at Nairn. The station buildings were replaced with improved accommodation for passenger and staff. The gables of the cross wings were surmounted with the Scotch thistle, the Prince of Wales feather, and other designs sculpted in stone. The masonry work was completed by Mr. Squair of Nairn. At the same time a new station master’s house was erected. The platforms were extended to around 440 yards (400 m) and raised in height to the level of the carriages. A new iron foot bridge over the line connected the platforms, avoiding passengers using a foot crossing over the running lines. The bridge over Cawdor Road was also widened at the same time. The work was completed in 1886. [76]
Heading Southwest out of Nairn trains passed through Gollanfield Junction Station which served the short Fort George Branch.
Gollanfield Station as it appeared on the Landranger OS map prior to closure. [79]Gollanfield Junction Railway Station opened in 1855 by the Inverness and Nairn Railway, it was initially named Fort George after the military base nearby. In July 1899, the Highland Railway opened a direct branch to Fort George (which was actually sited in the village of Ardersier). With the opening of the branch, the station was renamed Gollanfield Junction. Passenger services on the branch were withdrawn in 1943 and it closed to all traffic in August 1958. The following year, the station was renamed Gollanfield by British Railways. [77][78]The same location in the 21st century. Goods traffic at the station ceased in May 1964 and it was closed to passenger traffic on 3rd May 1965. Most of the buildings were subsequently demolished after closure, but the station house remains standing and is used as a private residence. [77][78]Looking East from the road bridge which used to span Gollanfield Railway Station, [Google Streetview, August 2021]Looking West from the road bridge which used to span Gollanfield Railway Station, [Google Streetview, August 2021]
Further details of Gollanfield Railway Station and photographs can be found here. [79]
The next stop on the line was at its terminus at Inverness.
J. W. P. Rowledge; The 4-4-0 Locomotives of the Glasgow & South Western and Highland Railways; in Brian Stephenson (ed.) Locomotives Illustrated No 117, January-February 1998, Ian Allan, Berkhamsted, Herts, 1997.

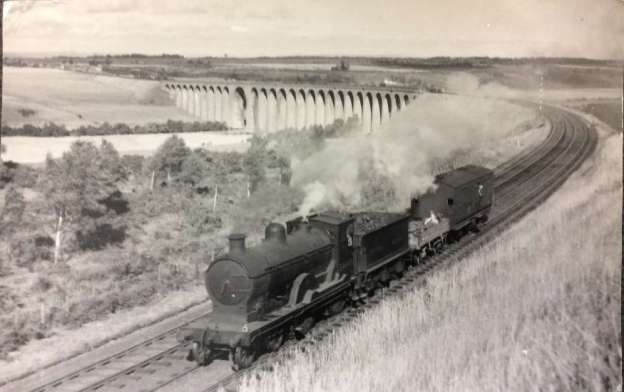
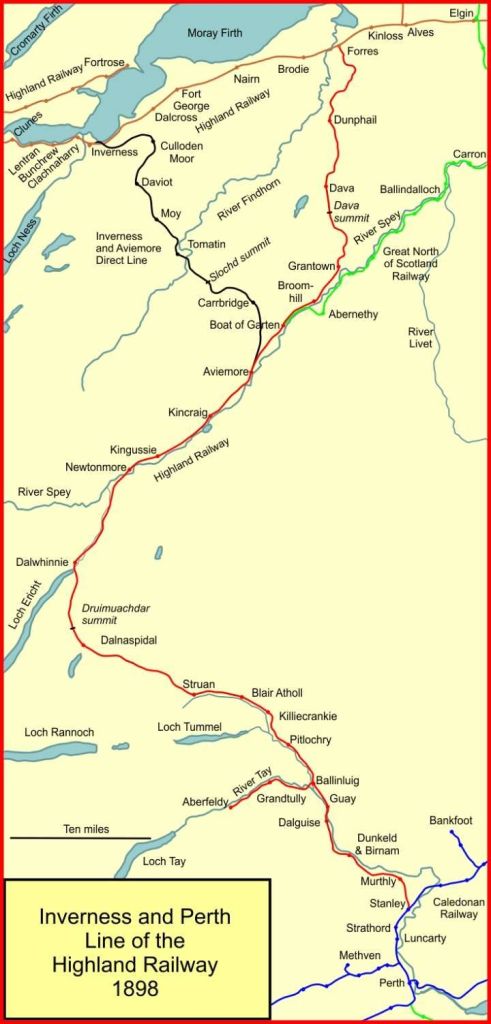
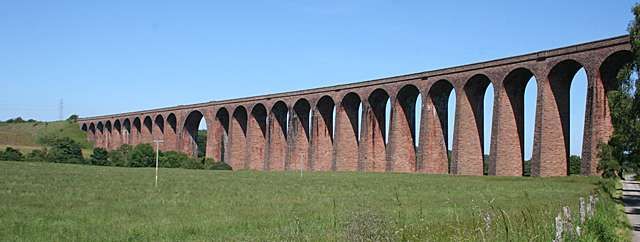
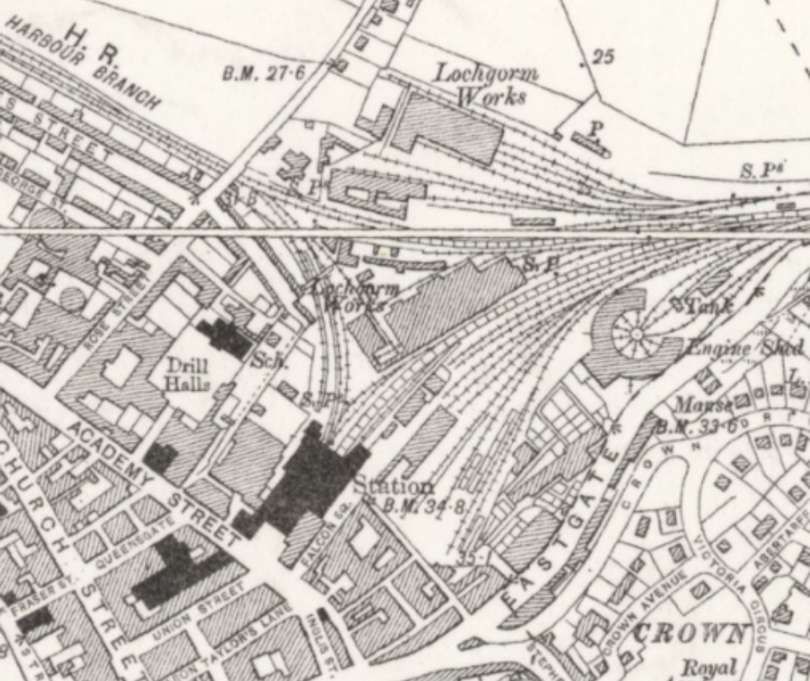
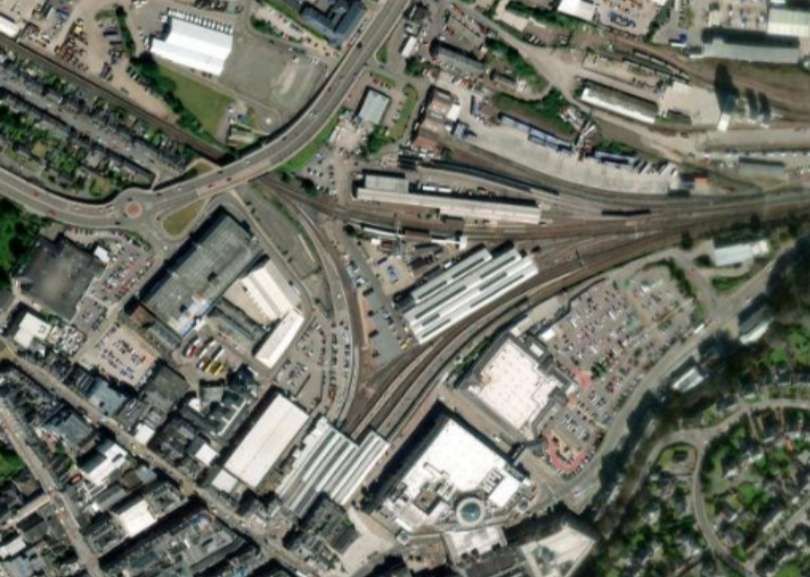

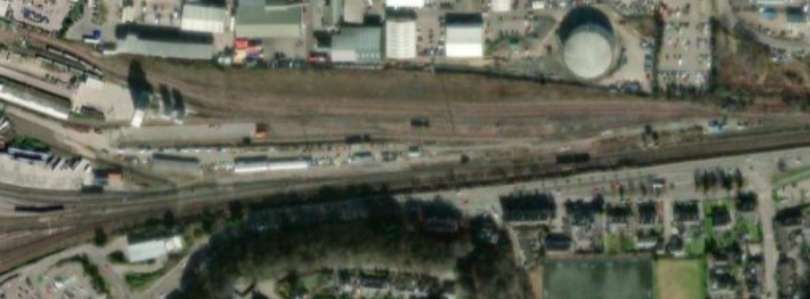
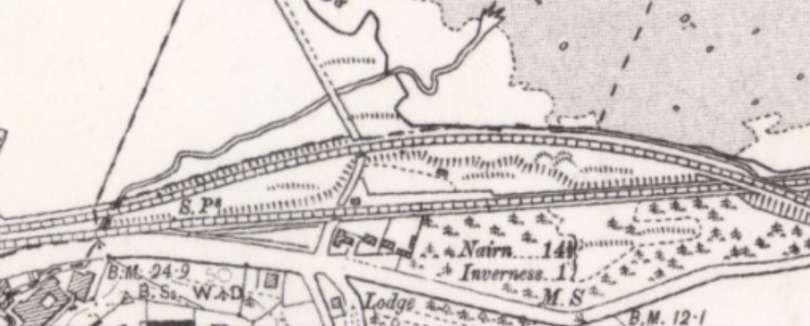
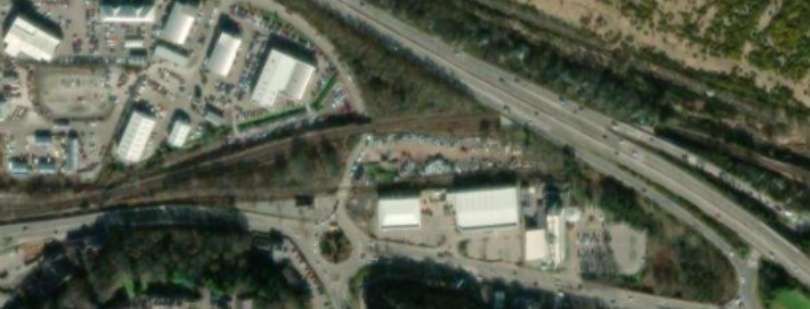
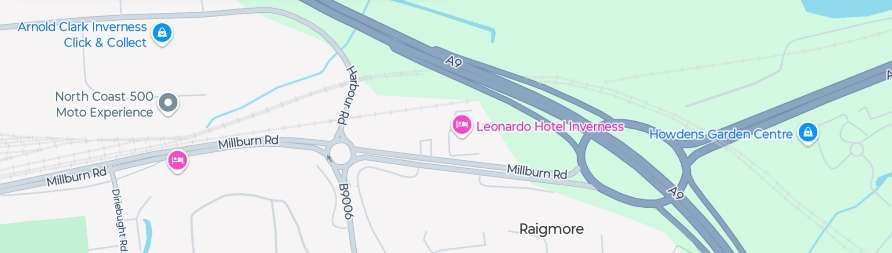
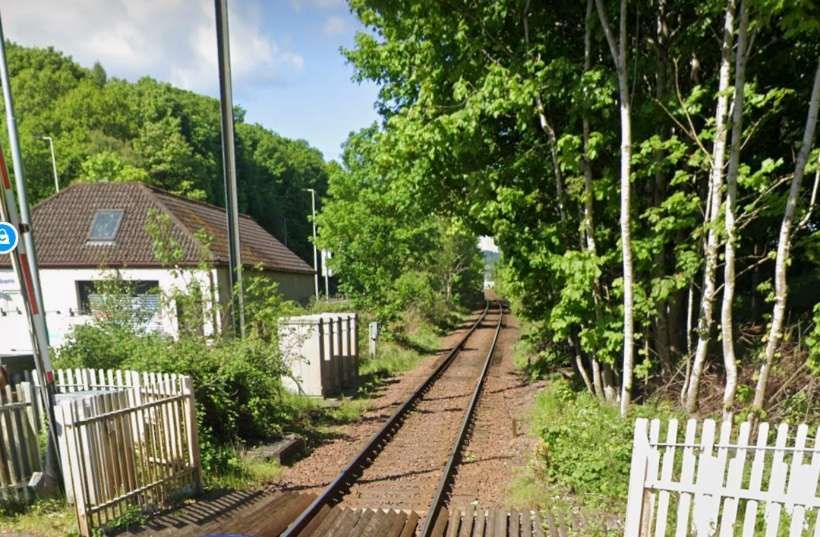
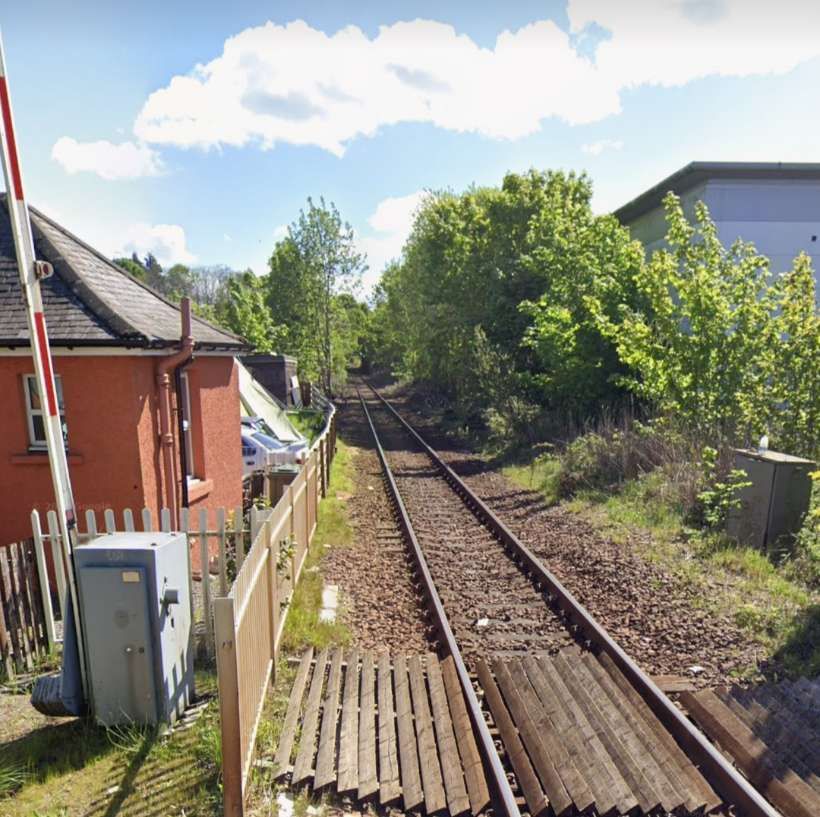
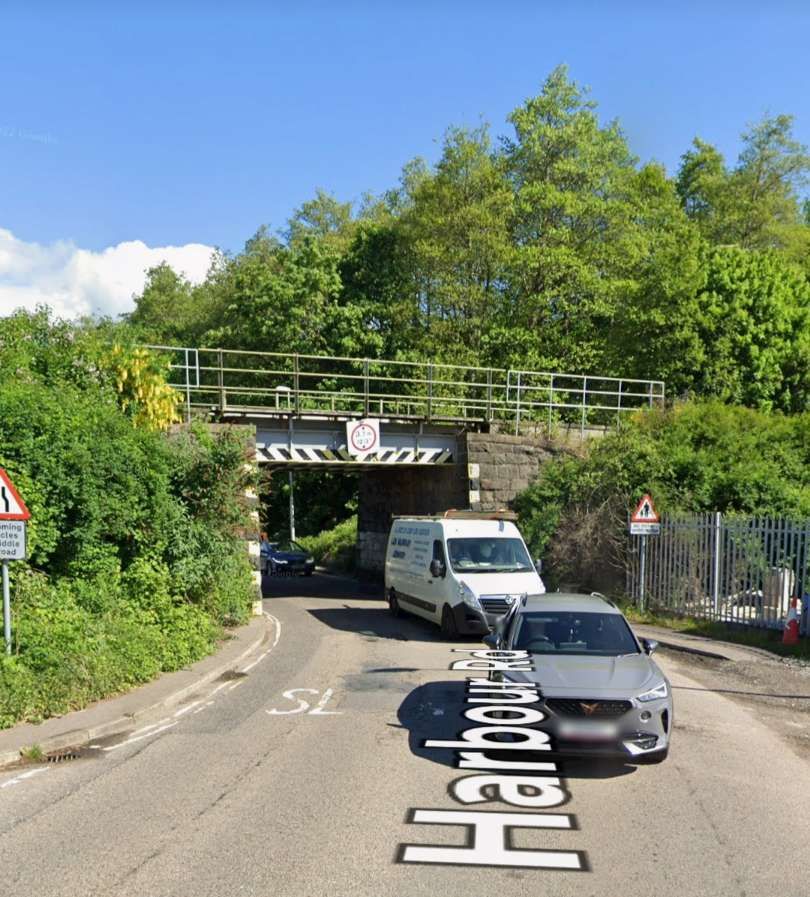
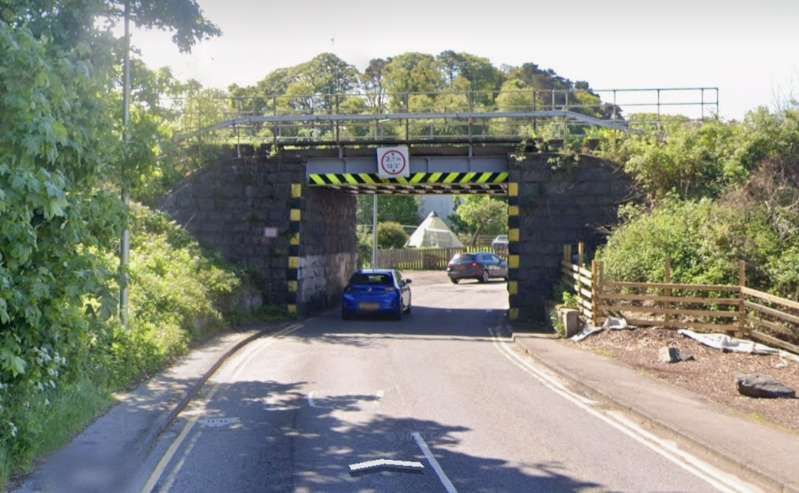
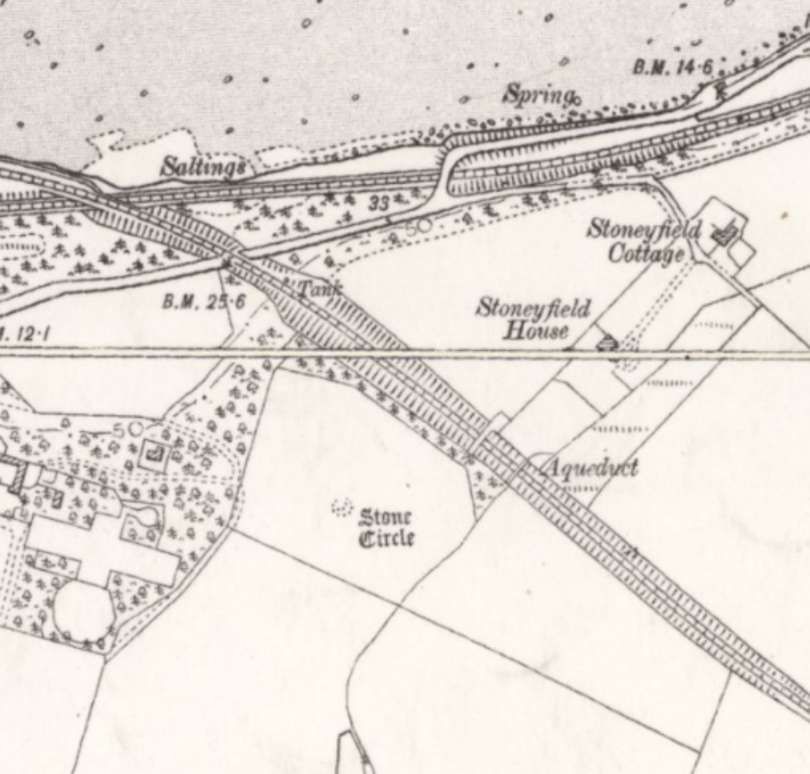
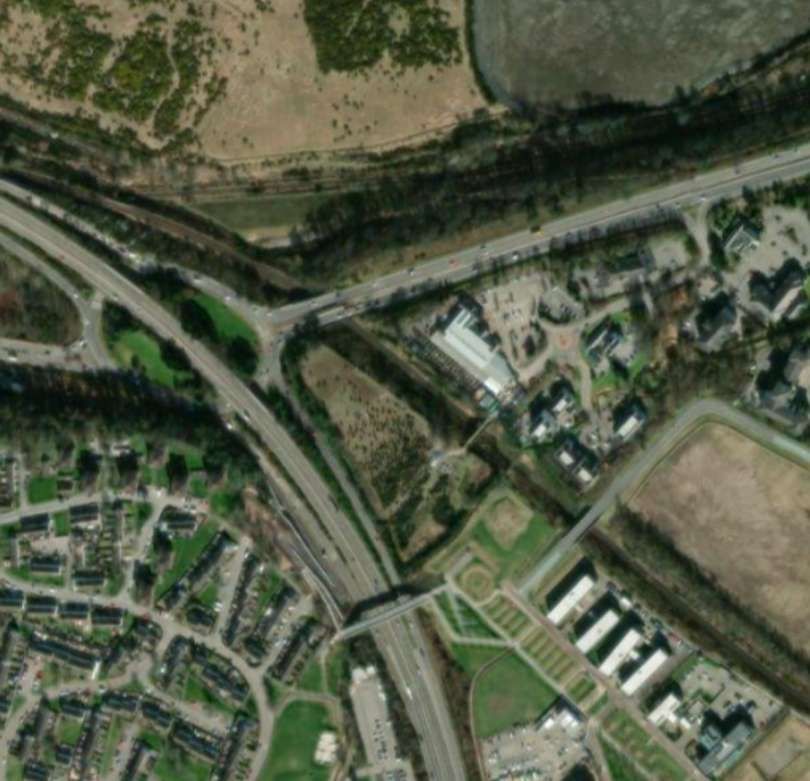
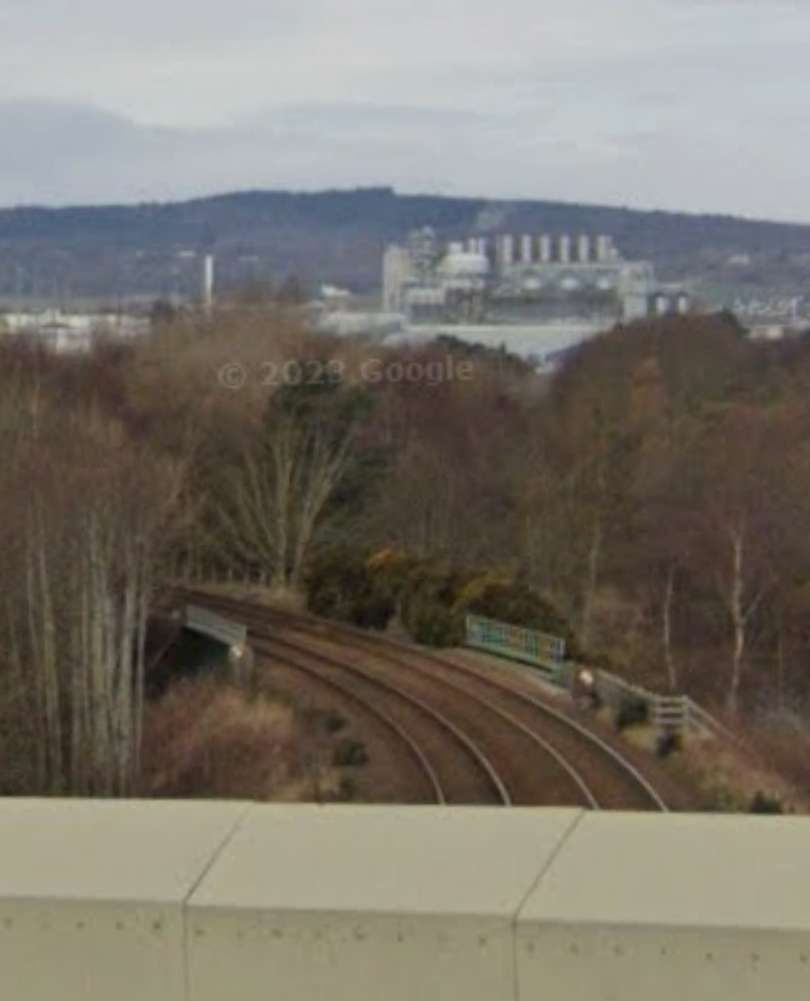
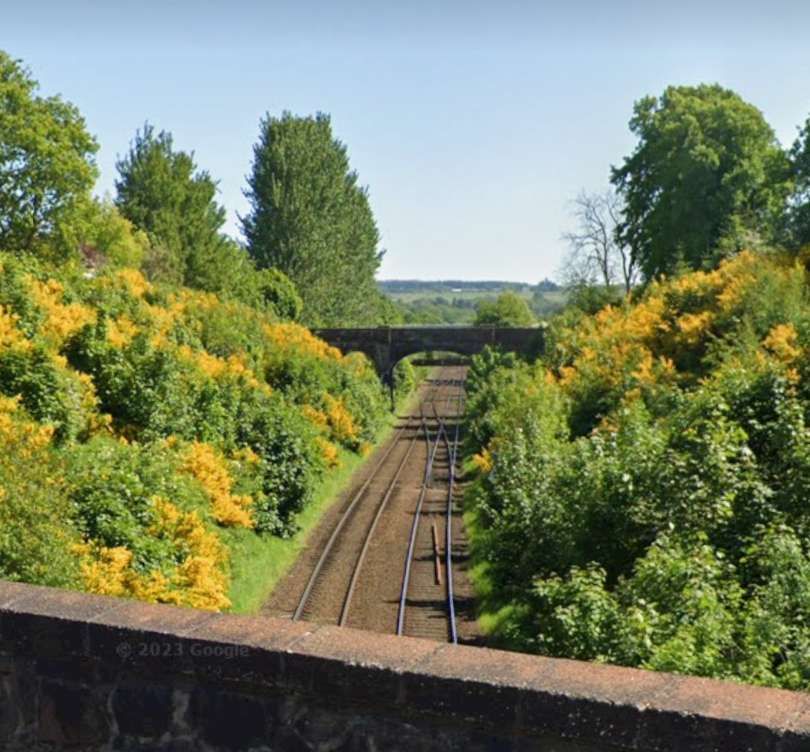

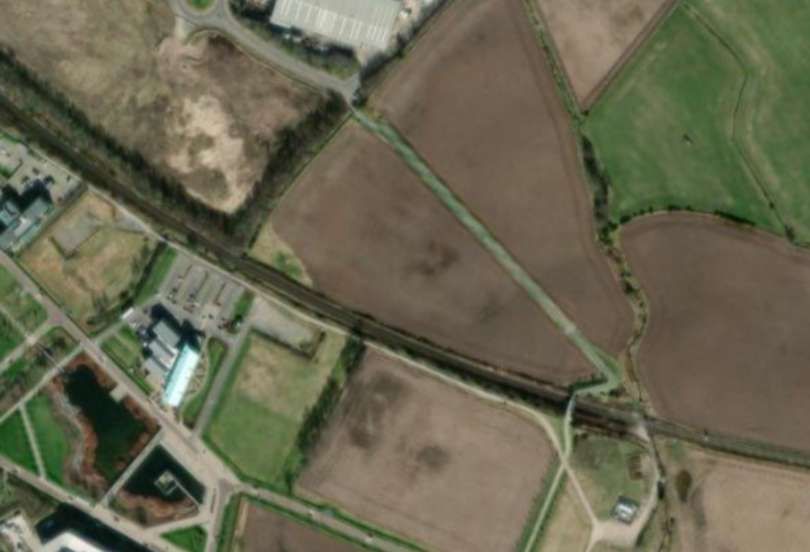
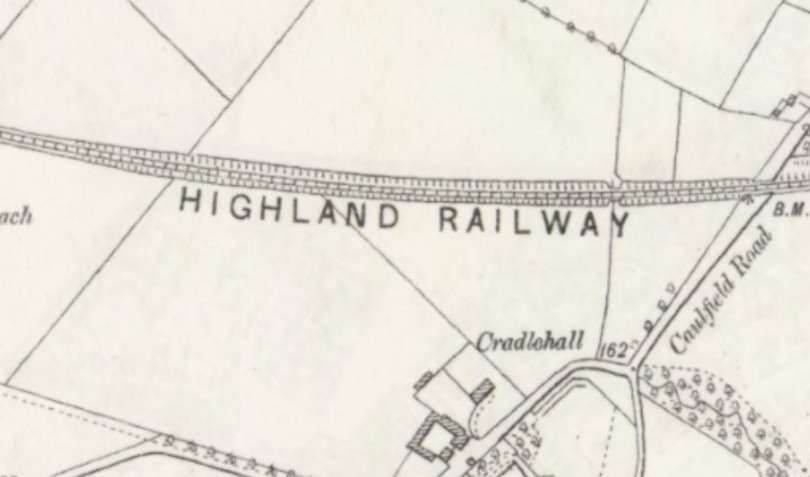
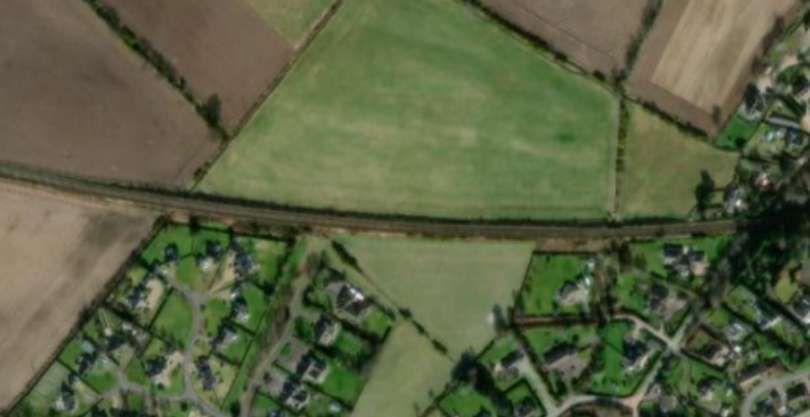
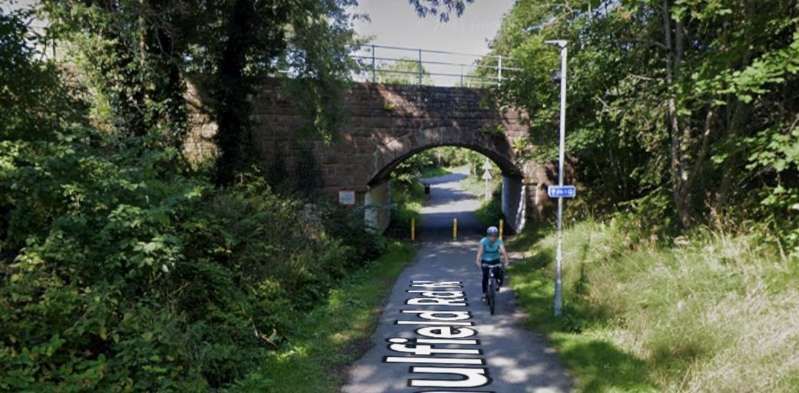
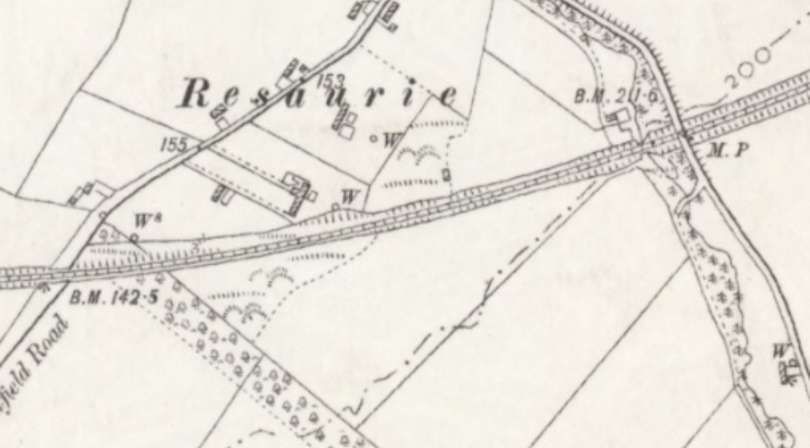
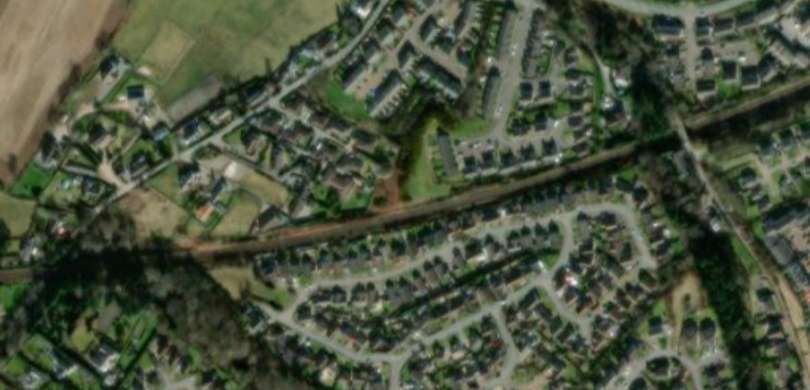
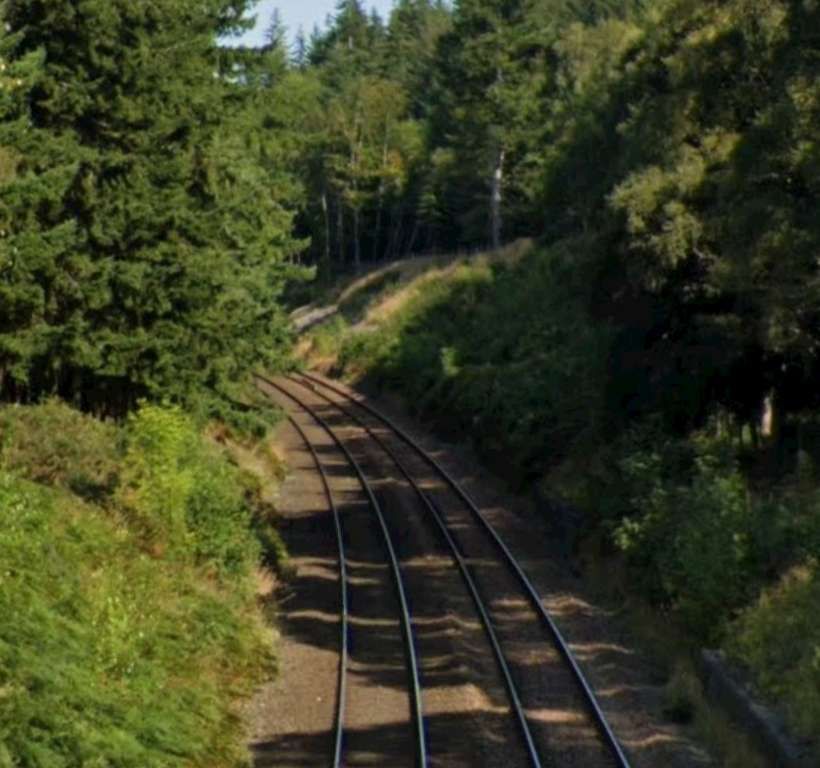
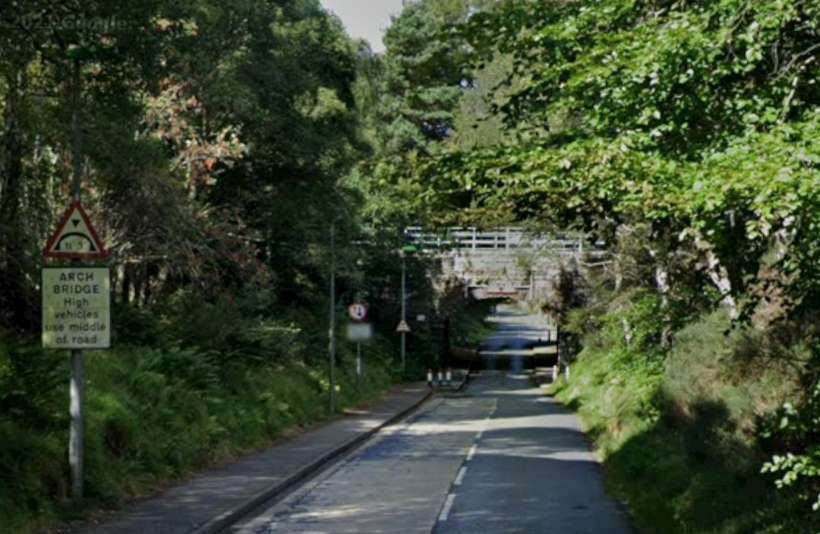
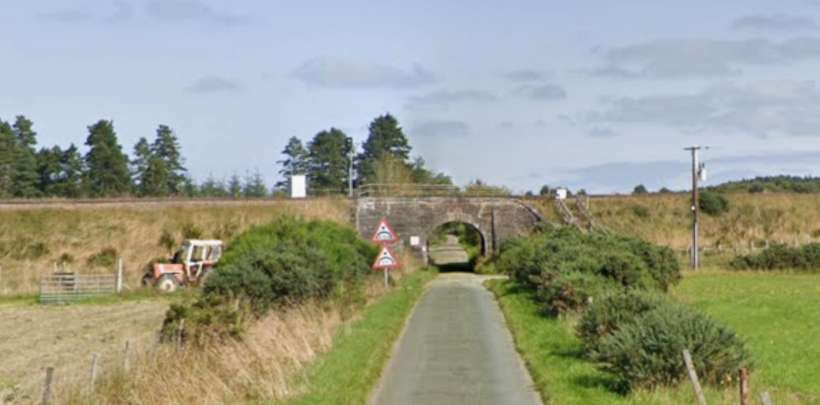
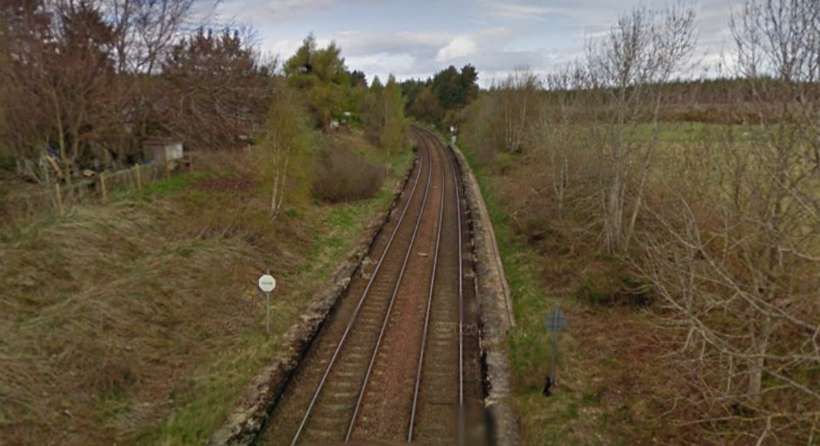
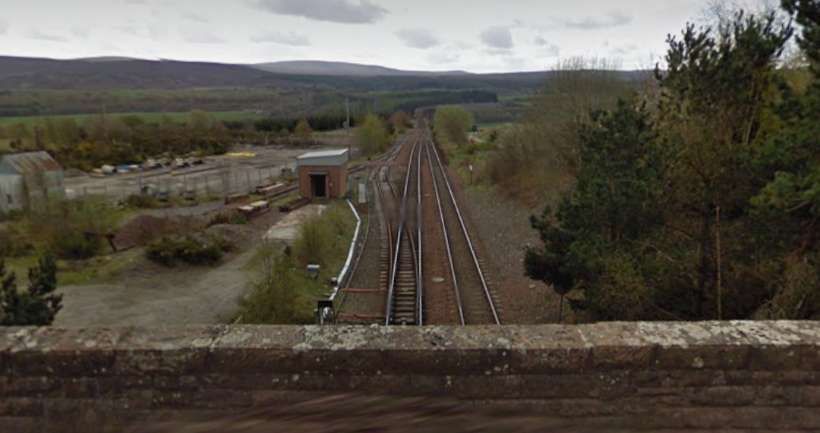
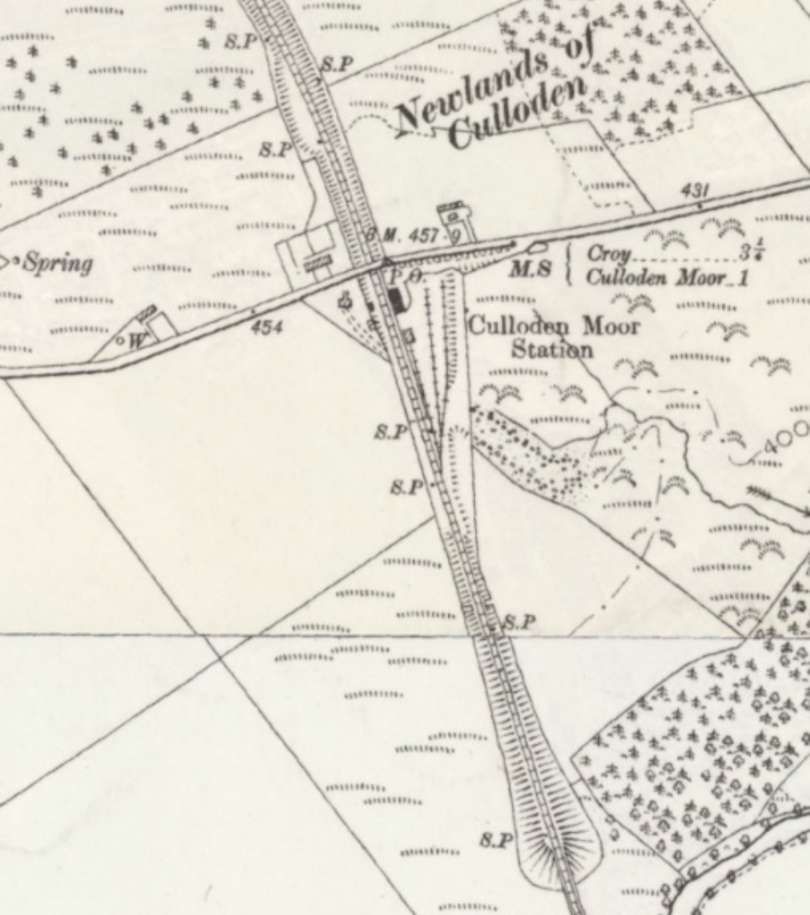

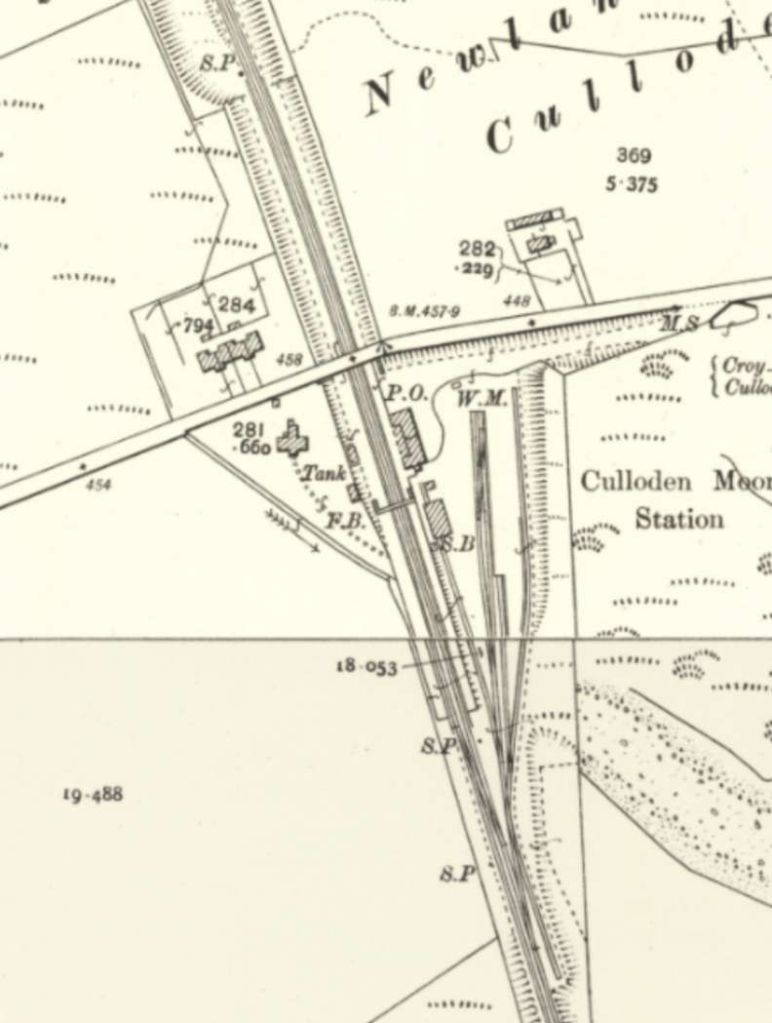
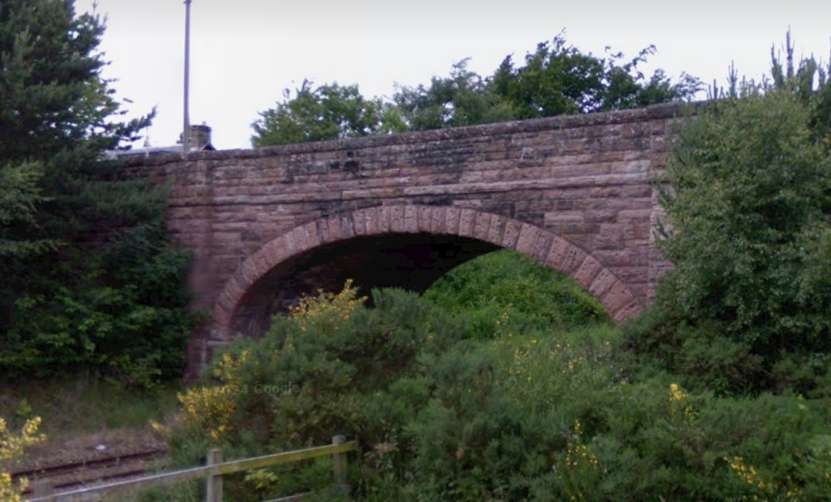
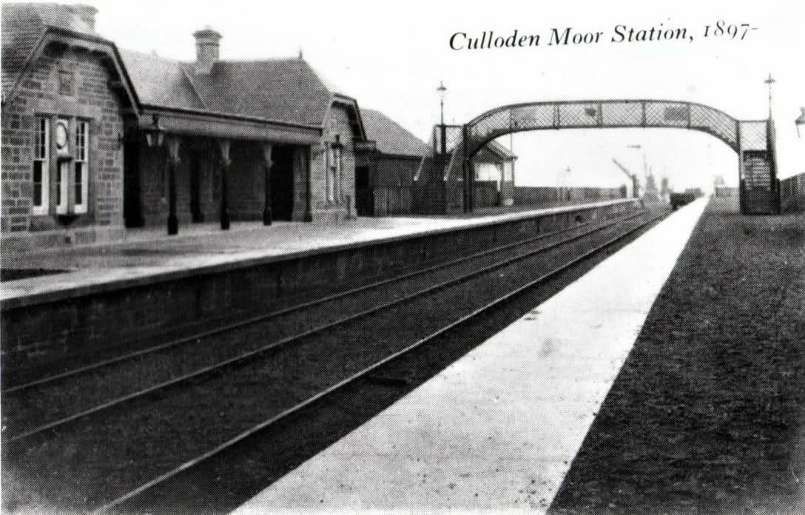
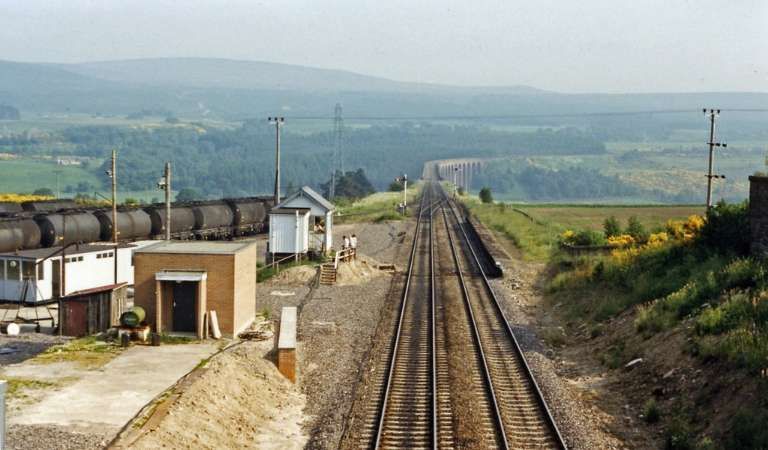
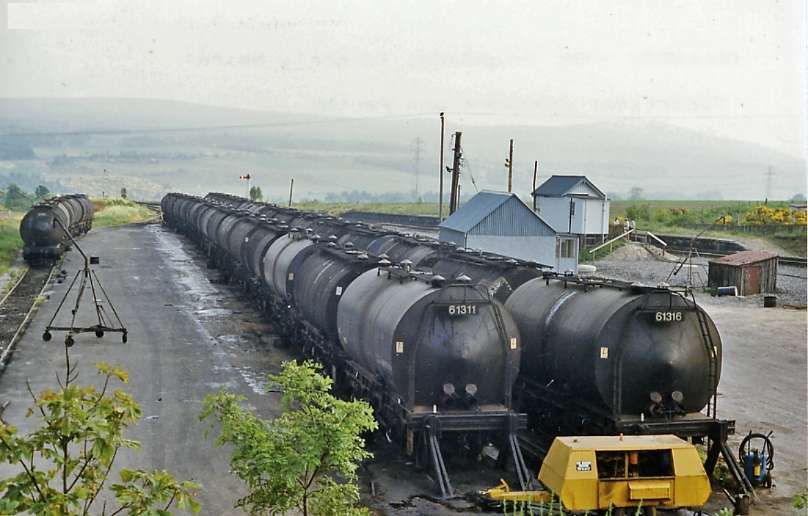
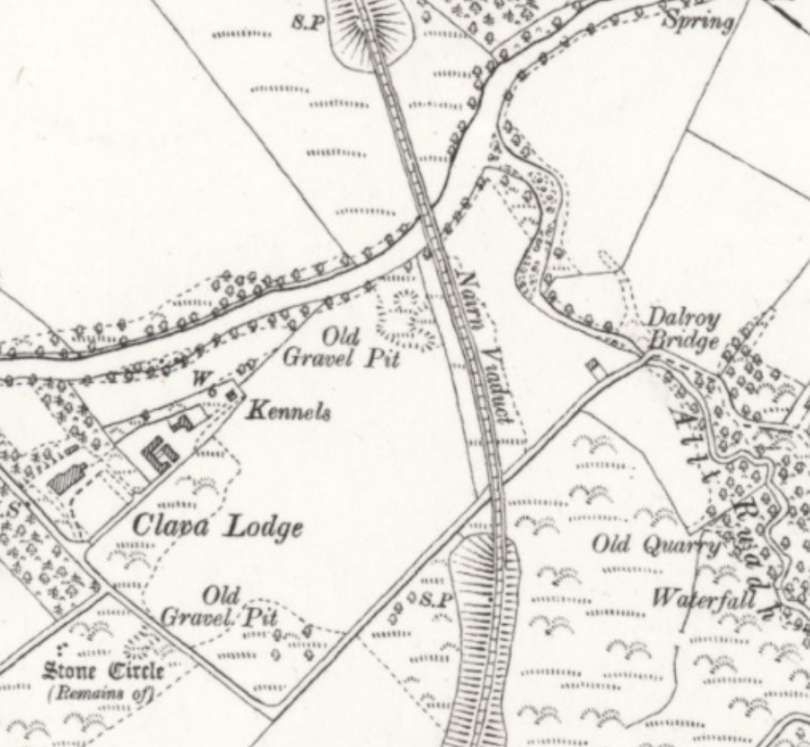

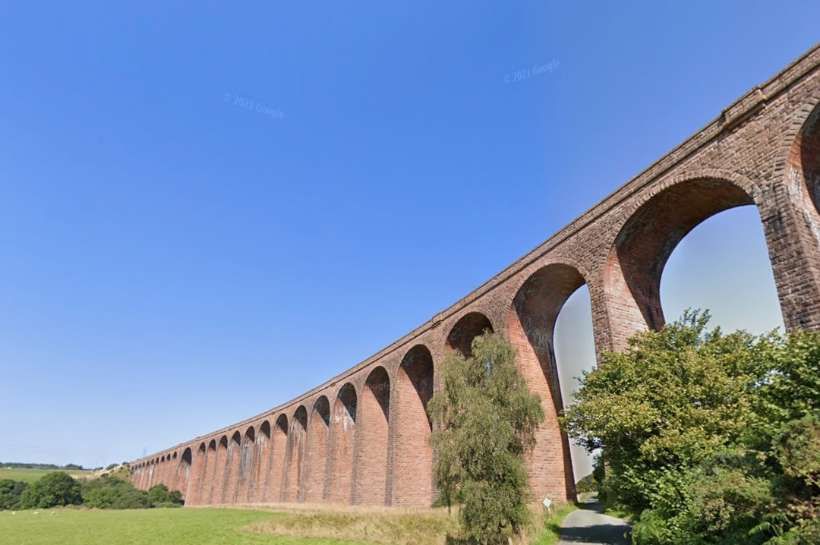
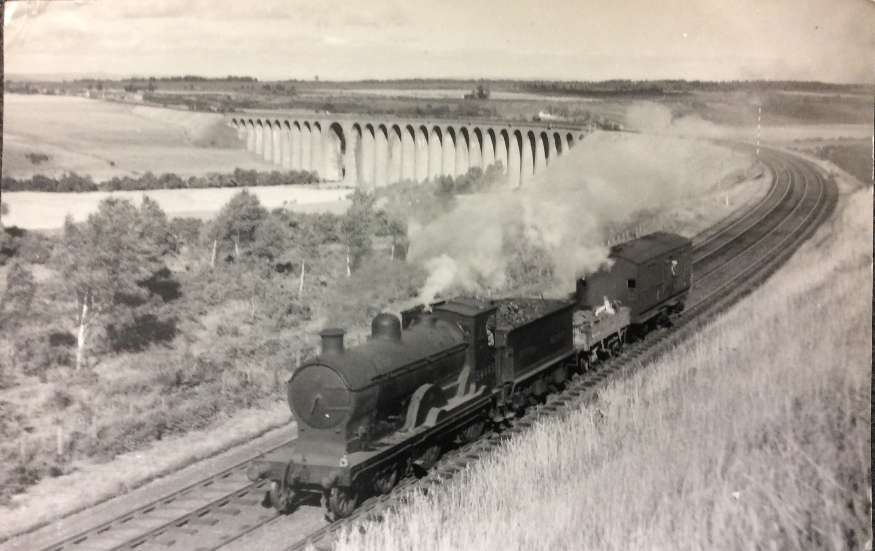
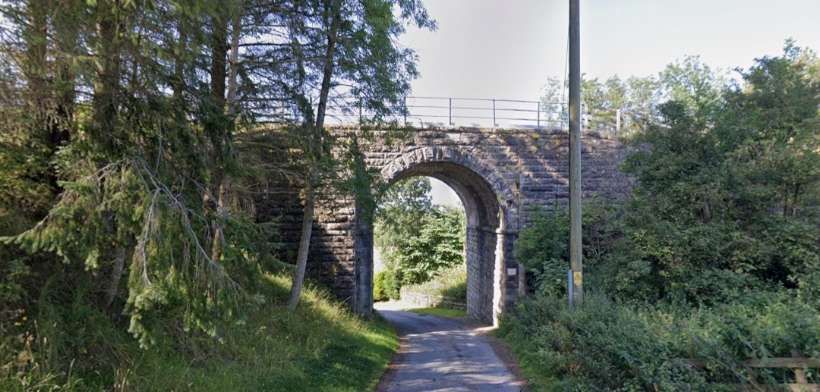
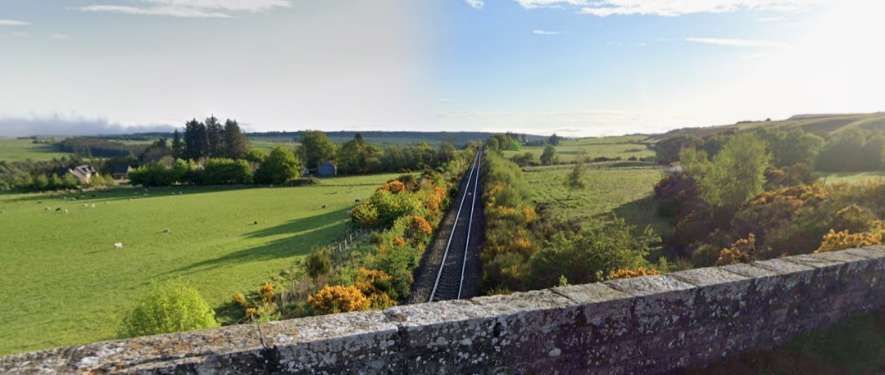
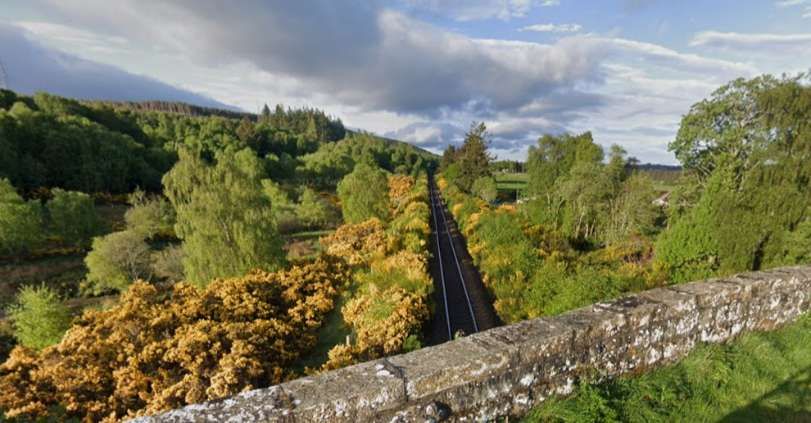
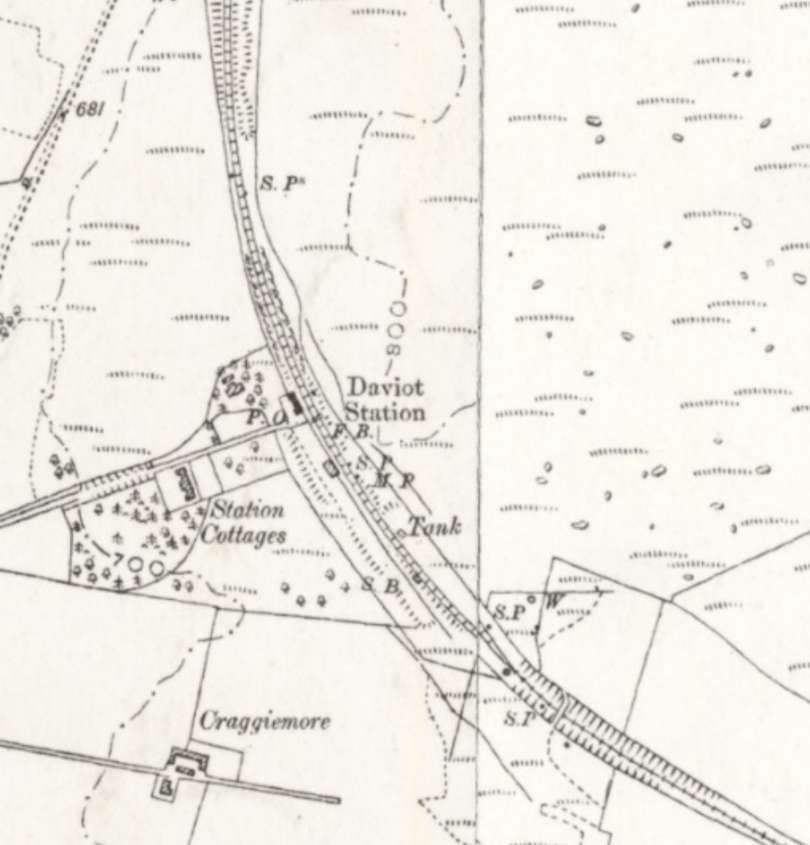
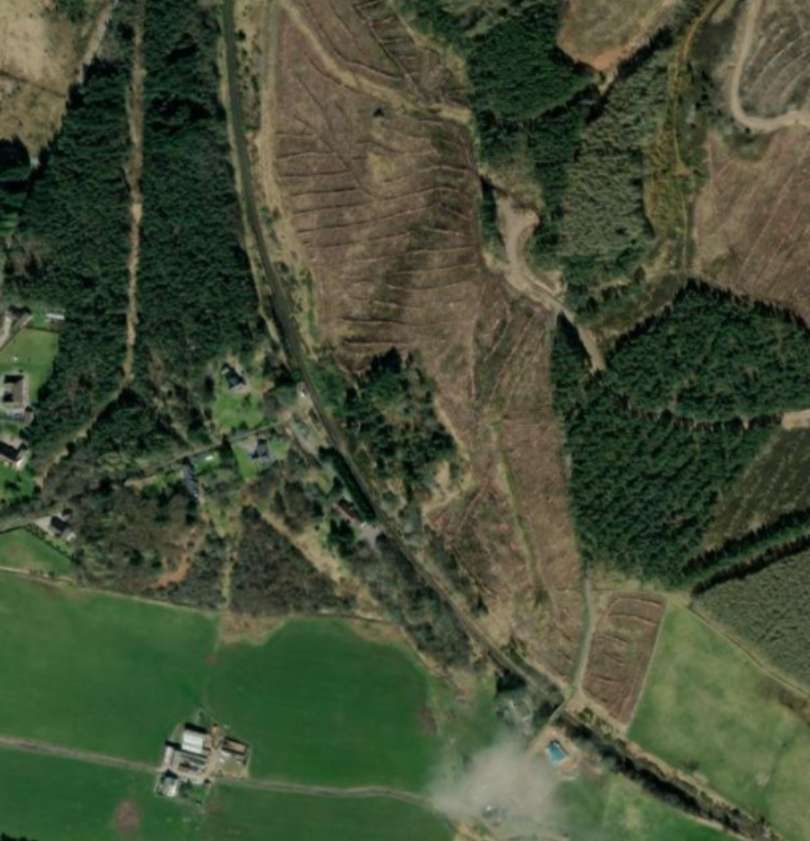
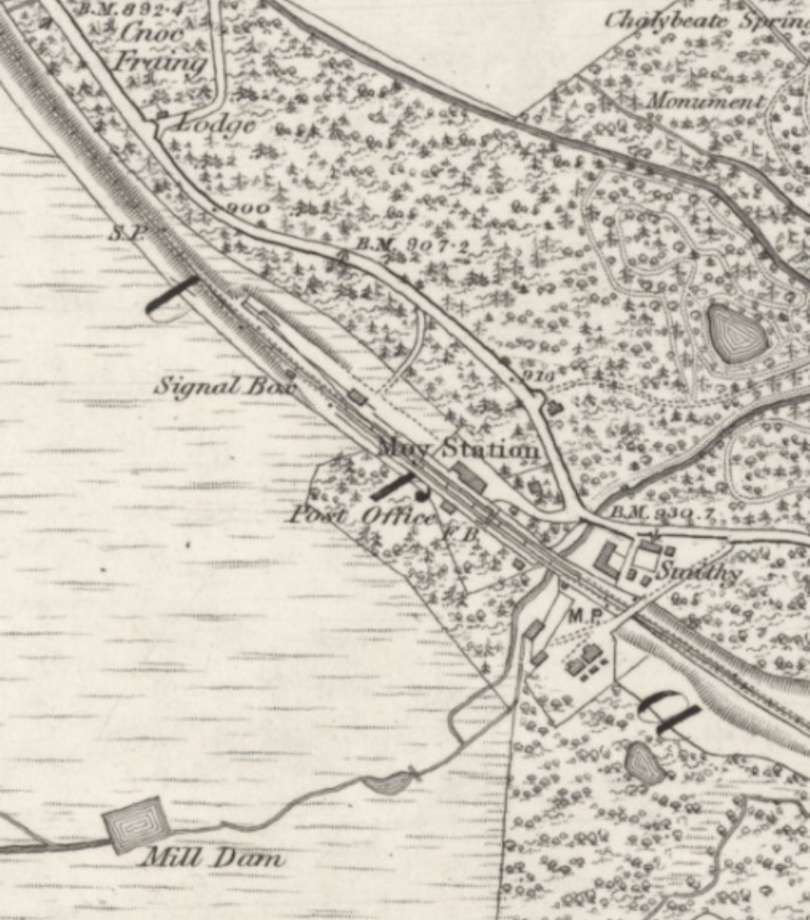
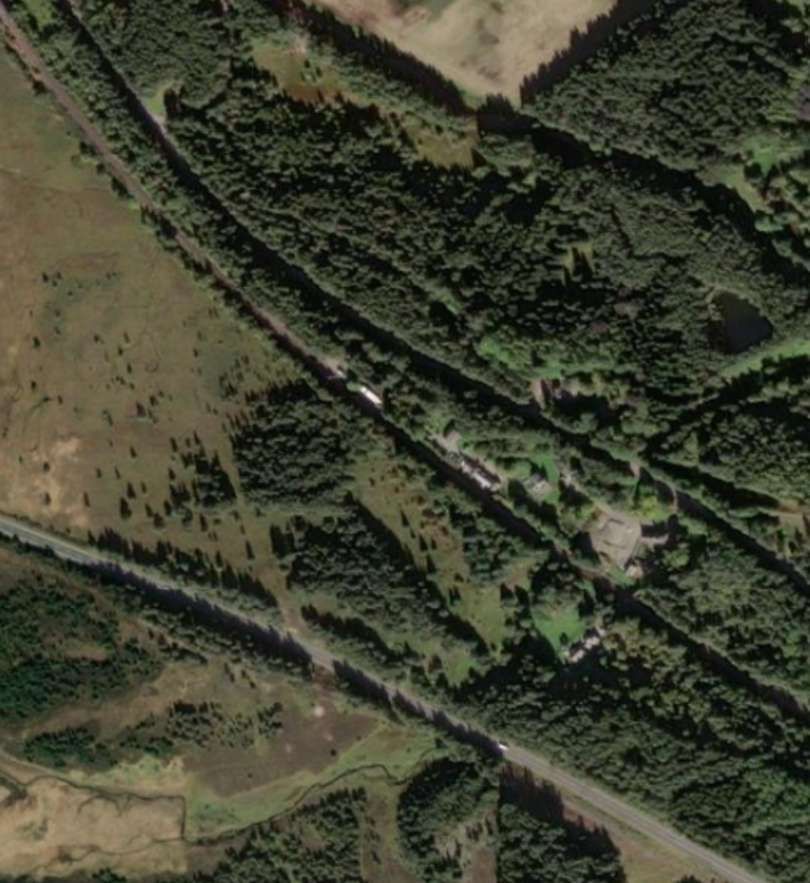
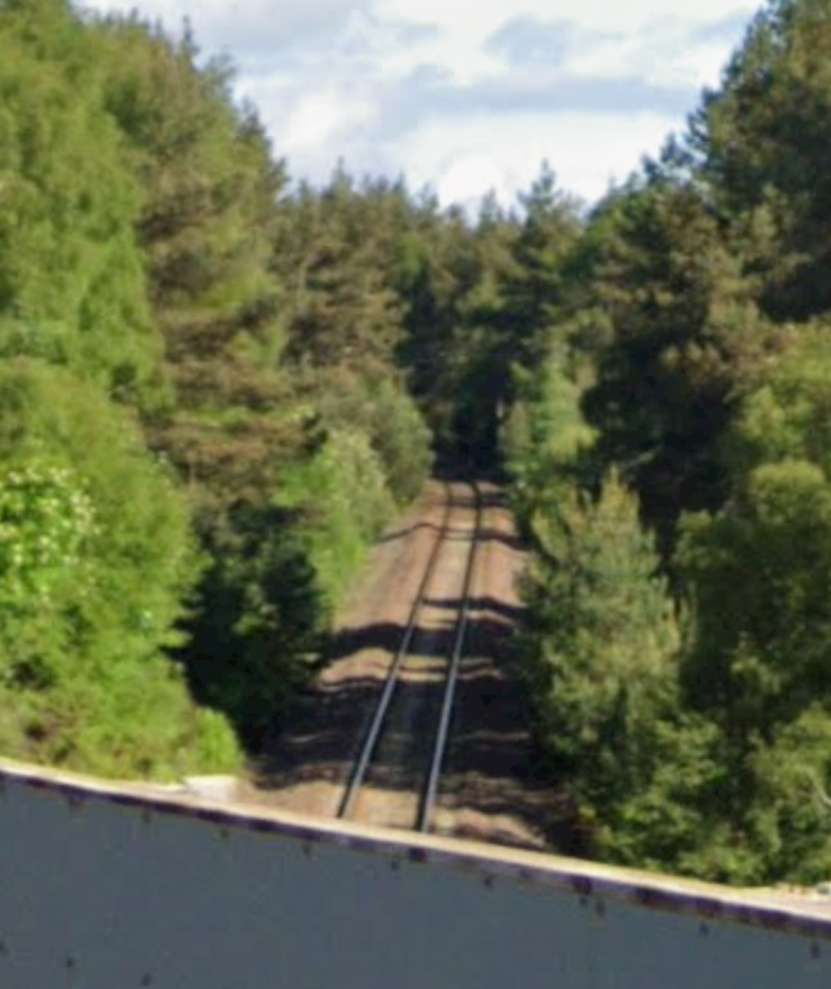
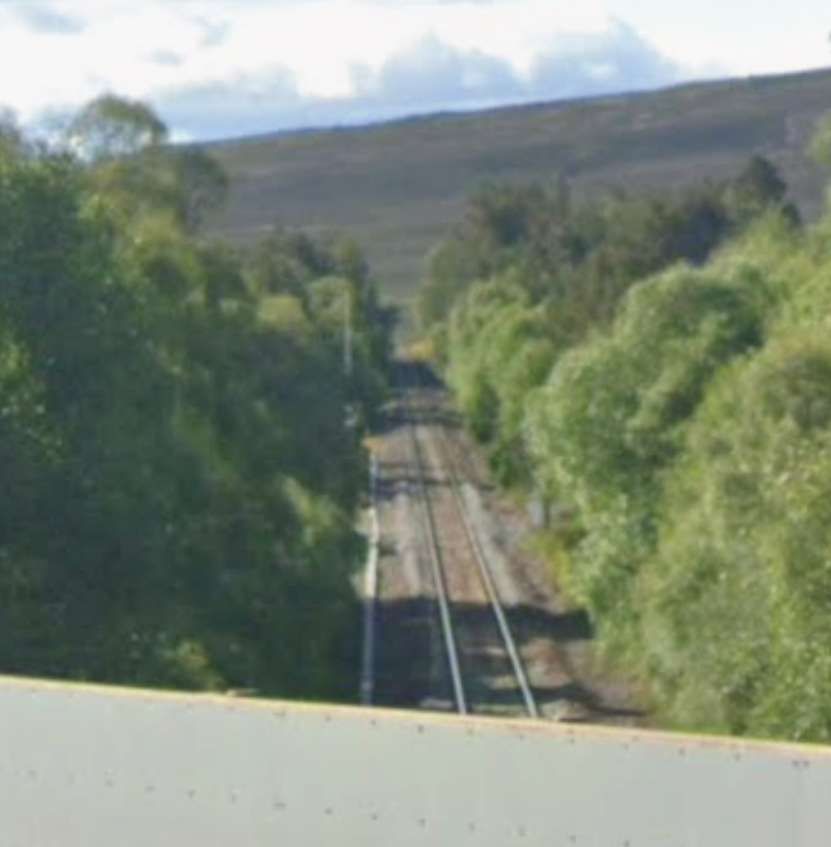
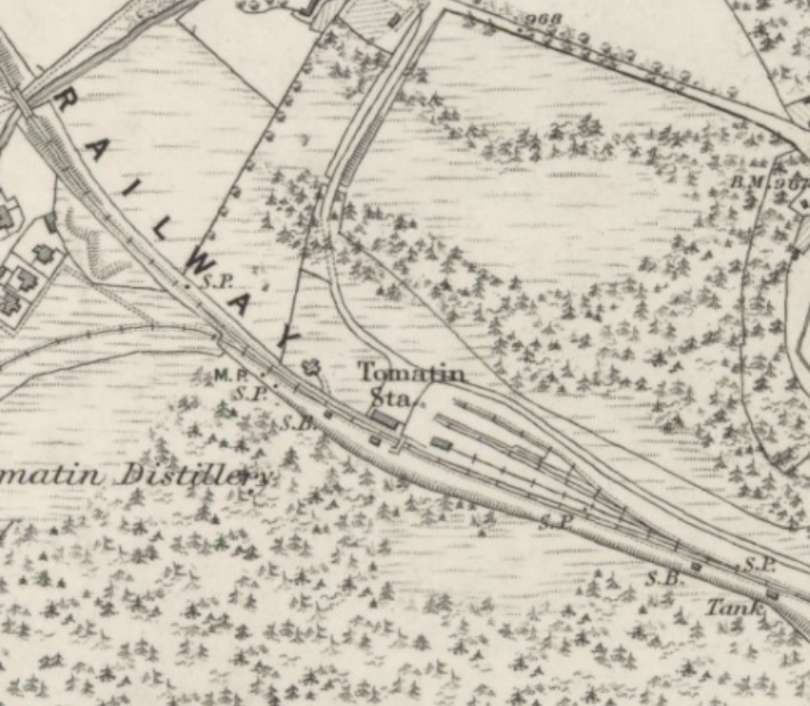
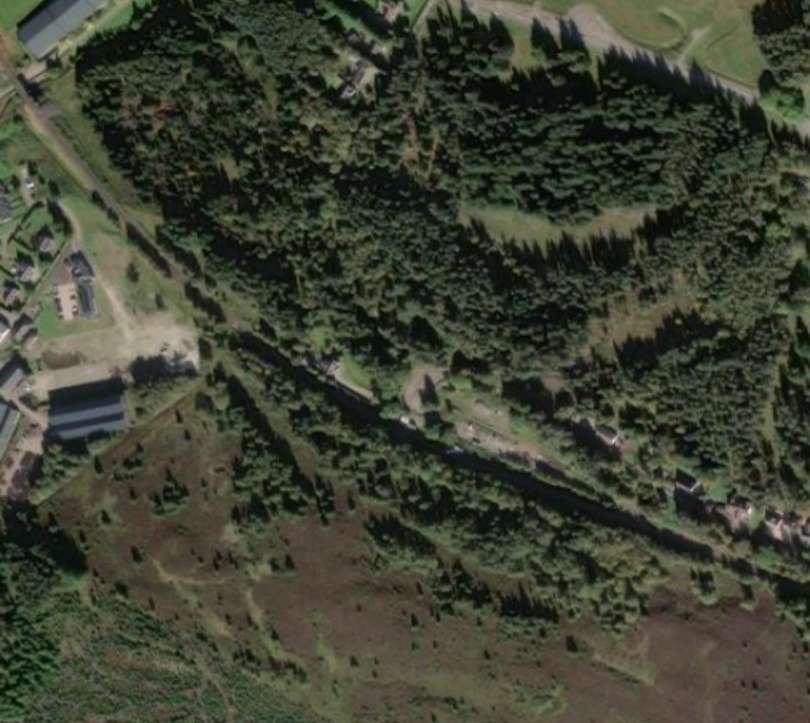
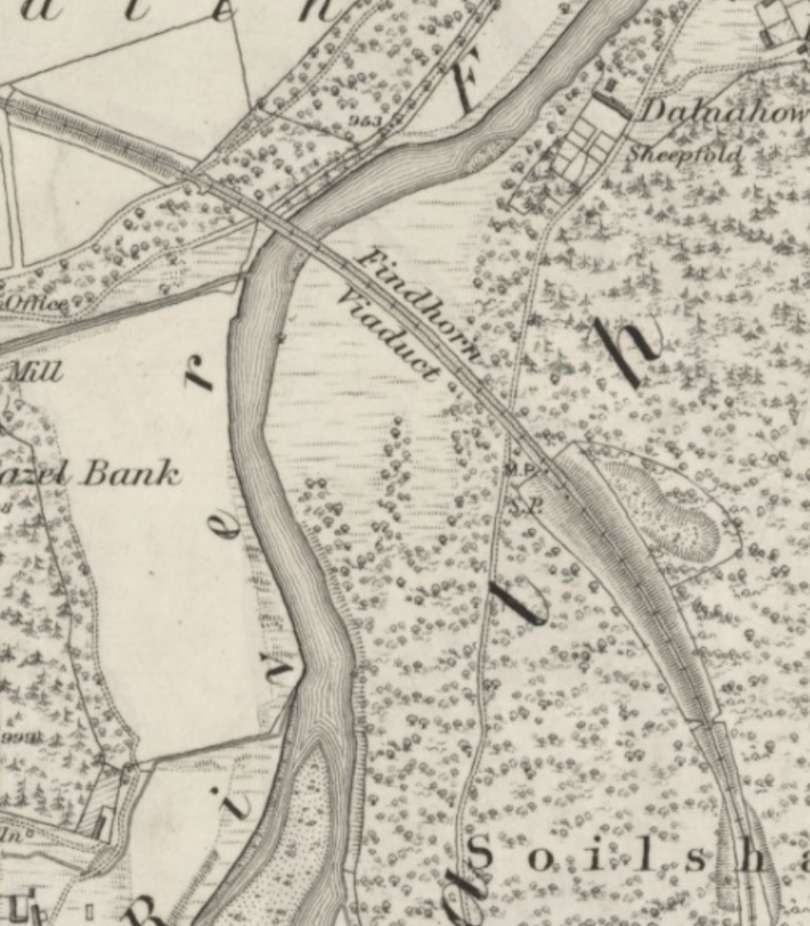
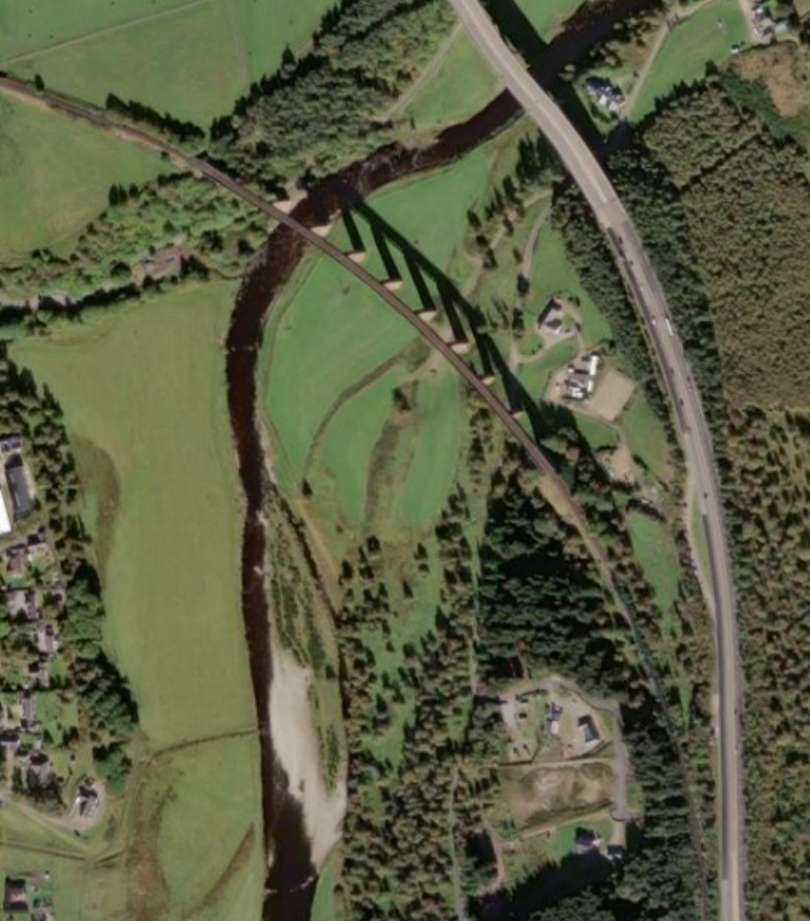
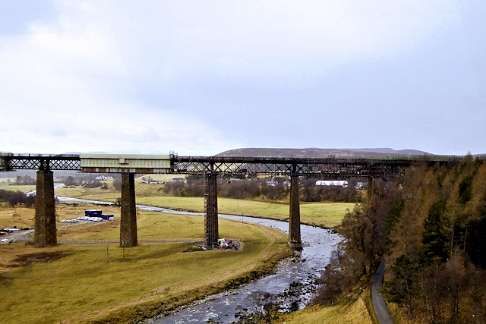
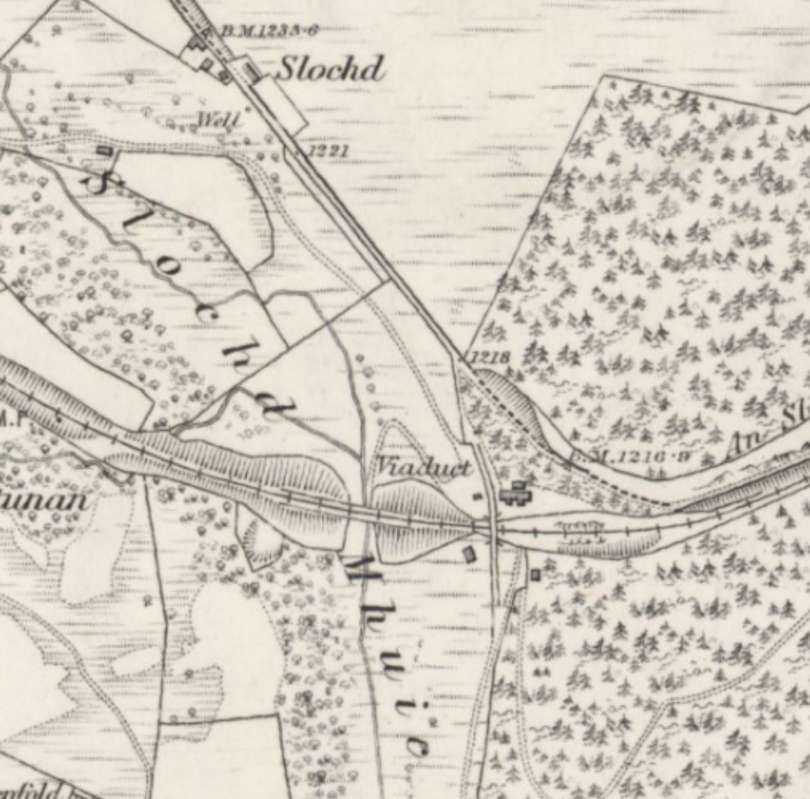
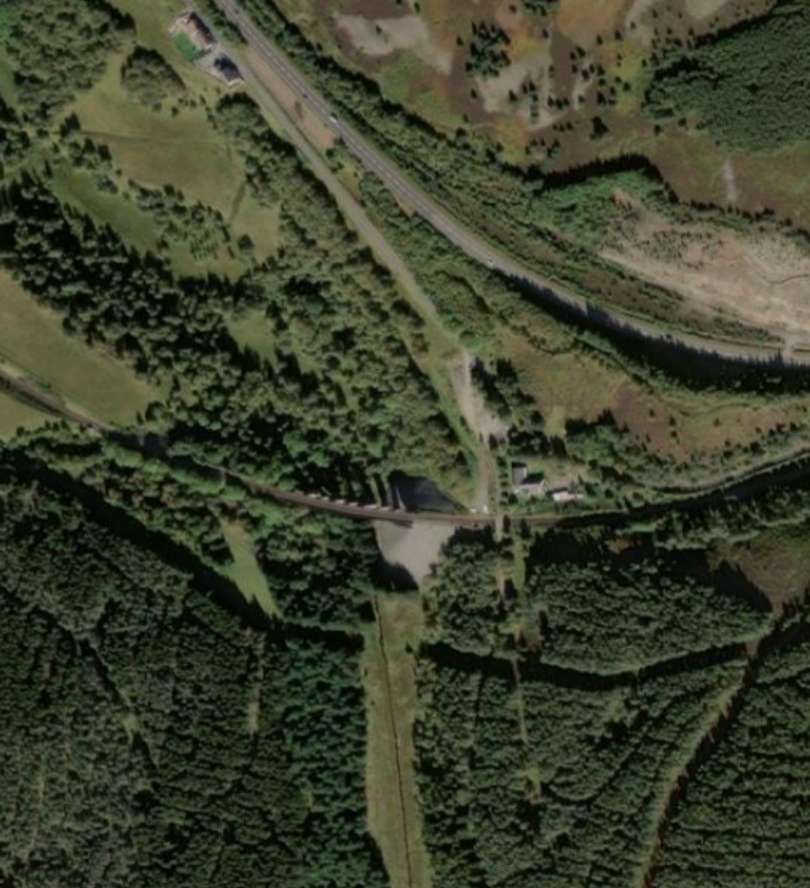
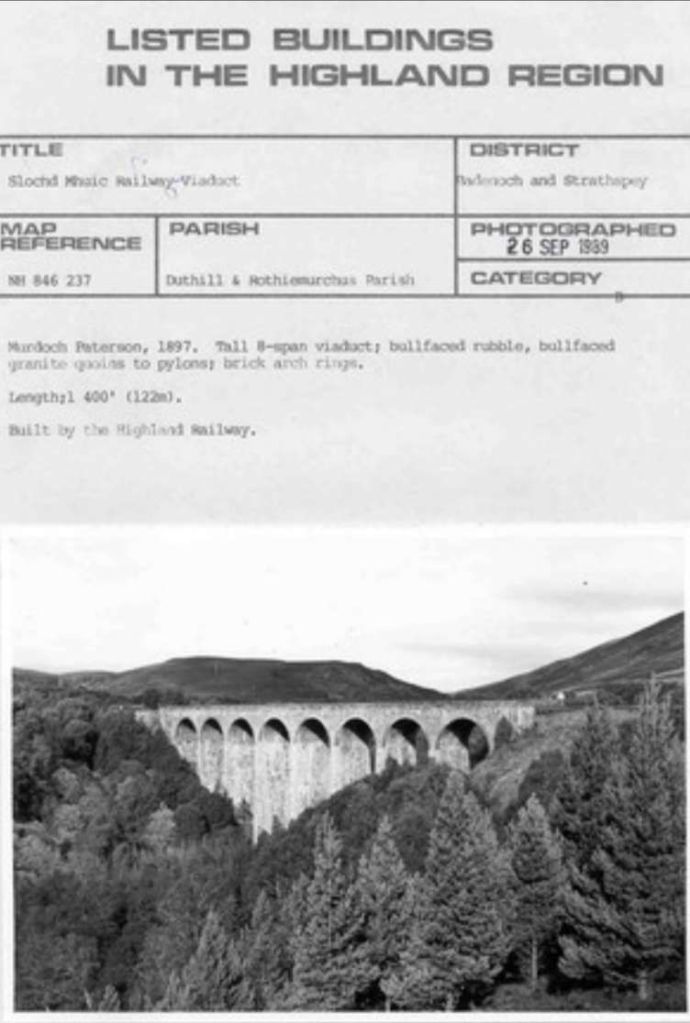
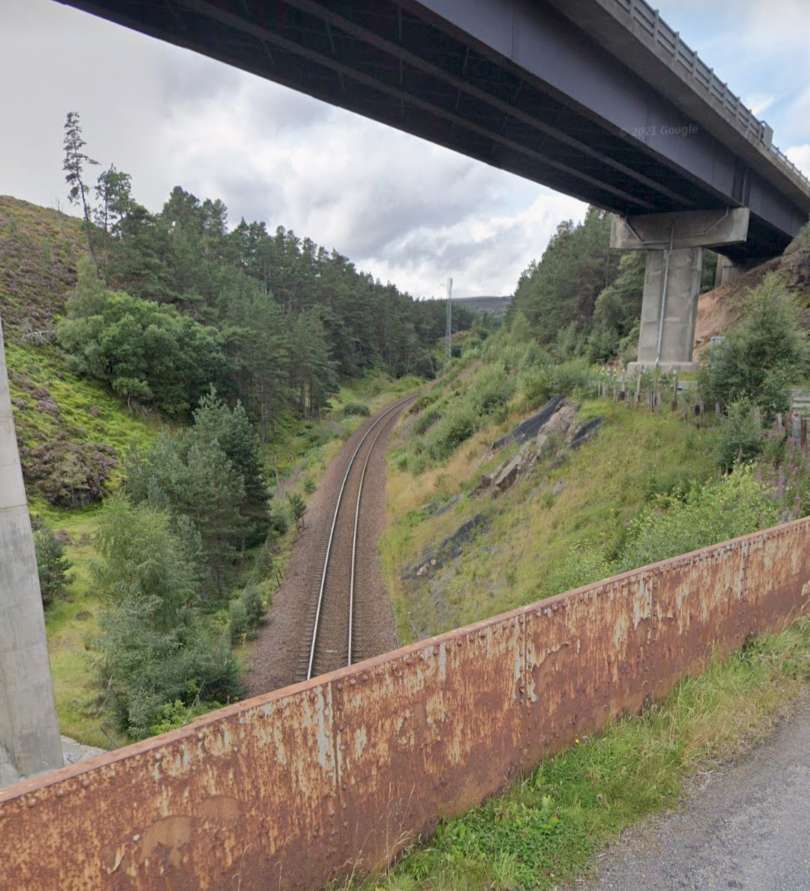
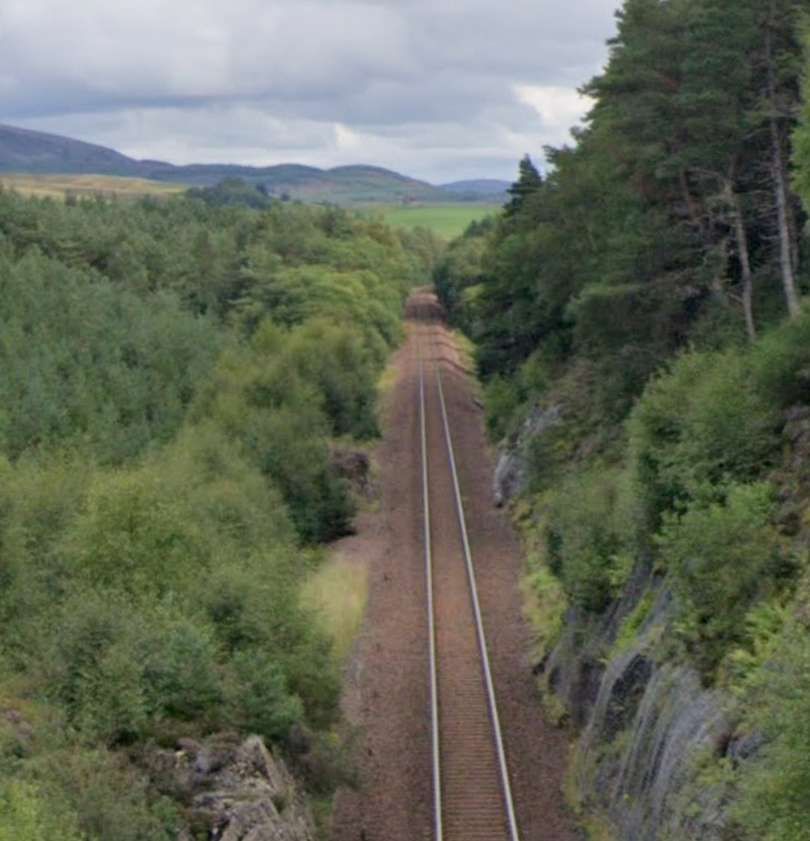
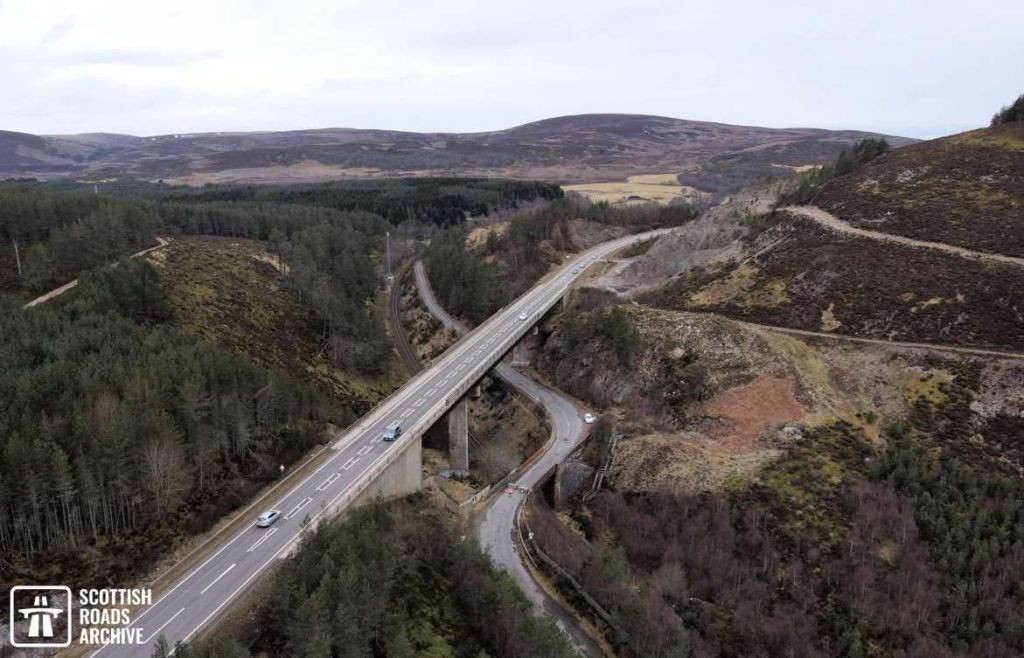
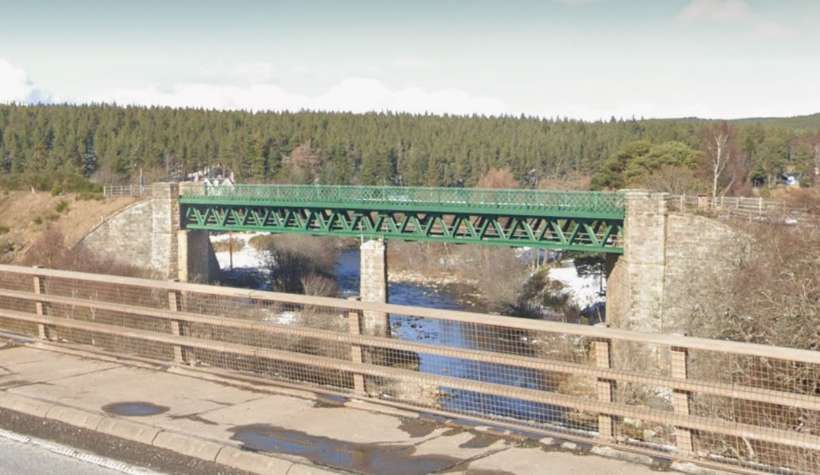
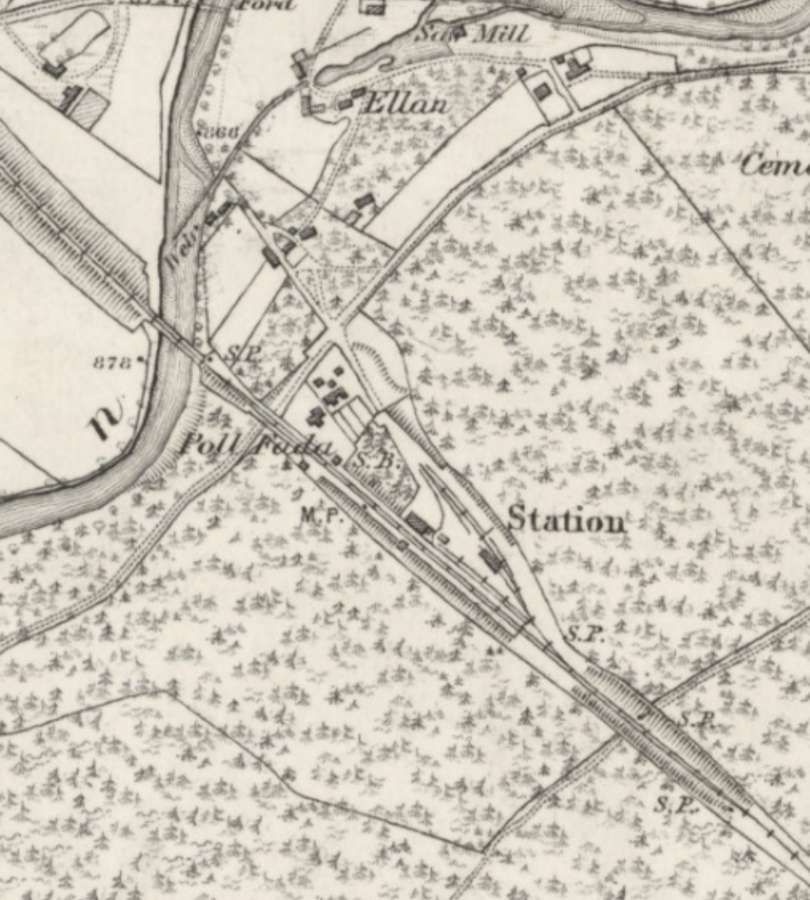
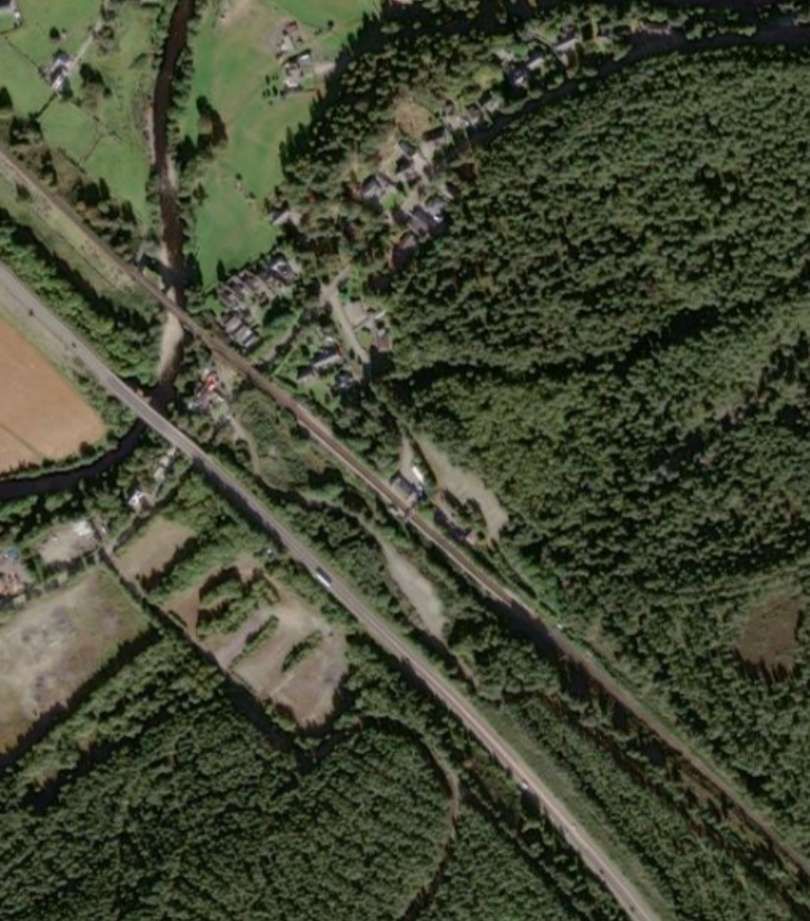


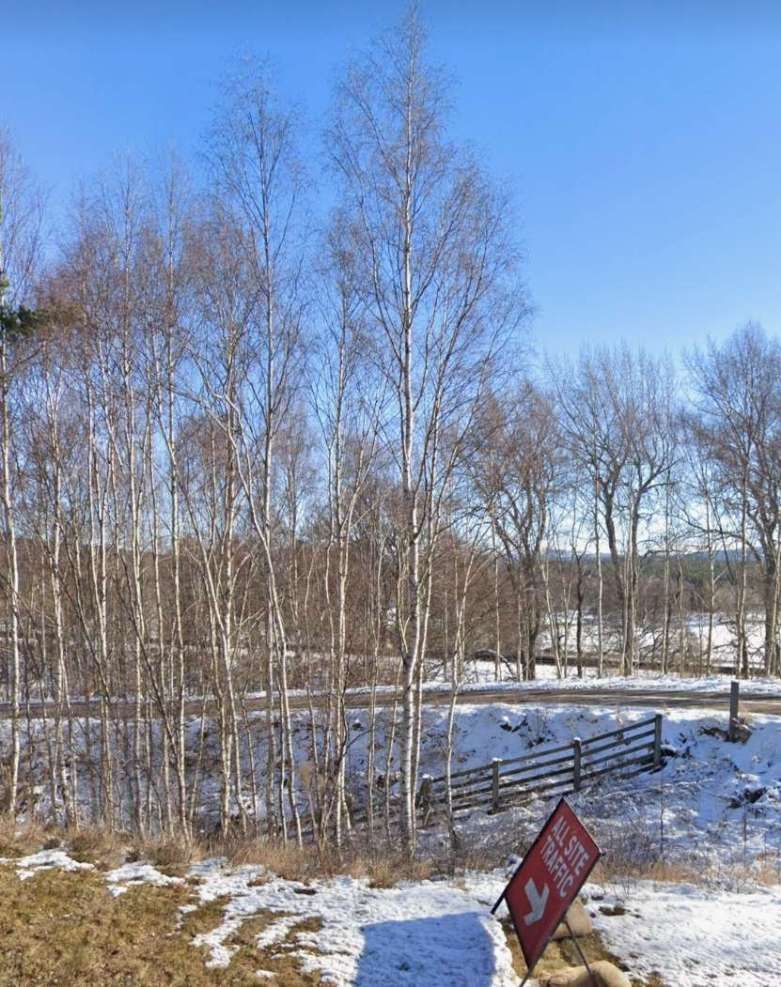
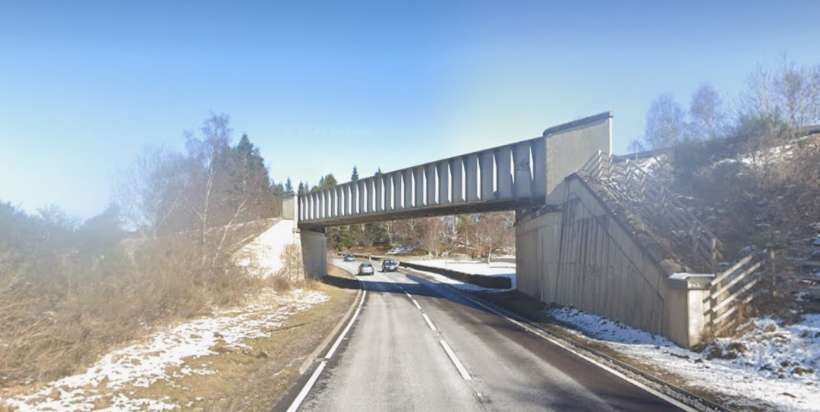
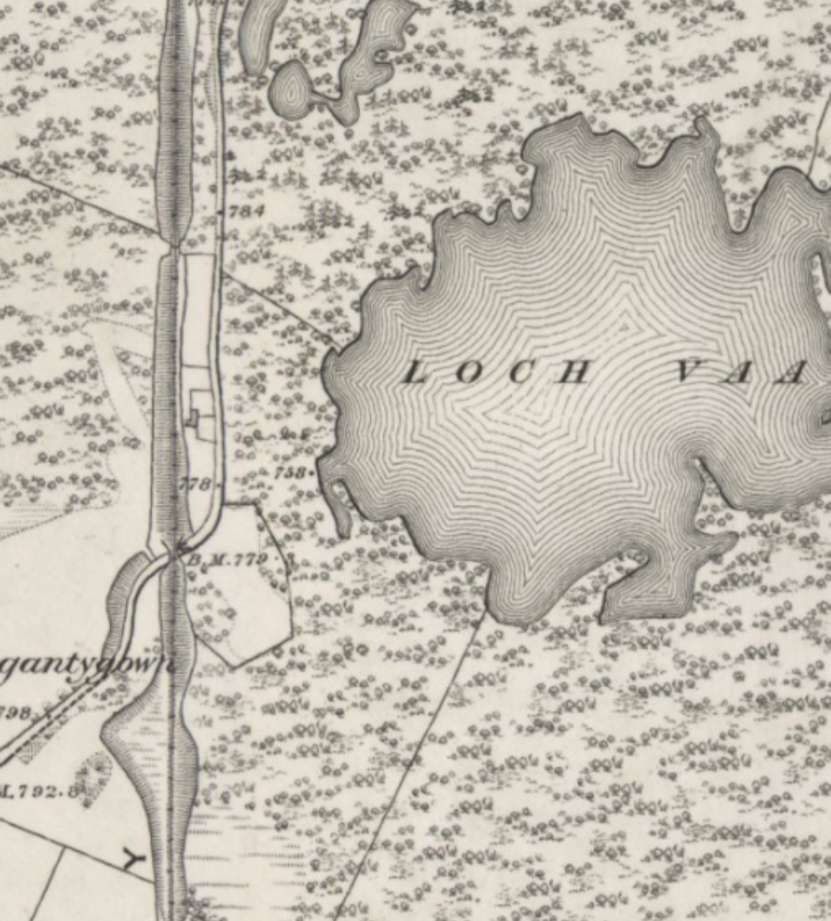
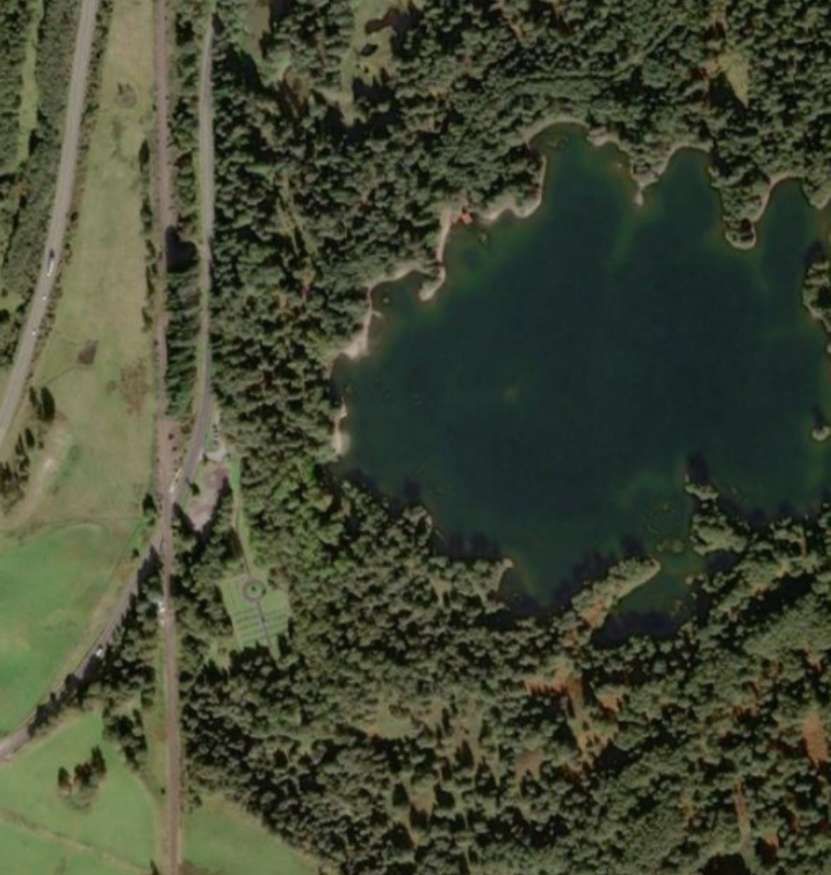
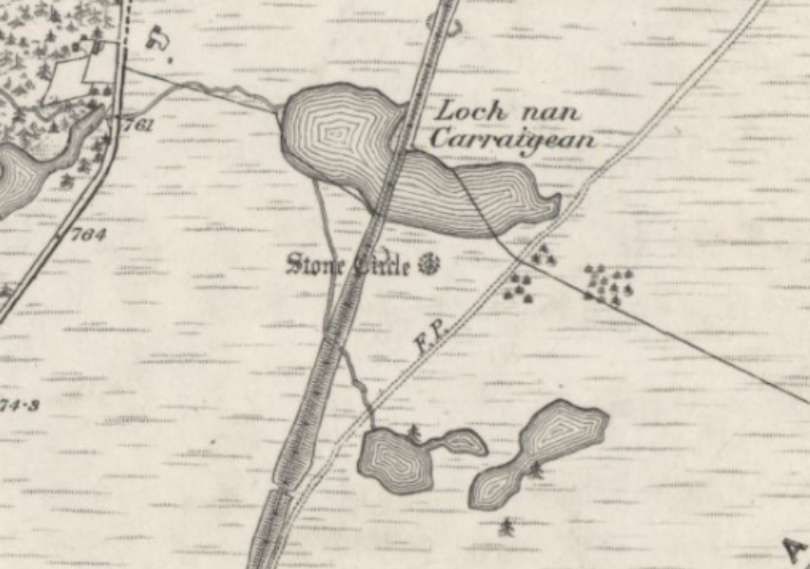
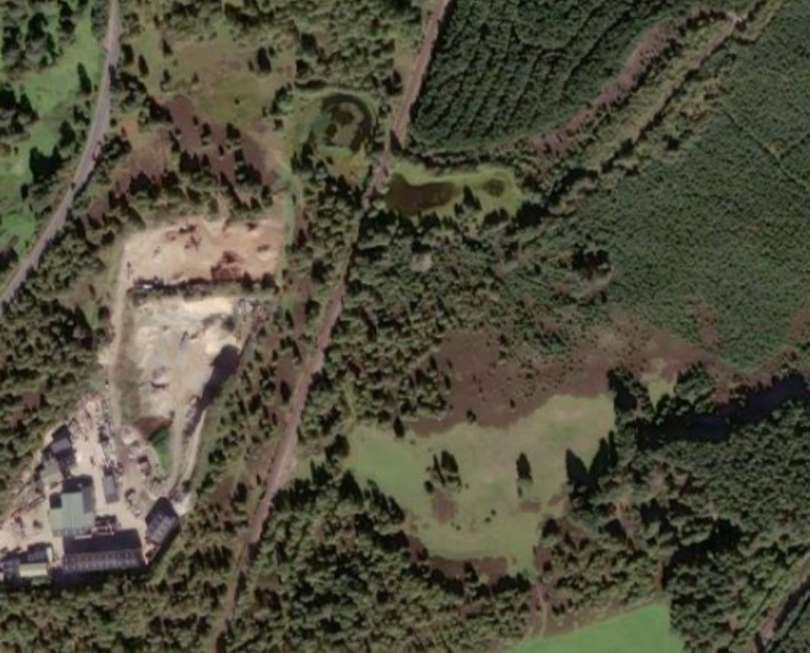

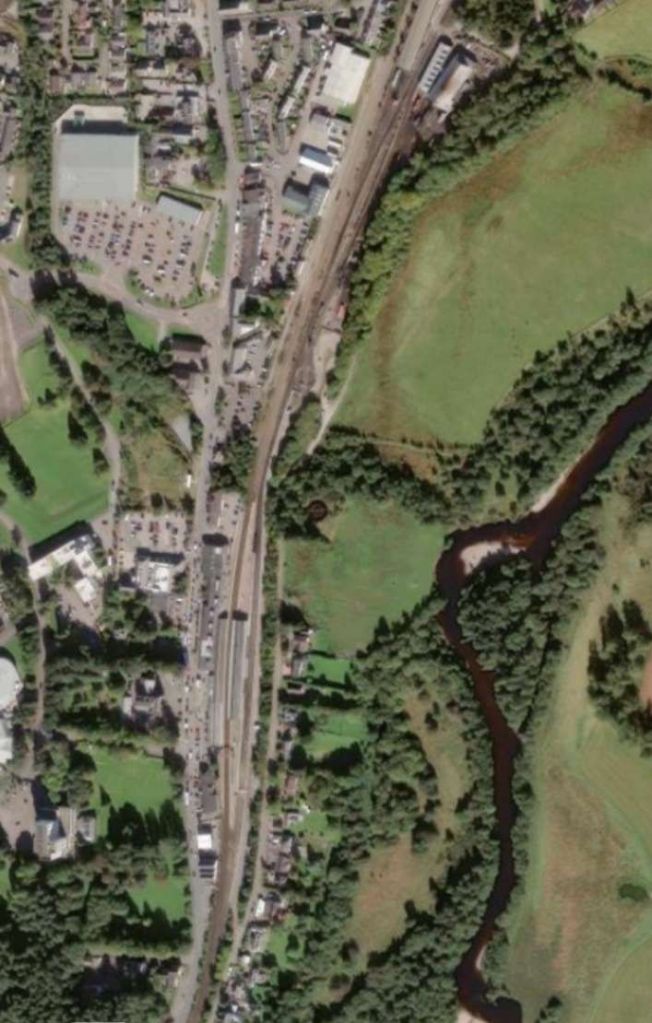
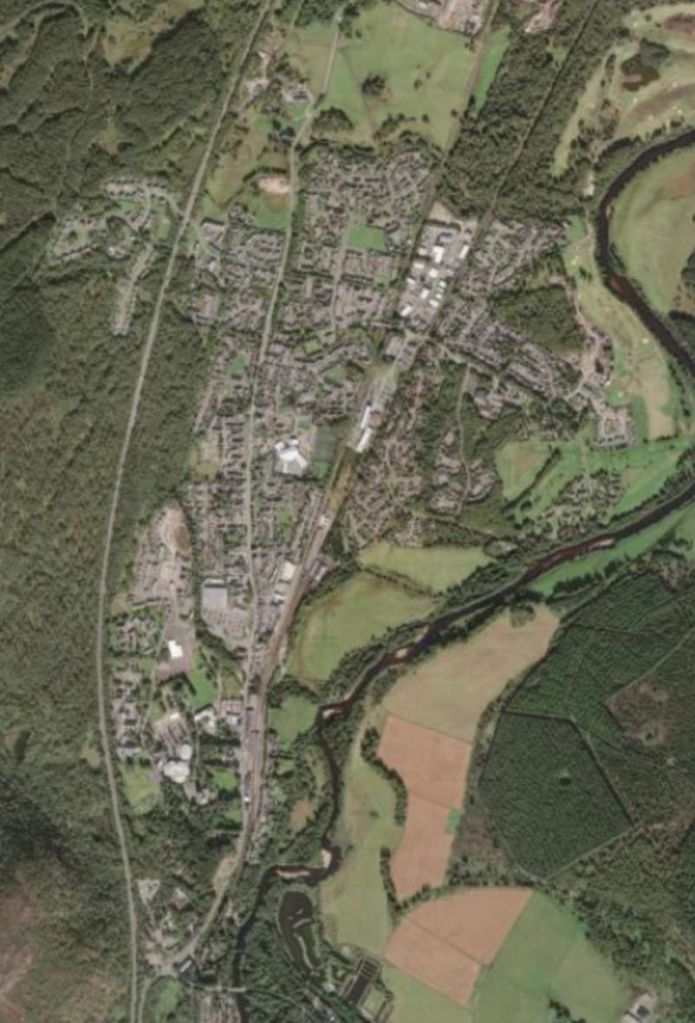
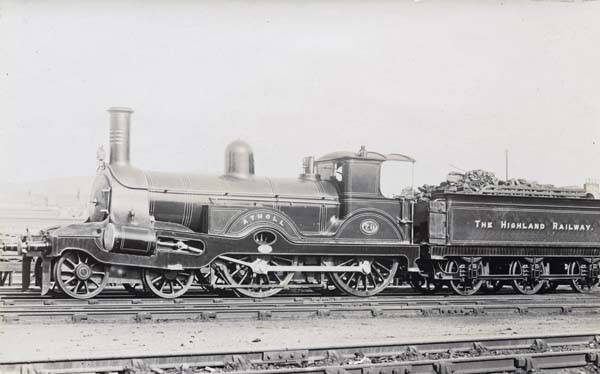
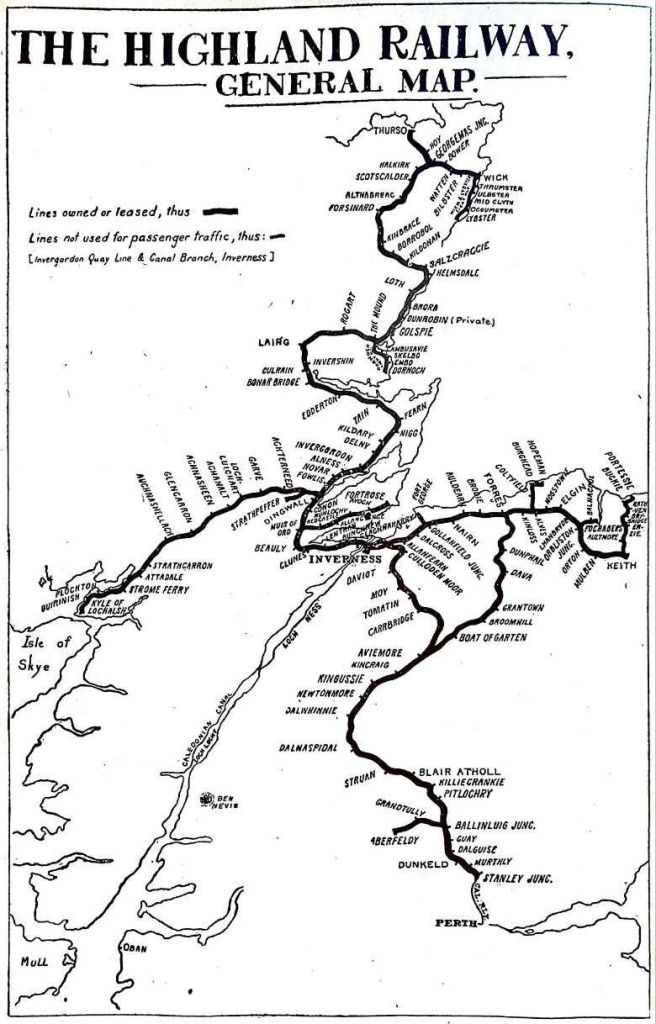

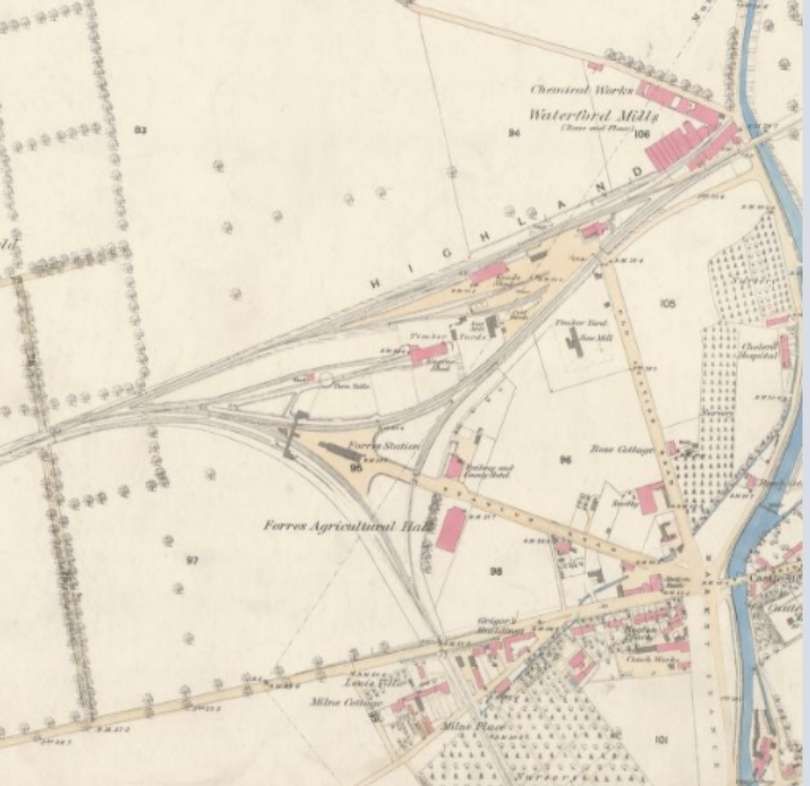
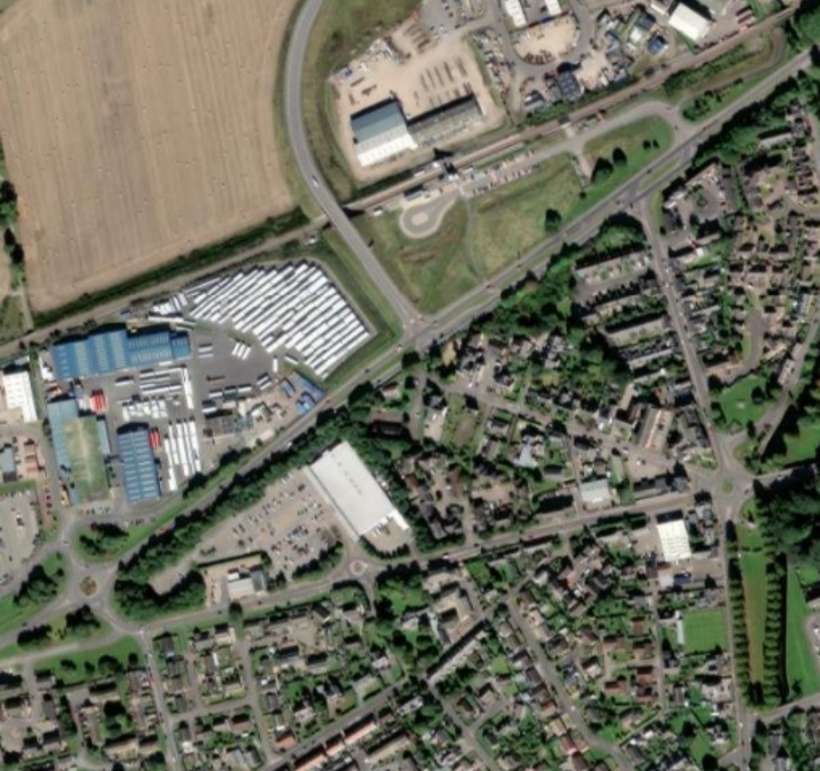
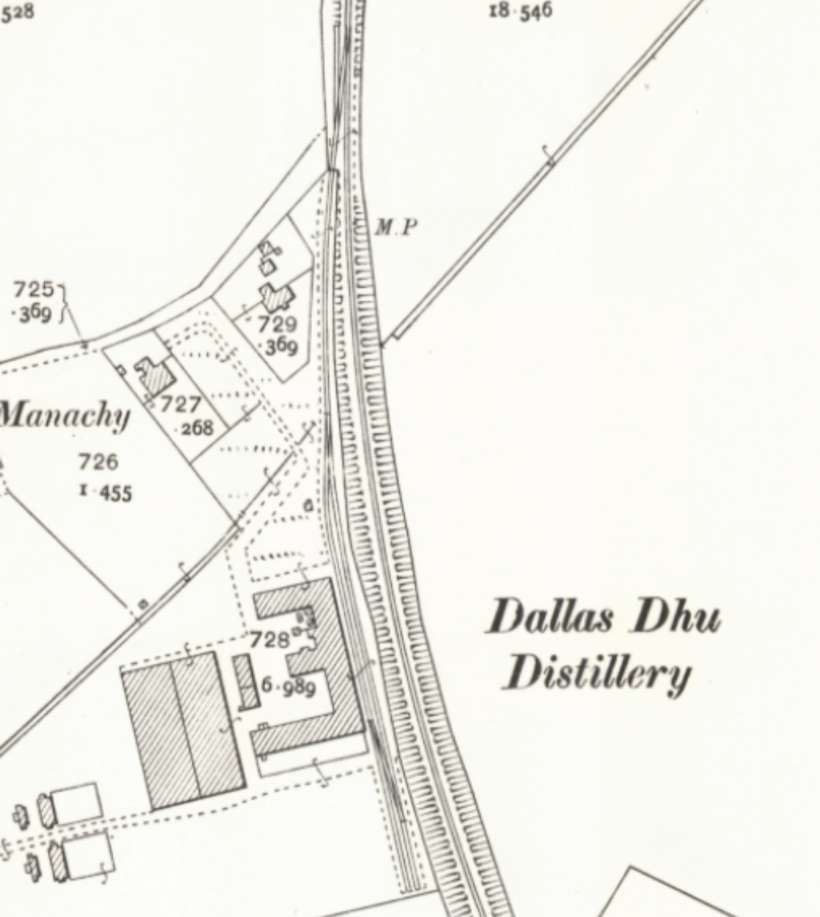
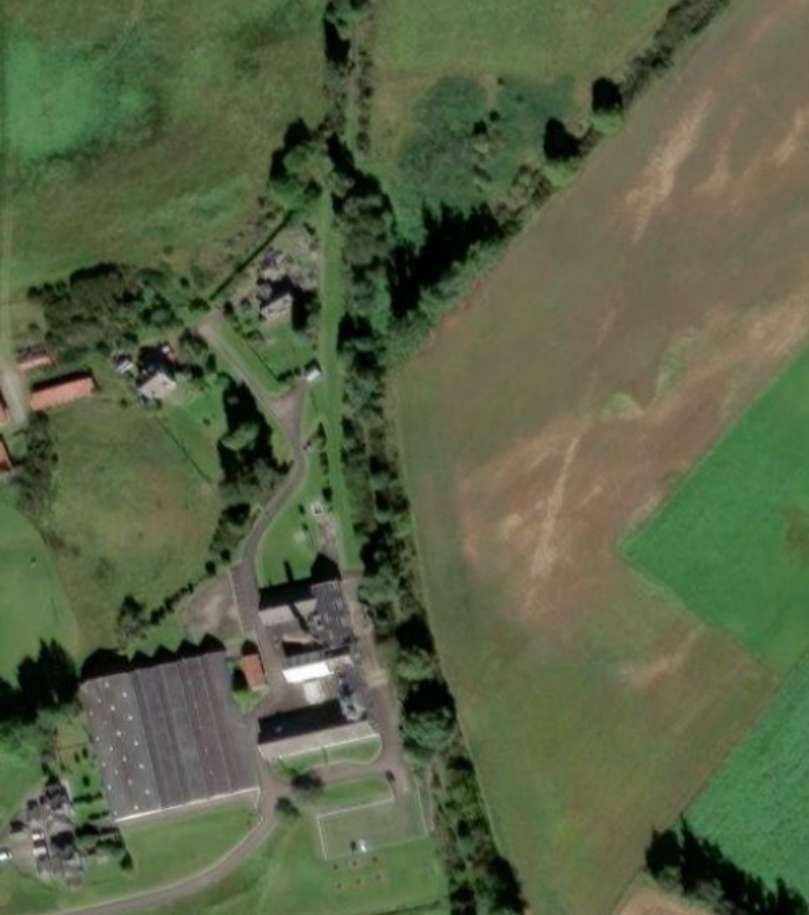
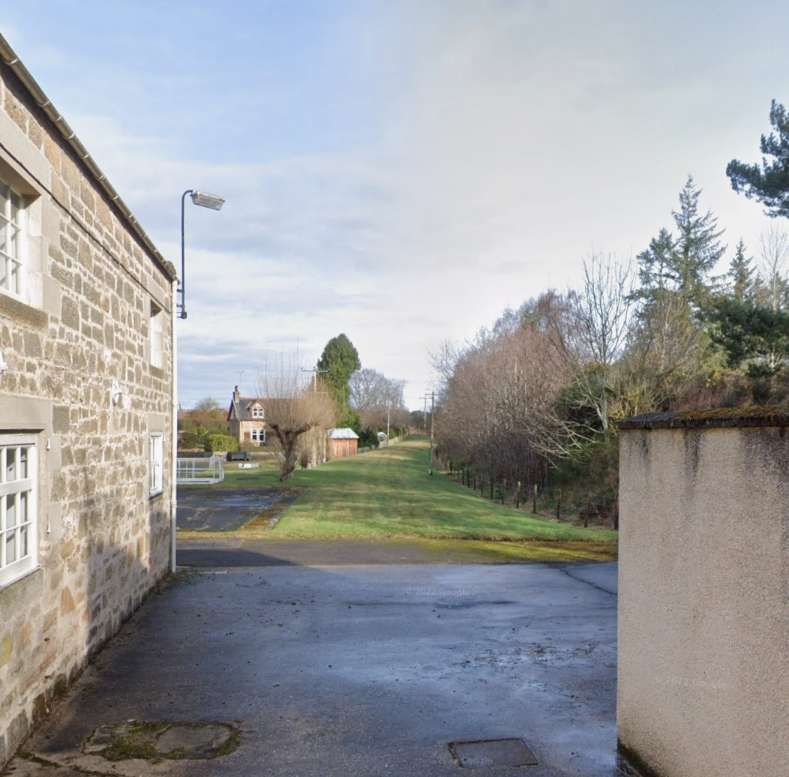
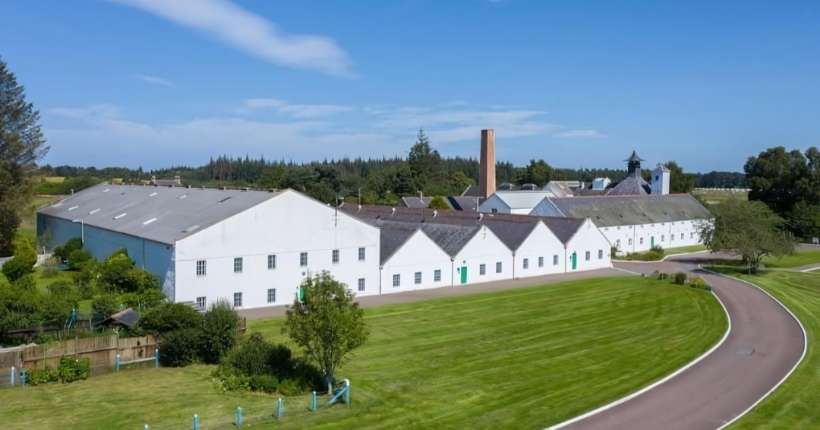
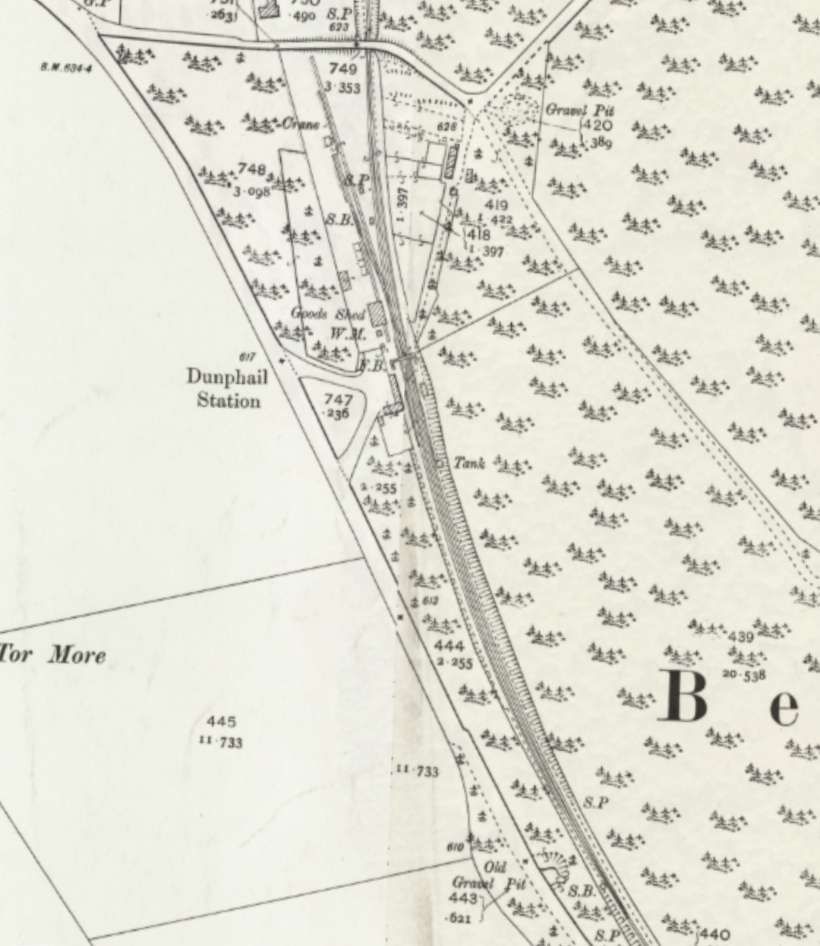

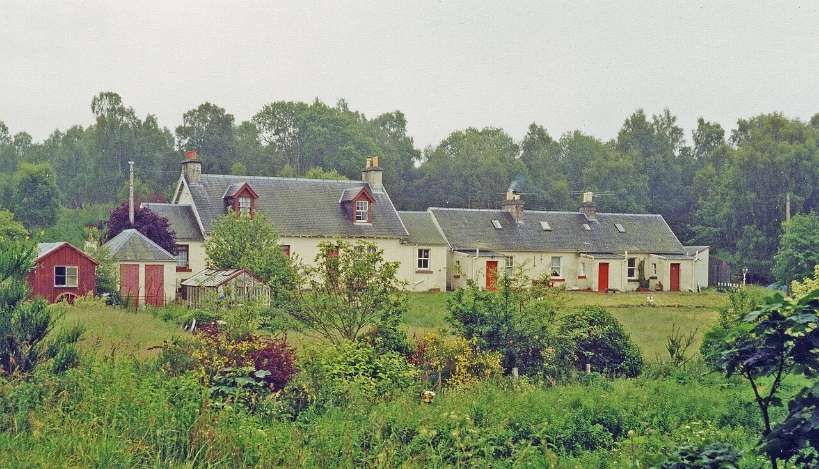
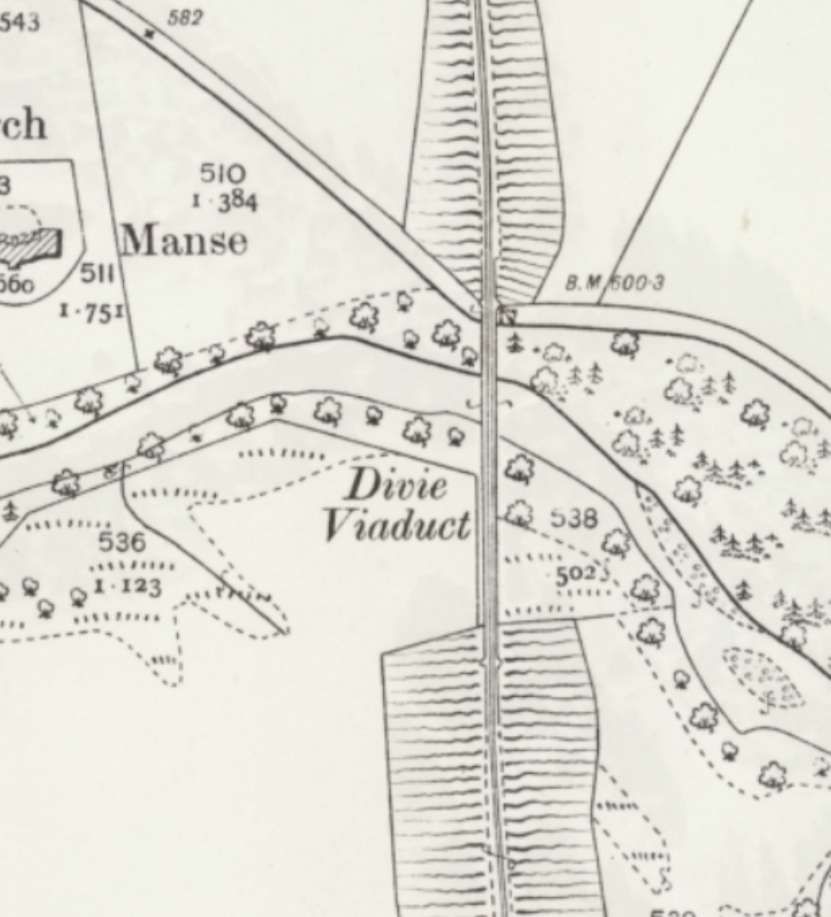
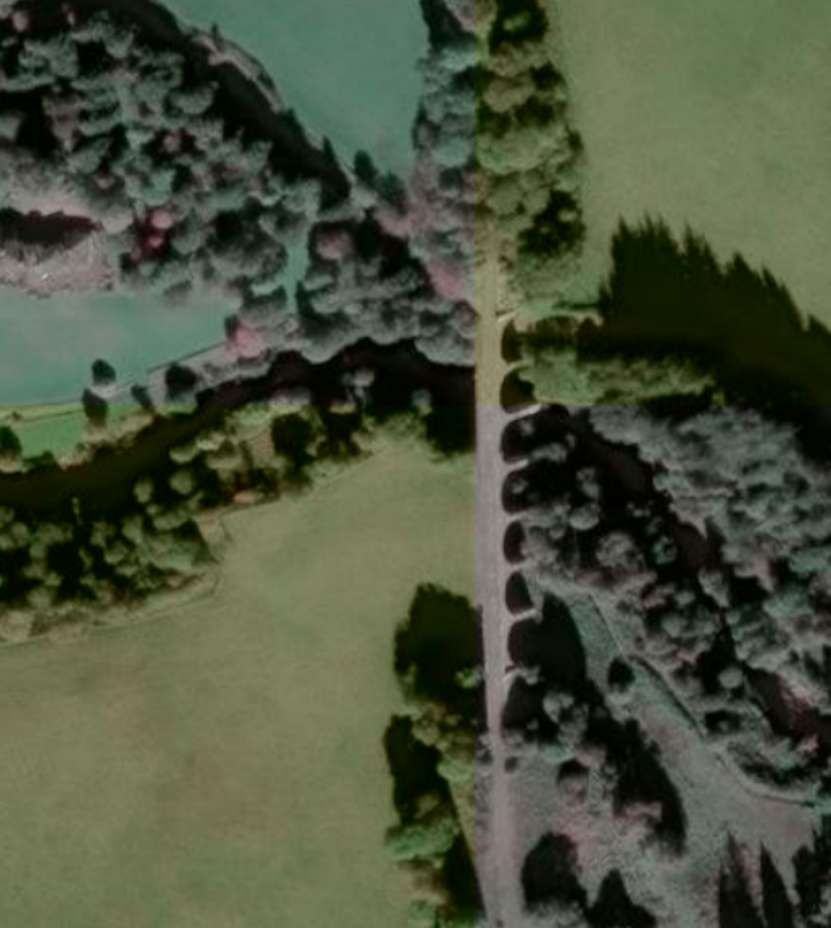
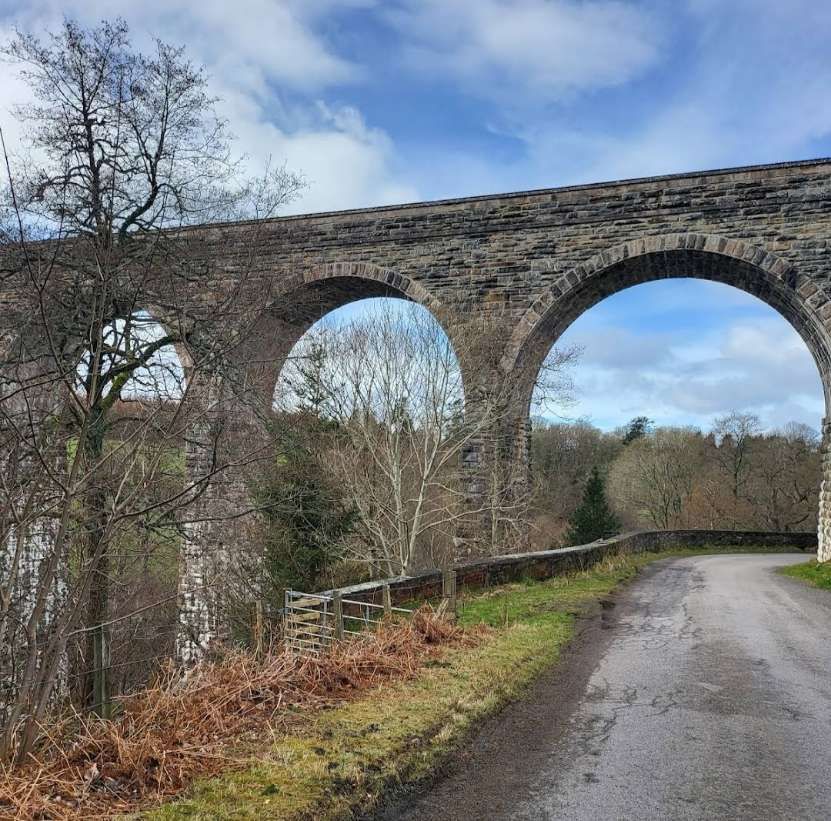
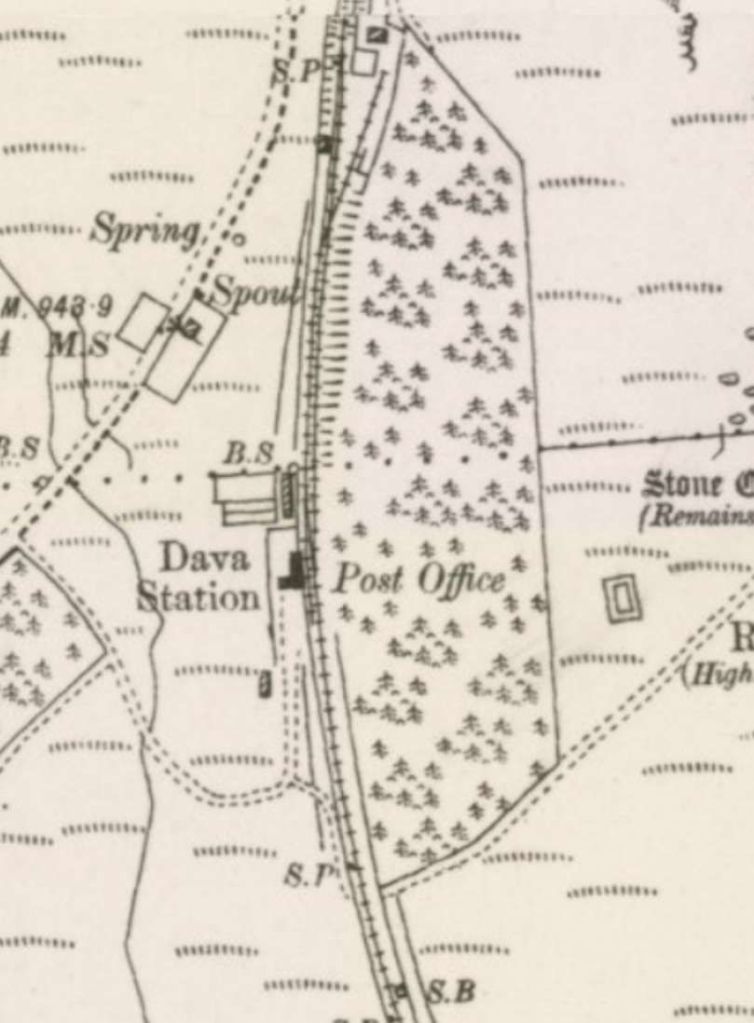
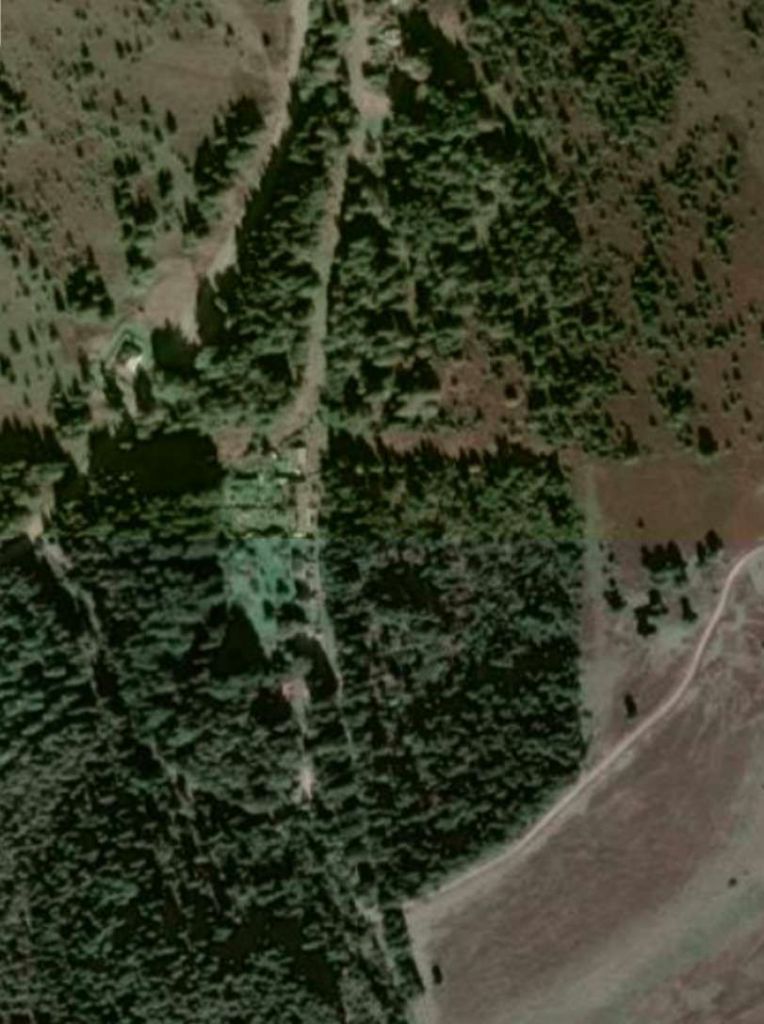

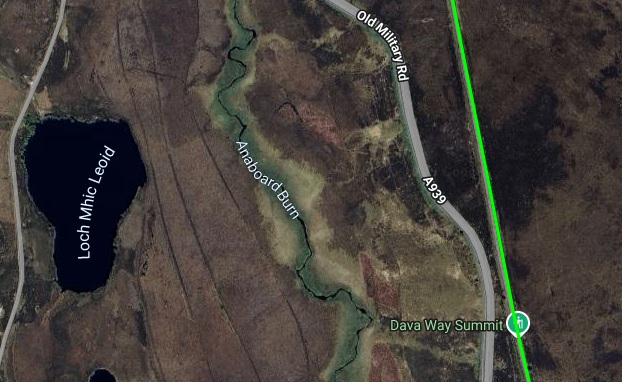
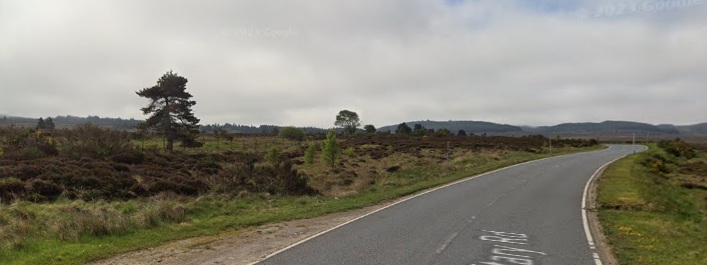
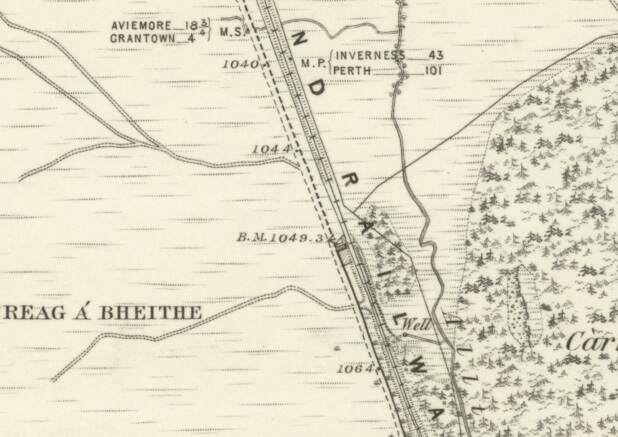
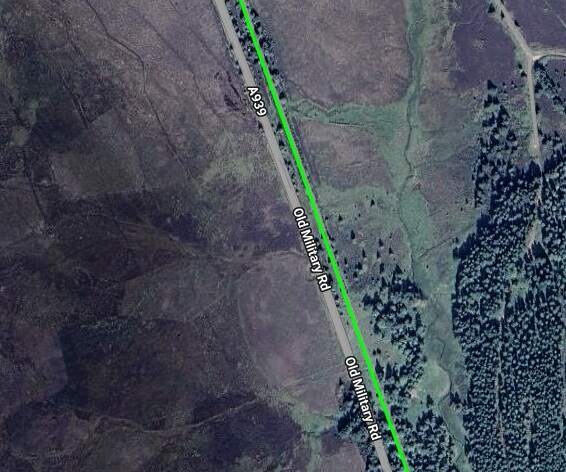
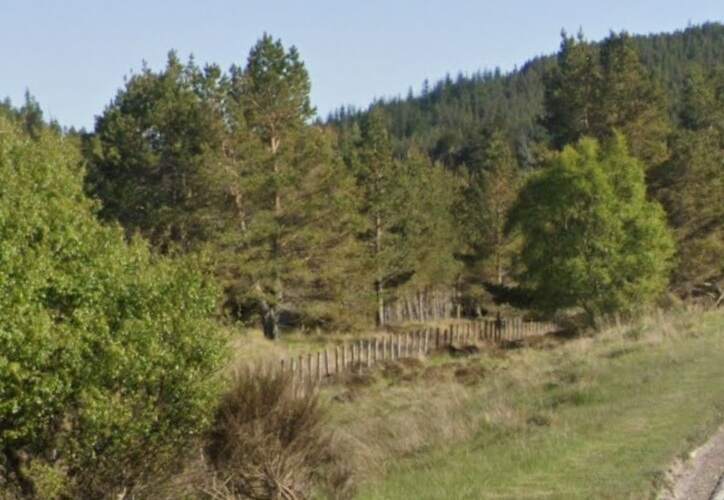
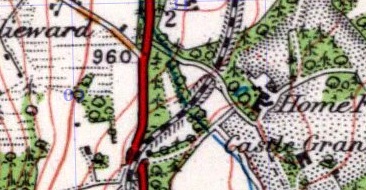
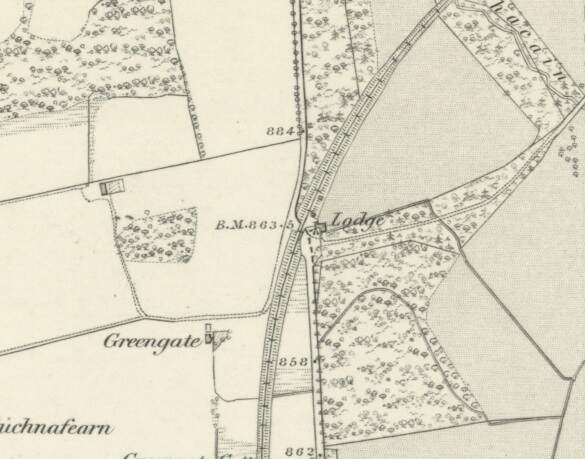

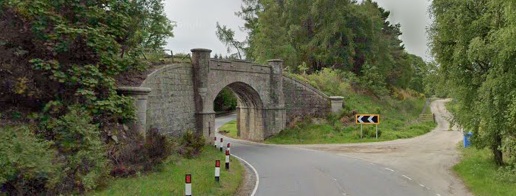
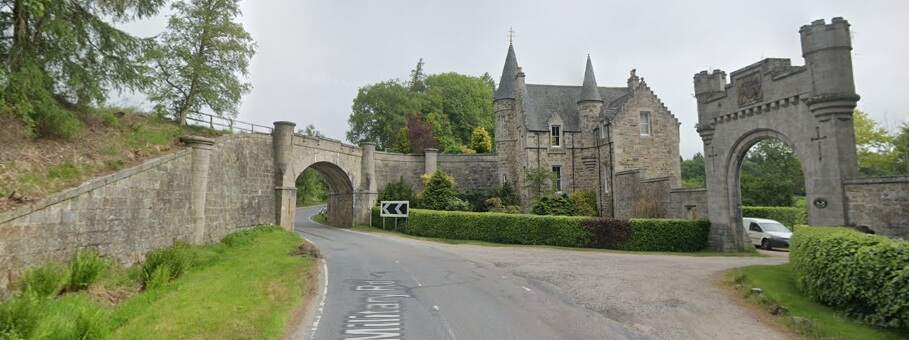
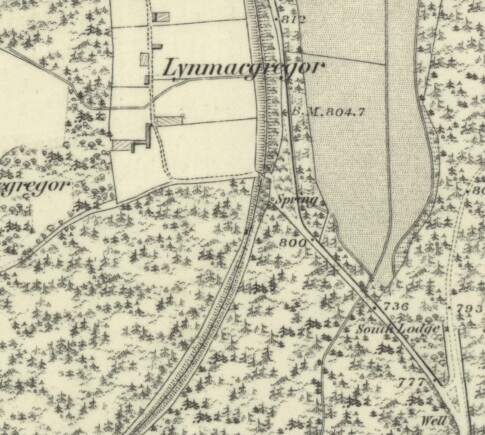
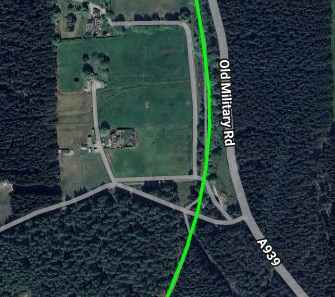
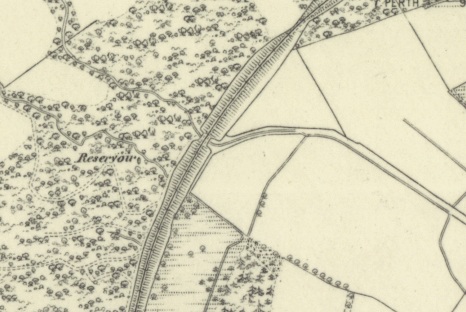
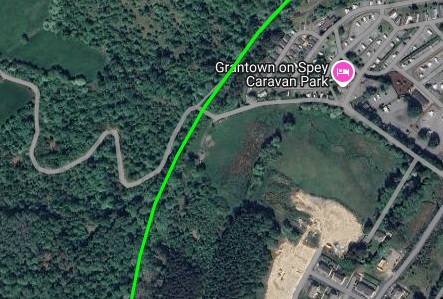
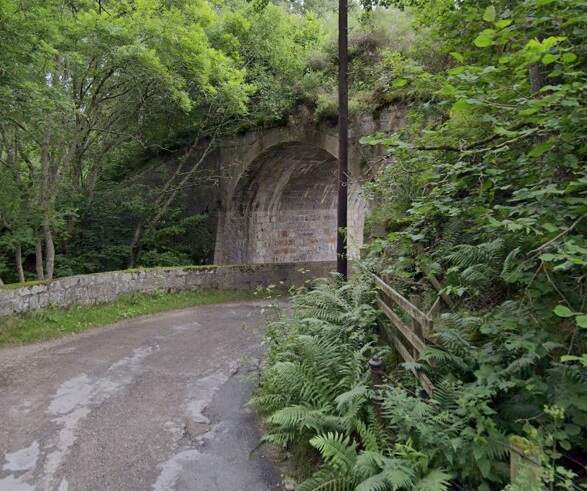
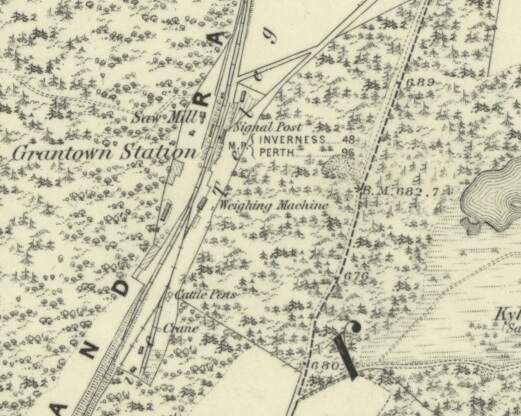
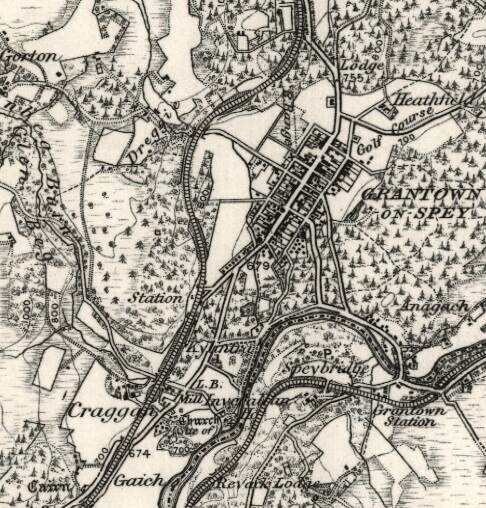
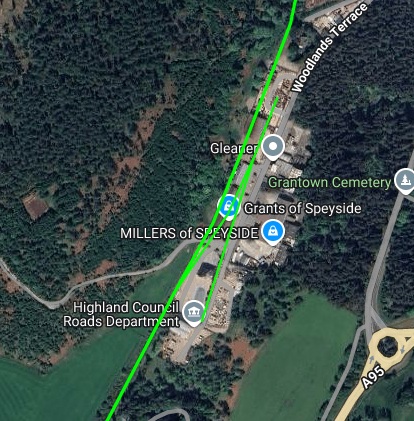
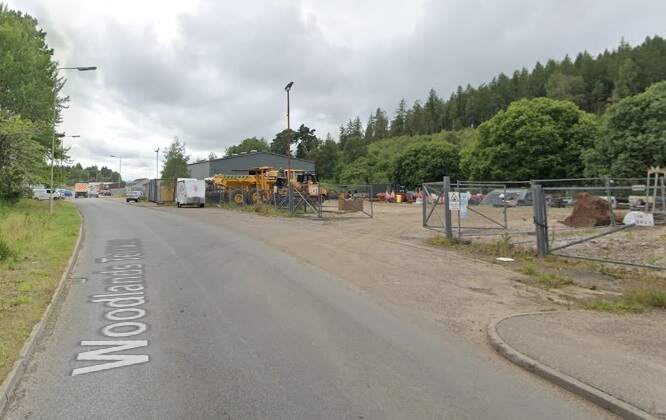
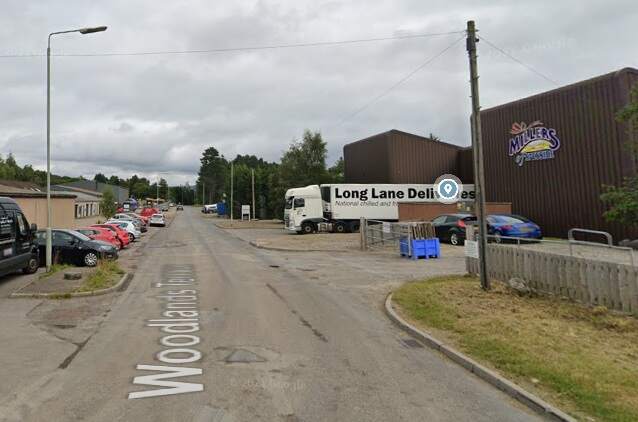
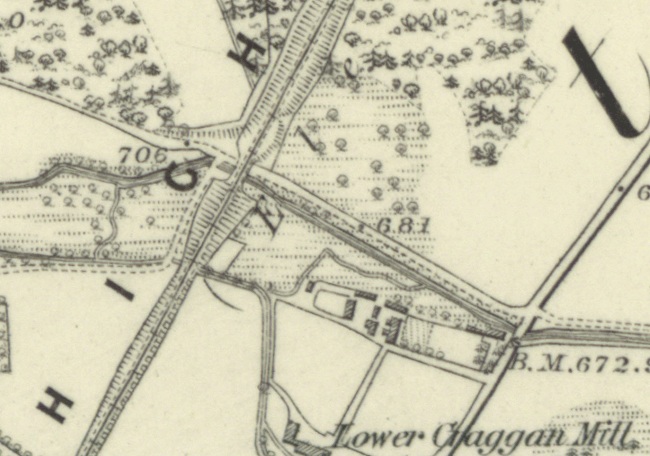
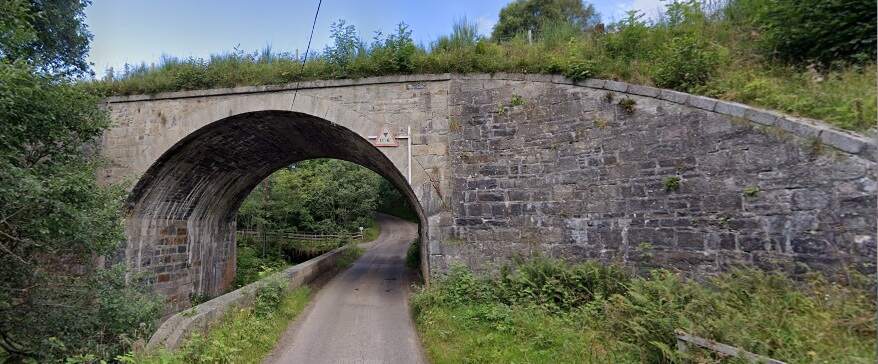
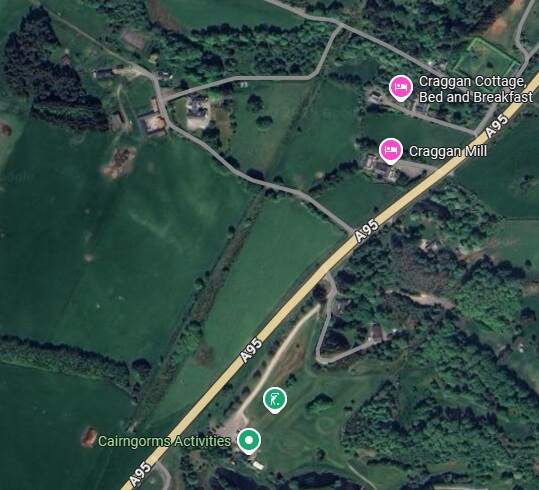
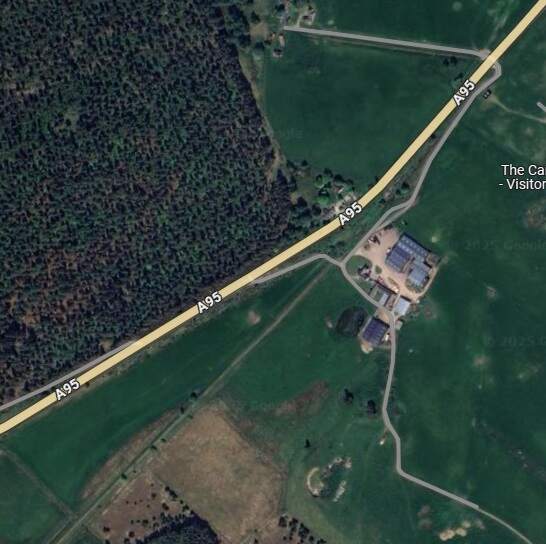
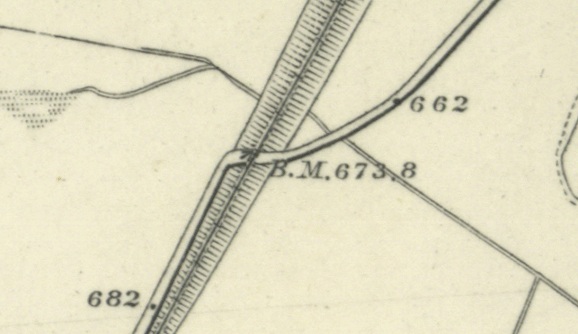
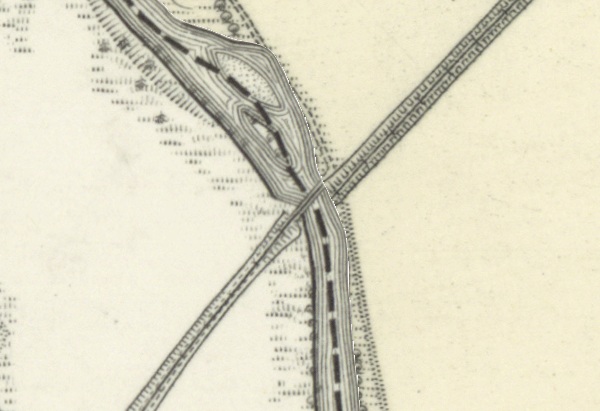
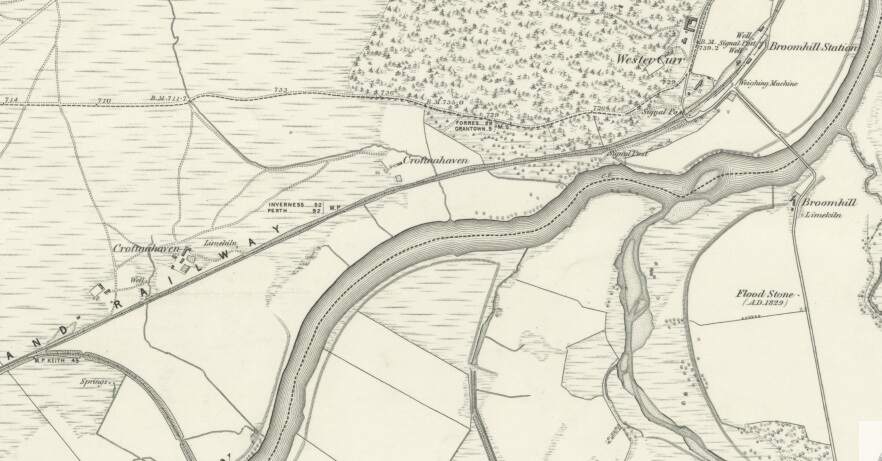
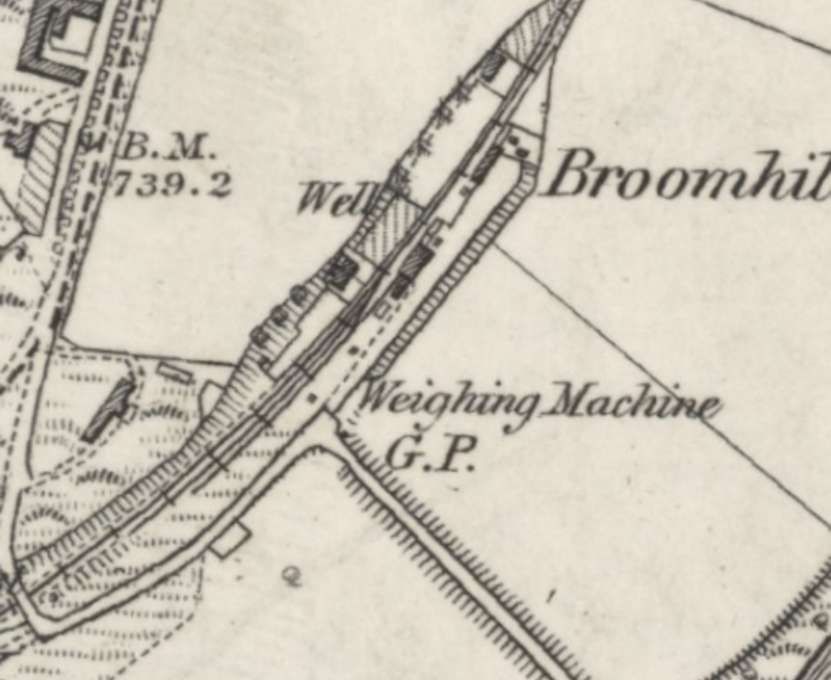
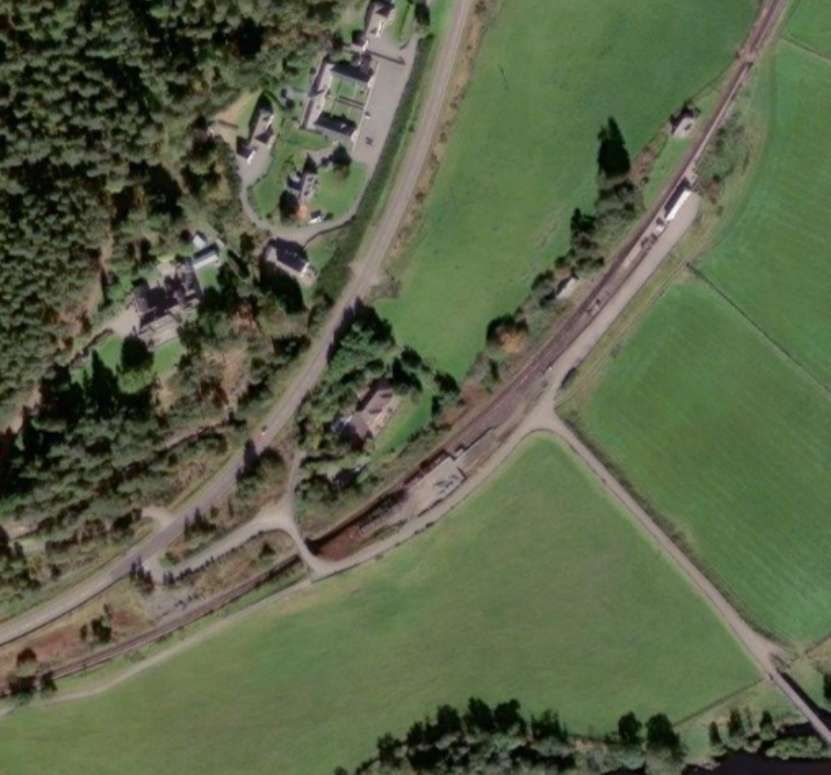
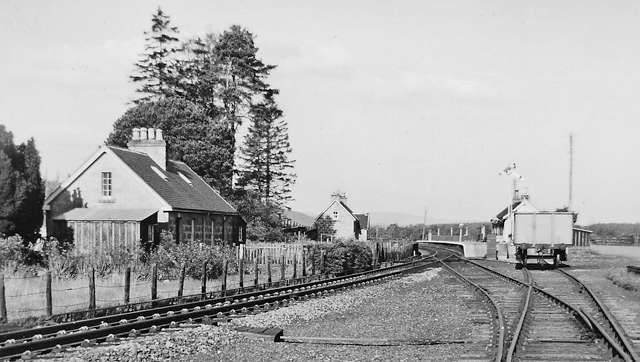
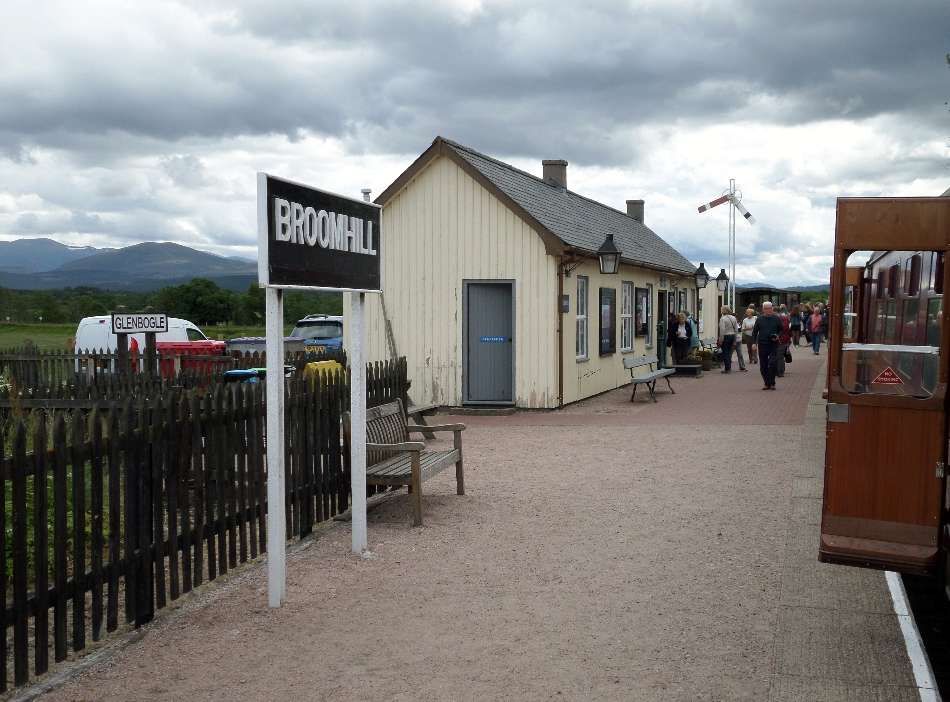
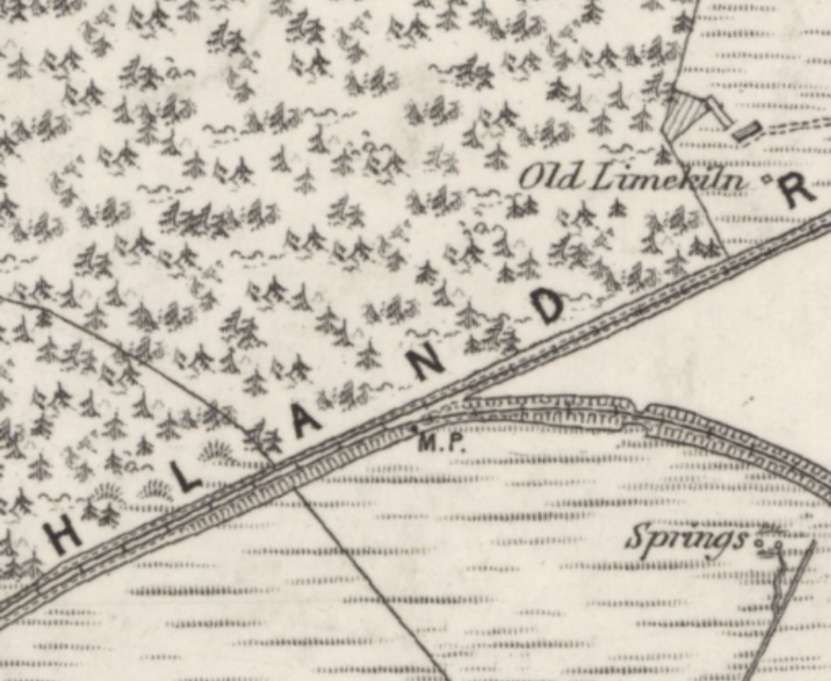
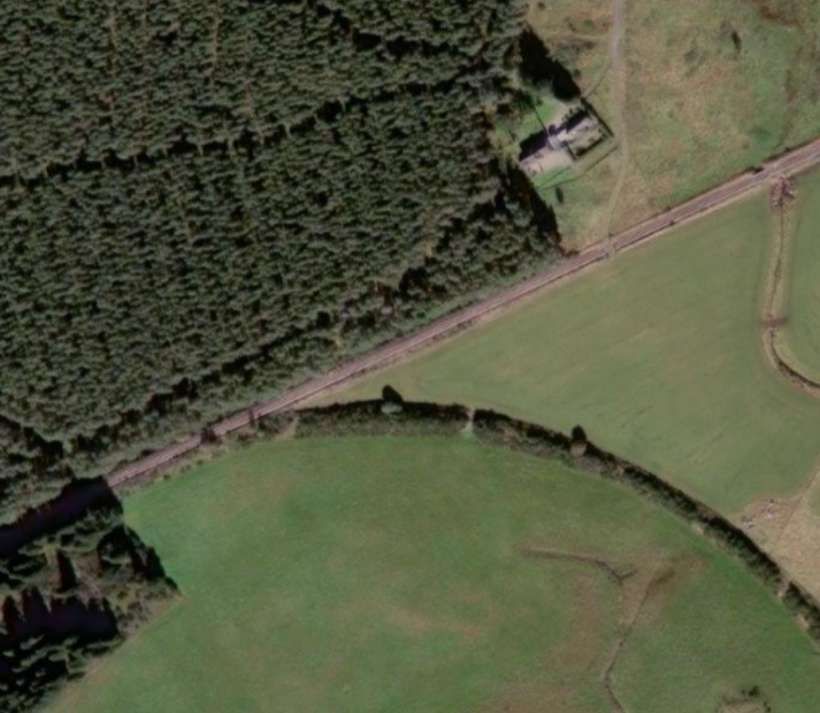
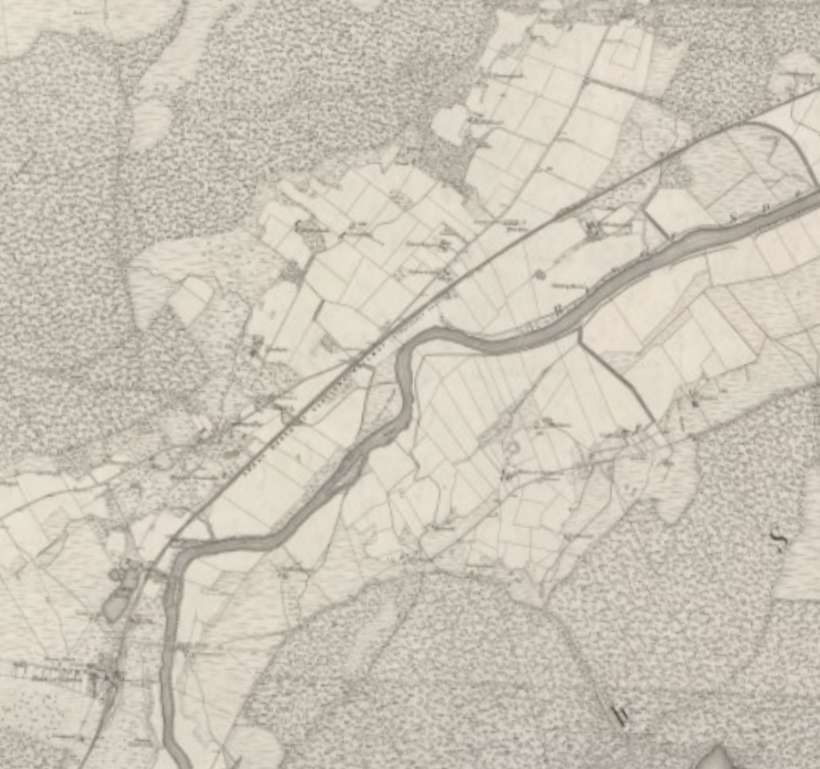
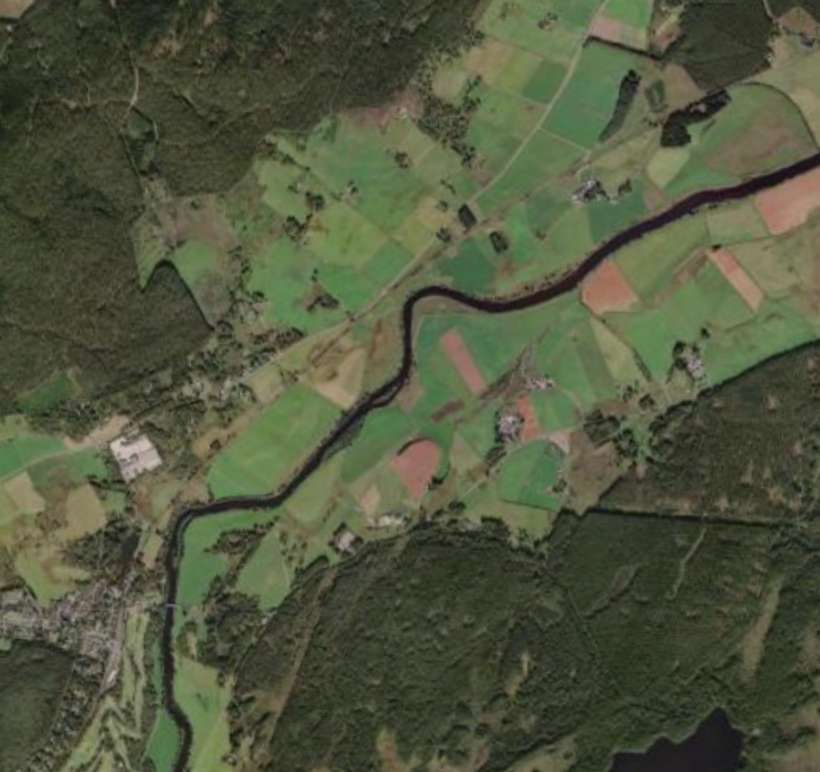
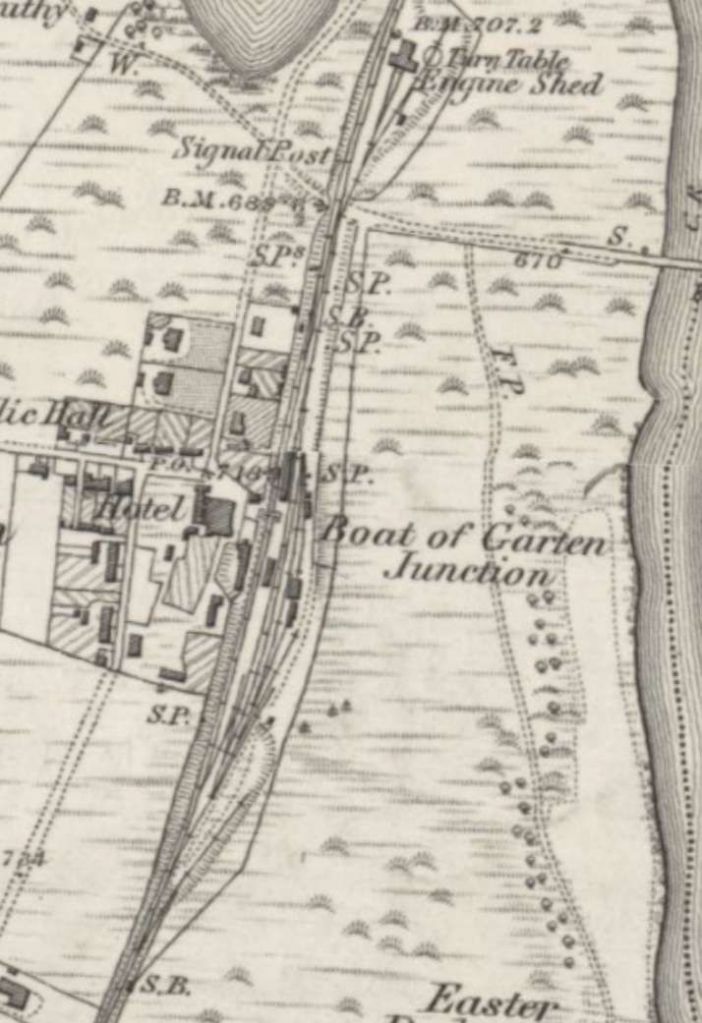
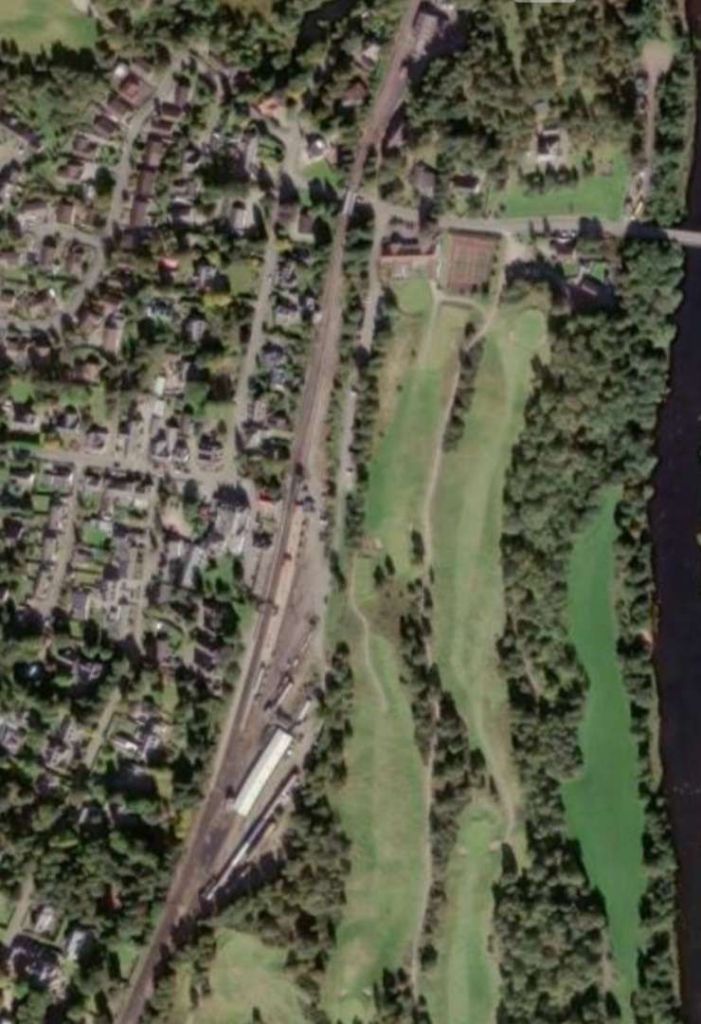
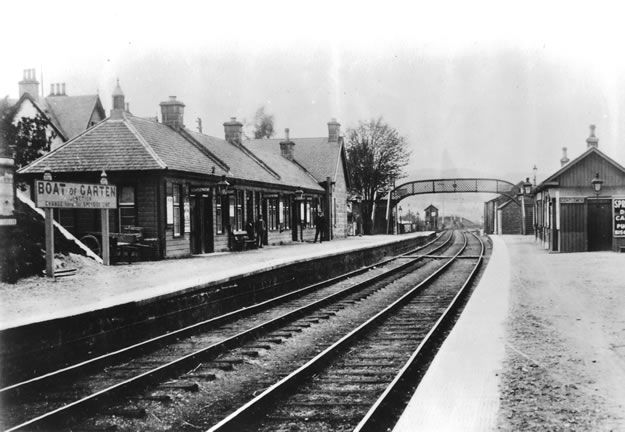

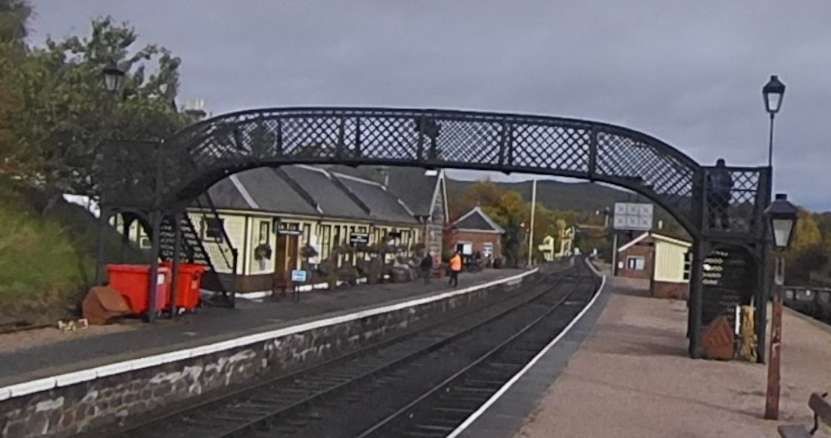
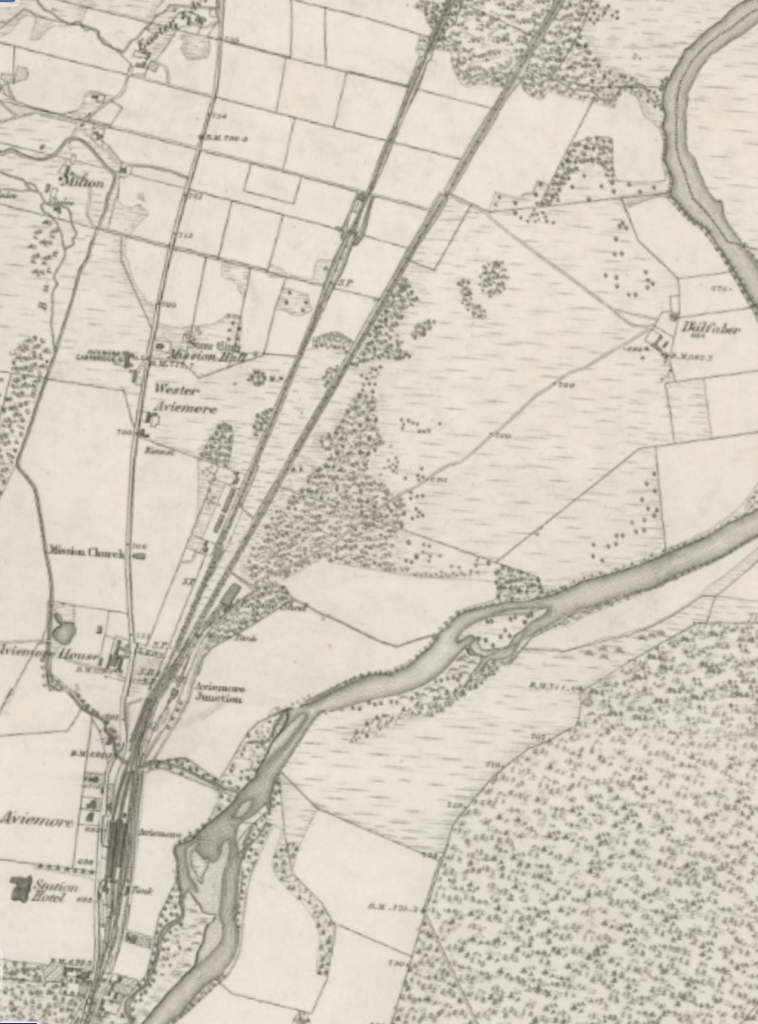
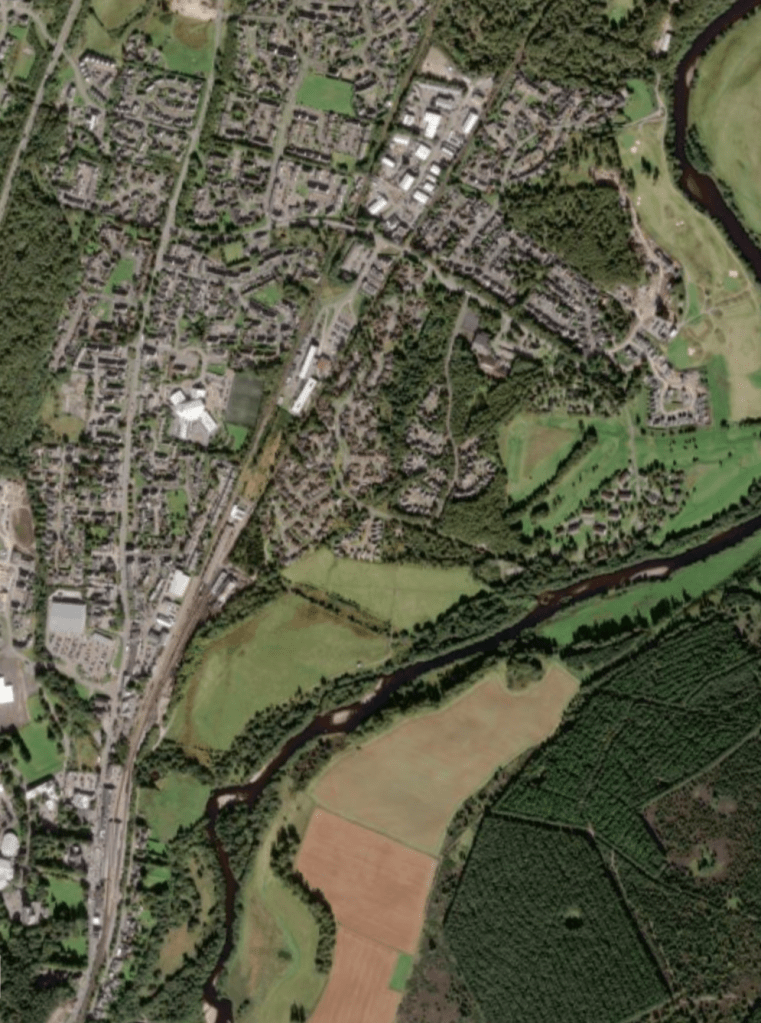
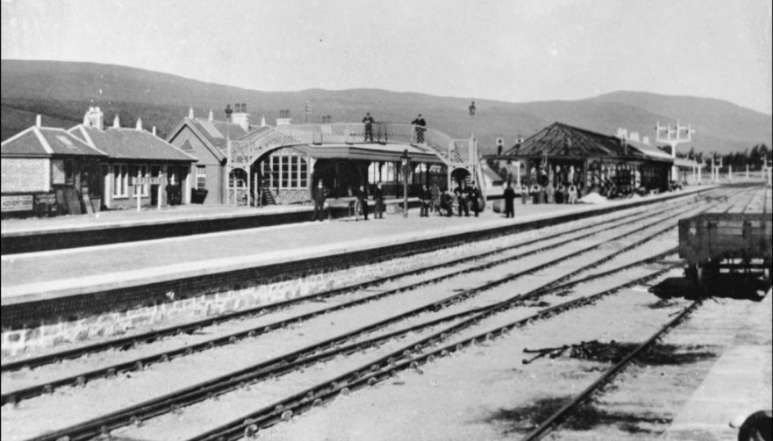
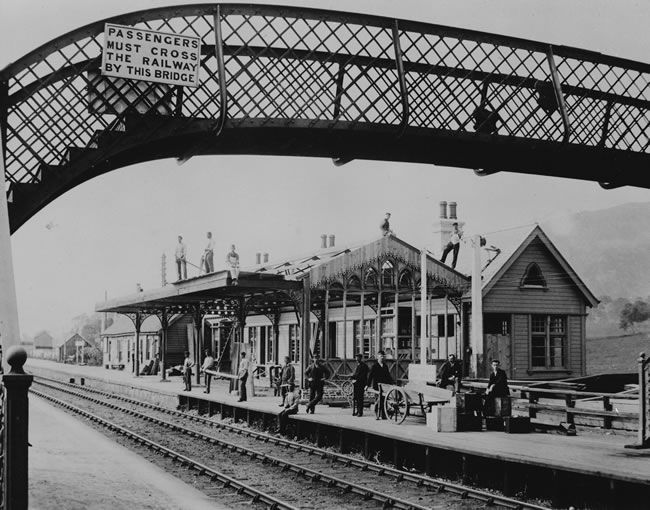
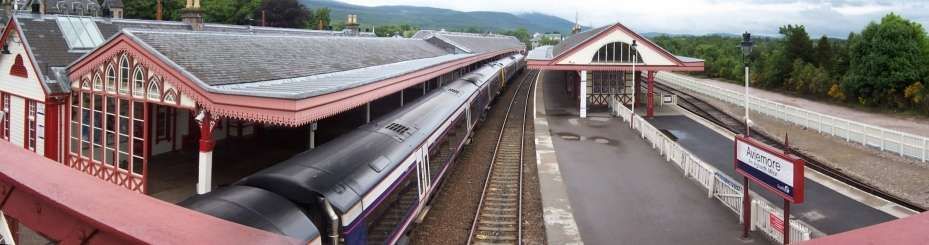
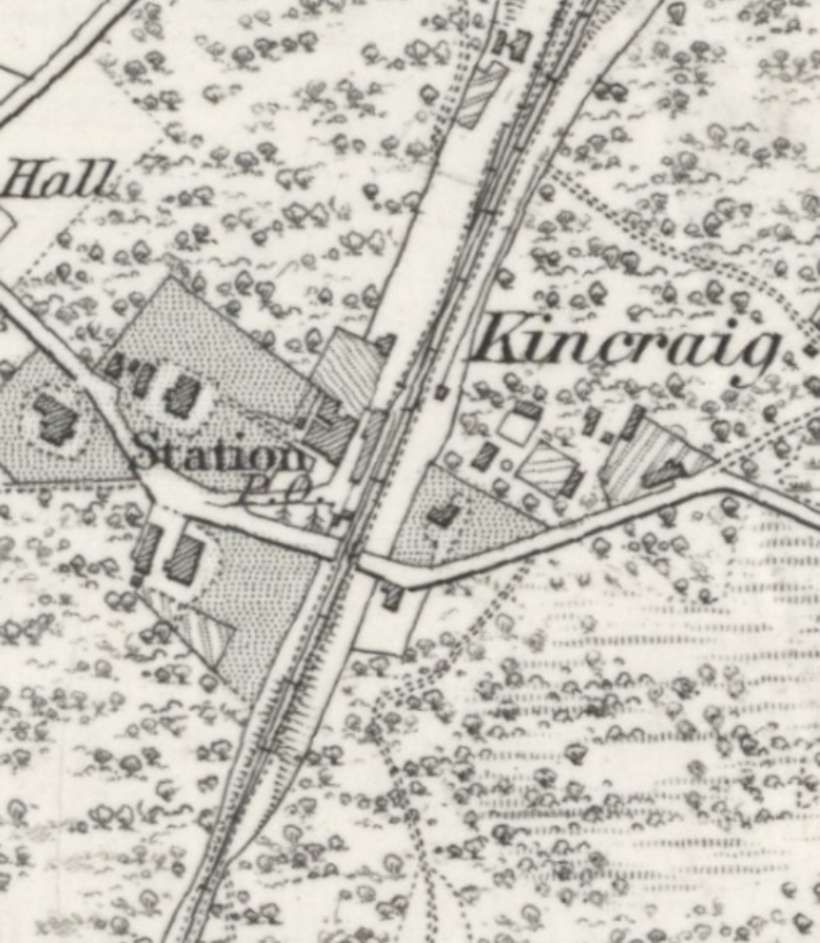
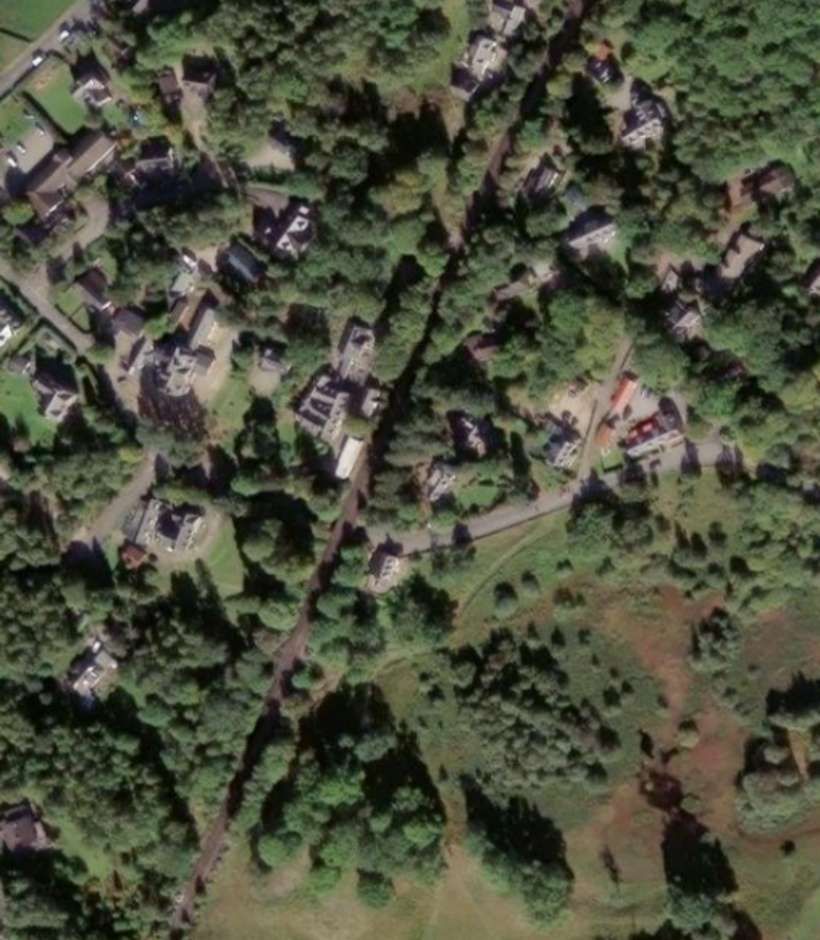
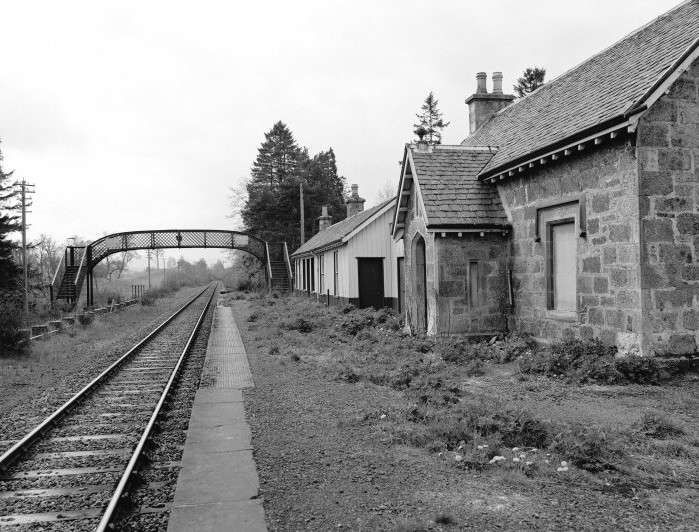
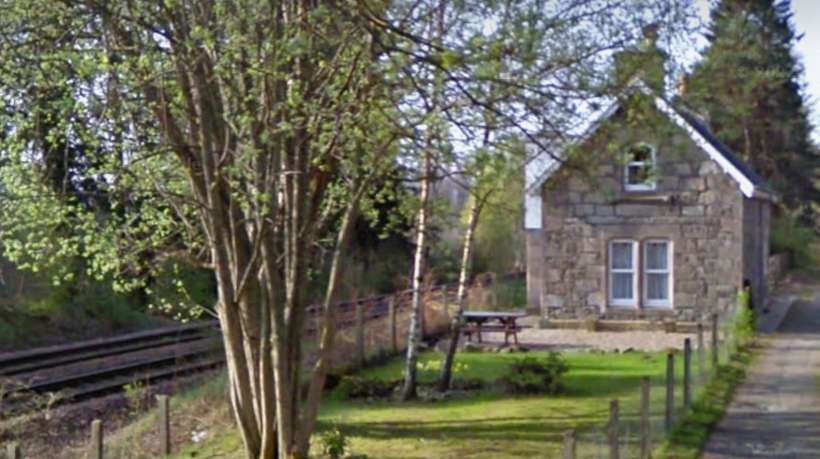
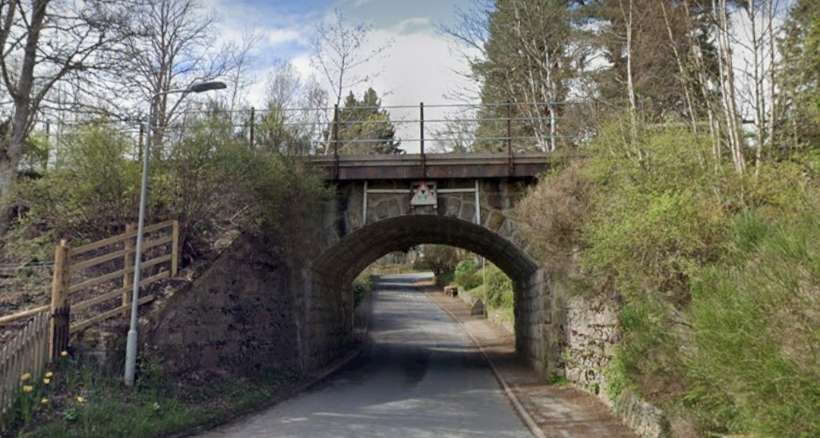
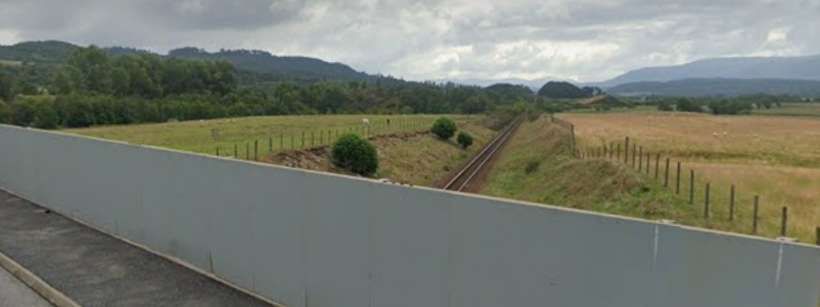
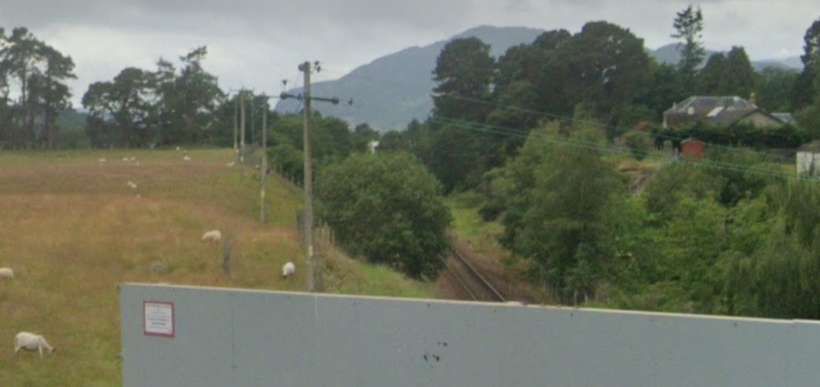
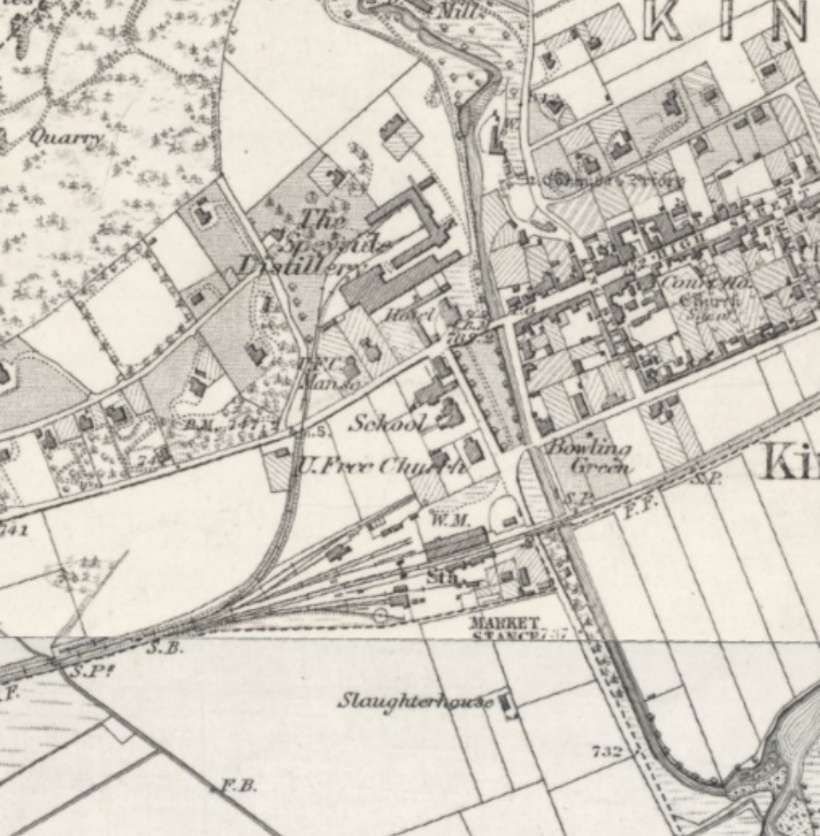
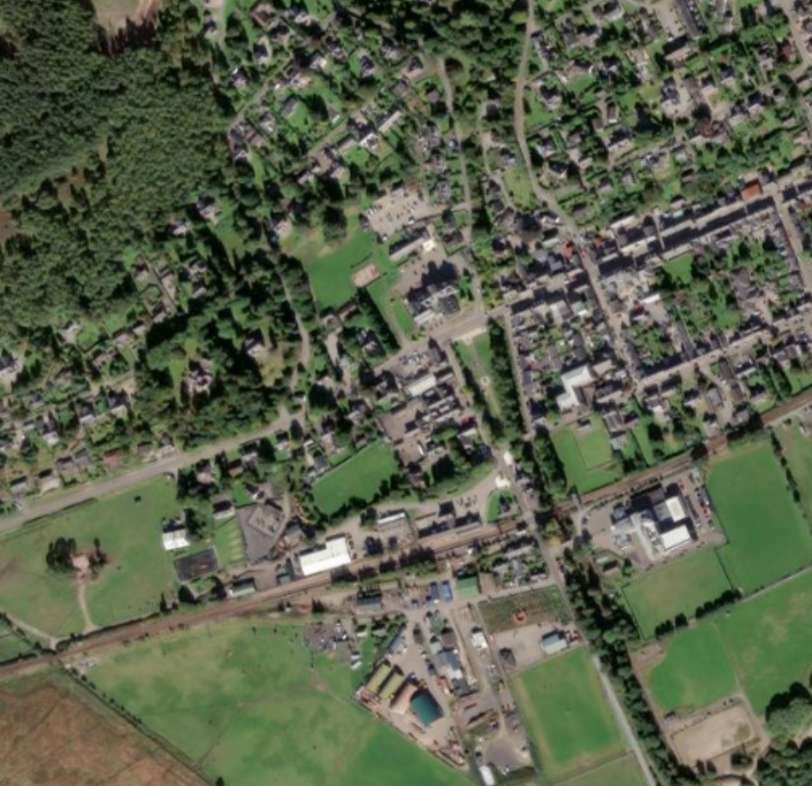

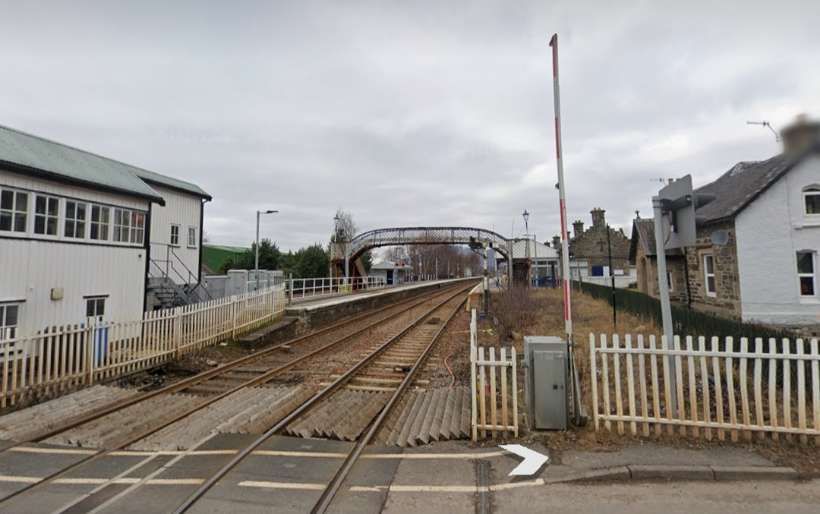
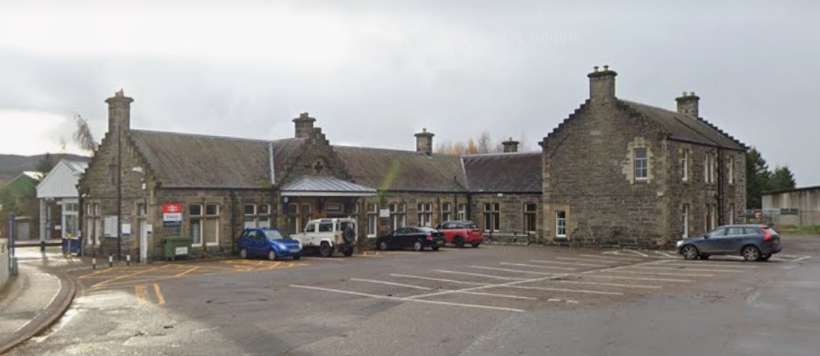
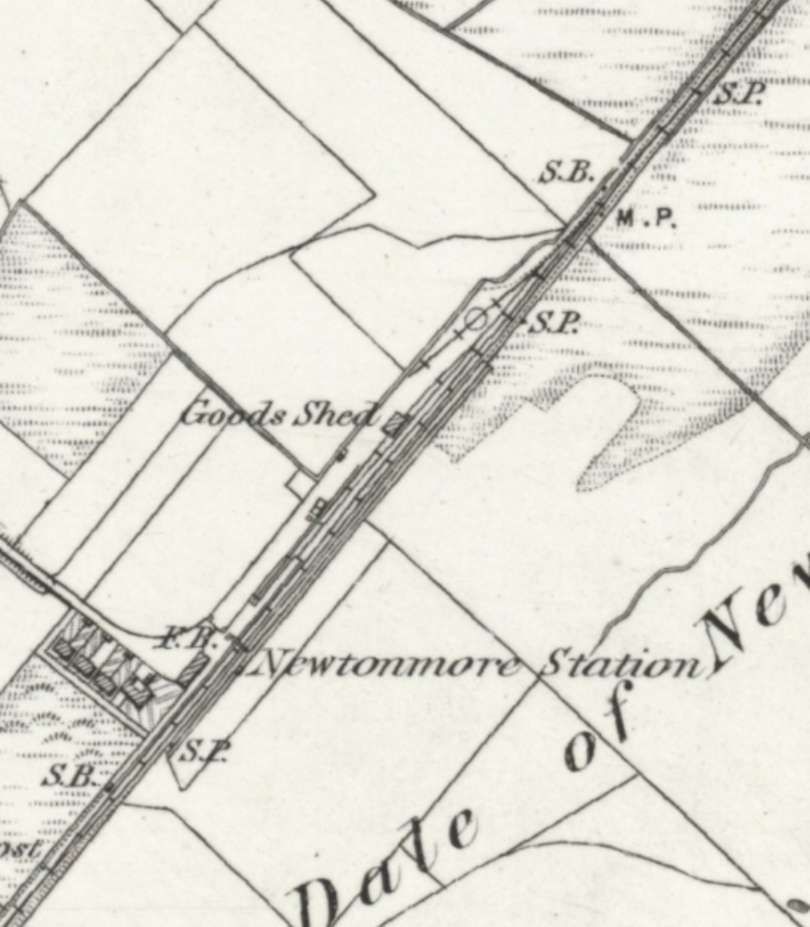

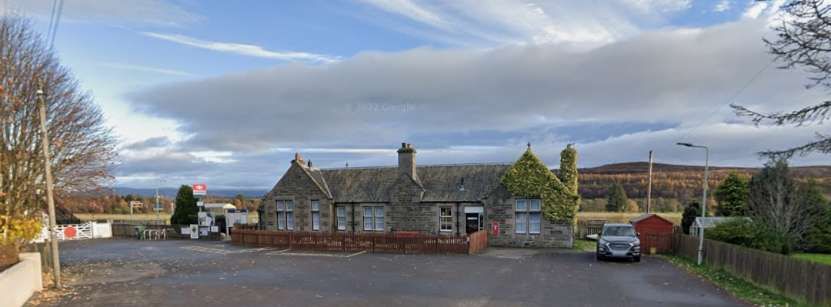
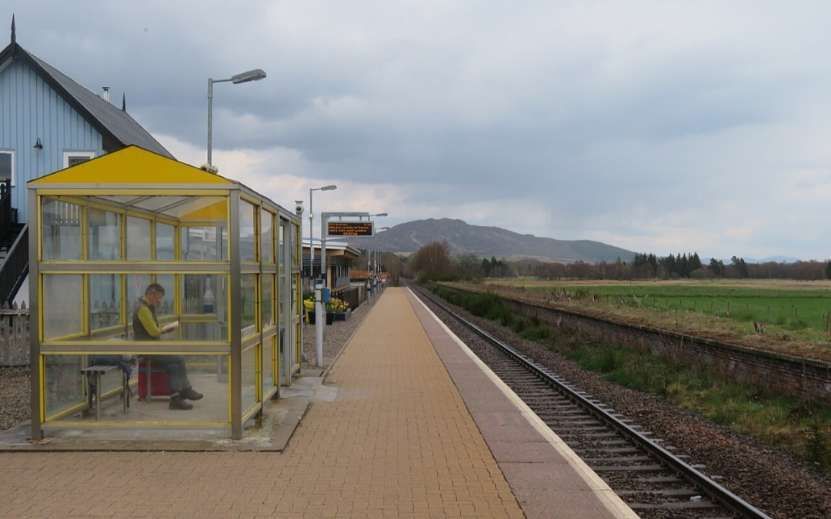

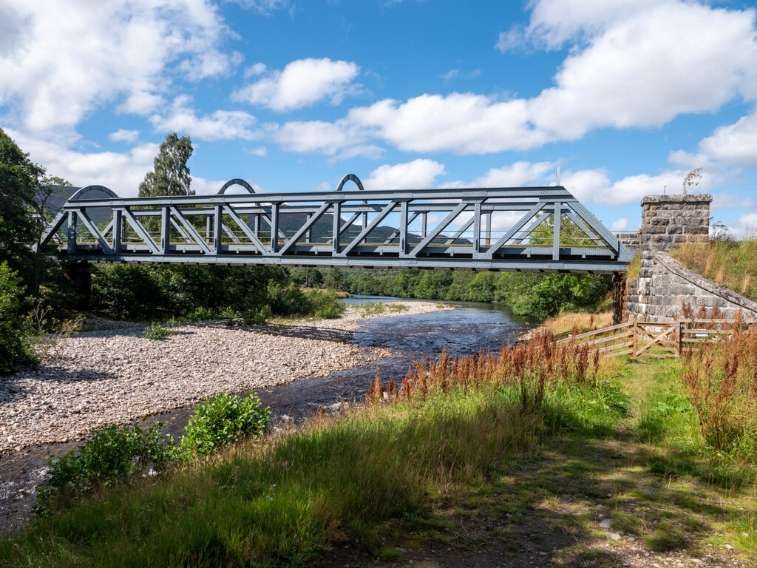
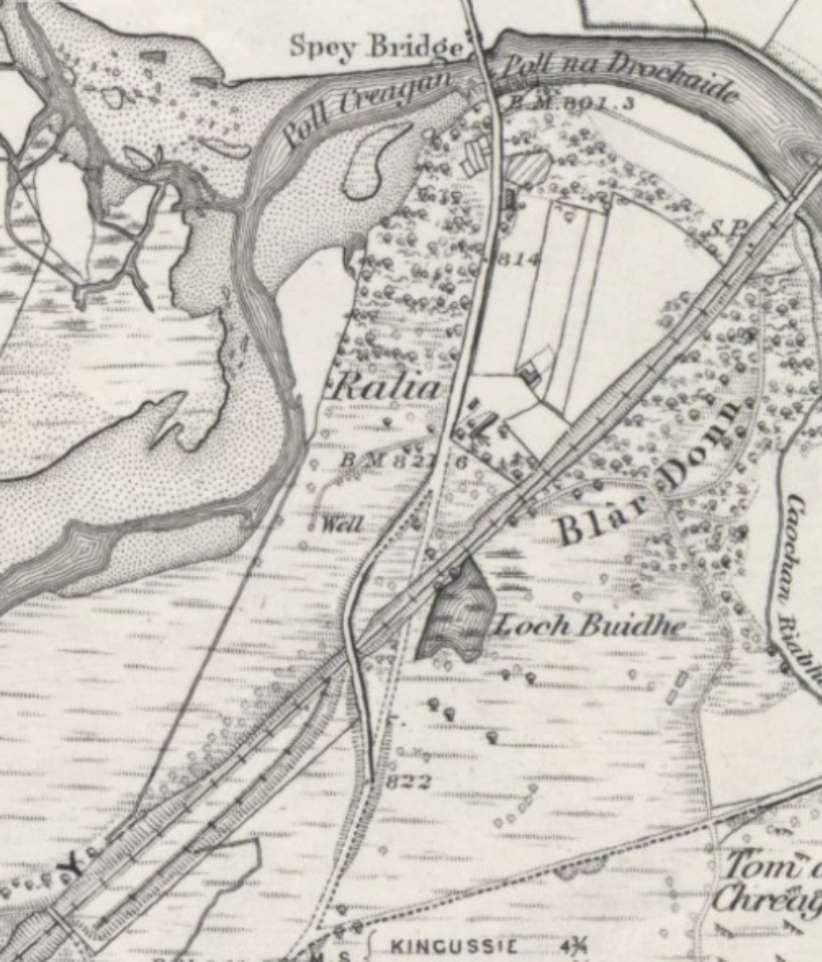
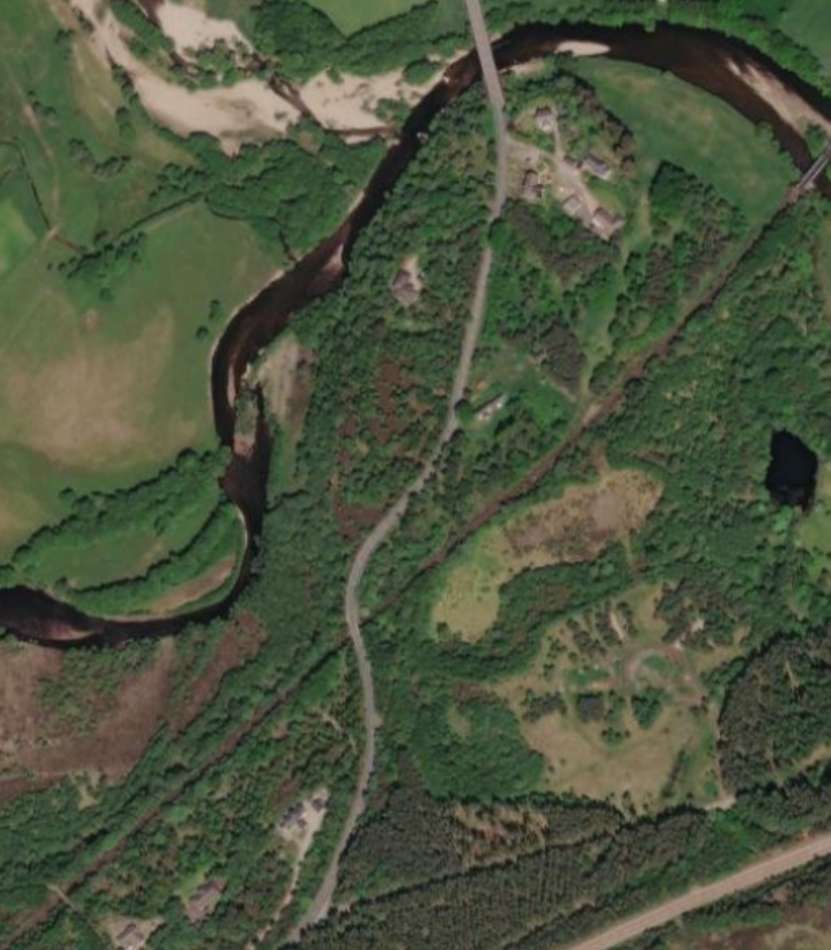
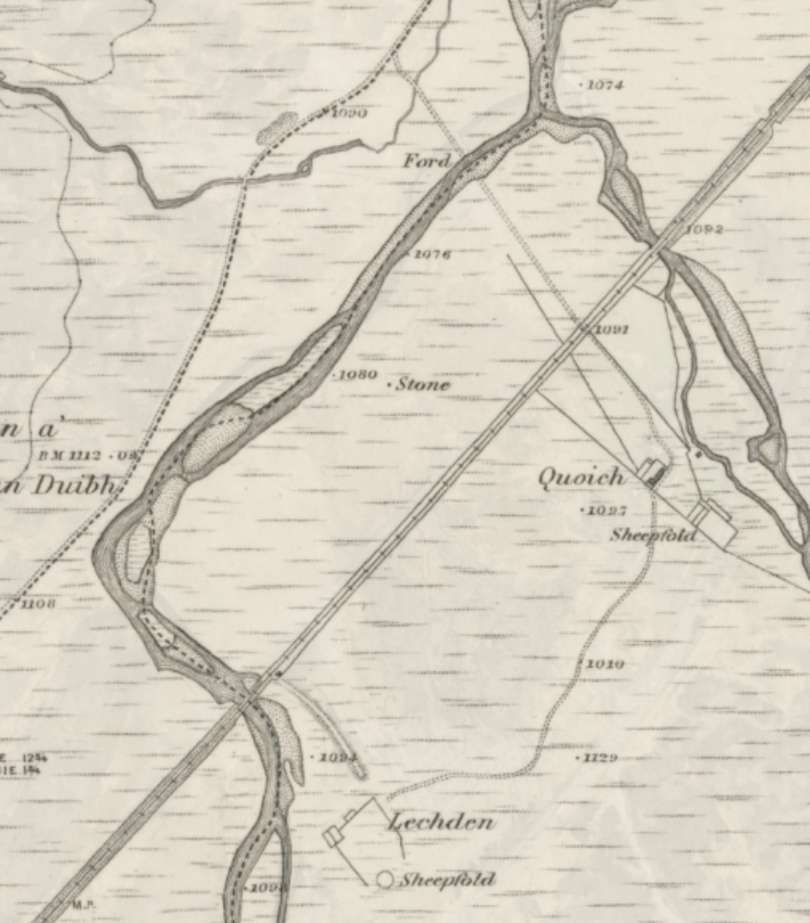
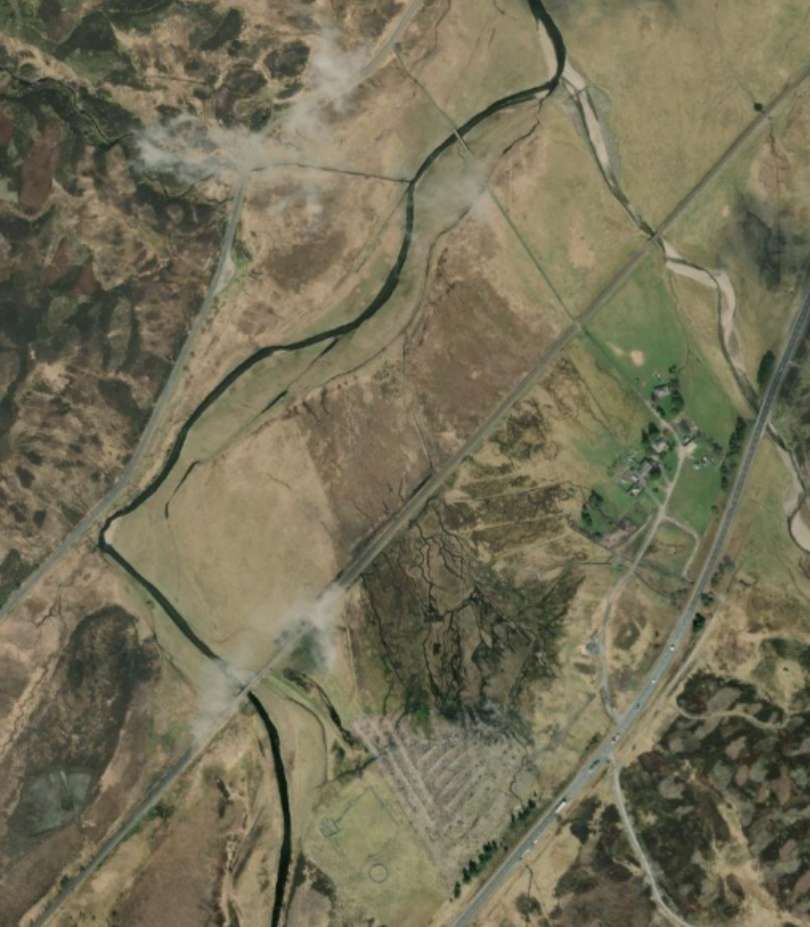
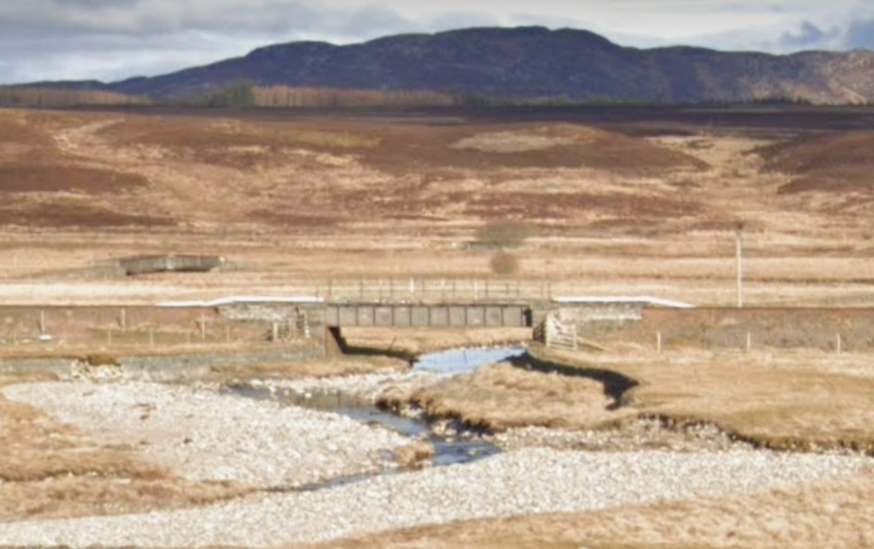
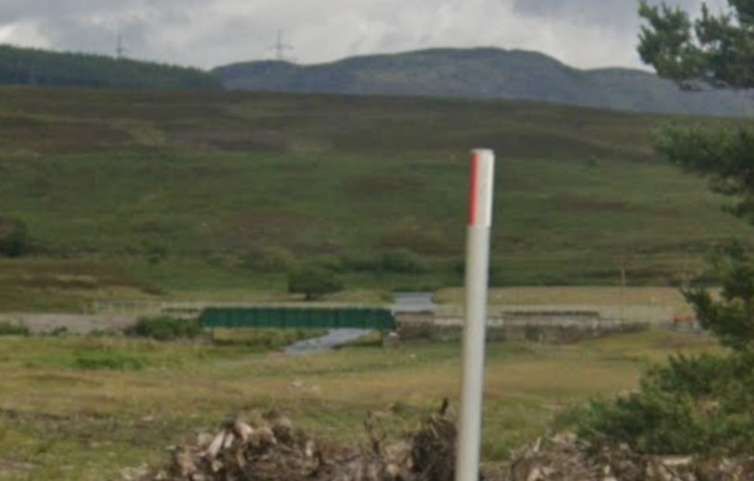
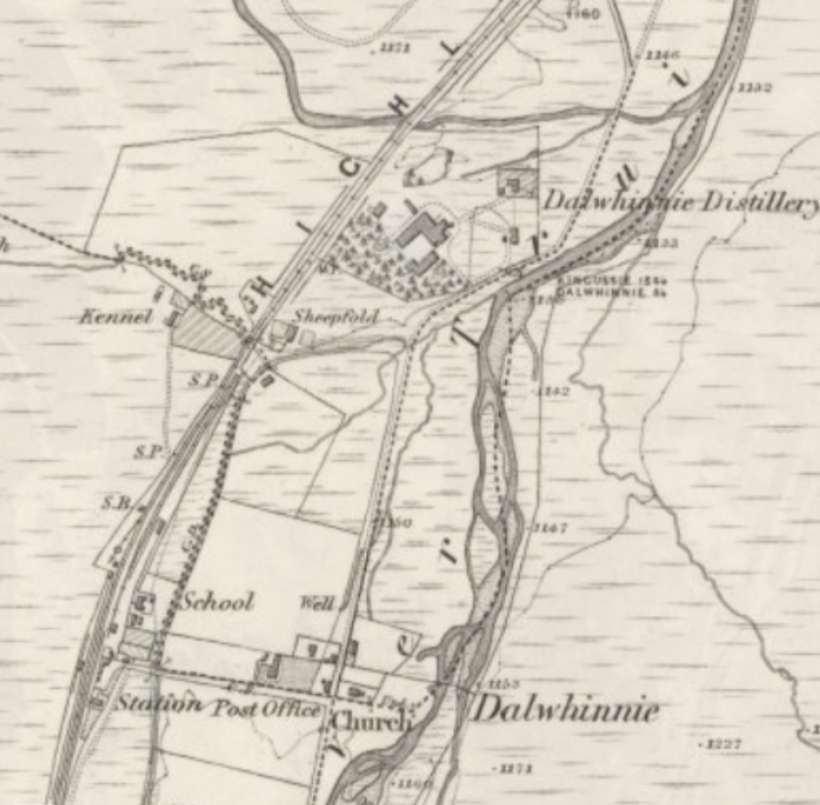
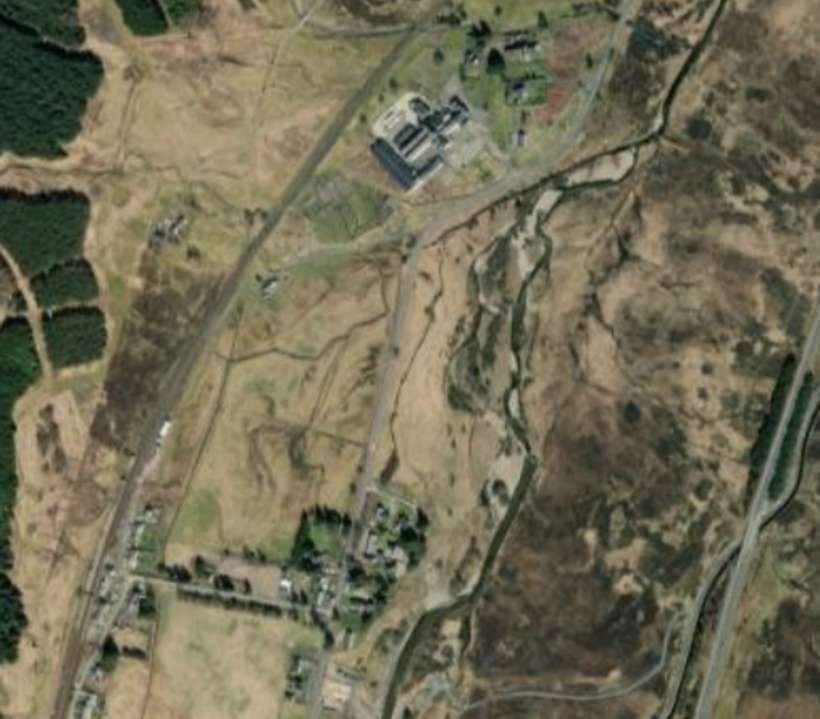
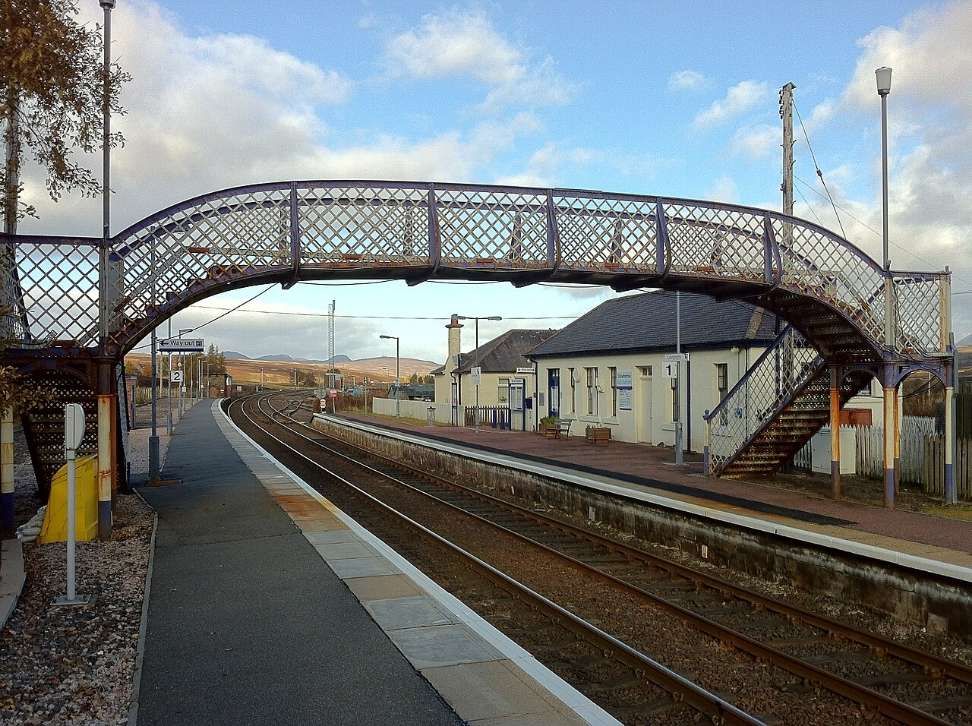
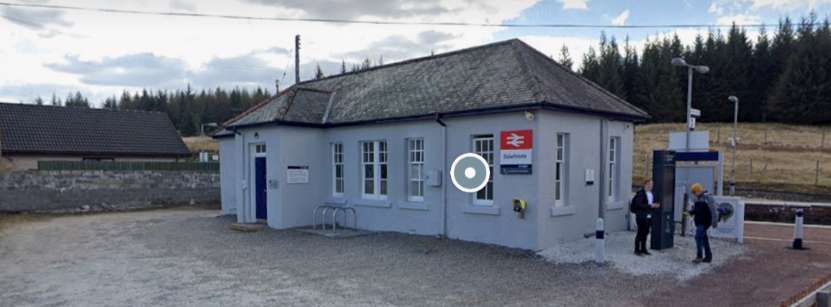
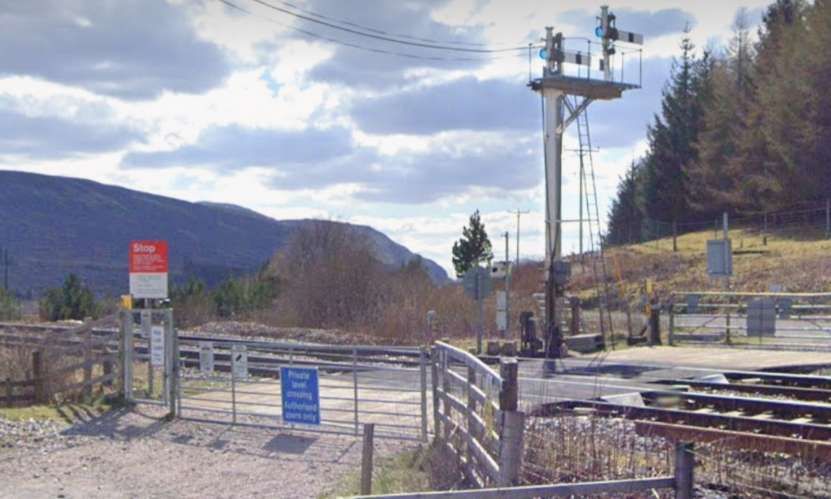
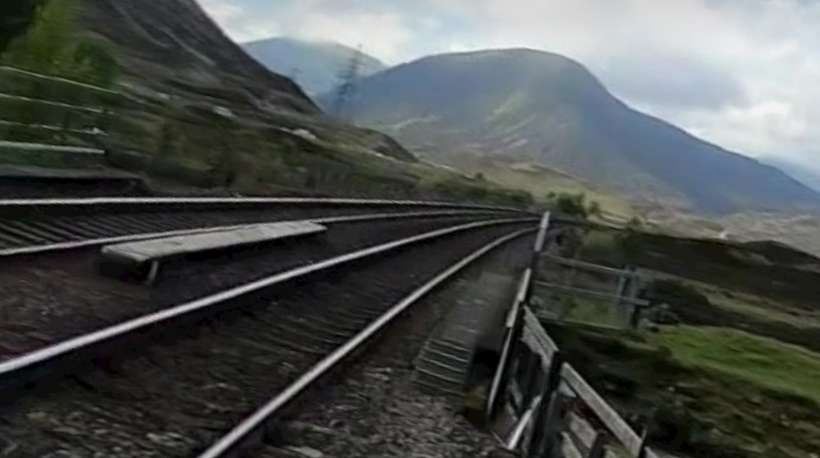
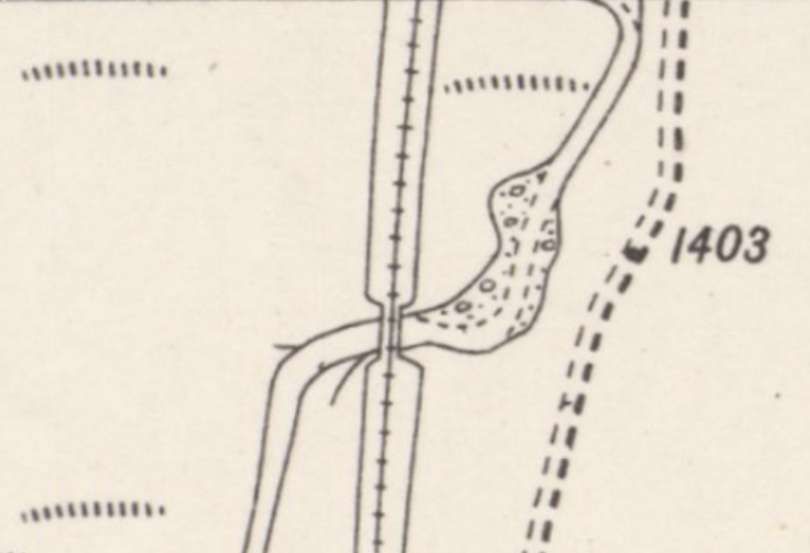
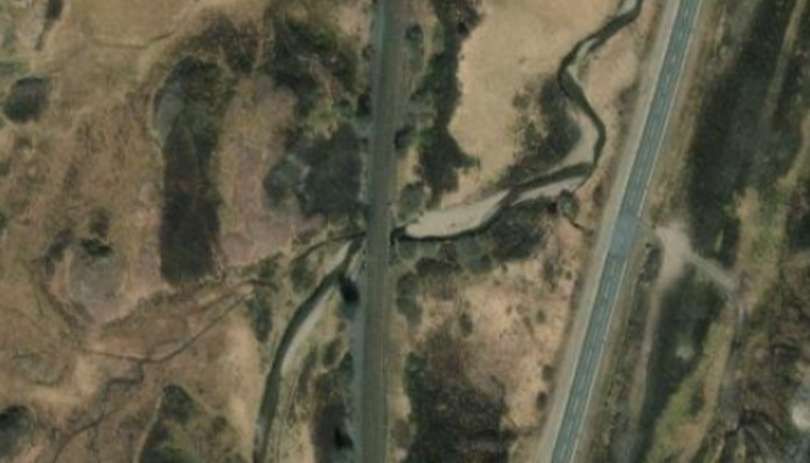

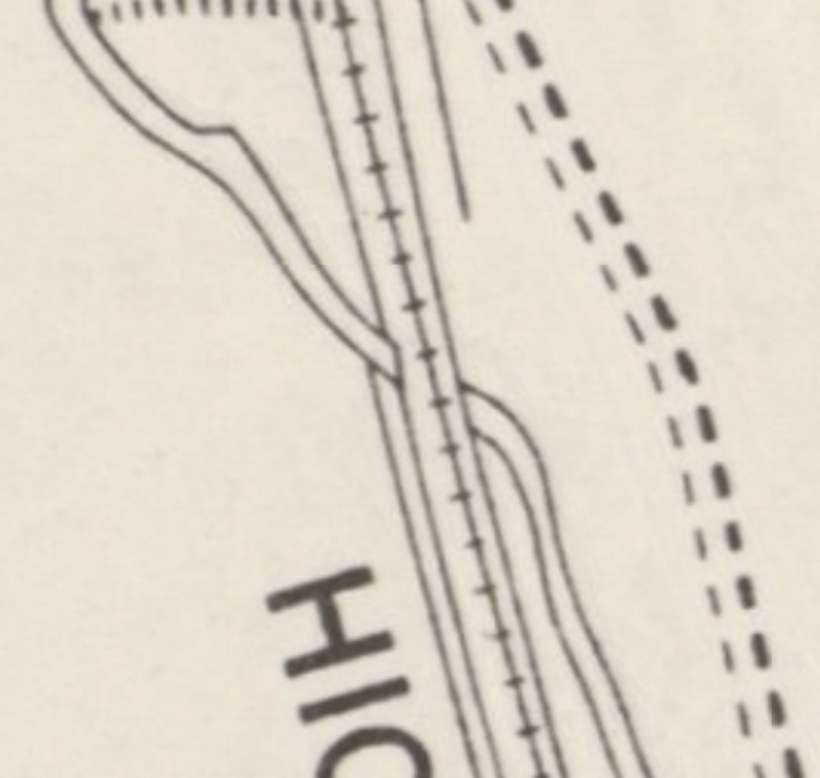
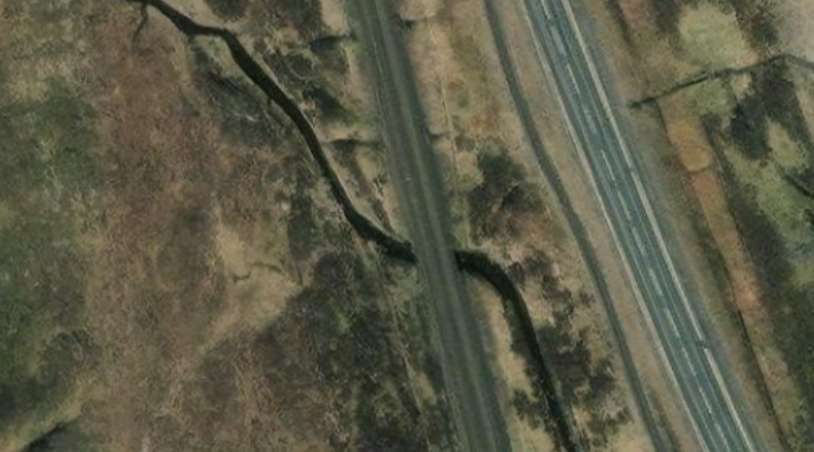
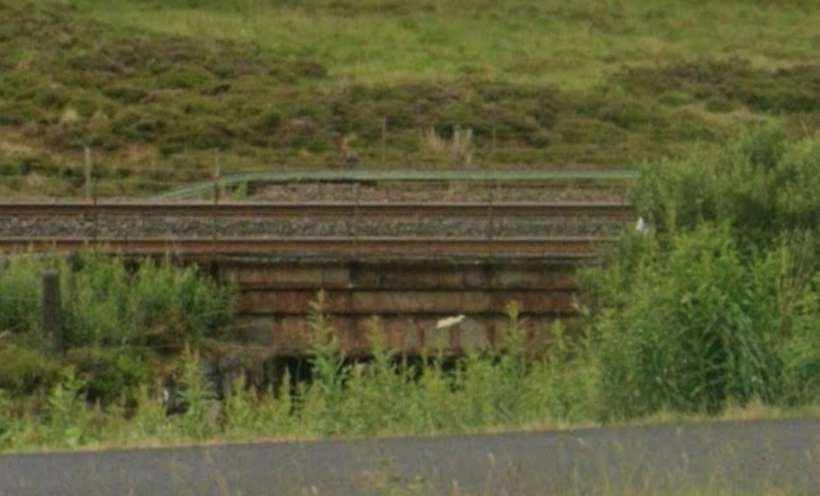
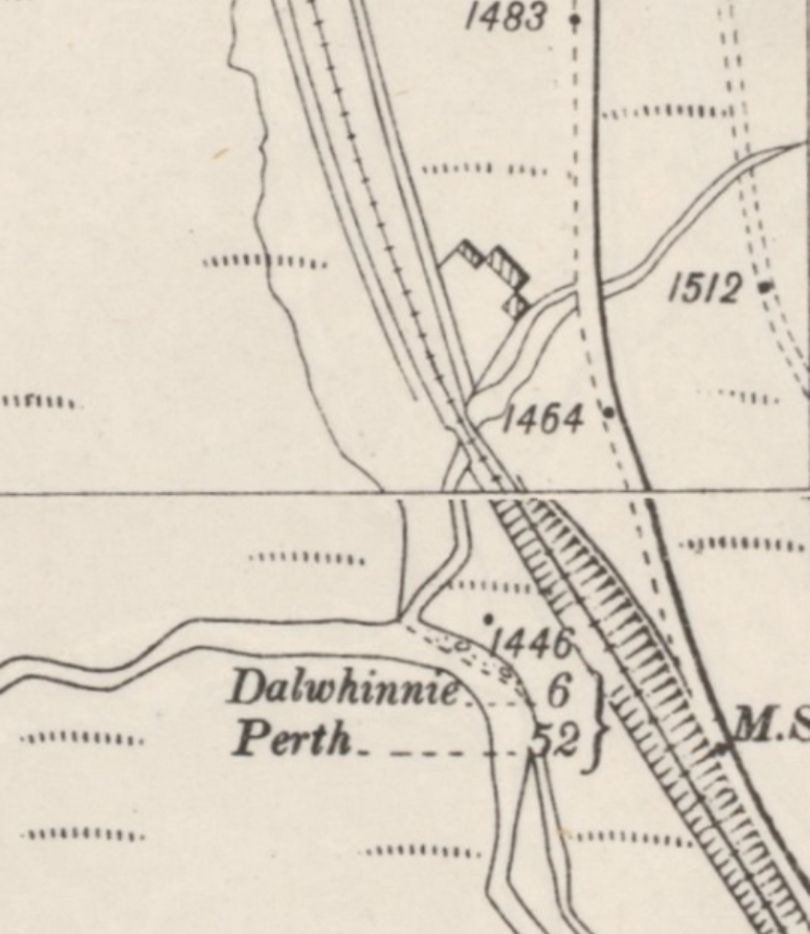
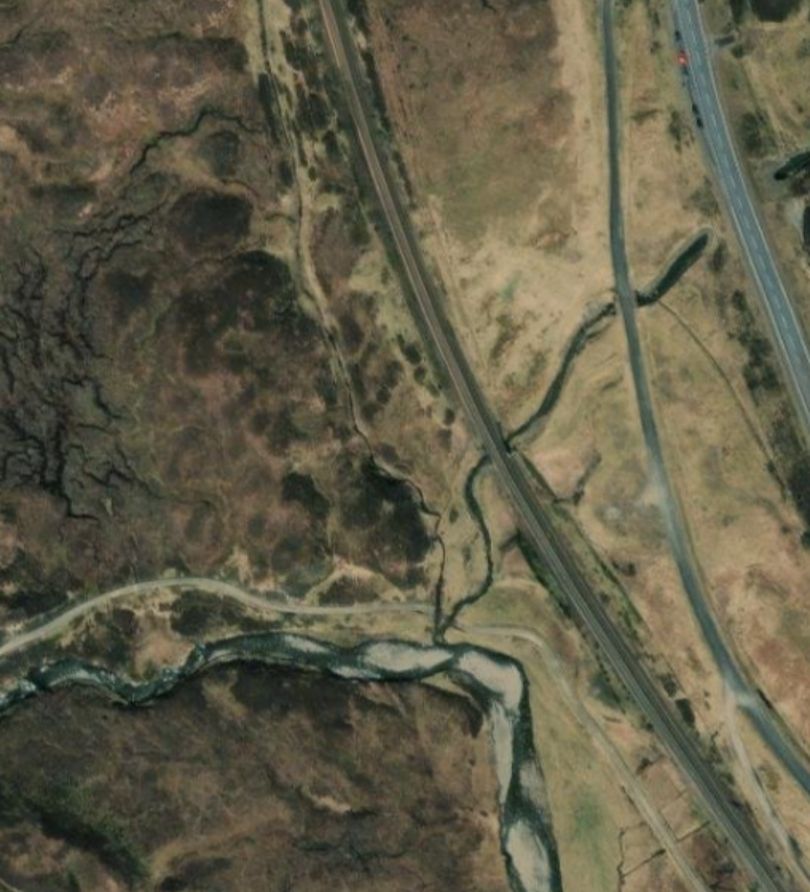
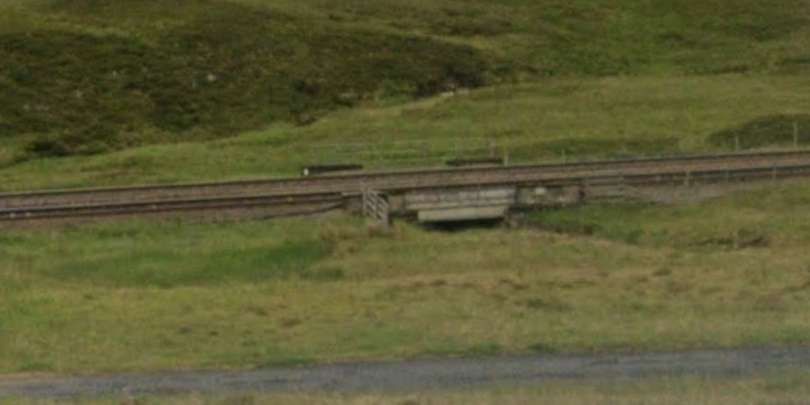
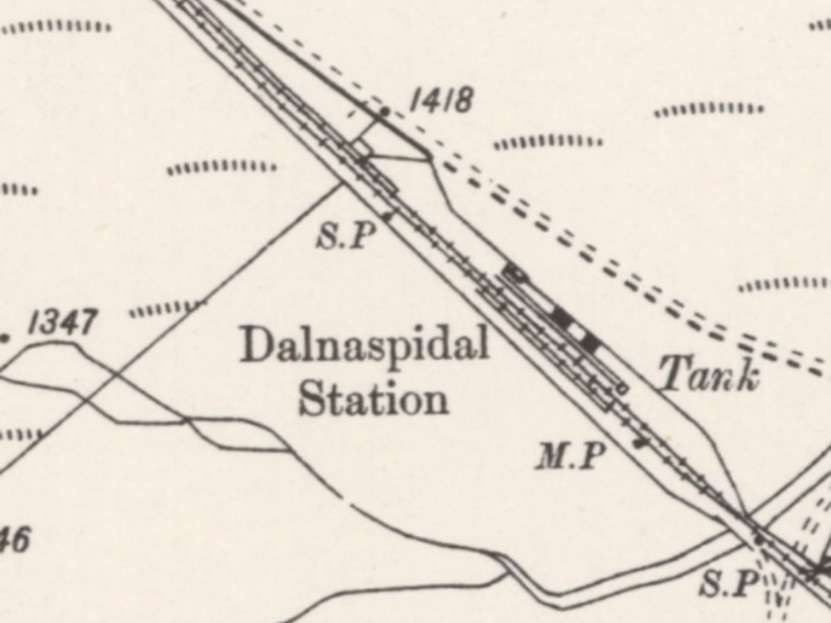


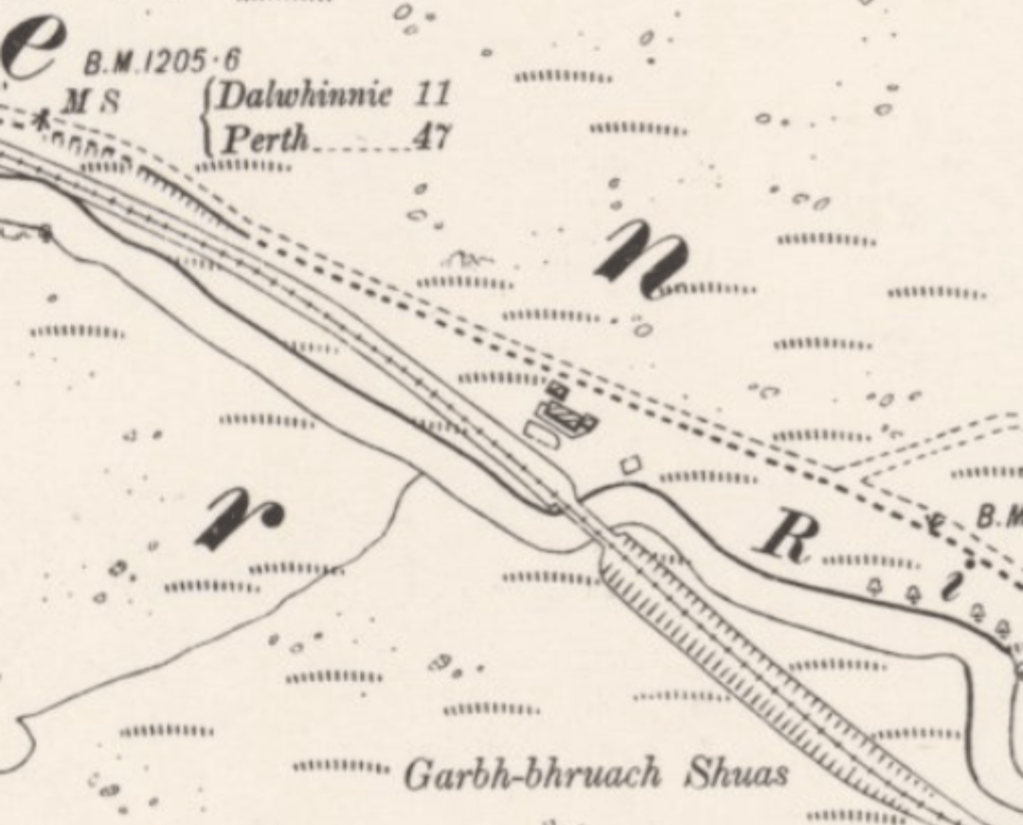
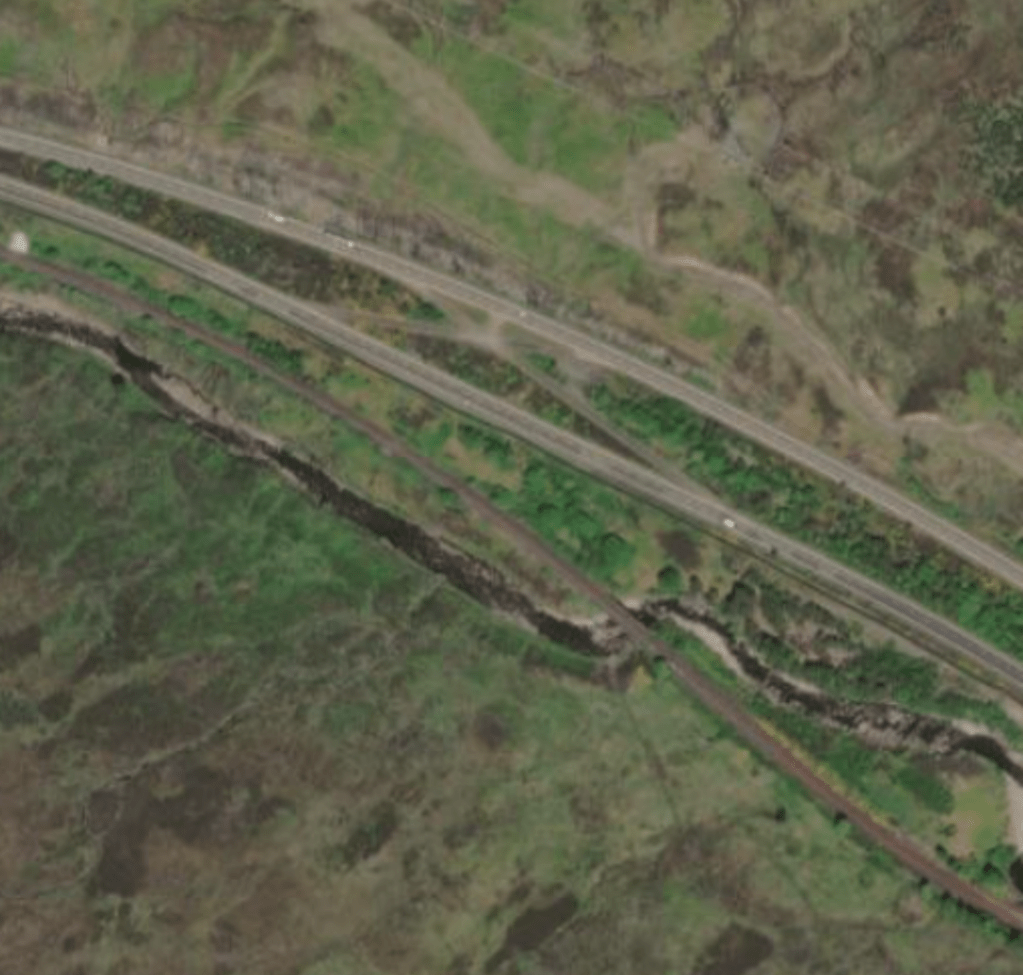

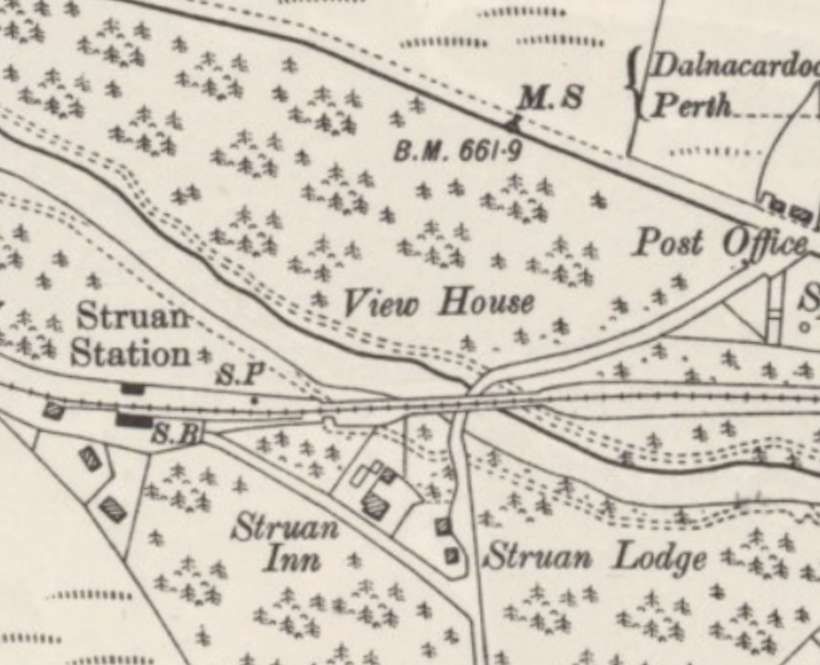

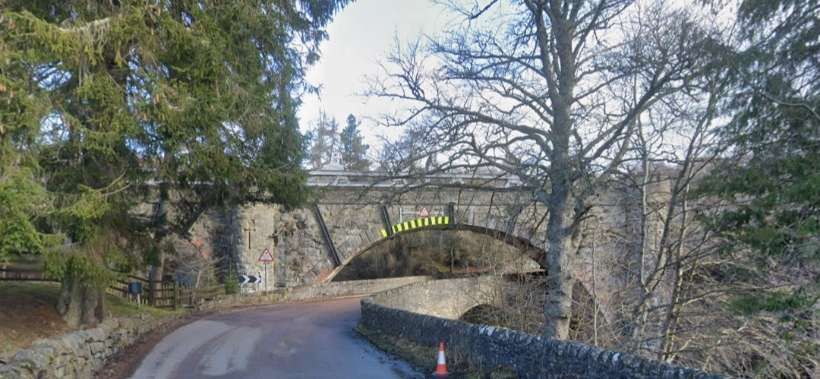
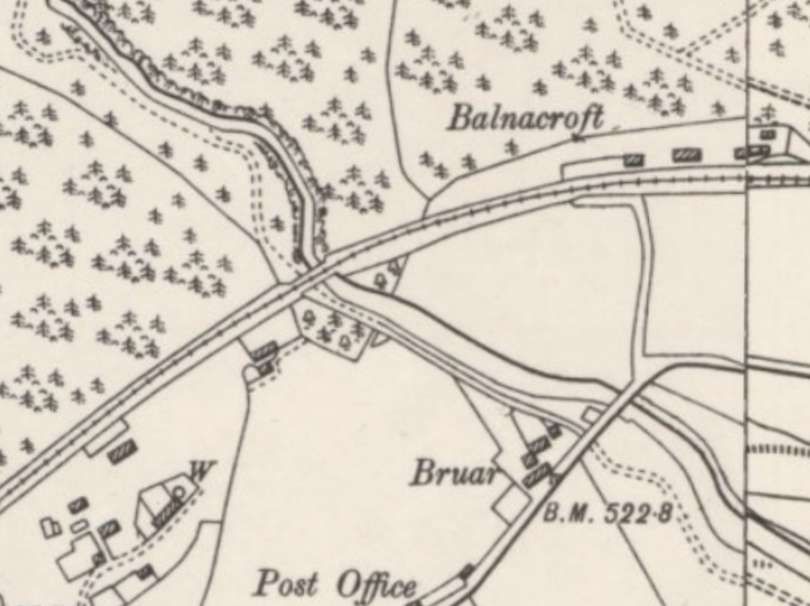


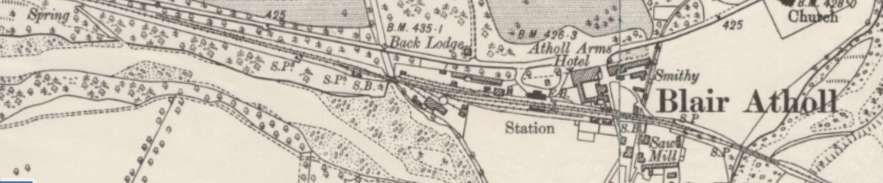
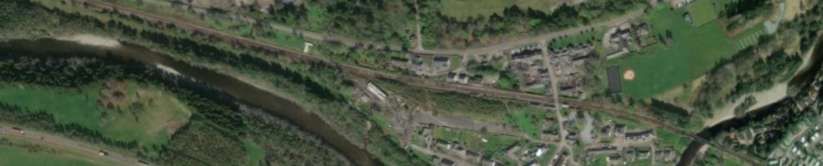
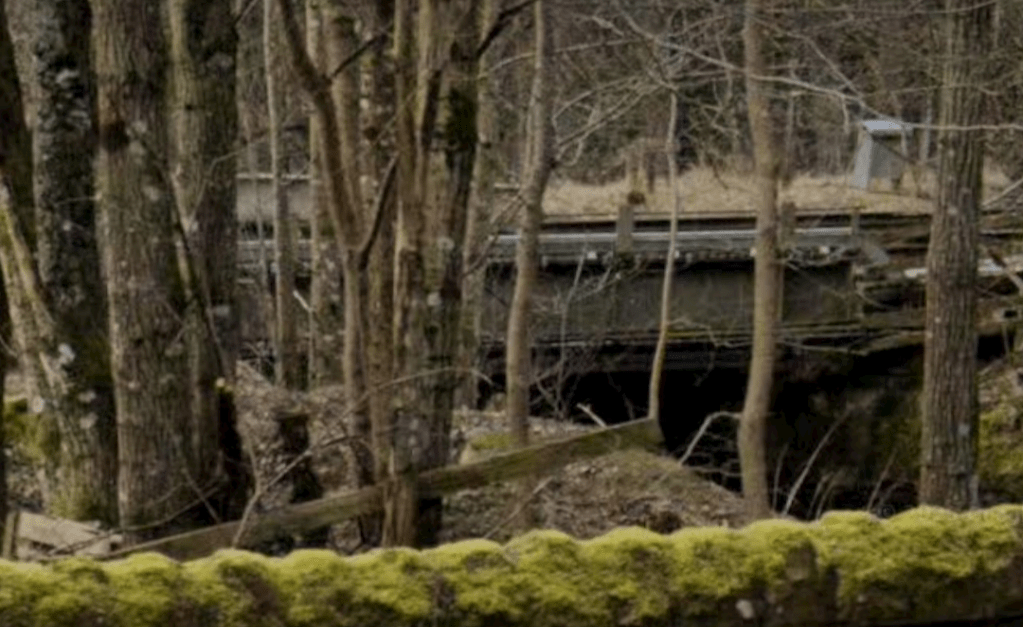
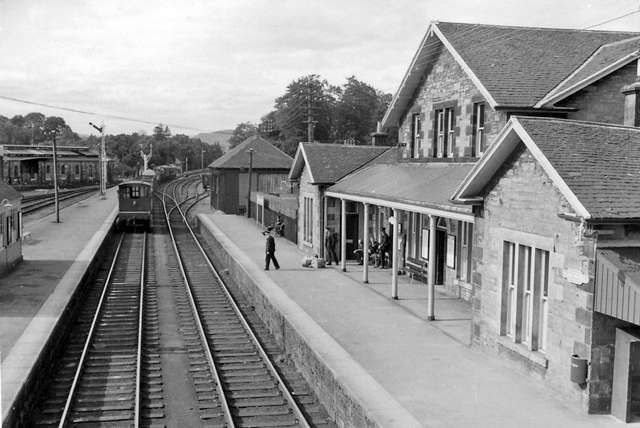
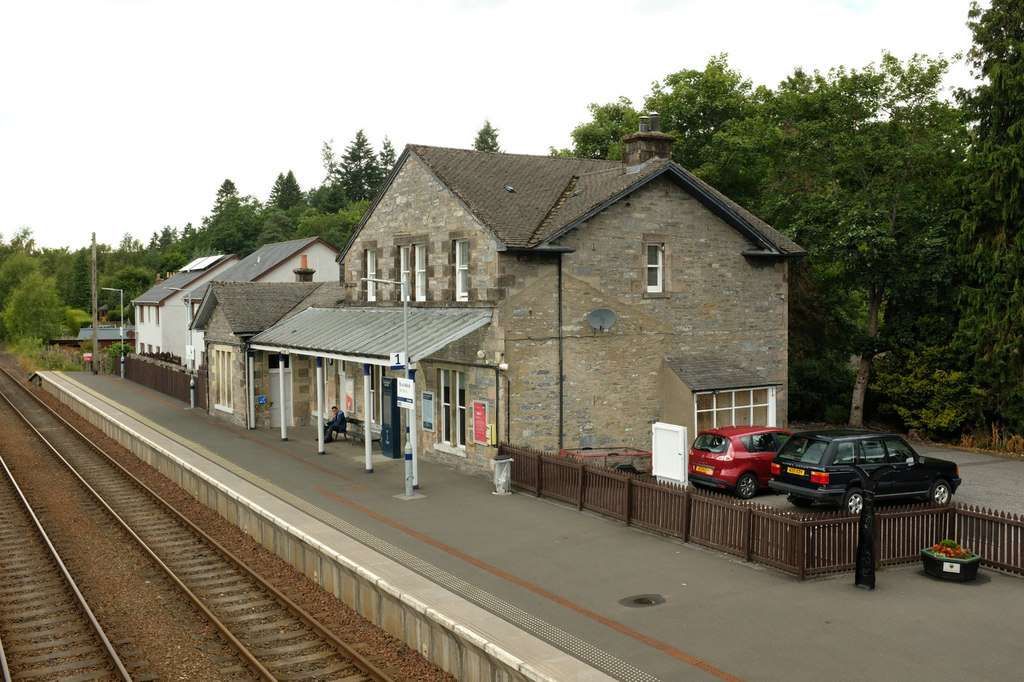
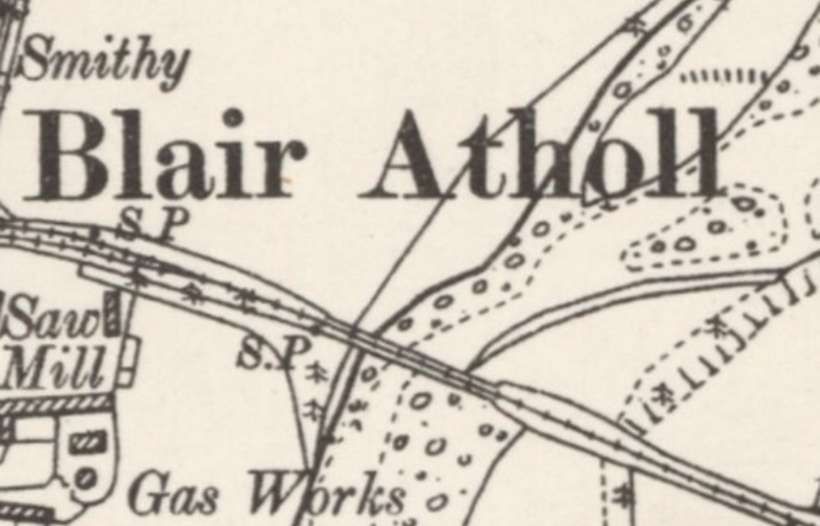

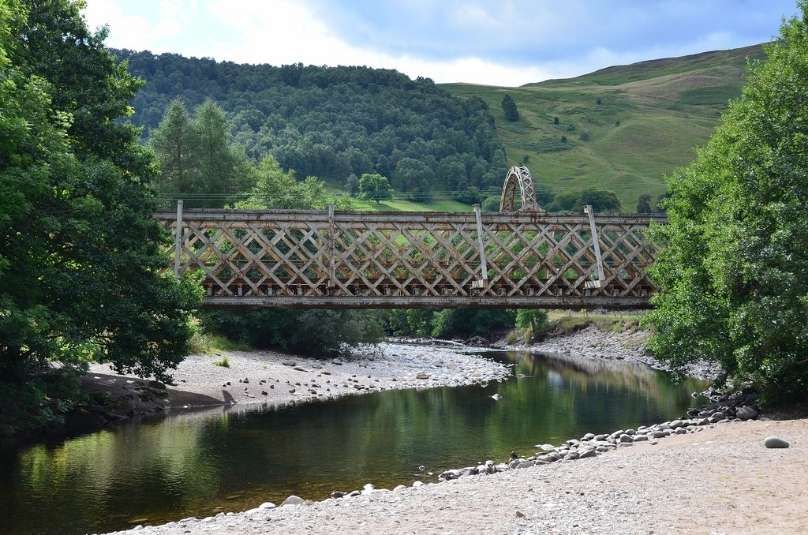
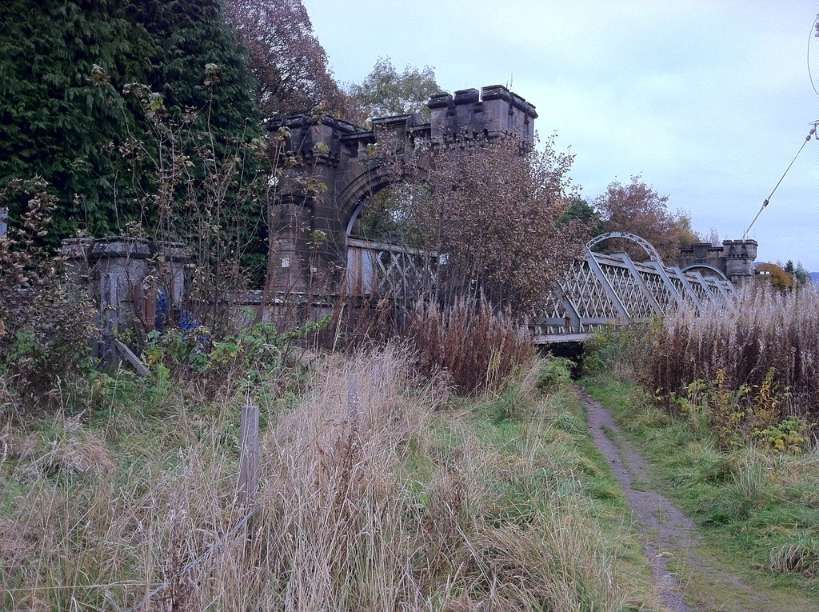

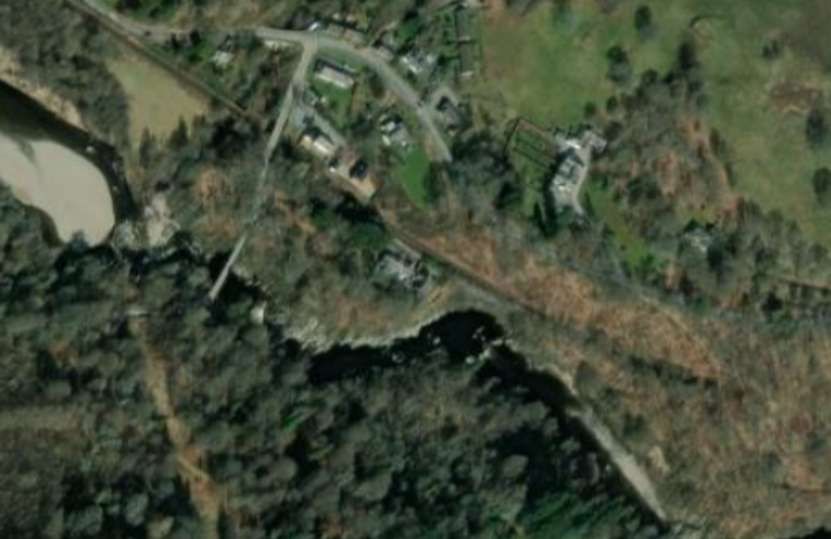
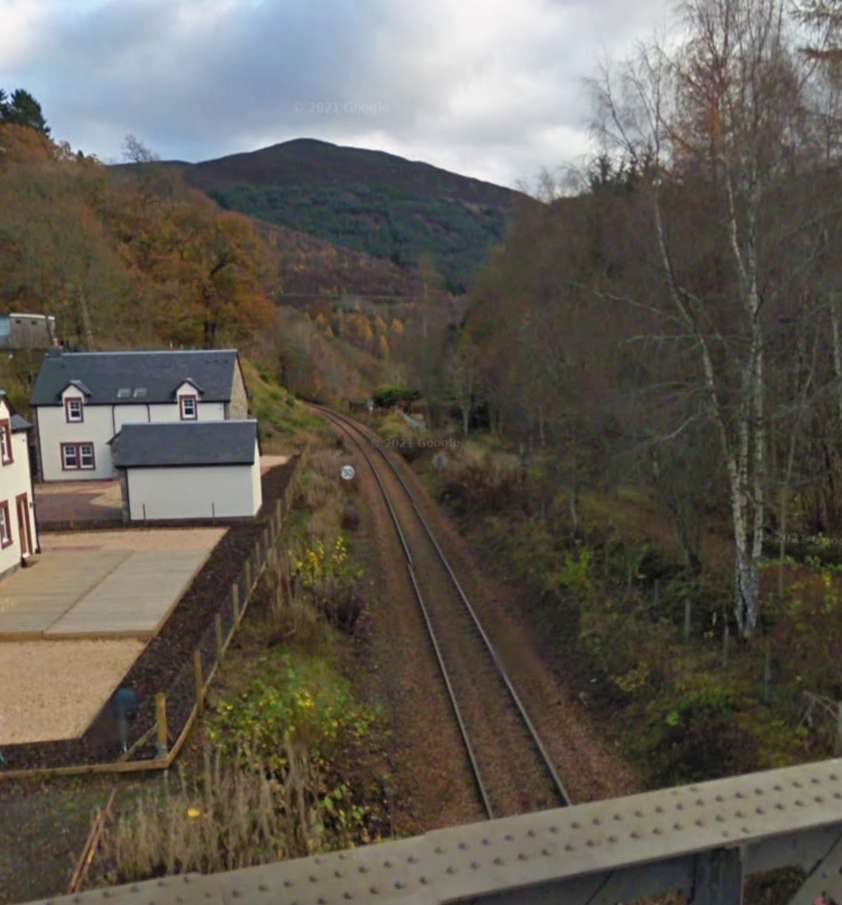
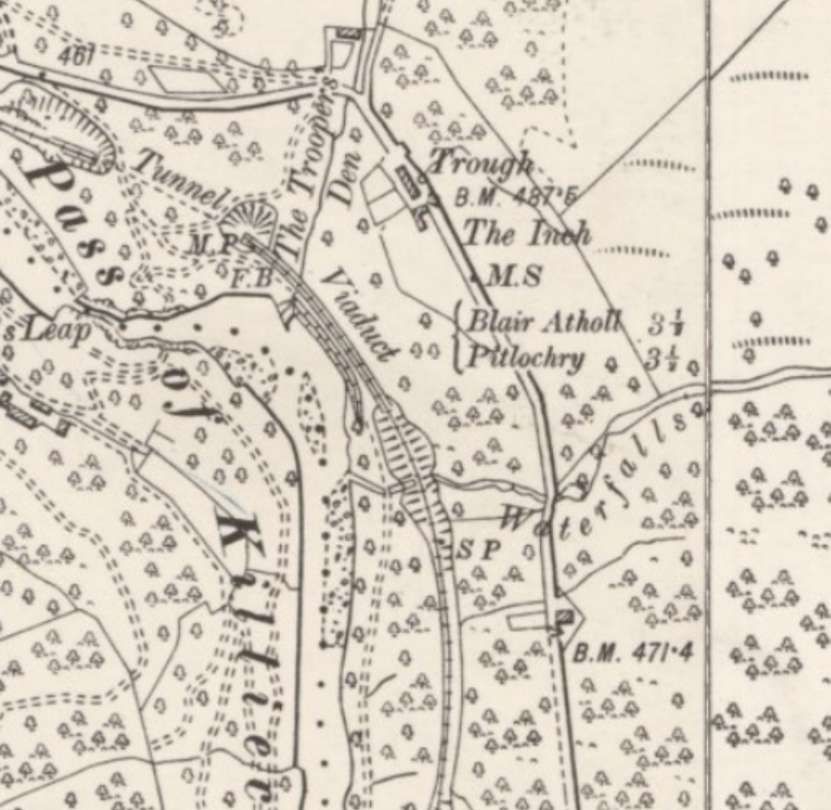
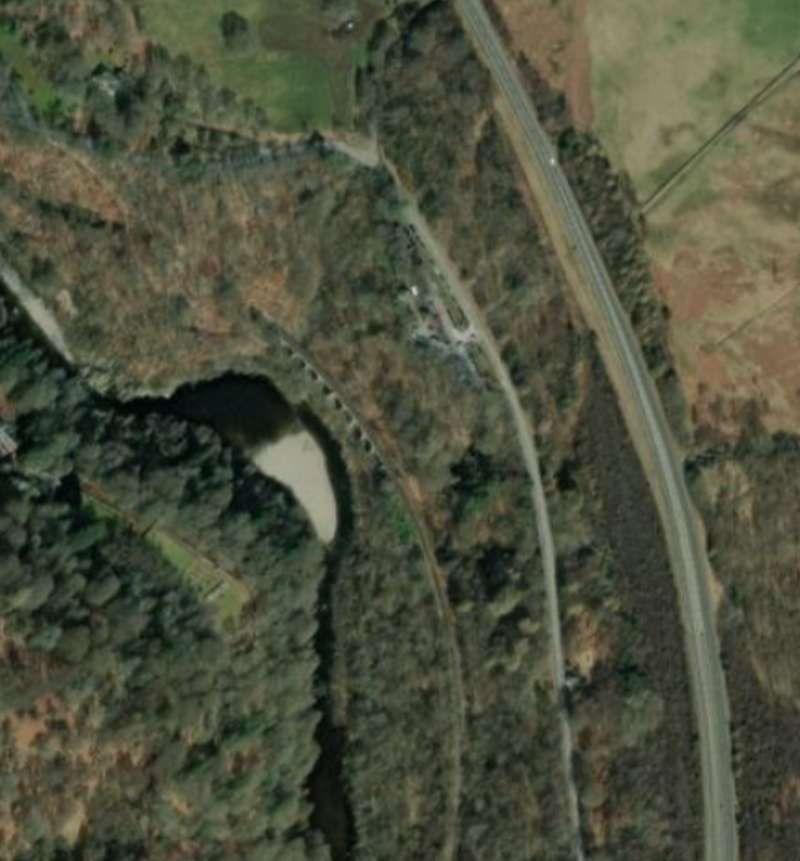
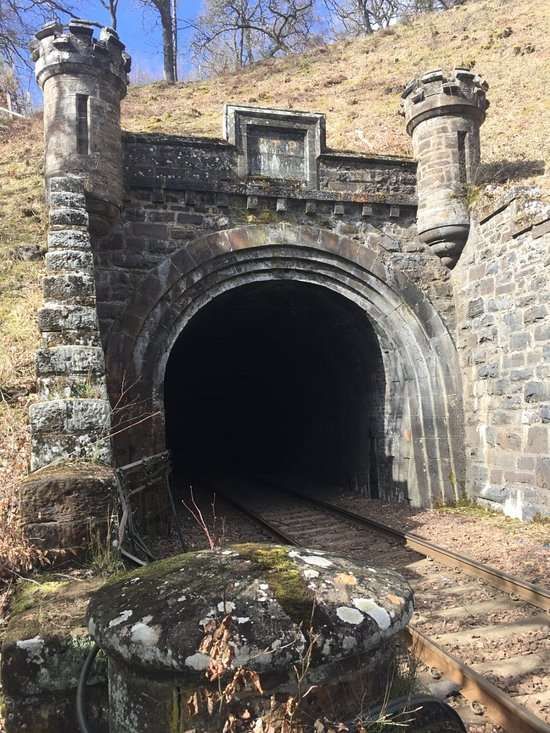
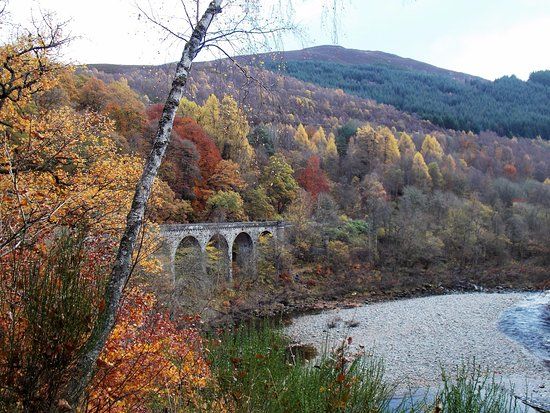
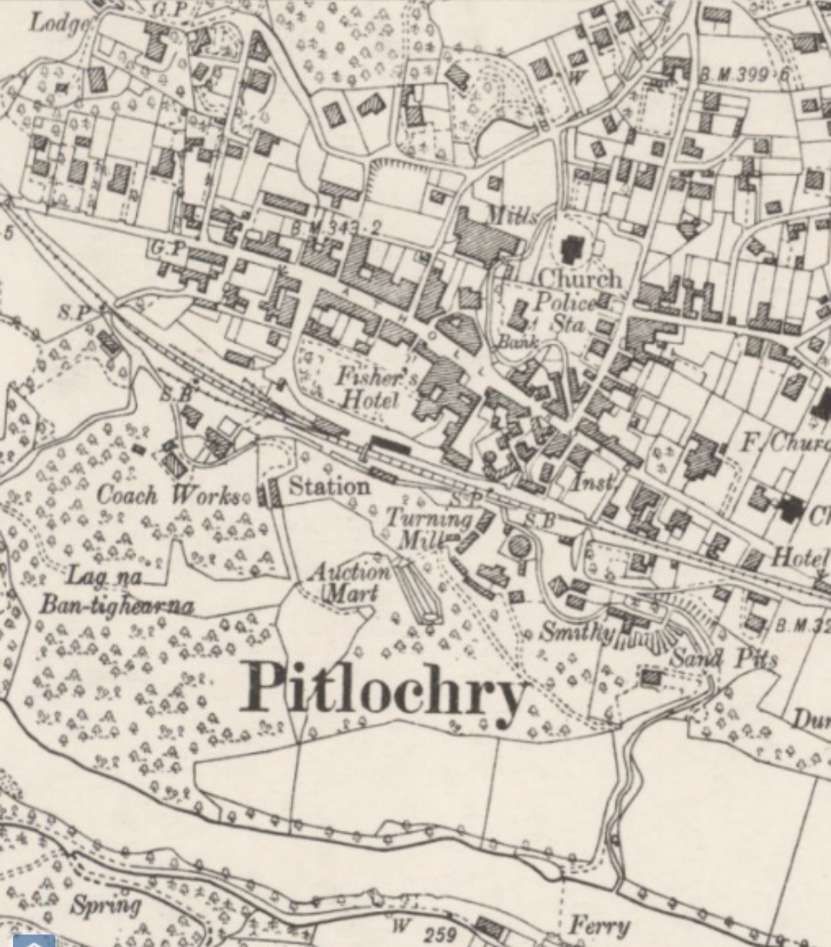
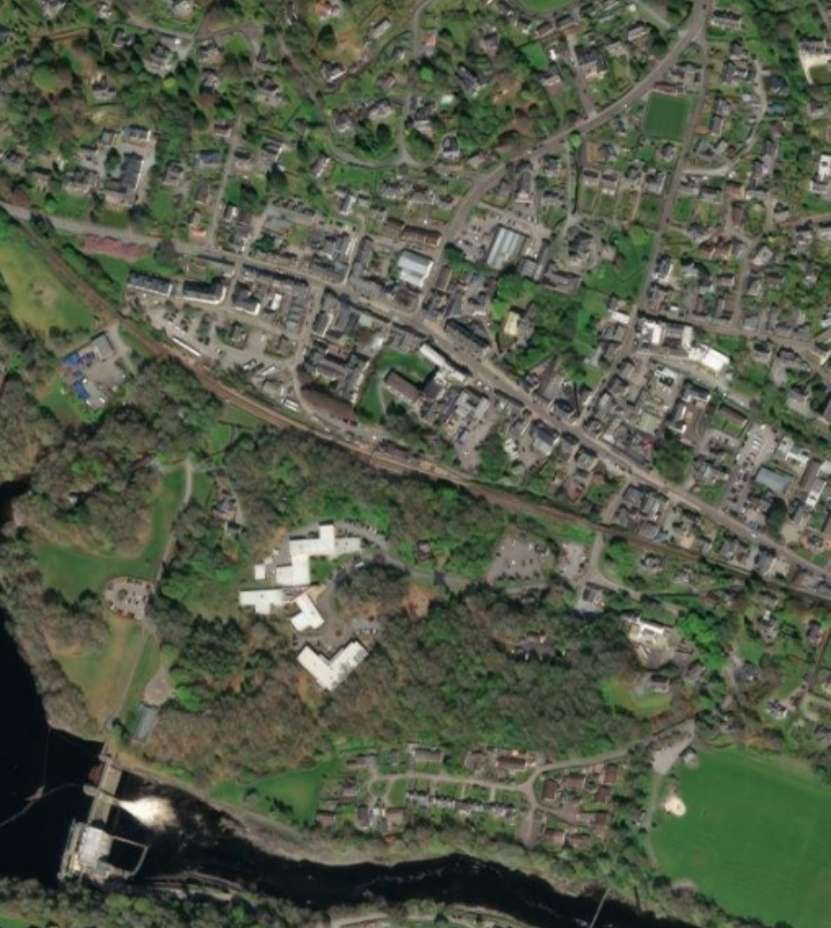
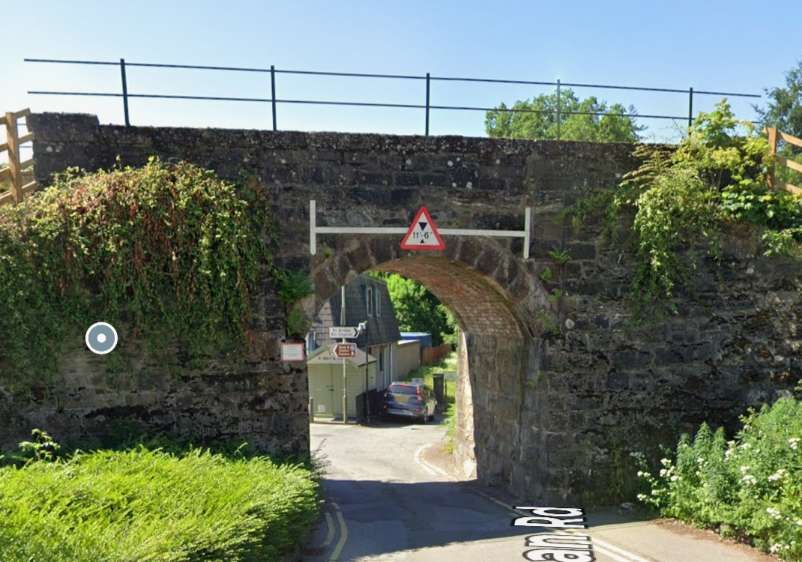
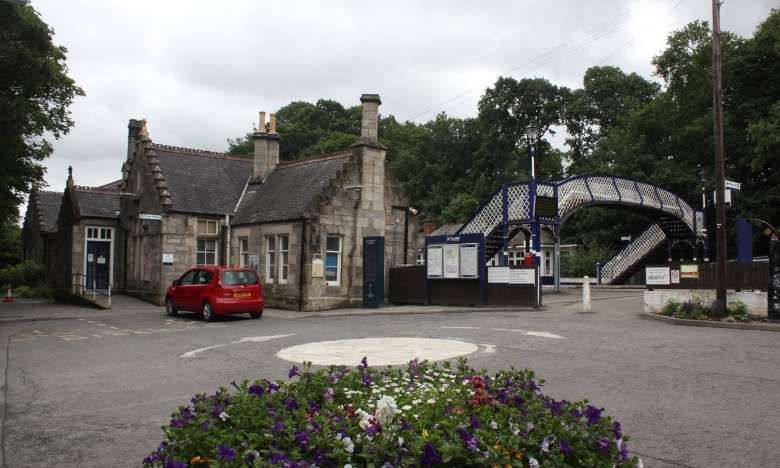
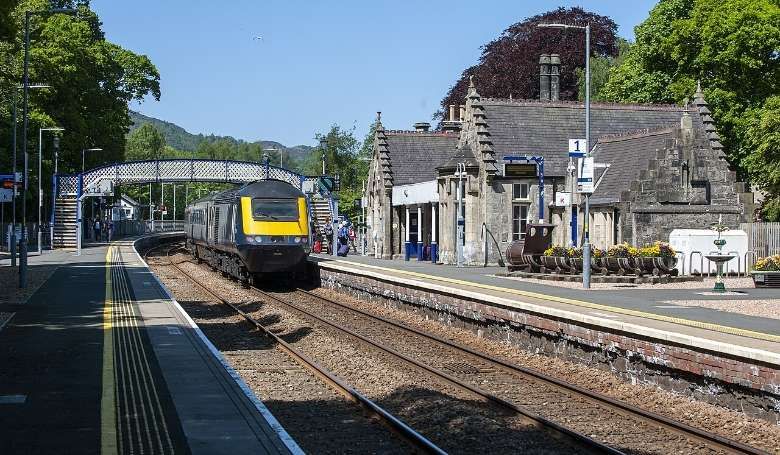
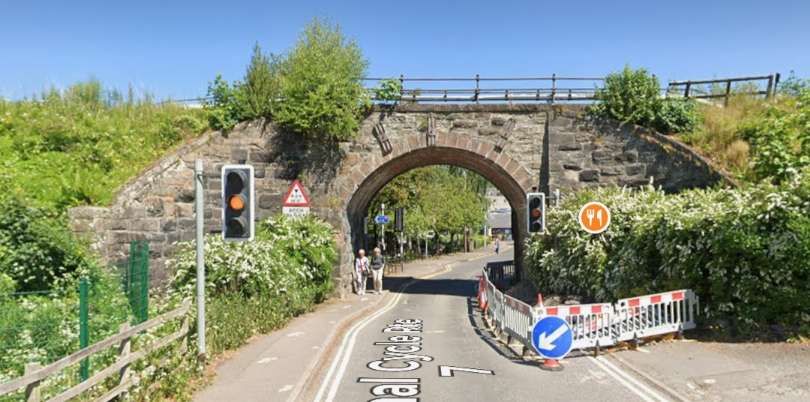

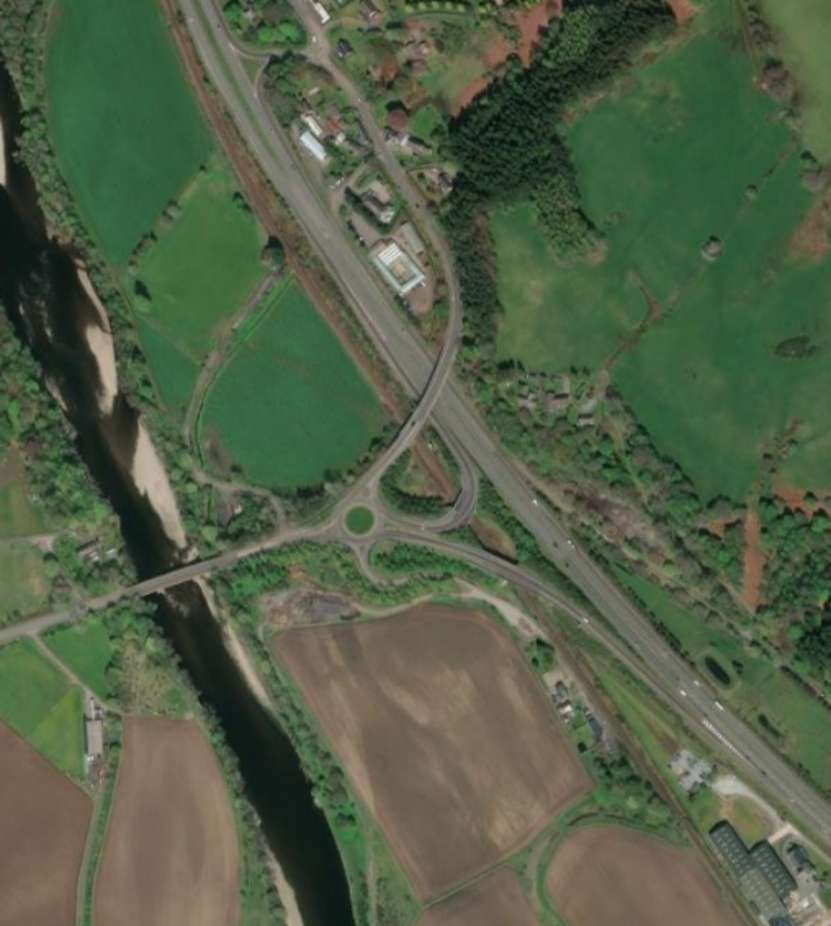


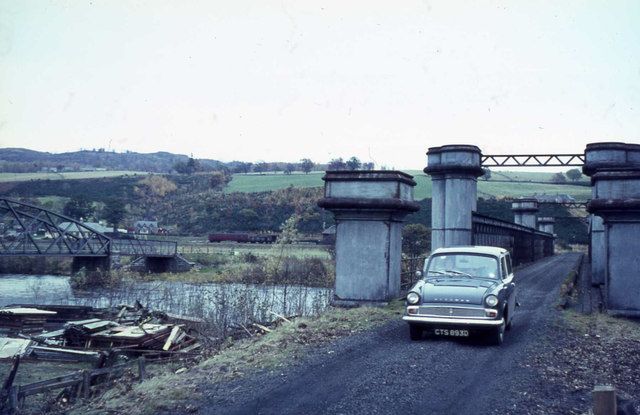

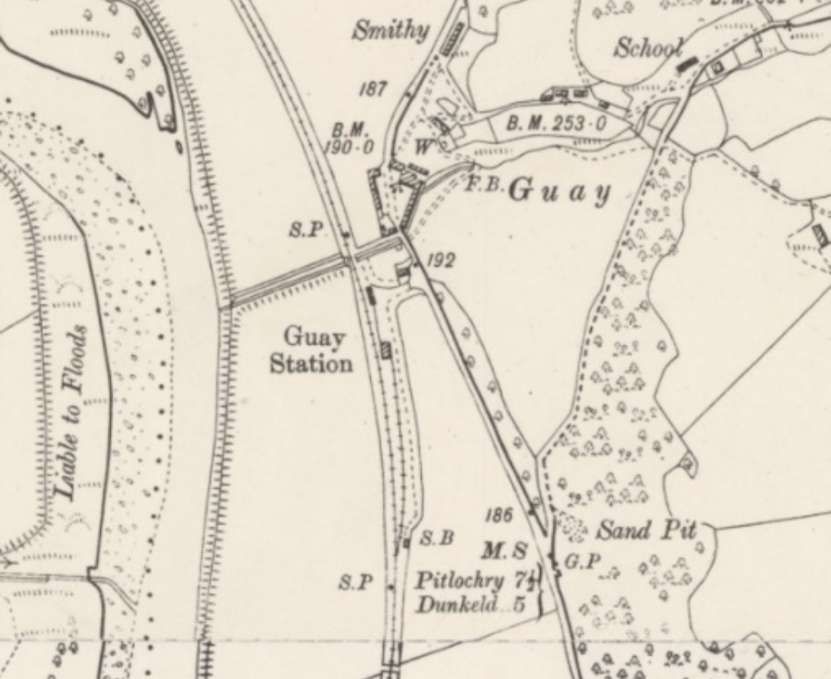

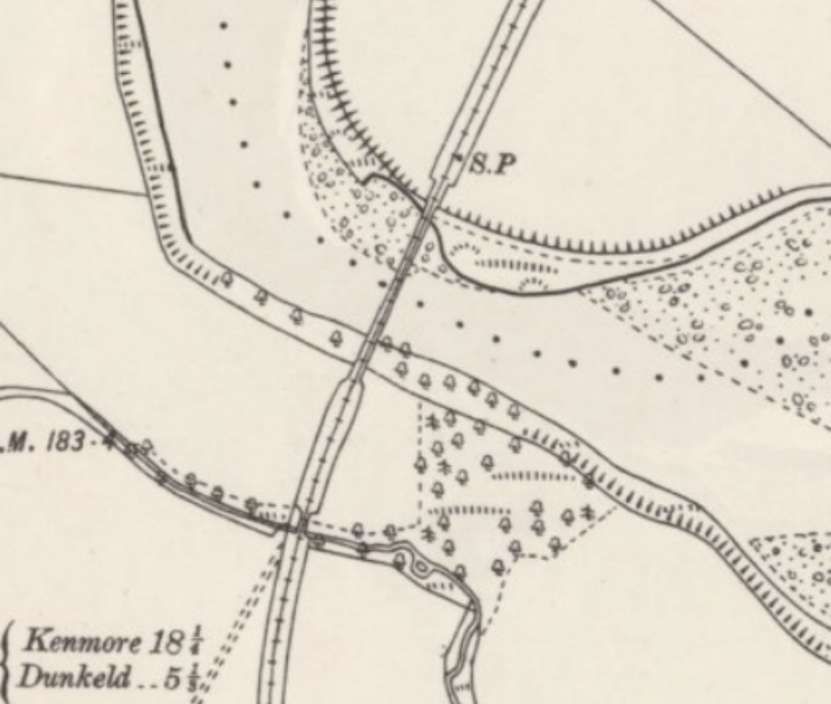
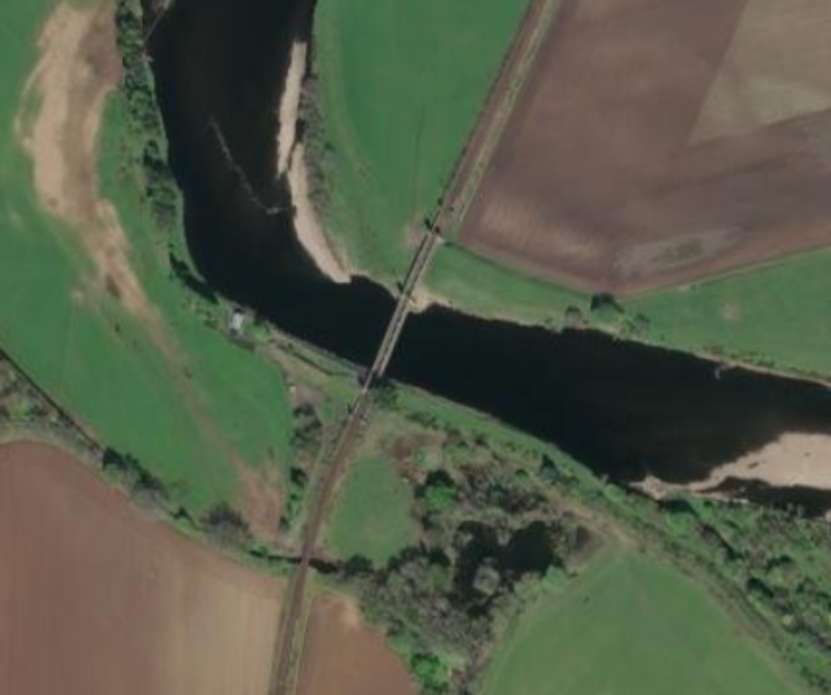
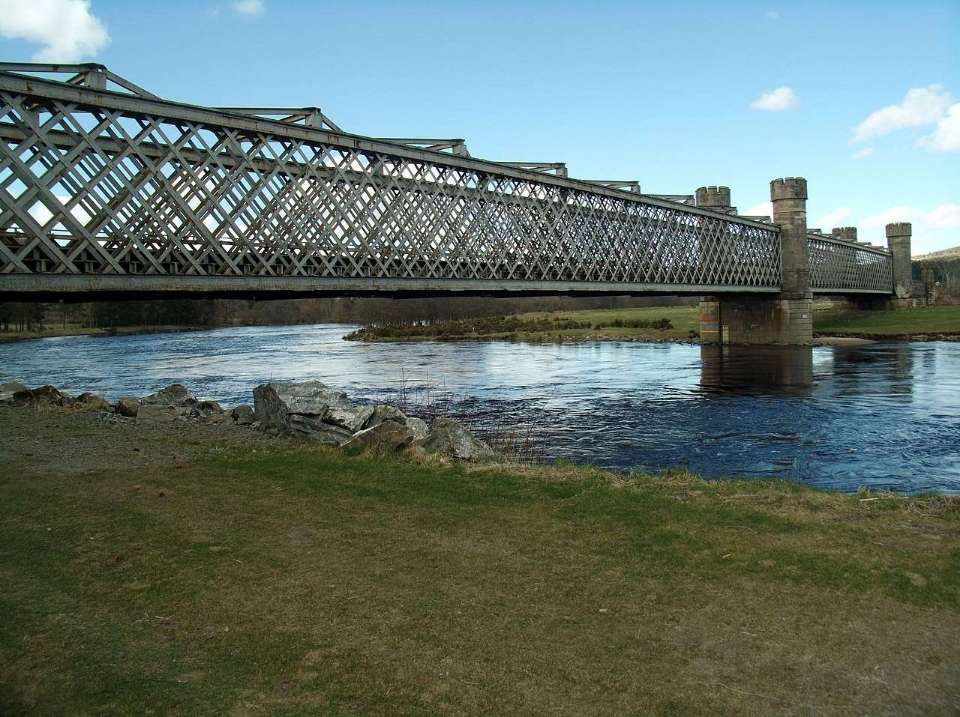
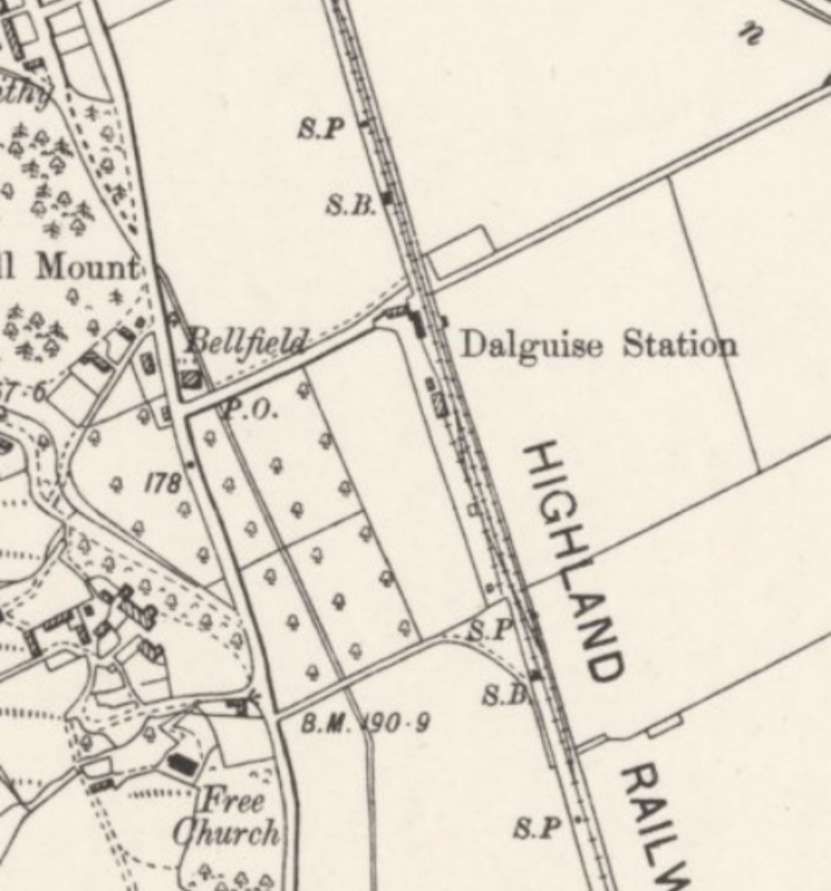
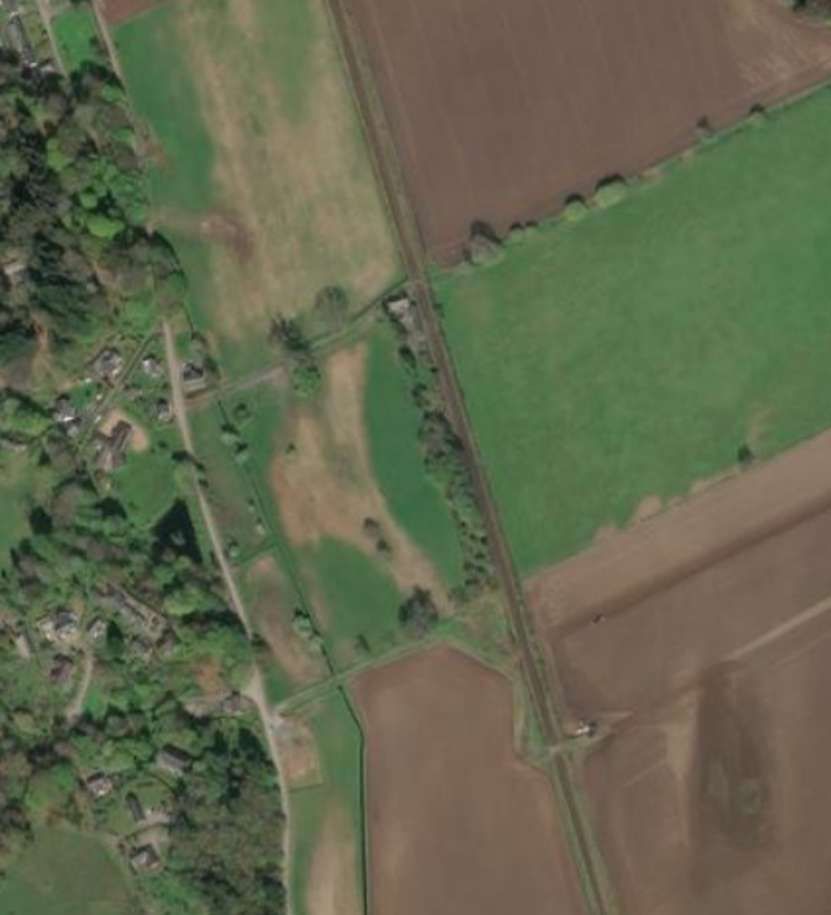
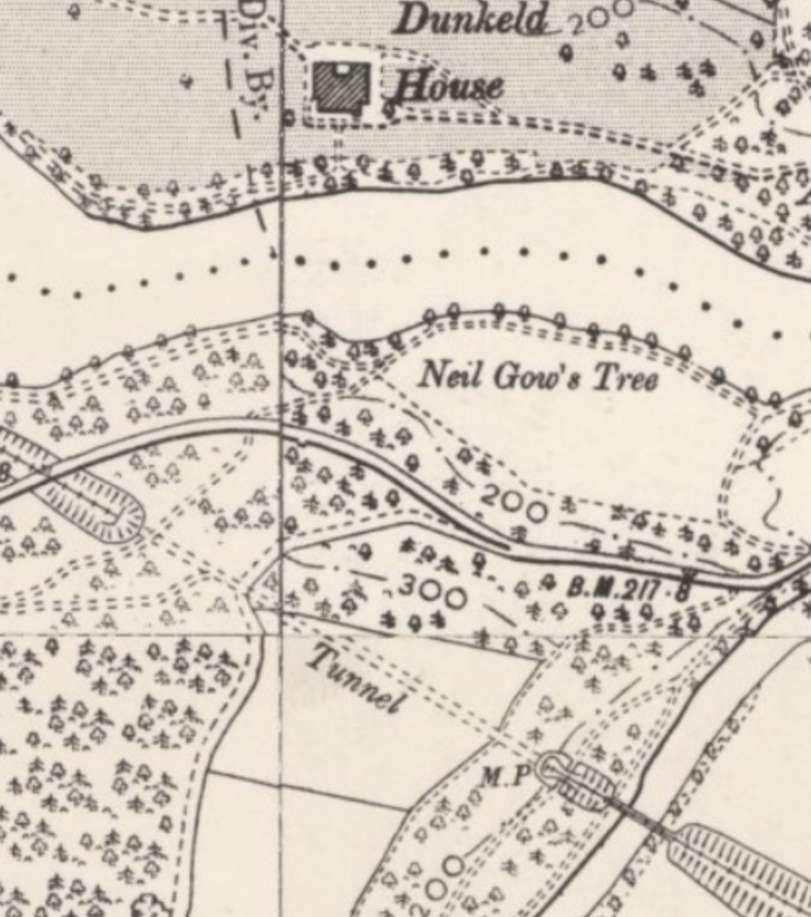
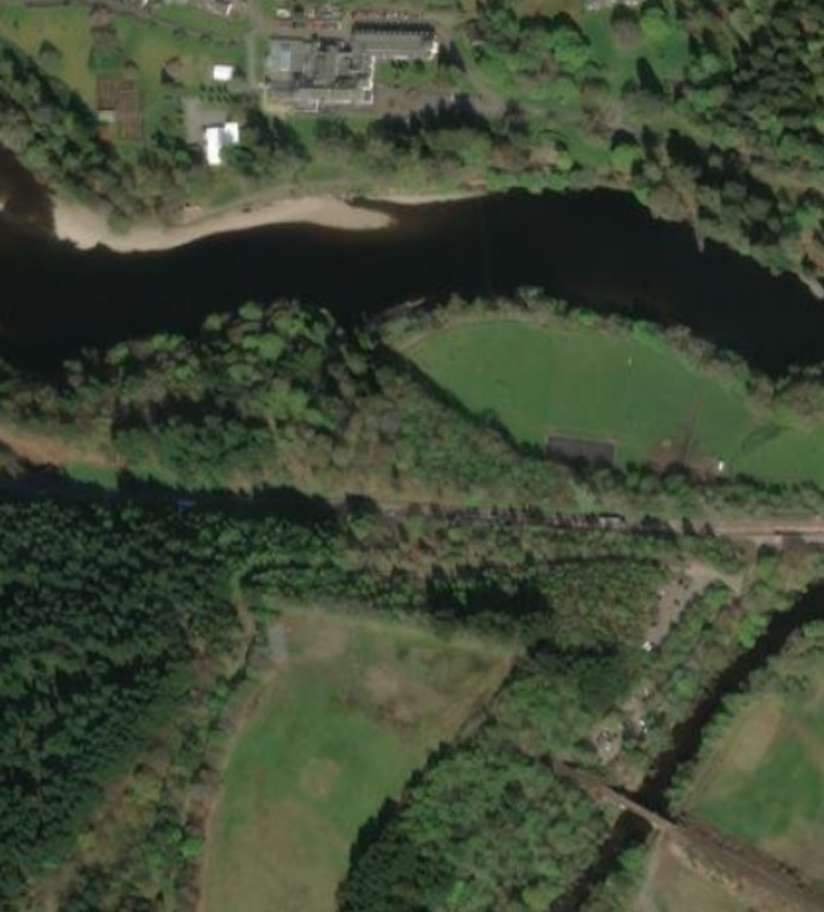
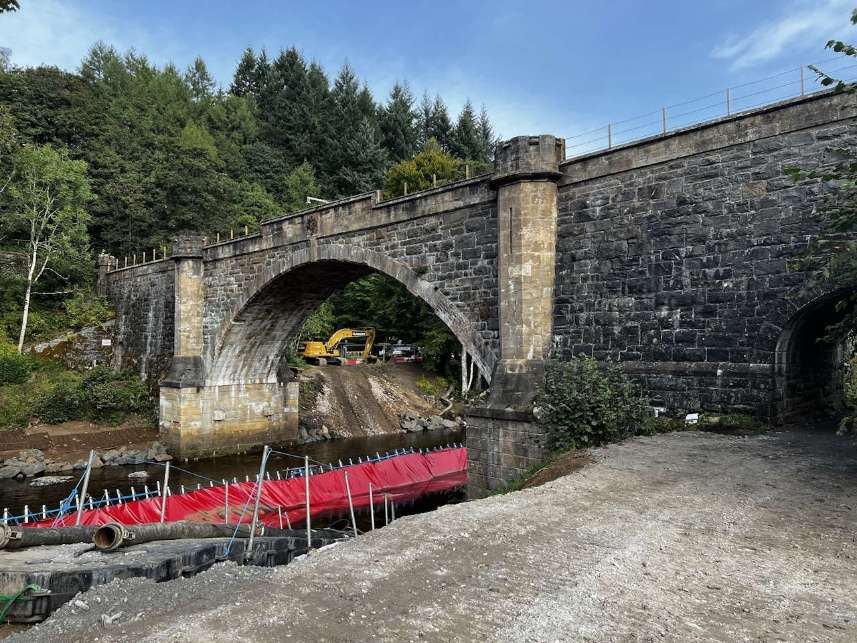
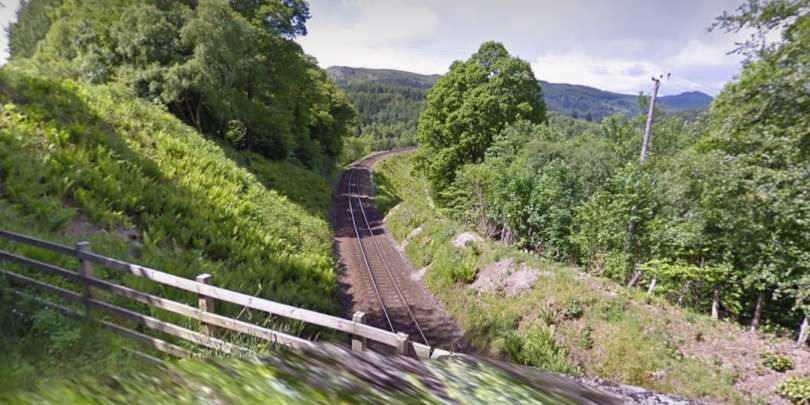
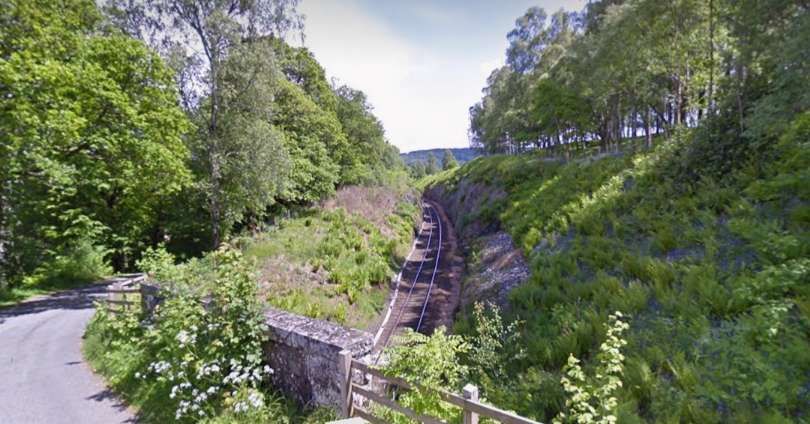
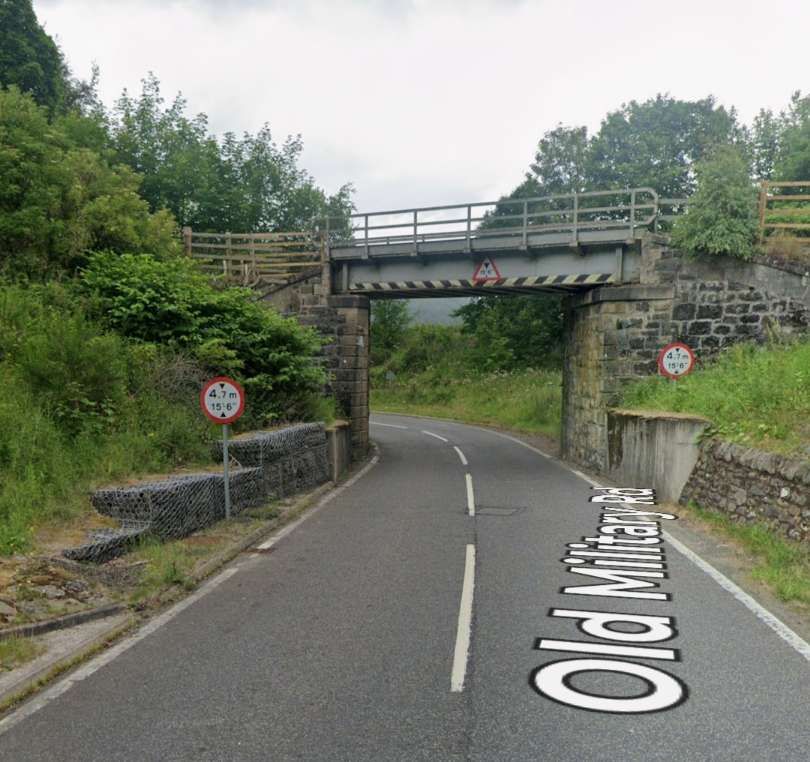
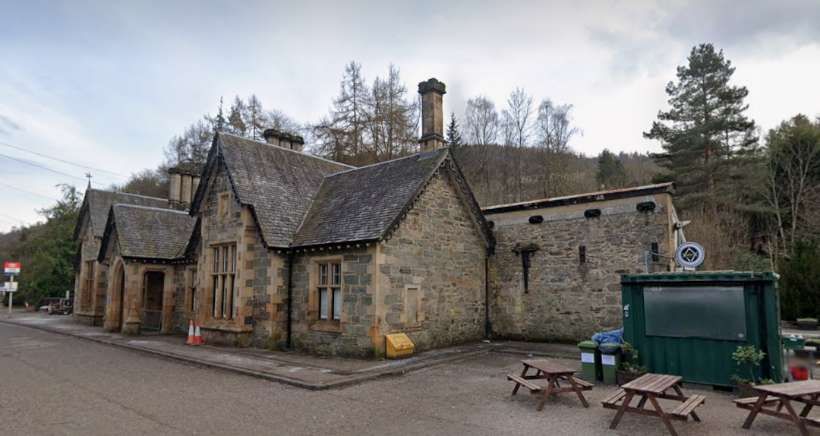
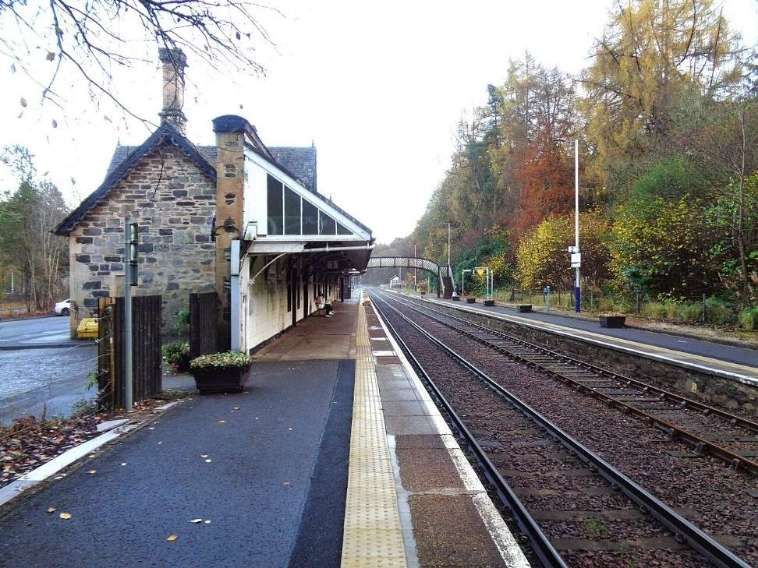
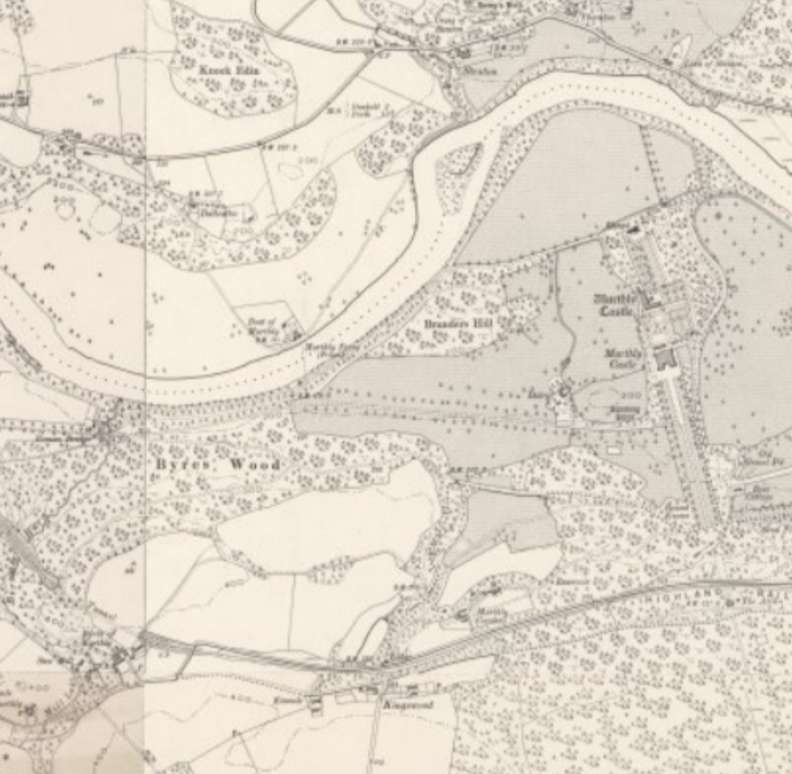
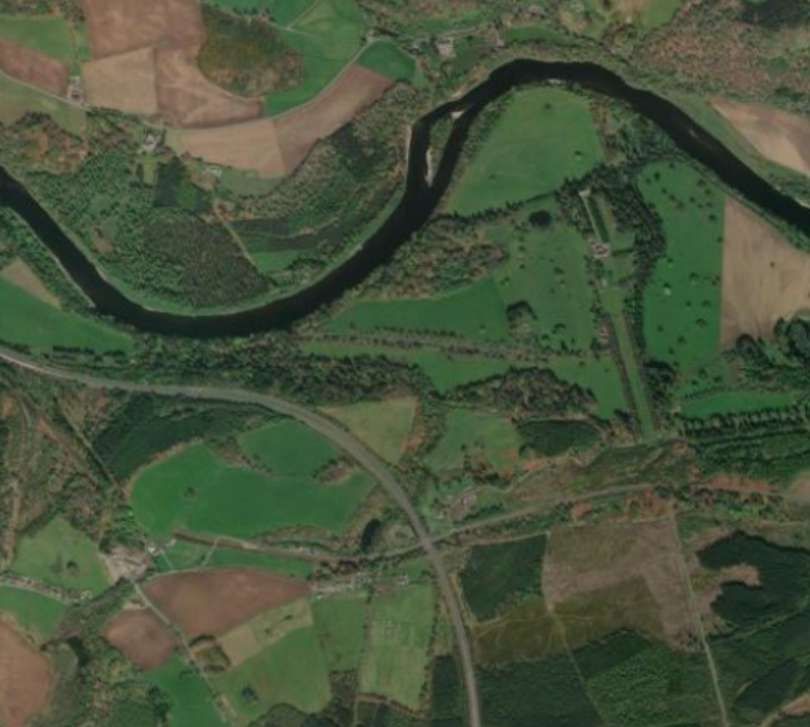
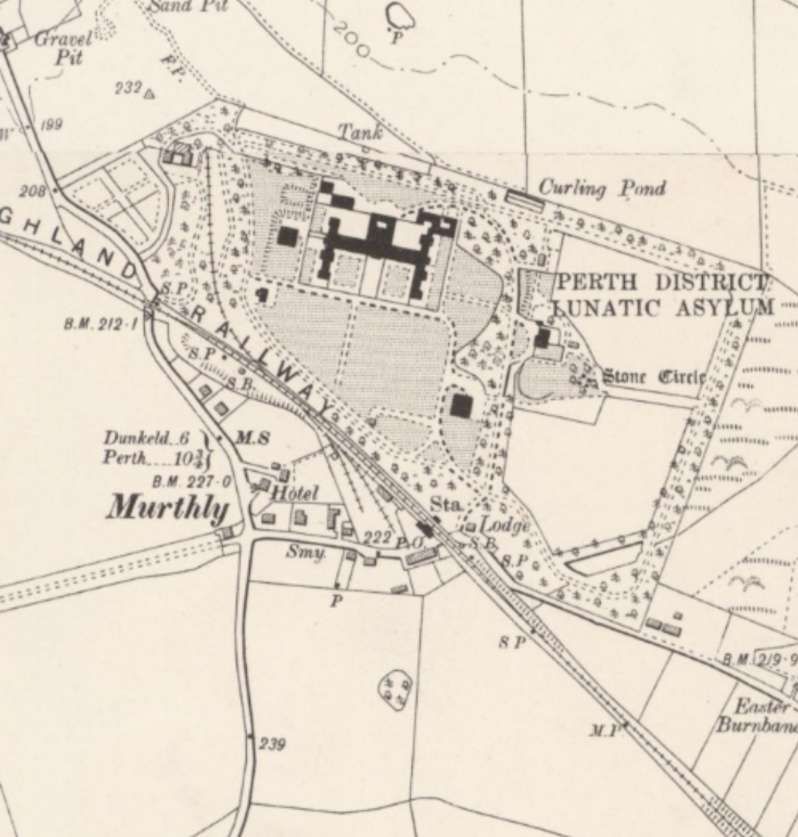
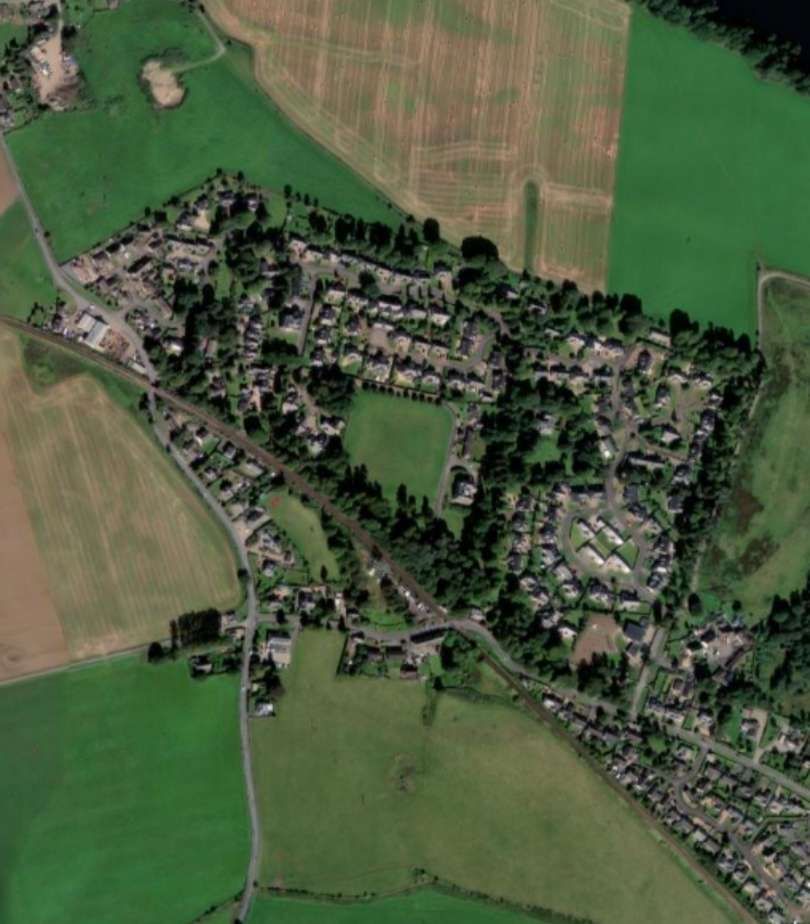
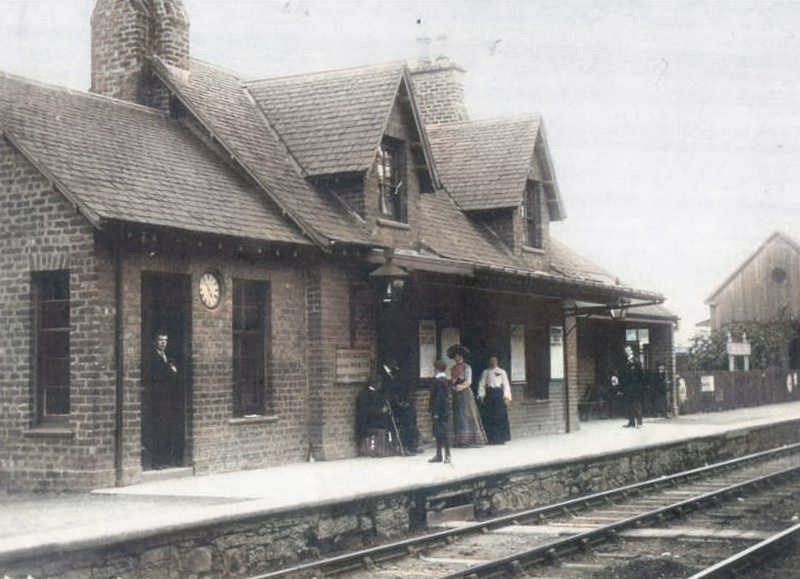
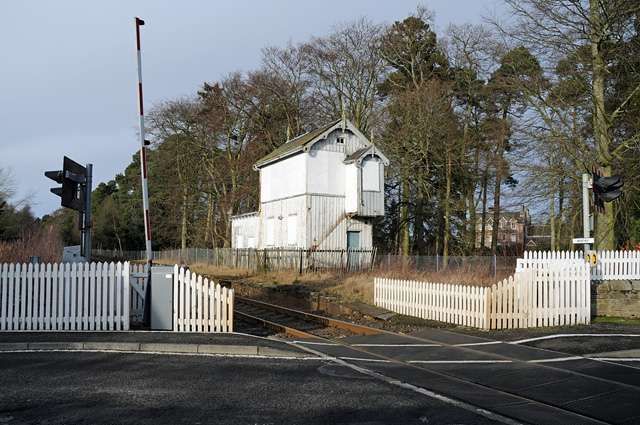
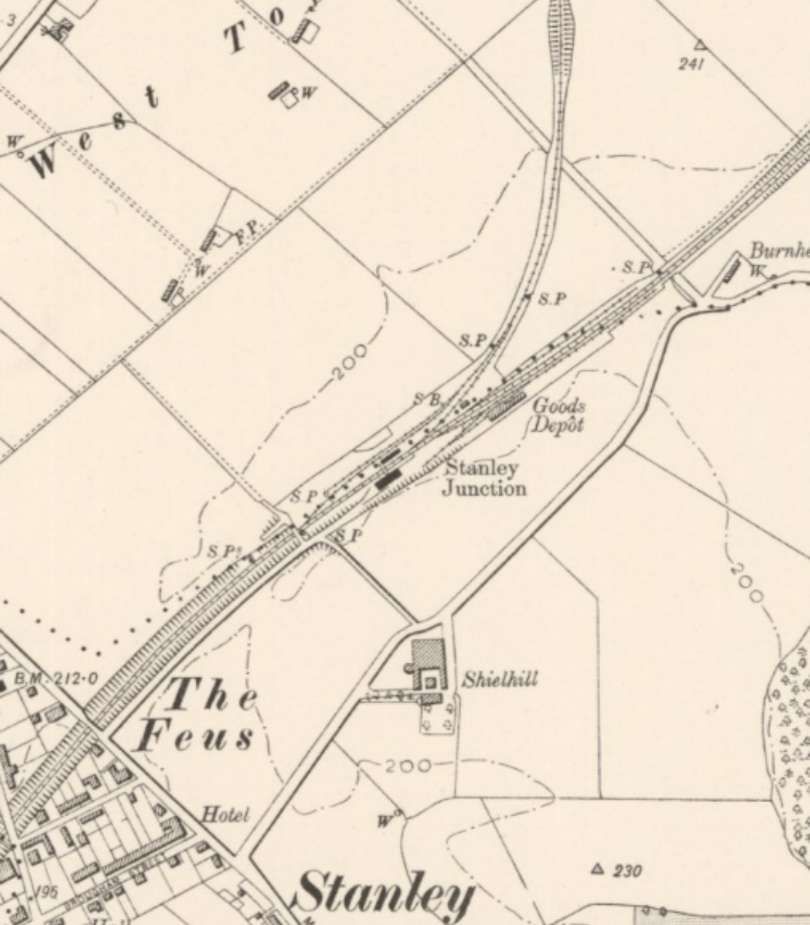
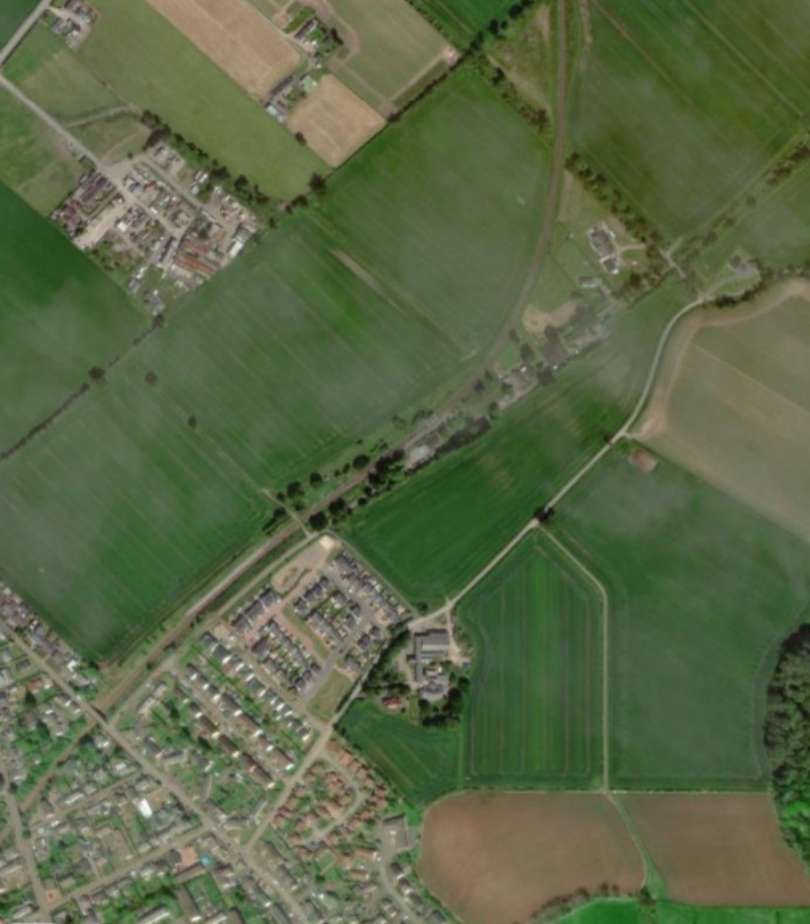
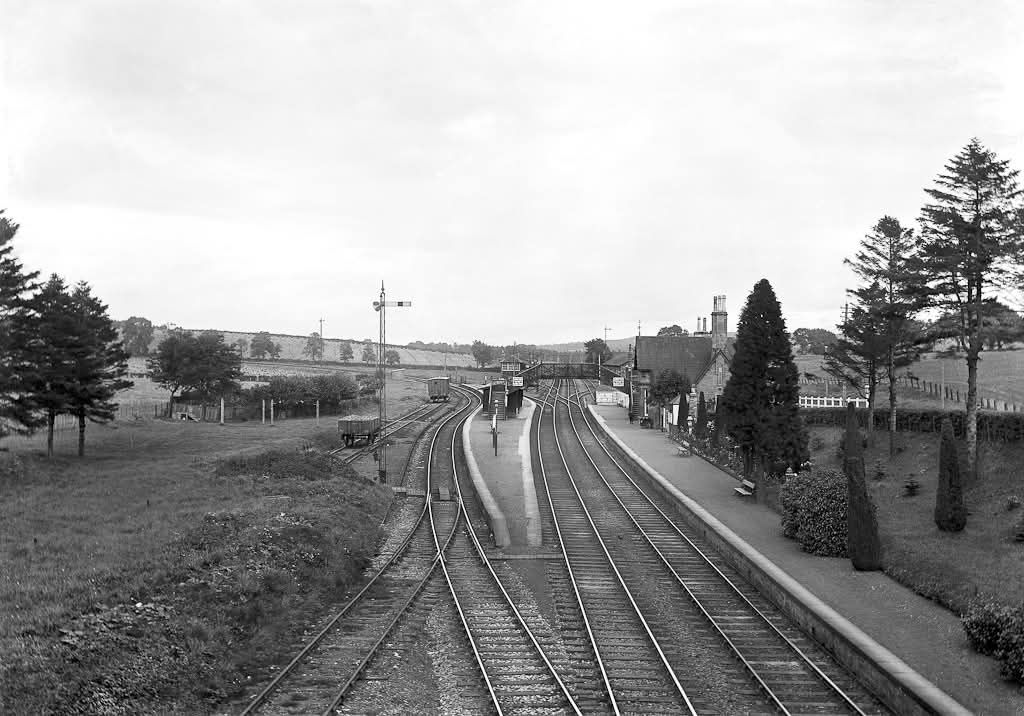
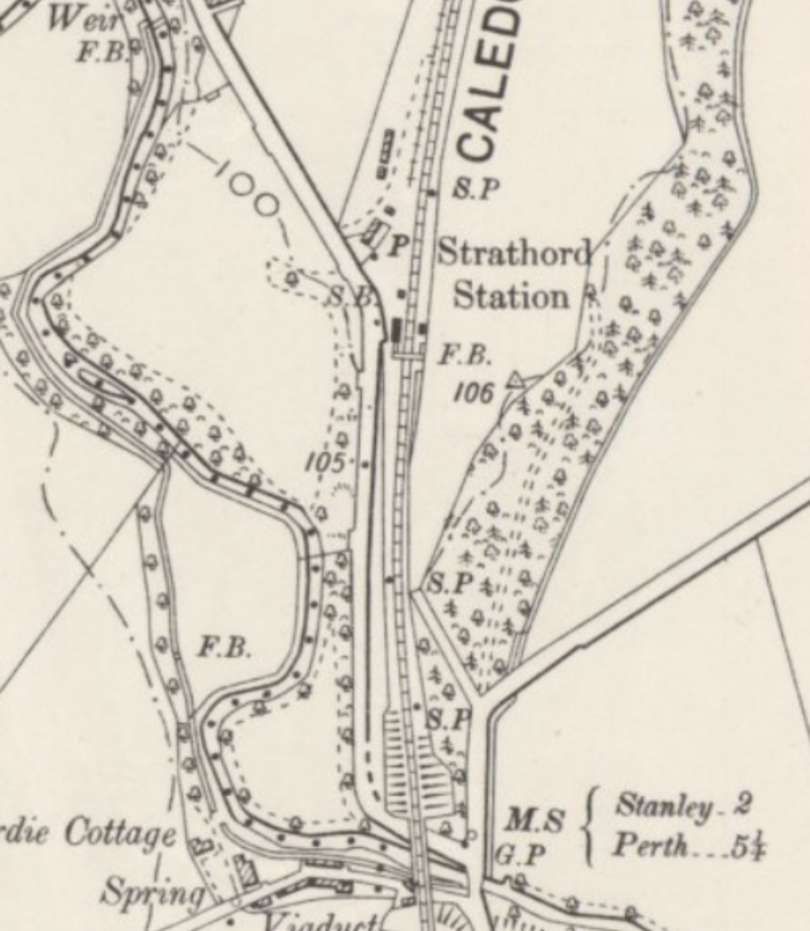
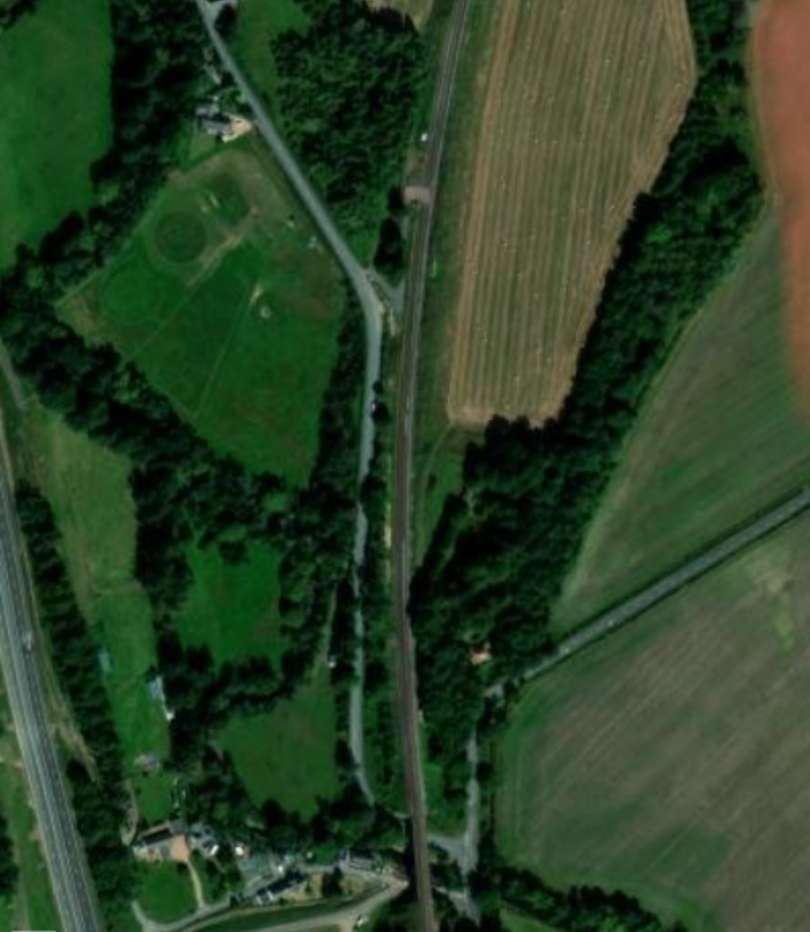
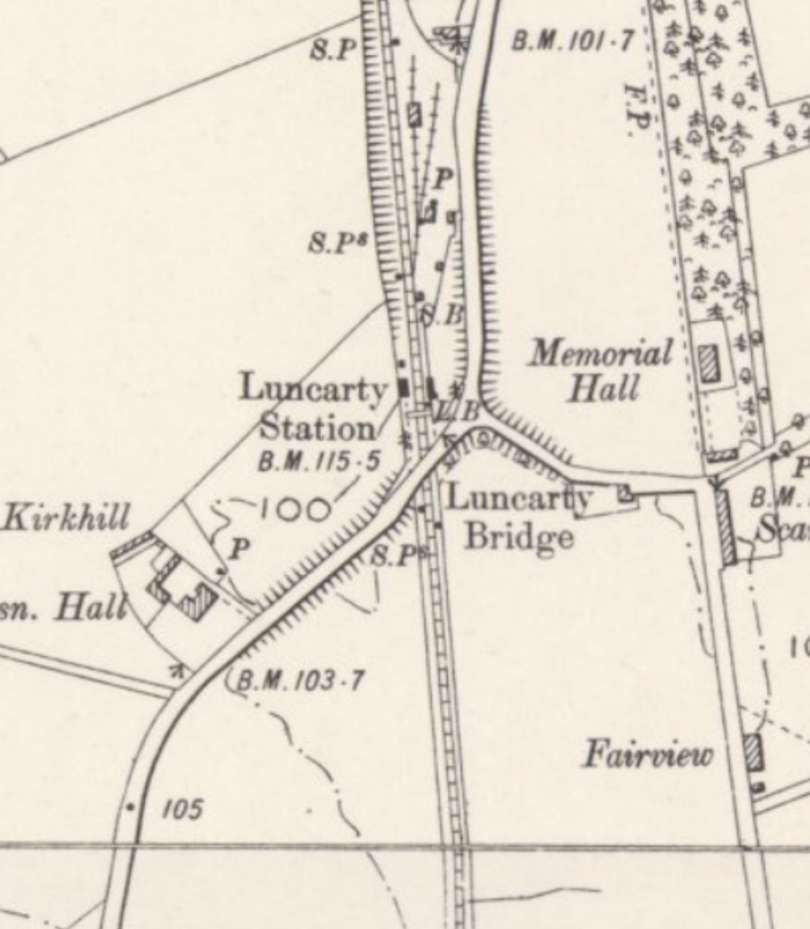
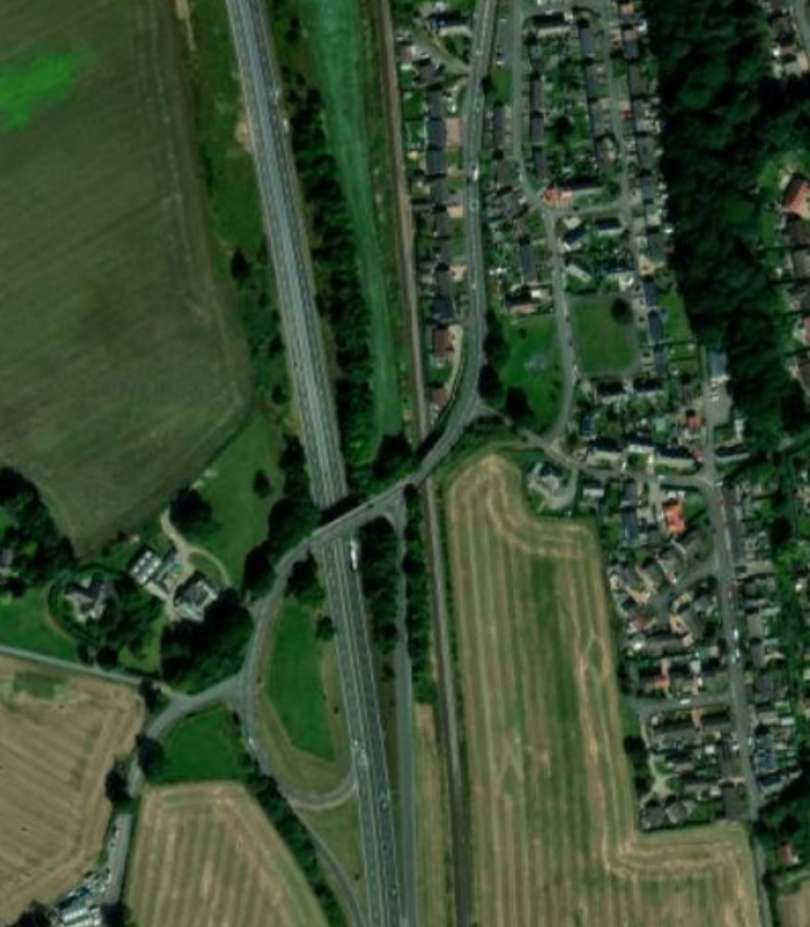
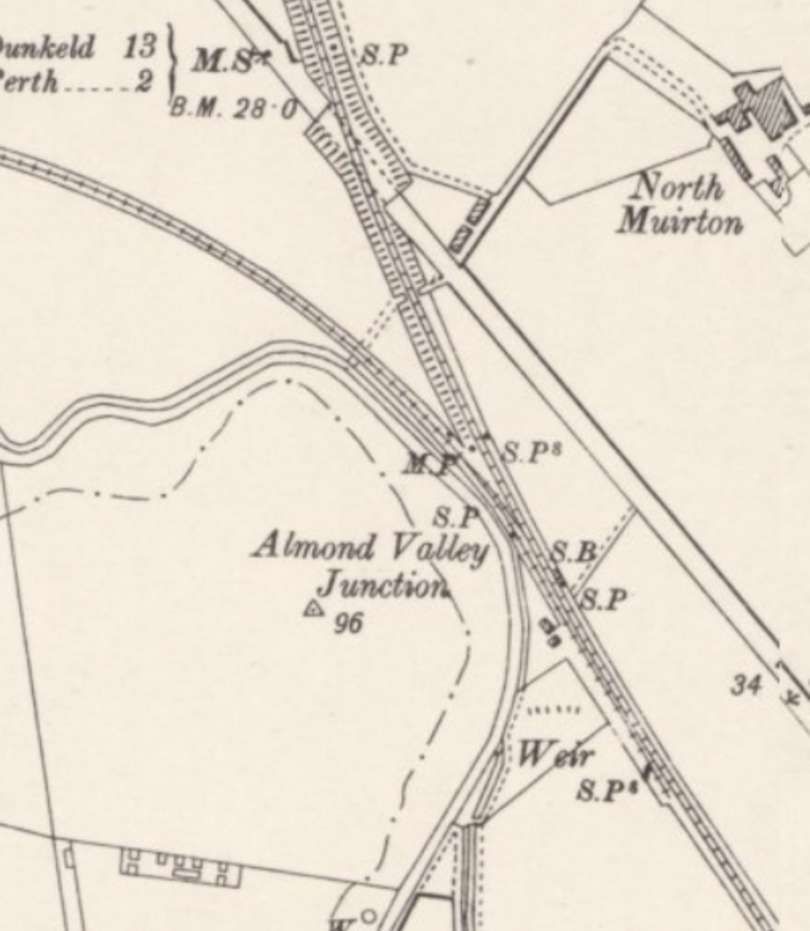
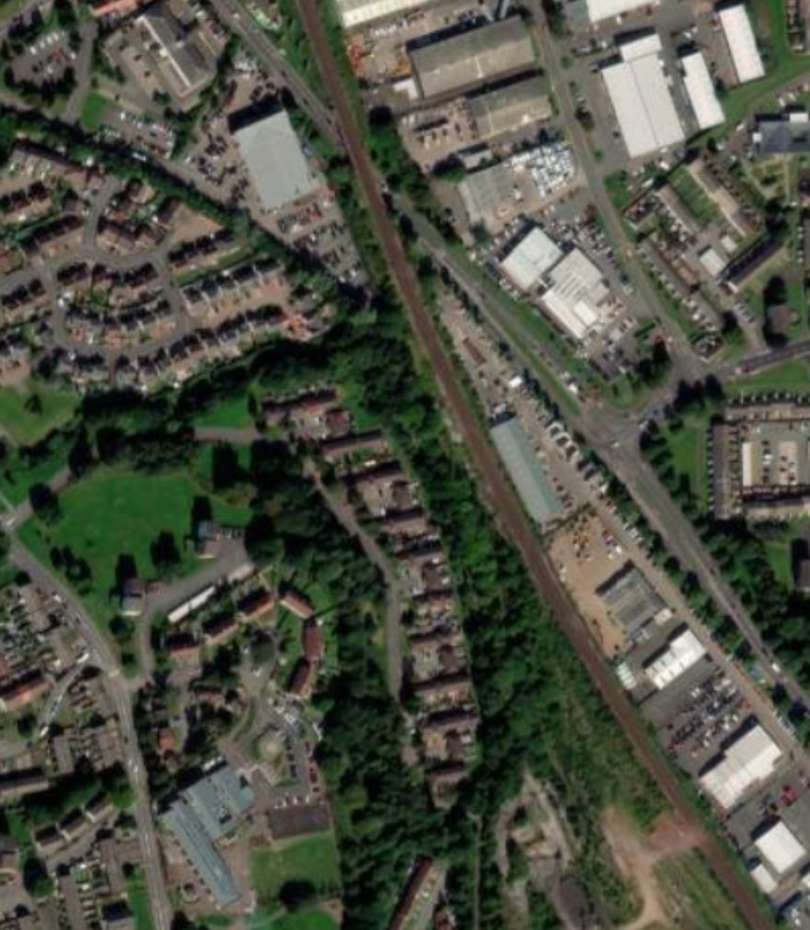
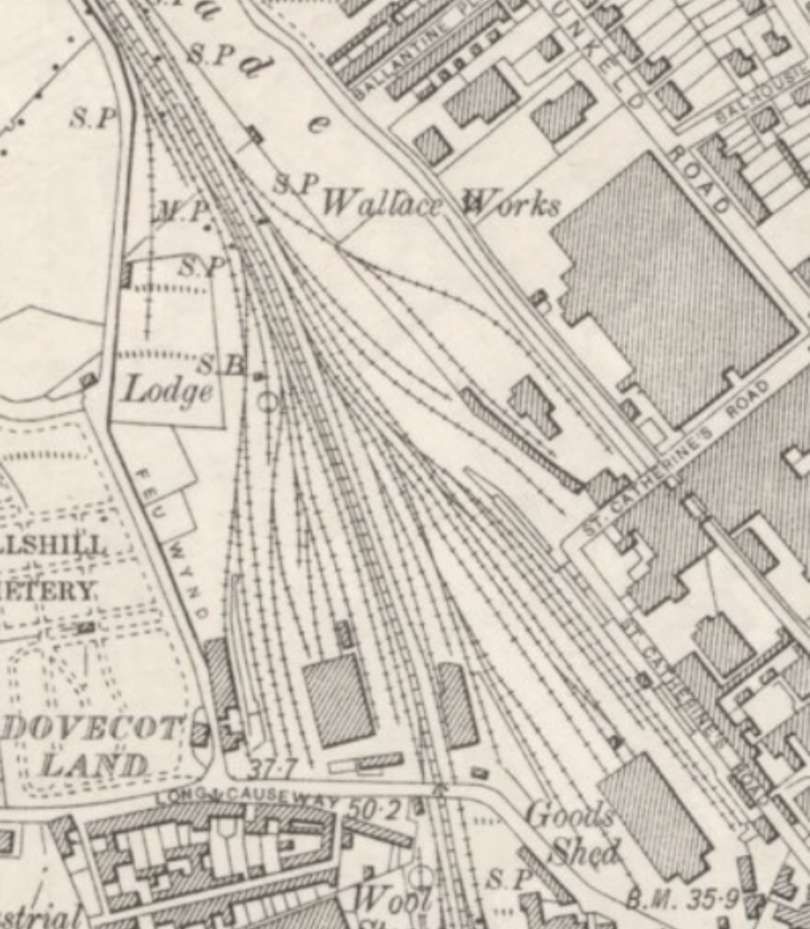
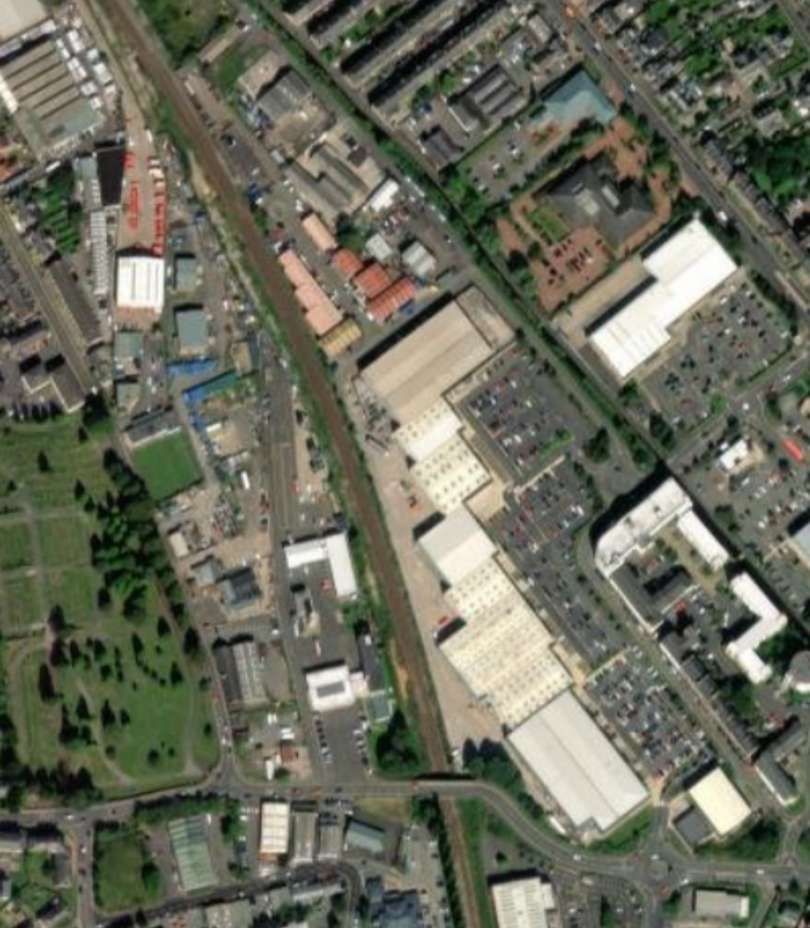
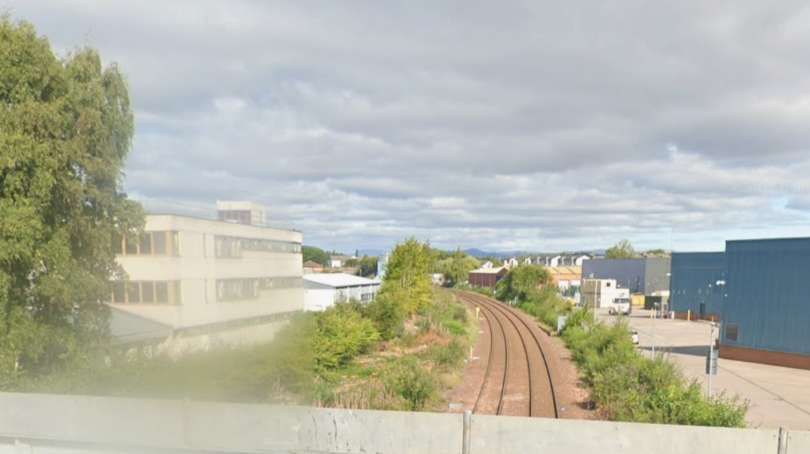
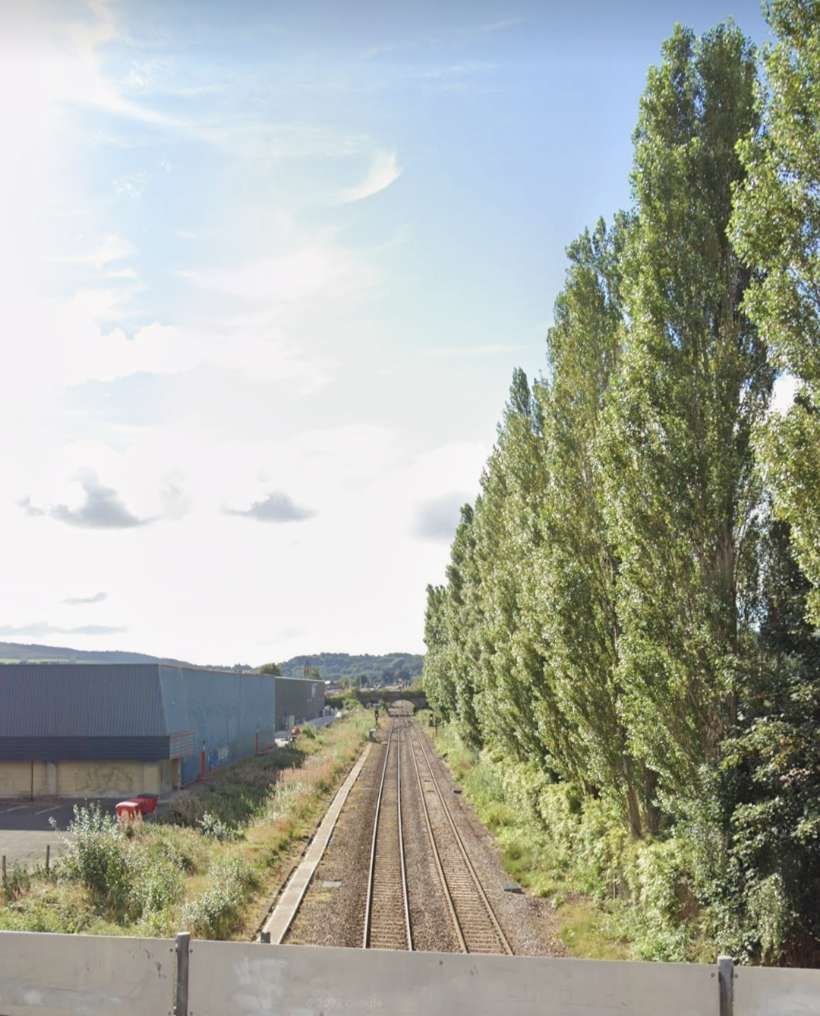
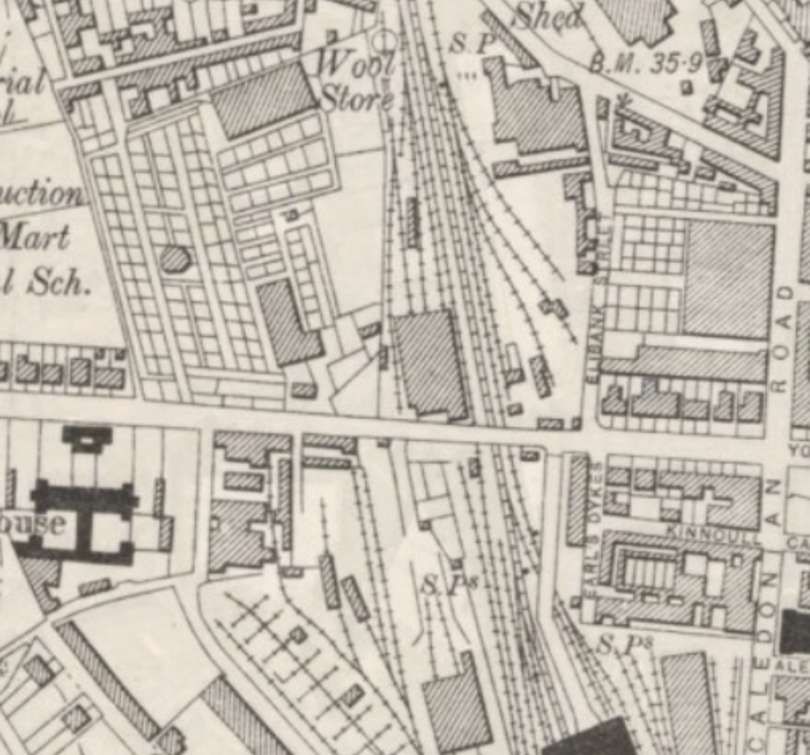

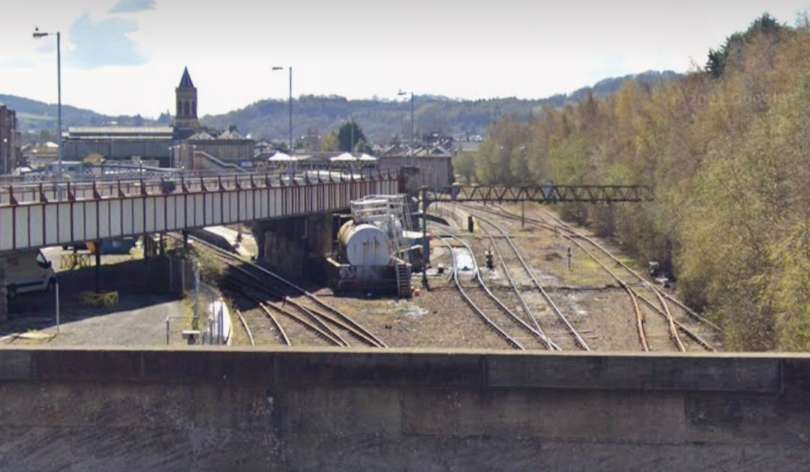
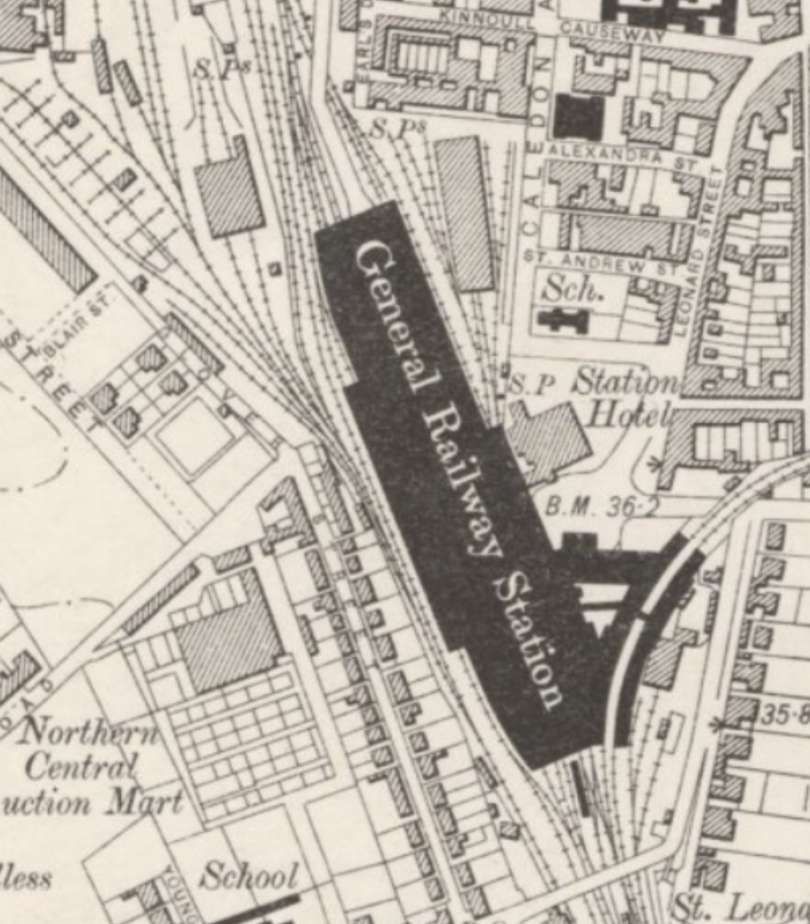
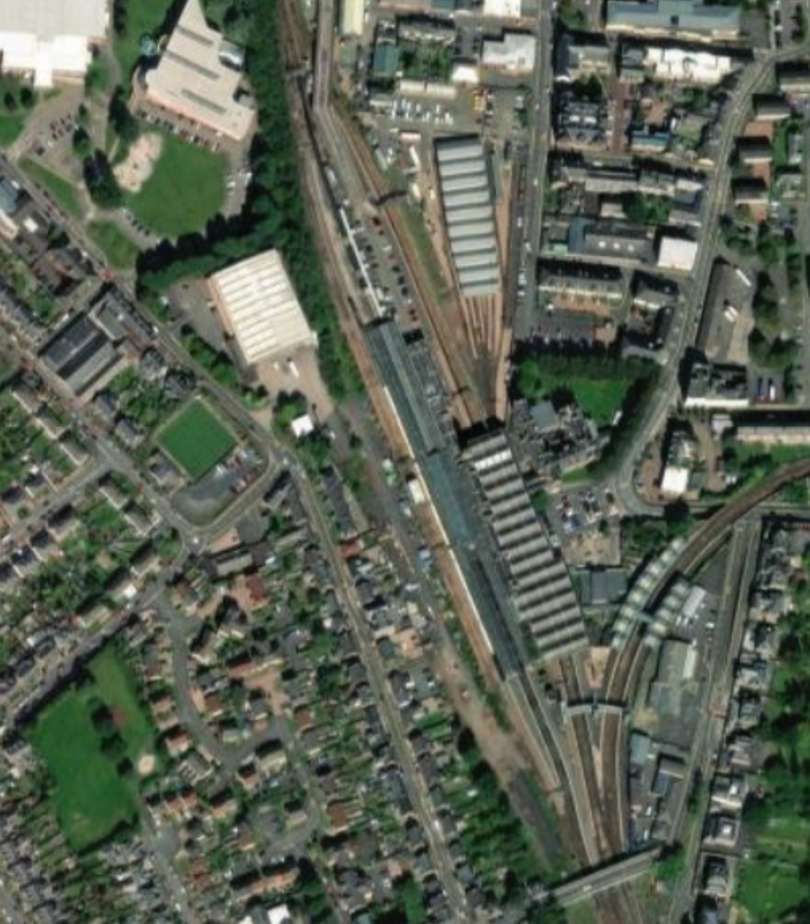
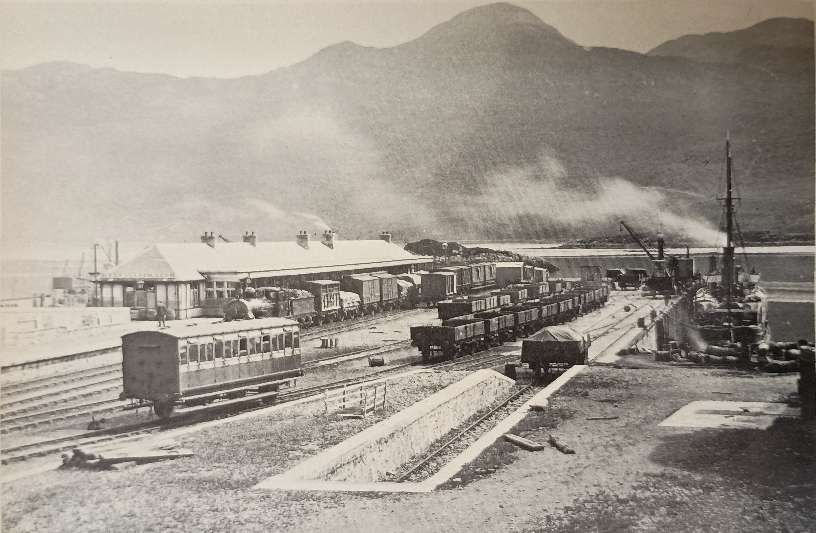
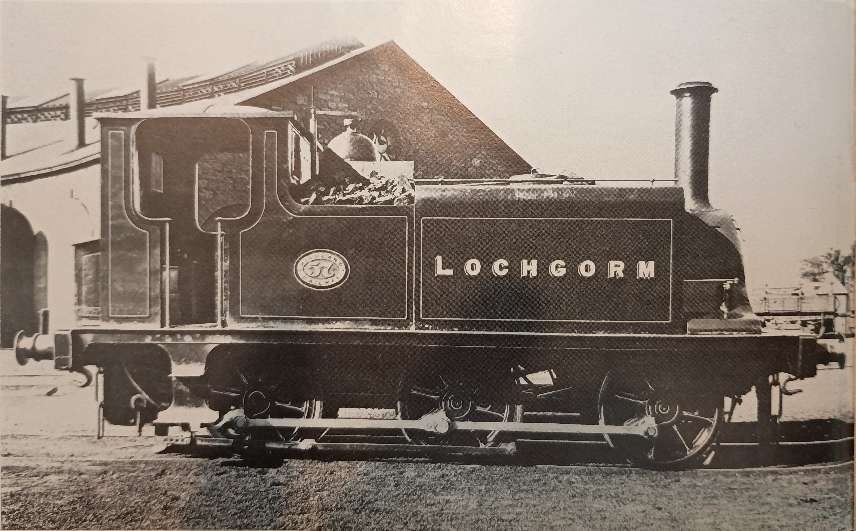
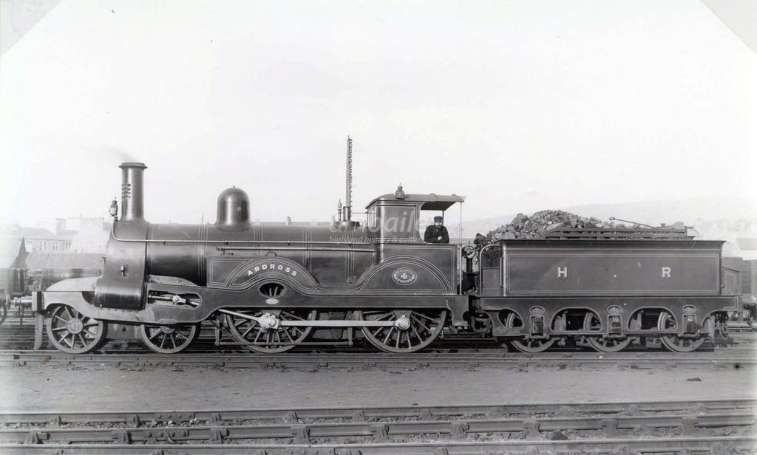
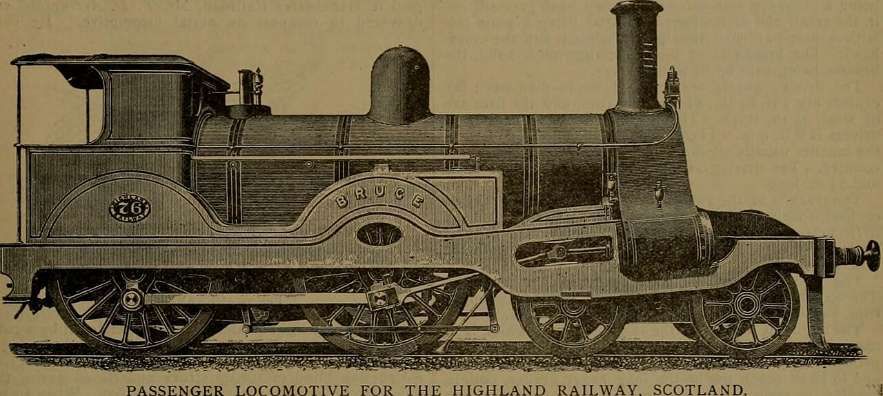
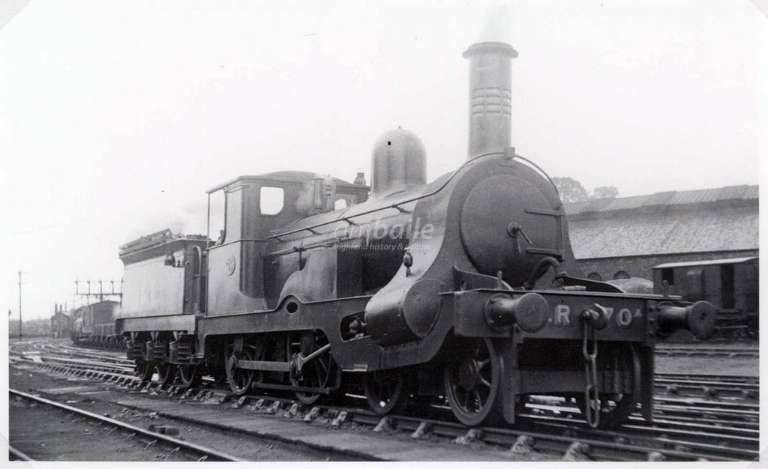

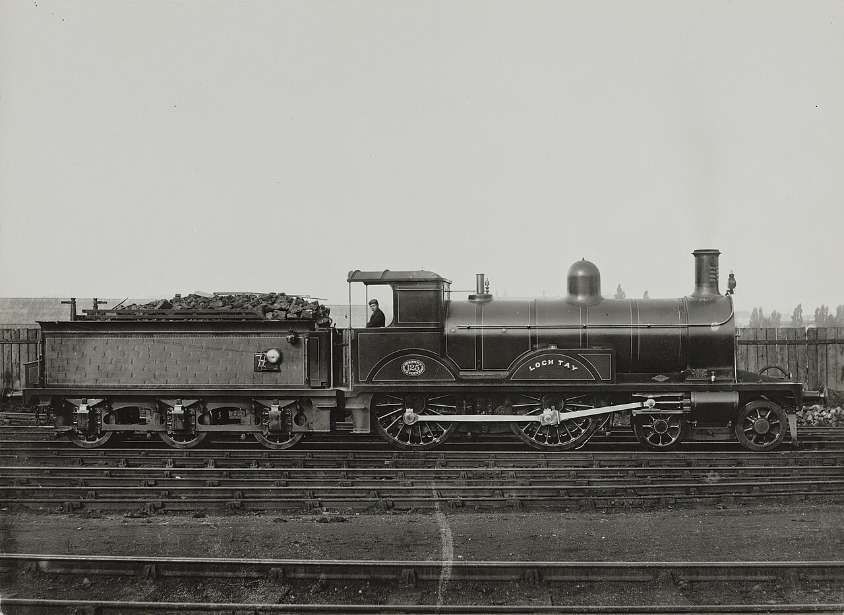
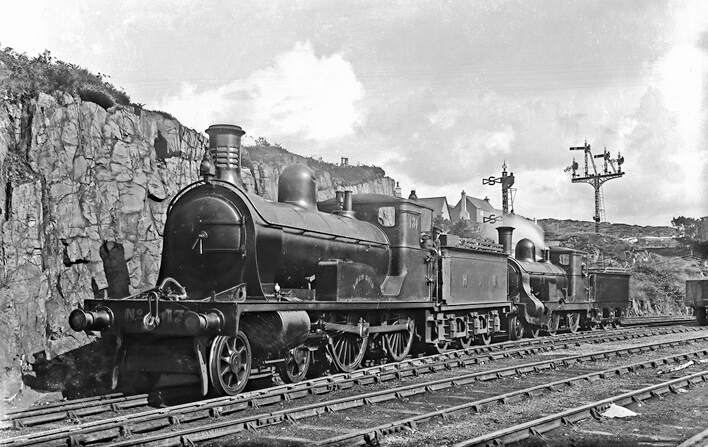

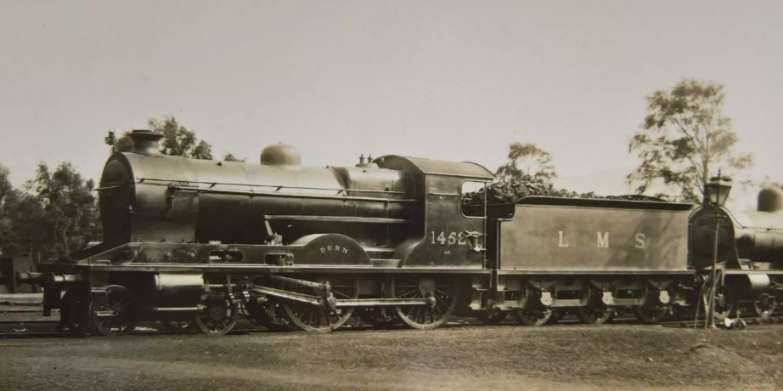
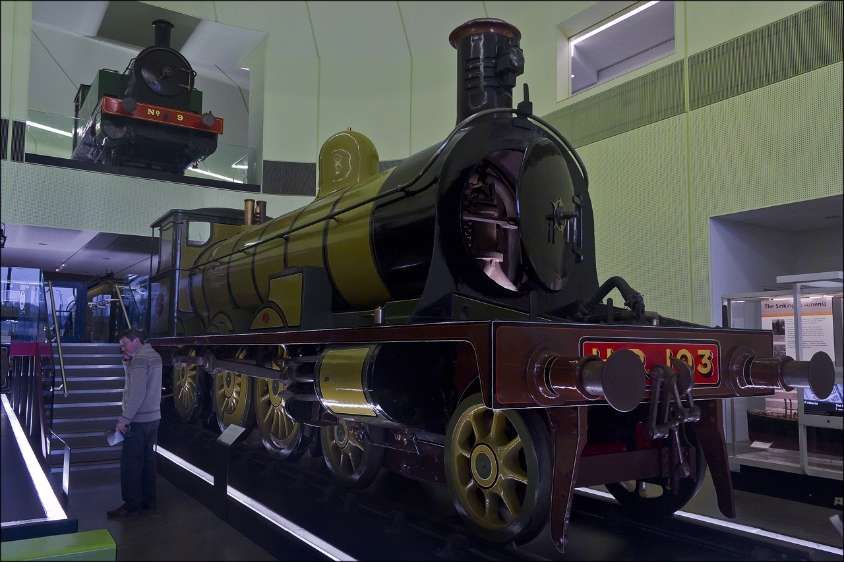

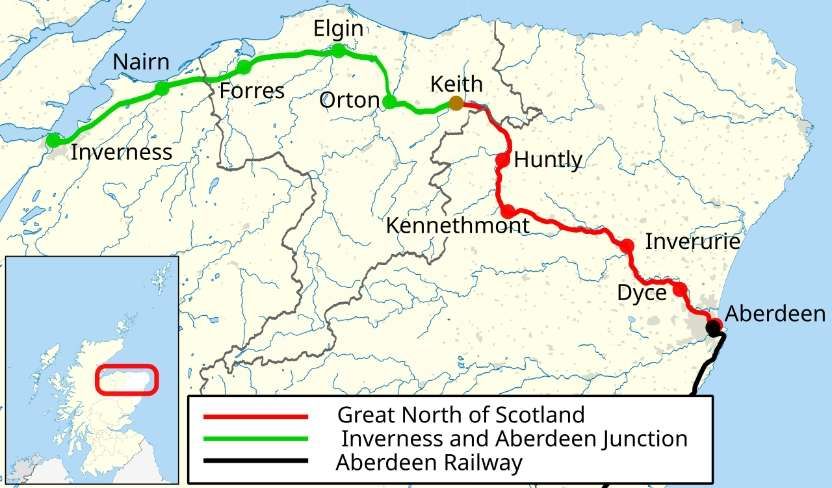
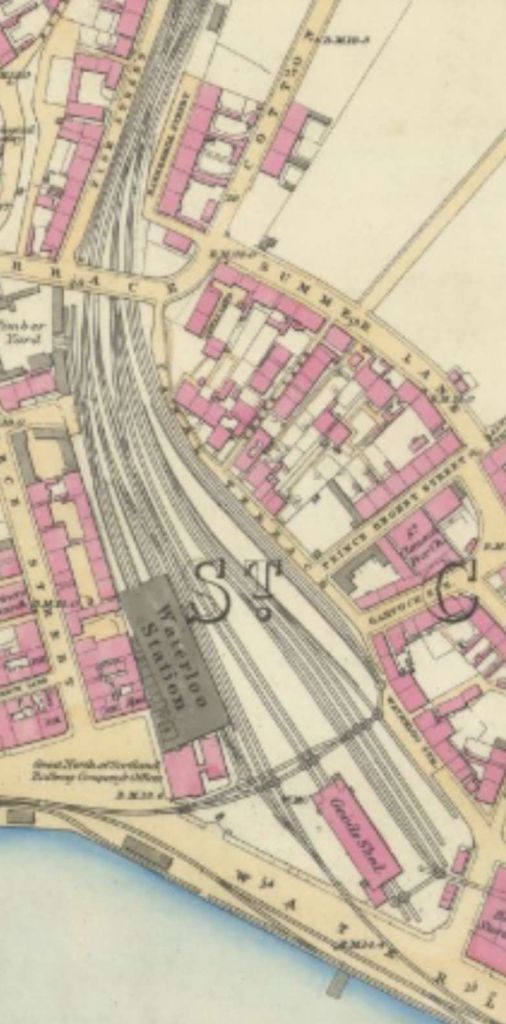
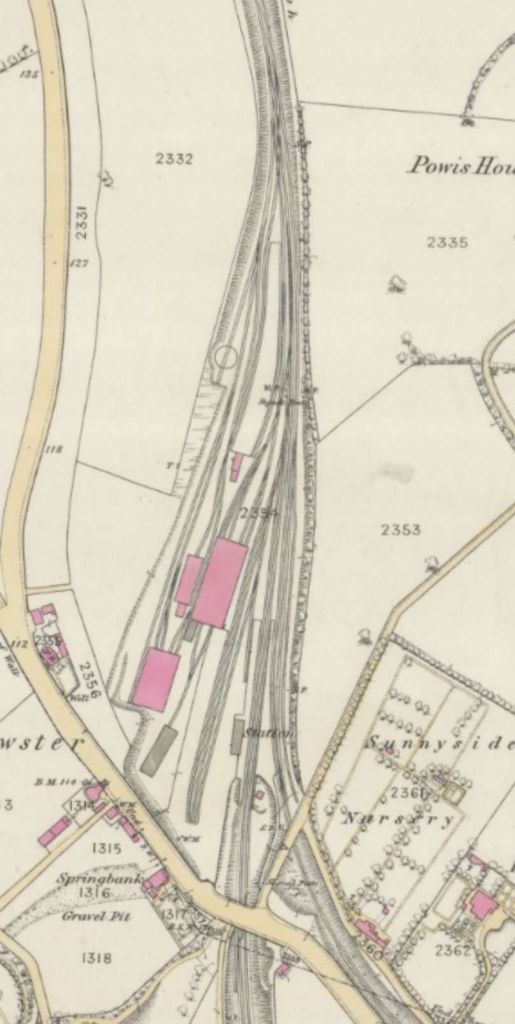
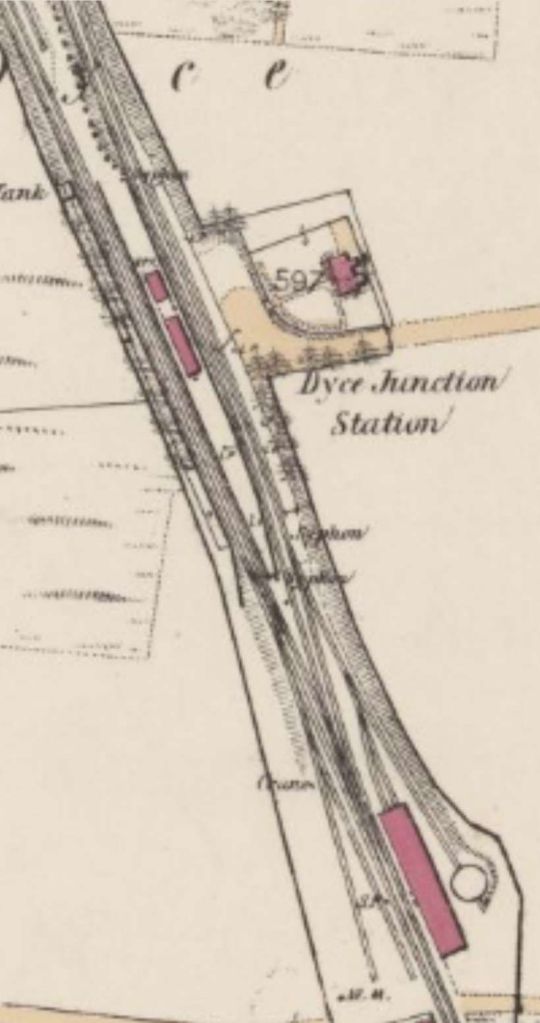
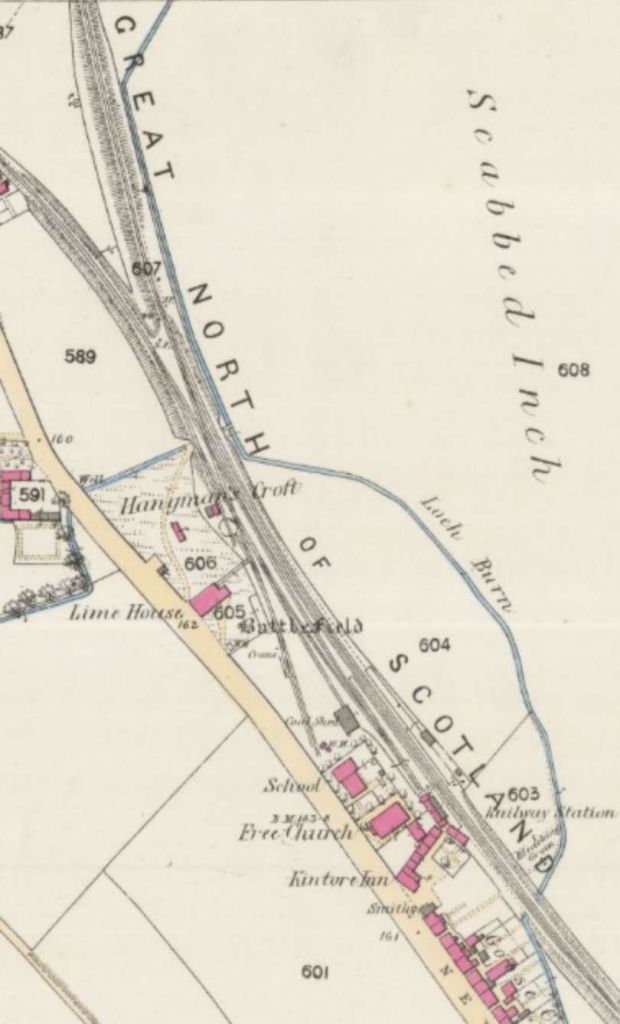
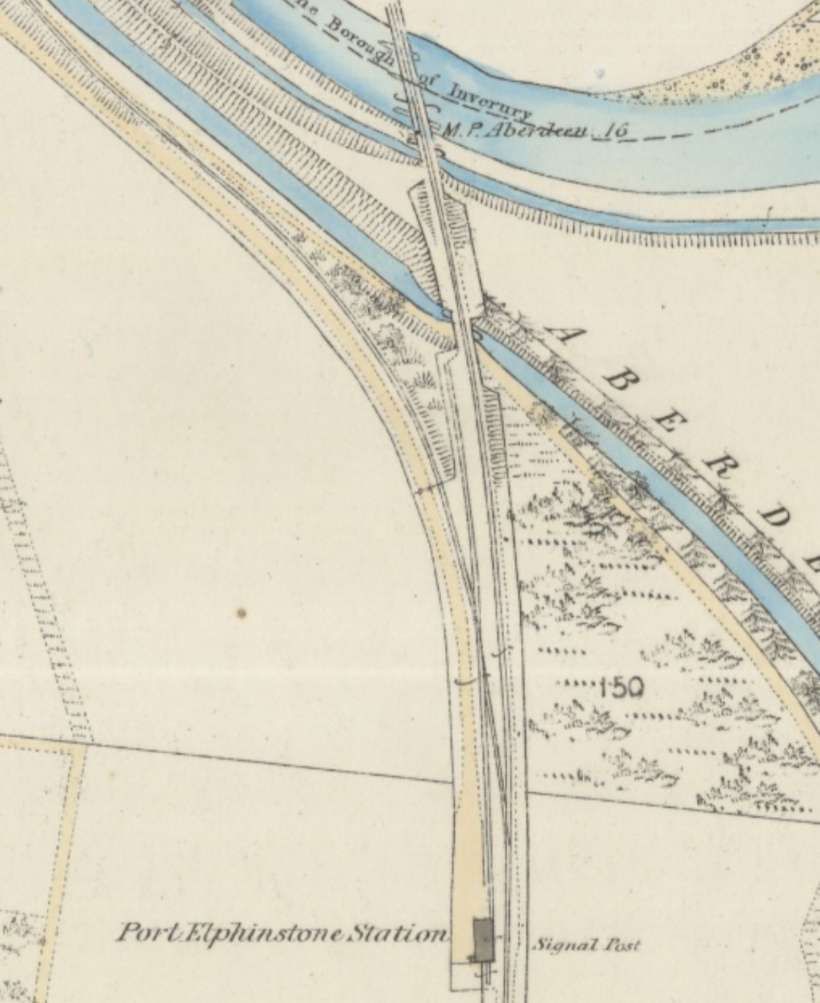
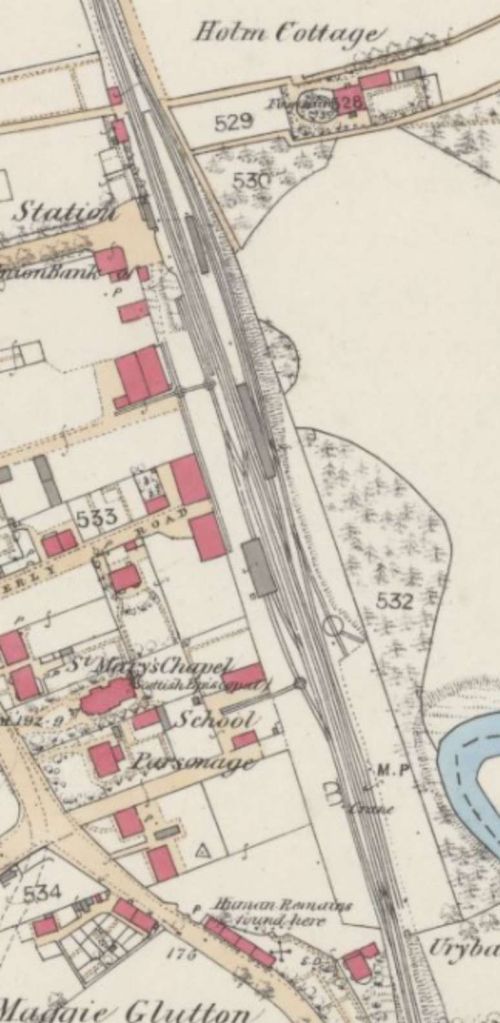


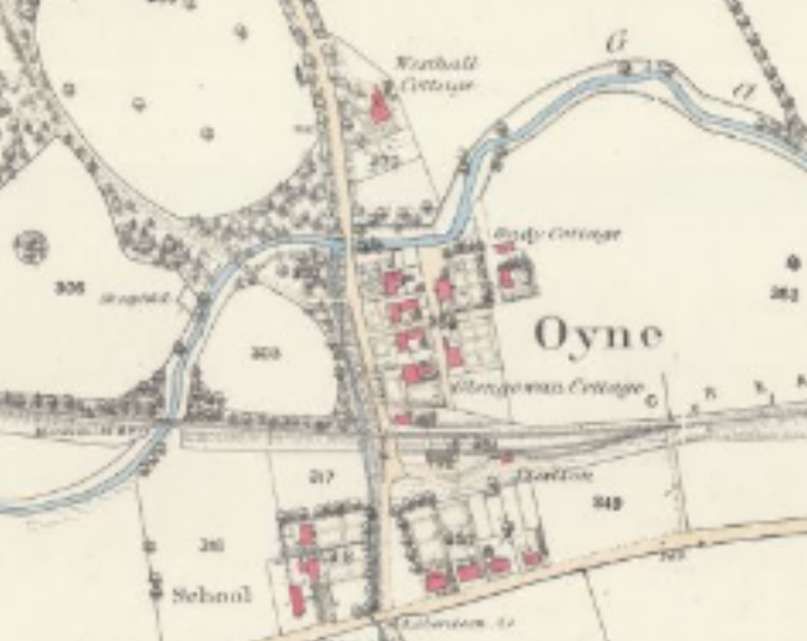
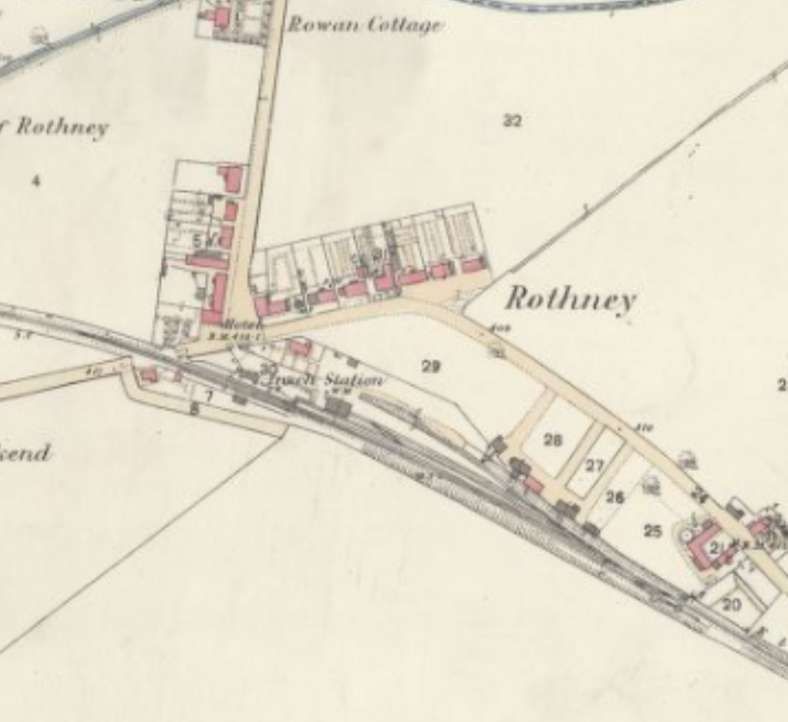
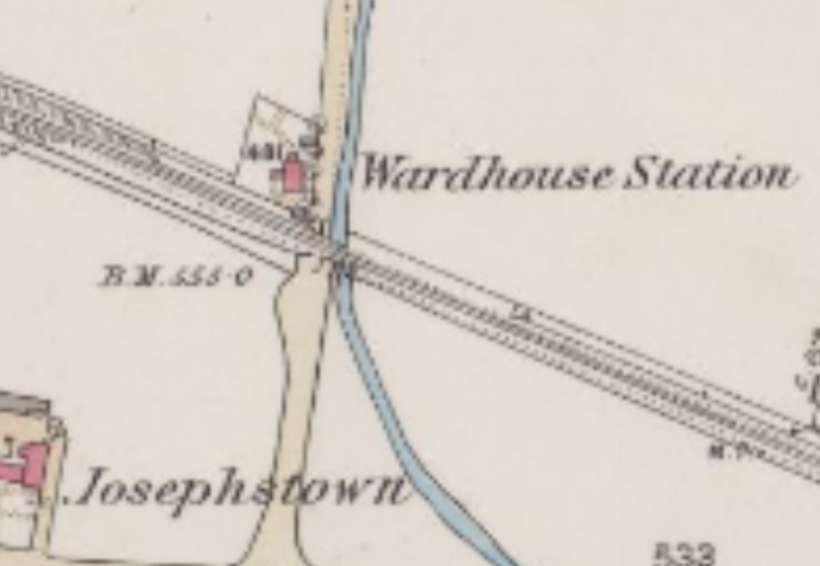
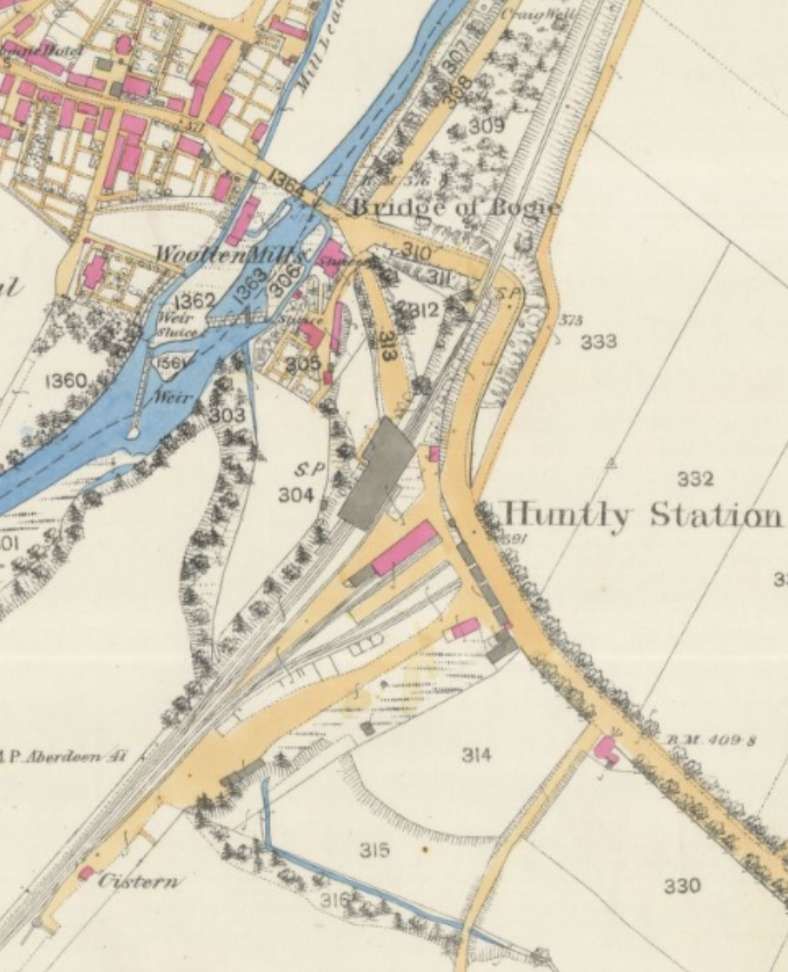
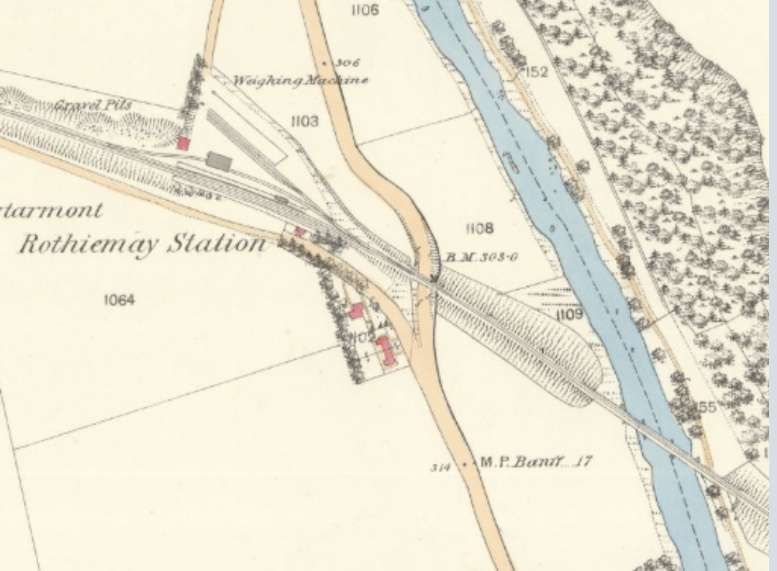
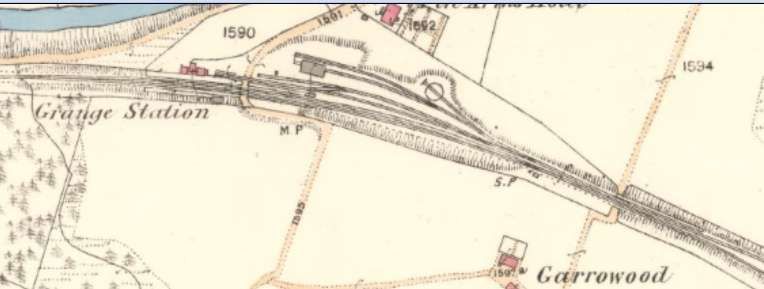
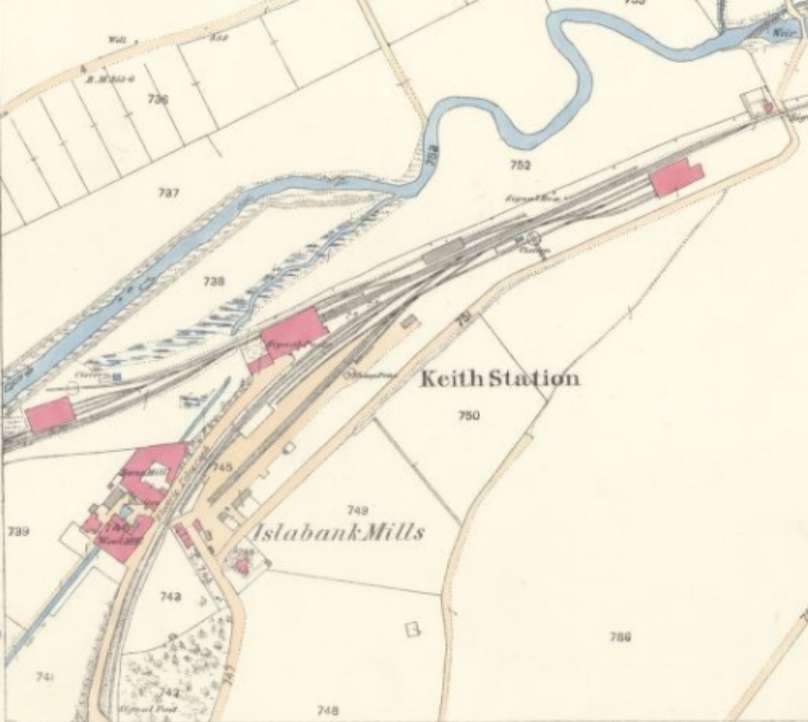
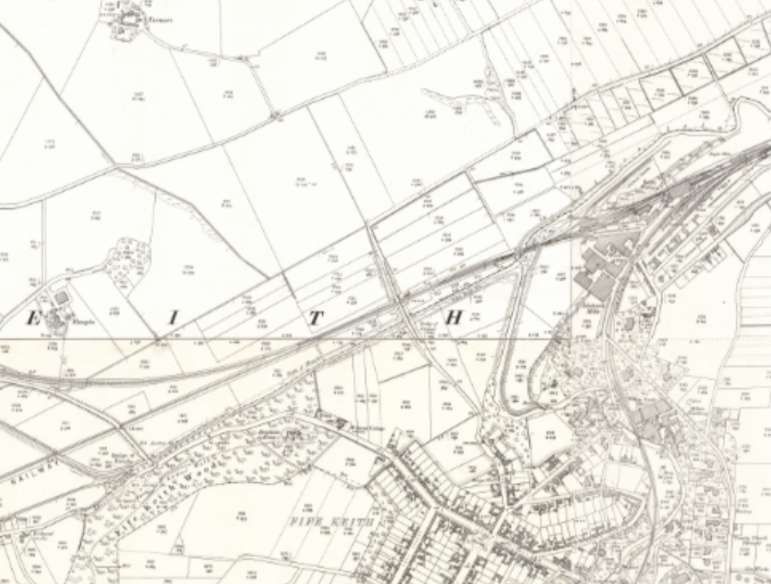
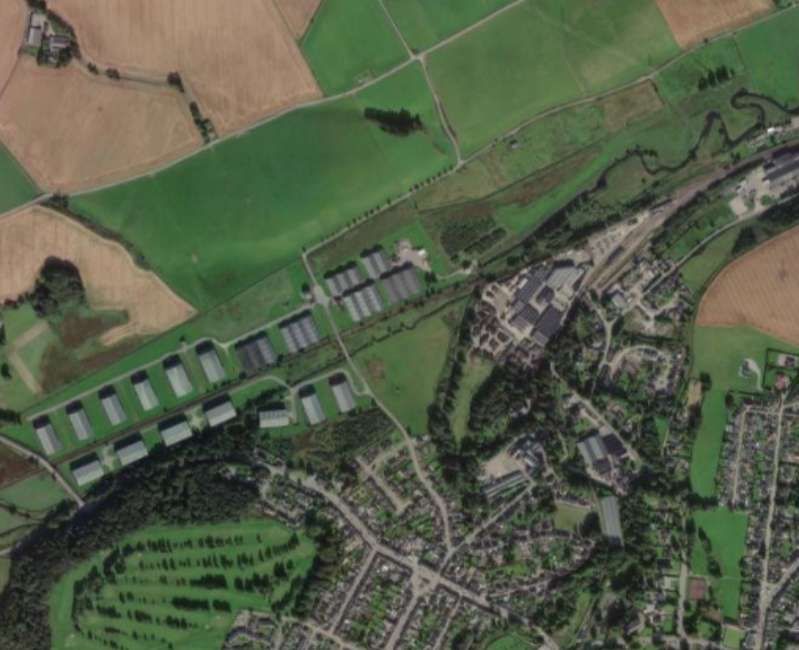
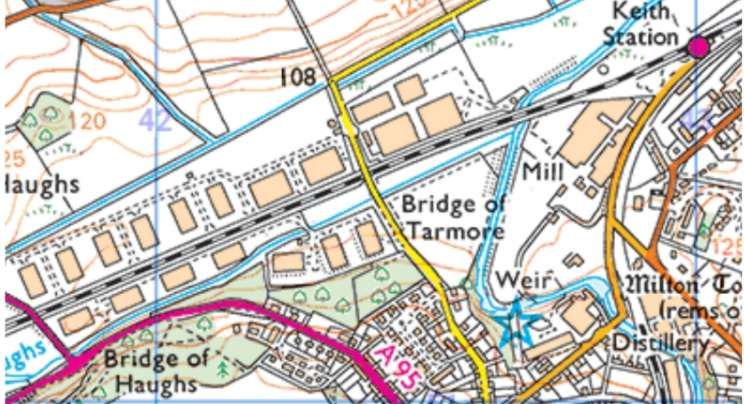

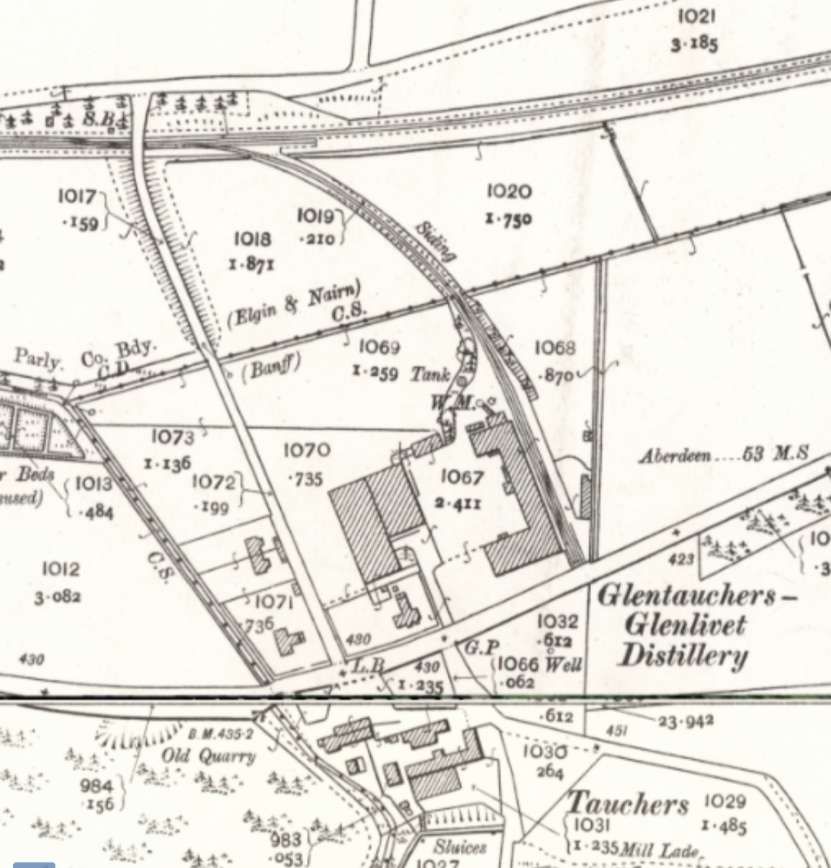
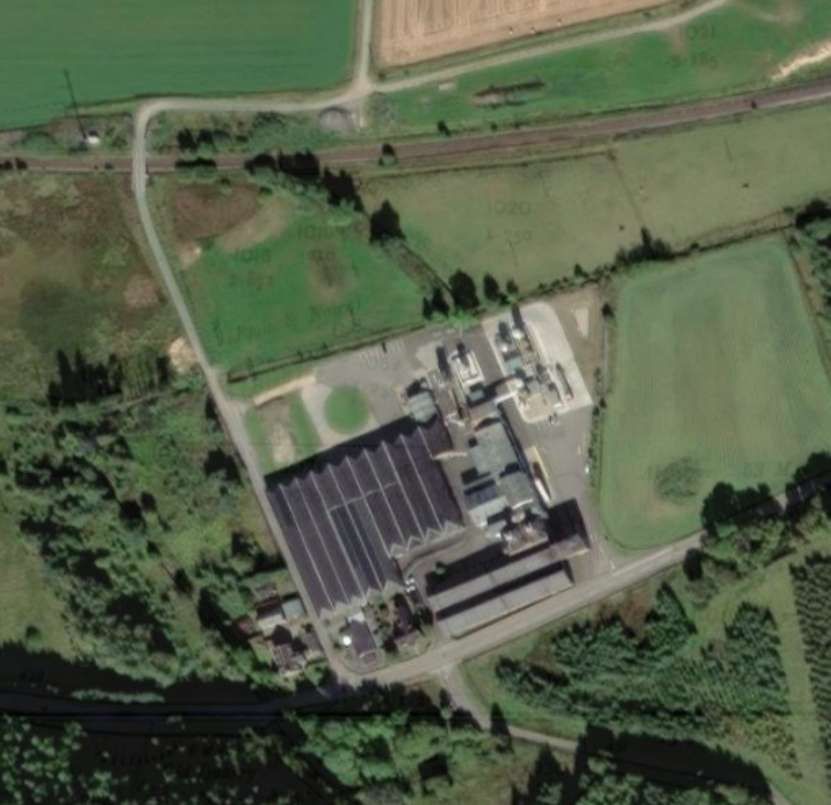
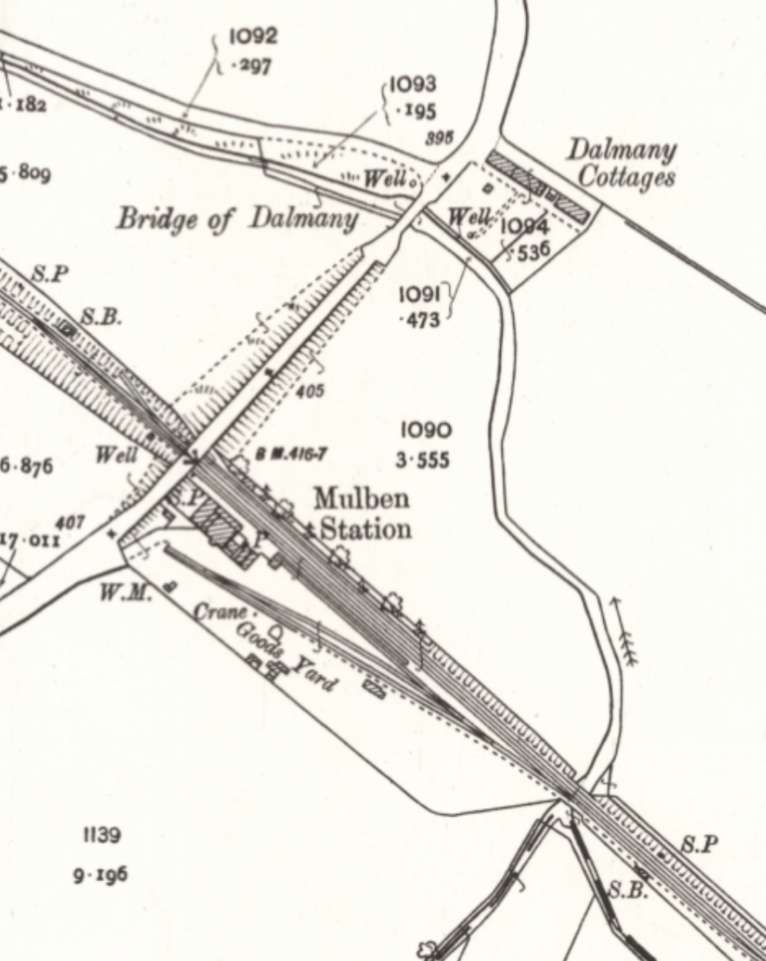
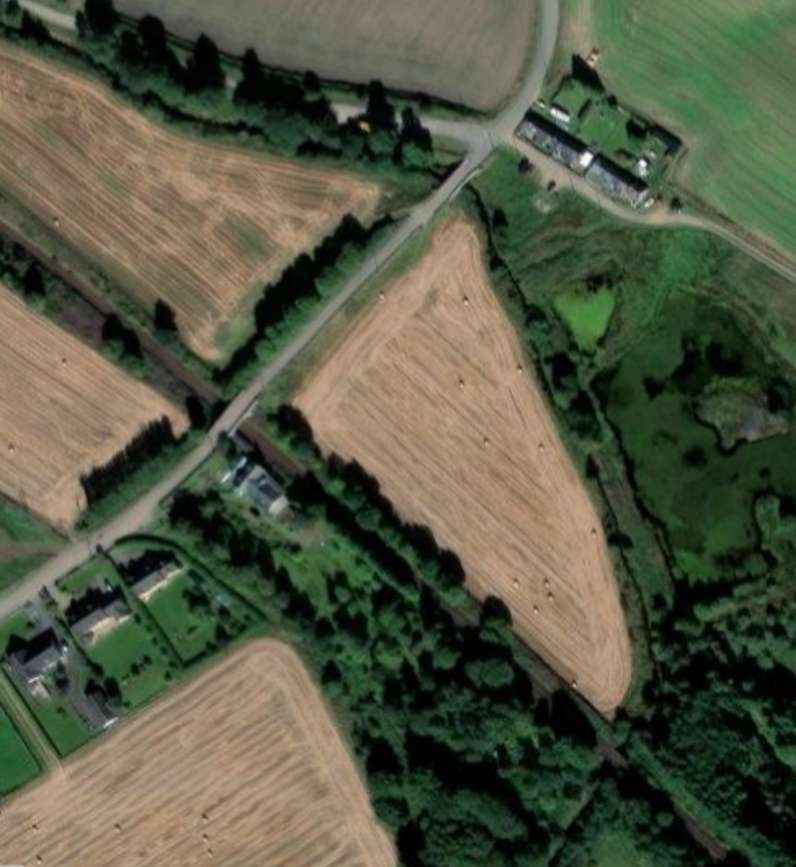
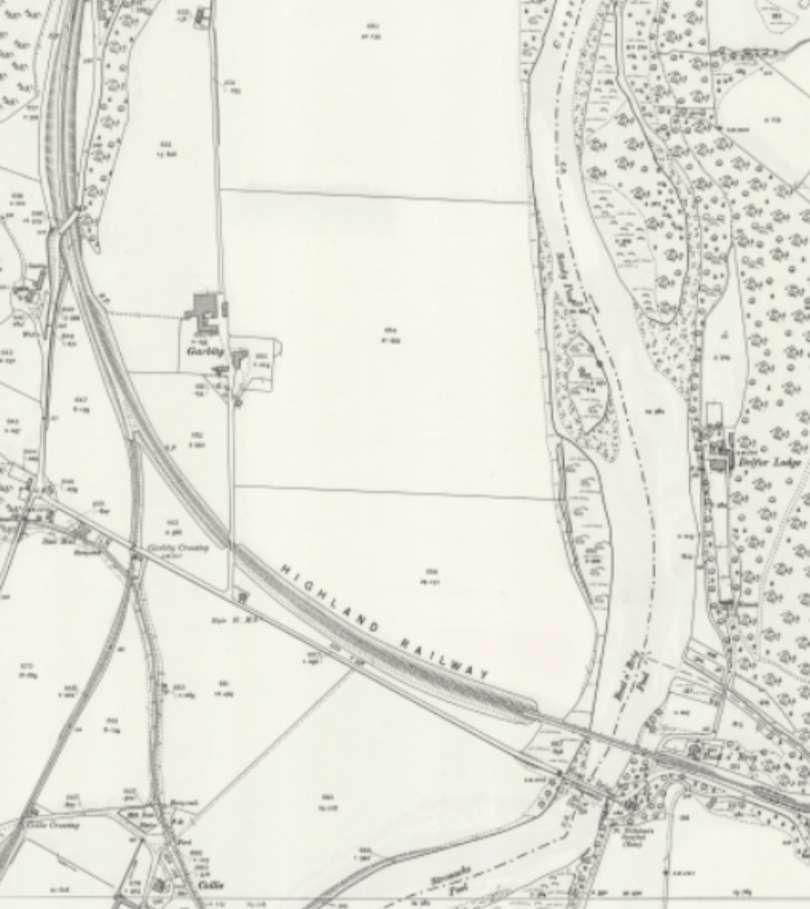
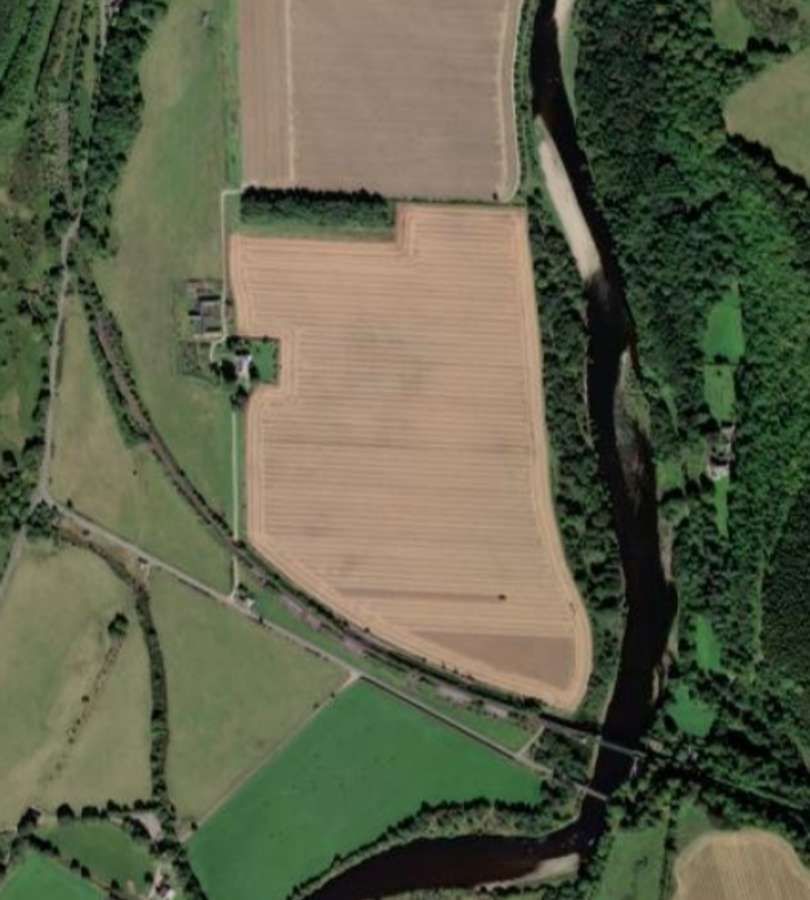
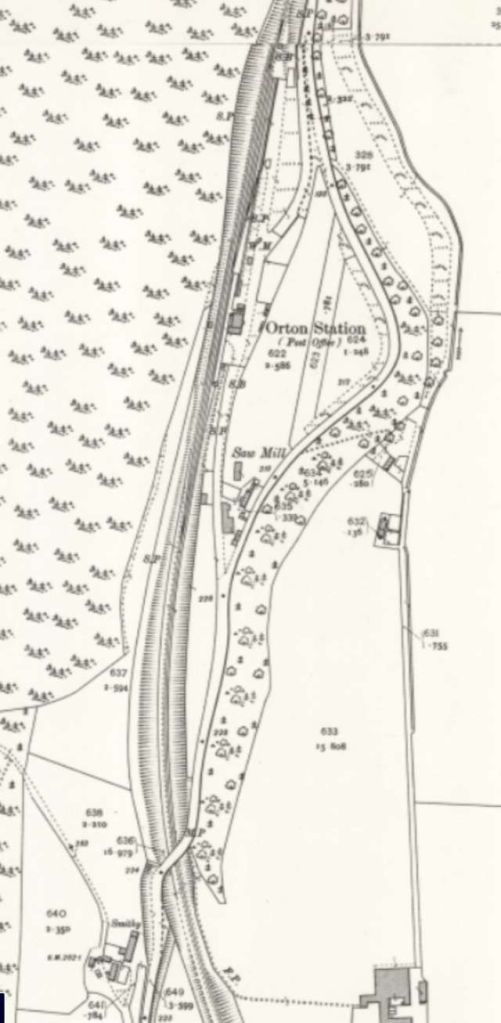
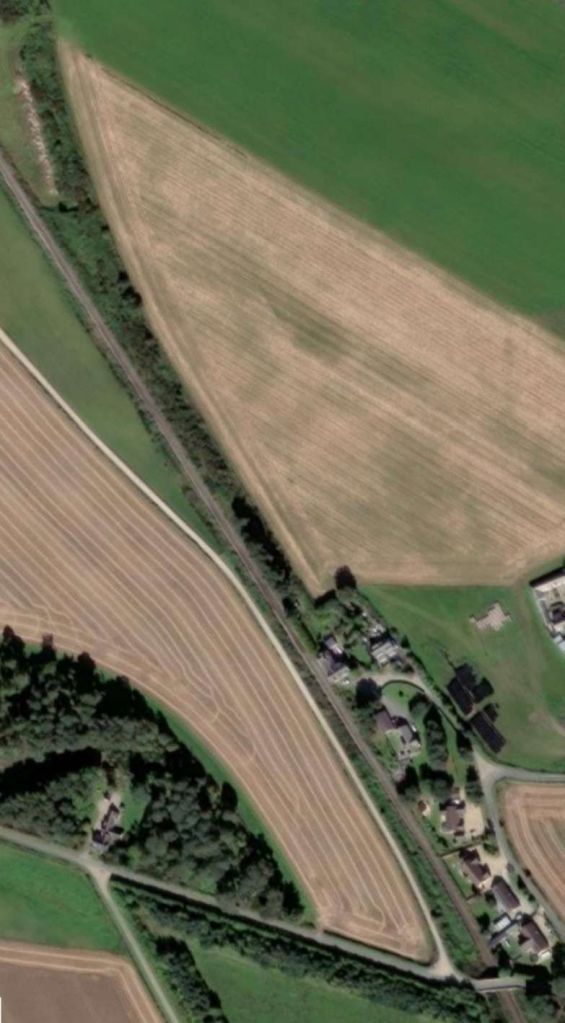
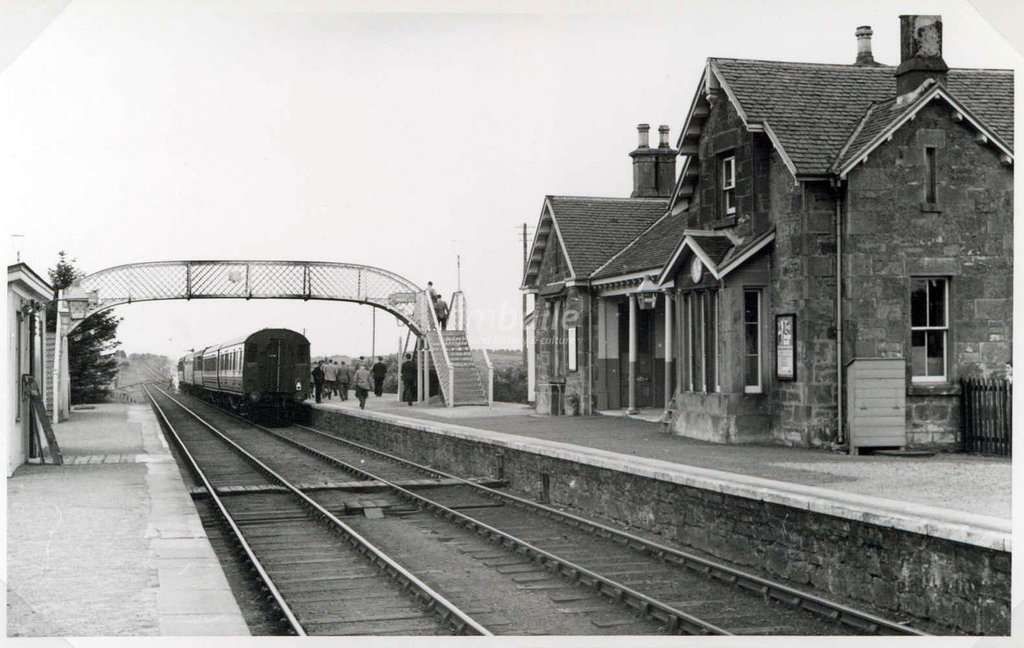
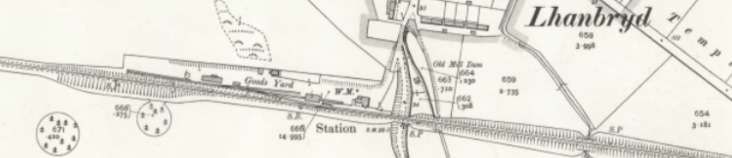
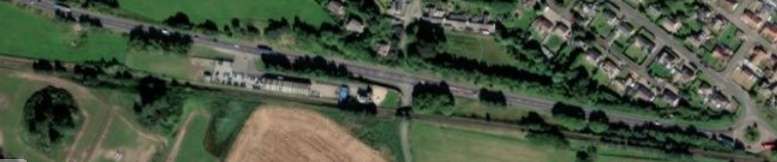
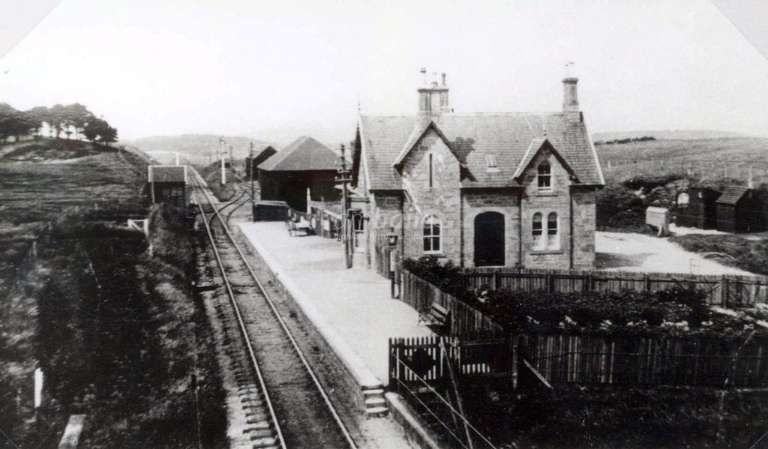


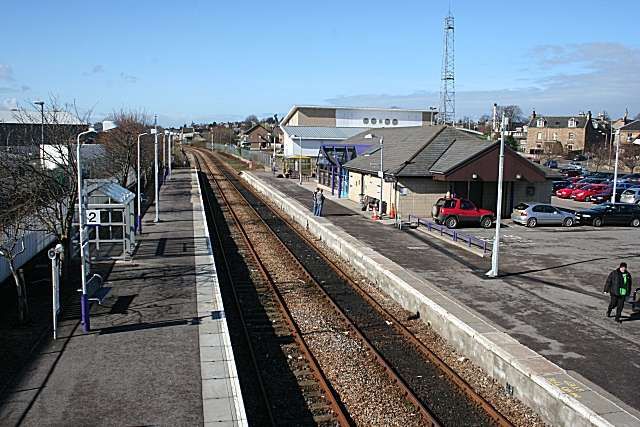
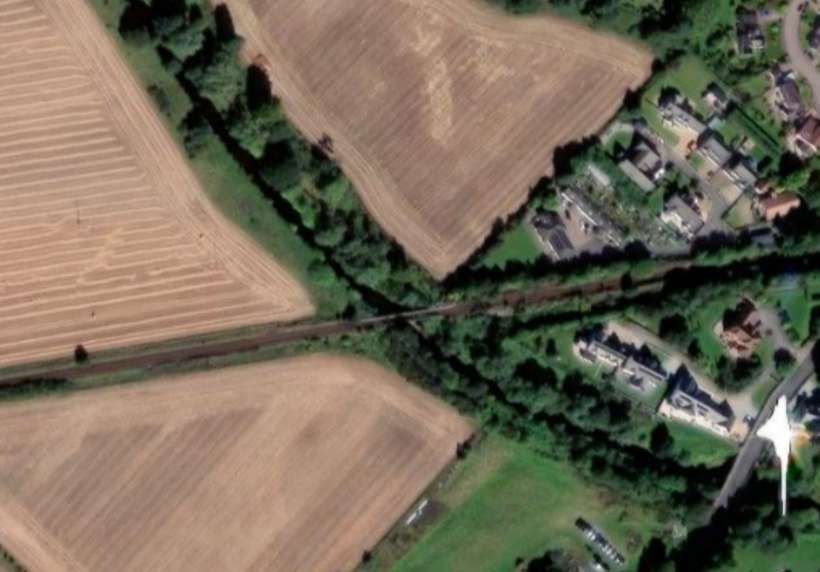
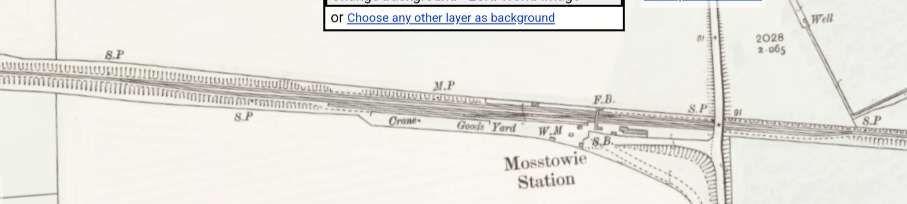

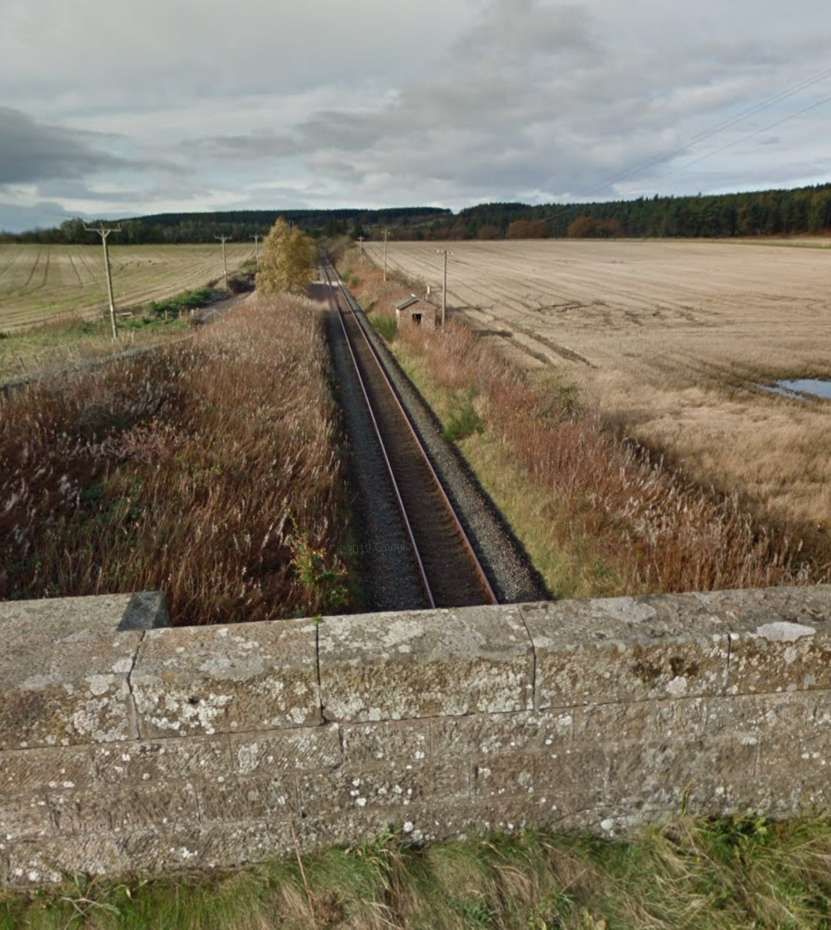
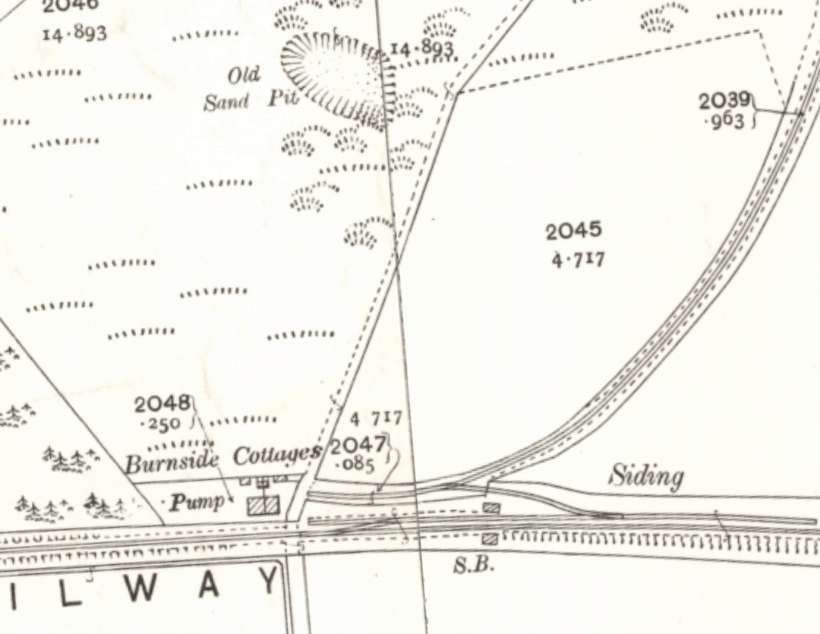
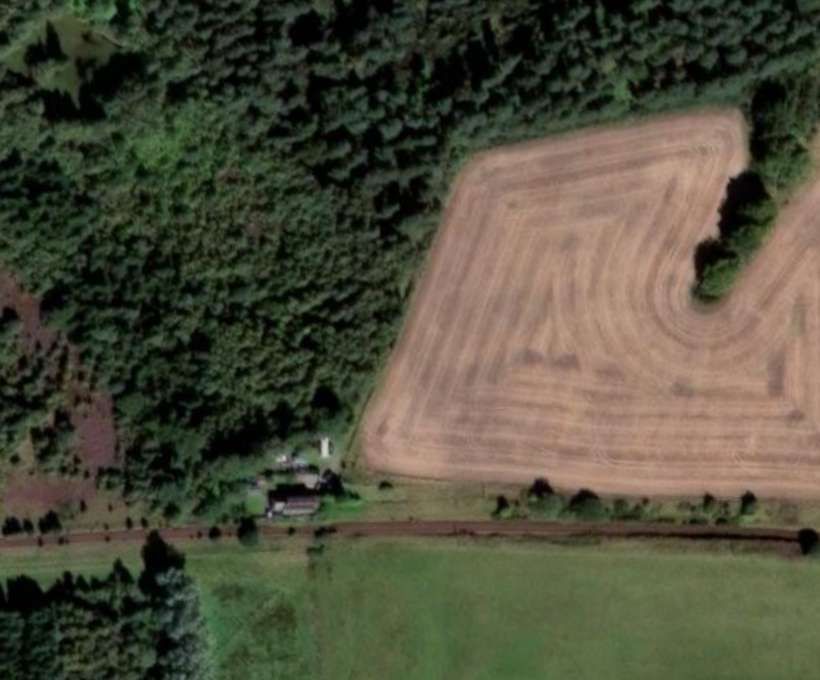
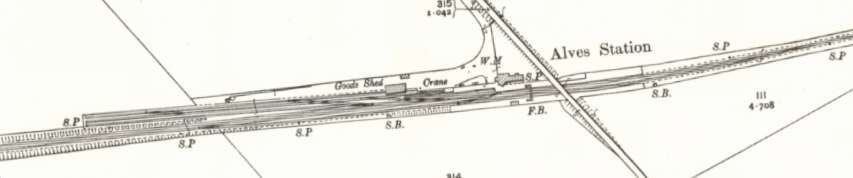

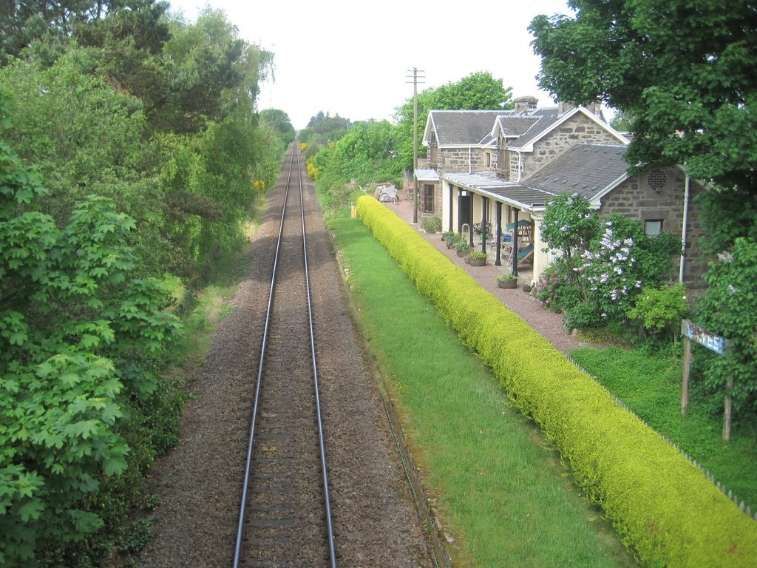
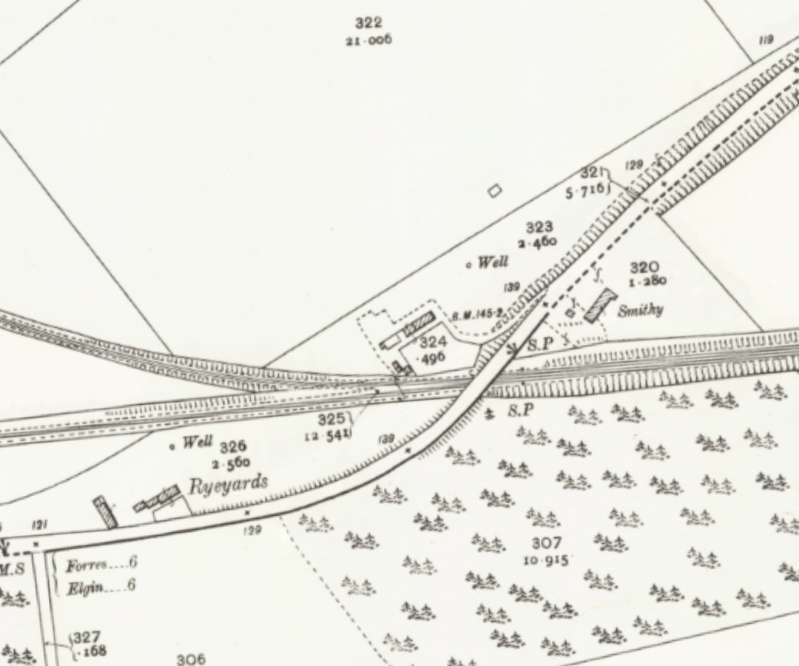
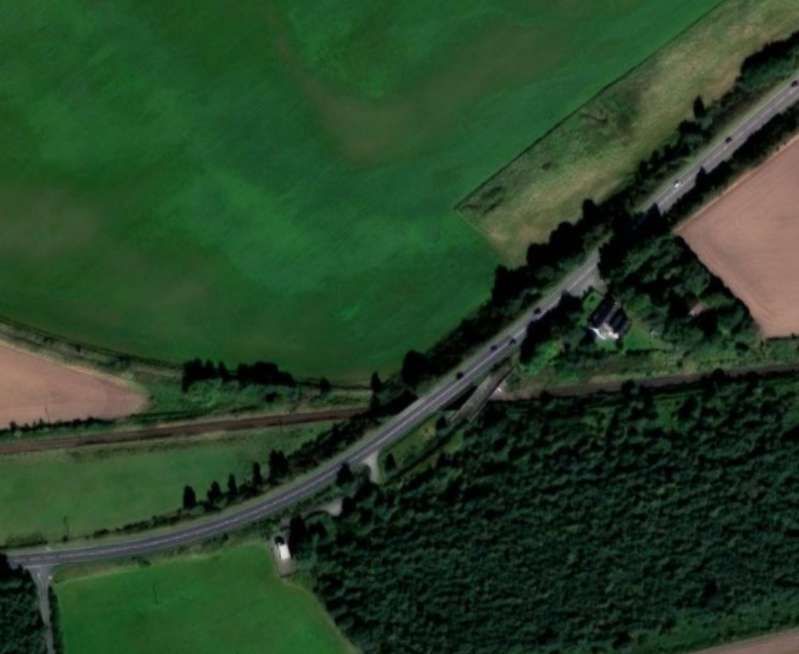
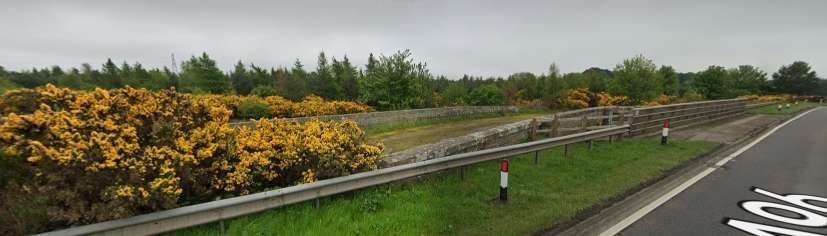
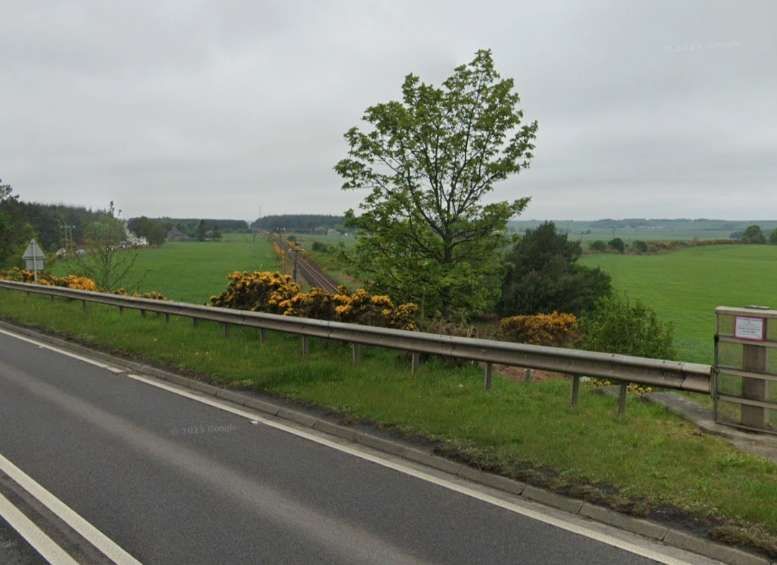
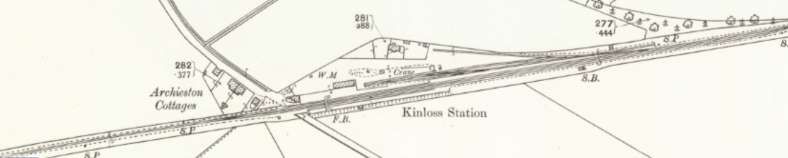

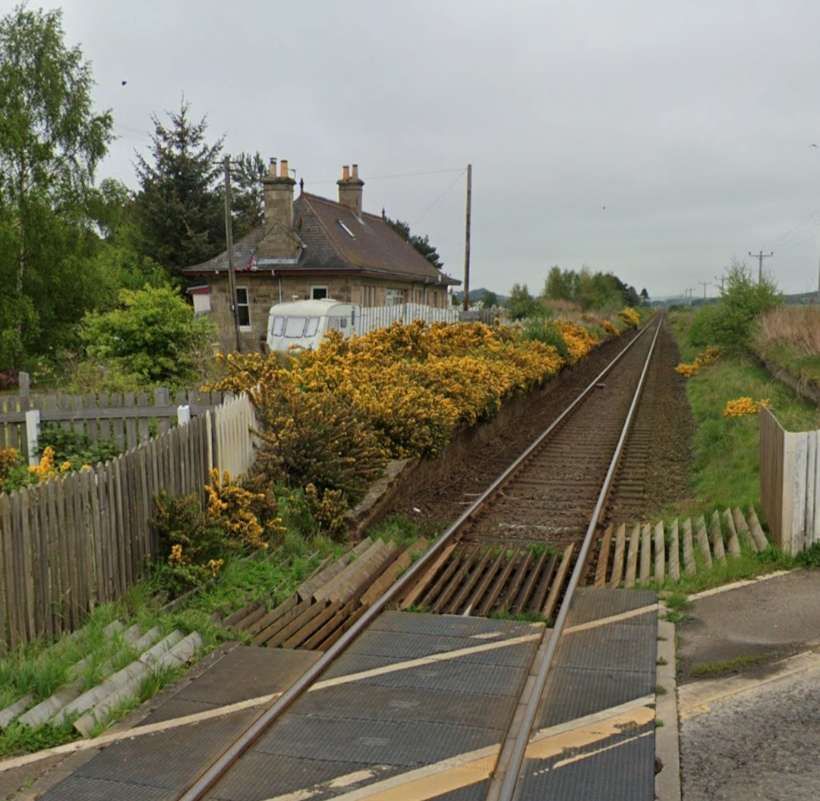
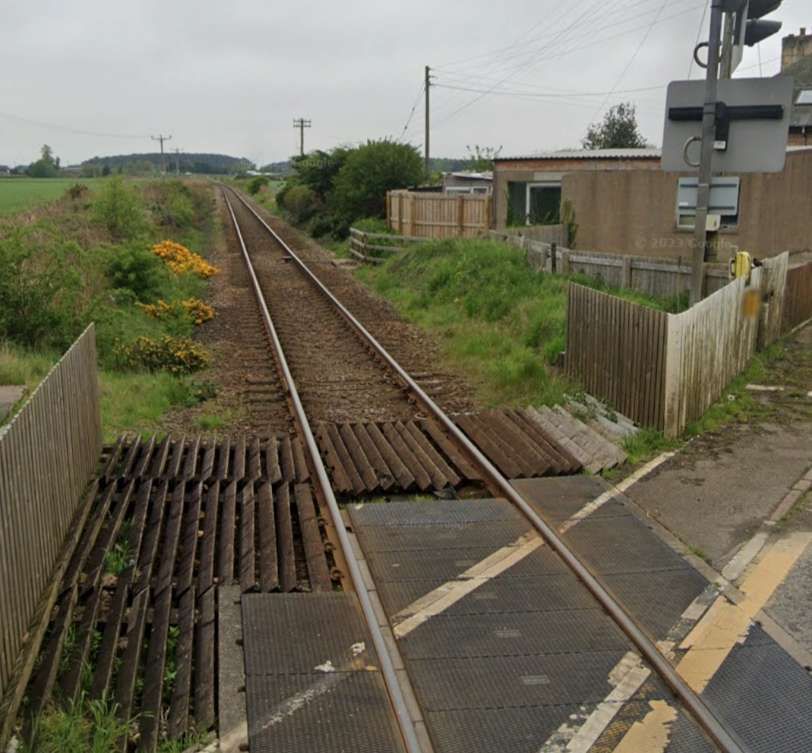

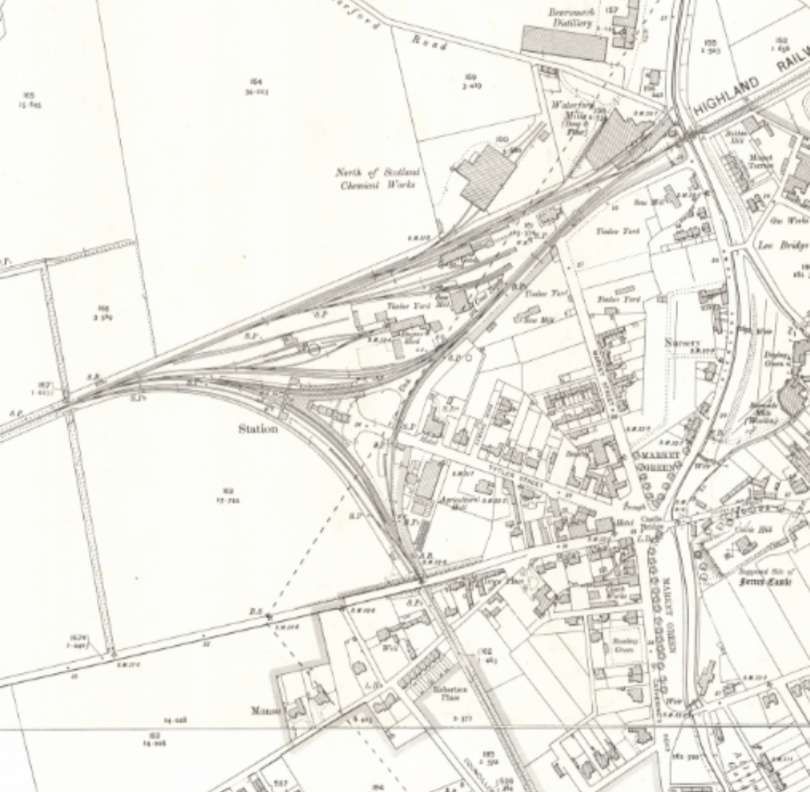
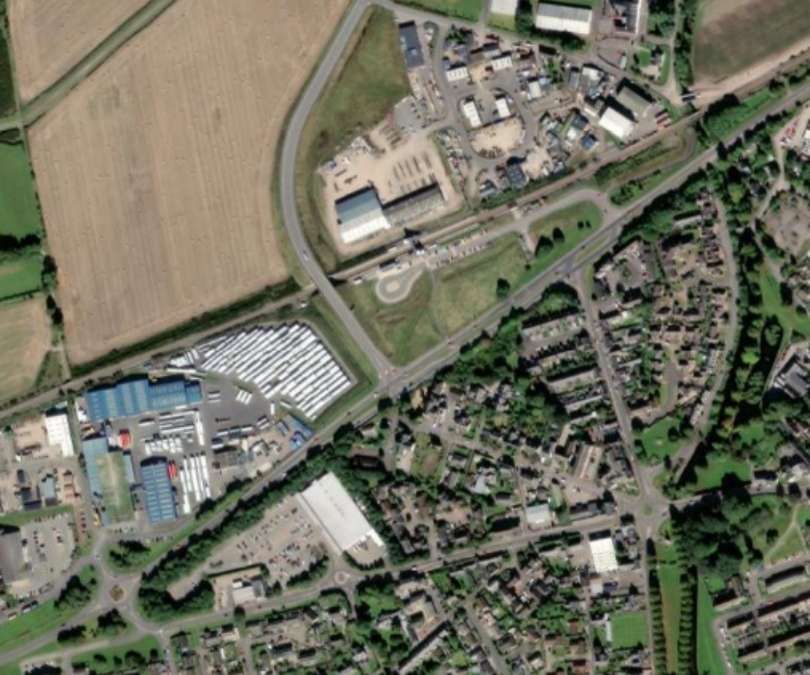

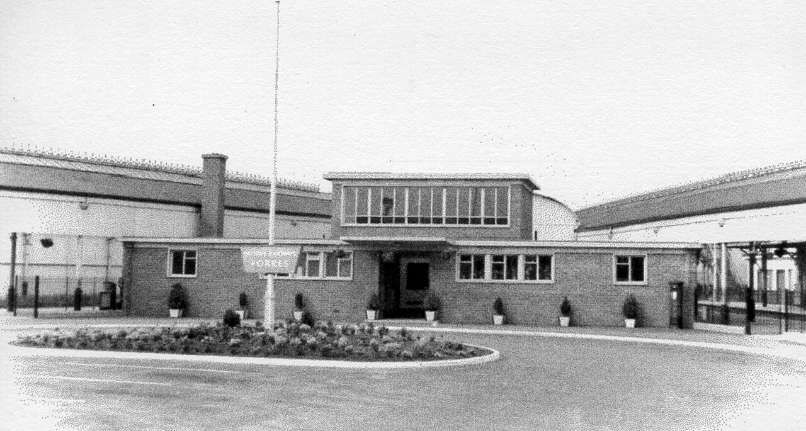
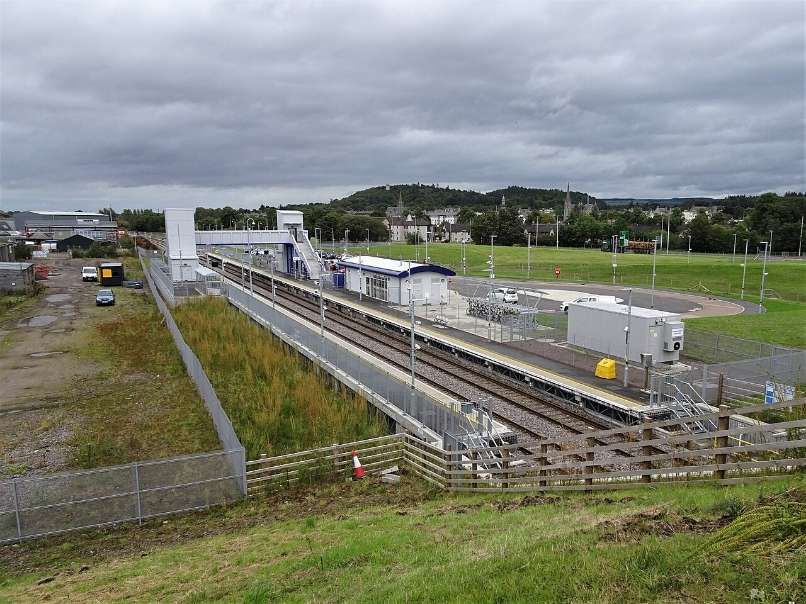
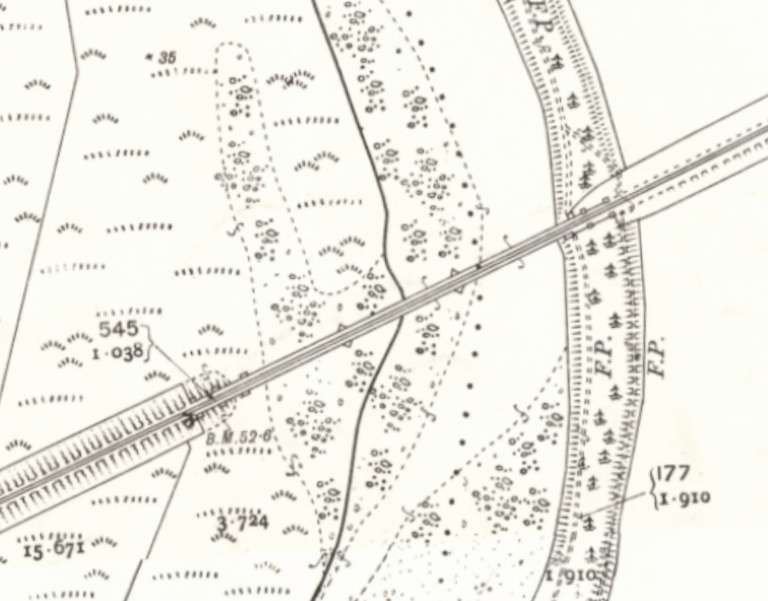
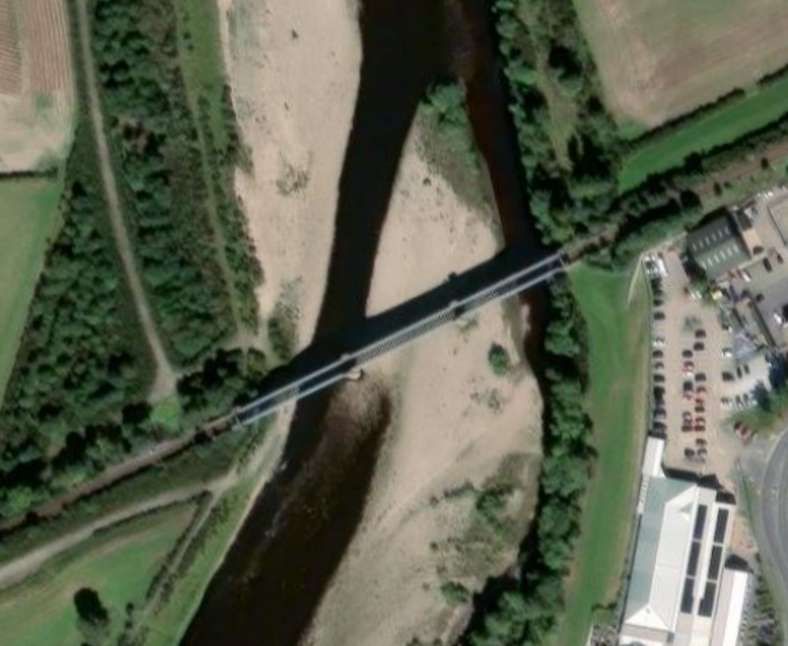
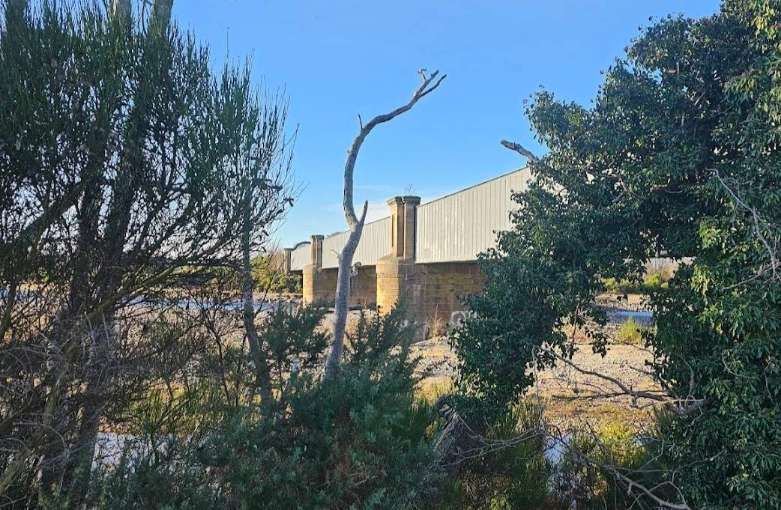
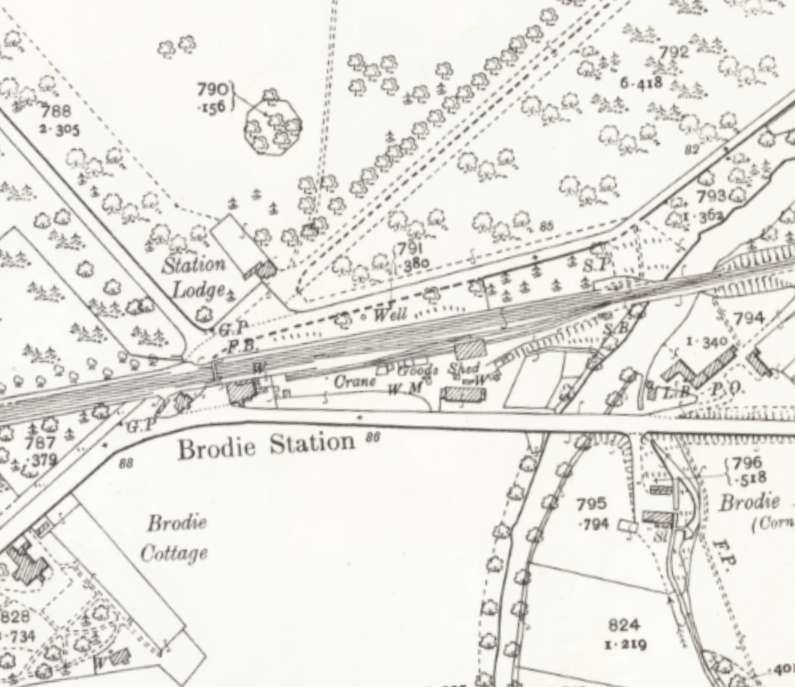
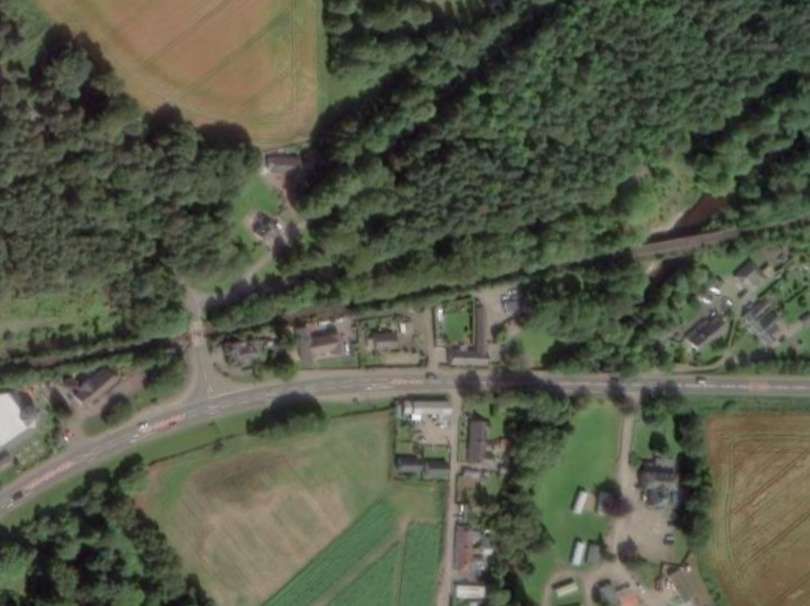
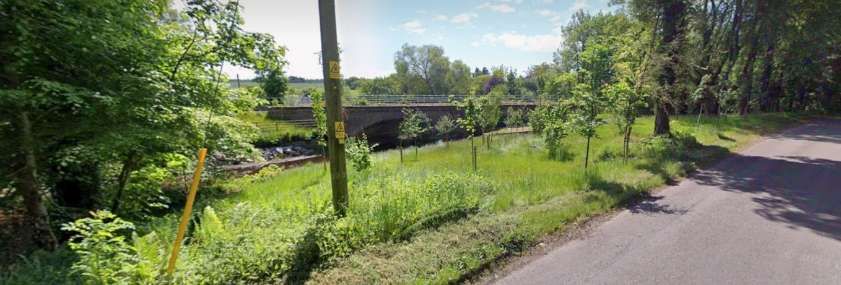

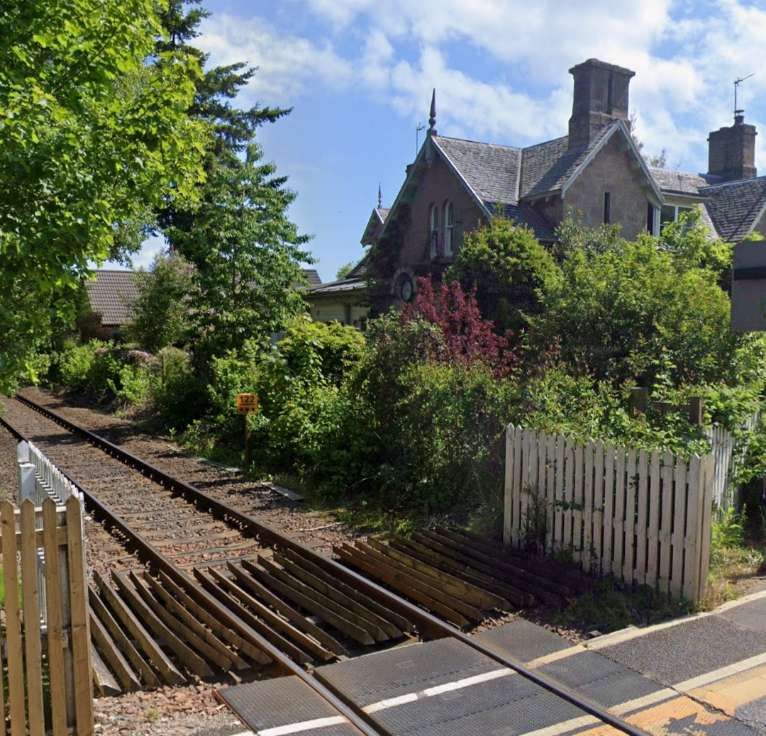
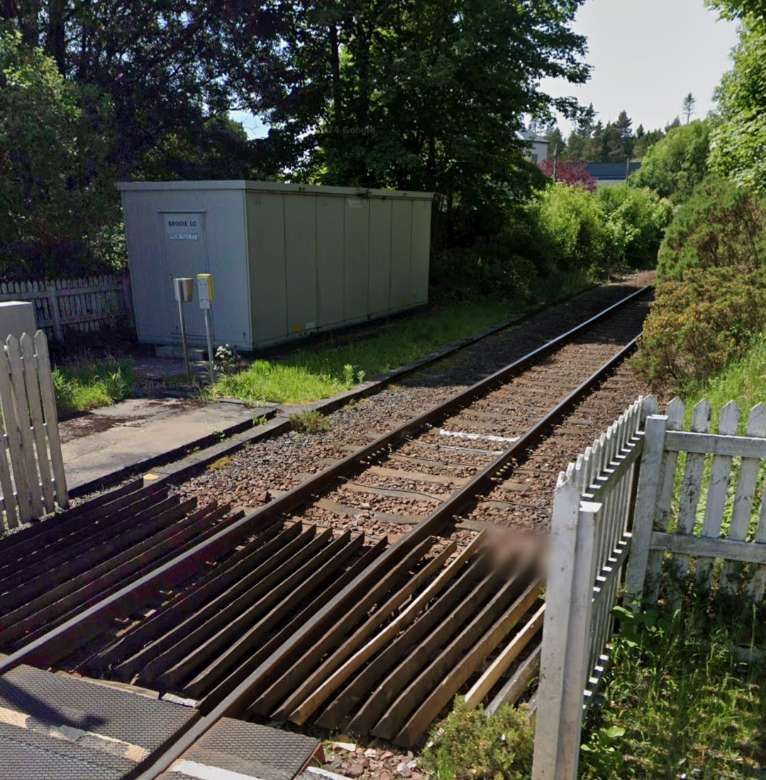

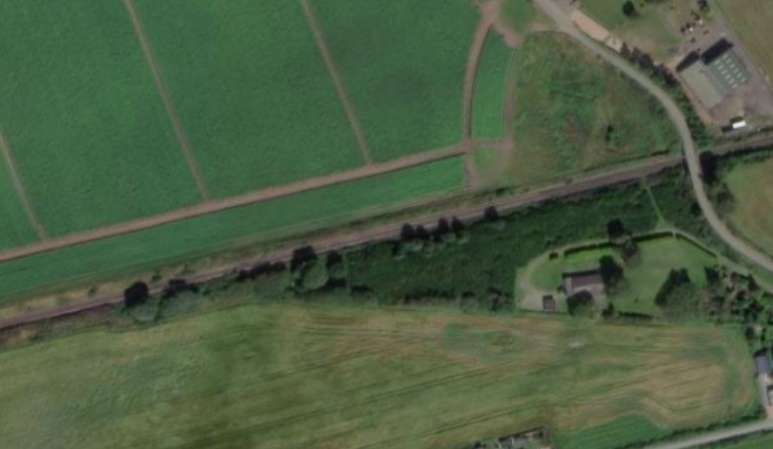
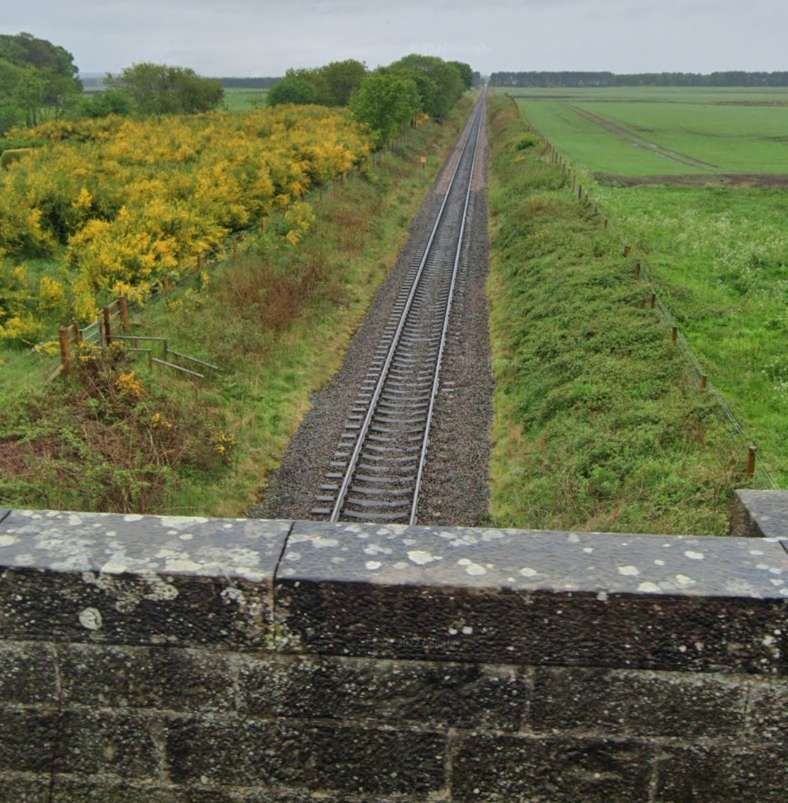
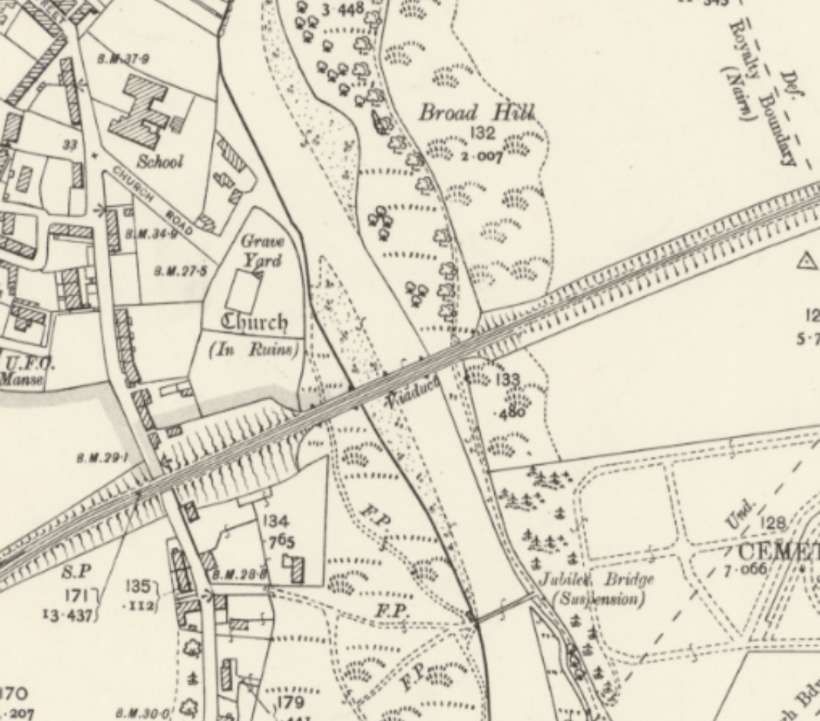
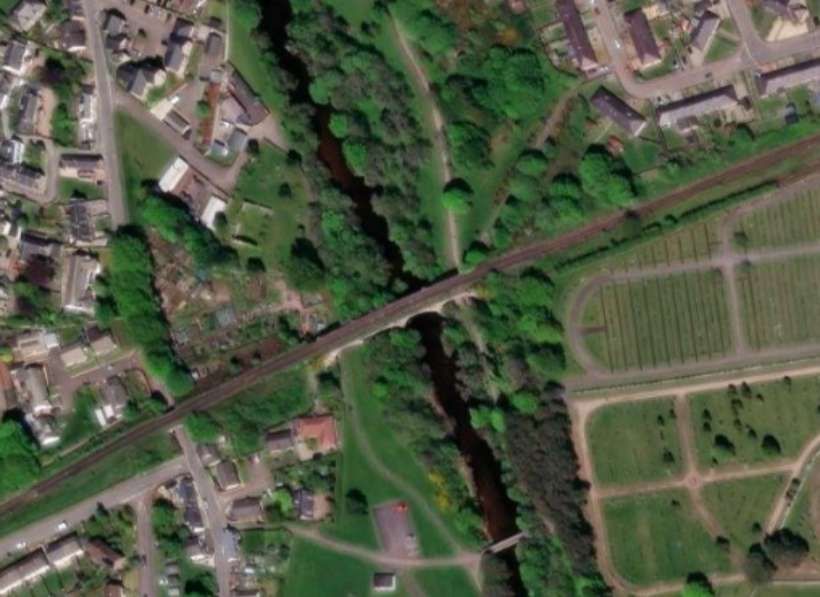

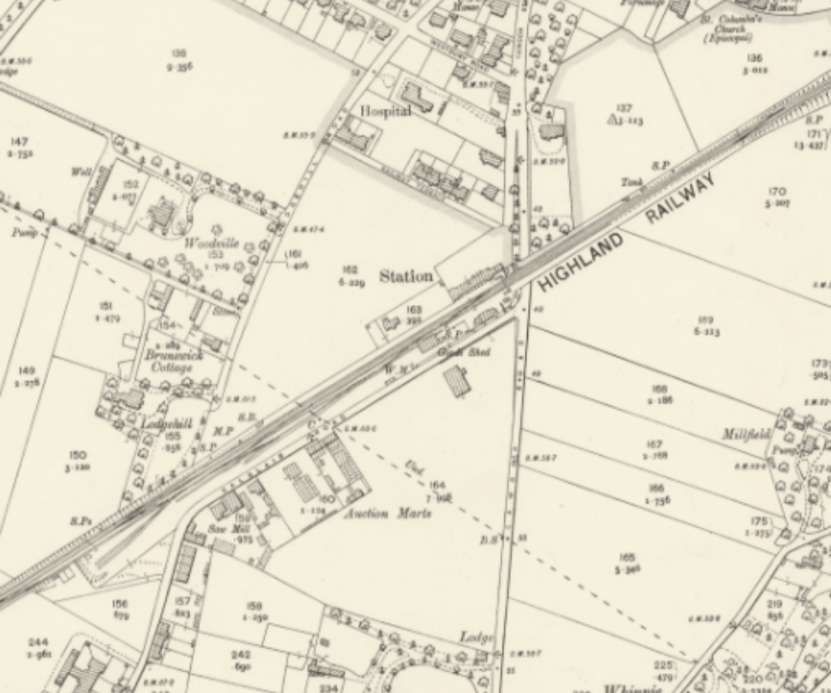
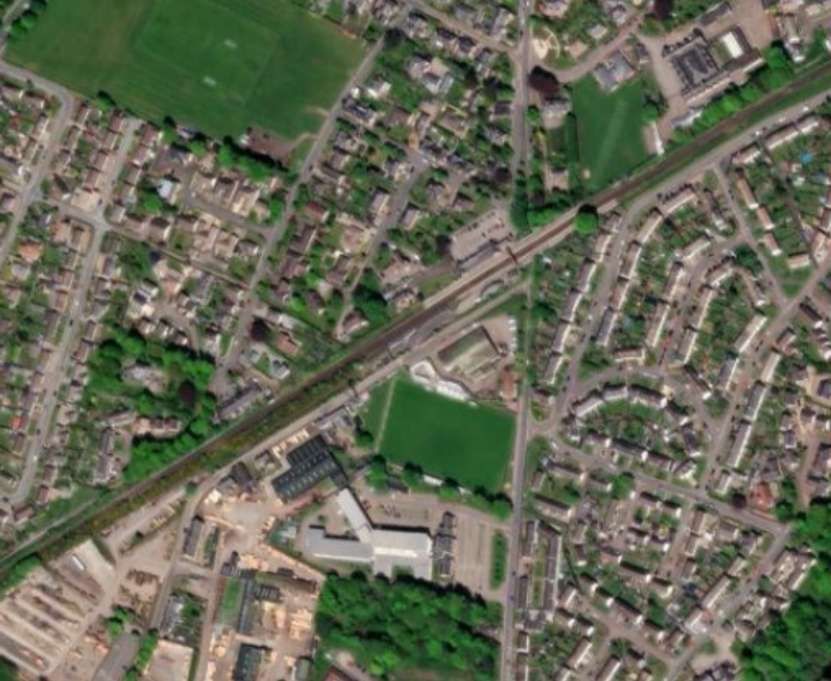

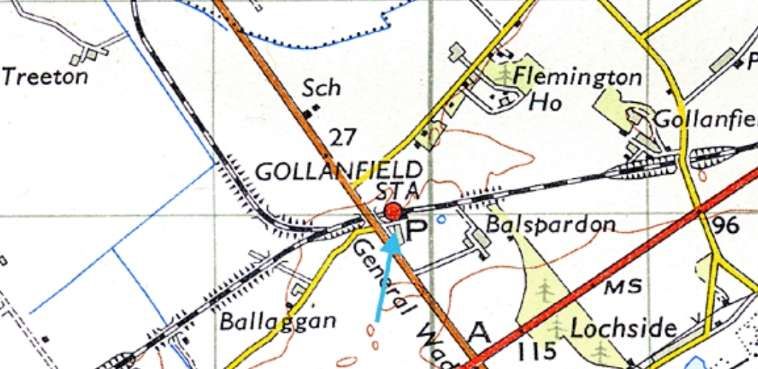
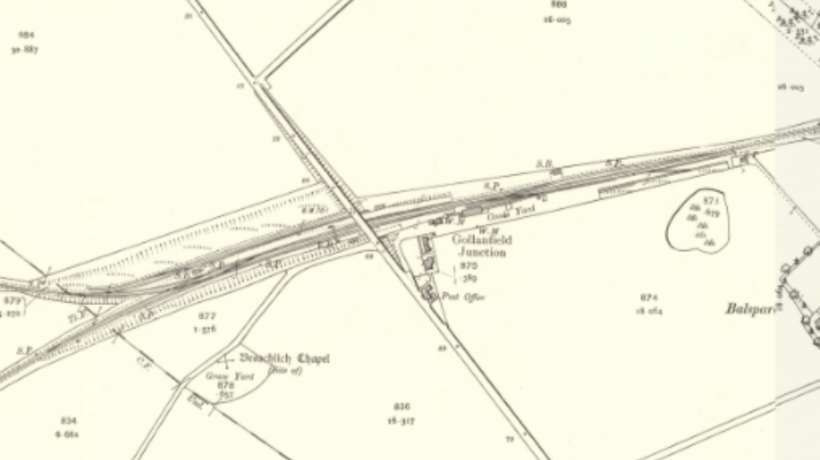
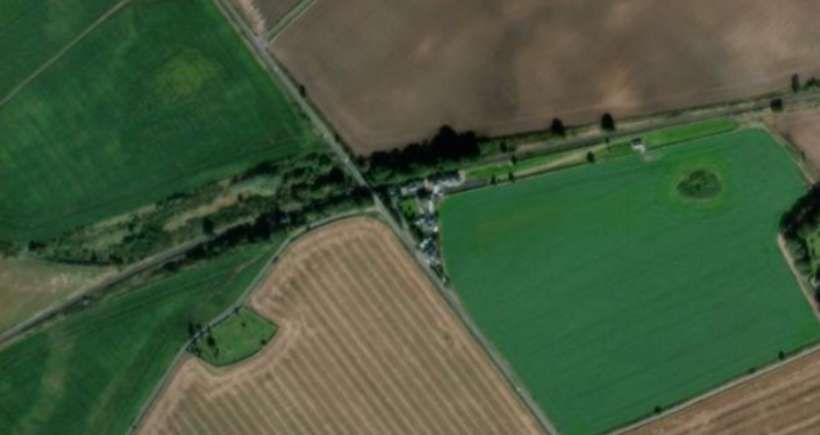
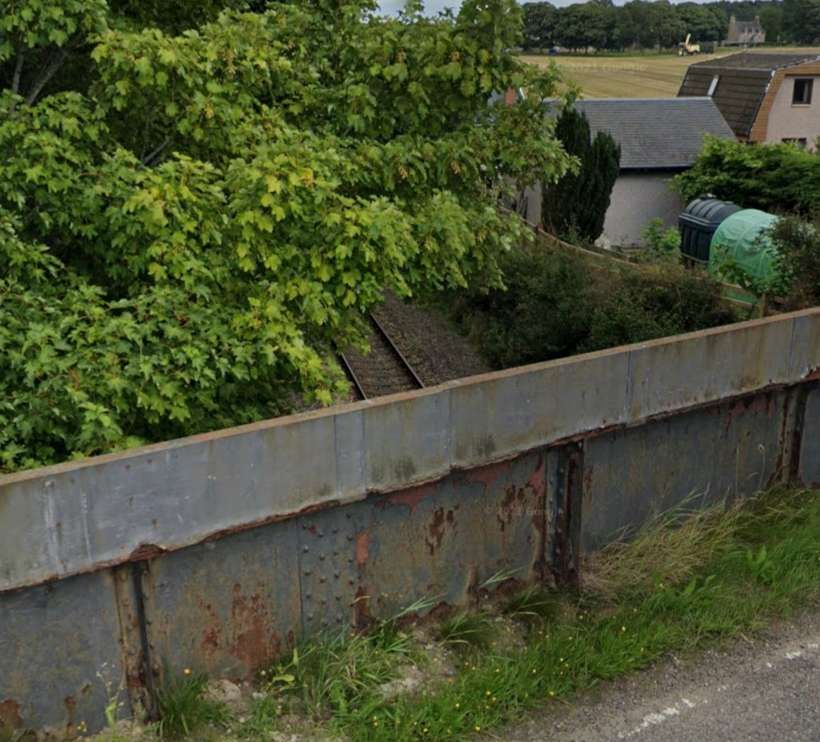
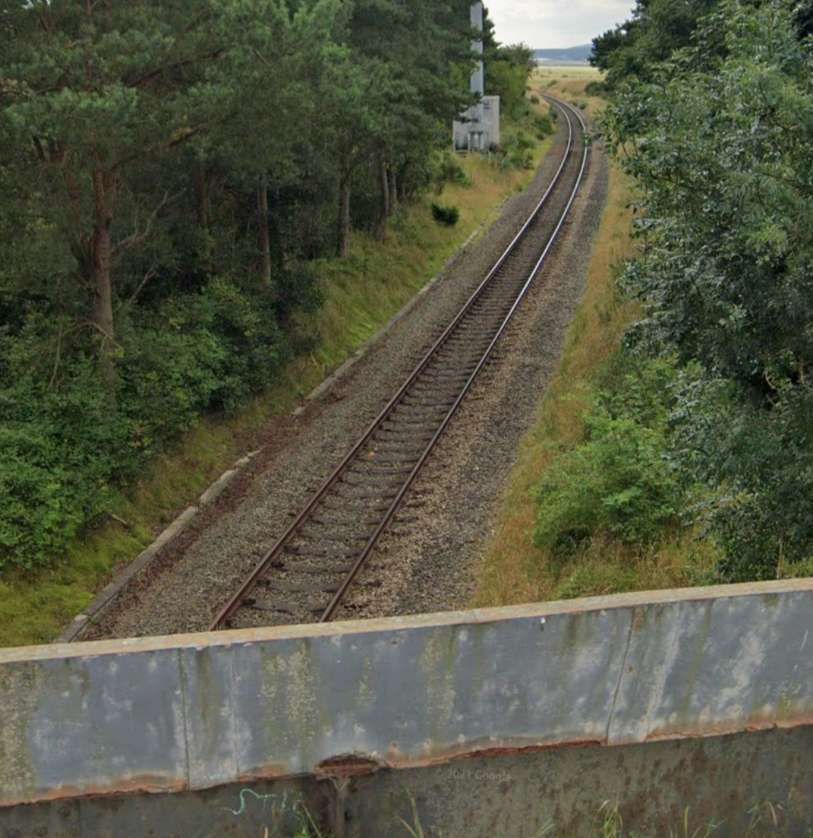
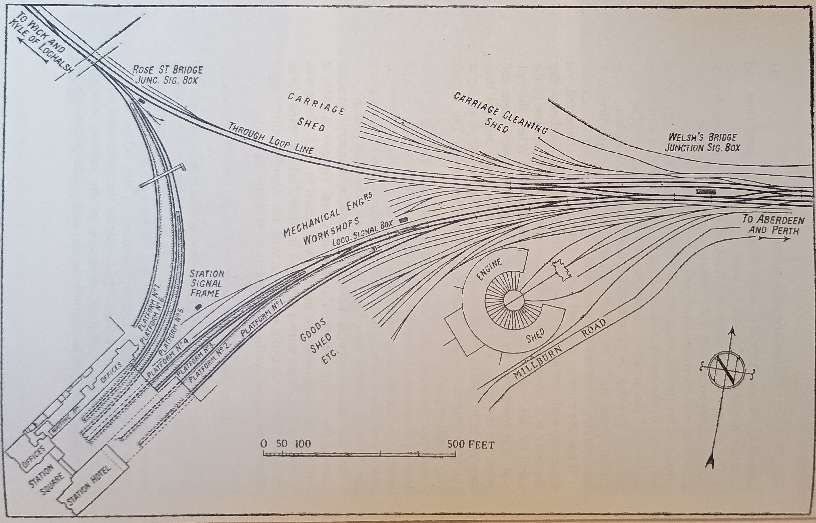
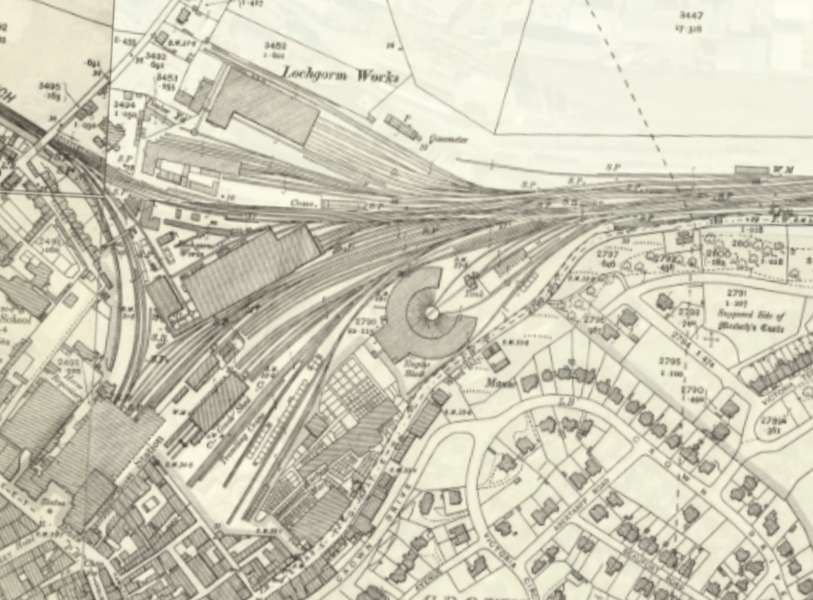
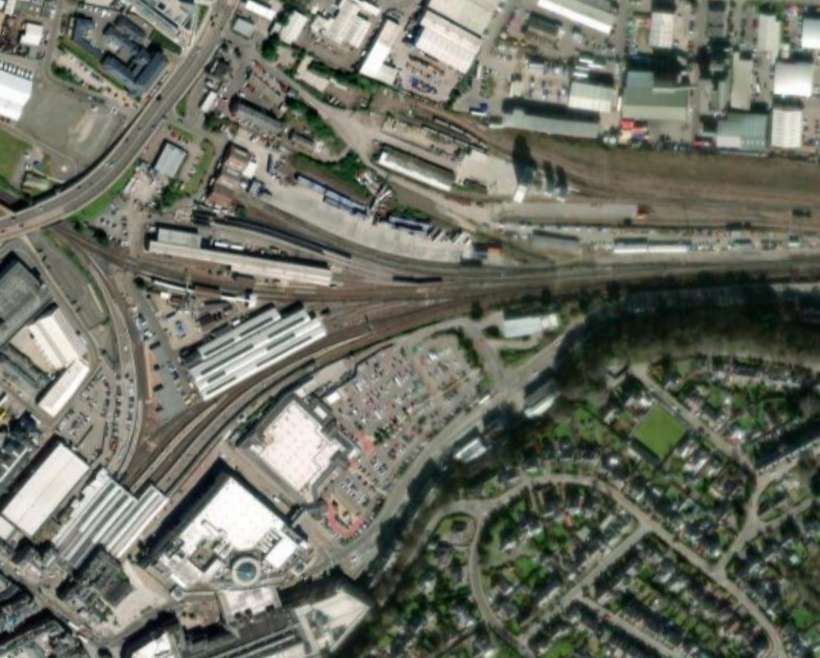
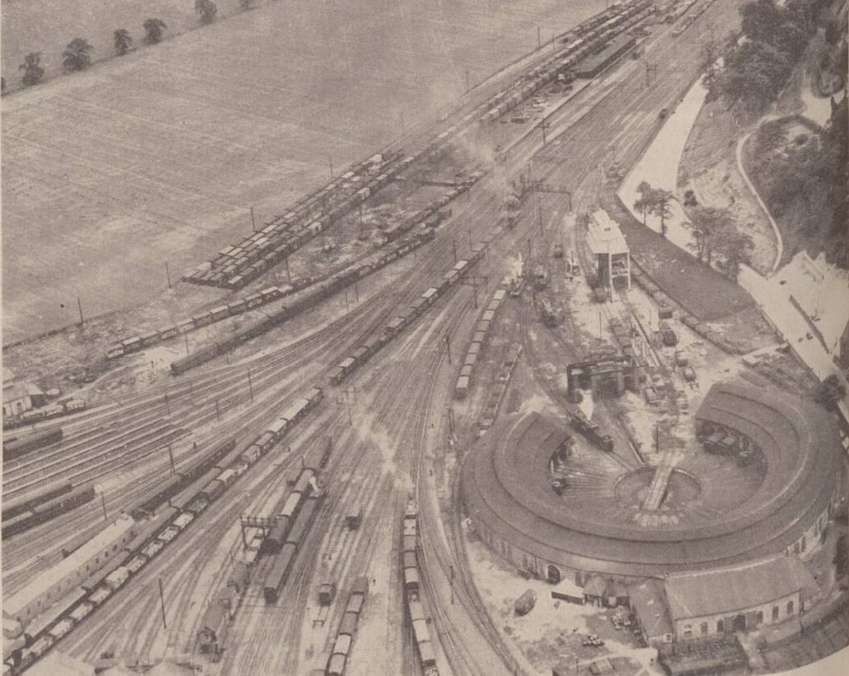
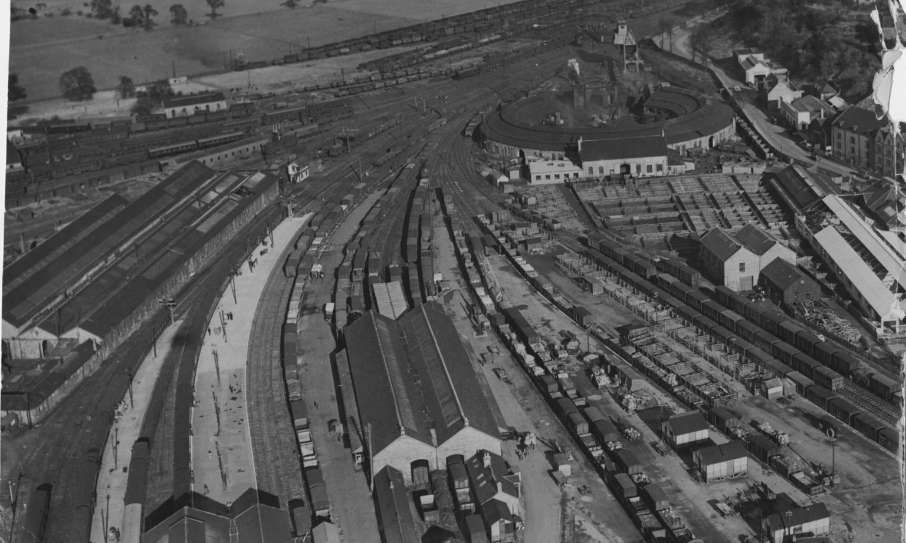
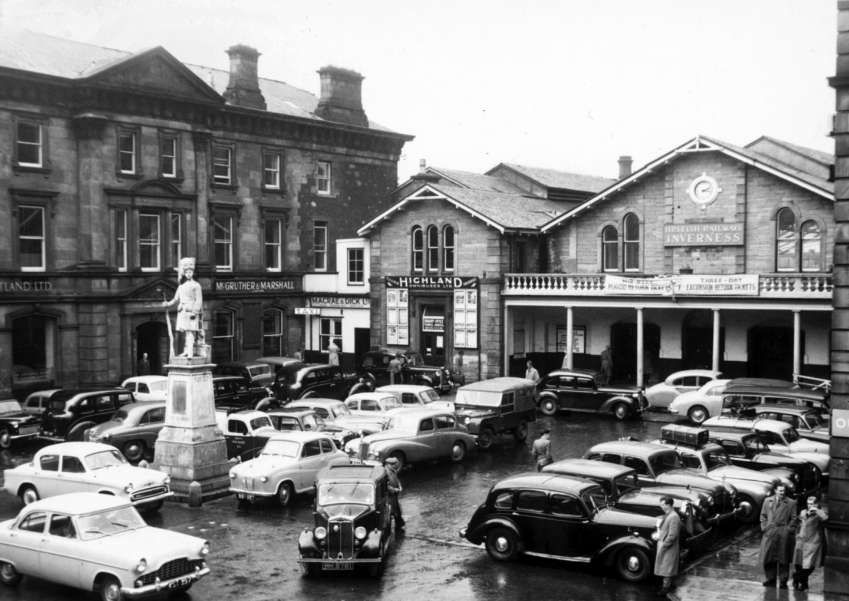

.jpg)