
This is the second part of a short series about the Manchester and Leeds Railway. The first part can be found here. [66]
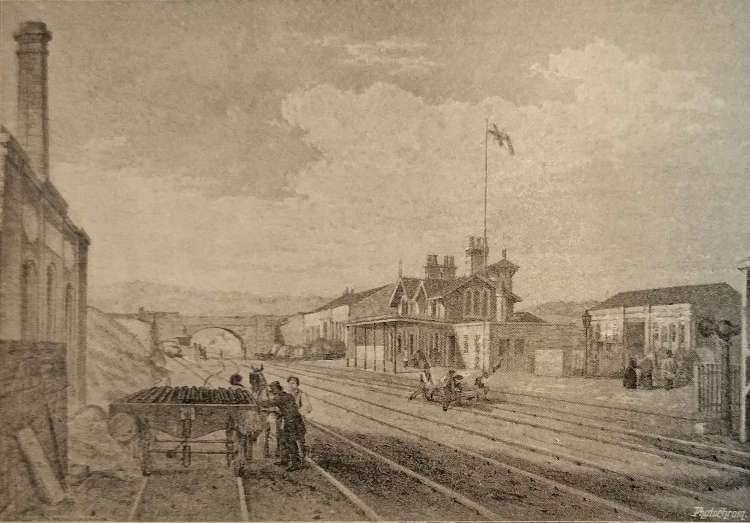
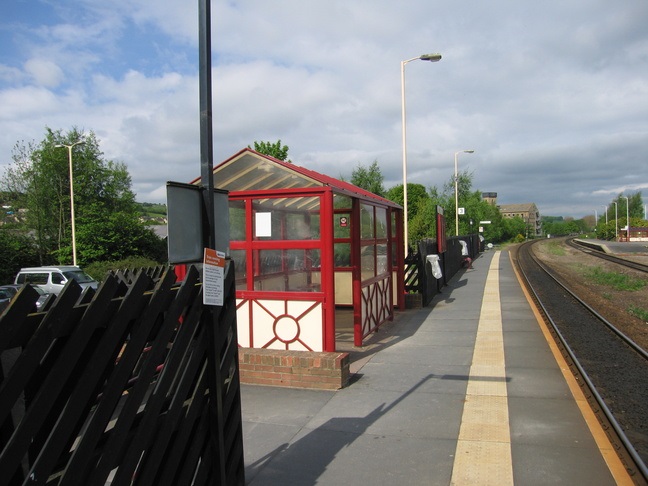
We re-commence our journey at Sowerby Bridge Railway Station. ….
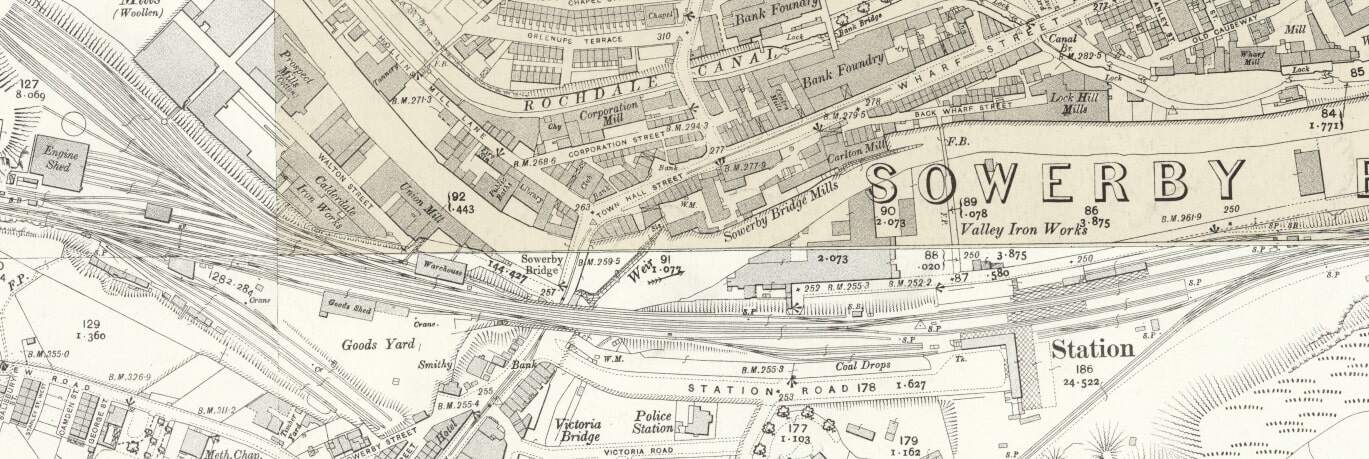
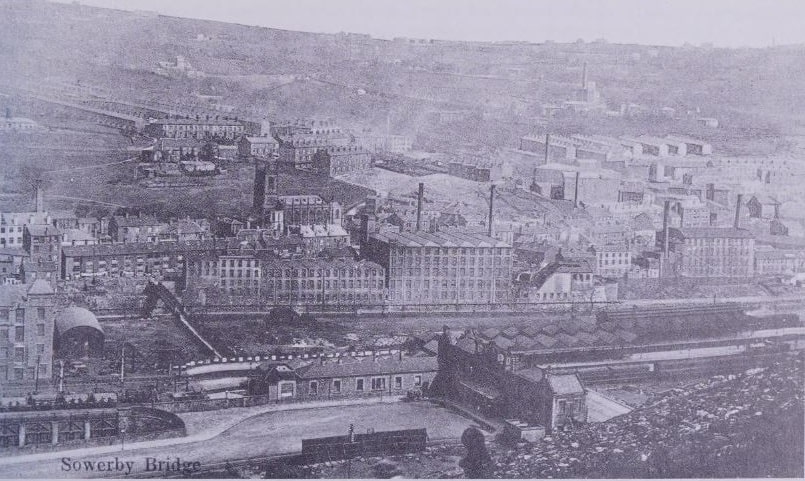
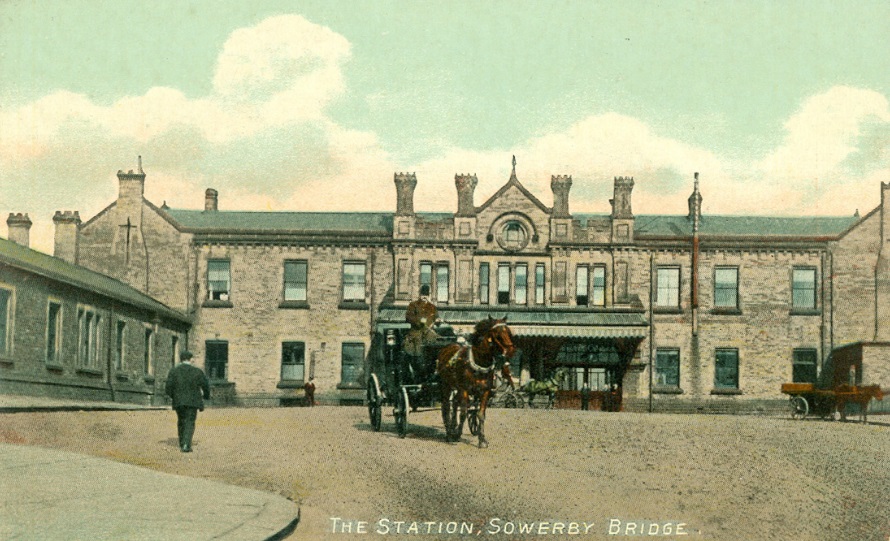
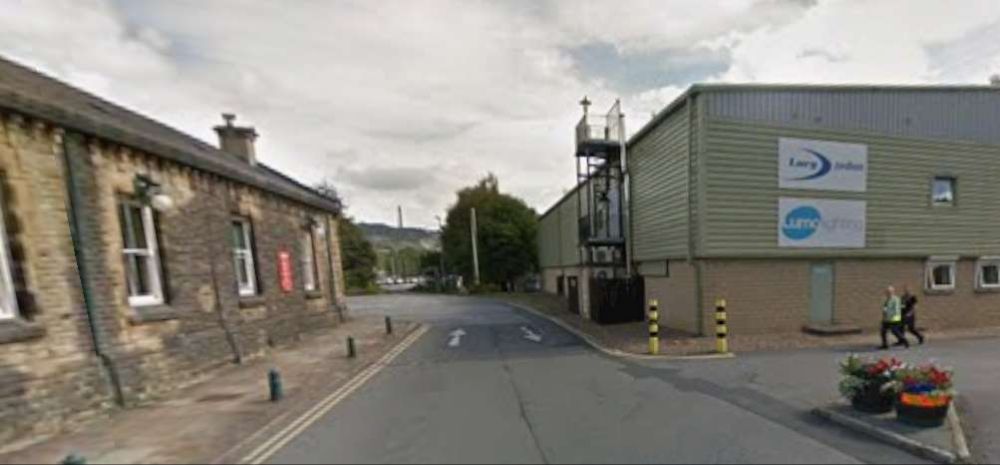
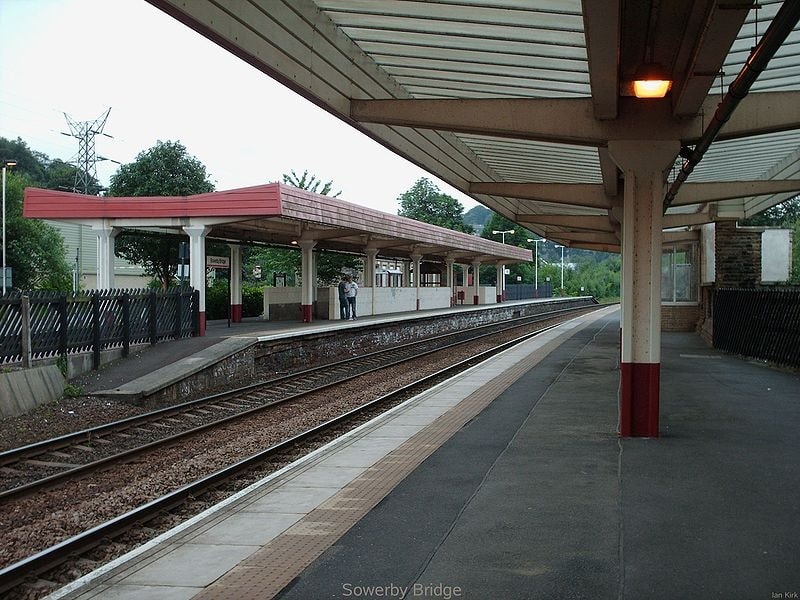

More images of Sowerby Bridge Railway Station can be found here [67] and here. [68]
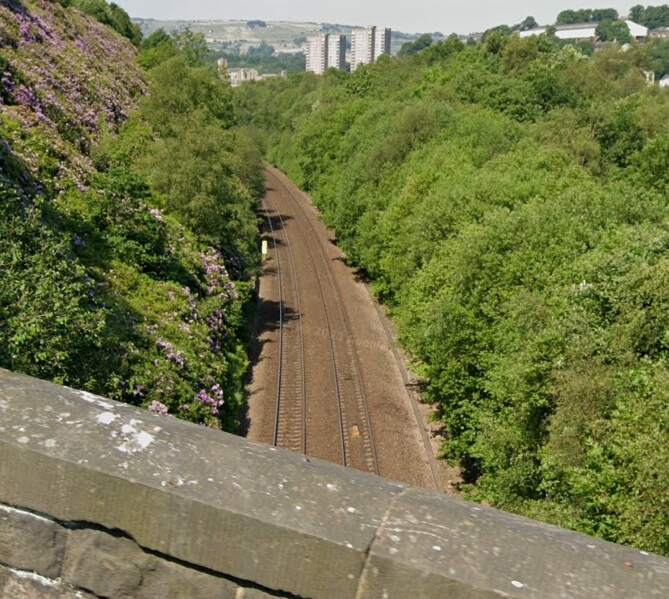
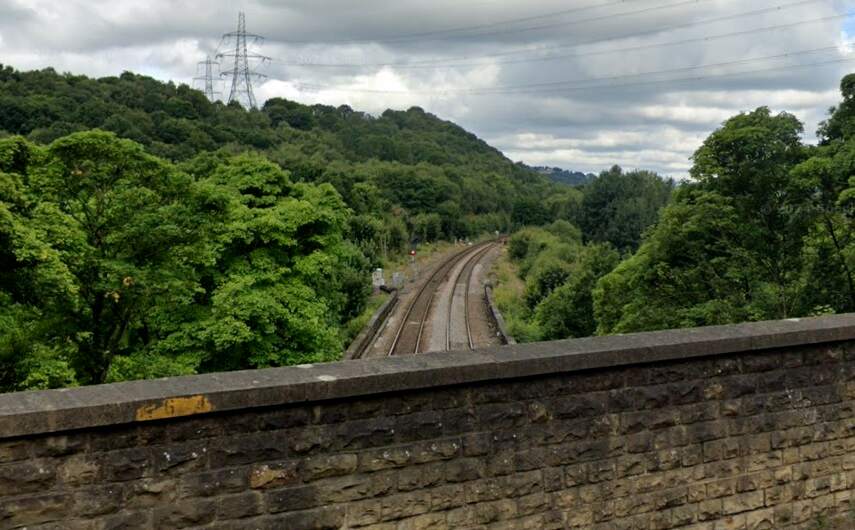
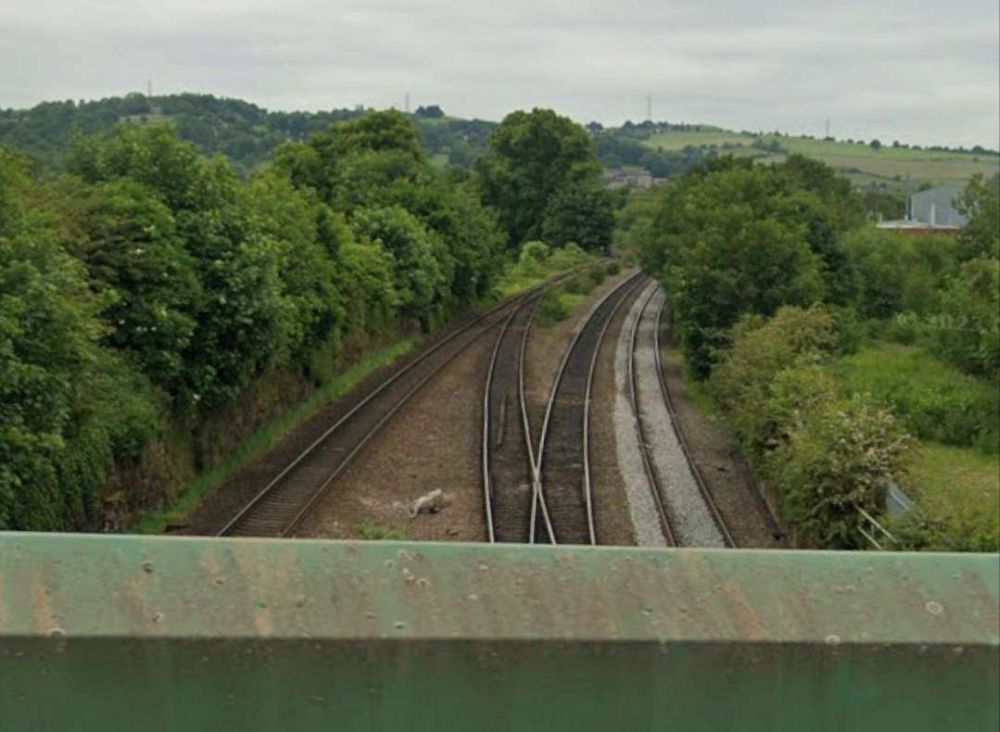
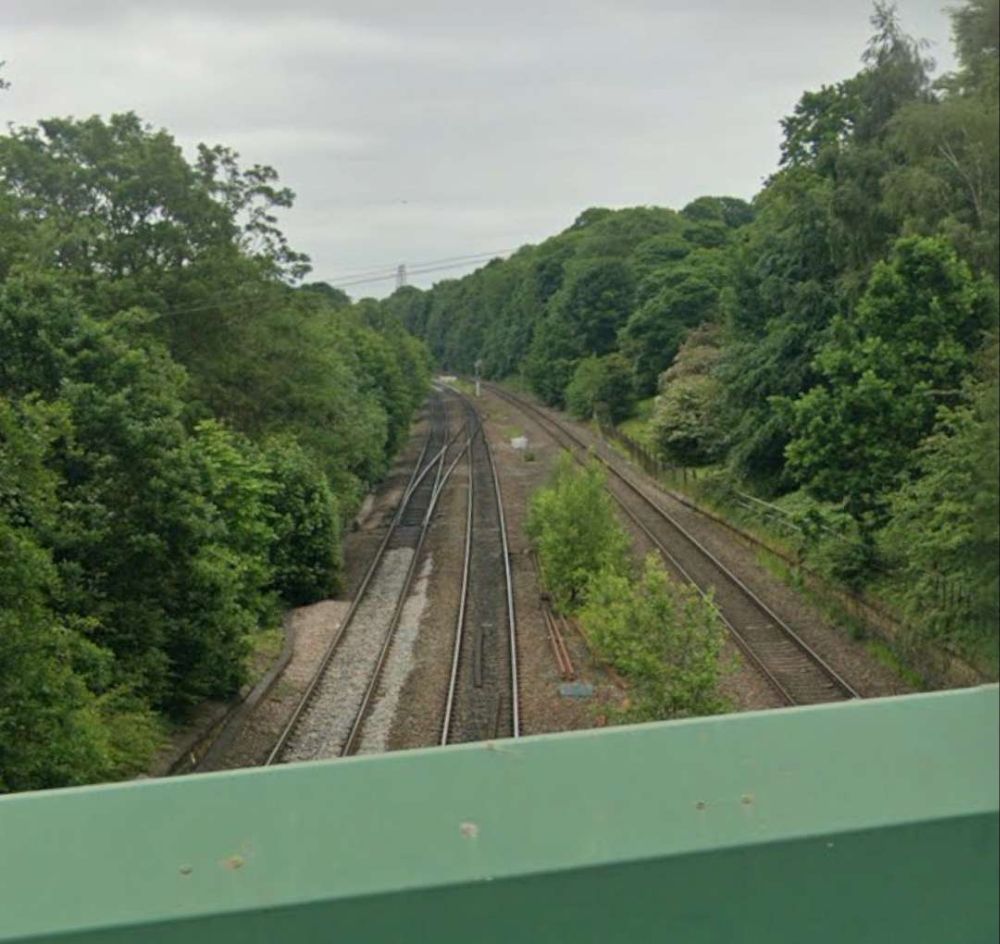
Just beyond the eastern station limits Fall Lane bridges the line – two views from the bridge follow.

To the East of Sowerby Bridge the line crosses the River Calder again.
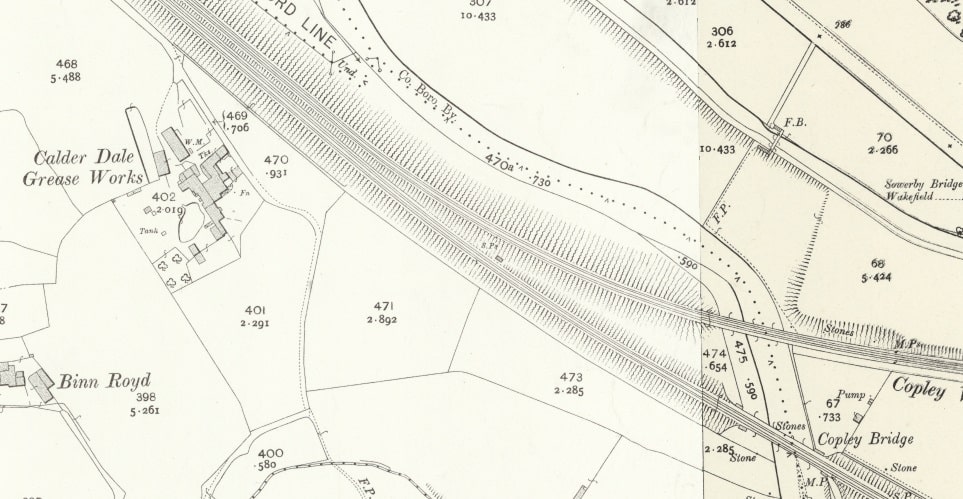
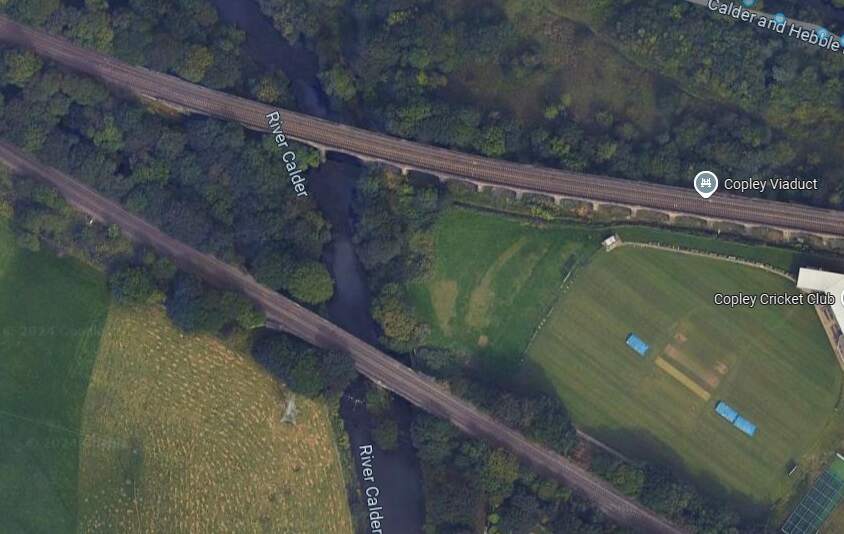
An image of Copley Viaduct can be seen here. Just beneath the viaduct, at the left of the linked photograph, a train is crossing Copley Bridge on the line we are following. [61]
The Manchester and Leeds Railway then crosses the Calder once again and enters Greetland Station. The second arm of the Sowerby Bridge, Halifax and Bradford line joins the mainline just before (to the Northwest of) Greetland Station.
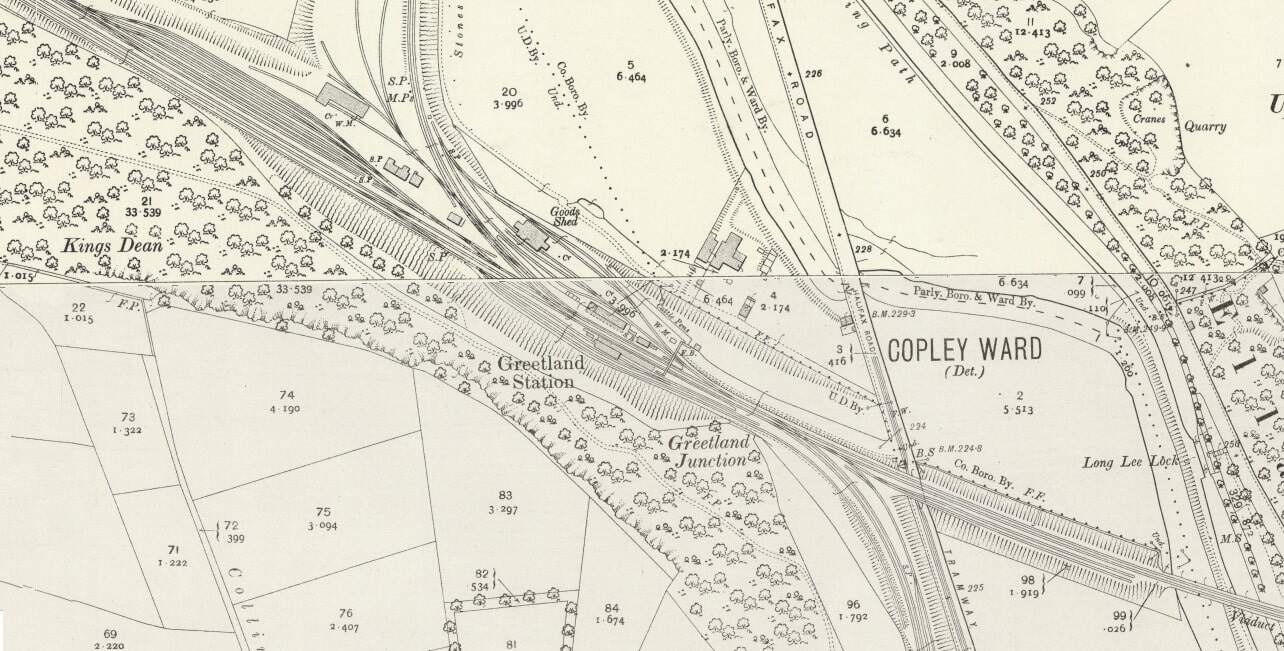
Greetland Railway Station “was originally opened as North Dean in July 1844. It was subsequently changed to North Dean and Greetland and then to Greetland in 1897. Situated near the junction of the main Calder Valley line and the steeply-graded branch towards Halifax (which opened at the same time as the station), it also served as the junction station for the Stainland Branch from its opening in 1875 until 1929. It was closed to passenger traffic on 8th September 1962.” [27]
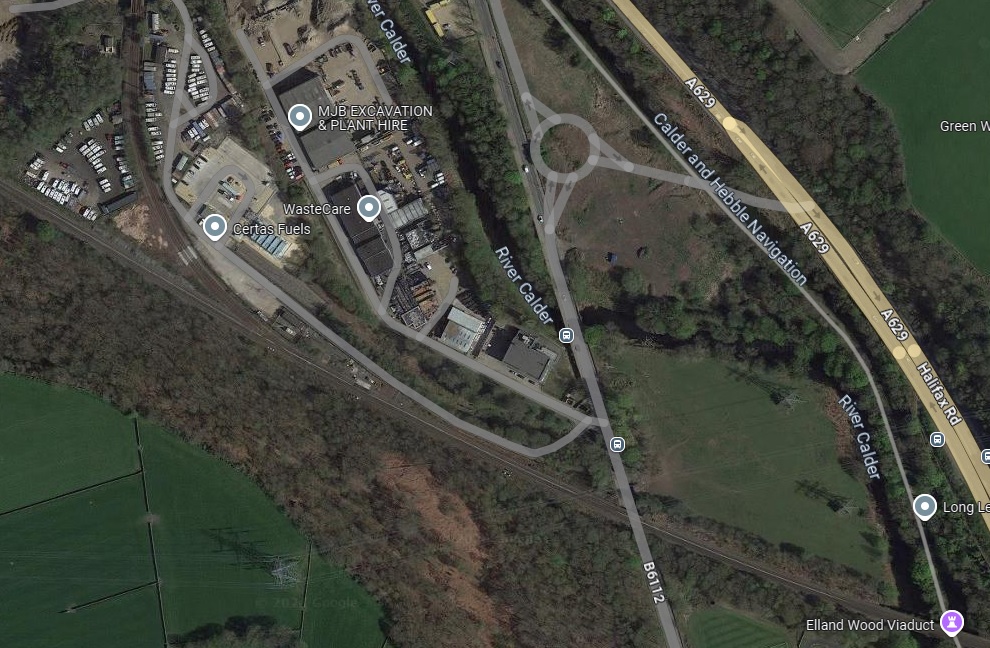
Rake says that the line then approaches “Elland Tunnel, 424 yards, in length, and, after leaving Elland Station, pass[es] through a deep cutting, from which a large quantity of stone for the building of the bridges was obtained.” [1: p471]
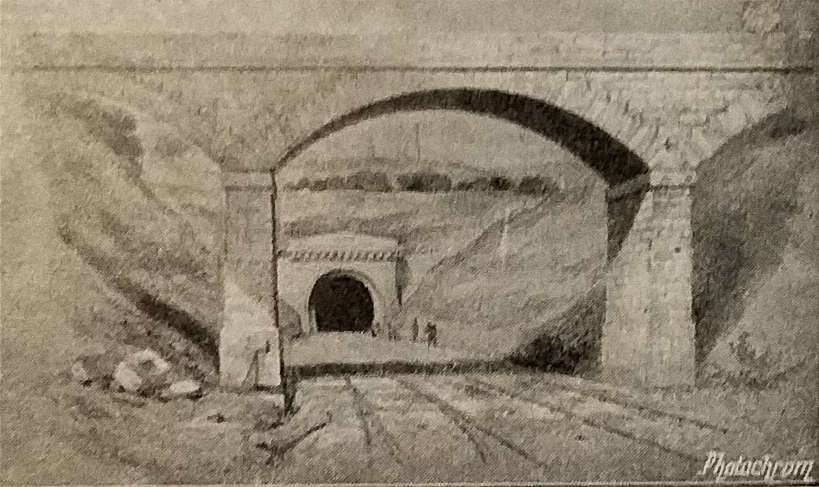
To the East of Elland Railway Station the railway is carried above the River Calder, passing Calder Fire Clay Works. Further East again, “the railway is carried across a steep and rugged acclivity, rising almost perpendicularly from the river. … The viaduct consists of six arches of 45ft span each, and leads directly to Brighouse, originally the nearest station to Bradford.” [1: 472]
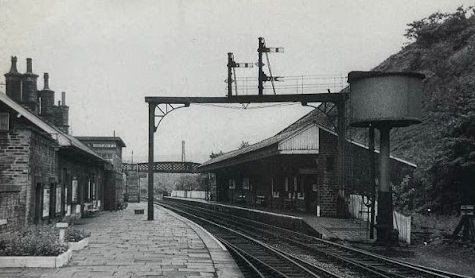
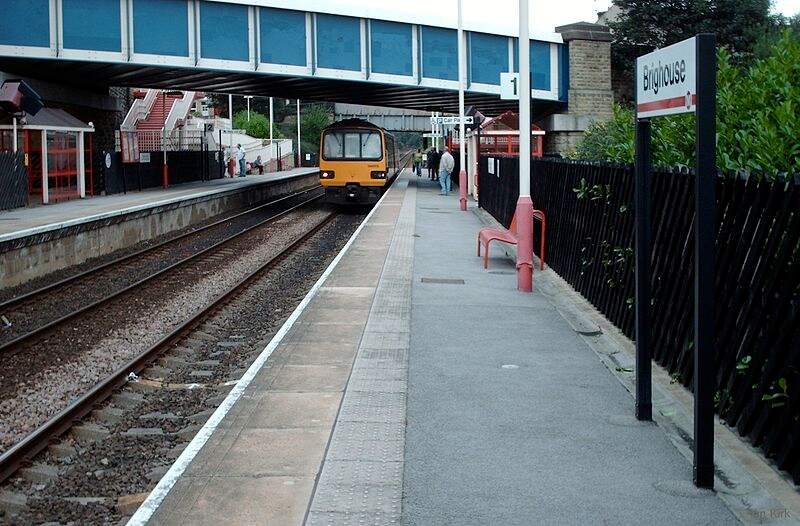
From Elland, the line runs on through Brighouse


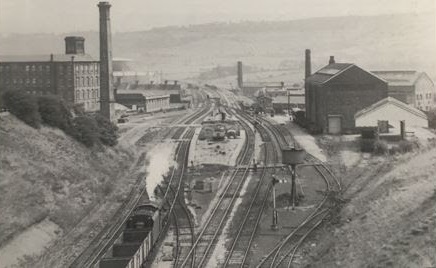
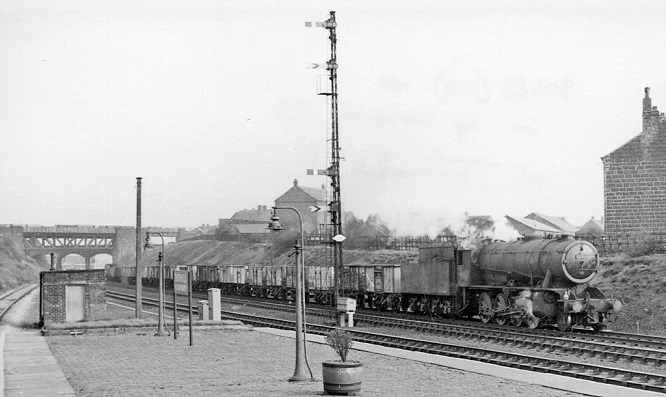
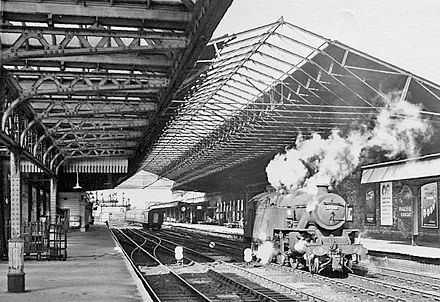
The locomotive is arriving at the station from the East with a local passenger train. The locomotive had only recently been transferred to Wakefield from Ardseley. It was withdrawn at the end of 1964. The photograph looks Southeast through the station. [32]
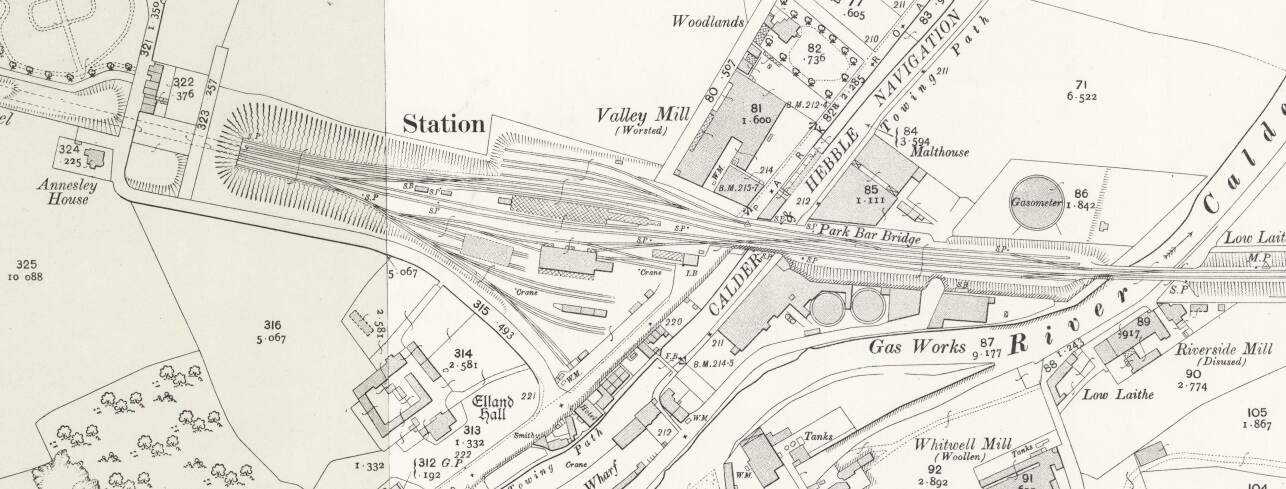
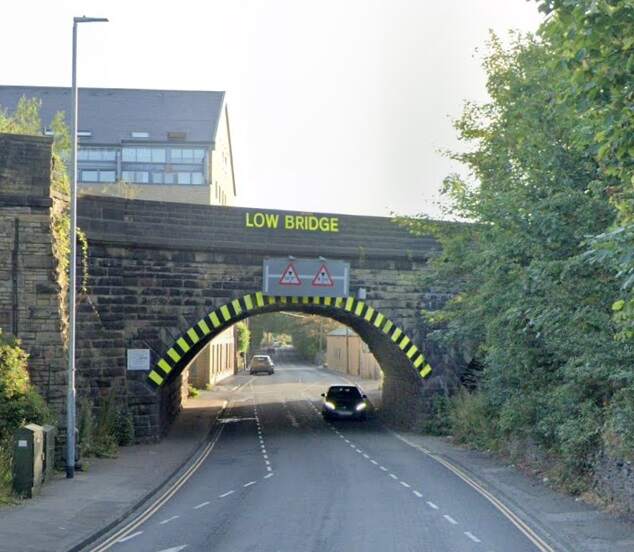
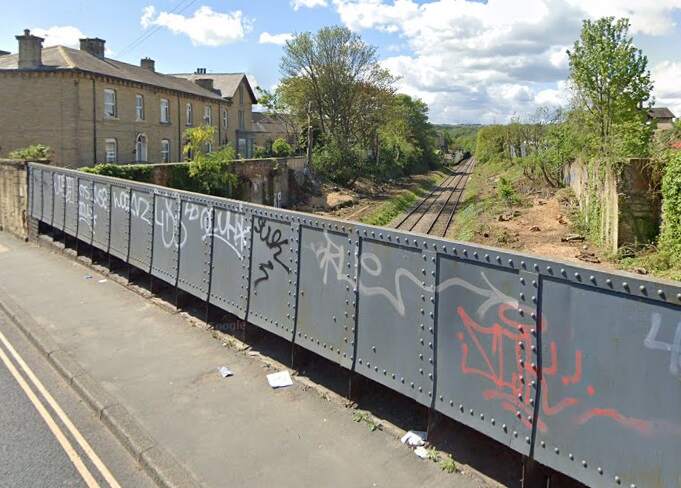
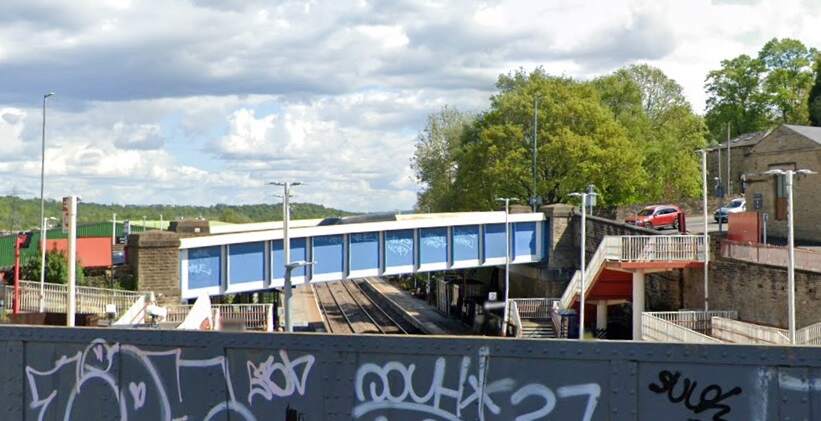
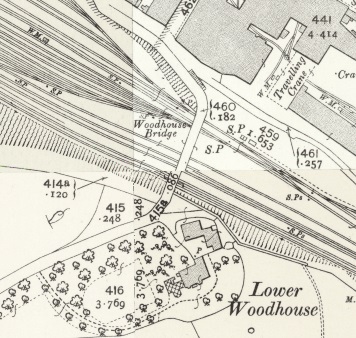
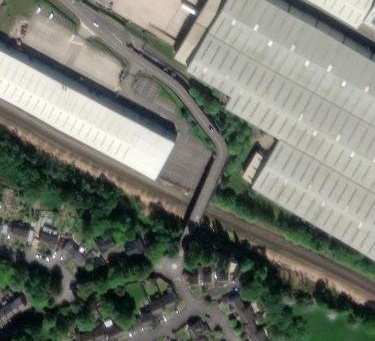
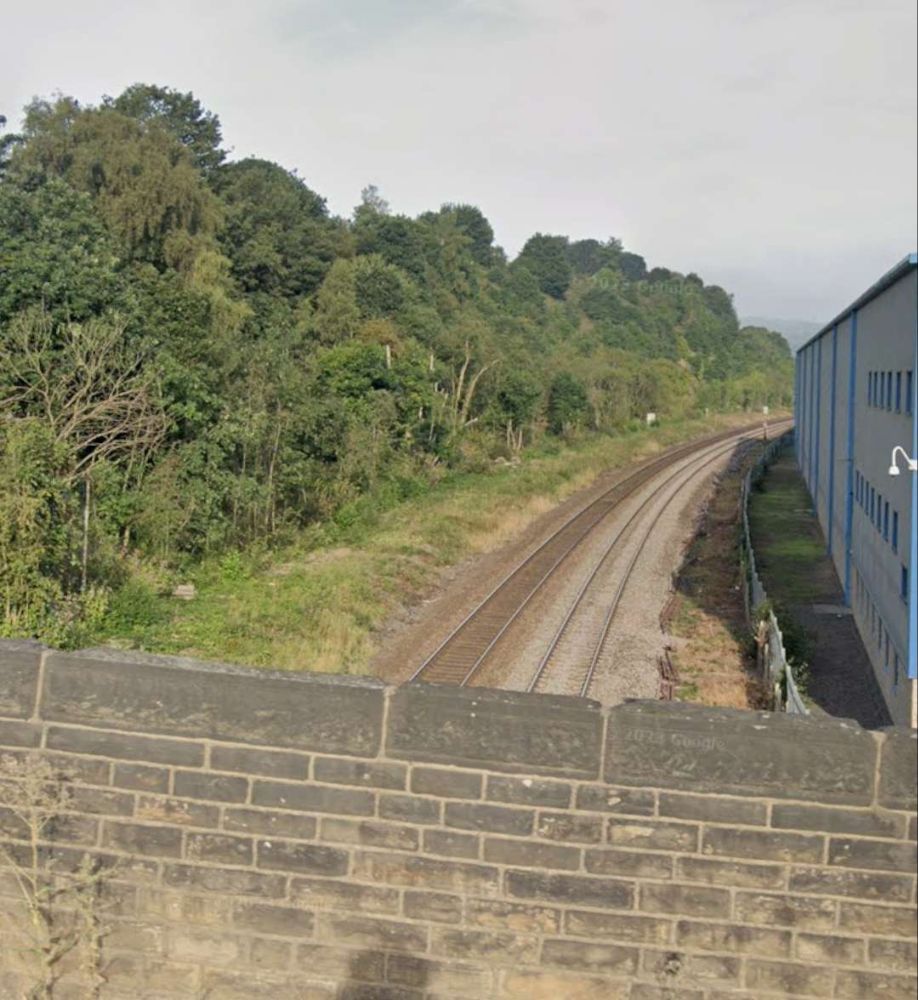
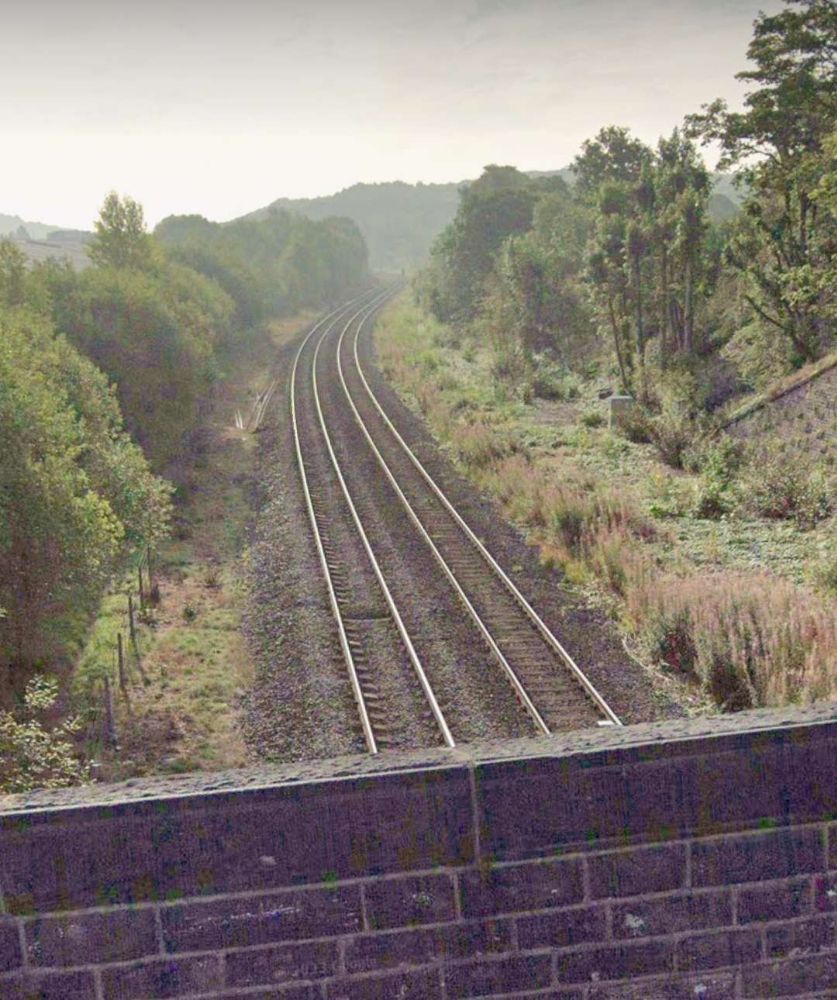
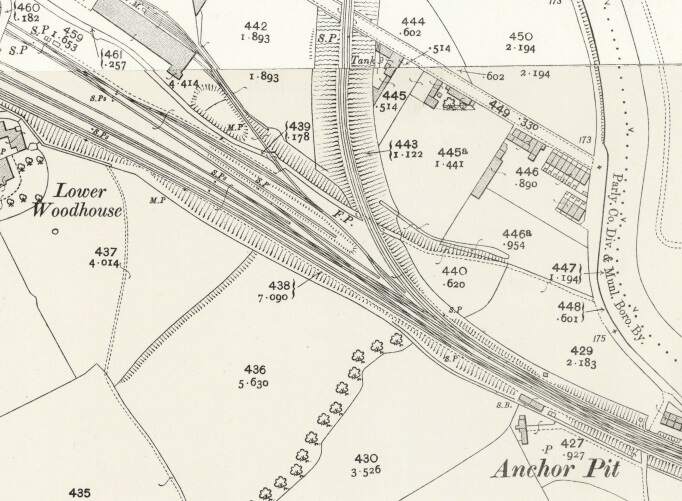
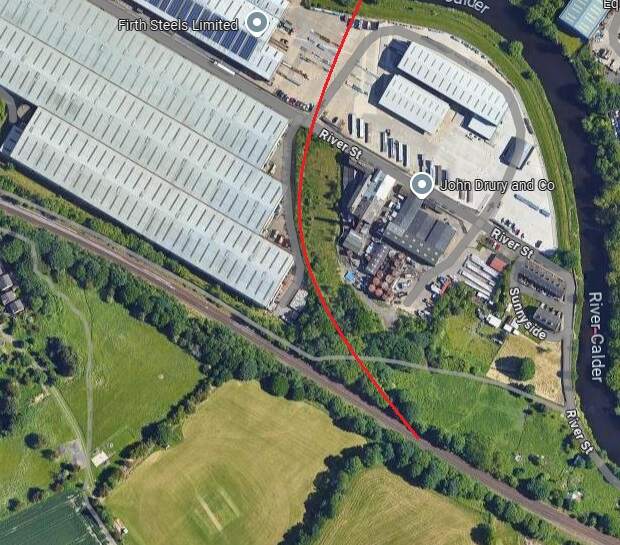
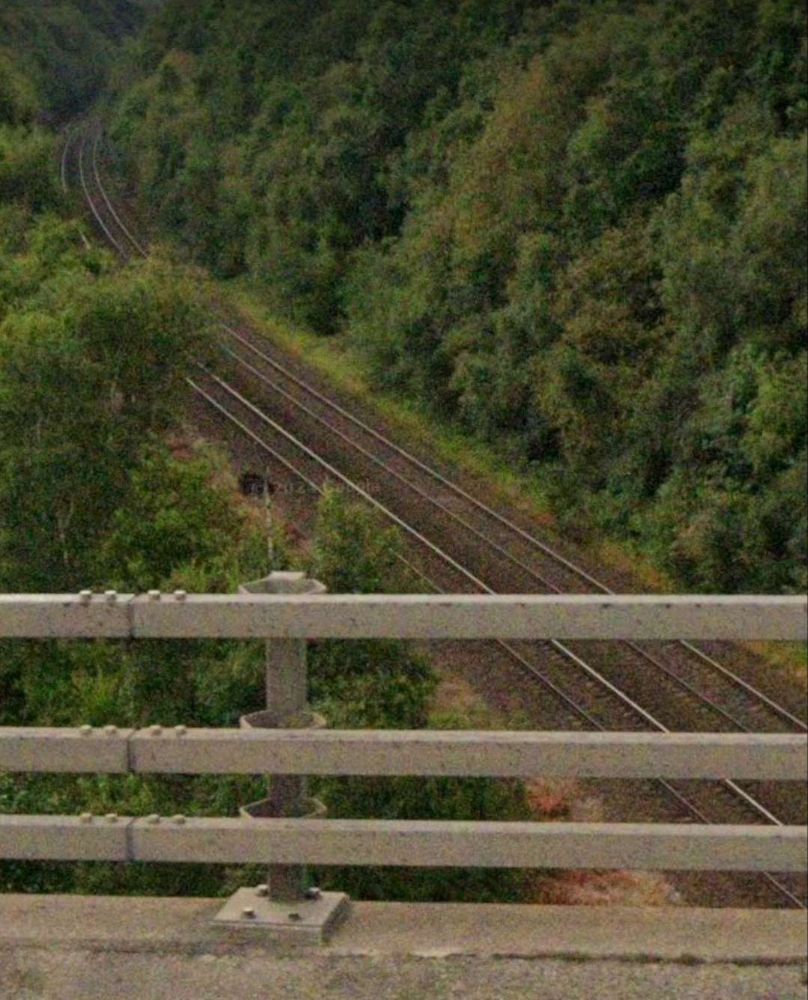
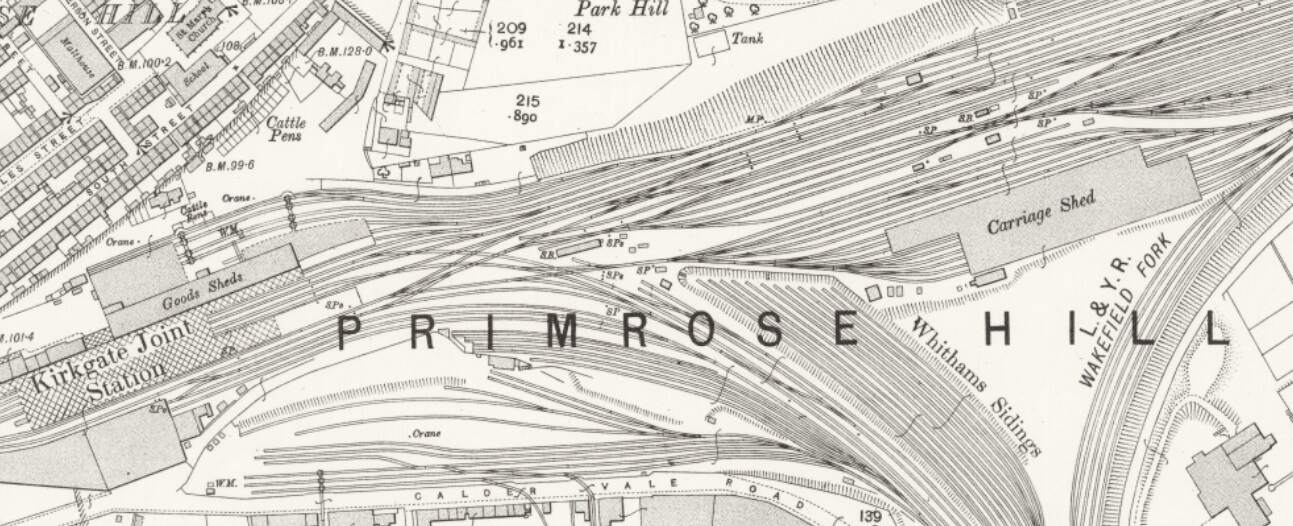
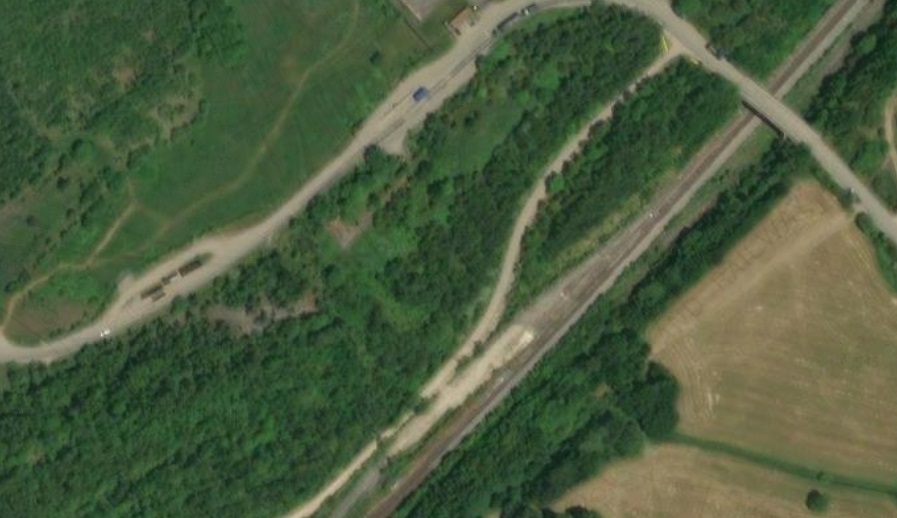
To the East of the passenger facilities at Brighouse there were a significant array of sidings. The first length of these can be seen on the OS Map above. Around 75% of the way along these sidings Woodhouse Bridge spanned the lines. Much of the area has been redeveloped by modern industry. The next four images relate to that bridge.
Leaving Brighouse Station, the railway is joined, from the North, by the Bailiff Bridge Branch (long gone in the 21st century).
A little further to the East, in the 21st century, the line passes under the M62 and enters a deep cutting before, at Bradley Wood Junction, the Bradley Wood Branch leaves the line to the South (still present in the 21st century).
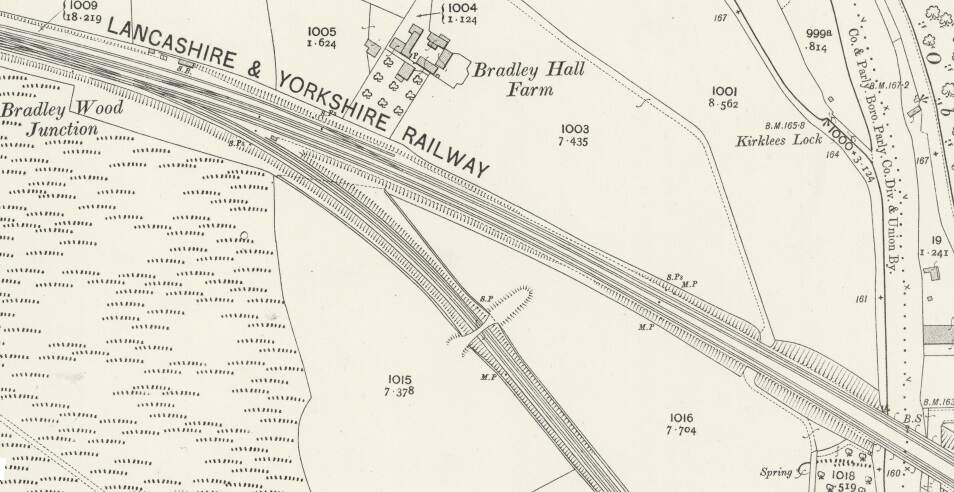
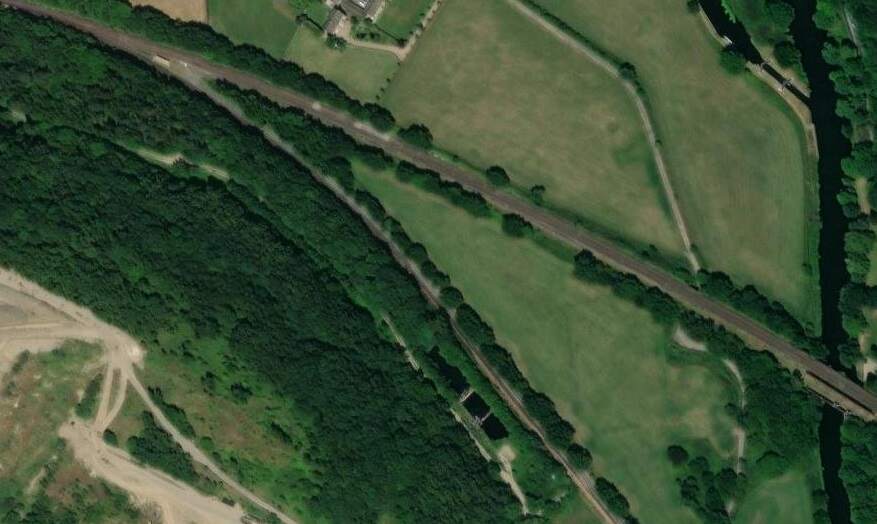
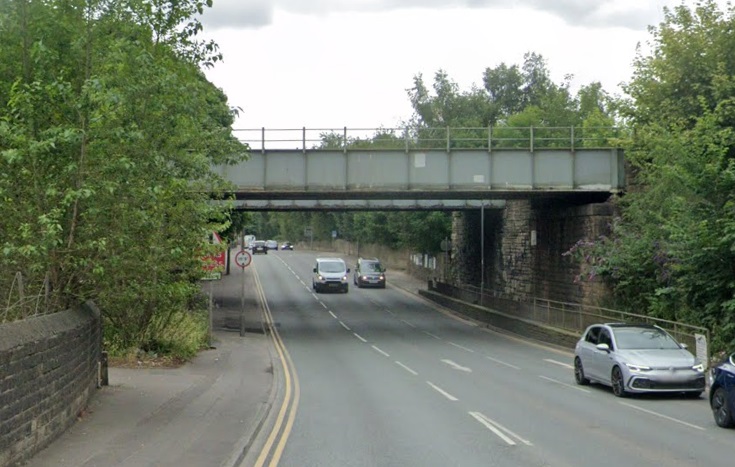
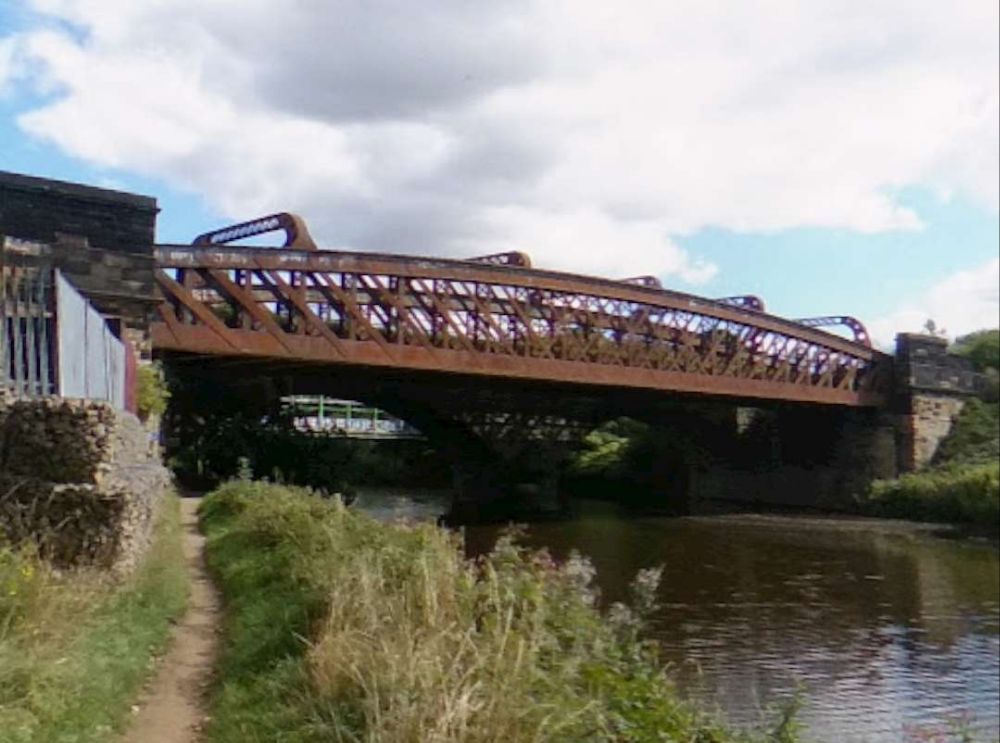
“Beyond [Bradley Wood Junction] the Calder is crossed by a viaduct of two arches of 76 ft. span each. this is succeeded by an embankment, along which the line continues down the valley. [It] again cross[es] the Calder by a viaduct similar to that just referred to.” [1: p472] The line was widened to the South side to create a four-track main line and single span girder bridges were positioned alongside the original structures.
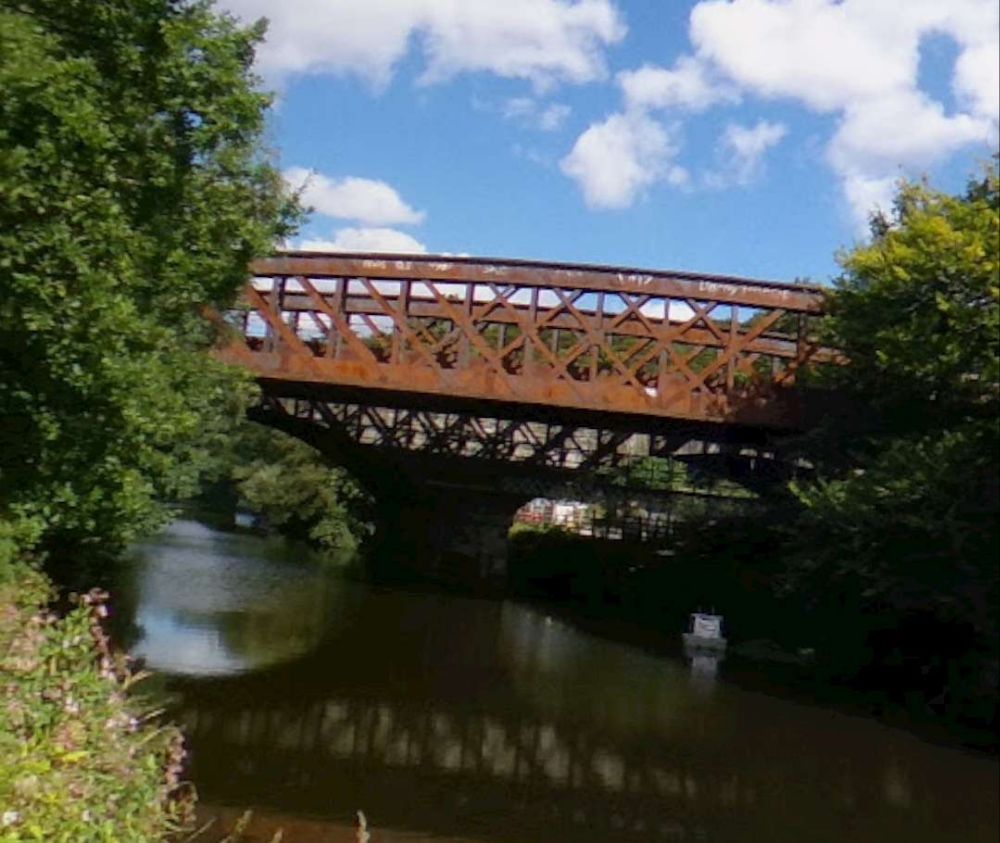
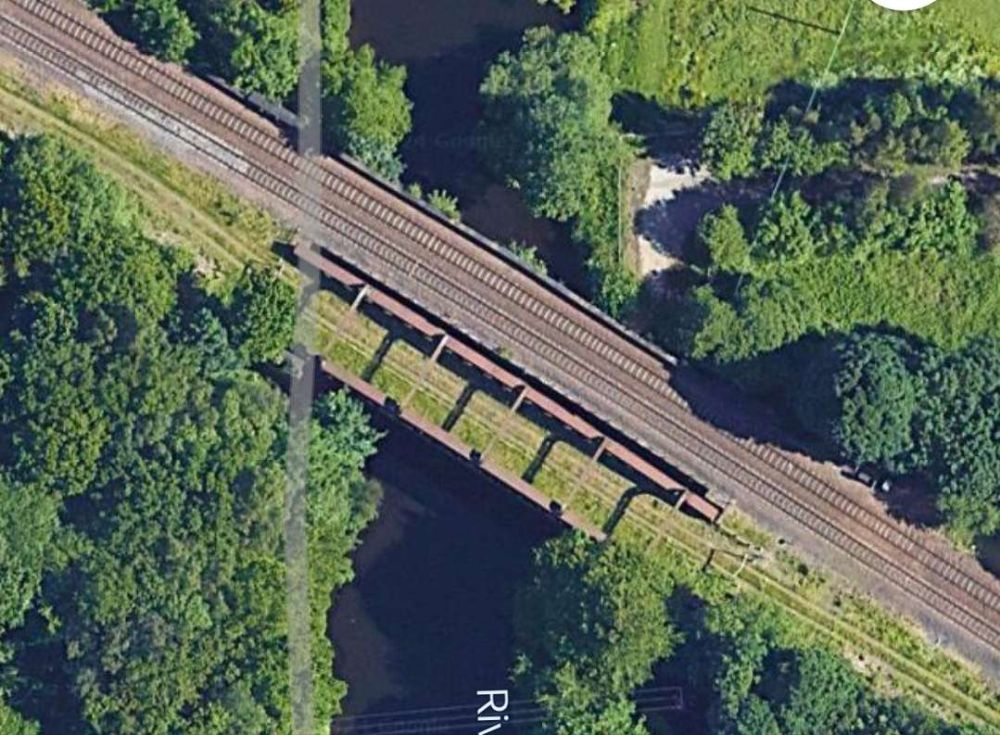
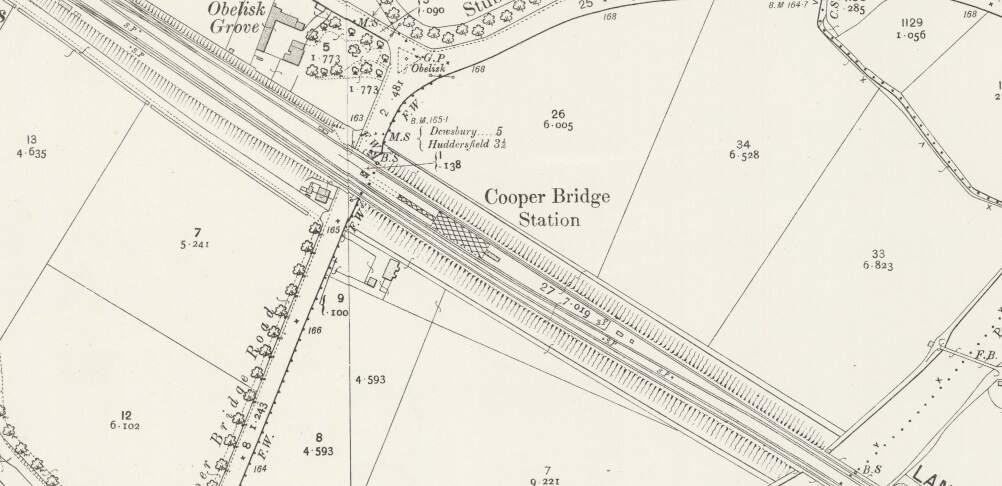
In between the two bridges across the River Calder, was Cooper Bridge Station.
Rake’s journey along the line seems not to focus so closely on the remaining length of the line. Various features and a number of stations seem to have been missed (particularly Cooper Bridge, Mirfield, Ravensthorpe, Thornhill, Horbury & Ossett). It also seems to suggest that the line goes through Dewsbury Station. Rather than rely on Rake’s commentary about the line, from this point on we will provide our own notes on the route.
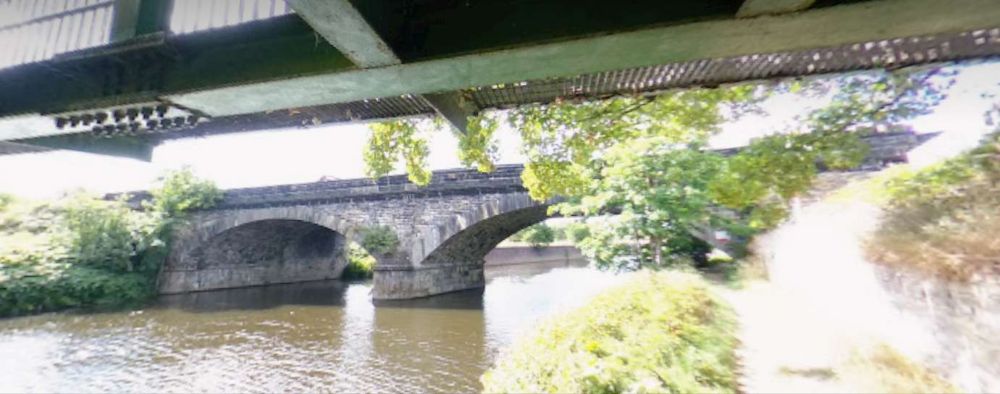
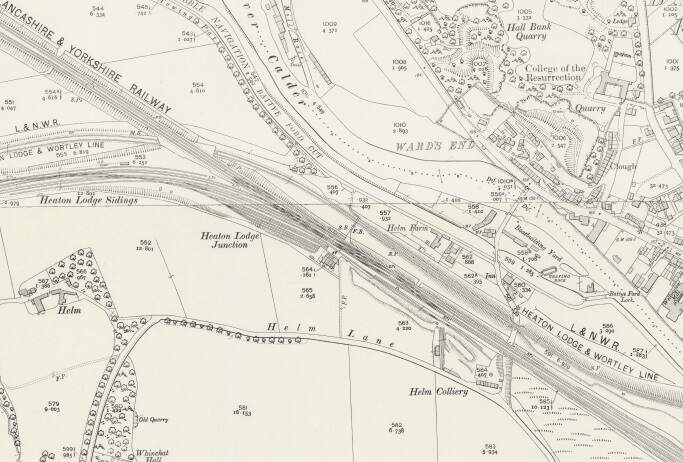
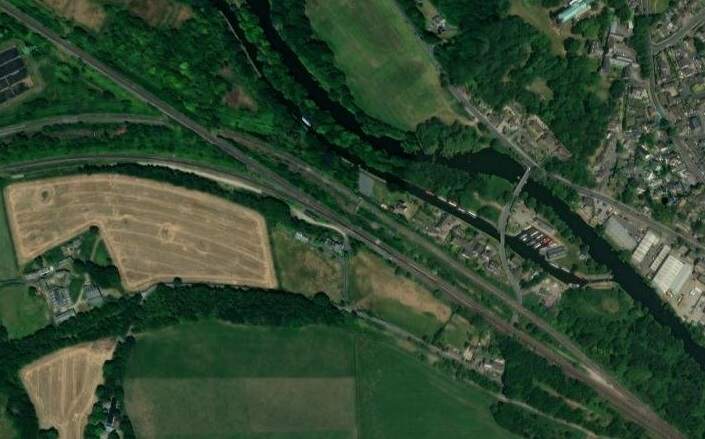
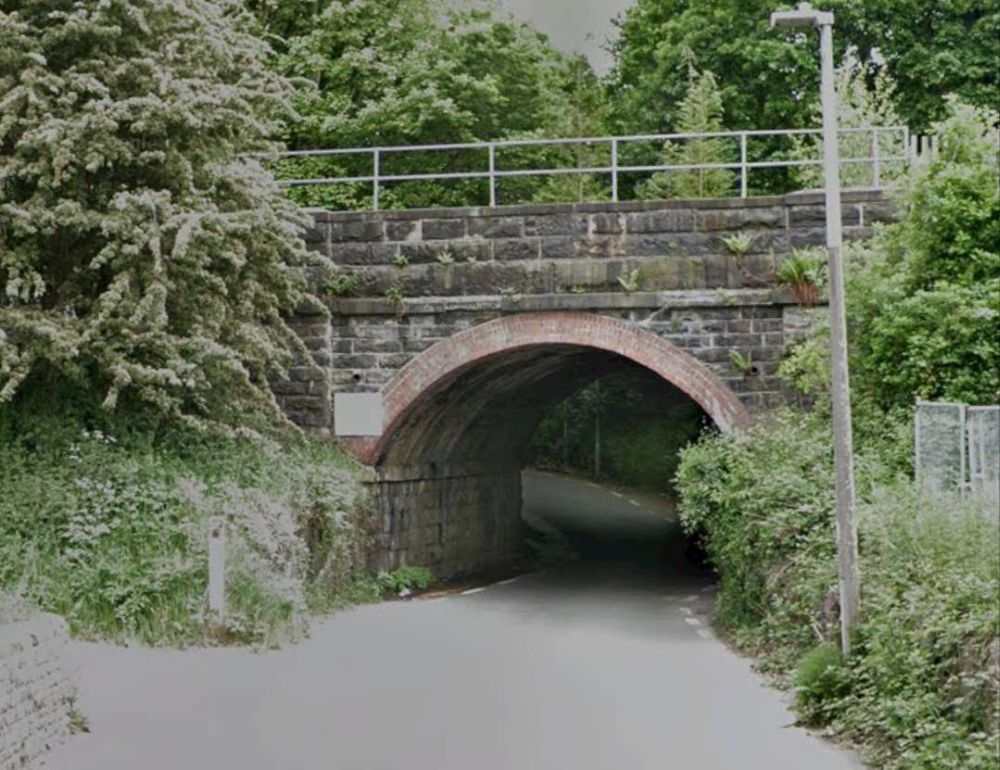
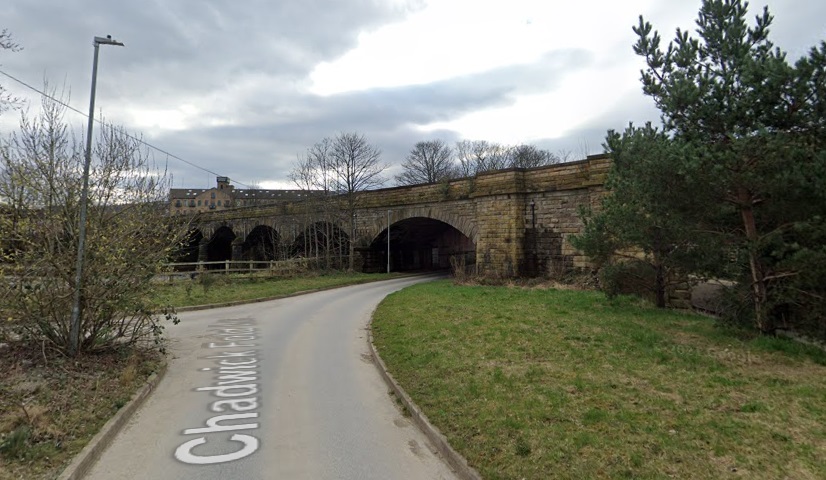
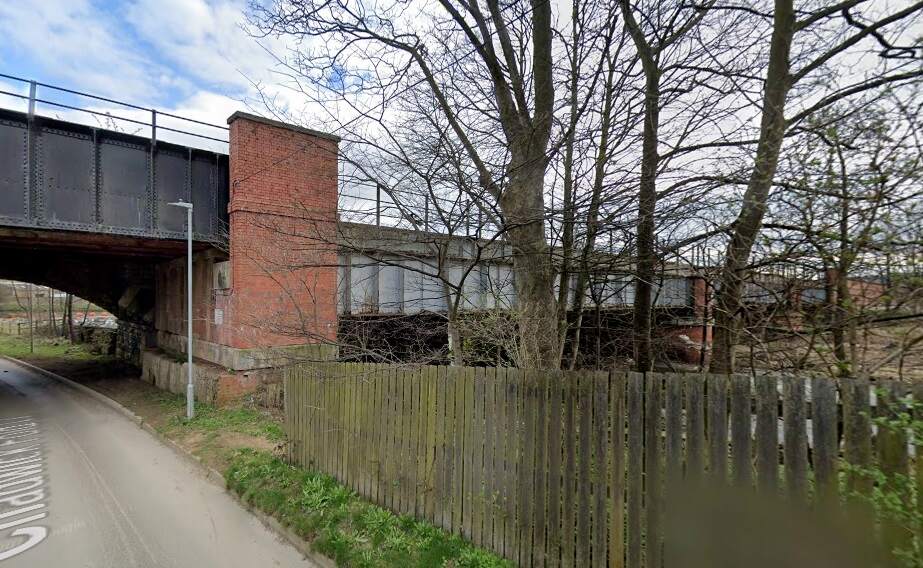
At Heaton Lodge Junction, the LNWR Huddersfield & Manchester line joined the Manchester & Leeds line with the LNWR Heaton & Wortley line passing beneath. The Manchester & Leeds line ran on towards Mirfield Station passing the large engine shed before entering the station over a long viaduct which once again crossed the River Calder.
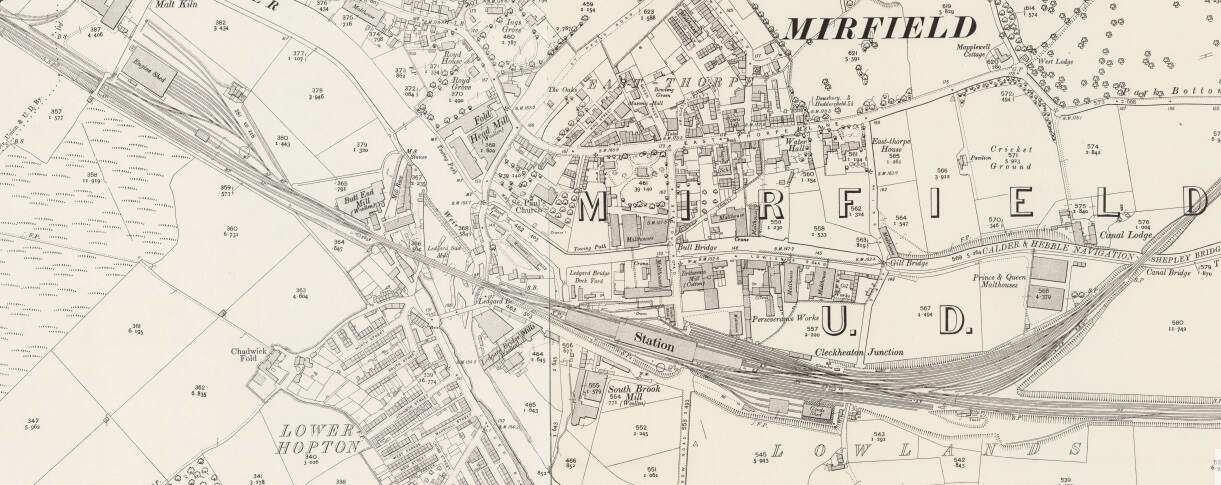
Just to the East of Mirfield Station was Cleckheaton Junction and then Wheatley’s Bridge over the River Calder. A bridge then carries Sand Lane over the railway.
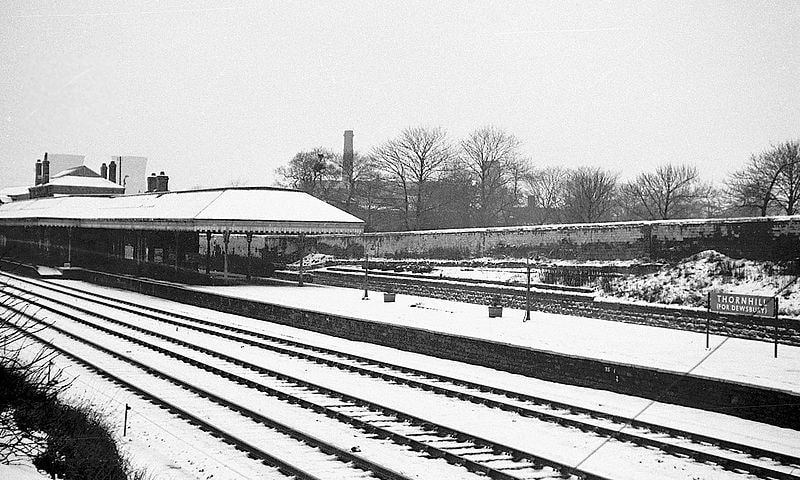
Soon after this the line encountered Dewsbury Junction which hosted Ravensthorpe (Ravensthorpe and Thornhill) Station.

Thornhill Railway Station was a short distance further East just beyond the junction where the Ravensthorpe Branch met the main line at Thornfield Junction.

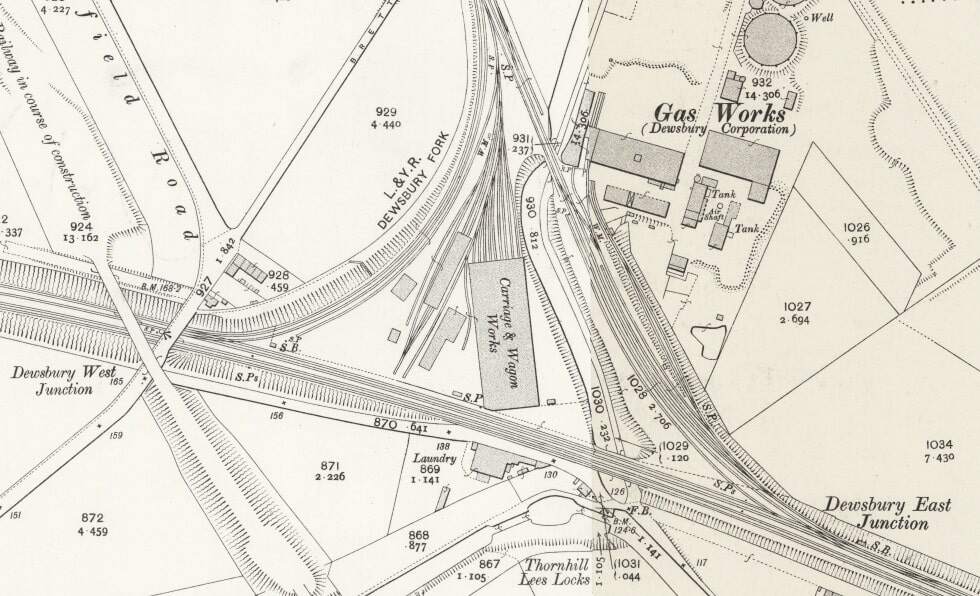
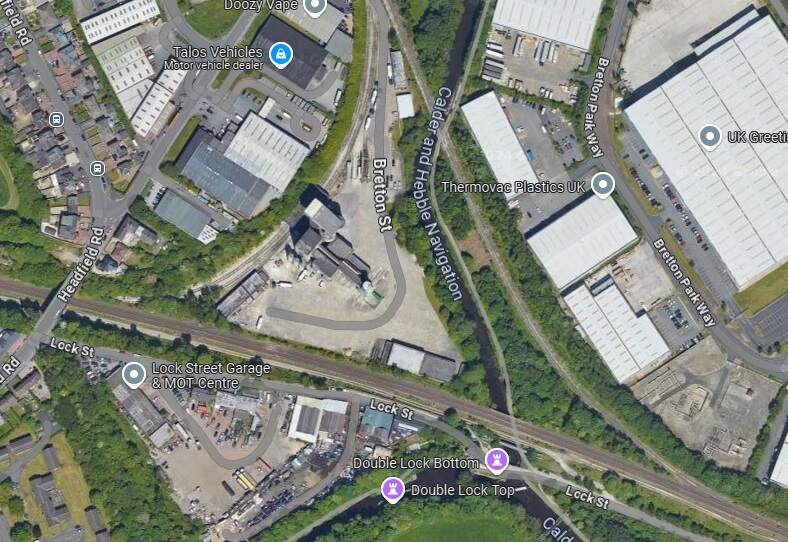
East of Thornhill Station were Dewsbury West and Dewsbury East junctions which together with Headfield Junction formed a triangular access to Didsbury Market Place Station. This was a busy location which sat close to Dewsbury Gas Works, Thornhill Carriage and Wagon Works and Thornhill Lees Canal Locks and a canal branch. Just off the North of the map extract below was a further junction giving access to the GNR’s Headfield Junction Branch, before the line crossed the River Calder and entered Dewsbury Market Place Station and Yard and terminated there.
Dewsbury was very well provided for by both passenger and freight facilities. In its railway heyday the Midland Railway, the London & North Western Railway, the Lancashire & Yorkshire Railway and the Great Northern Railway all had access to the town. A computer drawn map showing the different lines can be found here. [42]
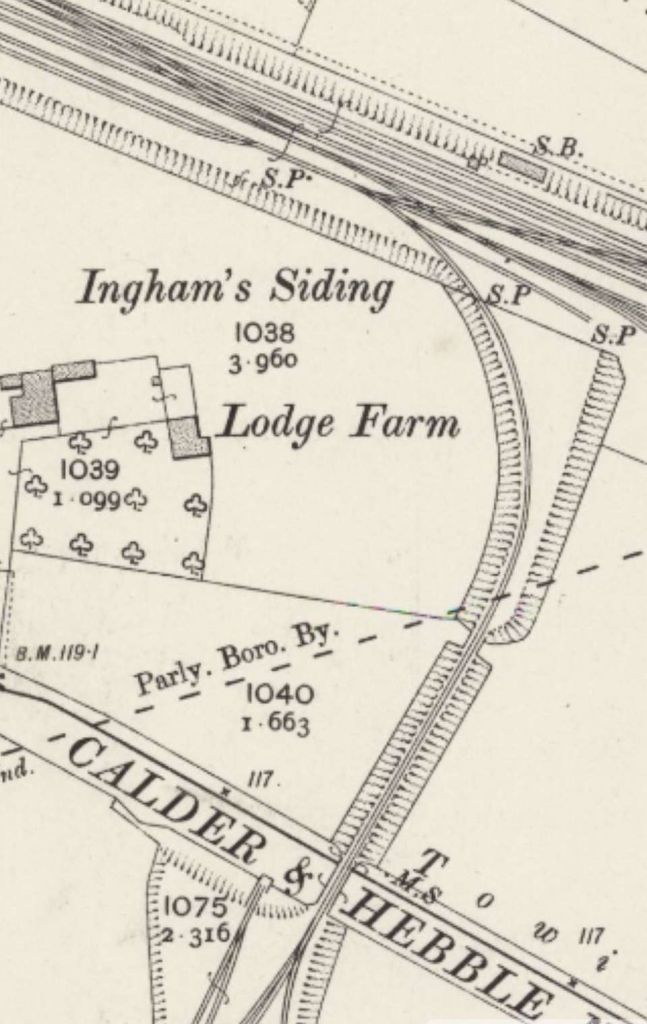
Continuing along the line towards Wakefield and Normanton, the next feature of note is the junction for Combs Colliery’s Mineral Railway at Ingham’s Sidings. Nothing remains of this short branch line.
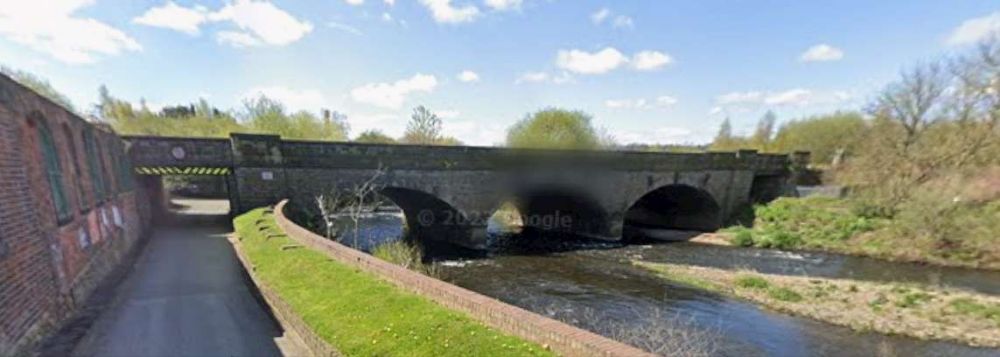
Further East the line continues in a straight line East-southeast to cross the River Calder once again. It then passes the Calder Vale and Healey Low Mills at Healey and runs Southeast to Horbury and Ossett Station.
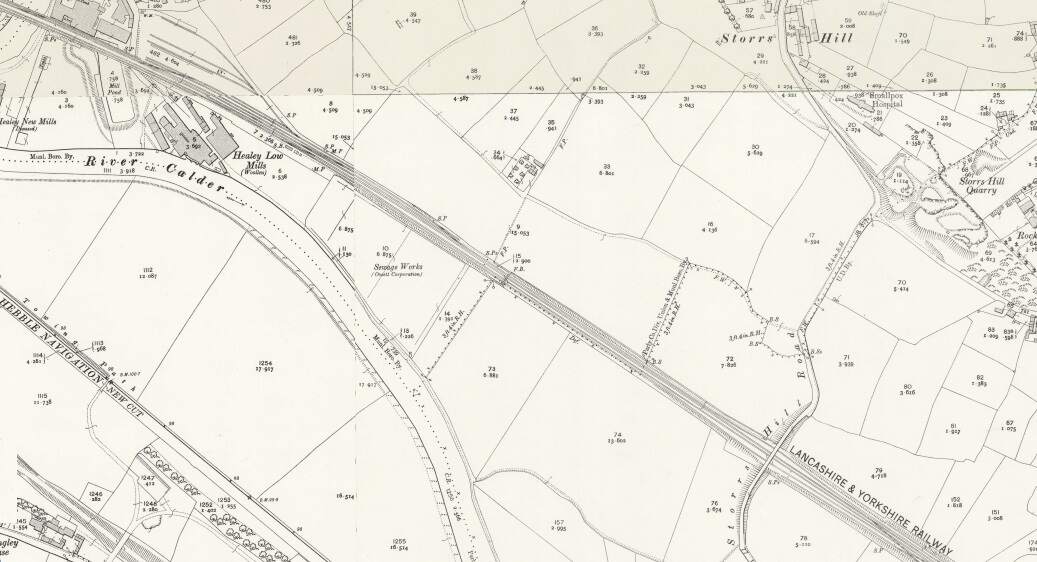
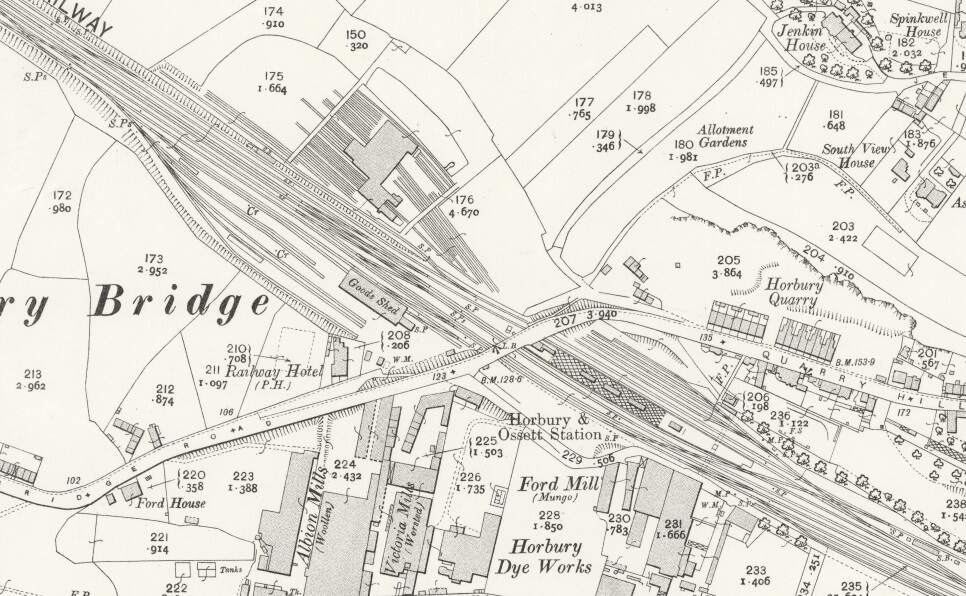
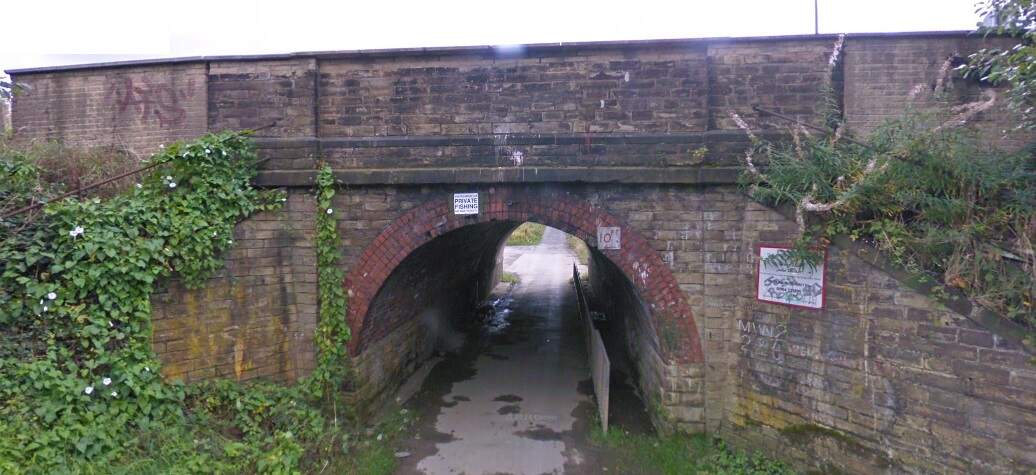
“Horbury and Ossett railway station formerly served the town of Horbury. … The station was opened with the inauguration of the line in 1840, on the west of the Horbury Bridge Road, to the south-west of the town. Later a new, more substantial structure was built just to the east. … British Railways developed a large marshalling yard in the 1960s at Healey Mills immediately to the west of the original station. … [The station] closed in 1970. Almost all that remains is the old subway which ran under the tracks. Ossett is now the largest town in Yorkshire without a railway station. Proposals to open a new one are periodically canvassed, perhaps on part of the Healey Mills site.” [45]
A little further East is Horbury Fork Line Junction where a mineral railway runs South to Harley Bank Colliery and the Horbury & Crigglestone Loop leaves the Manchester to Leeds line.
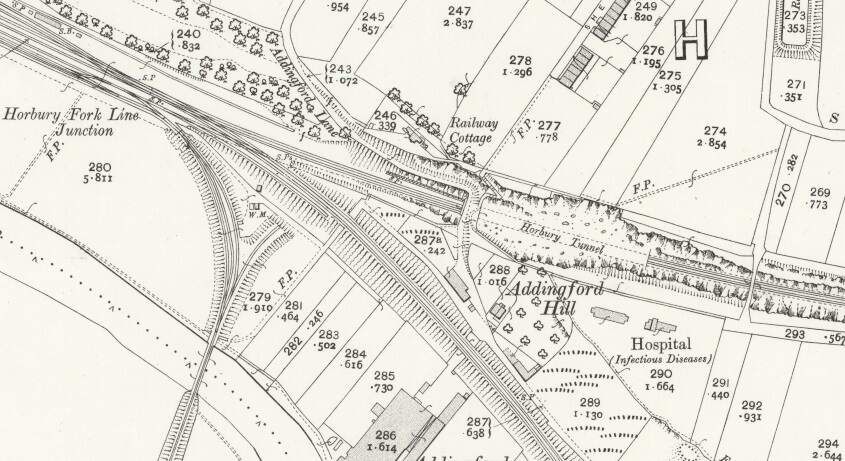
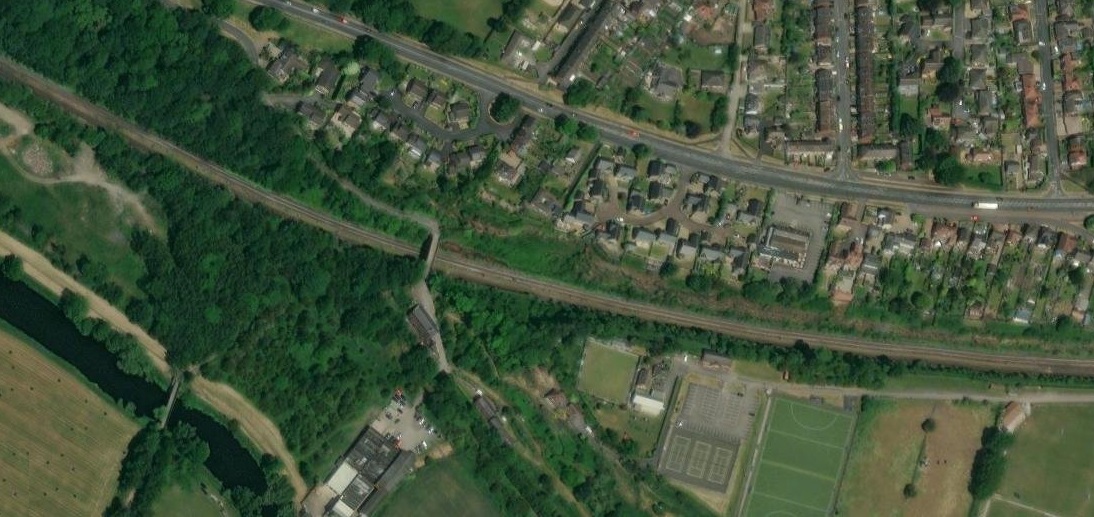
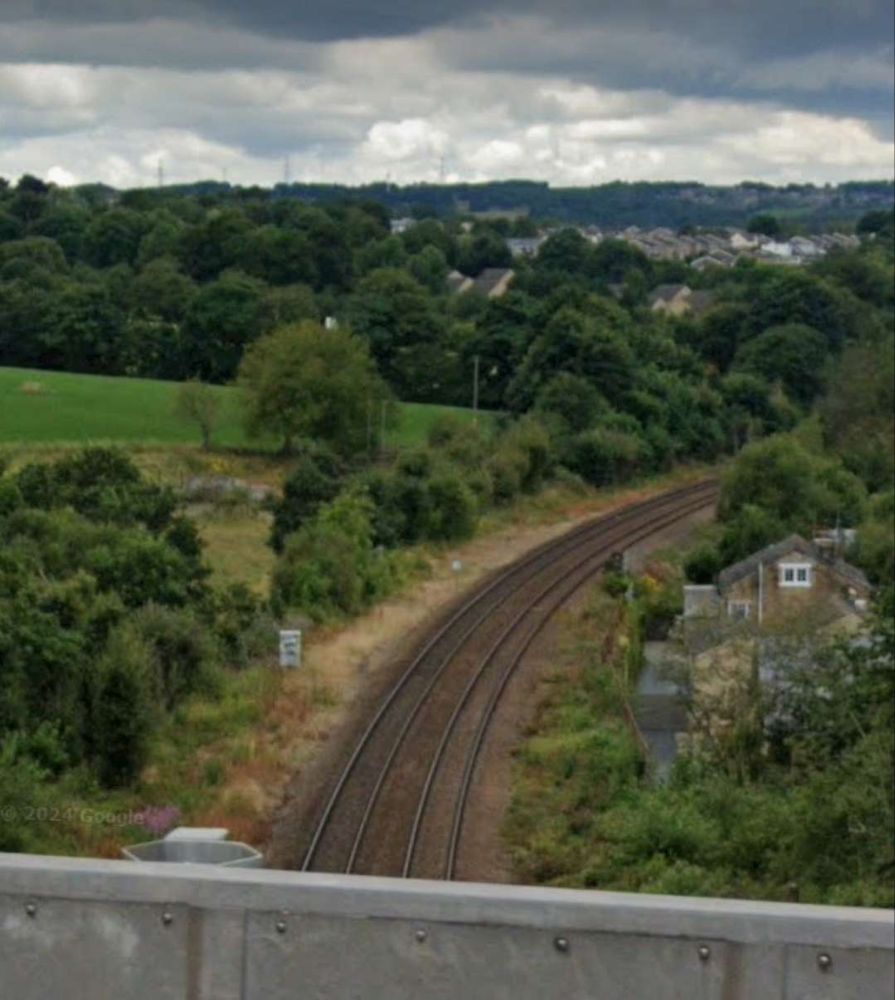
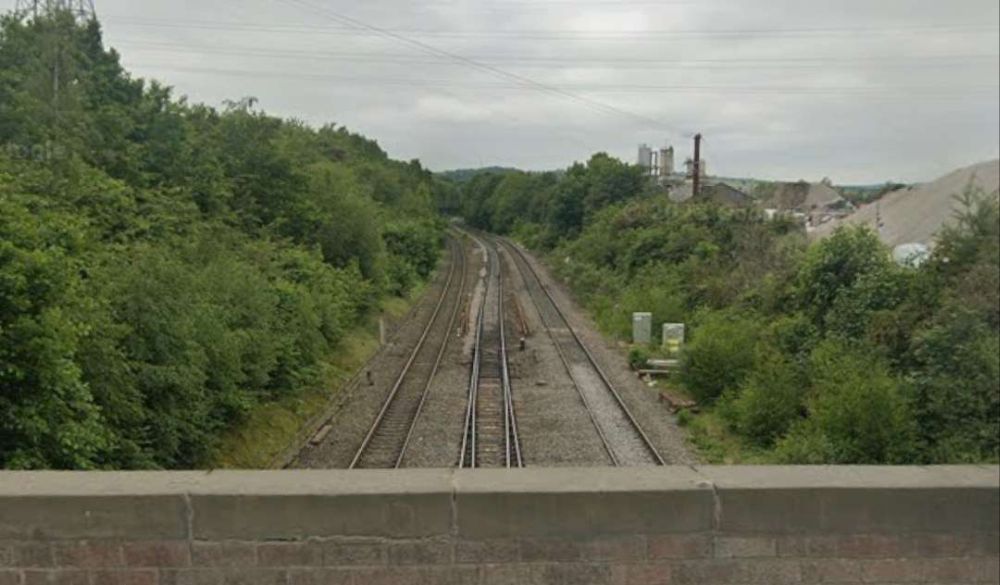
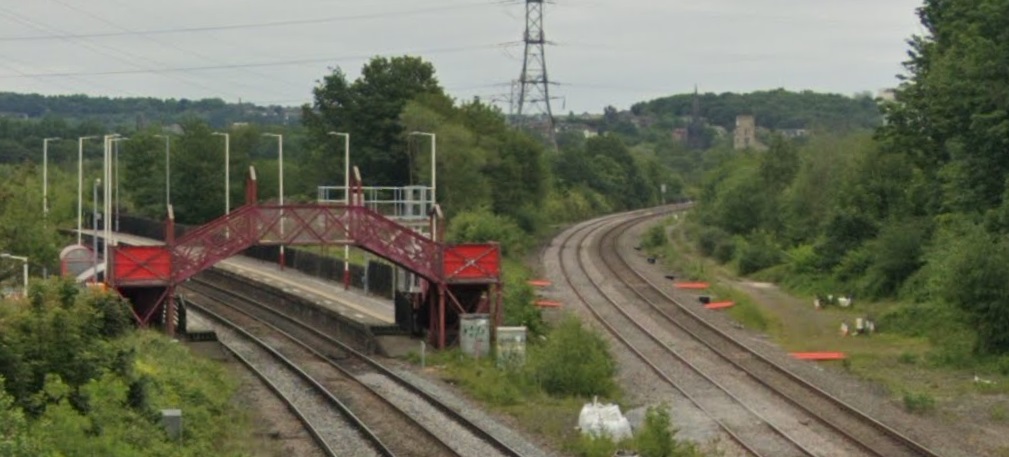
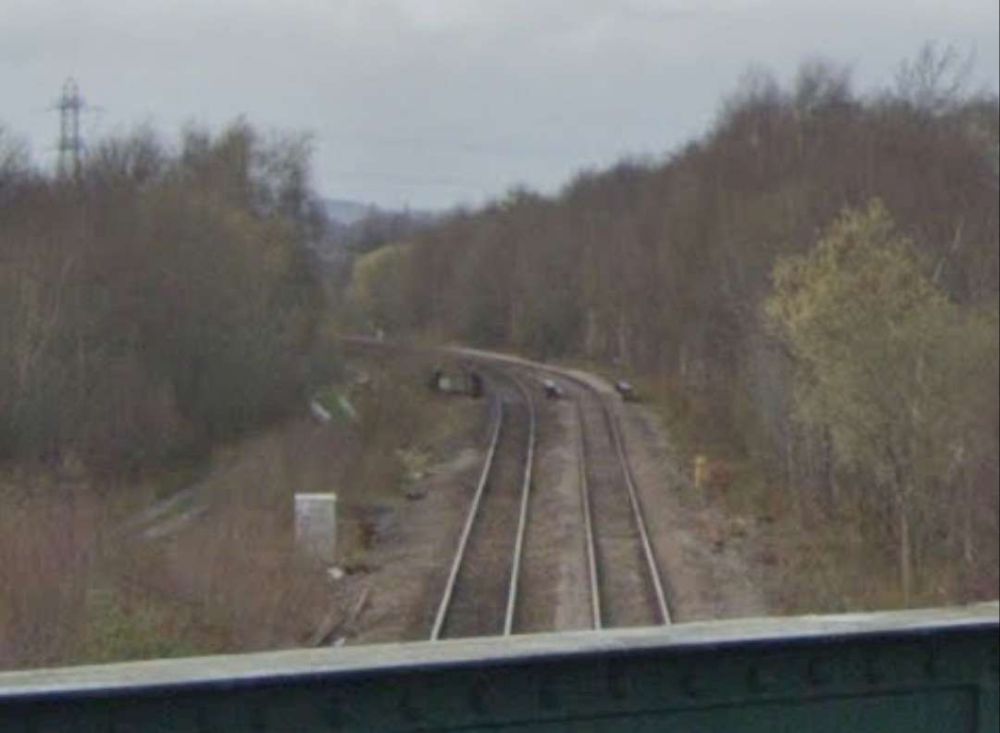
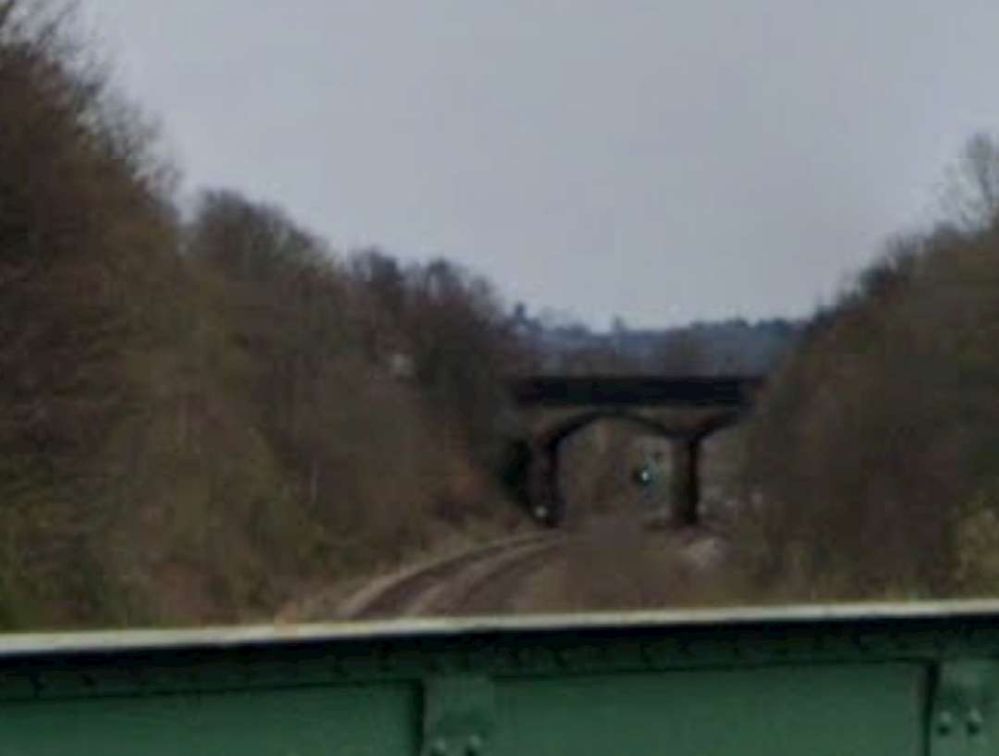
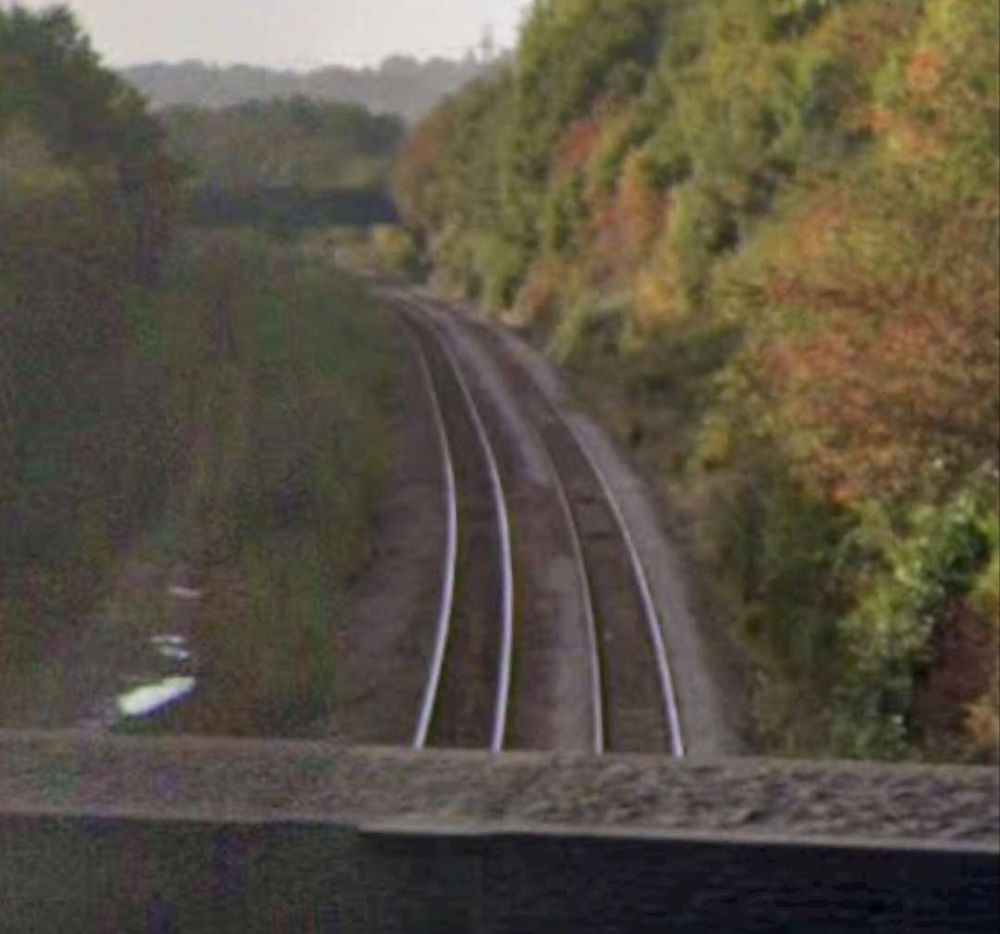
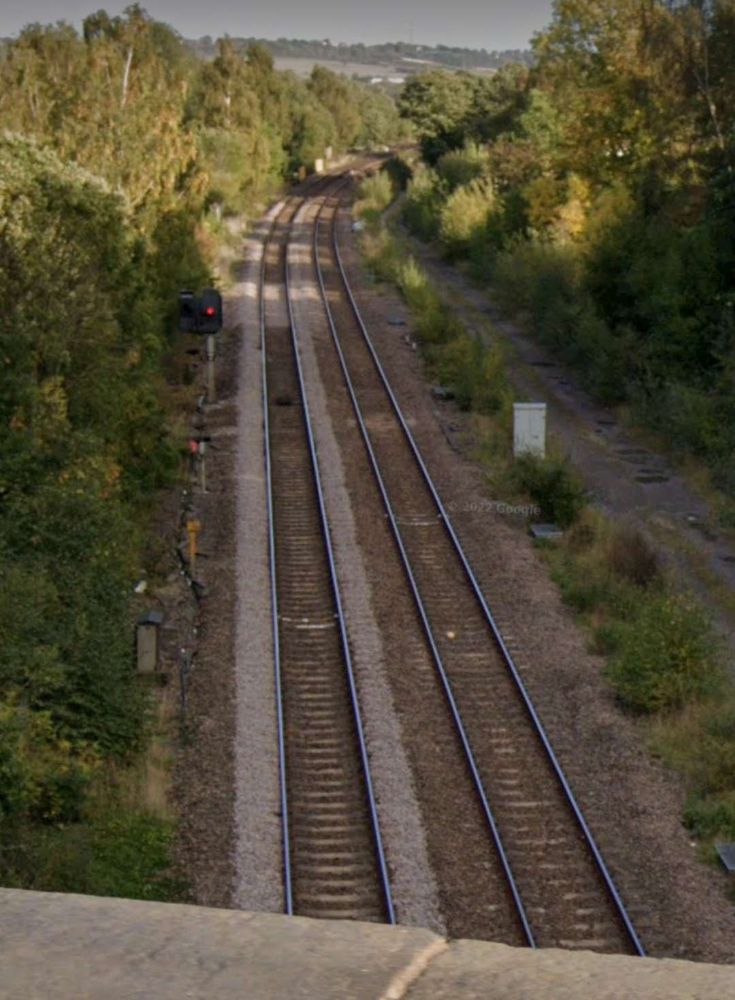
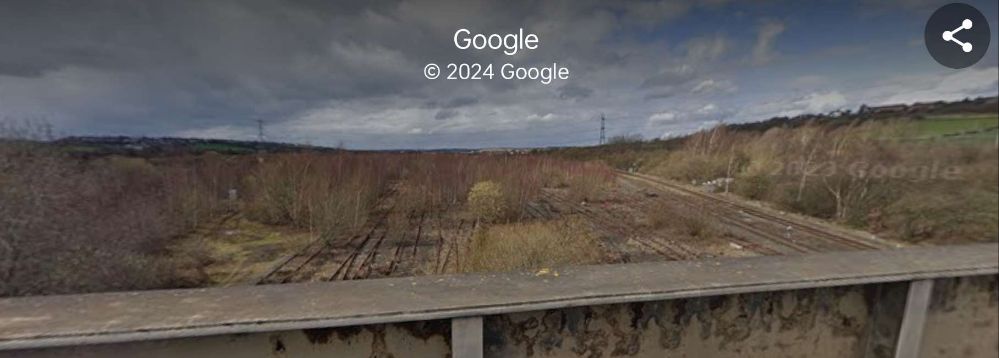
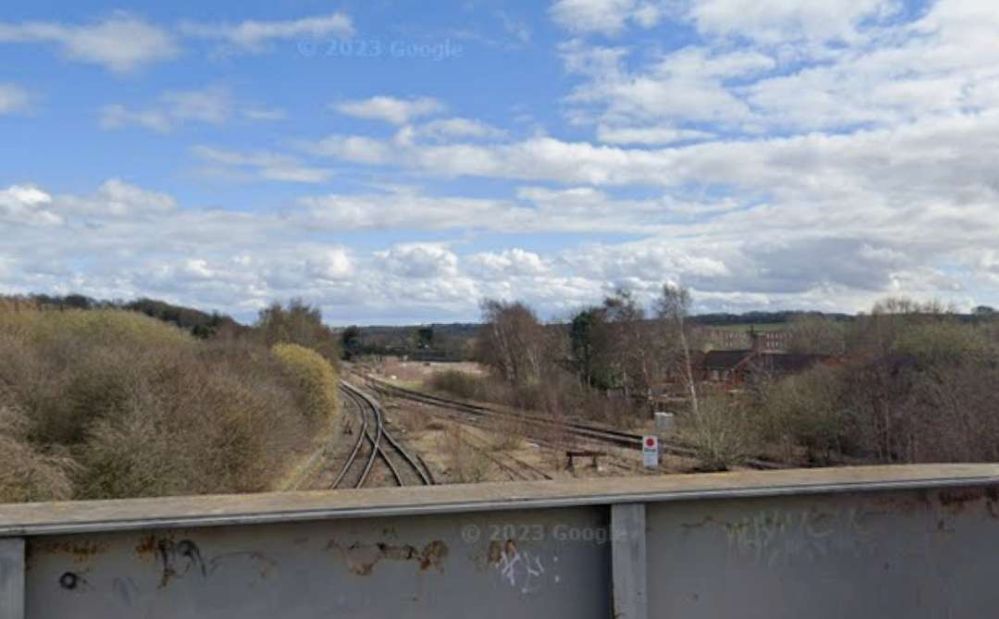
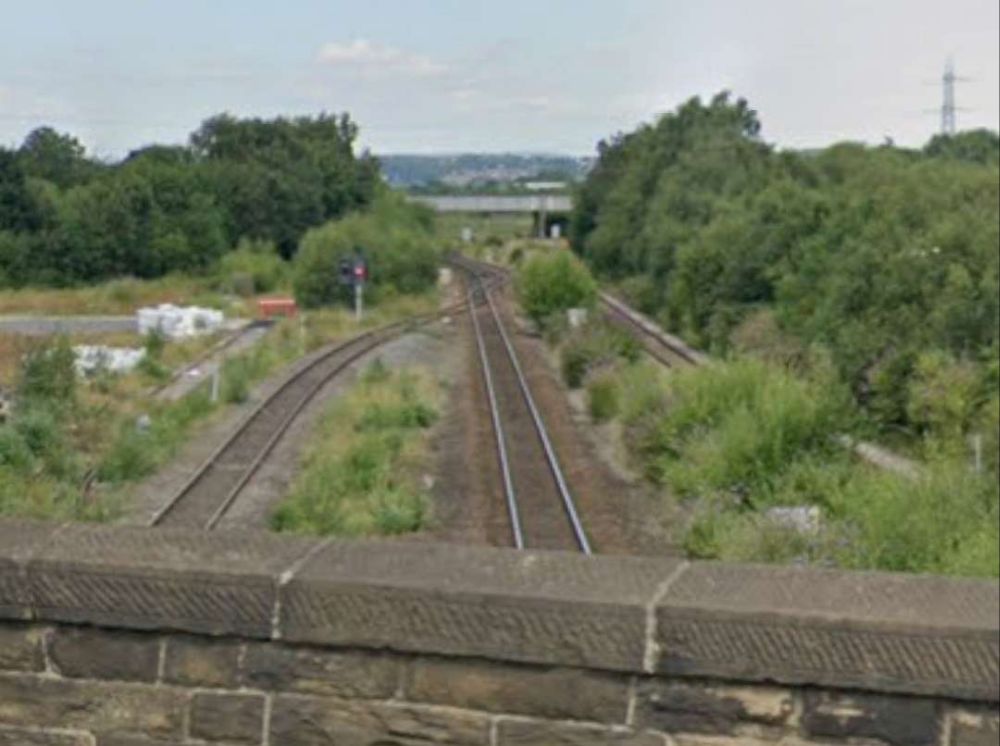
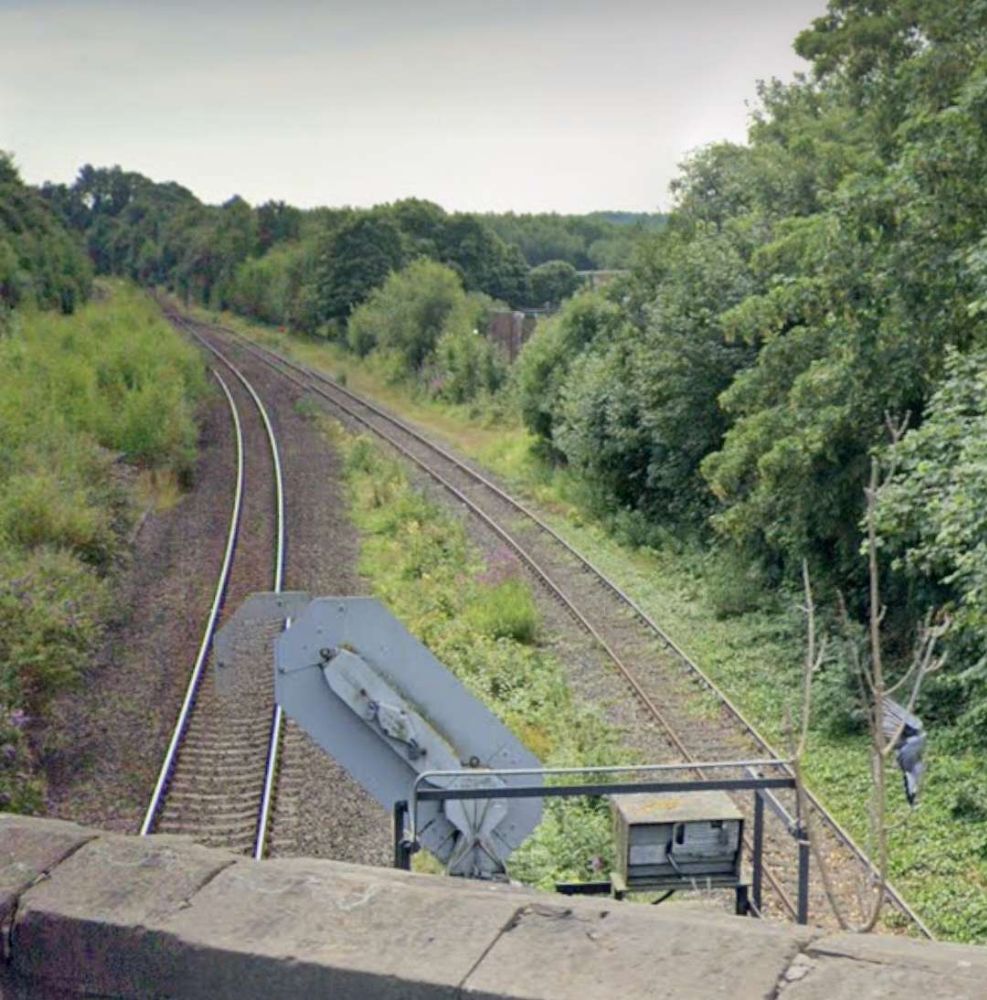
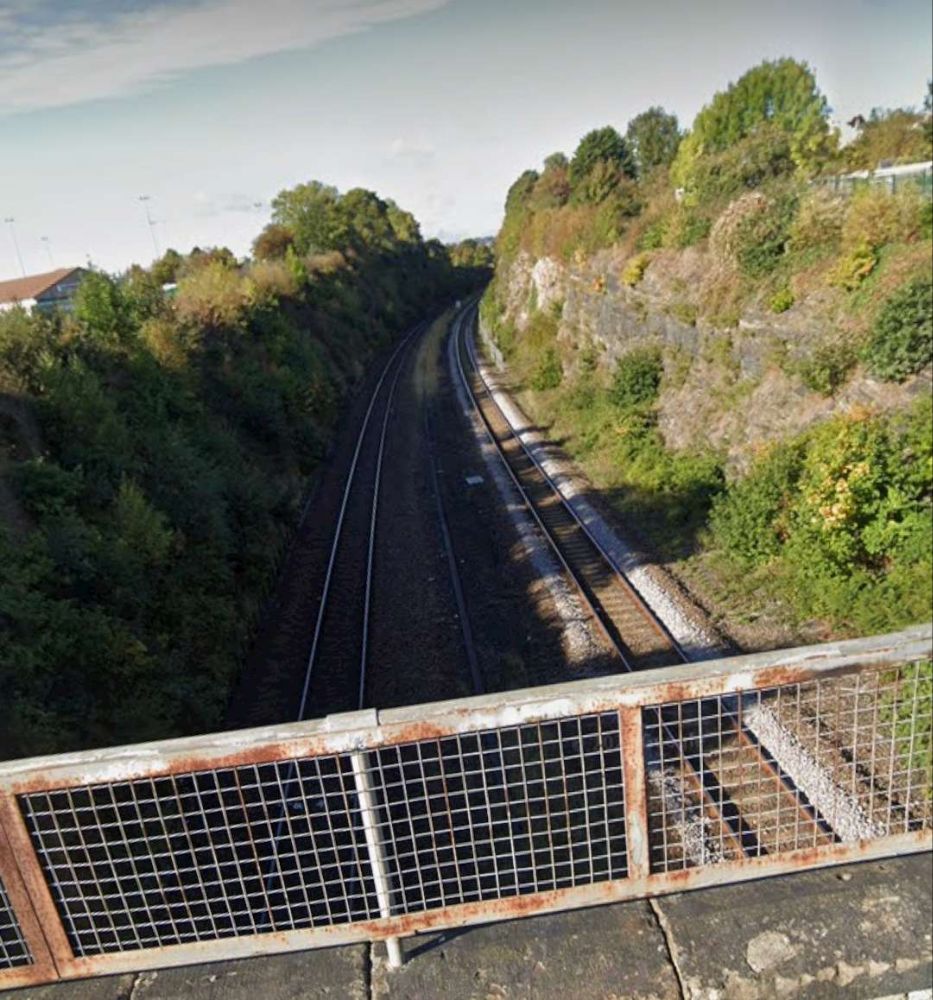
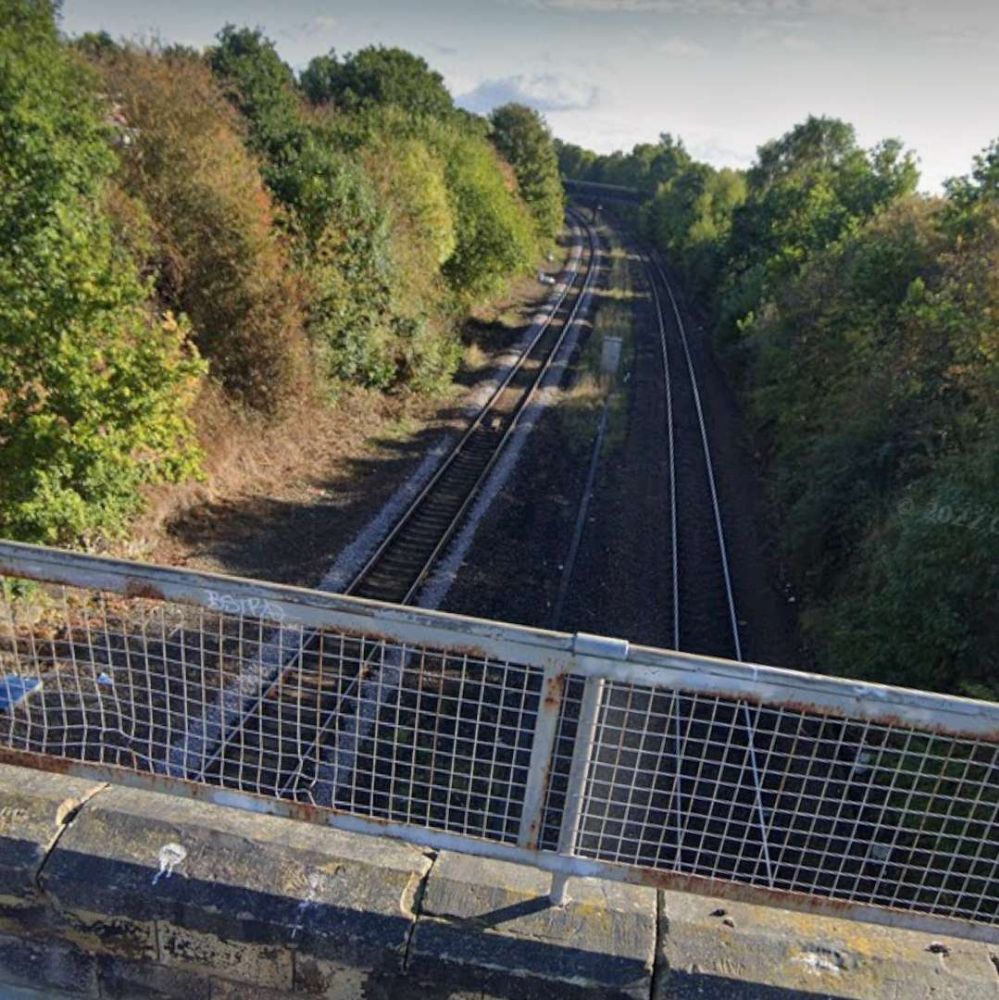
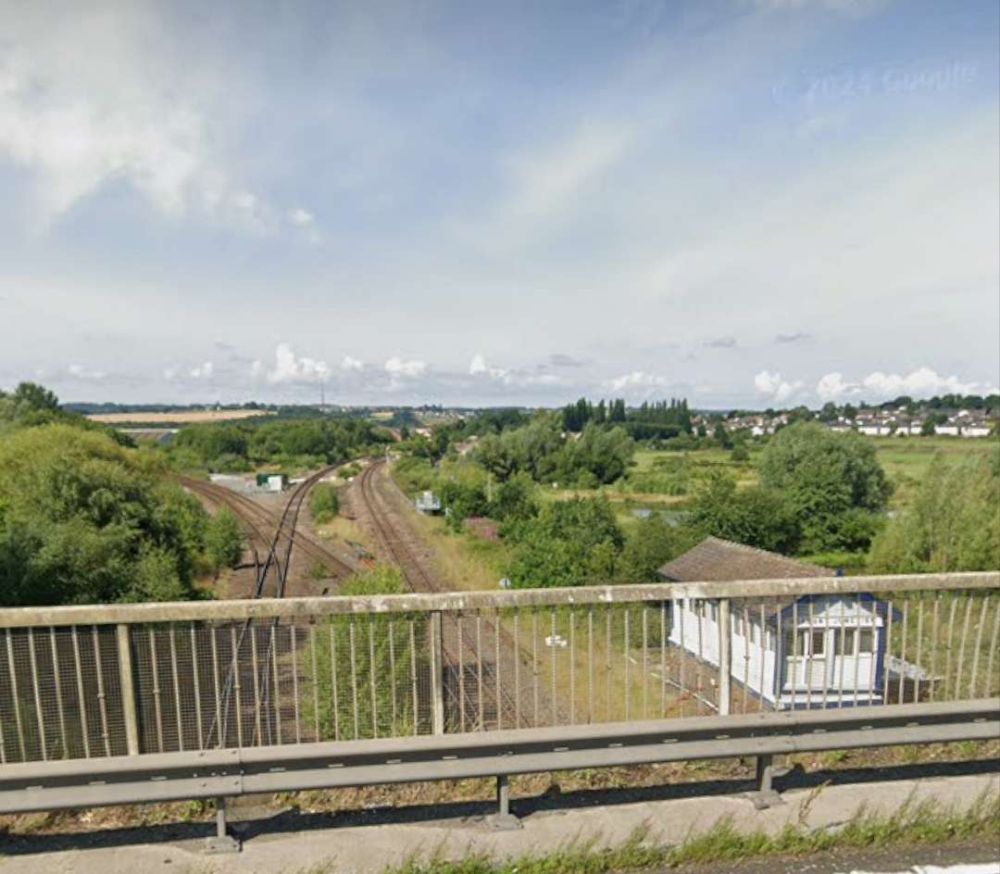
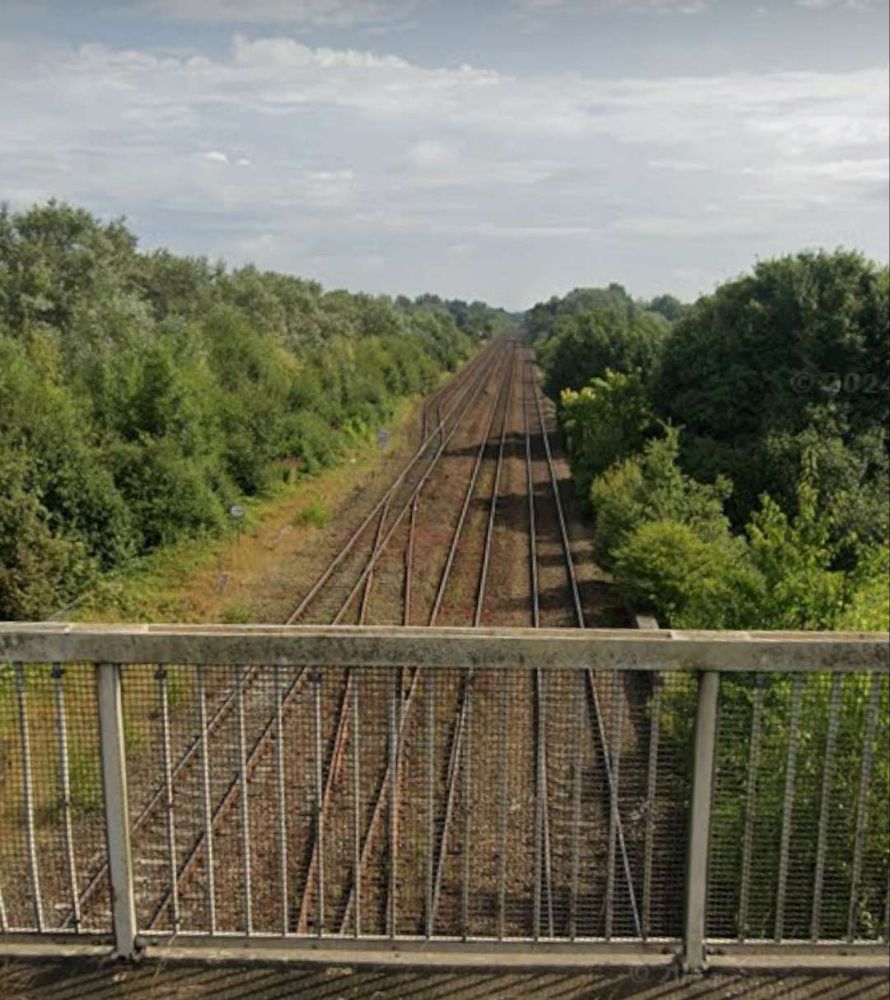
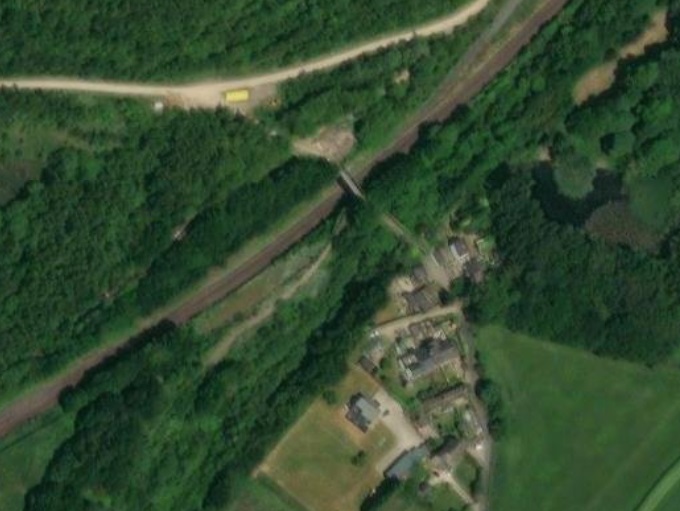
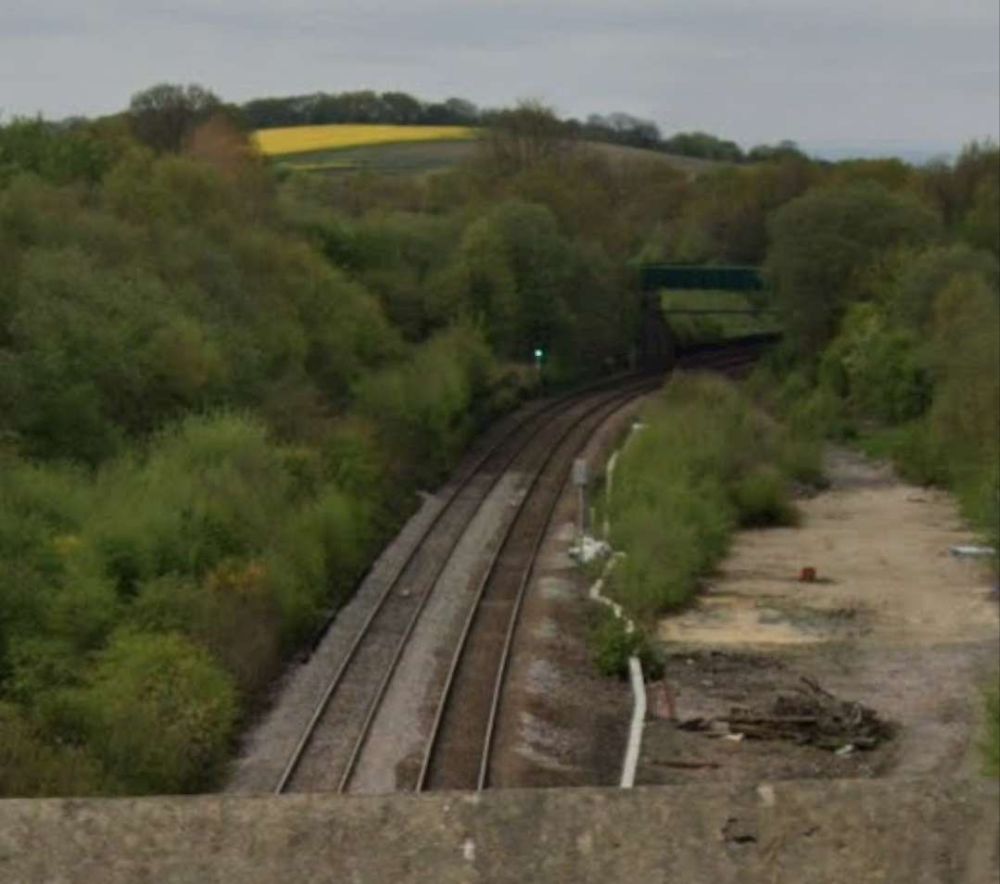
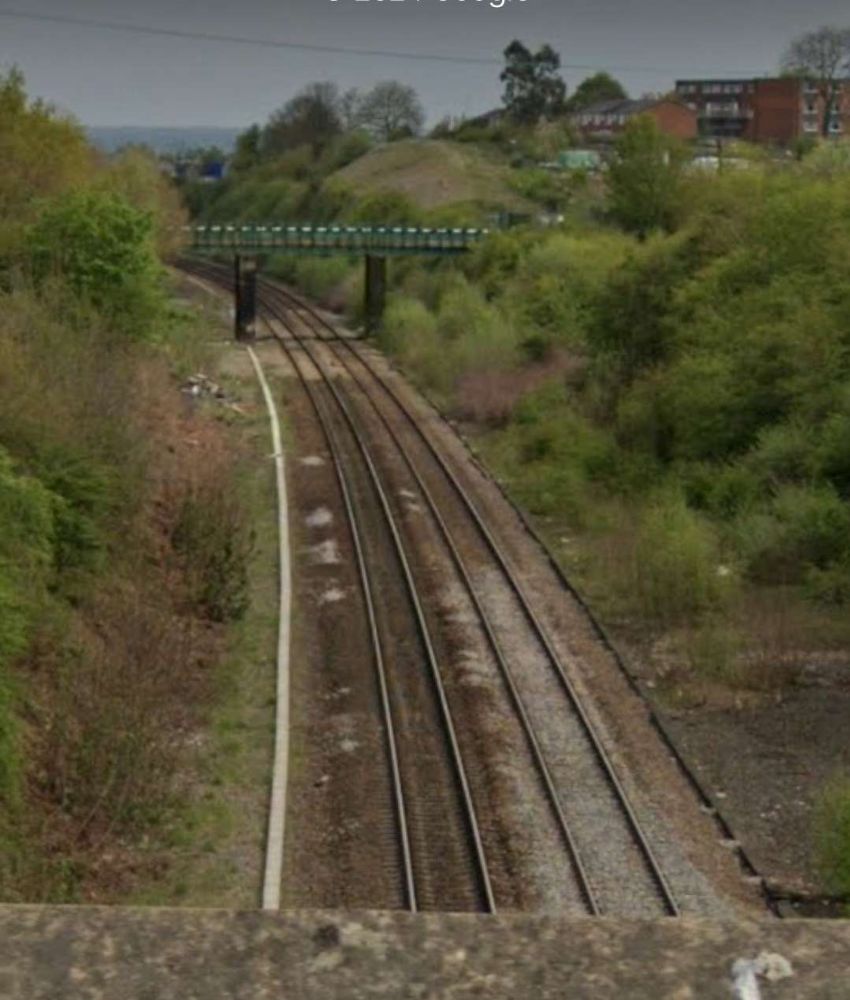
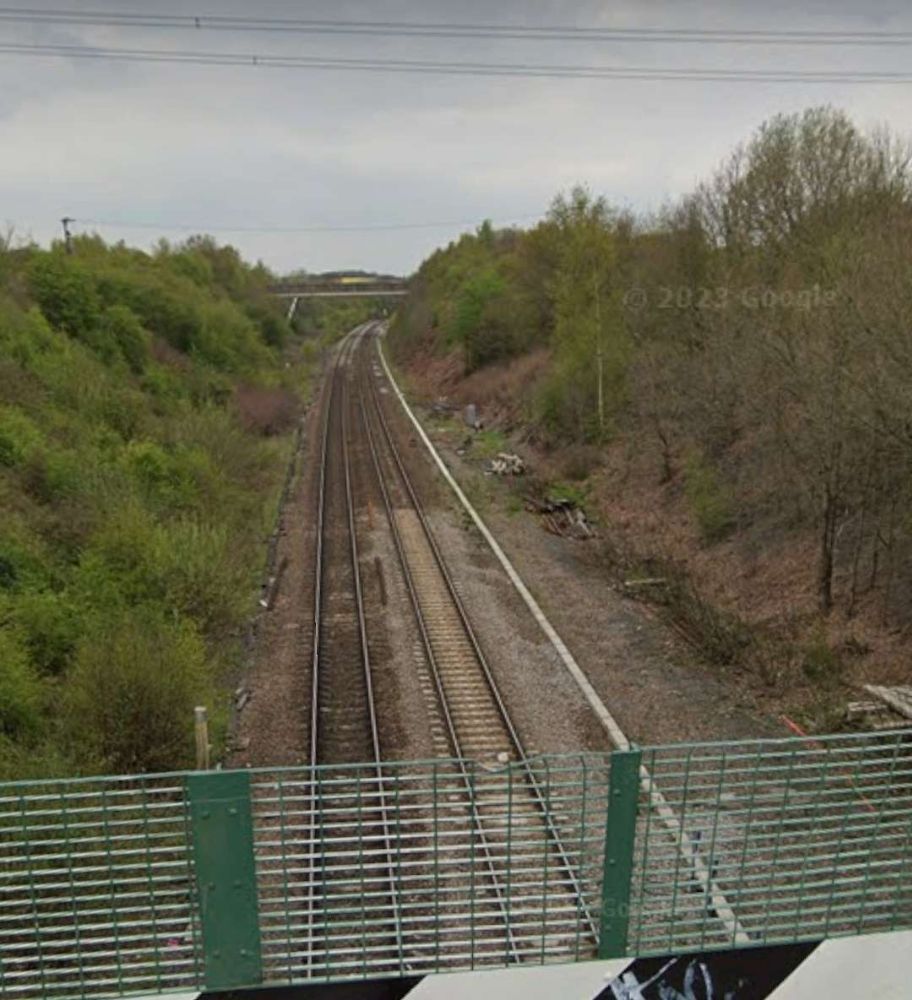
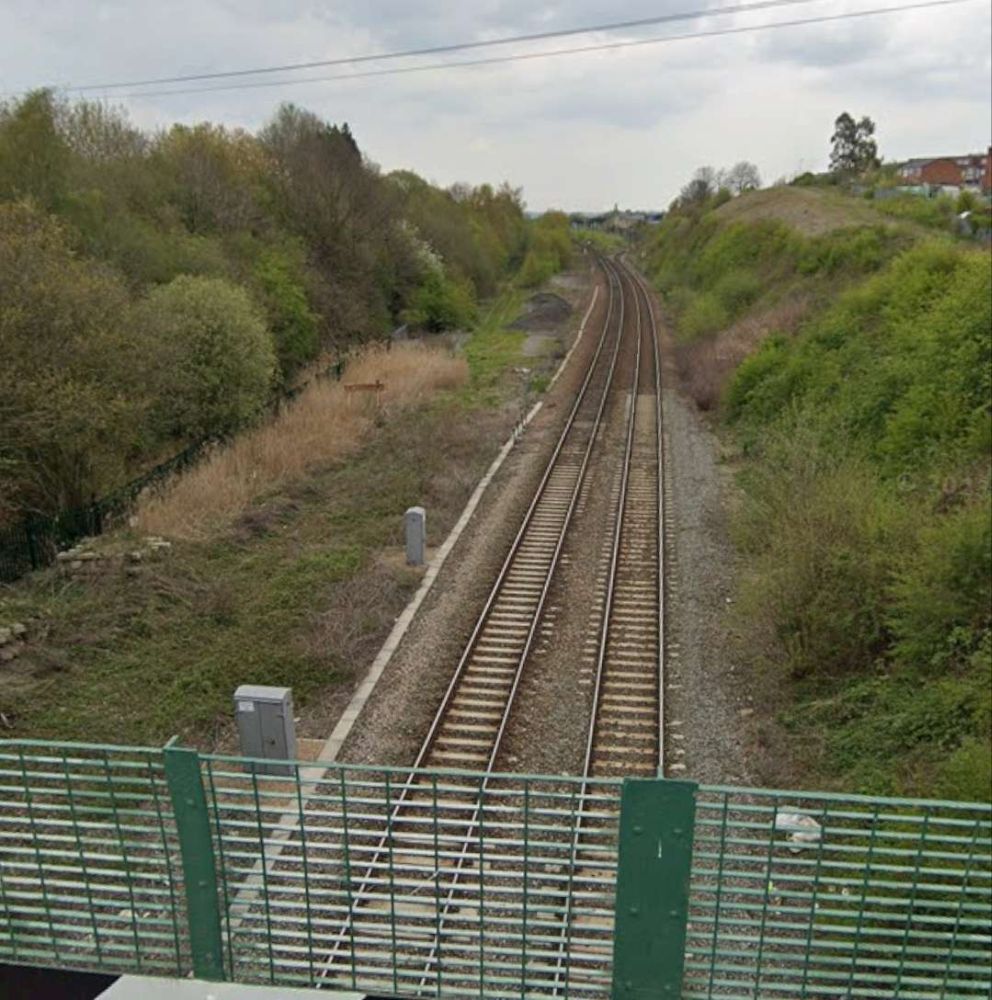
These next few photographs show views of the line from a series of three overbridges to the East of Horbury Fork Line Junction.
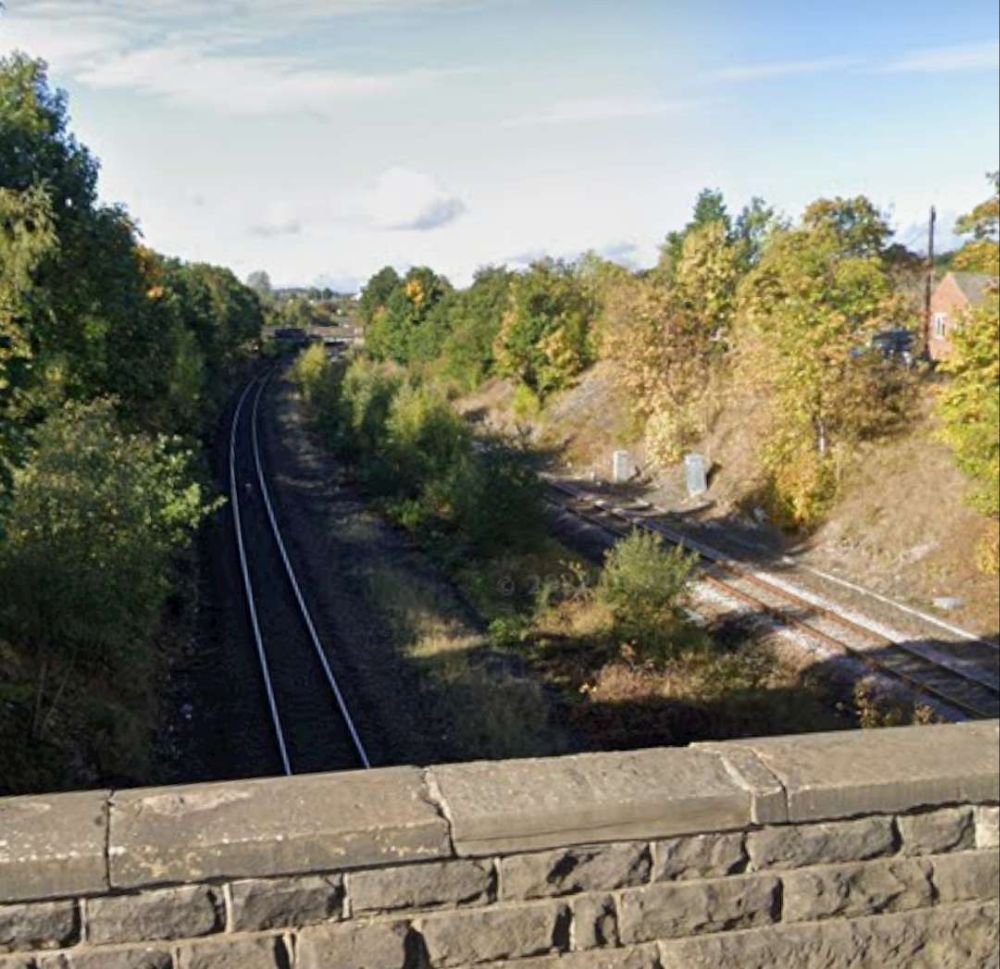
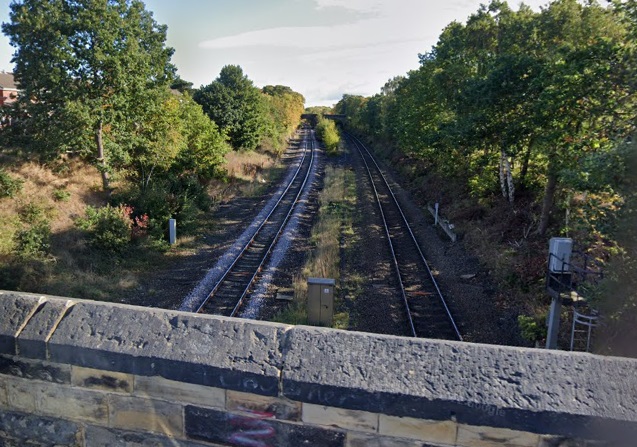
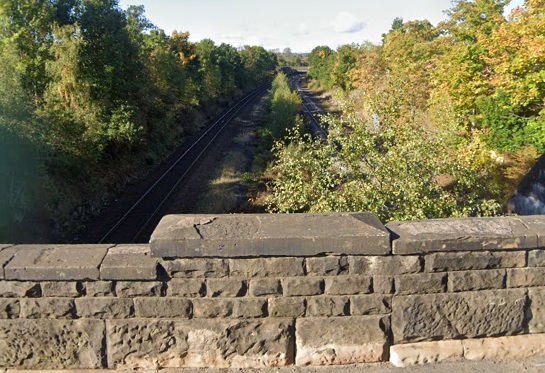
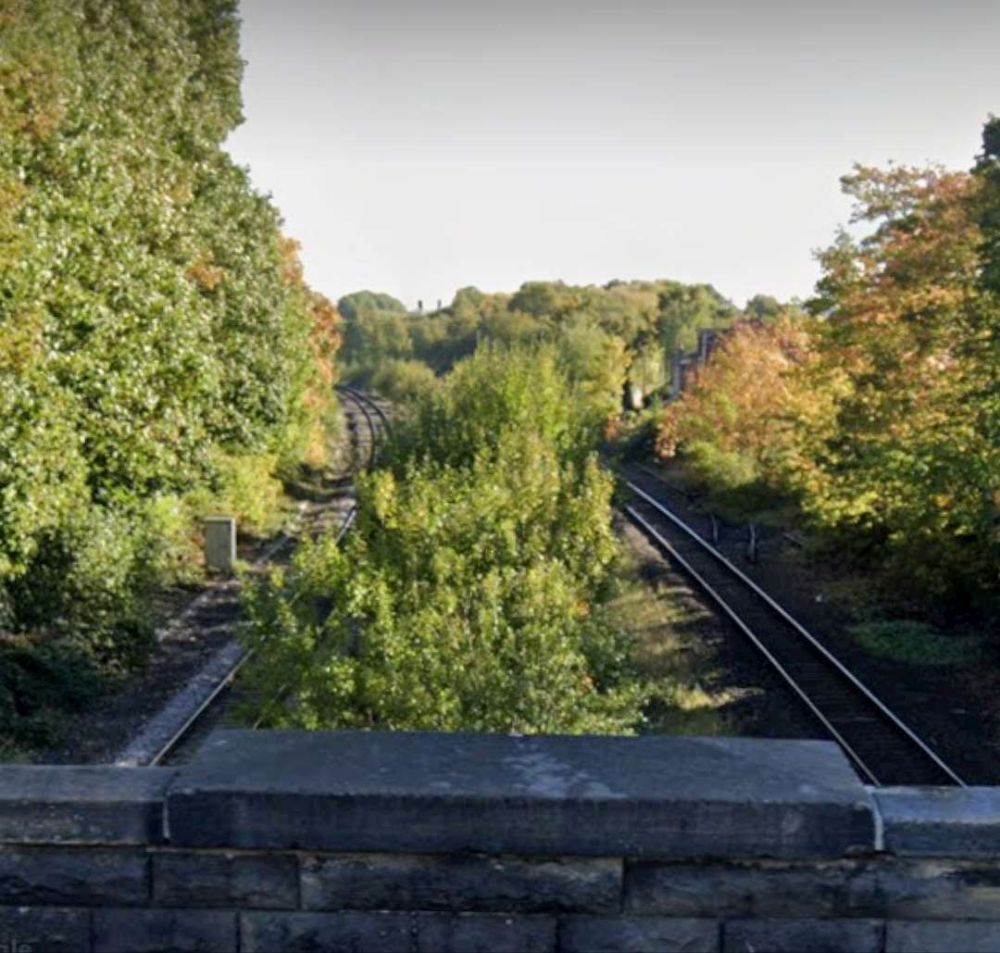
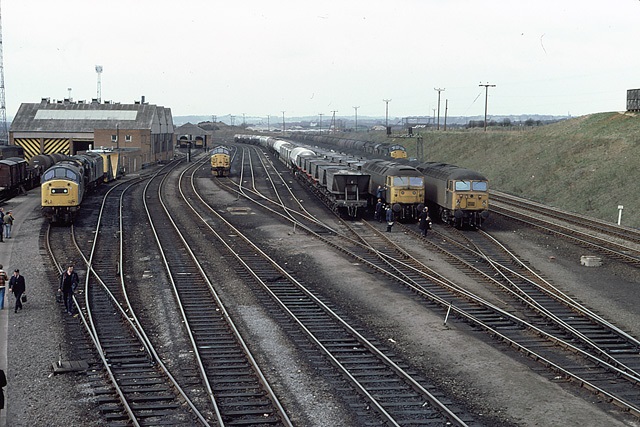
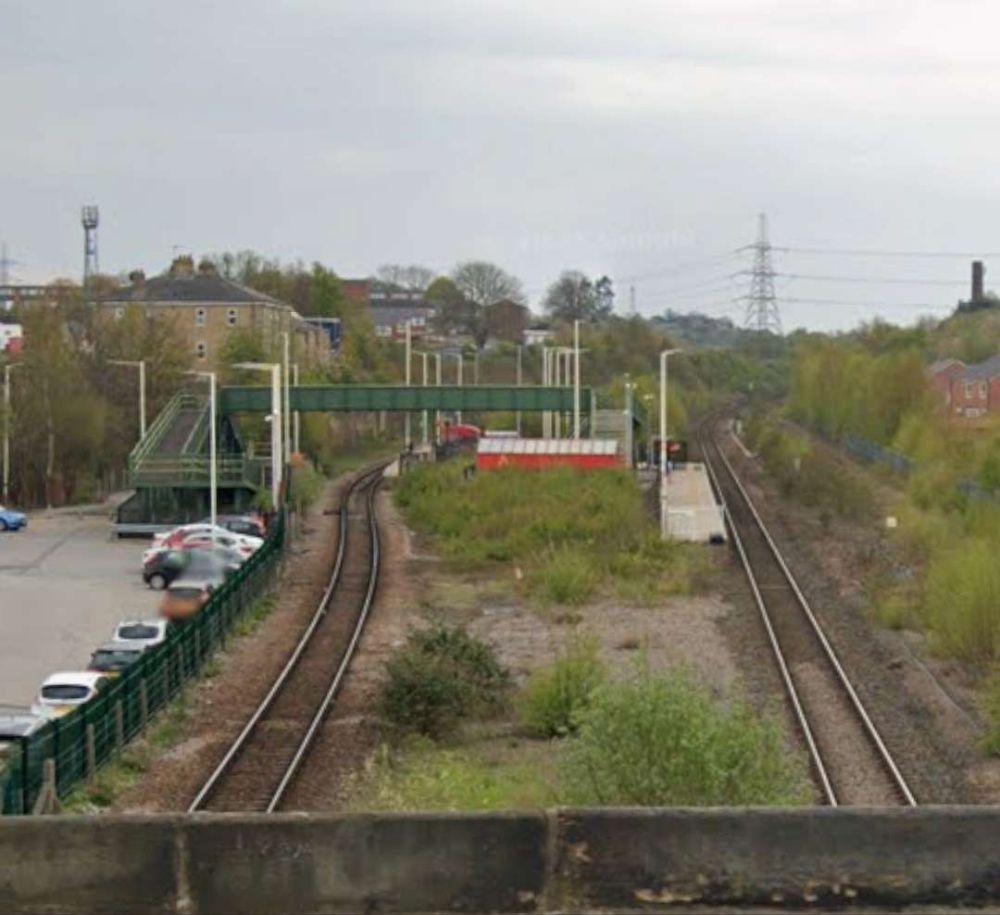
The next significant location on the line is Horbury Junction.


Industrialisation in the immediate area of Horbury Junction began “in the early 1870s with the construction of Millfield Mill, followed by the Horbury Ironworks Co. In 1873, Charles Roberts bought a site for a new factory at Horbury Junction and moved his wagon building business from Ings Road, Wakefield to Horbury Junction. Before that, the area of Horbury Junction was a quiet backwater with a corn mill and a ford across the Calder for farm traffic.” In reality, a beautiful pastoral area of countryside was changed forever with the coming of the Railway, Millfield Mill, the Wagon Works and the Ironworks.” [51]
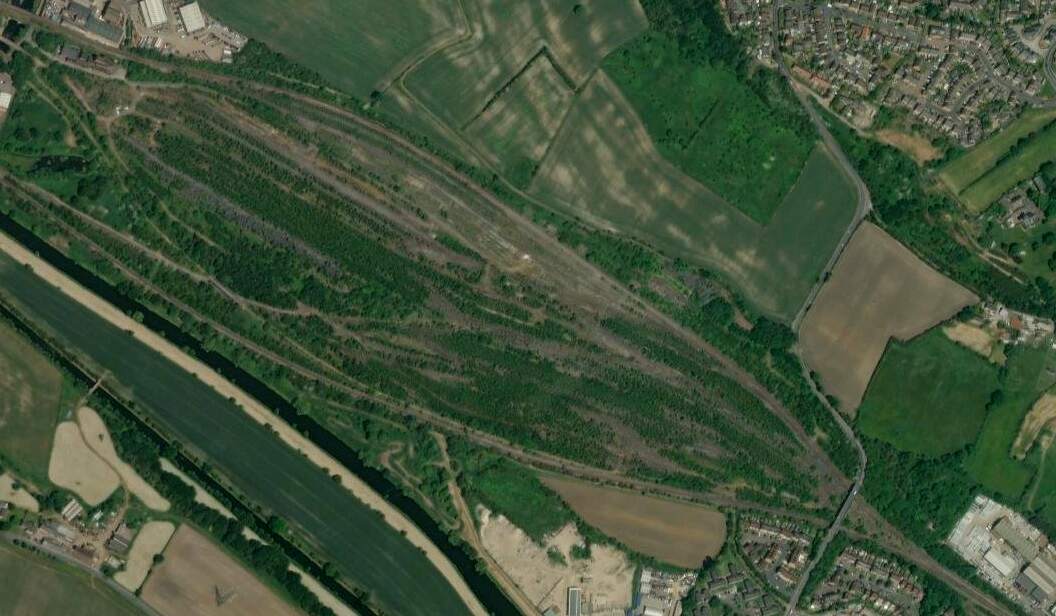
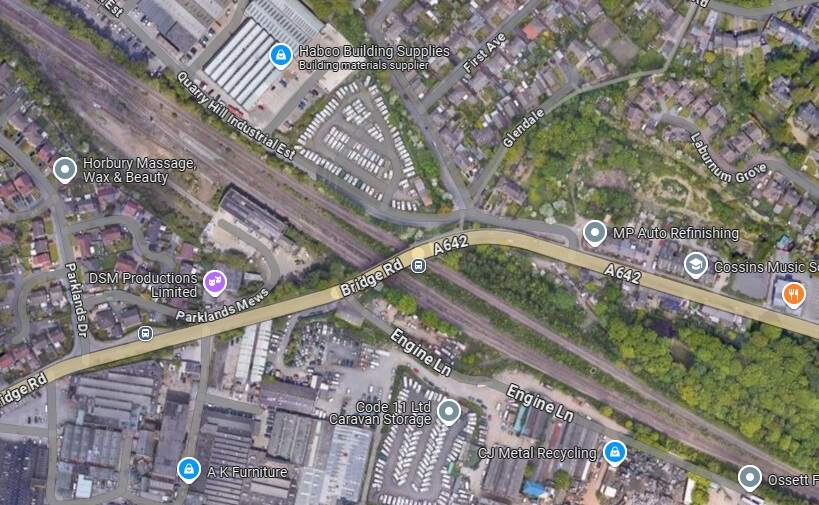
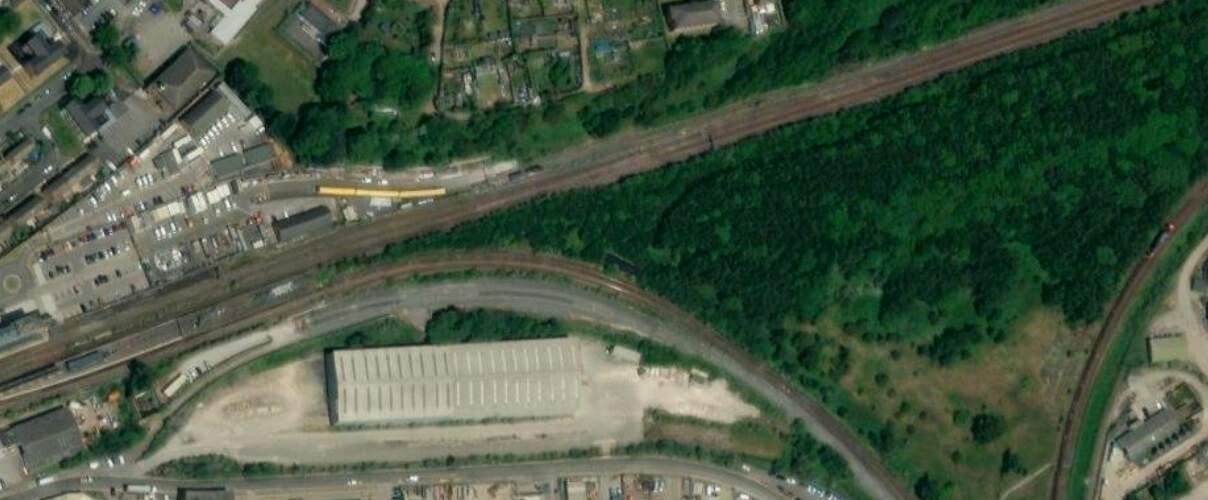
In the 21st century, just beyond Horbury Junction, the line is crossed by the M1.
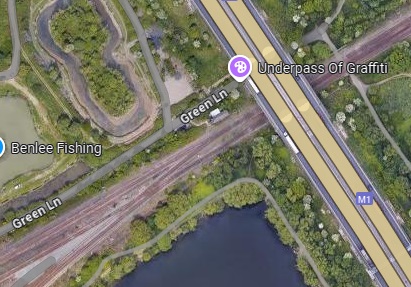
In the 21st century, just beyond Horbury Junction (on the left of this extract from Google Maps), the line is crossed by the M1. [Google Maps, October 2024.
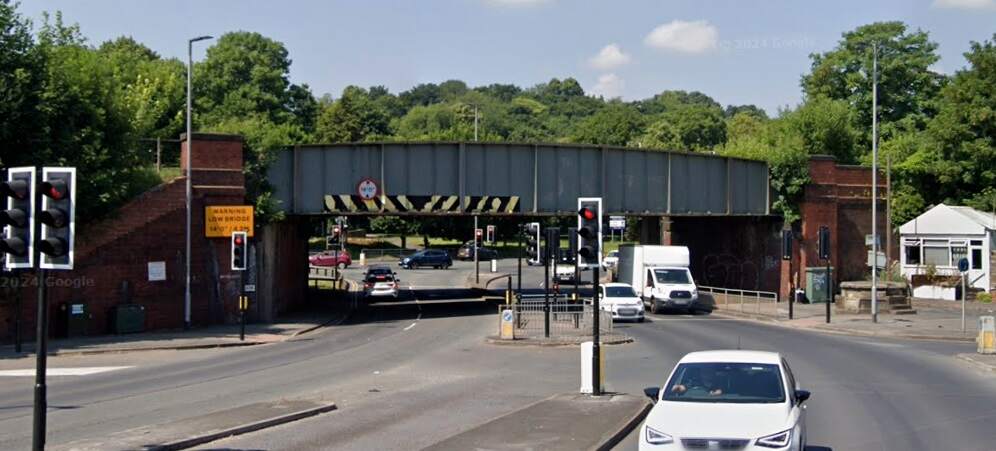
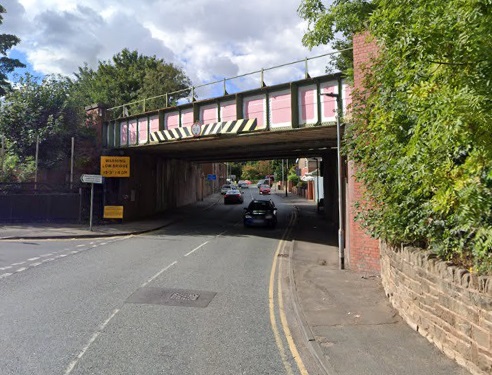
Following the line on to the Northeast, it next passes through Thornes.
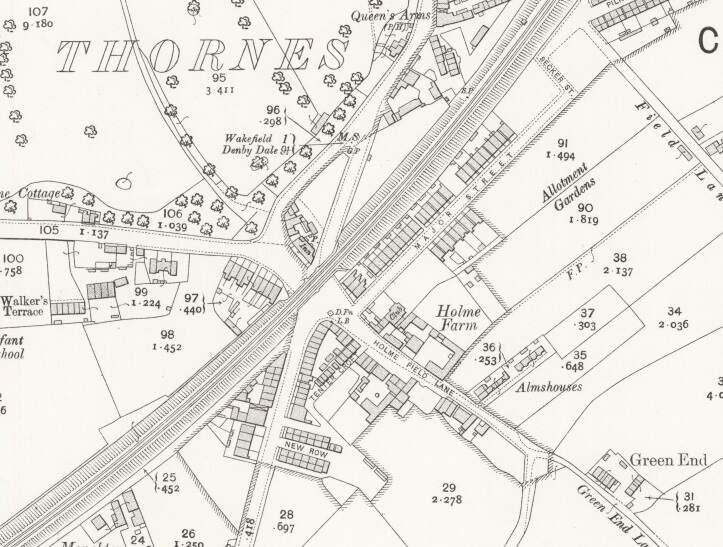
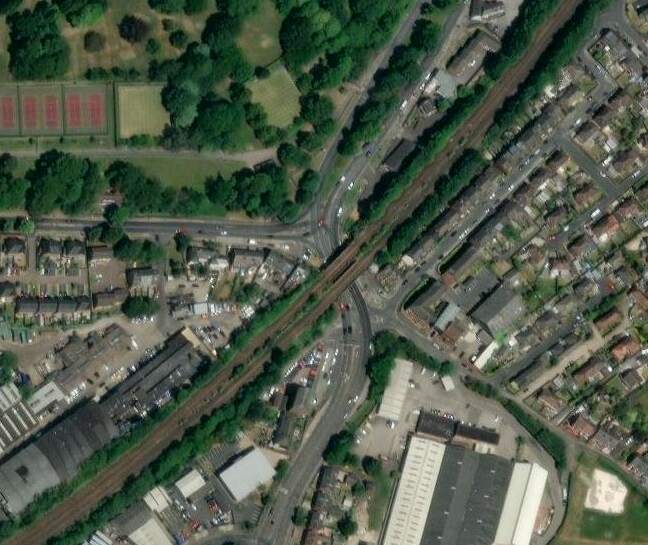
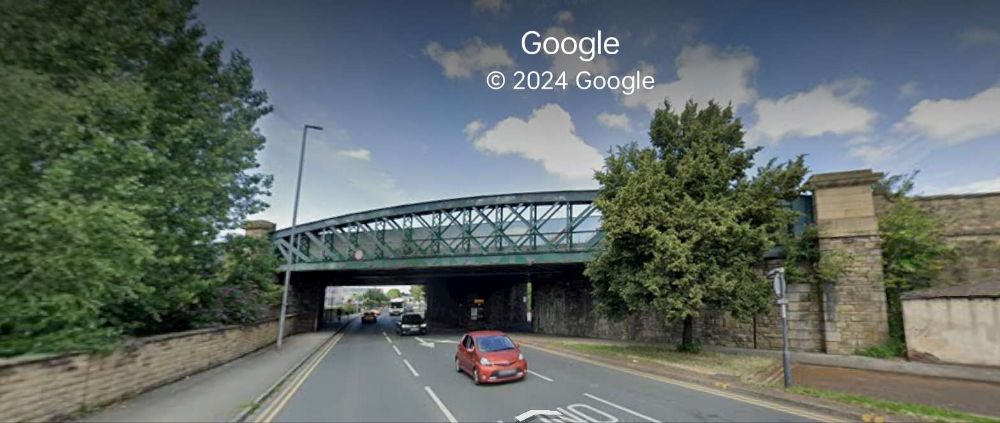
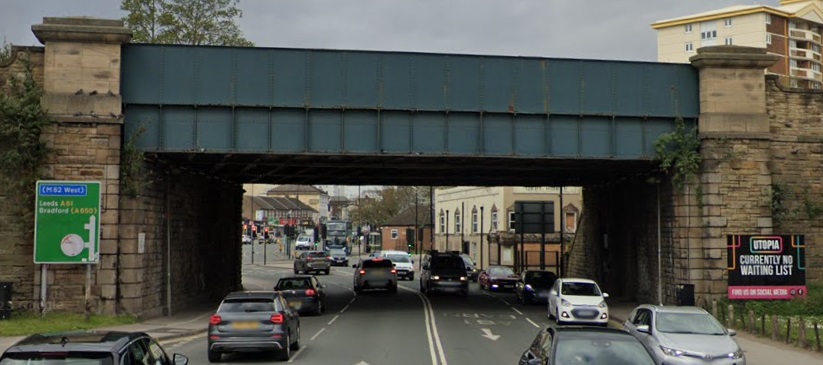
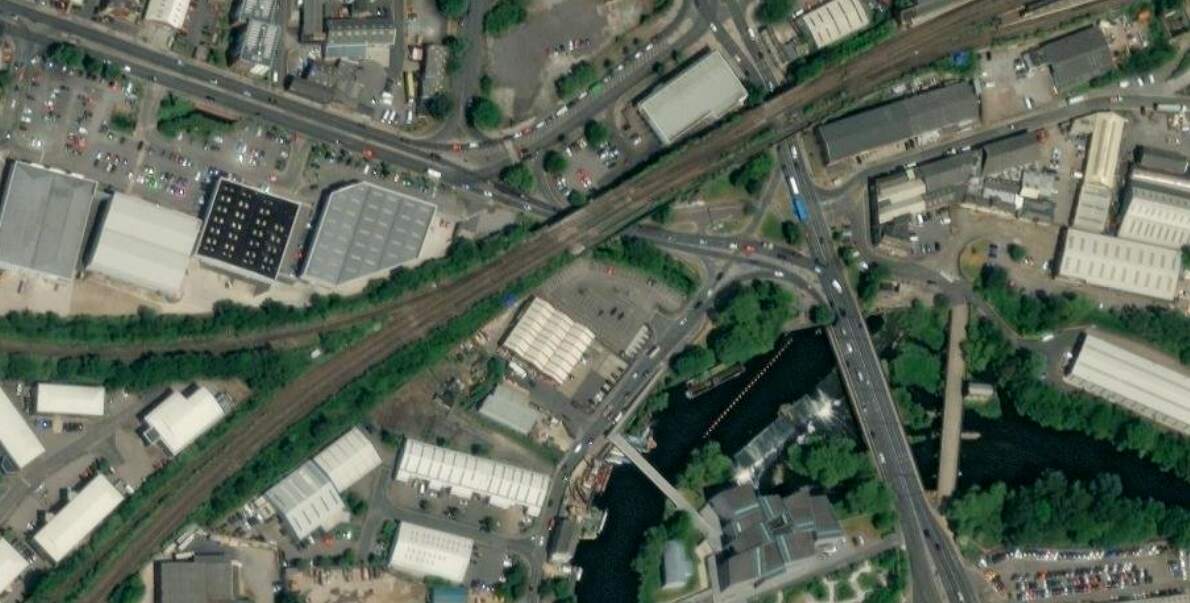
Northeast of Thornes, the Manchester and Leeds Railway ran at high level into Kirkgate Joint Station in Wakefield.
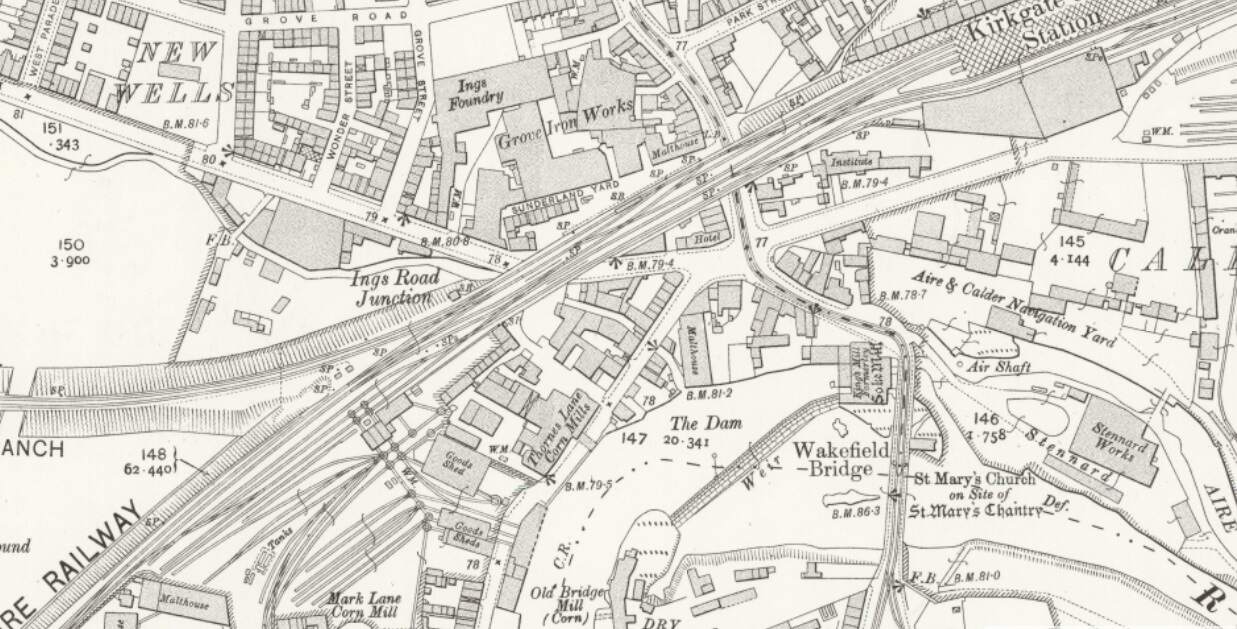
Wikipedia tells us that once it was opened by the Manchester and Leeds Railway in 1840, Kirkgate station was “the only station in Wakefield until Westgate was opened in 1867. The railway station building dates from 1854. … Some demolition work took place in 1972, removing buildings on the island platform and the roof with its original ironwork canopy which covered the whole station. A wall remains as evidence of these buildings. After this, Kirkgate was listed in 1979.” [72]
Kirkgate Station was refurbished in two phases between 2013 and 2015. [72]
A series of modern images of Kirkgate Station are shared below
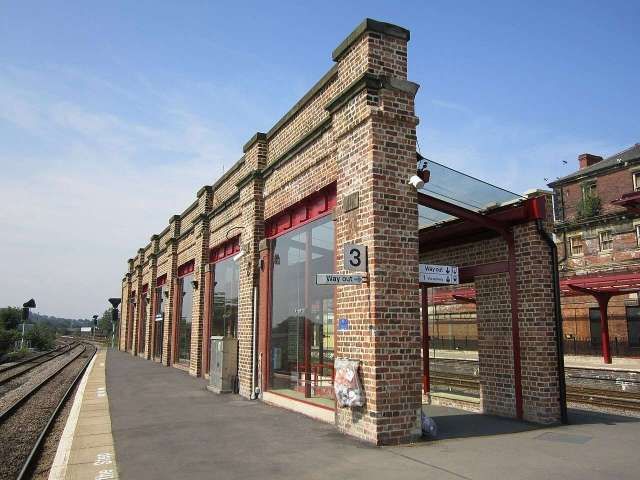
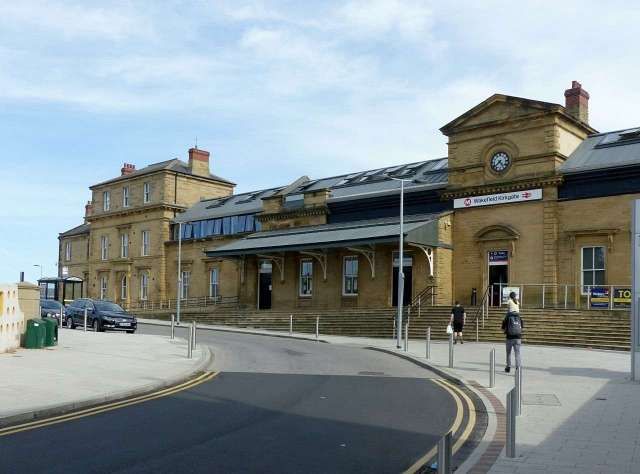
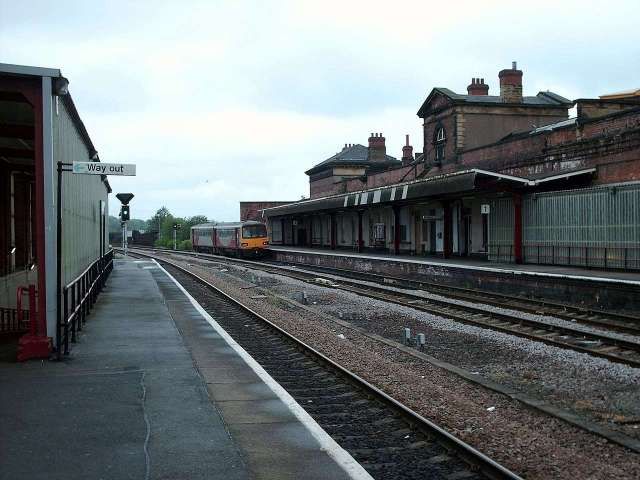
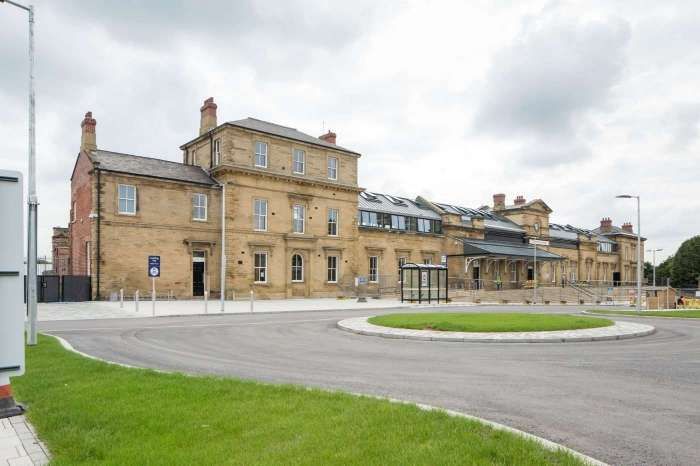
The images of Kirkgate Station above are:
- The support wall to the overall roof which was retained in the 1972 reordering and which has been refurbished in the 21st century, © Rept0n1x and licenced for reuse under a Creative Commons Licence (CC BY-SA 3.0). [72]
- The modern road approach to the station buildings, © Alan Murray-Rust and licensed for reuse under a Creative Commons Licence (CC BY-SA 2.0). [72]
- A Pacer DMU at Wakefield Kirkgate platform one in May 2006, (c) Ian Kirk and licenced for reuse under a Creative Commons Licence, (CC-By 2.5). [72]
- The recently refurbished front façade of Kirkgate Railway Station, © Groundwork Landscape Architects. [73]
Just to the East of Wakefield Kirkgate Station were Park Hill Colliery Sidings.

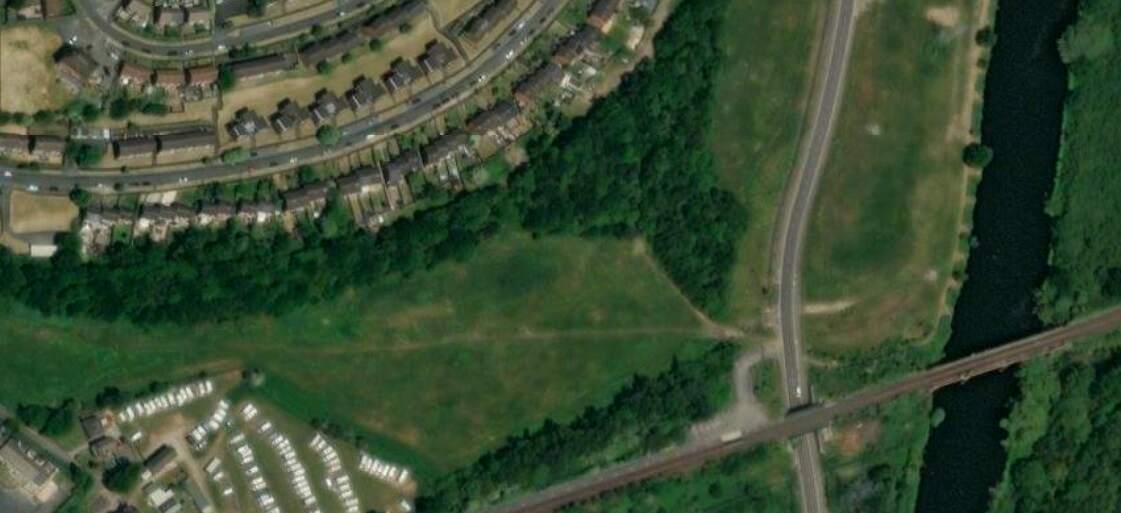
And beyond those sidings a further crossing of the River Calder.
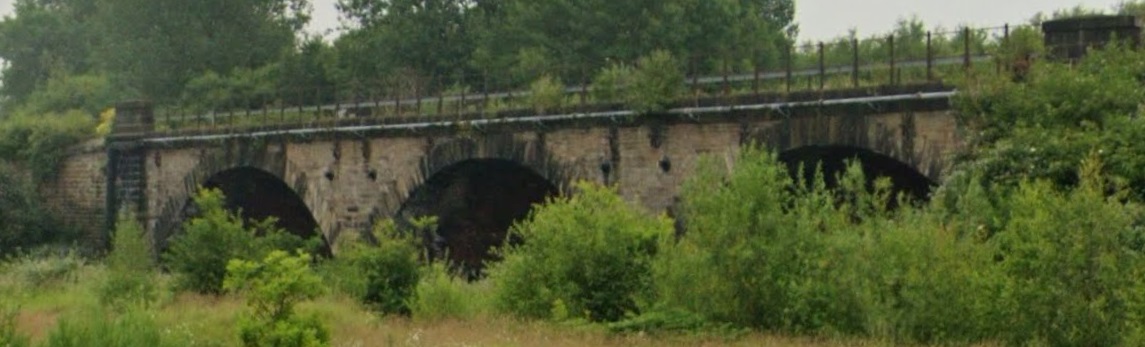
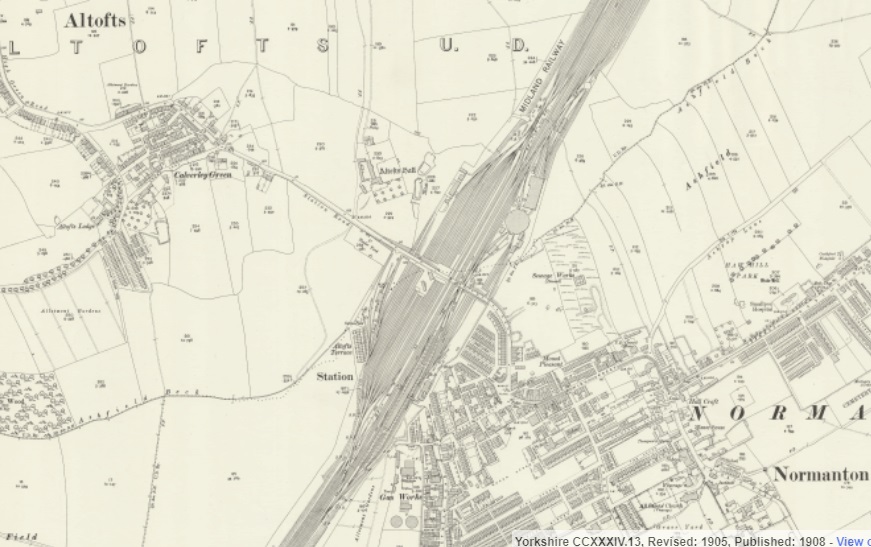
Just a short distance further along the line, at Goosehill, the Manchester and Leeds Railway (by 1905, The Lancashire and Yorkshire Railway) joined the North Midland Railway (by 1905, The Midland Railway)
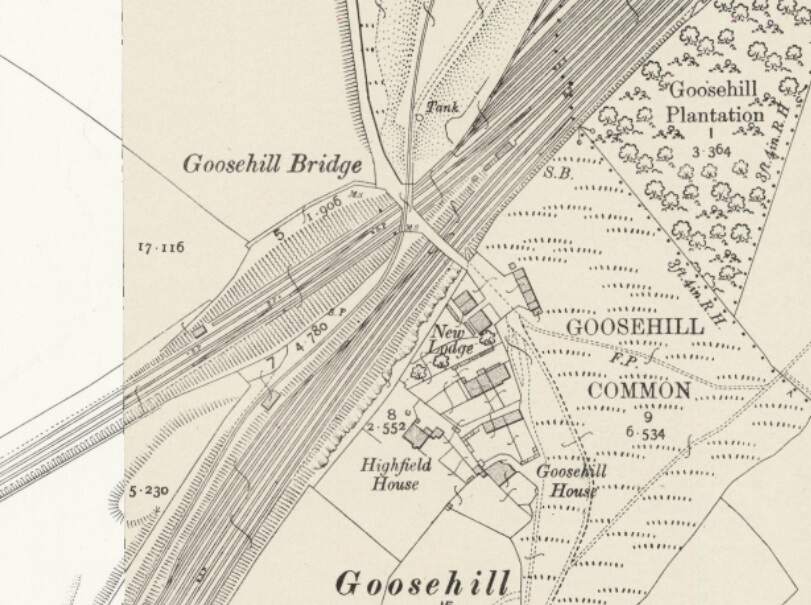
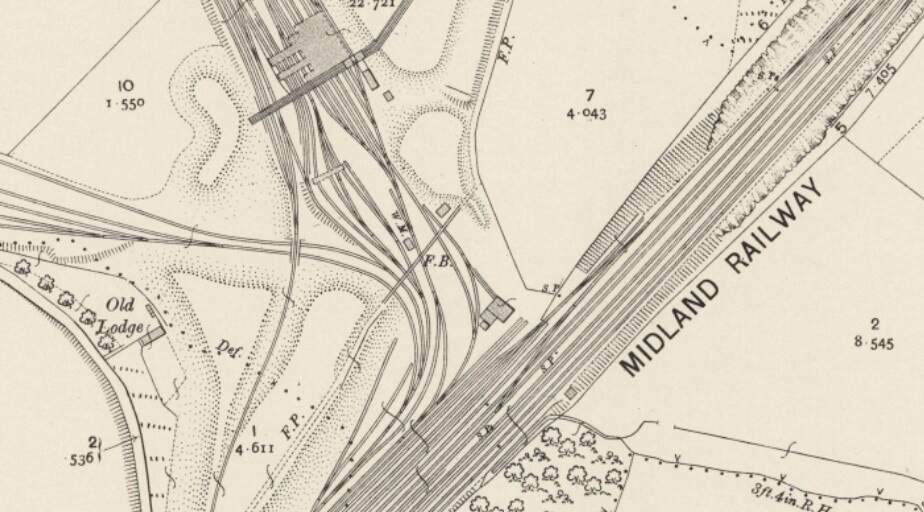
From this point on the traffic from the Manchester and Leeds Railway ran on North Midland (later Midland) Railway metals, via Normanton Railway Station and then passing Silkstone and West Riding Collieries, and on towards Leeds, approaching Leeds from the Southeast. Normanton Station appears on the map extract below.
Rake’s last words on a journey along the railway are these: “Just previous to reaching Wakefield, the railway is carried over a viaduct of 16 arches, and, quitting that station it enters a deep cutting, and crosses the Vale of Calder for the last time, a little to the east of Kirkthorpe. Here was the most important diversion of the Calder, by which the cost of building two bridges was saved. … The line terminated by a junction with the North Midland Railway, a mile to the north of which point was situated the Normanton Station, where the York and North Midland, and by its means, the Leeds and Selby and Hull and Selby Railways united with the former lines. The remainder of the journey to Leeds, 9 miles, was traversed on the North Midland Railway.” [1: p472]
Rake goes on to talk about the gradients of the railway which “were considered somewhat severe. Starting from Manchester, the line ascends to Rochdale, 10 miles, over a series of inclinations averaging about 1 in 155; from Rochdale to the summit level, 6½ miles, the ascent is 1 in 300; the total rise from Manchester being 351 ft. From the summit level plane, which extends for 1 mile 55 chains, to Wakefield, a distance of 30 miles, the line descends for the first six miles on a gradient of 1 in 182, after which it is continued by easy grades of an average inclination of 1 in 350. Below Wakefield a comparatively level course is maintained to the junction with the North Midland Railway, the total fall from the summit being 440 ft. The curves were laid out so as not to be of a less radius than 60 chains. The gauge adopted on the Manchester and Leeds Railway was 4 ft. 9 in., to allow a in. play on each side for the wheels. … The rails were of the single parallel form, in 15 ft. lengths, with 3 ft. bearings, and were set in chairs, to which they were secured by a ball and key, as on the North Midland Railway. The balls, (3/4 in. diameter), were of cast iron, and fitted into a socket formed in one side of the stem of the rail; the key, which was of wrought iron, was 8 in. long (and 5/8 in. wide at one end, from which it tapered to 3/8 in. at the other end). … Stone blocks were used where they could be obtained from the cuttings, and were placed diagonally, but sleepers of kyanised larch were used on the embankments, the ballasting being of burnt and broken stone.” [1: p472-473]
It is interesting to note that the tramway/tramroad practice of using stone blocks as sleepers was in use when this railway was first built!
Rake continues: “The Manchester terminal station was located between Lees Street and St. George’s Road, and was entirely elevated on arches. The passenger shed was covered with a wooden roof, in two spans, and the whole length of the station was 528 ft. The passenger platform was approached by a flight of 45 steps from the booking-office on the ground floor. [1: p473]
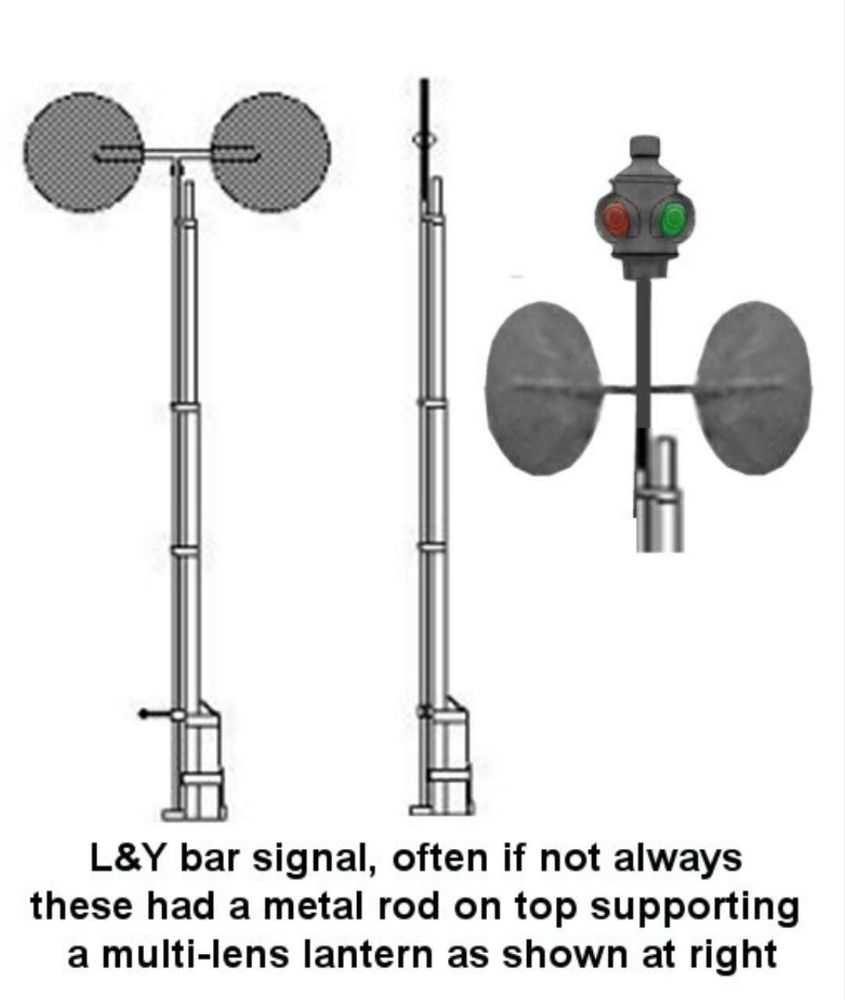
“The signals were of the horizontal double disc or spectacle form which, when revolved to the extent of a half circle, caused both discs to be invisible to the driver and indicated all right, the lamp above showing, when illuminated, green; the colour shown by the lamp when both discs were crosswise to the line being red.” [1: p473]
Rolling Stock
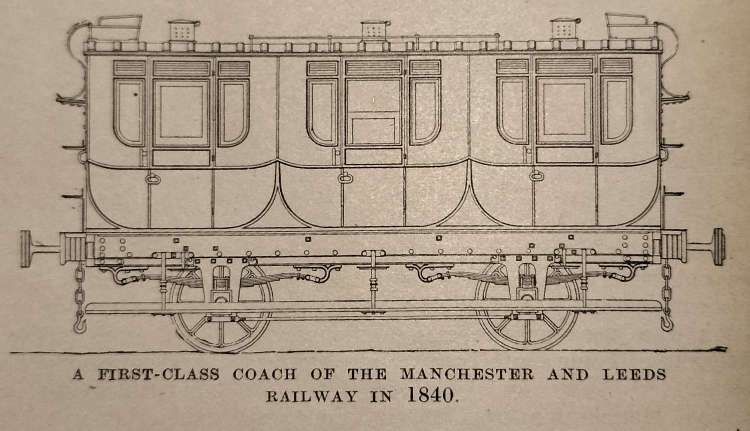
“The carriages consisted of three classes, The first class, in three compartments, upholstered, and fitted with sash windows painted blue; second-class, in three compartments, but open at the sides and furnished with wooden sliding shutters painted yellow; and carriages termed ‘mixed’, in which the middle compartment was for first-class, and each of the ends was for second-class passengers. There was also a carriage of novel construction, built according to the plan of the chairman of the company and used at the opening of the line. The under-framing was of the usual construction, but the body was unique. The floor was considerably wider than ordinary, and the sides curved outwards until they joined a semicircular roof, the greater part of which was fitted with wire gauze to give air, but capable of being instantaneously covered with waterproof material, by the action of an inside handle, so that sun and rain could be shaded out at pleasure. The sides were fitted throughout with plate glass, and ranges of seats occupied the floor, having passages on either side. Tents were also contrived in the sides which closed at will by spring action. The effect of the interior was said to resemble the interior of a conservatory! These carriages were in each case mounted on four wheels, with a perforated footboard of iron running the whole length of the body, in substitution for the lower tier of steps in use on other railways at the time.” [1: p473-474]
I have produced Rake’s description of this ‘unusual carriage’ as I have found it impossible to imagine what it looked like from Rake’s word-picture.
At the end of 1840, “an improved form of third-class carriage was constructed, in which each wheel was braked; the brake levers were attached to the axle-boxes and, consequently, when applied by the guard. who sat on the roof, did not bring the body of the carriage down on to the springs, The buffing springs were placed in front of the headstocks, and a flat iron bar attached to the buffer worked in brackets on the sole bar. The doors were fitted with latches on the outside, which were fastened by the guard when the passengers were inside.” [1: p474]
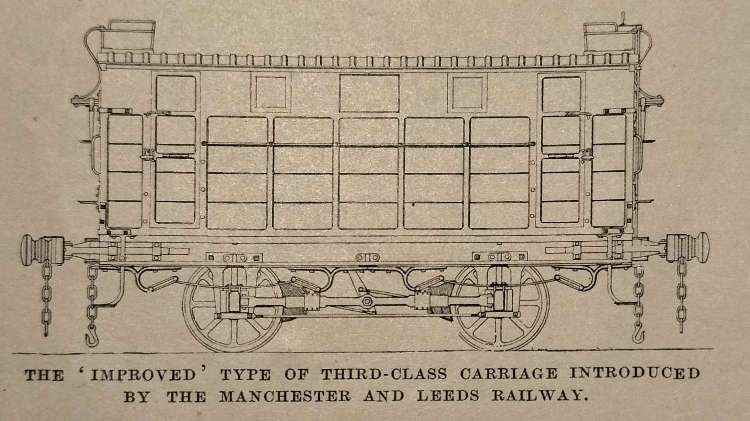
“The windows and the doors being fixed, no passenger could open the door until the guard had released the catch. Roof lamps were not provided in these coaches, which were painted green. … The third-class carriages. or rather, wagons, were provided with four entrances, to correspond with the “pens” into which they were sub-divided by means of a wooden bar down the centre, crossed by another bar intersecting the former at right angles in the middle of its length. There were no seats, and the number of passengers for which standing room could be found was limited solely to the to the bulk Stanhope or ‘Stan’ups’, as they were derisively termed. The contrivance of pens was said to be due to a determination to prevent respectably dressed individuals from availing themselves of the cheaper mode of conveyance, in which there was little to distinguish them, it was complained, ‘from the arrangements for the conveyance of brute beasts which perish’. The company’s servants were strictly enjoined “not to porter for wagon passengers‘!” [1: p474]
Further details of Rolling Stock on the Railway can be found in Jeffrey Wells book about the line. [75: p81-85]
Locomotives
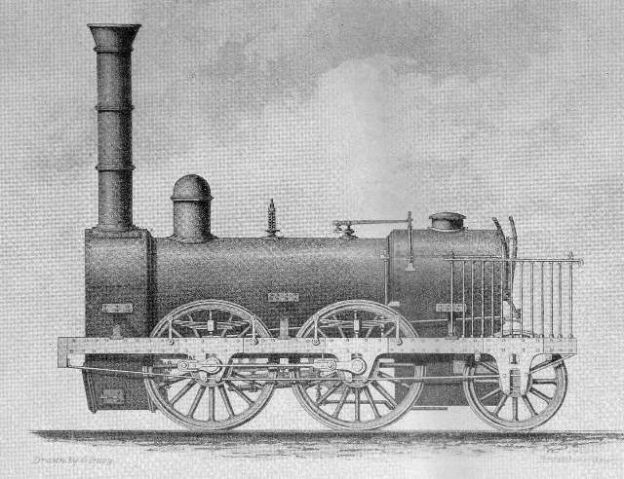
Rake tells us that the locomotives were all mounted on 6 wheels and purchased from Sharp, Roberts & Co., Robert Stephenson & Co., and Taylor & Co. They all had 14 in. diameter, 18 in. stroke cylinders and 5 ft. 6 in. diameter driving wheels. Jeffrey Wells provides a more comprehensive, tabulated, list of those early locomotives. [75: p79-80]
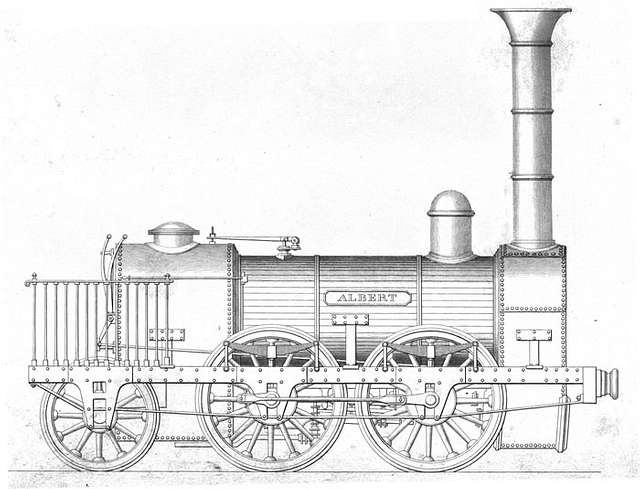

The first three 0-4-2s were made by Robert Stephenson & Co., and that company supplied plans and specifications for its locomotives which meant that The Manchester and Leeds Railway could have the same design manufactured by other firms of the Company’s choice. The first 12 locomotives built for the Manchester and Leeds in 1839 were all to Stephenson’s 0-4-2 design. Wells tells us that of these locomotives, the first three (Nos. 1 -3) were called Stanley, Kenyon and Stephenson and were built by R. Stephenson & Co. They were supplied to the Railway in April and May 1839. [75: p79]
The next three locomotives (Nos. 4-6) were supplied by Sharp Bros., Manchester. Lancashire and Junction were supplied in May 1839 and York in July 1839. Nos. 7, 9 and 10, named respectively, Rochdale (16th July), Bradford (6th September) and Hull (7th September)came from Naysmith & Co., Patricroft. Nos. 8, 11, 12 (Leeds, Scarborough and Harrogate) were supplied by Shepherd & Todd by September 1839. [75: p79]
Wells comments that No. 1, ‘Stanley’ “was named after Lord Stanley, Chairman of the House of Commons Committee who supported the Manchester and Leeds Railway Bill in 1836. … Other Stephenson designs followed: 19 engines, numbered 15 to 40, of the 2-2-2 wheel arrangement were delivered between October 1840 and April 1842. These were recommended by Stephenson to work the eastern section of the line, between Sowerby Bridge and Wakefield, thus gradually removing the [Manchester and Leeds Railway’s] reliance on North Midland Railway motive power which had at first prevailed from late in 1840.” [75: p80]

He continues: “Once again several manufacturers were involved in the supply of these locomotives. Goods engines were represented by a further batch of 0-4-2s; 13 were delivered (Nos 33 to 46) between April 1841 and June 1843, the three manufacturers involved being R. Stephenson & Co., Haigh Foundry, Wigan, and William Fairbairn & Co. of Manchester. … Three standard Bury-type 0-4-0s were the last engines to be delivered (Nos 47 to 49) the first two bearing the names West Riding Union and Cleckheaton respectively. All three were completed between November 1845 and January 1846 by the firm of Edward Bury of Liverpool.”
And finally. …
Rake concludes his article, the first to two about the line in The Railway Magazine (I currently only have access to this first article) with two short paragraphs. The first reflects on policing: “There were no police on the railway, the whole of the platelayers being constituted as constables on the completion of the first section of the line; and, we are afterwards told, that ‘the vigilance resulting from the pride these men take, in being thus placed in authority, had been found to supersede the necessity of any more expensive system of surveillance.'” [1: p474]
The second notes that: “The directors [were] very anxious to complete the railway as far as Rochdale, at the earliest possible time, and on the 4th July, 1839, it was opened through that town to Littleborough, a distance of about 14 miles, the event ‘exciting a most extraordinary degree of local interest and wonder’ we are told.” [1: p474]
References
- Herbert Rake; The Manchester and Leeds Railway: The Origin of the Lancashire and Yorkshire Railway; in The Railway Magazine, London, December 1905, p468-474
- https://www.geograph.org.uk/photo/820318, accessed on 23rd September 2024.
- https://premierconstructionnews.com/2016/04/14/summit-tunnel, accessed on 23rd September 2024.
- https://en.m.wikipedia.org/wiki/Summit_Tunnel, accessed on 23rd September 2024.
- https://commons.m.wikimedia.org/wiki/File:Gauxholme_Bridge,_Todmorden.jpg, accessed on 23rd September 2024.
- https://www.yorkshirepost.co.uk/news/opinion/columnists/trans-pennine-rail-in-the-age-of-victoria-1807452, accessed on 23rd September 2024.
- https://www.geograph.org.uk/photo/504379, accessed on 23rd September 2024.
- https://maps.nls.uk/geo/explore/#zoom=17.9&lat=53.71428&lon=-2.09924&layers=168&b=ESRIWorld&o=100, accessed on 23rd September 2024.
- https://maps.nls.uk/geo/explore/#zoom=18.9&lat=53.70635&lon=-2.10701&layers=168&b=ESRIWorld&o=100, accessed on 23rd September 2024.
- https://maps.nls.uk/geo/explore/#zoom=16.9&lat=53.71706&lon=-2.09298&layers=168&b=ESRIWorld&o=100, accessed on 23rd September 2024.
- https://maps.nls.uk/geo/explore/#zoom=17.1&lat=53.73968&lon=-2.03054&layers=168&b=ESRIWorld&o=100, accessed on 23rd September 2024.
- https://maps.nls.uk/geo/explore/#zoom=16.5&lat=53.73833&lon=-2.00992&layers=168&b=ESRIWorld&o=100, accessed on 23rd September 2024.
- https://maps.nls.uk/geo/explore/#zoom=16.1&lat=53.73044&lon=-1.98307&layers=168&b=ESRIWorld&o=100, accessed on 23rd September 2024.
- https://maps.nls.uk/geo/explore/#zoom=16.1&lat=53.72280&lon=-1.94806&layers=168&b=ESRIWorld&o=100, accessed on 23rd September 2024.
- https://maps.nls.uk/geo/explore/#zoom=16.8&lat=53.70808&lon=-1.91151&layers=168&b=ESRIWorld&o=100, accessed on 23rd September 2024
- https://commons.wikimedia.org/wiki/File:Mytholmroyd_3.jpg, accessed on 24th September 2024.
- https://en.wikipedia.org/wiki/Luddendenfoot_railway_station, accessed on 24th September 2024.
- https://www.geograph.org.uk/photo/4500324, accessed on 24th September 2024.
- https://en.wikipedia.org/wiki/Mytholmroyd_railway_station#/media/File:Mytholmroyd_railway_station,_November_2020.jpg, accessed on 24th September 2024.
- https://commons.wikimedia.org/wiki/File:Todmorden_station_p2.jpg, accessed on 24th September 2024.
- https://maps.nls.uk/geo/explore/#zoom=17.0&lat=53.61032&lon=-2.15338&layers=168&b=ESRIWorld&o=100, accessed on 24th September 2024.
- https://www.geograph.org.uk/photo/2160438, accessed on 24th September 2024.
- http://www.halifaxpeople.com/Sowerby-Bridge-Train-Station.html#google_vignette, accessed on 24th September 2024.
- https://commons.wikimedia.org/wiki/File:Sowerby_Bridge_stn.jpg, accessed on 24th September 2024.
- https://maps.nls.uk/geo/explore/#zoom=17.0&lat=53.70193&lon=-1.88141&layers=168&b=ESRIWorld&o=100, accessed on 24th September 2024.
- https://maps.nls.uk/geo/explore/#zoom=17.0&lat=53.69406&lon=-1.85773&layers=168&b=ESRIWorld&o=100, accessed on 24th September 2024.
- https://en.wikipedia.org/wiki/Greetland_railway_station, accessed on 24th September 2024.
- http://www.halifaxpeople.com/Historic-West-Vale.html, accessed on 24th September 2024.
- https://maps.nls.uk/geo/explore/#zoom=17.0&lat=53.69065&lon=-1.84016&layers=168&b=ESRIWorld&o=100, accessed on 24th September 2024.
- http://www.halifaxpeople.com/Historic-Elland.html, accessed on 24th September 2024.
- https://maps.nls.uk/geo/explore/#zoom=17.0&lat=53.69860&lon=-1.77905&layers=168&b=ESRIWorld&o=100, accessed on 24th September 2024.
- https://www.flickr.com/photos/tcs-pics/6805337658, accessed on 24th September 2024.
- https://commons.wikimedia.org/wiki/File:Brighouse_station.jpg, accessed on 24th September 2024.
- https://maps.nls.uk/geo/explore/#zoom=17.0&lat=53.68478&lon=-1.72933&layers=168&b=ESRIWorld&o=100, accessed on 24th September 2024.
- https://www.geograph.org.uk/photo/2151166, accessed on 24th September 2024.
- https://www.chiark.greenend.org.uk/~owend/interests/rail/stnpages/mirfield.html, accessed on 20th May 2010.
- https://en.wikipedia.org/wiki/Thornhill_railway_station, accessed on 24th September 2024.
- https://www.geograph.org.uk/photo/2146249, accessed on 24th September 2024.
- https://maps.nls.uk/geo/explore/#zoom=17.0&lat=53.67578&lon=-1.65453&layers=168&b=ESRIWorld&o=100, accessed on 24th September 2024.
- https://maps.nls.uk/geo/explore/#zoom=17.0&lat=53.67662&lon=-1.63870&layers=168&b=ESRIWorld&o=100, accessed on 24th September 2024.
- https://maps.nls.uk/geo/explore/#zoom=17.0&lat=53.67609&lon=-1.62408&layers=168&b=ESRIWorld&o=100, accessed on 24th September 2024.
- http://lostrailwayswestyorkshire.co.uk/Dewsbury.htm, accessed on 26th September 2024.
- https://maps.nls.uk/geo/explore/#zoom=17.0&lat=53.67145&lon=-1.61316&layers=168&b=ESRIWorld&o=100, accessed on 27th September 2024.
- https://maps.nls.uk/geo/explore/#zoom=17.0&lat=53.65930&lon=-1.56897&layers=168&b=ESRIWorld&o=100, accessed on 27th September 2024.
- https://en.wikipedia.org/wiki/Horbury_and_Ossett_railway_station, accessed on 27th September 2024.
- https://maps.nls.uk/geo/explore/#zoom=16.0&lat=53.66442&lon=-1.58084&layers=168&b=ESRIWorld&o=0, accessed on 27th September 2024.
- https://en.wikipedia.org/wiki/Healey_Mills_Marshalling_Yard, accessed onn 27th September 2024.
- https://www.geograph.org.uk/photo/864329, accessed on 27th September 2024.
- https://maps.nls.uk/geo/explore/#zoom=17.0&lat=53.65617&lon=-1.55890&layers=168&b=ESRIWorld&o=100, accessed on 27th September 2024.
- https://maps.nls.uk/geo/explore/#zoom=17.0&lat=53.65728&lon=-1.53700&layers=168&b=ESRIWorld&o=100, accessed on 30th September 2024.
- https://www.horburyhistory.org/Horbury-Junction/, accessed on 30th September 2024.
- https://maps.nls.uk/geo/explore/#zoom=17.0&lat=53.66955&lon=-1.50480&layers=168&b=ESRIWorld&o=100, accessed on 30th September 2024.
- https://maps.nls.uk/geo/explore/#zoom=17.4&lat=53.67749&lon=-1.49163&layers=168&b=ESRIWorld&o=100, accessed on 30th September 2024.
- https://maps.nls.uk/geo/explore/#zoom=17.4&lat=53.67943&lon=-1.48383&layers=168&b=ESRIWorld&o=100, accessed on 30th September 2024.
- https://maps.nls.uk/geo/explore/#zoom=17.4&lat=53.68334&lon=-1.47138&layers=168&b=ESRIWorld&o=100, accessed on 30th September 2024.
- https://maps.nls.uk/geo/explore/#zoom=17.4&lat=53.69000&lon=-1.43723&layers=168&b=ESRIWorld&o=100, accessed on 2nd October 2024.
- https://maps.nls.uk/geo/explore/#zoom=17.4&lat=53.69243&lon=-1.43590&layers=168&b=ESRIWorld&o=100, accessed on 2nd October 2024.
- https://maps.nls.uk/geo/explore/#zoom=15.4&lat=53.70320&lon=-1.42452&layers=168&b=ESRIWorld&o=100, accessed on 2nd October 2024.
- Embedded link: https://www.flickr.com/photos/neil_harvey_railway_photos/7834033734, accessed on 3rd October 2024.
- https://www.invaluable.com/auction-lot/two-albums-containing-300-cards-incl-yorkshire-ox-166-c-6fd4b7e9e0, accessed on 3rd October 2024.
- https://www.blipfoto.com/entry/3134415230512138681, accessed on 3rd October 2024.
- https://maps.nls.uk/geo/explore/#zoom=17.0&lat=53.69371&lon=-1.76350&layers=168&b=ESRIWorld&o=100, accessed on 3rd October 2024.
- https://maps.nls.uk/geo/explore/#zoom=15.0&lat=53.72852&lon=-2.05697&layers=168&b=ESRIWorld&o=100, accessed on 3rd October 2024.
- https://igg.org.uk/rail/3-sigs/sigs-1.htm, accessed on 5th October 2024.
- https://commons.wikimedia.org/wiki/File:L%26MR_engine_%27Victoria%27.jpg, accessed on 6th October 2024.
- https://rogerfarnworth.com/2024/10/06/the-manchester-and-leeds-railway-the-railway-magazine-december-1905-part-1/
- http://www.halifaxpeople.com/Sowerby-Bridge-Train-Station.html, accessed on 6th October 2024.
- http://www.calderdalecompanion.co.uk/ph796.html, accessed on 6th October 2024.
- https://maps.nls.uk/geo/explore/#zoom=17.0&lat=53.69483&lon=-1.76821&layers=168&b=ESRIWorld&o=100, accessed on 7th October 2024.
- https://maps.nls.uk/geo/explore/#zoom=17.0&lat=53.68967&lon=-1.74458&layers=168&b=ESRIWorld&o=100, accessed on 7th October 2024.
- https://maps.nls.uk/geo/explore/#zoom=16.0&lat=53.68030&lon=-1.71952&layers=168&b=ESRIWorld&o=100, accessed on 7th October 2024.
- https://en.m.wikipedia.org/wiki/Wakefield_Kirkgate_railway_station, accessed on 7th October 2024.
- https://groundworklandscapearchitects.org.uk/regions/yorkshire-and-the-humber/kirkgate-station, accessed on 7th October 2024.
- https://www.geograph.org.uk/photo/2043843, accessed on 8th October 2024.
- Jeffrey Wells; The Eleven Towns Railway: The Story of the Manchester and Leeds Main Line; Railway & Canal Historical Society, Keighley, West Yorkshire, 2000.
- https://picryl.com/topics/period+drawings+of+early+steam+locomotives, accessed on 9th October 2024.
- https://en.m.wikipedia.org/wiki/0-4-2#/media/File%3AStephenson_0-4-2.jpg, accessed on 9th October 2024.
- https://commons.wikimedia.org/wiki/File:Stephenson_Patentee_type_2-2-2_locomotive_no_123_%E2%80%9CHarvey_Combe%E2%80%9D_built_1835,_from_Simm%E2%80%99s_%E2%80%9CPublic_Works_of_Great_Britain%E2%80%9D_1838,_newly_engraved_%2B_reprinted_1927_%E2%80%93_No_caption,_black_and_white.jpg, accessed on 9th October 2024
