
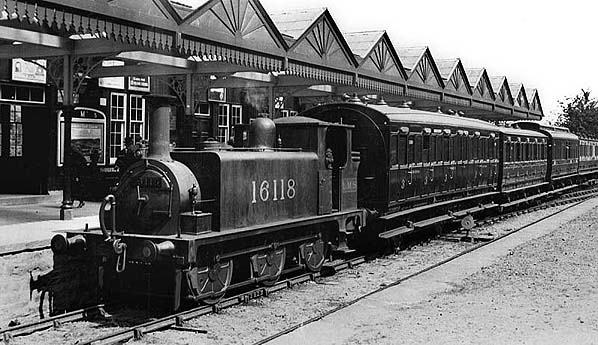
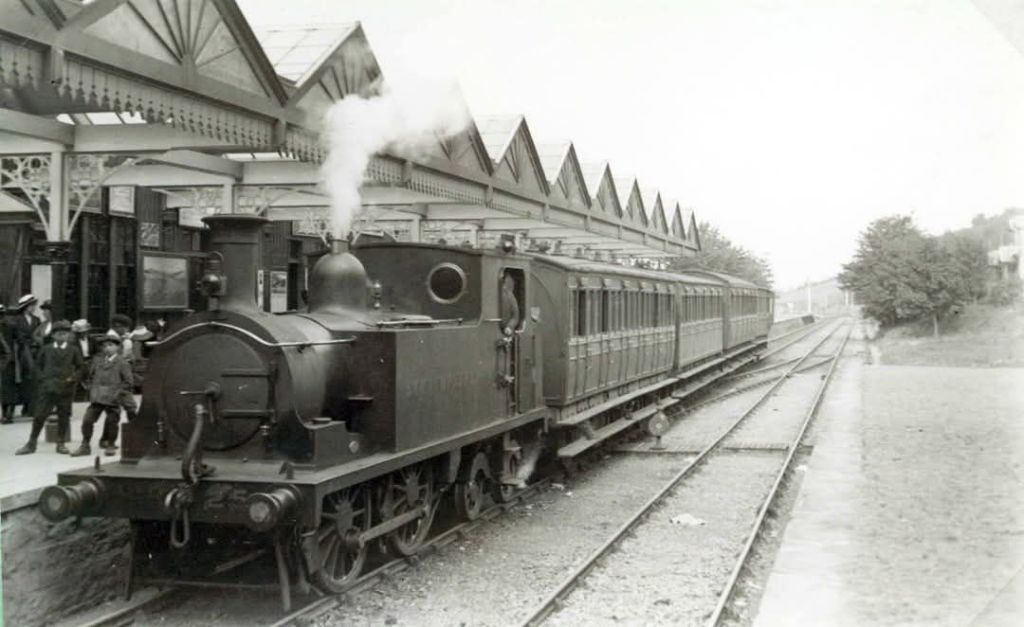
The featured image above shows Strathpeffer Railway Station in 1928. Locomotive No. 16118, one of a class of three locos designed by William Stroudley. Built in 1869 at the Highland Railway’s Lochgorm works in Inverness, they became known as ‘Lochgorm Tanks’ and this loco carried the number 56 when first built and the name ‘Balnain’, and later ‘Dornoch’. All three passed to the LMS in 1923 when they lost their names and are widely believed to be the basis of the LBSCR Terrier design that Stroudley produced later in his career. This loco and sister No. 16383 were broken up in 1927, although the third lasted until 1932, © John Mann Collection, used with the kind permission of Nick Catford. [30]
Stanley Jenkins comments: “Situated at the head of a fertile valley some five miles inland from the Cromarty Firth, Strathpeffer was once famous as a health spa and fashionable holiday resort. Although the medicinal value of the local mineral springs had been known for many years, the village did not really develop until the Victorian era when the Countess of Cromartie was instrumental in creating a Central European-style spa in this remote part of Scotland.” [1: p53]
When the first section of the Dingwall & Skye Railway opened on 19th August 1870 the Strathpeffer area became much better connected. However, the new line ran well to the North of the village. The line had a station named ‘Strathpeffer’ but it was 2 miles from the spa and at a much higher level. The station ended up in that location because of the opposition of a local landowner to a far better route for the Dingwall & Skye line, which would have passed through the village. The result was a steeply inclined (1 in 50) line climbing to the summit at Raven Rock
The distant station meant that the increasingly popular spa had to provide a horse-drawn road service for increasing numbers of upper-middle class clients. Stanley Jenkins tells us that “It soon became clear … that a direct rail link was needed. Meanwhile, in 1880 the Dingwall & Skye Railway was merged with the Highland Railway, and following this development it was agreed that a short branch line would be built to Strathpeffer. The proposed line would follow a route similar to that suggested for the Dingwall & Skye Railway in the 1860s, albeit with a terminal station in Strathpeffer, rather than a through station as originally planned. Accordingly, on 28th July 1884 powers were obtained for the construction of a 2 mile 38 chain railway from Fodderty Junction, on the Dingwall & Skye Railway, to Strathpeffer. The authorised line ran west-south-westwards across easy terrain towards its destination, and with few physical obstacles to hinder the work of construction good progress was made. The single-track branch was opened on 3rd June 1885, the original Strathpeffer station on the Dingwall & Skye route having been renamed Achterneed just two days earlier.” [1: p53]
The line was single-track and had no intermediate stations. As there was no station at Fodderty Junction, trains ran to and from Dingwall. Jenkins comments that the railway terminated at Strathpeffer “in a spacious terminus, while at Dingwall the Highland Railway company provided a new junction station with much improved facilities.” [1: p53]
Jenkins notes that lines like that serving Strathpeffer “attracted a certain amount of excursion and leisure traffic during the Edwardian period. Indeed, the Strathpeffer branch was albeit briefly – served by a ‘named’ train. In 1911, the ‘Strathpeffer Spa Express’ was introduced as a special Tuesdays-only working that left Aviemore at 2.30pm and ran non-stop to Dingwall; the train then continued westwards to Strathpeffer, with an arrival time of 4.15pm. This prestigious service ran in conjunction with a train that left Perth at 11.50pm, the idea being that through travellers would be able to reach their hotels with time to wash and change before dinner. Curiously there was no corresponding up service, and one assumes that travellers were expected to return southwards on normal branch services. A similar through service was available on Saturdays during the Edwardian period; this working normally left Inverness at 3.00pm, and it called intermediately at Beauly, Muir of Ord, and Dingwall. In the up direction the balancing southbound service departed from Strathpeffer at around 8.15pm. These through workings catered primarily for visitors to the larger hotels in Strathpeffer, and in this context it is interesting to note that the Highland Railway opened its own hotel in 1911. The through services were withdrawn at the start of World War I, the ‘Strathpeffer Spa Express’ being deleted in 1915, while the Inverness through trains ran for the last time in 1914.” [1: p53]
The Route from Dingwall to Strathpeffer
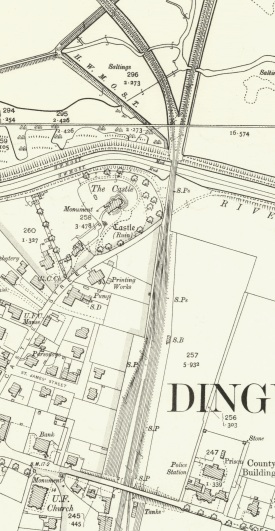
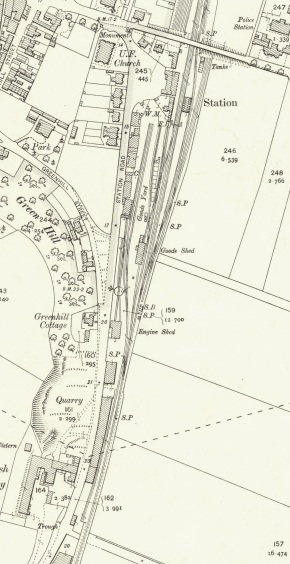
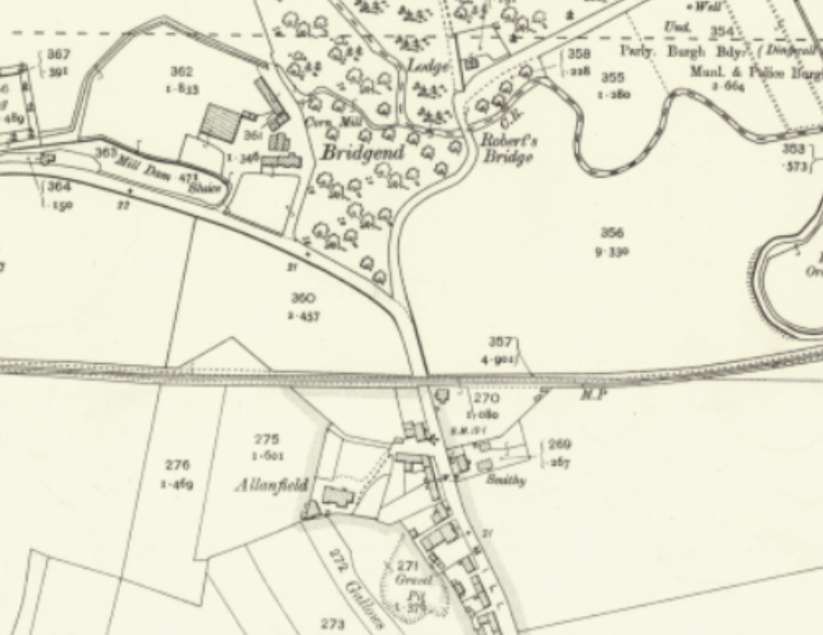
The two extracts below from the 25″ Ordnance Survey of 1904 give an overview of Dingwall Railway Station and village. The full length of the station site and the junction of the line to Skye are included on this extract from the 25″ Ordnance Survey from the turn of the 20th century. [14]
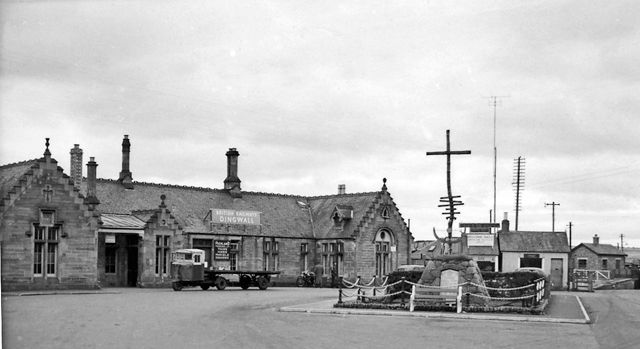
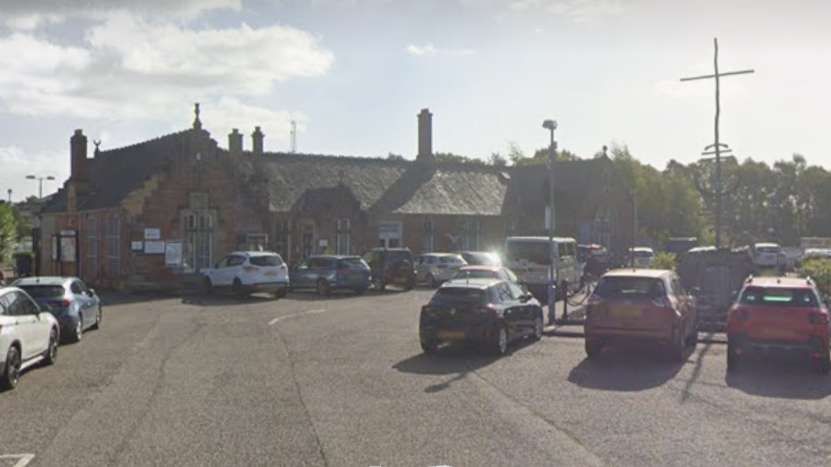
Jenkins notes that “In its later years the route was treated as a minor branch line, with a service of around half a dozen trains each-way between Strathpeffer and the junction station at Dingwall. The latter station was opened on 11th June 1862 when the first section of the Inverness & Ross-shire Railway was brought into operation. In its early years the station was a very basic affair which hardly seemed appropriate for the county town of Ross & Cromarty. The station became a junction following the opening of the Dingwall & Skye Railway on 19th August 1870, but Dingwall did not reach its fully-developed form until the construction of the Strathpeffer line in the following decade.” [1: p55]
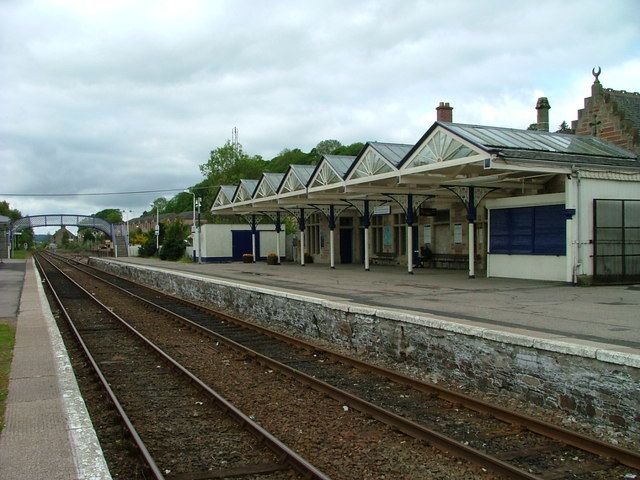
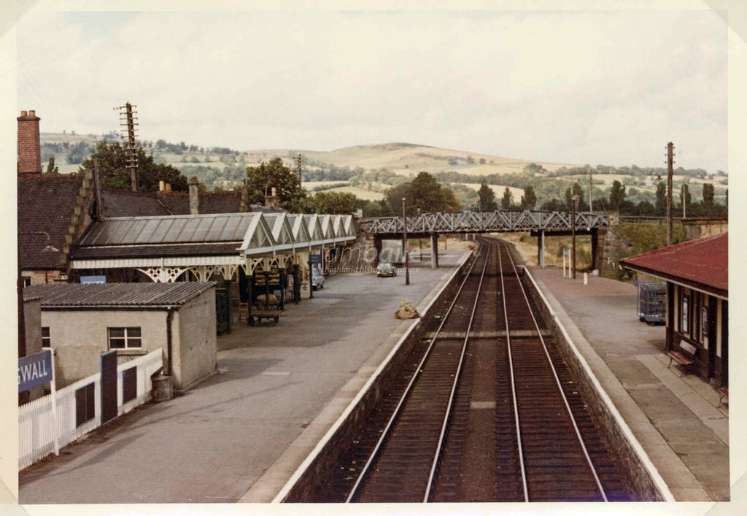
Jenkins tells us that “In view of the importance attached to the Strathpeffer scheme, it was decided that new and much-improved station buildings would be constructed, while a separate bay platform was installed at the north end of the station for use by terminating branch trains. The new station building was in effect a de-luxe version of the usual Highland Railway design, stone being utilised instead of the normal timber construction, while the building was given a substantial glass & iron platform canopy formed of seven transverse bays. The up and down platforms were linked by a lattice girder footbridge, and there was a small waiting-room block on the up side.” [1: p55]

Some further images of Dingwall Railway Station can be found on these links:
https://www.facebook.com/share/p/1B5bvwzurx/
https://www.facebook.com/share/p/1BgRLTgWpf/
https://www.facebook.com/share/p/14yFzJMksL/
https://www.facebook.com/share/p/1A7huVFWg6/
https://www.facebook.com/share/p/14pRHqrEUB/
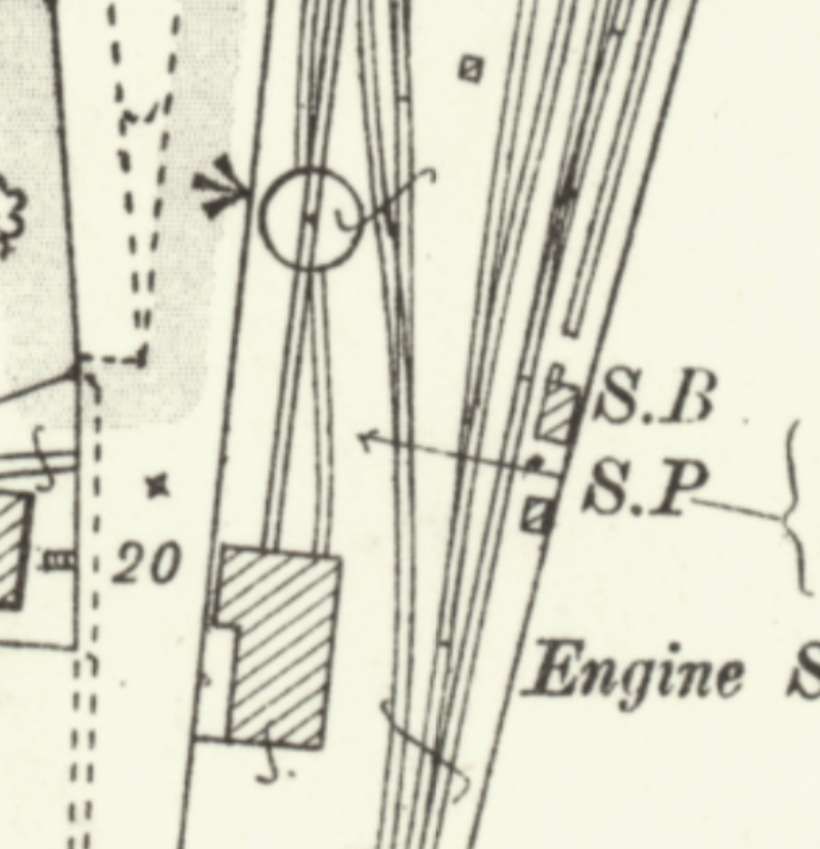
“The track layout at Dingwall incorporated a number of loops and sidings, while the goods yard contained a range of facilities for all forms of traffic including coal, livestock, vehicles, and general merchandise; a 4ton yard crane was capable of dealing with timber or other large or heavy consignments. The station was signalled from two standard Highland Railway signal cabins known as Dingwall South and Dingwall North boxes.” [1: p55-56]
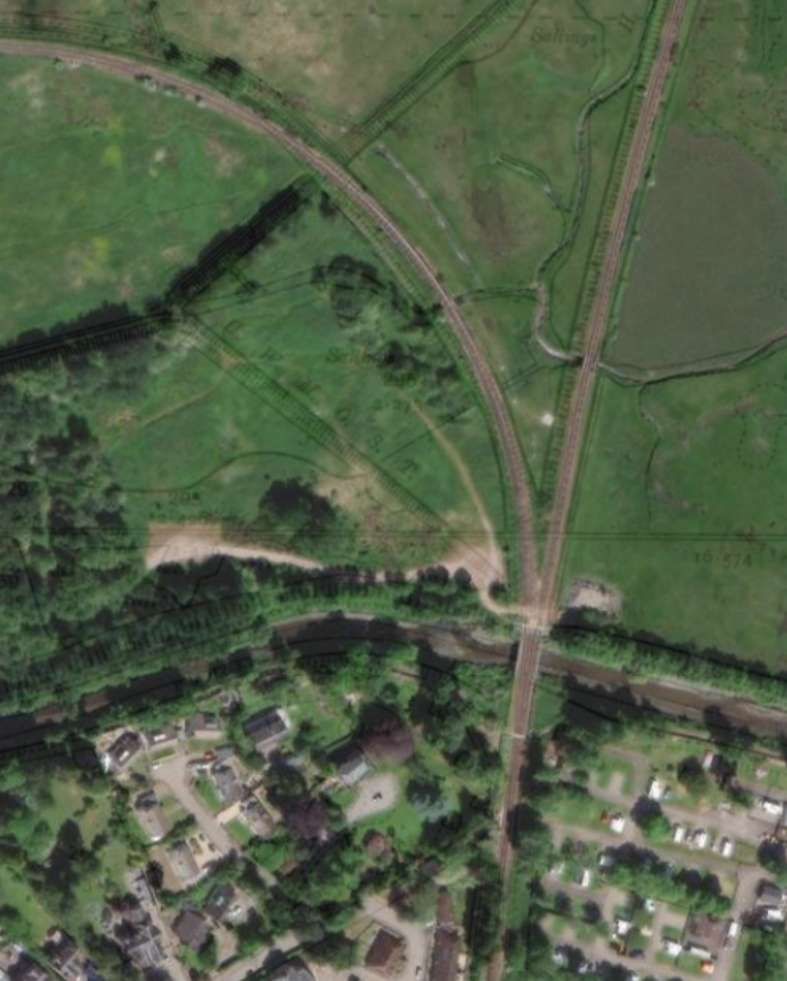

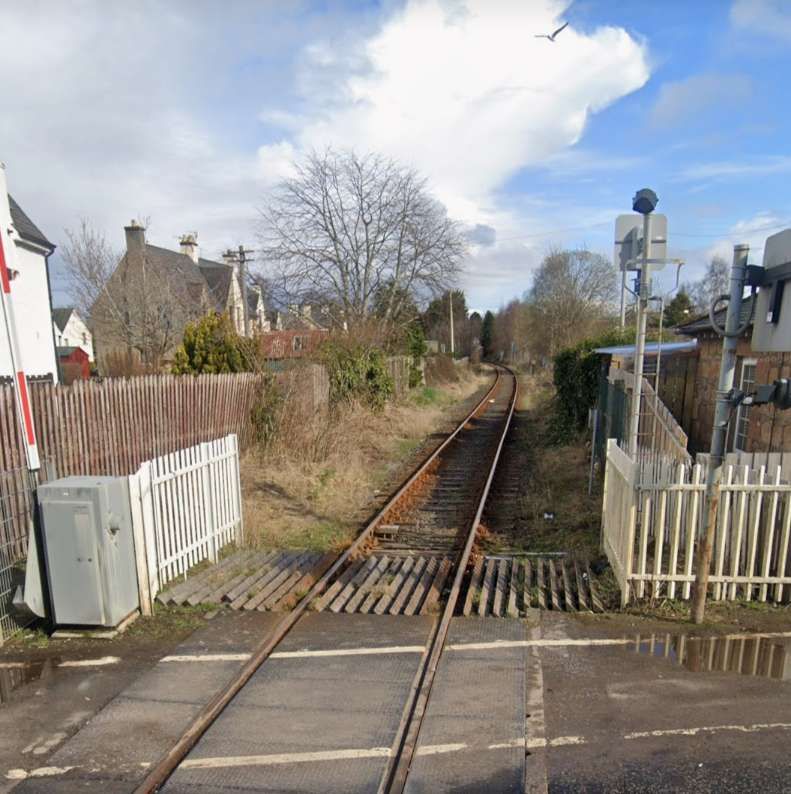
Jenkins tells us that, “On departure from Dingwall, branch trains proceeded westwards along the Kyle of Lochalsh line for a distance of 2 miles 22 chains. At Fodderty Junction the Strathpeffer route continued westwards, whereas the Kyle line turned sharply north-westwards on its way to Raven Rock Summit.” [1: p55-56]
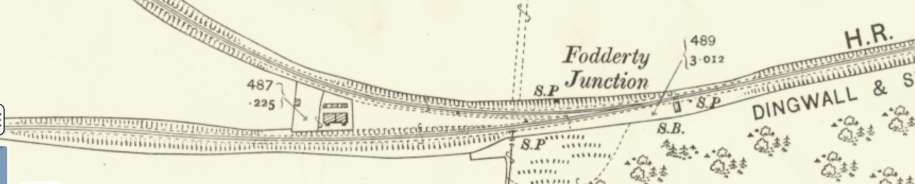

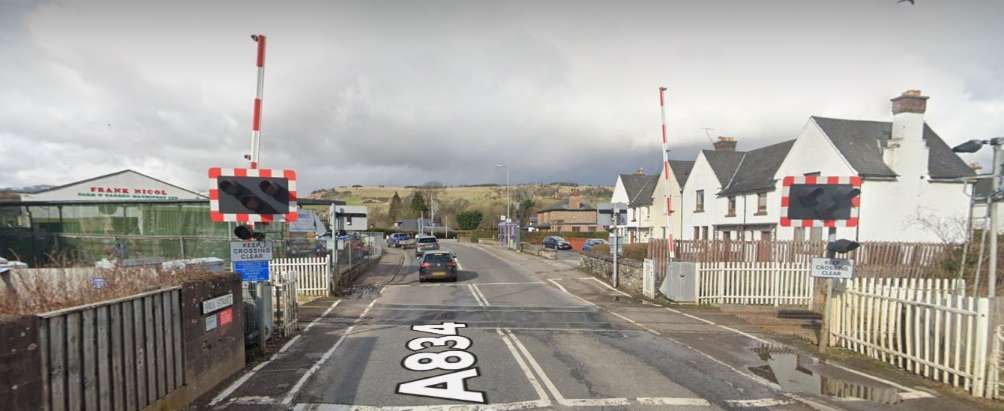
Immediately to the North of Fodderty Junction, just off the top edge of the two images above, the Kyle of Lochalsh line crosses the modern A834 – the road from Dingwall to Strathpeffer.

“Until 1936, Fodderty Junction was worked from a small signalbox controlling home and distant signals in each direction, as well as the junction points. The junction was later operated by a hand generator from Dingwall North Box, with key-token operation on the ‘main-line’ section between Dingwall North and Achterneed, and one-engine-in-steam working for branch trains between Dingwall North and Strathpeffer. This mode of operation presented certain problems in that there had to be various ‘fail-safe’ arrangements between the two systems of single-line working. The Strathpeffer branch was therefore worked by a Tyer’s Occupation Key, which prevented conflicting movements on the main line between Dingwall North and Fodderty Junction, and ensured the safe operation of the one engine-in-steam section between Fodderty Junction and Strathpeffer.” [1: p56]
“Fodderty Junction Signal Box was reopened in June 1940 in connection with heavy wartime traffic on the Kyle of Lochalsh line. This situation pertained until August 1944, when the box was again closed. The box itself was a typical Highland Railway structure, while a small stone cottage was available nearby for the benefit of the signalman and his family.” [1: p56]
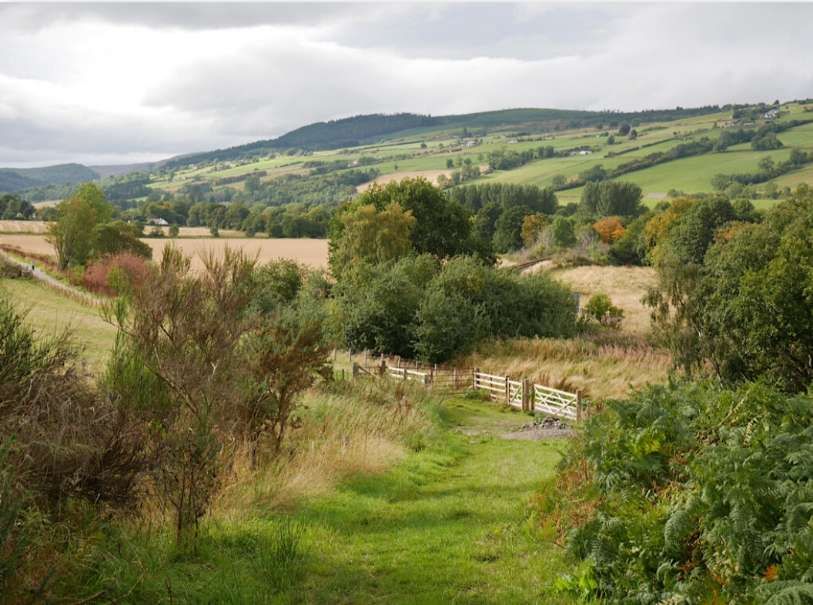
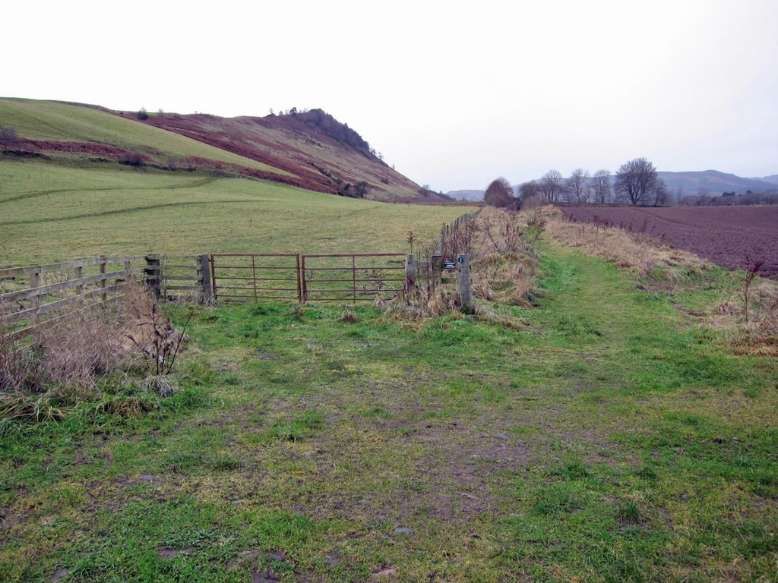
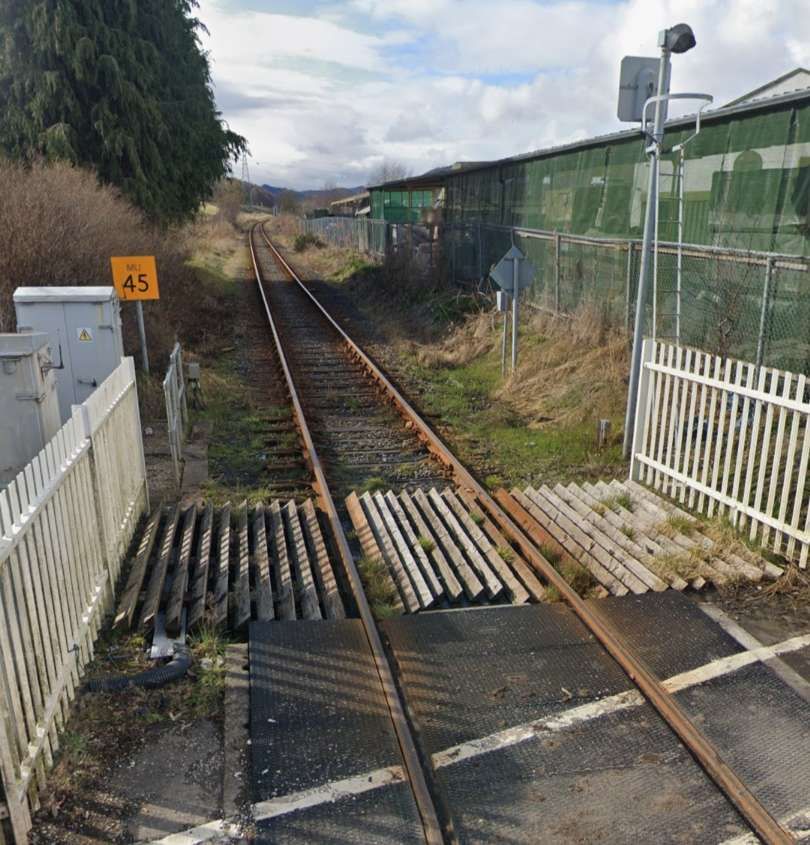
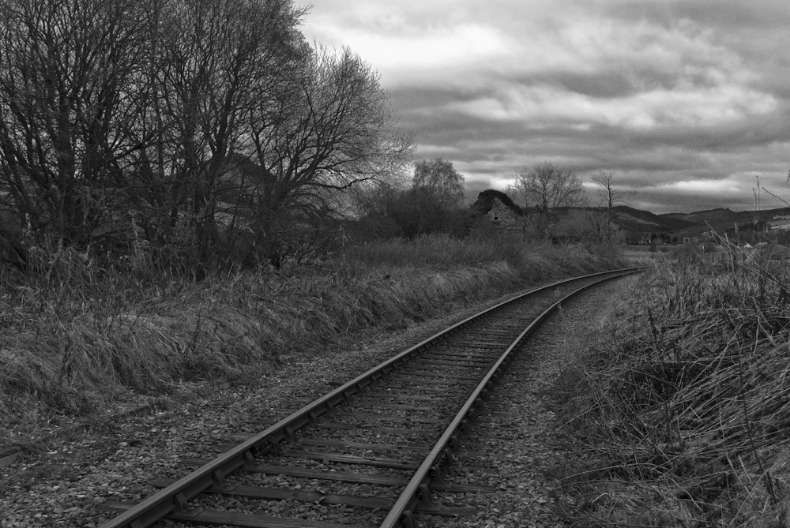
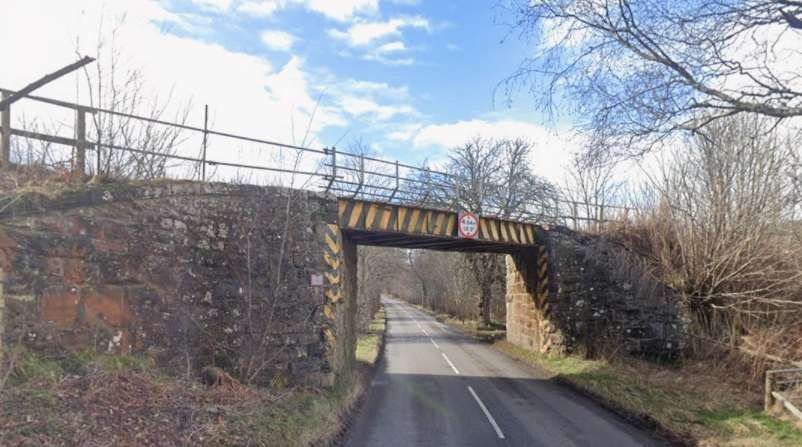
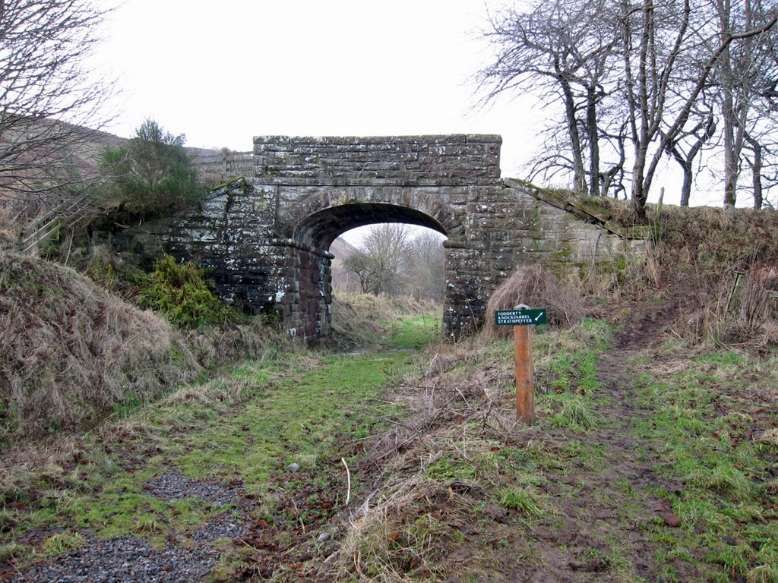
“Having gained their own line at Fodderty Junction, branch trains proceeded generally westwards along the south side of a fertile valley. The route was not quite straight, and as the railway approached its destination the single line was heading approximately west-south-westwards. Slowing for the final approach to the terminus, down trains passed a fixed distant signal, after which they came to rest in an attractive station, some 2 miles 38 chains from Fodderty Junction and 4 miles 60 chains from the start of the journey at Dingwall.” [1: p56]
Incidentally, for those who are unfamiliar with the full range of imperial units, a ‘chain’ is 22 yards in length (66 feet) and there are 80 chains to one mile. Initially the length of a chain varied between different jurisdictions but standardisation occurred in 1824 with the introduction of the imperial system of units. [2] A 66 ft. chain was made up of 100 links. [3]
The journey along the branch was relatively easy work for the locomotives employed. The approximately 2.5 miles to the terminus at Strathpeffer was on easy grades.
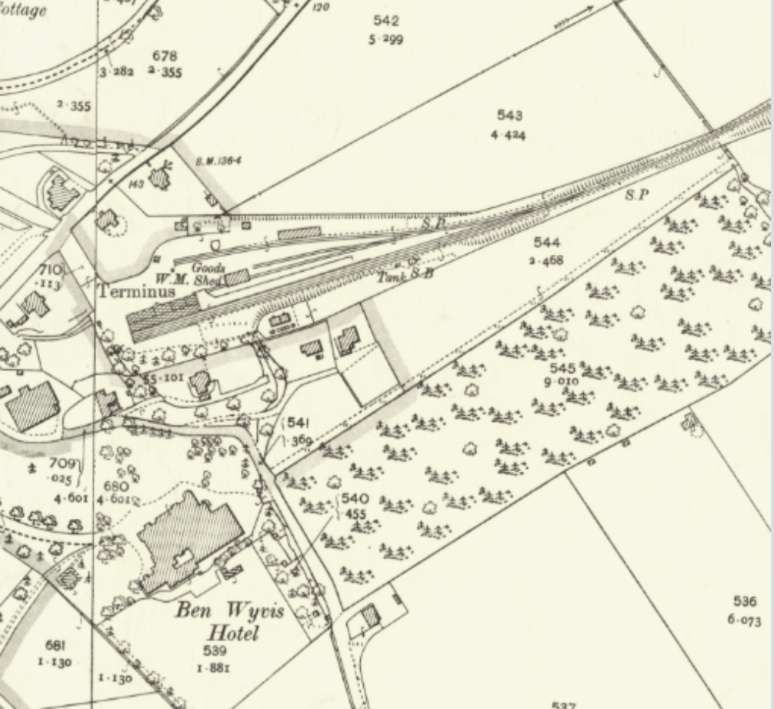
“Like other Highland Railway branch-line stations Strathpeffer was well laid-out, with a lengthy platform for passenger traffic on the up side and a small goods yard on the down side of the line. The platform line was flanked by an engine-release road, which was equipped with a short dead-end spur at its western end. Although only one platform was provided, there was sufficient space for a second platform on the down side if traffic requirements had ever justified such a facility. There was a short loading dock beside the spur at the end of the run-round loop, and this could, if necessary, have been extended eastwards to form a second full-length platform.” [1: p56]
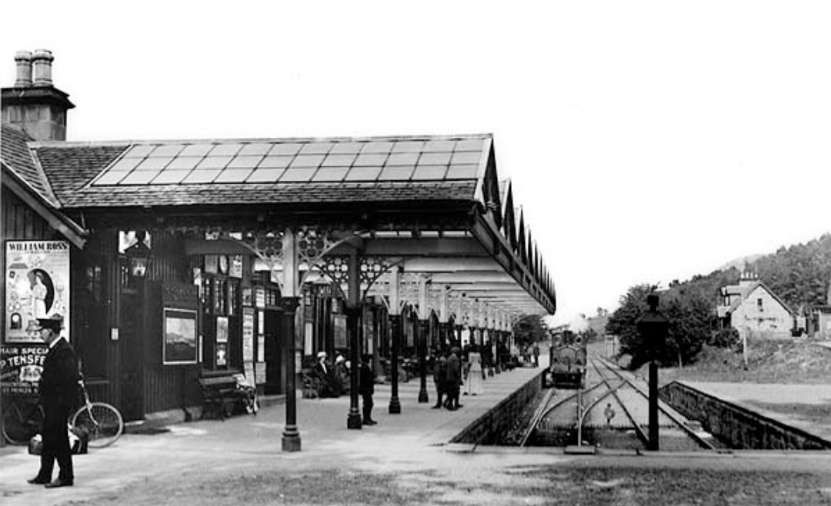
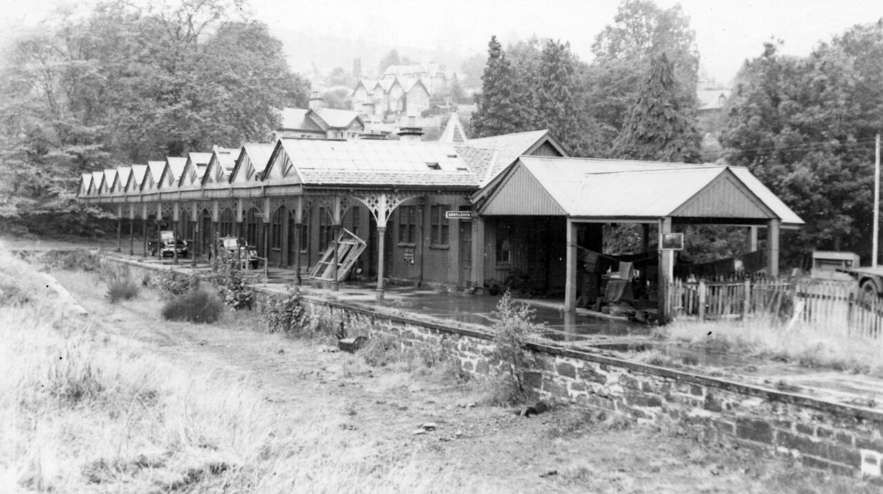
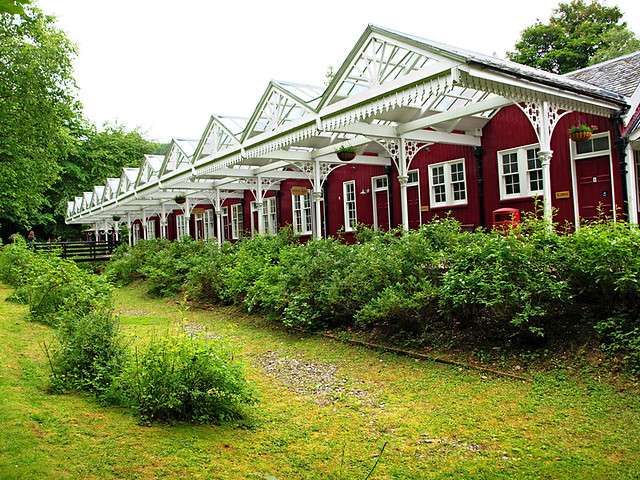
“The station building was similar to those at other Highland branch-line terminals, albeit somewhat larger. This typical single-storey timber-framed structure was clad in the usual vertical weatherboarding, while its low-pitched slated roof was punctuated by an array of squat chimney stacks. As at Dingwall, an extensive ridge & furrow platform canopy was provided, eleven transverse bays being supported on a dozen vertical iron columns with ornate quatrefoil spandrels. The Highland Railway was not, by any definition, a rich company, and the provision of this lavishly-appointed station underlined the company’s commitment to the development of passenger traffic at Strathpeffer.” [1: p56]
https://canmore.org.uk/collection/44840 shows Stroudley 0-6-0 saddletank locomotive LMS 16118 (originally named ‘Balnain’ and later ‘Dornoch’) in Strathpeffer Station. [NB. This image can only be viewed on canmore.org.uk website as is not available for download.]
“The goods yard contained three dead-end sidings, one of which passed through a typical Highland Railway timber goods shed while another terminated alongside a raised loading bank. The yard was entered by means of a siding connection on the up side of the running line, the single turnout facing the direction of down trains. The main form of goods traffic handled here was domestic coal for consumption in the nearby hotels and guest houses, although it seems likely that a considerable amount of building material would have been handled at Strathpeffer during the Victorian period when many new buildings were being erected in the immediate vicinity.” [1: p56]
“The terminus was signalled from a small signal cabin on the down side of the run-round loop. The box contained an 11-lever frame with three spare levers. There was just one working signal, this being an up starting signal that was locked in the ‘danger’ position when the key token for the Dingwall North to Strathpeffer section was placed in the Strathpeffer key-token instrument. As a further safety measure a catch-point and sand-drag was provided beside the starting signal, and once set for the sand-drag the catch-point could not be reset until the key-token had been withdrawn from the Strathpeffer instrument.” [1: p57]
“Other features of interest at Strathpeffer station included a water tank and a well-built stone cottage for the stationmaster, both of these structures being situated to the south of the platform on the down side of the line. The station was well-sited in relation to the village (or ‘The Strath’, as it was known locally), and visitors arriving by train did not have far to walk in order to reach their hotels.” [1: p57]
“Strathpeffer was well-equipped with shops, golf courses, gardens and a pump room, all of these amenities being designed to cater for the needs of upper-middle class Victorian visitors.” [1: p57]
“Sadly, the heyday of Strathpeffer as a fashionable resort came to an end with the outbreak of war in August 1914, and in retrospect the LMS era was a period of slow but inexorable decline. Passenger services lingered on until the end of World War II, but the end came on 23rd February 1946 from which date the railway was closed to passenger traffic. Goods services continued until March 1951, after which the branch was closed in its entirety. Demolition was soon accomplished, but the once-elegant station building at Strathpeffer survived in a derelict condition.” [1: p57]
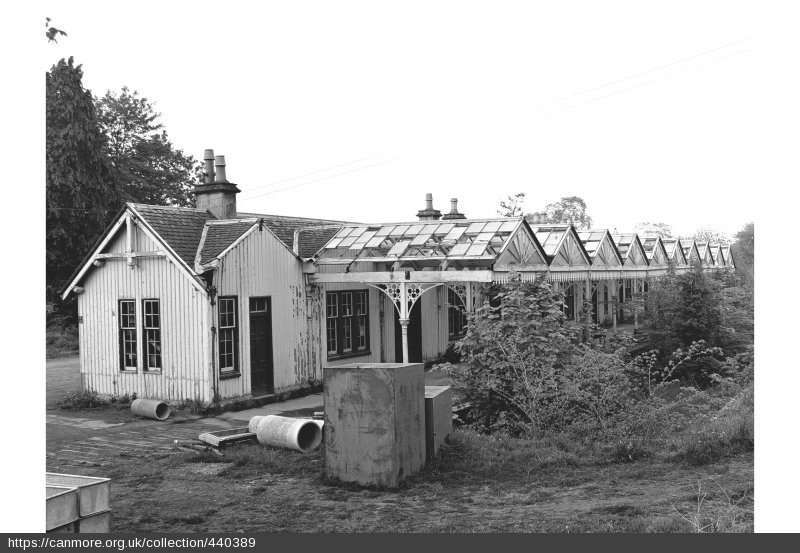
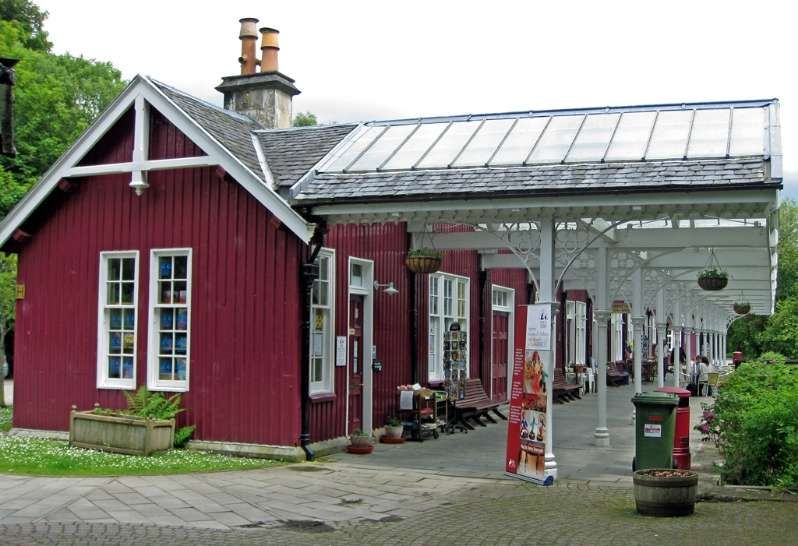
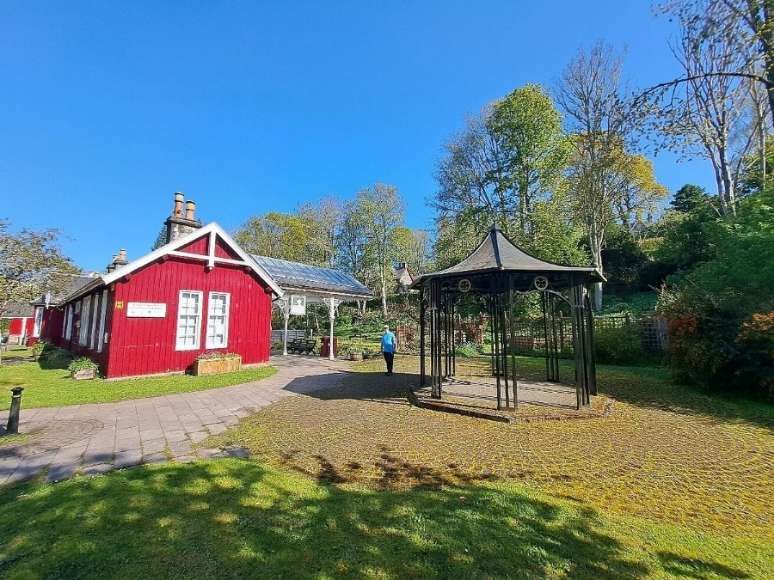
“In due course the delights of Strathpeffer were rediscovered by spa enthusiasts, conservationists, and students of Victorian architecture, and in recent years the Spa Pavilion and other buildings have been lovingly restored. Happily, the station building was sufficiently intact to attract funding for its restoration, and in 1980 this timber-framed Highland Railway structure was reopened as a craft centre and museum. In its new role, the restored station forms a fitting memorial, not only to the Strathpeffer line, but also to the other minor lines that once abounded in this corner of Scotland.” [1: p57]
References
- Stanley Jenkins; Highland Railway Minor Lines: 2; in Rex Kennedy (ed.); Steam Days; Red Gauntlet Publications, Bournemouth, Dorset, January 2002; p48-57.
- William John Macquorn Rankine; A Manual of Civil Engineering (2nd ed.); Griffin Bohn & Company, London, 1863, p3.
- https://en.m.wikipedia.org/wiki/Chain_(unit), accessed on 15th March 2025.
- https://www.tripadvisor.co.uk/Attraction_Review-g551820-d1674152-Reviews-Highland_Museum_of_Childhood-Strathpeffer_Ross_and_Cromarty_Scottish_Highlands_Sc.html#/media/1674152/?albumid=-160&type=ALL_INCLUDING_RESTRICTED&category=-160, accessed on 15th March 2025.
- https://buzztrips.co.uk/posts/strathpeffer-railway-station-and-the-museum-of-childhood-memories/#google_vignette, accessed on 15th March 2025.
- https://canmore.org.uk/collection/440389, accessed on 15th March 2025.
- https://en.m.wikipedia.org/wiki/Strathpeffer_railway_station#/media/File%3AStrathpeffer_1885.png, accessed on 15th March 2025.
- https://en.m.wikipedia.org/wiki/Strathpeffer_railway_station#/media/File%3AStrathpeffer%2C_remains_of_station_1956_(geograph_5320831).jpg, accessed on 15th March 2025.
- https://en.m.wikipedia.org/wiki/Dingwall_railway_station#/media/File%3ADingwall_Railway_Station_-_geograph.org.uk_-_2996558.jpg, accessed on 15th March 2025.
- https://www.geograph.org.uk/photo/2124565, accessed on 15th March 2025.
- https://www.geograph.org.uk/photo/2224093, accessed on 15th March 2025.
- https://www.geograph.org.uk/photo/1737205, accessed on 15th March 2025.
- https://www.geograph.org.uk/photo/2565738, accessed on 15th March 2025.
- https://maps.nls.uk/geo/explore/#zoom=15.5&lat=57.59514&lon=-4.42297&layers=168&b=ESRIWorld&o=100, accessed on 19th March 2025.
- https://maps.nls.uk/geo/explore/#zoom=17.0&lat=57.59805&lon=-4.47179&layers=168&b=ESRIWorld&o=100, accessed on 19th March 2025.
- https://www.ambaile.org.uk/asset/27101, accessed on 19th March 2025.
- https://maps.nls.uk/geo/explore/#zoom=16.4&lat=57.59082&lon=-4.53233&layers=168&b=ESRIWorld&o=100&marker=54.16252,-2.44953, accessed on 21st March 2025.
- https://www.ullapoolmuseum.co.uk/wolb-mary-marjorie-macdonald, accessed on 21st March 2025.
- https://maps.nls.uk/geo/explore/#zoom=16.6&lat=57.59982&lon=-4.43917&layers=168&b=ESRIWorld&o=0, accessed on 21st March 2025.
- https://www.geograph.org.uk/photo/7326140, accessed on 21st March 2025.
- https://www.geograph.org.uk/photo/6903102, accessed on 21st March 2025.
- https://www.geograph.org.uk/photo/2329836, accessed on 23rd March 2025.
- https://www.geograph.org.uk/photo/4288961, accessed on 23rd March 2025.
- https://www.geograph.org.uk/photo/4289036, accessed on 23rd March 2025.
- https://www.geograph.org.uk/photo/5941209, accessed on 23rd March 2025.
- https://www.geograph.org.uk/photo/5941214, accessed on 23rd March 2025.
- https://www.geograph.org.uk/photo/7213775, accessed on 23rd March 2025.
- https://www.geograph.org.uk/photo/1023122, accessed on 23rd March 2025.
- https://www.facebook.com/share/1E6af9PaC2, accessed on 23rd March 2025.
- http://www.disused-stations.org.uk/s/strathpefferhttp://www.disused-stations.org.uk/s/strathpeffer/, accessed on 23rd March 2025.

.jpg)