The featured image shows a horse-drawn/mule-drawn tram in Zanzibar before the turn of the 20th century. [1]
Zanzibar hosted two early rail systems, with a mule-drawn tramway operating from 1879 to 1888 between Stone Town and Chukwani, which later used a steam locomotive. A second, more notable 7-mile line known as the Bububu Railway ran from 1905 to 1930, connecting Stone Town to Bububu, featuring passenger service and, briefly, electric street lighting. [4]
The First Line (1879–1888): Built by Sultan Barghash bin Said, this, one of the first, tracks in sub-Saharan Africa. The 2ft-gauge line ran from the Sultan’s palace at Stone Town [2] to Chukwani. Initially the two coaches were hauled by mules but in 1881 the Sultan ordered an 0-4-0T locomotive from the English locomotive builders Bagnall, this was named ‘Sultanee’. The railway saw service until the Sultan died in 1888 when the track and locomotive were scrapped. [4][11]
The Bububu Railway – a.k.a. the Zanzibar Railroad Co. (1905–1930) – In 1905, the American company Arnold Cheyney built a seven-mile, 3ft-gauge line from Zanzibar Town to the village of Bububu. It originated near the Arab Fort in Zanzibar Town, ran along the seafront, passed through the city’s narrow streets, and traveled north along the coast to Bububu. It was notorious for its ability to set fire to property and the surrounding countryside, but it ran for 25 years until it closed in 1930. Within the town, the railway operated on some of the narrowest streets. [4][5]
In the 1920s, the trains ran 6 or 7 times daily. The train was popular among the locals, but a special first class coach was available for the benefit of sightseeing tourists. [4]
During the railway construction the Americans undertook the task of installing electrical power lines along the track. Wherever the rails were placed, metal poles were installed and power lines strung overhead. By 1906, Stone Town had electric street lights. In 1911, the railway was sold to the government, and by 1922 the passenger service ceased. As roads improved and motor vehicles on the island increased, its popularity diminished. [4]
With the improvement works to the port, the railway was used for the haulage of stone which was used to build the port and reclaim the seafront. Today much of the old track bed has been built on however some of the railway’s bridges and embankments remain close to the main road to Bububu. [4]
I have struggled to identify the route of the old railway despite a number of websites/blogs suggesting that remnants of the railway can be seen from the main road to Bububu. The most significant structures may perhaps now be in use by the road or replaced by newer structures carrying the road. I have been unable to locate the structure below, which appears to be seen from the highway:
PastRailwayEmpires identifies this structure as one constructed for the Bububu Railway. The photograph was taken in 2013. Perhaps someone else will be able to identify its location. [12]
Stone Town (also known as Mji Mkongwe (Swahili for ‘old town’), is the old part of Zanzibar City. The newer portion of the city is known as Ng’ambo, Swahili for ‘the other side’. Stone Town is located on the western coast of Unguja, the main island of the Zanzibar Archipelago. Former capital of the Zanzibar Sultanate, and flourishing centre of the spice trade as well as the Indian Ocean slave trade in the 19th century, it retained its importance as the main city of Zanzibar during the period of the British protectorate. When Tanganyika and Zanzibar joined each other to form the United Republic of Tanzania, Zanzibar kept a semi-autonomous status, with Stone Town as its local government seat. [3]
The short paragraph immediately below appeared in the February 1952 edition of The Railway Magazine in reply to a question submitted by G. T. Kaye.
“The Nidd Valley branch of the former North Eastern Railway (which was closed to passengers on 31st March 1951) terminated at Pateley Bridge, 14 miles from Harrogate. In 1900, a Light Railway Order was obtained for a 2 ft. 6 in. gauge line from Pateley Bridge to Lofthouse-in-Nidderdale, six miles further up the valley, but the promoters had difficulty in finding the necessary capital. At that time, the Bradford Corporation was about to undertake the construction of reservoirs in the Nidd Valley, and a railway was required to carry materials to the sites. The Corporation took over the powers for the light railway, and extended it for a further 6 miles, from Lofthouse to Angram. The railway was laid to the standard-gauge, and was opened to passengers between Pateley Bridge and Lofthouse on 1st May 1907. The remainder of the line did not carry public traffic. The line was worked by two 4-4-0 tank engines and passenger coaches purchased from the Metropolitan Railway. The passenger services were withdrawn on 31st December 1929, and the line was closed completely some months later.” [1: p143]
It appeared close to the back of the magazine in the section called, “The Why and the Wherefore”. It seemed like a good idea to explore what further information there is available about the Nidd Valley Light Railway. …….
The Website ‘WalkingintheYorksireDales.co.uk’ has a page dedicated to the railway which can be found here. [2]
A number of images relating to the line can be found here. [13]
The Oakwood Press published a book by D. J. Croft about the line. [3: p3]
Croft wrote: “The valley of the River Nidd, in the West Riding of Yorkshire, is nearly 55 miles long, beginning at Great Whernside, and ending at Nun Monkton where the Nidd flows into the River Ouse. However, the area known as Nidderdale extends for only about a half of the length, and forms a compact geographical region of its own. Despite this length, and great scenic beauty, it remains to this day one of the forgotten valleys of the Yorkshire Dales.” [3: p3]
“The area of Nidderdale can be divided into roughly two equal sec tions, with the market town of Pateley Bridge between the two. The first substantial historical accounts of Nidderdale appeared in Domesday Book of 1086. However, some of the local lead mines were worked in the time of the Brigantes, whilst several surrounding localities suggest Roman occupation.” [3: p3]
“Nidderdale has several industries, notably quarrying and lead mining. and a small textile industry. There is also a small slate quarry, a marble quarry, and a long, thin ironstone vein stretching along the valley. Through-out the ages, however, Nidderdale has had prosperity alternating with decline. As the early mining industry began to decline, so textiles became important around the thirteenth century. This too tended to decline by the seventeenth century, and mining became important once more. Unfortunately, the prosperity of the lead mining era passed, and so too did the prosperity of Nidderdale.” [3: p3]
“This period of decline lasted until 1862, when the North Eastern Railway opened its line from Harrogate to Pateley Bridge, thus opening this remote valley to the outside world. Prior to this, the only roads out of the dale had been to Grassington, Riponand Kirkby Malzeard, and the only regular connection with the outside world had been the Nidderdale Omnibus, a double-deck horse bus, linking Pateley Bridge with trains of the Leeds & Thirsk Railway at Ripley. This operated from 1st August 1849, until the opening of the railway, and ran twice daily.” [3: p3]
The approach of the 20th century brought a new prosperity to the valley, which was to last for the next thirty years or perhaps a little longer. Thid was the period when the Nidd Valley Light Railway was active.
The story of the line is the story of the thirteen or so miles between Pateley Bridge and the head of the valley, for it was there “that the Nidd Valley Light Railway was conceived, constructed and closed. All this happened within a period of less than forty years.” [3: p3]
The Story of the Line
Wikipedia tells us that the origins of a railway in the upper Nidd Valley “can be traced back to 1887–88, when Bradford Corporation began to investigate the valley as a source for the public water supply. … Alexander Binnie, who was the Waterworks Engineer for Bradford at the time, and Professor Alexander Henry Green, a geologist from Oxford, visited the area, and Green advised Binnie that the valley was suitable for the construction of large dams. The Bradford Corporation Water Act 1890 was obtained on 14th August 1890, authorising the construction of four dams. … A second Act of Parliament was obtained on 27th June 1892, by which time the four reservoirs were Angram, Haden Carr, High Woodale and Gouthwaite. Gouthwaite Reservoir was designed as a compensation reservoir, to maintain flows in the Nidd further down the valley.” [4][5: p76-77]
The first reservoir, Haden Carr, was completed in 1899, together with a 32-mile (51 km) pipeline (the Nidd Aqueduct) to deliver water to Chellow Heights reservoir on the outskirts of Bradford. [4][5: p79] “Gouthwaite reservoir was built … between 1893 and 1901.” [5: p84-85] The activity in the valley attracted attention from outside the region and a company from London, Power & Traction Ltd applied for a Light Railway Order “to construct a line from the terminus of the Nidd Valley Railway at Pateley Bridge to Lofthouse. … Following a hearing at Harrogate on 9th October 1900, the Light Railway Commissioners awarded an order to Power & Traction for a 2 ft 6 in (762 mm) gauge railway.” [4] Negotiations with Bradford Corporation over a possible £2,000 investment in the scheme ultimately failed. [5: p86]
“In 1903, Bradford invited tenders for the construction of Angram Reservoir, and … reached provisional agreement with the Nidd Valley Light Railway Company to purchase the powers awarded to them to build the light railway. … Bradford wanted to ask the Light Railway Commissioners for permission to increase [the track gauge] to 3 ft (914 mm). … They also wanted to ensure that they bought enough land to allow a standard gauge railway to be constructed ‘at any future time’. The North Eastern Railway, owners of the Nidd Valley Railway, argued that it should be standard gauge from the outset, since they were running excursions to Pateley Bridge twice a week, and these could continue over the Nidd Valley Light Railway. It would also remove the necessity of transshipping goods.” [5: p86]
Then next three map extracts show the railway facilities in Pateley Bridge while the Nidd Valley Light Railway was active. …
A transfer order was eventually granted, “with powers to borrow up to £30,000 to fund the project. In May 1904, the Board of Trade agreed to a change to standard gauge, and borrowing powers were increased to £66,000 in 1908, because of the extra costs of building the wider formation. The document was signed by Winston Churchill, the President of the Board of Trade.” The contractor working on the Anagram reservoir, John Best, “was awarded a contract to build the light railway to Lofthouse for £23,000, and a tramway from Lofthouse to Angram for £5,385.” [5: p86-87]
Then the intrigue began! A contract had been awarded in April 1902 to Holme and King for the construction of a road from Lofthouse to Angram. Bradford Council “had purchased enough land to allow the light railway to be built beside the road, and although Best was awarded a contact for the railway in 1903, it appears that Holme and King built a 3 ft (914 mm) gauge contractor’s railway beside part or all of the road. They had two locomotives on site, both 0-4-0 saddle tanks, one bought second hand some years earlier and moved to the site in spring 1902, after working on several other projects, [5: p87] and the second bought new for delivery to Pateley Bridge. [5: p89] By mid-1904, there was a 6.5-mile (10.5 km) line from Angram, which crossed the River Nidd on a 20-foot (6.1 m) bridge just before it reached Lofthouse.” [4]
So, Best began extending the line towards Pateley Bridge from the River Nidd rather than starting the work again! Wikipedia tells us that “by 13th July 1904, it had reached a level crossing at Sykes Bank, 0.5 miles (0.8 km) below Lofthouse, and work had commenced at several other sites. On that date, a party of 150 members of Bradford City Council, with invited guests, arrived by train at Pateley Bridge, and were transported to Gouthwaite Dam in carriages. Here there was a ceremony in which the Lord Major cut the first sod for the Nidd Valley Light Railway.” [4] The party “proceeded to Sykes Bank, where a train was waiting, which consisted of 15 wagons fitted with makeshift seats, and two locomotives, one of which was Holme and King’s Xit and the other was Best’s Angram. It took about an hour to reach Angram, where there were presentations, and Alderman Holdsworth cut the first sod for the dam. Refreshments were then served and the party returned to Lofthouse by train and to Pateley Bridge by carriage.” [4][5: p90-91]
The narrow gauge had hardly reached Pateley Bridge and Angram begun its regular duties along the line when standard gauge rails began to be laid starting at Lofthouse and working both up and down the line from there. “When the first standard gauge locomotive arrived, it was towed along the road to Sykes Bank by a Foden steam lorry, its flanged wheels making a mess of the road surface. The main line and sidings became mixed gauge for a while, although the third rail was gradually removed from 1906.” [5: p91 & 93] There was a veritable network of rail lines at the Angram Dam site where, as well as a village built for the workers, “the railway terminated in several sidings, which included a locomotive shed. The sidings were at a similar level to the crest of the dam. A branch left the main line and descended to the valley floor, where there was a cement mixing plant and more sidings. This line included a winch-operated incline which descended on a gradient of 1 in 15 (6.7%). Another incline, of 3 ft (914 mm) gauge, ascended the far side of the valley, giving access to Nidd sluice and lodge. A third incline brought rock down to the main line from a quarry, some 2 miles (3.2 km) below the terminus.” [4][5: p93 & 97]
At the other end of the Light Railway, “at Pateley Bridge, the Nidd Valley Light Railway station was to the north west of the North Eastern Railway’s Pateley Bridge railway station, close to the River Nidd. The two were connected by a single track which crossed a level crossing. There were a series of sidings immediately after the level crossing, with the station and more sidings beyond that. A carriage shed and a locomotive shed were located a little further along the valley of the Nidd.” [4]
Ramsgill Village was served by a stationary Bouthwaite which sat on the opposite side of the River Nidd. This map extract comes from the 25″ Ordnance Survey of 1907, published in 1909. [7]
“Best built two-storey stone buildings for the stations at Pateley Bridge, Wath, Ramsgill and Lofthouse. He built a signal box at Pateley Bridge, with the other stations having ground frames and simple signalling. Operation of the line was controlled by the Tyer’s Electric Train Tablet system, and six machines were ordered at a cost of £360. [5: p101] Both intermediate stations had goods sidings on the eastern side of the main track, while Lofthouse had a passing loop and sidings to the west.” [4]
The Station at Wath sat between the village and the River Nidd. The 25″ Ordnance Survey of 1907/1908 and published in 1909. [8]
“Best had a number of locomotives, both 3 ft (914 mm) gauge and standard gauge, which operated over the entire line from Pateley Bridge to Angram during the construction phase. For the opening of the Nidd Valley Light Railway proper, the 6.5 miles (10.5 km) from Pateley Bridge to Lofthouse, Bradford Corporation ordered six open wagons and two brake vans from Hurst Nelson of Motherwell. Locomotives and carriages were obtained second-hand from the Metropolitan Railway in London. These consisted of ten 4-wheeled coaches and two 4-4-0 Beyer Peacock side tank locomotives. All had become surplus to requirements, as electrification of the line had been completed in 1905. The locomotives were fitted with condensing equipment, for working in the tunnels under London, but the price of £1,350 for the pair included removal of this, and the fitting of cabs. All twelve vehicles arrived at Pateley Bridge, with one engine in steam … The locomotives were named ‘Holdsworth’ and ‘Milner’ after two Aldermen who had served Bradford Waterworks since 1898.” [4][5: p101, 102]
“An official opening took place on 11th September 1907, when a train consisting of three carriages and the Corporation saloon were hauled by ‘Holdsworth’ from Pateley Bridge to Lofthouse, with stops at Wath and Gouthwaite reservoir. At Lofthouse the engine was replaced by one of Best’s engines, and continued to Angram where luncheon was served in the village reading room.” [4][5: p102, 105]
“The two locomotives were much too heavy to comply with the Light Railway Order, which specified a maximum axle loading of 6.5 tons. They weighed 46.6 tons in working order, with 36.7 tons carried by the two driving axles. The Corporation applied for an increase in the axle loading, specifying the weight as “over 42 tons”. Milner, the newest of the two locomotives, dating from 1879, [5: p102] did not perform well, and was replaced by a Hudswell Clarke 0-6-0 side tank, also named Milner in May 1909. The original Milner was sold to the North Wales Granite Company at Conwy in 1914. [5: p102, 111] Following discussions with the Board of Trade in 1906, the Corporation and the North Eastern Railway had obtained permission for three passenger trains per week to pass over the goods yard and sidings at Pateley Bridge, so that excursions could continue up to Lofthouse between June and September only. Despite the agreement, when the first excursion was due to make the journey on 14th September 1907, the NER decided not to allow their stock to pass onto the Nidd Valley Light Railway, nor to allow the Corporation engine and carriages to come to their station, and so the passengers had to walk between the two stations. [5: p110] In order to avoid confusion for parcels traffic, Lofthouse station became Lofthouse-in-Nidderdale on 12th December 1907, and Wath became Wath-in-Nidderdale in February 1908 for similar reasons.” [4][5: p107-108]
Work on Angram reservoir was finally completed in 1916. “Bradford Corporation had already obtained an Act in 1913, allowing them to abandon their plans for a reservoir at High Woodale, and instead to build a much larger one at Scar House. It would submerge the site of Haden Carr reservoir, and the Act allowed them to start construction “when appropriate”. The cost of the new works was estimated at £2,161,500, and although three tenders were received, they decided on 14th May 1920 to build it themselves, using direct labour. Scar village was built between 1920 and 1921, consisting of ten hostels for a total of 640 men, a school, canteen, recreation room, concert hall, mission church and some bungalows.” [4][5: p115]
Plans to electrify the railway using hydro-electric power, were considered in March 1920, but rejected as being too expensive. uneconomic. Holdsworth, was taken out of service in 1866 because it was too heavy for the line, but when no buyers could be found, it was used as a stationary steam supply for another 14 years. There were plans to overhaul Milner, to obtain another lighter engine, and to purchase two railmotor cars. Only one railmotor (‘Hill’) was eventually purchased in 1921. It can be seen in the two images immediately below.
“From August 1920, work was carried out to improve the line between Lofthouse and Angram. This included easing the alignment on many of the curves, the addition of loops near Lofthouse and at Woodale, just below the Scar House site, and the construction of a 180-yard (160 m) tunnel near Goyden Pot, which was used by up trains only.” [4][5: p119-122]. “The line at Angram was extended to a small quarry in 1921, along the trackbed of Best’s 3 ft (914 mm) gauge line beyond the dam. Stone was extracted for remedial work, caused by wind and wave erosion of the southern bank of the reservoir near the dam.” [4][5: p123]
Close to the Scar House dam site, “a network of sidings were constructed, zig-zagging down to the Nidd, and back up the other side of the valley. A double track self-acting incline provided access to the Carle Fell Quarry, to the north of the reservoir, and as the quarry was worked, two further inclines were constructed. One was single track, with a winding engine at the top, and around 1930, an incline worked by locomotives was added. Above the later quarry face, a Simplex petrol locomotive worked on a 2 ft (610 mm) track, removing overburden.” [4][5: p118]
Power for the works “was generated using water from Angram reservoir, which was discharged into Haden Carr reservoir. A 4,775-foot (1,455 m) pipeline supplied the turbines. This was later supplemented by a steam generating station. [5: p123-124] Two locomotive sheds were built, one near the village and another on the north side of the River Nidd, with a further two at Carle Fell Quarry. All had two tracks. Twelve four-wheeled carriages were bought from the Maryport and Carlisle Railway, to provide transport for the workers and their families from Scar House to Lofthouse, and a two-track carriage shed was built to the east of the main complex.” [4][5: p125]
“Six locomotives worked in the quarry. Allenby, Beatty, Haig and Trotter were based at the shed at the top of the main self-acting incline, while Ian Hamilton and Stringer were based in a shed at a higher level. Three steam navvies were used to load stone into the railway wagons, and there were nineteen or twenty steam cranes, all of which were self-propelled and ran on the tracks either in the quarry or on top of the dam.” [4][5: p129]
The main engineering work at Scar House reservoir closed to completion in September 1931 but it was not until July 1935 that filling of the reservoir commenced. “The official opening was on 7th September 1936. Scar House, which gave its name to the reservoir, was demolished. A new Scar House was built, at the foot of the incline from Carle Fell Quarry, which provided a home for the reservoir keeper, and a boardroom for official visits. [5: p130-131] A project to re-route the waters from Armathwaite Gill and Howstean Beck through a tunnel and into the reservoir began in May 1929. A 2 ft (610 mm) gauge line was laid, on which two battery-electric locomotives and twelve wagons ran.” [4][5: p131]
Two 0-6-0ST locomotives ‘Gadie’ and ‘Illingworth’, head a goods train on the line. [12]
Decline
“The start of work on Scar House Reservoir led to an overhaul of existing stock. Seven of the original Metropolitan Railway coaches were upholstered and repainted, while the remaining five were used for the workmen. [The] steam railmotor [Hill] … obtained in 1921, … had previously been owned by the Great Western Railway. It … was fitted with electric lights in 1923. It worked on the public section of the railway, and never travelled beyond Lofthouse. Numerous new and secondhand locomotives were purchased, most for use on construction work, but two, Blythe and Gadie, were fitted with vacuum brakes, and so worked goods trains from Pateley Bridge to Scar House, as well as passenger trains between Scar House and Lofthouse and sometimes Pateley Bridge.” [4][5: p133]
“Passenger trains for the residents of Scar village ran on Tuesdays, Thursdays and Saturdays, the mid-week ones connecting with ‘Hill’ at Lofthouse, and the Saturday ones running through to Pateley Bridge. The 1927 printed timetable showed five trains a day between Pateley Bridge and Lofthouse, but also showed the trains onwards to Scar Village, with a note that these were for exclusive use of residents. Saturday trains were hauled by Blythe or Gadie, but were banked at the rear by another engine above Lofthouse because of the steep gradients.” [4][5: p134]
“Traffic returns showed 106,216 journeys by workmen in 1921, and 41,051 by ordinary passengers. The figure for workmen was not declared after 1922, as the accommodation at Scar Village was available. The peak year for journeys was 1923, with 63,020, after which there was a gradual decline, with 24,906 journeys for the final nine months before closure. The line made a total operating loss of £36,435 between 1908 and 1924, and then made a modest profit until 1929. Fares were cut by one third in early 1929, in the face of competition from motor buses, and a decision was taken to close the line in April 1929.” [4][5: p
“An approach to the London and North Eastern Railway to take over the railway was unsuccessful, and on 31st December 1929, the railway closed to public passenger and goods services. The sections below and above Lofthouse continued to be run as a private railway. [5: p135] The Saturday train to Pateley Bridge for the residents of Scar Village continued until 1932.” [4][5: p133]
The line to Angram was severed by the works at Scar House in 1933. “By 1936, with construction completed, the railway was lifted, and a sale was held at Pateley Bridge on 1st March 1937, where everything was sold as a single lot. … At its peak, the Scar House reservoir project had employed about 780 men, and the population of Scar Village had been 1,135. By 1936, there were just eight houses occupied, and seven pupils at the school, which closed on 31st January 1938.” [4][5: p130 & 138]
A Journey along the Line
“The railway began in Pateley Bridge, close to the River Nidd, with the goods yard just to the north of the B6265 road. The passenger station was a little further north, and is now occupied by a road called ‘The Sidings’.” [4]
The Nidd Valley Light Railway Station, Transshipment Yard and Goods Yard at Pateley Bridge. 25″ Ordnance Survey of 1907/08, published in 1908. [9]The Nidd Valley Light Railway Station Platform at Pateley Bridge in 1907. This image was shared on the Railways Around Harrogate & Yorkshire Facebook Group on 18th January 2024 by Ian McGregor, (c) Public Domain. [17]The same area in the 21st century. ‘The Sidings’ is the cul-de-sac directly above the centre-bottom of the image. The new build further to the North is an extension to Millfield Street. [9]The Sidings. [Google Street view, May 2024]The extension to Millfield Street. [Google Streetview, May 2024]The line’s Carriage Shed and Engine Shed sat to the North of the Station. 25″ Ordnance Survey of 1907/08, published in 1908. [9]The same area in the 21st century. The area of the Carriage and Engine Sheds has now reverted to farmland. [9]
The line headed North “along the east bank of the river, and this section of it now forms part of the Nidderdale Way, a long-distance footpath. Wath station was just to the south of the minor road that crosses Wath Bridge, and had two sidings.” [4]
Wath Railway Station was on the South side of the road between the Corn Mill and Wath Bridge. 25″ Ordnance Survey of 1907/08, published in 1908. [14]The same area in the 21st century. ESRI satellite imagery provided by the National Library of Scotland. [14]Looking South from the minor road into the site of Wath Station. The station building is now a private home. [Google Streetview, May 2024]The line North of the minor road was on a low embankment. [Google Streetview, May 2024]
“The footpath leaves the course of the railway before the station, and follows the bank of the river, crossing over the railway trackbed by Gouthwaite Dam.” [4]
The line passed close to the Northeast end of Gouthwaite Dam. 25″ Ordnance Survey of 1907/08, published in 1908. [15]A very similar area in the 21st century. [Google Maps, October 2025]Beyond the North end of Gouthwaite Reservoir, the route of the old railway can be seen from the minor road which links Coville House Farm to Bouthwaite. This view looks South from the road. The route of the old line is beyond the drystone wall in a shallow cutting. [Google Streetview, May 2024]Turning through 90° to face West, the end of the cutting can be seen on the left of this image, the line ran on beyond the tree at the right side of the photograph. [Google Streetview, May 2024]Further North along the same minor road, the old railway ran to the left of the drystone wall, between it and the electricity pole. [Google Streetview, May 2024]
“The trackbed was close to the shore of the reservoir, and the footpath rejoins it after a deviation to the north west. Ramsgill Station was at Bouthwaite, rather than Ramsgill, just to the south of Bouthwaite Bridge, where the Ramsgill to Bouthwaite road crosses Lul Beck.” [4]
Ramsgill Railway Station at Bouthwaite. 25″ Ordnance Survey of 1907/08, published in 1908. [16]Approximately the same area as it appears on 21st century satellite imagery. The line can easily be picked out close to the bottom-right of this image, to the West of the minor road. The station area remains quite distinct! The route of the line continues Northwest on the North side of the minor road which enters centre-left. [Google Maps, October. 2025]The Station Building at Ramsgill Railway Station in Bouthwaite, the main running line was to the right of the building and crossed the road to the right of the camera. [Google Streetview, May 2924]Looking Northwest from approximately the same place these trees sit on the line of the old railway. Just North of the road, the line bridged the stream running through the village. [Google Streetview, May 2924]
“The footpath rejoins the trackbed briefly at Low Sikes, where there was a level crossing over the Ramsgill to Lofthouse road.” [4]
The level crossing adjacent to the River Nidd at Low Sikes. 25″ Ordnance Survey of 1907/08, published in 1908. [18]The same location in the 21st century. Note the gap in the drystone wall bottom-right which sits on the line of the old railway. [18]Looking Southeast along Nidderdale at Low Sikes. The redline approximates to the line of the old railway in the photograph. Foreshortening of the image significantly tightens the curve of the line. [Google Streetview, May 2024]Looking Northwest alongside the River Nidd from Low Sikes. The line ran approximately straight ahead from the sign post in the foreground. [Google Streetview, May 2024]
The next significant location along the line was Lofthouse Station which sat on the South side of the village of Lofthouse, between the road and the river.
Lofthouse Railway Station sat on the Northeast bank of the River Nidd. The railway crossed the River Nidd on a bridge shared with the highway. [6]A similar area in the 21st century. [6]Lofthouse Railway Station building in 21st century, seen from the Southeast. [Google Streetview, May 2024]Lofthouse Railway Station building in 21st century, seen from the Northwest. The railway and platform were on the right of the building. [Google Streetview, May 2024]This road bridge over the River Nidd was once shared with the light railway, the red line shows the route of the line. [Google Streetview, May 2024]Once across the river the line turned sharply to the North to follow the road to Scar House. It followed the West shoulder of the road with the River Nidd off to the East of the road. [Google Streetview, May 2024]
The metalled road is owned by Yorkshire Water but open to the public. The line continued North remaining on the West shoulder of the road.
“The bricked up tunnel can be seen about 2 miles (3.2 km) from Lofthouse, where the road and river turn sharply west. There is a picnic spot near the southern portal of the tunnel.” [4]
Beyond Goyden Tunnel the original line (still used by Southbound trains after the tunnel was built) bears sharply to the West. [Google Streetview, May 2024]Before the tunnel was constructed a short passing loop was provided on the sharp bend. It was not long enough to allow any significant trains to pass but it mitigated the risk of collision! [19]
Images from two different OS sheets surveyed in the late 1920s show the tunnel noted above. [20]
The line from this point on travelled in a westerly direction. Originally the railway ran through the site of Scar House Reservoir as far as Angram Reservoir. Travellers on the railway would have been able to look down and see a small reservoir formed to secure the intake of the pipeline which served Bradford. Its Dam was called the Nidd Intake Dam.
The Nidd Intake Dam and Reservoir. 25″ Ordnance Survey of 1907/08, published in 1908. This reservoir was swamped by the later Scar House Reservoir. [22]This map extract comes from the 6″ Ordnance Survey of 1907 which was published in 1910. The Light Railway has been built but there is no sign of construction work on the Angram Reservoir. [23]A much later OS Map (1956) showing Angram Reservoir with the route of the old railway marked by red dashes. Note that Scar House Reservoir intrudes at the top-right of this map extract. [24]
At Scar Village there is another picnic spot and a car park. The railway followed the most northerly of the two tracks at this point.
A relatively low grade image showing the area close to Scar House Reservoir on which Scar Village was built. The original line of the railway in the track on the northside of the site of the village. The village historical survey report from which this image has been taken provides details (In some depth) of the site of the village and can be found here. [25]
“At Scar Village there is [a] picnic spot and a car park. The railway followed the most northerly of the two tracks at this point. Another track down to the weirs follows the course of one of the zig-zag tracks across the valley. A footpath crosses the dam to the north side of the lake, where the incline to the quarry is still clearly visible. Another road, open to the public on foot, follows the trackbed along the southern edge of Scar House Reservoir, to reach Angram dam. The course of the railway is clearly visible on the modern 1:25,000 Ordnance Survey map for almost the entire length of the railway.”[4]
A short video about Scar Village and the work on Scar House Dam. [21]
References
The Why and the Wherefore; in The Railway Magazine, February 1952; Tothill Press, Westminster, London, p142-144.
There was a short tramway in the quartzite quarry close to Ord which was operational in the mid-20th century. …
The small village of Ord sits on the Northwest side of the Sleat Peninsula. [1]The small building shown on this map near to Coille a’ Chuaraidh is the approximate location of the quarry. [6]A road from the village runs Southeast across the Sleat Peninsula. The quartzite quarry was on the North side of the road at Coille a’ Chuaraidh. [1]
J.G. Stein & Co. of Bonnybridge commenced quarrying at Ord, Sleat Peninsula, Isle of Skye in 1944 and this continued until 1960. Silica was extracted from the quartzite ore and used as a heat resistant substance in industrial furnaces, fire bricks, cements, boilers etc. Only the explosives store and a storage building, now used as a bothy, survive. [1]
Ore was removed from the quarry in trucks that ran on a very short rail track to the road where it was loaded onto lorries and taken to the pier at Armadale. The ore was then loaded into a waiting puffer (coastal trading boat). [1]
The high cost of transport away from Skye meant that the quarry was uneconomic and it closed in 1960. [2]
The tramway/railway was very short – only 110 metres in length. [4]
The tramway was operated by manpower, no mechanical propulsion was employed. Rolling stock consisted of a number of wooden-framed tipper wagons, allegedly used on the Skye Marble Railway. [3]
This image is a postcard view of the Skye Marble Quarry.At the centre of the image is one of the tipper wagons used at Kilchrist and which may well have been bought for use at Ord Quarry. [5]
Until the 1970s, there were a number of these wagons gradually deteriorating on the beach at Ord, although there is no longer any sign of them. [4]
The featured image for this article is the only photograph I have been able to find of ‘Skylark’, the locomotive which for a matter of only a few years operated on the Skye Marble Railway. Further notes about the locomotive can be found in this article.This information board across the road from Kilchrist Church, features Skylark at the head of a train of wagons. [5]
Some sources say that in 1904, an aerial ropeway was constructed to transport marble to Broadford Pier from Kilchrist Quarries (alternatively known as Kilbride Quarries or Strath Suardal). The quarries were used to excavate marble. [1][2] Other sources talk of the line being worked first by horses. [14] There was an incline between the upper and lower Quarries at Kilchrist which appears to have been rope-worked. It is most likely, given the length of line from Kilchrist to the quay at Broadford and the relatively shallow gradients, that the line from the marble works down to Broadford was worked by horses, but it is entirely possible that an aerial ropeway was employed. Nothing remains of the line beyond the formation which now carries a footpath once South of Broadford, and, as will be seen below, some rails in the surface of the pier at Broadford.
The main length of the line was converted to a tramway/railway in 1910. It was, in total, over 6 km in length. [4] Some sources quote 3.5km [viz. 2] and probably take that length from the length of the footpath which follows the route of the old railway. The Skye Marble Railway was a 3 ft (914 mm) narrow gauge [5] line which only operated from circa. 1910 to 1912/1913. [6][7]
The Northern half of the Skye Marble Railway as shown on railmaponline.com’s satellite imagery. [8]The Southern half of the Skye Marble Railway as shown on railmaponline.com’s satellite imagery. [8]
It seems appropriate at this point to take a break from our journey along the line to find out as much as possible about the locomotive which was used on the Skye Marble Railway for a short time in the early 20th century. The website of the Industrial Railway Society (IRS) has some more information about this locomotive which the Skye Marble Company knew as ‘Skylark’. … The engine was first known as ‘Bruckless’, the notes which follow come from the IRS archives and were pulled together by D. Cole in 1965, in part from work undertaken by Dr. Iain D. O. Frew: “Delivered to T.S. Dixon in May 1892 through the agency of Josiah Buggins as ‘Bruckless’ for the Donegal-Killybegs contract of the County Donegal Railways, it was sold in 1894 after the completion of the contract and later worked for the Preston Corporation Waterworks Department on the construction of the Spade Mill No.1 Reservoir at Longridge. There it was named ‘Skylark’. Subsequently, in 1907, it went … to the Skye Marble Company and was used firstly by a contractor in building the Company’s railway from Torrin to Broadford, and then, from 1909, to work the railway itself. In 1913, following the failure of the quarries, the line was lifted and the locomotive sold to W.N. Jackson, a Glasgow metal merchant. He in turn sold it to J. Mackay, contractor for the Roundwood Reservoir in County Wicklow. This contract passed to H. & J. Martin Ltd. in 1915, and after its completion in 1925 the locomotive was scrapped.” [15]
D. Cole undertook further research into Hunslett’s records and was able to ascertain that “from July 1897 – the date from which the earliest detailed Hunslet spares records have survived – to March 1905 spares were sent to the Newcastle & Gateshead Waterworks. Delivery was sometimes to Otterburn, and the name of the locomotive was frequently quoted as ‘Bruckless’. No name was quoted by Preston Corporation when ordering spares between March 1907 and March 1910.” [15]
Cole was also able to confirm that:
from November 1910, spares were sent to W.R. Herring with the locomotives name quoted as ‘Dilworth’; [15]
in January 1911 and May 1911, spares were sent to Skye Marble Ltd. but no name was quoted; [15]
in August 1913, spares were ordered for the locomotive named ‘Skylark’ by W.H. Jackson, Glasgow, but sent to Mr. Easter, Skye Marble Cottages, Broadford, Isle of Skye; [15]
from May 1914 to May 1916, spares were sent to John Mackay, Dublin Waterworks, Roundwood, Co. Wicklow; [15] and
the last spares of all were sent out in January 1921 to H. & J. Martin Ltd., Roundwood Reservoir. – K.P.P. [15]
We now continue the journey along the old railway route. …
This view looking South towards the village of Broadford shows the footpath below the road (to the left beyond the dwarf wall) which probably follows the line of the old railway. [Google Streetview, December 2021]
The alignment of the railway which I have proposed here is supported by Railscot. On their page about the railway the alignment is shown adjacent to the shore rather on the higher ground to the West. [7]
The yellow-brick abutment on the Northside of the river is original, the modern footbridge sits on that abutment but is on a different alignment to the old railway. There is no remaining abutment on the South side of the river, so a new smaller abutment was constructed to support the footbridge. A comparison is made and pictures are provided, on this site. [5] The photographs towards the bottom of that webpage give an idea of the alignment of the old railway bridge. Which crossed from the North abutment to a point on the South bank of the River Broadford marked by the young tree in the image below.
The modern footbridge sits on one of the abutments of the old railway bridge beyond the river in this picture. The old railway bridge spanned the river on a line between the North abutment and the young tree, in leaf, at the centre of this image which looks North from the A87. [Google Streetview, May 2022]
From the South bank of the river and running South the line shown on railmaponline.com’s satellite imagery seems to be realistic, following, as it does, a curved route to the East of the location pictured above. …
Crossing the modern A87, the old railway ran Southeast crossing the modern Glen Road (which did not exist at the time the railway was operating) close to Broadford (Church of Scotland) Church and then curved round to the East of Strath Suardal Way (which also did not exist when the railway was working). [8]
The next two images show the formation of the old railway on a low embankment on the East side of Strath Suardal Way.
This photograph was taken at the roundabout looking South-southwest along Strath Suardal Way. The low embankment runs behind the street lighting. [Google Streetview, December 2021]Further along Strath Suardal Way and looking Southwest, the low embankment is again visible blue beyond the street lighting columns. [Google Streetview, December 2021]Towards the end of Strath Suardal Way the line of the old railway turned away to the Southwest. [8]The old Railway’s route runs through the evergreen trees on the left side of this West-southwest facing photograph. [Google Streetview, December 2021]The line then ran over open moorland to the East of the road to Elgol (the modern B8083). [8]Initially the route of the old railway and the modern B8083 converge as they head South-southwest. [8]The footpath access to the line of the old railway can be seen just as the old railway route and the B8083 begin to diverge. [8]The footpath access to the line of the old railway as seen from the B8083. Just beyond the second gate the footpath turns to the right and follows the old railway formation. The first length of the footpath runs through a protected plantation of young trees. [Google Streetview, December 2021]
The four photographs immediately below show the first few hundred metres of the footpath along the old railway – as far as the plantation boundary fence which can be seen beyond the two low gateposts in the fourth photograph.
When marble was discovered near Kilchrist in Strath Suardal on the slopes of Ben Suardal about 3 miles (5 kilometres) Southwest of Broadford, a large factory was built near the quarry for cutting and polishing the quarried blocks. The Marble was formed by the heating of limestone by igneous intrusions in the Tertiary Era. It appears that small scale workings were active as early as the 18th century, developing throughout the 19th century. [14]
“On level ground by the South side of the Broadford to Torrin road are the remains of an industrial complex belonging to the old marble quarries. The remains consist of a ruinous concrete shed/warehouse 60m long, a railway platform, traces of the railway line and sidings, and four brick-built circular bases 2.4m in diameter.” [17]
From adjacent to the lower quarry, with its own branch, spoil heaps and concrete bases, [22] the line continued South but as a rope-worked incline.
Looking South up the incline towards the upper quarry. [My photograph, 5th May 2025]
The view South up the incline to the upper quarry. This image is embedded from here. [19]. Clicking on the image takes you directly to the original image which is one of a series of photographs of the route of the old railway can be found here. [5]
In a rocky cleft immediately to the East of the track to Boreraig, are the remains of two former dynamite stores, one within the other. The older, larger building with walls of rubble construction, envelopes a smaller concrete blockhouse. Close to these are the remains of the ot for the winding wheel for the rope-worked incline.
Also located at the upper quarry (but of which I did not get photographs) are two machinery stands:
2m square with 11 bolts protruding
6.5m by 5.2m with 4 stanchions protruding.
The Demise of the Line
The operation was not a commercial success. The railway line was abandoned by 1914 when the operating company became bankrupt. The line was offered for sale as part of the liquidation of the business. The sale comprised a 9½-in, 4-wheeled locomotive, 500 tons of 35 pounds (16 kg) and 56 pounds (25 kg) flat-bottomed rail and 9,000 6-foot creosoted sleepers. [4][20]
Extracting the marble proved difficult and expensive and quarrying finally ended here in 1939. [21]
In the Summer of 2024, my wife and I visited Giants’ Causeway as part of a few days meandering along the North coast of Ireland. When reading a series of older copies of the Modern Tramway, I came across an article written in 1950. … The Modern Tramway of September 1950 featured an article by D. G. Evans about one of the very early electric tramways – The Giants’ Causeway and Portrush Tramway. His article is quoted in full in this article.
Wikipedia tells us that The Giants’ Causeway, Portrush, & Bush Valley Railway & Tramway was a “pioneering 3 ft (914 mm) narrow gauge electric railway operating between Portrush and the Giant’s Causeway on the coast of County Antrim, Northern Ireland. The line, 9 1⁄4 miles (14.9 km) long, was hailed at its opening as ‘the first long electric tramway in the world’. [2] The Giant’s Causeway and Bushmills Railway today operates diesel and steam tourist trains over part of the Tramway’s former course.” [3]
The Giants’ Causeway, Portrush, & Bush Valley Railway & Tramway. [24]
Writing in 1950, Evans says that:
“The recent decision of the shareholders to close down the Giant’s Causeway tramway was sad news to those who knew the line and can recall the pleasure of breezy rides along the cliff tops in the qua’nt cars that had seen but little change since their first day of operation. The line was the first tramway in the United Kingdom to be operated by electricity and the current was produced by a hydro- electric power station at Walkmills, one mile from the Bushmills terminus. A waterfall on the river Bush was the source of the hydro-electric power.
Opened from Portrush station to Bushmills in January, 1883, the line was extended to the ultimate terminus at Giant’s Causeway in 1887. The original current collection was from a side conductor rail 17in. above ground and 22in. from the inside running rail. This method was of course unsuited to a street tramway and the portion of the line which ran in the centre of the street through the town of Portrush was therefore worked by steam tram engines of the usual vertical boiler pattern. This method of operation of the first half-mile of the tramway persisted until 1899, when a change over to the overhead trolley system was made. From that date until 1915 the steam tram engines were retained for use during the peak traffic periods in the summer at which time the original power station proved inadequate for the needs of the system.” [1: p185]
Wikipedia gives some of the background to the opening of the line: “The Giant’s Causeway Tramway came about through the enthusiasm of William Atcheson Traill, M.A.Ing., of Ballylough (1844–1934), together with his brother Dr Anthony Traill, who between them undertook most of the promotion and fundraising for the line. W.A. Traill was a man with not only an interest in railways but also a keen interest in technological developments in engineering. The Act of Parliament incorporating ‘The Giant’s Causeway, Portrush, and Bush Valley Railway and Tramway Company’ was passed on 26th August 1880. It authorised a tramway from Portrush to Bushmills and a railway from there to join the Ballycastle Railway (also 3 ft. gauge) at Dervock. The only section of the railway never built was a short spur at Dervock. [5] The Dervock section was abandoned by an 1885 Act, which authorised extension from Bushmills to the Causeway.” [3][6]
“At the Berlin Trade Fair of 1879 Siemens was demonstrating the first railway electrification system and it was that which led the British branch of the firm to be commissioned to incorporate this new technology into the Giant’s Causeway Tramway venture. Sir William Siemens (1823–83) was briefly a Director and Siemens Brothers of London were appointed electrical engineers to the company, their representative being Dr Edward Hopkinson, who later went on to work on the Bessbrook and Newry Tramway and the City & South London Railway. Surveying and civil engineering work was carried out by Edward Price, son of the eminent Irish civil engineer James Price.” [3]
“The line was the world’s first to be powered by hydroelectricity, something that was later developed at Bessbrook and in Switzerland. Traill built a generating station at Walkmill Falls (24 feet (7.3 m)) head), near Bushmills, installing 104 horsepower (78 kW) Alcott water turbines to produce up to 250 volts at 100 amps of electrical power for his line. Later 160 horsepower (120 kW) turbines were installed. [8] This building, although without its equipment, is still in existence.” [3]
“Because of legal problems over water rights, erection of the Walkmills turbines was delayed and when the first section of the tramway, from Portrush to Bushmills, was opened on 29th January 1883 some of the timetabled passenger traffic was handled by steam tram engines which were in any case necessary on the town section in Portrush where it was impossible to provide electric power since this was originally fed to the trains via an elevated third rail which ran alongside the line. Therefore, a 25 horsepower (19 kW) steam generator was installed at the Portrush depot, [9] (by 1936 replaced by a 550 volt diesel generator for the Portrush-Dunluce section).” [3]
“The ceremonial opening, using electric traction, took place on 28th September 1883 although a full scheduled electric service did not begin until 5th November and steam locomotives remained available for use until at least 1926.” [3] In 1897, of the annual mileage travelled, “17,797 miles (28,641 km) were steam operated and 4,721 miles (7,598 km) electric. In 1901 the figures were 7,423 miles (11,946 km) and 23,550 miles (37,900 km) respectively. Very little use of steam was made after 1916.” [3]
Evans tells us that:
“In 1915, the Portrush power plant was installed and the two remaining steam engines were kept as stand-by equipment for use in the event of electricity failures. They were finally sold in 1930 to a public works contractor.
The voltage was 550 d.c., the Portrush plant supplying the Portrush-Dunluce section and the original station outside Bushmills the remainder of the line. Laid to the 3ft. gauge, the line was 7.5 miles in length, single track throughout with loops at irregular intervals.
The loops were normally run through on the landward line, the other line being used only when it was necessary to pass another car. All points (except those at the Portrush terminus which were tramway section) were of light railway type, controlled by dolly-weighted point levers which normally held the rails set for the direct (or landward) line.” [1: p185]
Wikipedia tells us that “the section from Bushmills to the Giants’ Causeway opened on 1st July 1887. In 1895, a cyclist died of electric shock after coming into contact with the conductor rail. At the subsequent inquiry it was revealed that the line voltage varied from an average of 290 V up to 360 V, and the company agreed to a temporary reduction in the voltage, which limited the number of services that could be electrically worked. The third rail was replaced by overhead electric wire using side poles from 26th July 1899, apparently initially at 250 V. Voltage drop remained a problem and the tram was the subject of a song by the Irish Rovers which comments on its slow speed. The song was written by Hugh Speers of Bushmills. [10] After upgrading of the Bushmills generating station in 1907 it was possible to produce a 550 V output.” [3]
Evans continues:
“As the wiring was double and followed the rails through the gantry type standards at loops, it followed that the trolley pole had to be changed from the wire normally used (the landward wire) to the seaward wire when a loop wasto be used pass another tram. The writer has often seen this trolley changing performed whilst the cars her were at full speed on a downward grade and has marvelled at the dexterity with which the trolley wheel was placed on the opposite wire. The operation was also seen when the cars were descending the long hill outside Portrush. It seemed usual to lower the trolley bo boom west of White Rocks loop to the Holyrood Hotel. and coast from a point just West of White Rocks loop to the Holyrood Hotel.
The Portrush terminus was outside the N.C.C. (formerly B. & N.C.R.) station and consisted of a run-round loop and lay-by siding in Eglinton Street. At one time there was a short branch which diverged just beyond the loop and ran down to the Harbour, but this was taken up about 1893.” [1: p185-186]
“For a short distance, the line ran due north before turning in a 75-degree curve into Causeway Street. The single track was of tramway section rails as far as the outskirts of the town. From a point near the depot the line was laid on flat-bottom light railway track on the seaward side of the Portrush-Bushmills road. The depot consisted of a dead end road with a permanent way yard at one side. The auxiliary power station was also here. This power station had a modern diesel plant installed in latter years.
After leaving the depot the line ran through open country on its roadside reservation. Climbing steadily, it passed the famous Royal Links and at White Rocks gained the cliff tops. Onward to Dunluce, the trams ran close to the sea and in places the cliffs fell almost sheer from the trackside. There can be no doubt that the tramway, with its open toast-rack cars, was the best means of appreciating this wild and rugged coast.” [1: p186]
“Before reaching Dunluce, the tramway climbed to its highest point at Clooney Hill. This section, nearly 200ft, above the sea, abounded in sharp curves, gradients of 1 in 40 and even a short stretch of 1 in 30.
Beyond Dunluce, the line ran inland for a short distance below Gallows Hill, reaching the coast again at its most spectacular point. Here one could gaze down 140ft. to the foam-covered rocks below. From this point the line again ran inland and after three more passing loops reached Bushmills, a village known for its whisky. Bushmills had a light railway station provided with waiting room, luggage office and lavatories.” [1: p,186-187]
“At one side of the station yard is a small tram shed with accommodation for two cars. The line to the car shed is of interest in that it was to have formed the beginning of an extension to Dervock on the 3ft. gauge Ballycastle Railway. It was with a view to through running with the latter railway that the narrow gauge was adopted for the electric line. The owners wisely decided that an extension to the Causeway would probably be more remunerative.
From Bushmills the line was completely private right-of-way and negotiated cuttings and embankments of railway proportions. After passing a loop, the Bushfoot Golf Links request halt was reached. Soon after this, the line crossed the Bush river by the impressive Victoria Jubilee Bridge, a three-span structure so named because it was erected in 1887.” [1: p187]
“On the other side of the bridge the line passed through sandhills and rabbit warrens, reaching the coast again and following it for a short distance before finally turning inland for the last time. There were two loops between the Victoria Bridge and the terminus; the layout at this latter point consisted of a run-round loop and a siding. The passenger accommodation was unpretentious, consisting merely of a shelter. The tourist had still almost a mile to walk before reaching the Causeway itself, and here, as is usual in such places, he has to pay for admission.” [1: p187]
This extract from the 6″ Ordnance Survey shows the remaining length of the line. The terminus is shown in the top-right of the image. [23]
Discover Portrush describes the last part of the journey, thus: “the tram would run behind Black Rock Strand for about half a mile before turning right and climbing towards the Causeway Terminal. On the left passengers would see Runkerry House, a fine red sandstone house constructed in a striking location. Then part of the McNaughten Estate, occupied by two unmarried McNaughten ladies – later it became a home for the elderly after being passed to the government in lieu of death duties. Later still, it became an outward bound centre and is now divided into apartments.” [21]
The next three views show the modern preservation line’s buildings in the early 21st century.
The first of these three views shows the approach to the stationary from the Southwest.vThe second is a panorama of the station site and the third looks into the Station site from the East. [Google Streetview, September 2011]
Operation
Evans describes the operation of the original line:
“The somewhat tortuous route along the cliff tops gave the line a reputation for scenery rather than speed, but high speeds were frequently attained on the long falling gradient between White Rocks and the Portrush depot.
When the full summer service was operating, the lengthy sections between passing loops rendered operation difficult, and, as some of the loops were not visible from each other, boy signallers were employed. These boys were supplied with white and red flags which they would display to the drivers from a convenient vantage point, the red flag calling on an eastbound car and the white a westbound
The small shed at Bushmills was used by the morning tram from the village which left, with a load of school children and others, to journey into Portrush before the main service started from the depot The winter service was extremely meagre and did not continue beyond Bushmills out to the Causeway unless three or more passengers booked through to that point. During the summer peaks five sets (of one motor car and two trailers) were often in operation at one time.” [1: p187-188]
Wikipedia tells us that “Traill, a former geological surveyor, expected a considerable mineral traffic between quarries along the line and Portrush harbour, and there was originally a goods branch into the main square of Bushmills. However, this traffic fell away, the narrow gauge harbour branch being taken up when the Northern Counties station was opened in 1893, [11] and for most of its life the line primarily served tourists visiting the Causeway. From 1925/26 the line was closed down during each winter.” [3]
“Increased patronage, partly from military traffic, during World War II meant a brief revival of winter services, but receipts were becoming inadequate to support maintenance of the company’s ageing assets, and the line did not reopen after the end of the 1949 season (last day of regular service 30th September 1949), [12] and was subsequently dismantled.” [3]
Nos. 20-23 (toast-rack motor-cars with canopies, originally completely open).
No. 24 (vestibuled motor-car, Peckham pendulum truck, originally double deck 3ft 6in. gauge car and purchased as such from Dunfermline and District Traction Co., August, 1937. It had longitudinal cushioned seats).” [1: p188]
Wikipedia expands somewhat on the rolling-stock record provided by Evans: “the original cars were built by the Midland Railway Carriage and Wagon Company and were later followed by 5 examples from GEC, each with 2 x 20 horsepower (15 kW) British Thomson-Houston motors, and also a Peckham car. There were a maximum of six electric power cars owned at any one time, all being single-truck, single-deck vehicles with both enclosed and “toast rack” examples; typically these would haul several 4-wheel “toast rack” trailers, of which there were 15. There were four steam tram engines, ordered from Wilkinson of Wigan. They had vertical boilers, weighed 7 tons and burnt coke. No.2 was scrapped in 1899, No.1 converted to a ballast wagon in 1910 and Nos. 3 (Dunluce Castle) and 4 (Brian Boroihme) were sold in 1930 for the River Bann Navigation works near Portstewart.” [3][11]
“In 1938 a final electric tram was added to the stock as number 24. This vehicle was formerly a double deck Dunfermline and District Tramways car which was both re-gauged and extensively modified to become a single decker with enclosed ends for the Giants Causeway route.” [3][14]
The modified Dunfermline tram which was given the number 24. It was once a double-deck tram and ran originally on a different gauge. [21]
“A power car and trailer are restored at the Ulster Folk and Transport Museum, Cultra and another power car is in the care of the National Transport Museum of Ireland at Howth.” [3]
Full details of the steam locomotives can be found here. [17]
Evans concludes:
“The disappearance of this historic tramway, which changed so little in its 66 years of operation, yet provided a useful amenity, and an attraction for tourists, will be mourned by many and the line will be greatly missed by holidaymakers who have in previous years enjoyed rides along its scenic coastal route.” [1: p188]
The editor of The Modern Tramway commented: “We understand that a conference of local authorities is being held to urge the Government to subsidise the Giants Causeway line to the amount of £2,000 a year, so that it may be carried on as a tourist attraction. This is a move that commands our support, but we submit that the modernisation of the line might after a while actually render the subsidy unnecessary.” [1: p188]
Preservation
The Giants’ Causeway and Bushmills Railway was later constructed over the final two miles (3.2 km) of the Tramway and carried its first passengers at Easter 2002. Trains were running at least until the end of 2024. [3][13]
The Giant’s Causeway and Bushmills Railway (GC&BR) is a 3 ft (914 mm) narrow gauge heritage railway operating between the Giant’s Causeway and Bushmills. It “uses equipment originally assembled by Lord O’Neill for a tourist line at Shane’s Castle, Country Antrim, which closed in 1994. The idea of using this to revive part of the Tramway was largely conceived and promoted by David Laing. The Giant’s Causeway and Bushmills Railway Company is a not-for-profit organisation with charitable status. Clearance of the trackbed commenced at the end of 1999 and the railway carried its first passengers at Easter 2002.” [27]
“On 10th July 2010 the railway took delivery of a specially customised 4 coach diesel multiple unit capable of accommodating up to 90 passengers. Manufactured by Severn Lamb UK Ltd., it was designed to enhance the visitor experience to the North Antrim Coast and to recreate, in so far as was possible, the passenger experience of the original hydro electric tram. Commissioning of the new rolling stock by the manufacturers began on Monday 12 July with the inaugural journey three days later. The DMU is powered by a Kubota V3600-E3 engine and shares the line with the previous steam rolling stock. All vehicles run on bogies. The power vehicle is on the Causeway side and is shorter (4 windows) than the three trailers (5 windows).” [27]
Rolling Stock
In addition to the 4-coach DMU, the line has three locomotives and a number of coaches.
The Locomotives owned by the preservation line. [27]
References
D. G. Evans; The Giants’ Causeway and Portrush Tramway; in The Modern Tramway Vol. 13 No. 153, London, September 1950, p185-188.
Railway Times; 22nd September 1883. (Cited by the article at Reference No. 3)
It has taken me a while to get round to completing this article! ….
Saturday 6th May 2023 was the first time that I had been able to visit the Cavan & Leitrim at Dromod. A planned visit in 2020 was prevented by the COVID-19 pandemic and the associated lockdown which was enforced for our safety.
We were en-route, on 6th May, from Co. Donegal to Dublin after two great weeks following the route of the Burtonport Extension Railway between Burtonport and Letterkenny.
I had been intending to drop in to see the preservation society at Dromod either on the way to Co. Donegal or on the return journey. The second option worked in best with our travel arrangements.
My wife granted me an hour or so of freedom to explore the site at Dromod. Jo decided that she’d enjoy reading her novel more than traipsing around another railway related site. She had, after all, spent a good bit of her holiday walking along the track bed of abandoned railways.
My previous articles about Dromod and the first length of the Cavan & Leitrim Railway from Dromod to …. can be found on these links:
The first image below shows the site of the two stations at Dromod as they appear on Google Earth’s satellite imagery.
Dromod’s railway stations as they appear on Google Earth. [Google Earth, 18th July 2023]
Drumod/Dromod on the 1″ OSi mapping of the mid-20th century. The Iarnrod Eireann Line runs from the centre-bottom of the image in a Northwest direction. The Cavan & Leitrim Railway curved away to the East from its terminus close to the mainline station.
Dromod Iarnrod Eireann Railway Station seen from the road-bridge over the approach to the station from the South. The Cavan & Leitrim Station building is hidden behind the mainline building. The Goods Shed associated with the mainline station can be seen beyond the footbridge sitting at the end of the platform. [Google Streetview, September 2019]A platform level view of the Iarnrod Eireann Station looking North. The Cavan & Leitrim Railway Station sits behind the Station buildings in this view. Just visible above the train is the roofline of the mainline Goods Shed. [1]The Station Approach seen from the East. The Cavan & Leitrim Railway terminus can be seen on the right of the picture, the Iarnrod Eireann Station building is on the left. [Google Streetview, May 2009]The Cavan & Leitrim Railway terminus buildings at Dromod as seen from the Station Approach to the mainline station. The platform face was approximately on the line of the picket fence.[Goggle Streetview, May 2009]The street side approach to the station building. The photograph is taken looking North. [My photograph, 6th May 2023]The two stations as they appear on the 25″ OSi survey of the early 20th century. The northern approach to each station seems to have been guarded by an abattoir! [2]Three enlarged extracts from the same mapping make it easier to pick out details at the two station sites. North of the mainline Goods Shed, there appears to have been a goods transfer platform with the 3ft gauge siding on its East side and an Irish standard-gauge line on its West side. These three map extract do not properly show the Cavan & Leitrim Railway carriage and engine shed. The next map extract shows both these buildings which were to the North of the passenger facilities. [2]This map extract from the 25″ OSi survey shows the Cavan & Leitrim carriage shed, engine shed and turntable close to the centre of the image, the standard-gauge Goods Shed and the transfer platform are to the left of the image. [2]
The preservation line is only short in length and extends as far as the limits of the site permits towards Mohill. However, it is rightly proud of its work and continues to achieve much more than might be expected given the relatively small number of volunteers. You can visit its website by clicking here. [3]
Trains run on Saturdays, Sundays and Mondays. The group also has a transport museum, with narrow-gauge trains of every gauge, buses, planes, fire engines and artillery guns from WW1 and WW2.
‘Nancy’ sits alongside the Water Tower, outside the Engine Shed, at Dromod. She was not in steam on 6th May 2023. [My photograph, 6th May 2023]
‘Nancy’ was refurbished in the years prior to the pandemic. Work was finally completed in 2019. ‘The Railway Hub‘ reported the completion of the work on 22nd September 2019: “The restoration of the Cavan & Leitrim Railway’s Avonside 0-6-0T Nancy is officially complete after 22 years’ work and £160,000 investment. The former ironstone loco returned to steam at Alan Keef’s Ross-on-Wye workshops in March, but was delivered to Dromod without its brass dome cover as this was still being manufactured by ‘The Dorset Copperfish’. The new dome was finally delivered by Alan Keef on 27th July, and C&L volunteers wasted no time fitting it to Nancy as a final finishing touch.” [4]
The pictures taken at the preservation/museum site below are predominantly my own and were taken on 6th May 2023. By no means are these an exhaustive survey of the exhibits at Dromod.
We start with Michael Kennedy showing me Tralee and Dingle Railway Carriage No.10 (1891) which is stored in the carriage shed at Dromod awaiting restoration.
Tralee and Dingle Railway Carriage No.10T (1891) which is stored in the carriage shed at Dromod awaiting restoration. Michael is pointing to the faded CIE logo on the carriage side. It was in 1945 that Córas Iompair Éireann (CIÉ) was founded, uniting the Great Southern Railways with the Dublin United Tramway Company. The name means “Irish Transport Service” in the Irish language. CIÉ began its operations on 1st January 1945 as a private company with shares traded on the Dublin stock exchange. The Tralee & Dingle Railway became part of its empire! [My photograph, 6th May 2023]An internal view of Tralee & Dingle Carriage No. 10T which sits under cover awaiting restoration. [My photograph, 6th May 2023]
Tralee & Dingle Railway Carriage No. 10T sits in the Carriage Shed at Dromod awaiting restoration. It is one of a pair of Tralee &Dingle carriages (7T and 10T). Its sister (7T) is currently in Cumbria. Both carriages were built by the Bristol Wagon and Carriage Works, 7T in 1890 and 10T in 1891. They served on the Tralee & Dingle until it closed to passenger traffic in 1939 and we’re then moved to the West Clare Railway.
They served on the West Clare until the West Clare section was dieselised in the 1950’s and the carriages became redundant, they were then sold off as bodies and used as holiday homes and huts. Number 7T and 10T became huts for drainage contractor Gerry Walsh. Micheal Kennedy recovered the carriages a number of years back. 7T is being restored in Cumbria, as of 2023, work is ongoing on the bogies and chassis.
To find out more about these carriages and about donations to the work being undertaken please follow this link. [5]
Also at Dromod is railcar trailer No. 47C of the CIE West Clare Section. Originally built in 1890 by the Bristol Carriage and Wagon Company for the Tralee & Dingle Railway as a wooden bodied 3rd Class 34 seat carriage, it carried the number 6 on the Tralee & Dingle. On one of its windows is a short history of carriage conversions undertaken to make railcar trailer No. 47C.
Wikipedia informs us that “the Lochaber Narrow Gauge Railway was a 3 ft (914 mm) narrow-gauge industrial railway. It was a relatively long line, built for the construction and subsequent maintenance of a 15-mile-long (24-kilometre) tunnel from Loch Treig to a factory near Fort William in Scotland.[1] The tunnel was excavated to carry water for the Lochaber hydroelectric scheme in connection with aluminium production by British Aluminium. The railway came to be known colloquially as the ‘Old Puggy Line’.” [7]
A proper look at the Lochaber Narrow Gauge Railway is for another time but it ran from Fort William to Loch Treig and on to the Laggan Dam on Loch Spean, as shown below.
Thes five extract from RailMapOnline taken together show the full length of the Lochaber Narrow Gauge Railway. Opened in 1925, the Lochaber Narrow Gauge Railway finally closed in 1977. [8]
Back to the Cavan and Leitrim at Dromod. The museum includes a series of different means of transportation. Just a few photos from my visit in 2023.
A Great Northern Railway Gardner bus sits in front of carriage 10T in the carriage shed. [My photograph, 6th May 2023]One of the Bergbolagen Rail Tricycles restored by volunteers at the Cavan and Leitrim Railway. This tricycle was last in use by Bord na Mona on Clonsast Bog in County Kildare. [My photograph, 6th May 2023]
The Cavan and Leitrim Railway has restored two 3 foot gauge Bergbolagen Rail Tricycles, part of a batch purchased by Bord na Mona (The Irish Turf Board) in 1957 from the Bergbolagen Company in Stockholm, Sweden, the yellow one was used on Clonsast Bog in County Kildare, the green one (running second on the video) was used on Boora Bog in County Offaly. Andrew Wilson kindly donated the parts (rescued in the 1970s) from which both of these machines were restored. [9]
A replica 3 ft gauge rail inspection bicycle built by Cavan and Leitrim volunteers using the frames of 2 1920s “High Nelly’s” and original early 1900s american Teetor & Hartley wheels. [My photograph, 6th May 2023]The Guinness Steam Loco (No. 22) at the Cavan & Leitrim at Dromod was 100 years old in 2012 which made it 111 years old in 2023. This is it, in storage at Dromod on 6th May 2023. Loco No. 22 was built in Spense’s foundry, Cork Street, Dublin in 1912. It was part of an extensive network of locos in the Guinness brewery at St. James’s Gate in Dublin and continued in operations until 1957. In August 2003, No. 22 arrived in Dromod and since then, hard work began to restore it back to its former glory. So far the bodywork has been restored. No. 22 isn’t fully restored. Its Boiler is missing. The task of replacing it has proven challenging as it is designed to run on a 1ft 10in track, slightly narrower than the standard of 2ft. However that doesn’t mean it will never be restored. The Cavan & Leitrim continue in their search for the best replacement boiler and hope some day soon No. 22 will return to steam. [10]
Hidden amongst series of different important relics are two wagons. The first shown below comes from the West Clare Railway, the second
A chassis and frame from a 5 ton covered wagon from the West Clare Railway in storage at Dromod. [My photograph, 6th May 2023]A 2-plank China Clay wagon from North Devon built by Marshalls in 1880 in store at the Cavan & Leitrim Railway at Dromod. [My photograph, 6th May 2023]A restored two-plank wagon No.4318. [My photograph, 6th May 2023]
The November 1899 edition of The Railway Magazine carried a short article about the L&LSR which was not heavy on technical detail. It mostly reads as though it were a holiday brochure rather than an article in a railway journal. None-the-less, the article is still of interest, particularly for the fact that it was written during the period when the L&LSR was expanding.
A map of the L&LS Railway in 1899, before its significant expansion. I was particularly drawn to this map as my wife and I spent our main holiday this year in Rathmullan directly across Lough Scilly from Buncrana. I have still to complete a series of articles about the L&LSR between Derry and Cardonagh. [1: p461]
Chisholm starts his article: the L&LSR “is one of those excellent little lines constructed on the narrow gange principle, which are to be found in all parts of Ireland. The country has the benefit of light rail ways It is with one of these lines that the present article is intended to deal. It is to be hoped that the following notes respecting the L&LSR will prove interesting to readers.” [1: p461-464]
Chisholm then spends a number of paragraphs explaining how best a traveller from the mainland to Derry.
I found his outline of the route from London interesting as it highlighted the number of railway companies whose rails the journey would cross. “Leaving London (Euston or St. Pancras) the passenger is taken to Carlisle, the ‘Clapham Junction of the North’. The journey is continued to Stranraer on the Portpatrick and Wigtownshire Joint Railway, owned by the London & North Western, Midland, Caledonian, Glasgow & South Western, Companies. The steamers run alongside the harbour station, Stran raer. The boats are well built, and are fitted with the latest improvements, The joint companies are financially interested in this steam boat service, as is also the Belfast and Northern Counties Railway. The time occupied in crossing is approximately two hours. Larne harbour station also adjoins the steamer pler, … A narrow gauge train awaits the arrival of the boat, and by this train the traveller is taken to Ballymena, It is necessary to change here into the broad gauge ‘Londonderry Express’, which speedily runs to the city on the banks of the Foyle.” [1: p464-465]
At that time, Derry “consist[ed] of two towns, one on each side of the River Foyle. The waterside station of the Belfast and Northern Counties Rail- way is on the eastern bank. The river is spanned by the stately Carlisle Bridge, a fine structure, which can truly be termed ‘[Derry’s landmark’. … The [L&LSR’s] station was on the western bank of the river. On entering it and viewing for the first time the rolling stock therein, the Londoner’s thoughts [would] immediately fly to the London and South Western Railway. The carriages before him [were] painted almost exactly after the style of that Company’s coaching stock. In addition to this, [the L&LSR] Company paint their engines a bright grass green – another prominent ‘South Western’ feature.”
The featured image for this article shows L&LSR Locomotive No.1 J.T. Macky which was built by Black, Hawthorn & Co., of Gateshead in 1883. At the time of Chisholm’s article this locomotive was only around 6 years old. In a surprising digression from the more general nature of his article, Chisholm provides quite some detail about this locomotive. “It was named after the then Chairman of the Company. Mr. Fred. Dawson, the … General Manager of the Company, … supplied the [Chisholm] with the leading dimensions of ‘J.T. Macky’. It [was an 0-6-2T loco], a six-coupled engine with a two-wheeled pony truck at the rear. The diameter of the coupled wheels [was] 3 ft. 6 in., the diameter of the trailing wheels being 2 ft. 2 in. The gauge of the line [was] 3 ft 0 in. ‘J. T. Macky’ [had] cylinders 13 in. by 19 in.; a total heating surface of 592 square feet. …(112 tubes); a steam pressure of 140 lbs. per square inch, and a total length over the buffers of 27 ft. The total weight of the engine in working order [was] 23 tons 3 cwt.” [1: p462]
L&LSR Locomotive No. 1 ‘J.T. Macky’. [1: p463]
It is clear that Chisholm was quite taken by this locomotive: “The locomotive is extremely handsome, being painted … brought green picked out with black and white stripes. A bright brass dome is mounted on the top of the barrel.” [1: p462]
In 1899, Chisholm claimed that the L&LSR owned ten locomotives the first four named, respectively, J.T. Macky, Londonderry, Donegal and Inneshowen. The remaining engines bore numbers only. J.T. Macky, Londonderry, and Donegal were numbered ‘1’ to ‘3’ and were all 0-6-2T locomotives supplied by Black, Hawthorn & Co. Inneshowen was numbered ‘4’, supplied by the same company it was an 0-6-0T. I have only found evidence of a further four locomotives having been supplied to the L&LSR by 1899: No. 5(A) and No. 6(A), both supplied by Robert Stephenson & Co. in 1873, both 2-4-0T locomotives; and No. 5 and No. 6, both supplied by Hudswell Clarke in 1889, both 4-6-2T locomotives. [3]
Chisholm continues: The L&LSR consisted of “two branches. … The longer branch extend[ed] to Letterkenny, and the shorter to Buncrana. [At that time] the company work[ed] and own[ed] 14.5 miles of line.” [1: p462-463]
Chisholm goes on to write about the L&LSR’s expansion plans. Looking forward from the end of 1899, he says: “It aspires to greater things, … there are now being made extensions of great importance.The first of these is a line from Letterkenny to Burtonport, 49.5 miles. An extension from Buncrana northwards to Carndonagh (see map) is also now being undertaken. The latter will be 18.5 miles long. It will be seen that when these extensions are completed, the Lough Swilly Railway will be a comparatively big concern.” [1: p463]
From this point in his article, Chisholm sells the area around the L&LSR as a holiday destination. “The scenery in and around … County Donegal is exceptionally fine. … Buncrana has truly been described as a lovely spot. It is an ideal holiday resort. A fine building – the Lough Swilly Hotel – has been erected, where tourists will find excellent accommodation. The Lough Swilly Railway is fully alive to the fact that the district served by its line is essentially a resort for the tourist. With this view, [the Company] has introduced a number of facilities for holiday makers. For example, cheap tickets are issued daily between Londonderry and Buncrana – the fare for the double journey being only one shilling. The tickets are available by all trains. The passenger has not to get up at an unearthly hour in the morning to catch a special train. … There has also been introduced, … passengers proceed by rail from Londonderry to Buncrana, thence to Fahan, by steamer from Fahan to Rathmullan, by coach from Rathmullan to Rosapenna, Dunfanaghy, Gweedore, Dungloe, Glenties, Ardara, Carrick, Killybegs, thence by rail to [Derry]. ” [1: p463]
A train from Derry arrives at Buncrana. The Locomotive is L&LSR No. 4, ‘Innishowen’. [1: p464]
In Chisholm’s concluding remarks, he comments that “the railway is a thoroughly up-to-date concern. … The management is … thoroughly enterprising. The railway … is an interesting and well-managed line; the scenery in the district it serves can truly be described as amongst the grandest in the British Isles.” [1: p464]
References
A J. Chisholm; The Londonderry & Lough Swilly Railway; in The Railway Magazine, London, November 1899, p461-464.
My completed articles about the L&LSR can be found on this blog on the following links:
This next series of five extracts from the 25″ OSI survey show the Lough Swilly Railway heading North away from Newtowncunningham Railway Station.
The series of five map extracts above show the Lough Swilly Railway to the North of Newtoncunningham and parallel to Back Shore Road. [3]This extract from railmaponline.com’s satellite imagery shows the railway heading North from Newtowncunningham Station, alongside Back Shore Road, and covers the same length of the line as shown in the five map extracts above. [2]A track can be seen on the satellite image above crossing the line of the old railway as it curved round toward Moneygreggan. This photograph shows that lane. The photograph is taken from Back Shore Road running parallel to the line of the railway at this point. The track at this point was probably provided after the closure of the railway. It gives access to what was the old line of the road prior to the construction of the railway. With the construction of the railway the road was diverted to cross the railway further to the North. [Google Streetview, July 2021]This enlarged extract from the OSi 25″ survey shows the changes made at the location of the photograph immediately above. [3]This extract from the railmaponline.com satellite imagery shows the same location as the map extract immediately above. [2]
The next three images show the bridge in Moneygreggan which carried Back Shore Road over the line just to the North of the location above.
The road bridge constructed to carry Back Shore Road over the Lough Swilly Railway north of Newtoncunningham. [My photograph, 9th May 2024]The view South across the bridge parapet in the direction of Newtown Cunningham Station. [My photograph, 9th May 2024]The view North across the parapet of the same bridge. [My photograph, 9th May 2024]The next location worth noting along the line is a bridge over another minor road which headed West from Back Shore Road [3]The same location, this time on the satellite imagery from railmaponline.com. [2]The lane and the embankment are shrouded by trees. The line crossed the lane very close to its junction with Back Shore Road. [Google Streetview, July 2021]The next crossing of the line was for what was once a through route of sorts but which now is really no more than a farm access track. On the OSi 26″ survey this appears to have crossed the old railway by means of an over bridge. [3]Railmaponline.com’s satellite imagery shows the rail route in the 21st century shrouded in trees. [2]This image looks West along the access road in 2011. Hidden in the trees over the line of the Lough Swilly Railway there are some masonry remains which might be parapet walls for a bridge. Either side of the track the undergrowth and tree cover is dense.[Google Streetview, August 2011]
A series of three further extracts from the 25″ OSi survey show the next length of the Lough Swilly Railway as it turned to the East.
This section of the line ran North from the access road noted above. Back Shore Road crosses the old railway at a level-crossing at the top of this map extract. The stream that has followed the road North emptied into the Lough by means of a stone arch under the of railway. A photograph taken by Willie Rodgers of the stone-arched bridge carrying the old railway over the stream can be seen below. [3]Then curving round to the Northeast, the line crossed a long embankment over part of Lough Swilly. Open water was to the Northwest of the line, a lagoon and saltmarsh prone to flooding was to the Southeast of the line. [3]This extract from the 25″ OSi survey shows the line leaving the embankment and curing further round to the East. [3]The same length of the Lough Swilly Railway as shown in the three map extracts immediately above, as it appears on railmaponline.com’s satellite imagery. What was saltmarsh to the Southeast of the line has been reclaimed and is now in use as arable land. [2]Looking Southwest along the line of the embankment in the 21st century. Back Shore Road ends today in a small unmetalled carpark and a gate into the farmland visible to the top-right of this photograph. [My photograph, 9th May 2024]The small unmetalled carpark at the end of Back Shore Road. The route of the old railway is marked by the orange line heading out onto the embankment. [Google Streetview, July 2021]The stone-arched bridge at the Southwest end of the embankment which carries the route of the L&LSR over the drainage stream which empties into the Lough at this point. This image was shared on the Londonderry & Lough Swilly Railway Facebook Group by Willie Rodgers on 19th November 2021. [5]Looking Northeast along the line of the Lough Swilly Railway from a point 100 metres out along the embankment form the carpark noted above. [My photograph, 9th May 2024]
An aerial image taken by Michael Roulston in February 2021 looking Southwest along the embankment and showing the curve of the old line on its Southwestern approach can be seen by following this link: https://maps.app.goo.gl/vEEn4ViuBhW5QiTD6
A photograph taken by David Hughes in July 2020 from a point about halfway along the embankment can be found on this link: https://maps.app.goo.gl/zb85mGUaBZRqafHa6
A similar photograph taken by David Hughes on the same day shows the view along the embankment from the location of the sluice gates. The railway began to curve away from the line of the embankment at this point. The photograph can be found on this link: https://maps.app.goo.gl/o6TbpWy19muqJypu8
This enlarged extract from the 25″ OSI shows the old railway curving away from the straight line of the embankment. [3]The railway curved away from the straight line of the embankment. [Google Maps, May 2024]This view looks South from just to the North of the Northeast end of the embankment. The L&LSR can be seen curving away to the East and crossing the access road to the location of the photographer via a stone-arched bridge. [Google Streetview, September 2010]A better image of the bridge seen above, also taken from the North. This image was shared on the Londonderry & Lough Swilly Railway Facebook Group by Willie Rodgers on 19th November 2021. [5]The same bridge, seen this time from the South. This image was shared on the Londonderry & Lough Swilly Railway Facebook Group by Willie Rodgers on 19th November 2021. [5]The same structure seen from further to the South along the lane. The tree line to the right of the bridge marks the line of the Lough Swilly Railway. [Google Streetview, September 2010]The next significant location was a little further to the East where another minor road crossed the lien fo teh railway on a bridge. This enlarged extract from the 25″ OSi survey shows the location. [3]This enlaregd extract from the railmaponline.com satellite imagery shows the same location in the 21st century. [2]This view from the South shows the bridge parapets in place in the 21st century. The L&LSR cutting has been infilled and returned to arable use. [Google Streetview, July 2021]
The next three extracts from the 25″ OSI survey show the line turning first to the Northeast and after a short distance reaching Carrowen Railway Station.
These three extracts from the 25″ OSI surveytake us as far as Carrowen Station. [3]This extract from railmaponline.com’s satellite imagery covers the same length of line as appears in the three map extracts immediately above. [2]When the L&LSR was in use it was bridged by a minor road which linked roads to the North and South of the line and provided access to the complex of buildings shown on this enlarged extract from the 25″OSi survey. [3]A wider view of the same location in the 21st century as provided by railmaponline.com’s satellite imagery. Both the road and the old railway have been ploughed back into the landscape. [2]Approaching Carrowen Railway Station, the line was carried over a road close to Carrowen School. [3]Railmaponline.com’s satellite imagery shows the same area as covered by the map extract above. [2]Trees appear to form an arch over the narrow road at the point where the L&LSR was carried by a bridge across the road close to the site of what was Carrowen School. [Google Streetview, July 2021]An enlarged view of Carrowen Railway Station as shown on the 25″ OSi survey. [3]The Station site as shown on an enlarged extract from railmaponline’s satellite imagery. The old station househas been extended out across the line of the railway. [2]Carrowen Station Hose and platform viewed from the West. The building was not of the same design of other larger station houses that we have encountered in our journey along the line of the L&LSR. This photograph was shared on the Londonderry & Lough Swilly Railway Facebook Group by Conor Harkin on 27th April 2022 courtesy of Fahan Inch & Burt Parish. [6]The modern private dwelling on the site of Carrowen Station House includes the original station house It is seen here viewed from the village road to the East of the L&LSR. The photograph looks along the old station approach. The extension to the right of the building sits over the formation of the old railway. [Google Streetview, July 2021]This next extract from the 25″ OSi survey shows the old railway heading North-northeast away from Carrowen Railway Station and bridging a local road. [3]The same length of the line as it appears on modern satellite imagery. The rail-over-road bridge was sited at the top-right of the image. The bridge has gone a a minor realignment of the road carriageway has taken place. [2]Looking Northwest through the location of the bridge. The bridge and the line’s embankments have been removed. The orange line indicates the approximate line of the L&LSR. [Google Streetview, July 2021]Continuing North-northeast, the L&LSR ran through two level crossing close to Drumgowan. [3]the location of each of the crossings can easily be picked out on the modern satellite imagery of railmaponline.com. [2]This photograph taken from the closest metalled road shows the first crossing encountered. It was about 50 t0 100 metres down the lane at the centre of the image. The approximate line of the L&LSR is shown as an orange line beyond the trees. [Google Streetview, July 2021]From a very similar location to the last photograph but this time looking North-northeast. The line of the L&LSR crossed the field to the right of the photograph and ran through the trees which appear left of centre towards the top on the image. The track on the left of the image meets the line o0f the old railway at the first of the trees and then runs along what would have been the formation of the old railway to the coast of Lough Swilly, this can be seen on the next satellite image below. [Google Streetview, July 2021]
The next three extracts from the 25″ OSi survey show the L&LSR curving round to the East to run along the side of Lough Swilly. The earthworks of the earlier line from Derry to Farland Point can be seen to the North of the line.
The station at Farland Point opened on 12th December 1864 when the Londonderry and Lough Swilly Railway built its line from Londonderry Middle Quay railway station to a terminus at Farland Point. The L&LSR owned ferries which operated from Farland Pier. [7]
The L&LSR curved round to the East to run along the side of the Lough. Close to the flood gates earthworks from an abandoned line serving Garland pier would have been visible from trains running between Letterkenny and Derry. [3]
John McCarton comments on the Londonderry & Lough Swilly Railway Facebook Group: “The Londonderry and Lough Swilly Railway Company opened a railway service from Derry to Farland Point (Inch Level Wildlife Reserve today) in December 1861. From Farland Point, a paddle steamer service took train passengers acrossLough Swilly, to Ramelton or Letterkenny.Paddle steamers were chartered in from existing Lough Foyle and Clyde companies to inauguratethis new service. In September 1864, theline was extended from Tooban Junction to Buncrana, with a spur to Fahan, extending Into sidings at the pier for the transportation of goods and passengers to and from the paddle steamers.The ferry service moved to Fahan in 1866, which then became the hub for the L&LSR’s passenger and freight services, to Ramelton, Rathmullan and Portsalon.” [8]
These two extracts from the OSi 25″ survey show the L&LSR running along the South side of what became Inch Wildfowl Reserve. [3]This railmaponline.com satellite image covers the same length of the old railway as the two map extracts immediately above. [2]Looking East along the line of the old railway about 200 metres further along the embankment, (c) Roy Smyth. [Google Streetview, January 2023]Looking East-northeast along the line of the old railway as it curves with the embankment towards the Northeast, (c) Roy Smyth. [Google Streetview, January 2023]Looking Northeast at a point close to the right side of the railmaponline.com satellite image above, (c) Roy Smyth. [Google Streetview, January 2023]
The next few map extracts follow the old railway heading Northeast towards Tooban Junction Station. …
These three extracts form the OSi 25″ survey show the remaining length of the embankments alongside Lough Swilly as the line heads Northeast towards Tooban Junction. After turning to the Northeast the line can be seen running on a secondary embankment to the East of that facing the sea. [3]This extract from the railmaponline.com satellite imagery shows the length of the L&LSR covered by the three map extracts above. [2]Looking back to the Southwest along the L&LSR formation from the Inch Wildfowl Reserve car park. The railway ran along a low embankment to the East of the main embankment and to the East of the modern walkway. [Google Streetview, September 2010]Looking Northeast along the L&LSR formation from the Inch Wildfowl Reserve car park. The line ran, approximately, along the tree line close to the centre of this photograph. [Google Streetview, September 2010]Looking Northeast along the L&LSR formation again. (The line ran to the right of the path ahead.) As is evident in these last few images, the old railway was protected from the worst of the weather over Lough Swilly by a high embankment. We are closing in on the curve taking the line into Tooban Junction Station, (c) Roy Smyth. [Google Streetview, January 2023]
Inch Wildfowl Reserve
The story of the Wildfowl Reserve is told on its website: [9]
“Inch Lough is a brackish lagoon cut out from Lough Swilly by embankments, and penned between Inch Island and extensive flat agricultural polders (slobs) on the mainland of County Donegal by a third long embankment.
Historically there was a large area of Lough Swilly between Inch Island and Burt, which lies at the foot of Grianan Mountain (the site of the famous Iron Age hillfort, Grianán of Aileach). In 1836 it was proposed to claim this shallow expanse of tidal estuarine mud from the lough. Work started around 1840 and was complete by 1859.
The first stage was the construction of the Tready Embankment across the centre of the area, from Tooban Junction near Burfoot in the east, to Farland Point in the west. It would also serve as the route of the Londonderry and Lough Swilly Railway – a narrow-gauge line connecting Carndonagh and Derry in the north-east, with Letterkenny and Burtonport in the far west. The line operated between 1863 and 1953.
North of Tooban was a point where the mainland was close to Inch Island, and where a causeway, the Inch Embankment, was built to link the island to the mainland.
The third stage was to construct a parallel embankment in the west, between Farland Point and the island, the Farland Embankment, or as it is now generally called, the Farland Bank.
So between these three embankments and Inch Island there was a section of water cut off from Lough Swilly, and also from the mud flats to be drained. This area would be kept as a holding tank, to receive the waters drained from the south and keep out the tidal extremes of Lough Swilly. Thus Inch Lough was created, and over the years has become steadily less salty.
South of the Tready Embankment, between it and Grianan Mountain, all that area of Lough Swilly now isolated from the tidal waters could be drained through a complicated system of large and small drains, to create agricultural land. This huge expanse of flat polderland is locally known as The Slobs, or more formally as Inch Level. The drainage was not initially very successful. Until the late 1950s the patchwork of small fields were very marshy, and included some areas of unambiguous marshland.
At that time, industrialist Daniel McDonald, started to buy up the small properties and by 1961 had amalgamated all into Grianán Estate, the largest arable farm in Ireland at around 1200ha. The fields could then be enlarged and the drainage system re-vitalised.
There have been a few changes of hands since then. Most notably, a consortium of businessmen bought the estate in 1980 and announced plans to drain the northern half of the lake. A local campaign was immediately launched to resist this – mainly defending Inch Island’s status as an island, but concerned also about the threat to wildlife from the loss of half of the lake. The consortium claimed that the scheme proved to be technically unviable, and whether or not that was the real reason, or they were overwhelmed by the strength of the opposition, they abandoned the scheme and sold up in 1989.
An Grianan Farm is now in the hands of Donegal Creameries plc., and managed as an organic dairy farm. Parts of it are leased to local farmers. In 2002 the National Parks and Wildlife Service took on a thirty year lease of Inch lough and its surrounding wet grasslands. Since then, NPWS along with various stakeholders have developed the site, with ongoing work in conservation management, community involvement, and development of visitor infrastructure. The aim now is to sustainably develop Inch Wildfowl Reserve for the future, integrating conservation with community and farming, whilst allowing limited access for the public.” [9]
This extract from the 25″ OSi survey covers the next length of the line. Included in this extract is Tooban Junction and its station and the start of the branch to Cardonagh. [3]An enlarged extract focussing on Tooban Junction. The L&LSR line to Derry is the more northerly of the two line leaving the right of this image. The other line is a long storage line or headshunt. [3]This extract from the railmaponline.com satellite imagery covers the same length of the L&LSR as shown in the map extracts immediately above. It centres on the location of Tooban Junction Station. [2]Facing Northeast along the L&LSR formation again. This time on the curve round to the location of Tooban Junction Station, (c) Roy Smyth. [Google Streetview, January 2023]Facing East along the line of the old L&LSR through the location of Tooban Junction Station from the modern footbridge over the drainage channel. Note the signal post with two arms which stands on the station site, This is a reconstruction by Buncrana sculptor John McCarron as part of the Ghosts of Tooban Junction project, (c) Roy Smyth. [Google Streetview, January 2023]Tooban Junction Station seen from the West. This image was shared by Donegal Railway Heritage Museum in their Facebook Page on 6th February 2020, (c) Edward PattersonLooking West at Tooban Junction on 20th April 1953. The line to Letterkenny is to the left of the water tower, that to Cardonagh is to the right. This photograph was shared on the Fahan Inch & Burt Parish Facebook Group on 6th September 2015. [16]
The ‘Disused Stations’ website has a series of pages focussing on Tooban Junction Station. [10][11][12][13] These pages include a history of the station and a number of photographs of the station from various sources. Click here to visit the first of these pages.
Ernie’s Archive includes a number of photos of the station. [14] Click here to access these images.
Wikipedia notes that “the station opened on 9th September 1864 when the Londonderry and Lough Swilly Railway built their line from Londonderry Middle Quay to Farland Point. It closed for passengers on 23th October 1935. Freight services continued until 10th August 1953.” [17]
We take a break at Tooban Station and await the next train!
https://en.wikipedia.org/wiki/Tooban_Junction_railway_station, accessed on 27th May 2024. However, note comments made in response to this article by Martin Baumann: “The Derry to Buncrana line saw passenger services on bank holidays after regular services had ceased. The last day this happened was 6th September 1948. … Freight traffic ceased on 8th August 1953, not the 10th but it was possible to travel on freight services as the Swilly had no Goods Brake Vans so a Passenger Brake with some seats was always in the formation.”

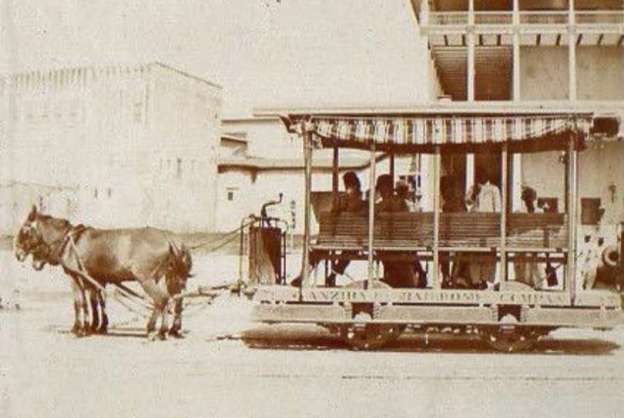
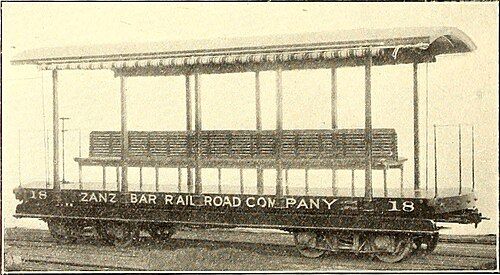
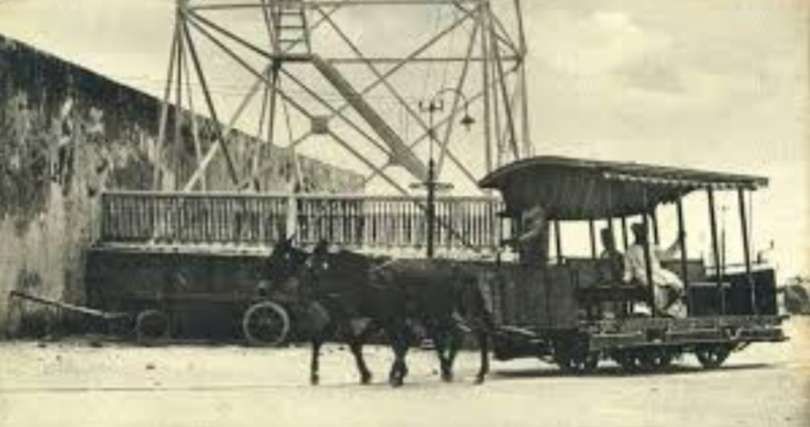
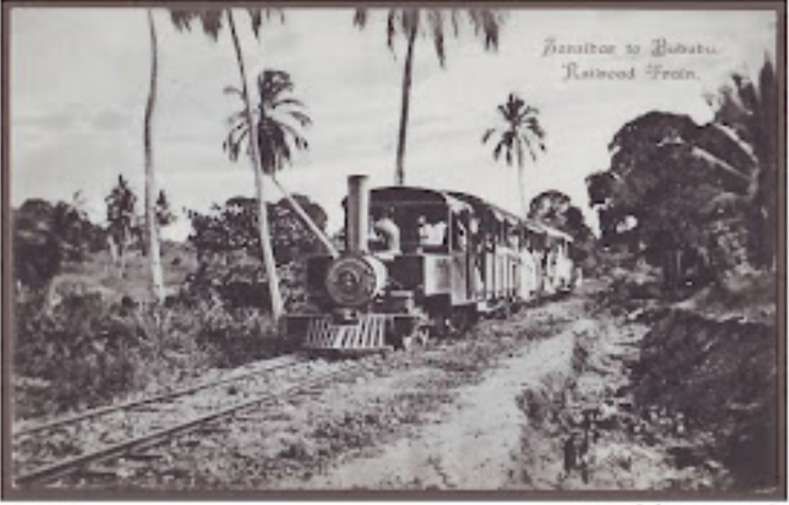
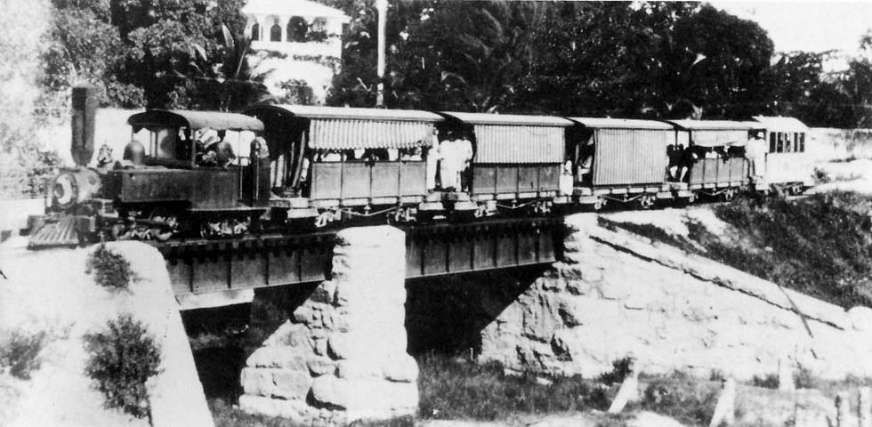
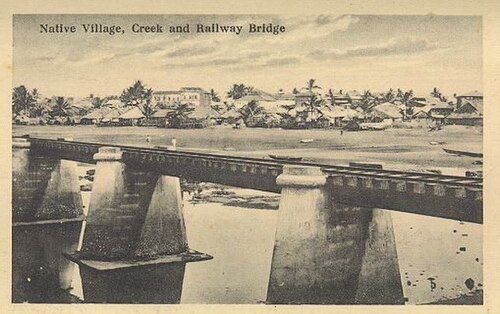
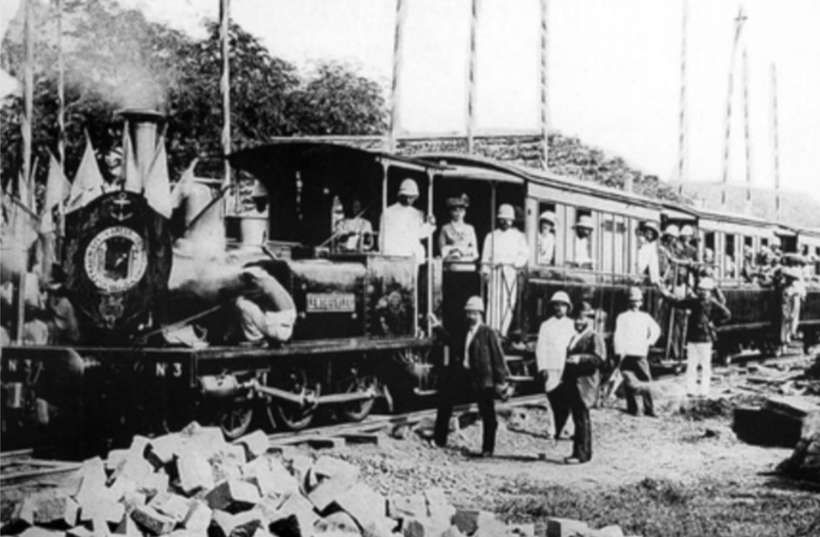
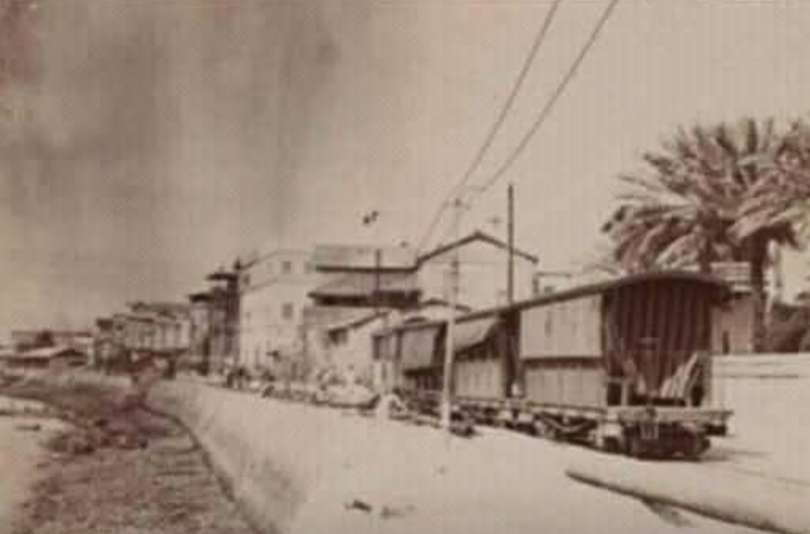
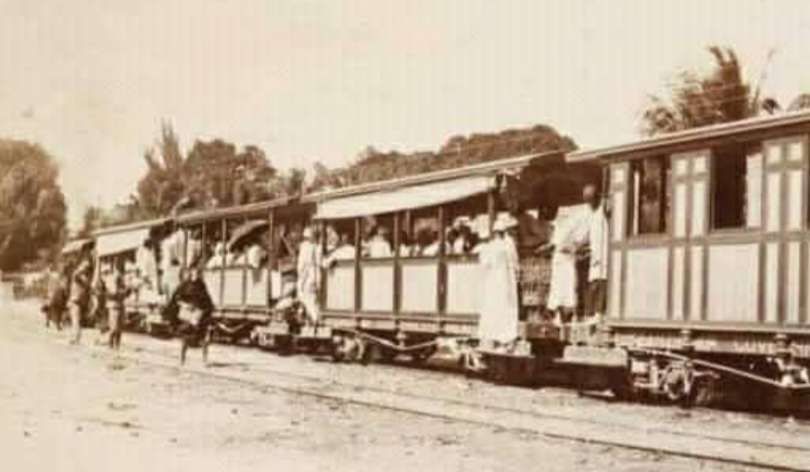
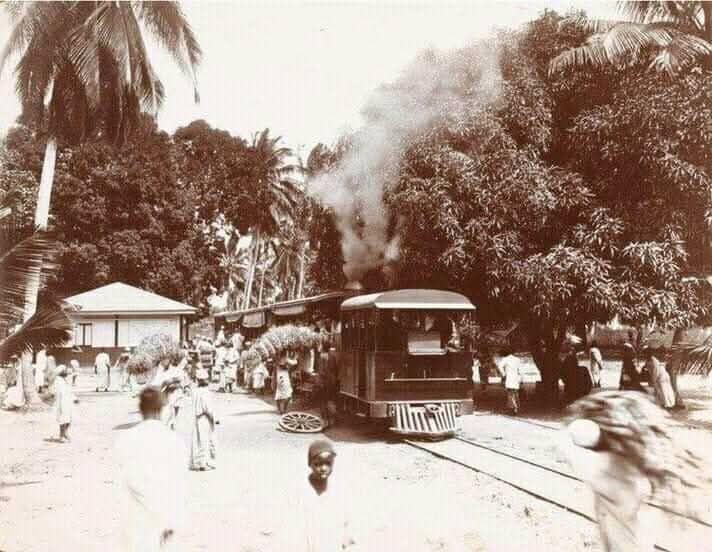
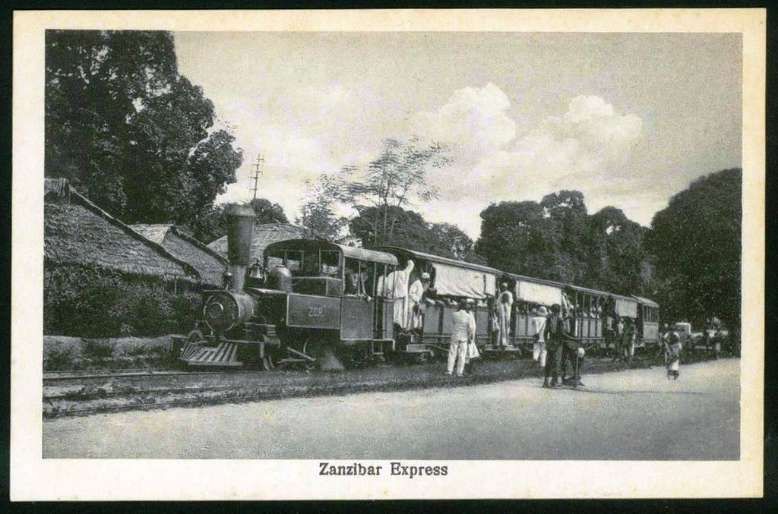
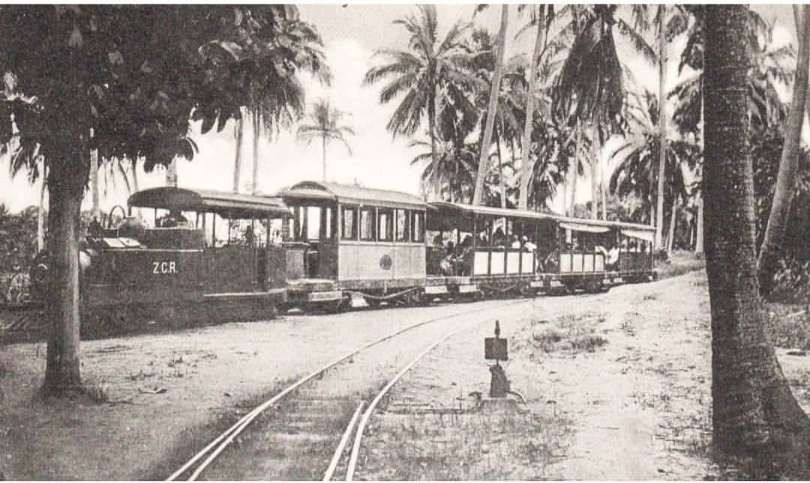

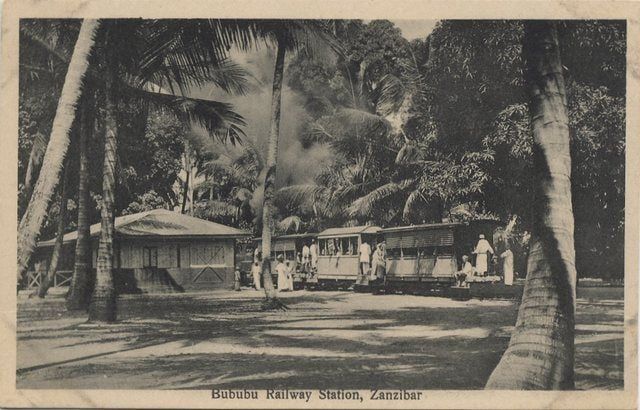
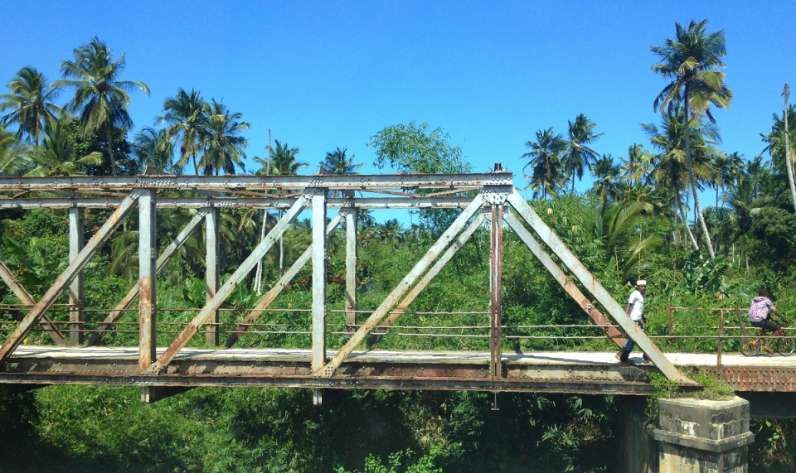

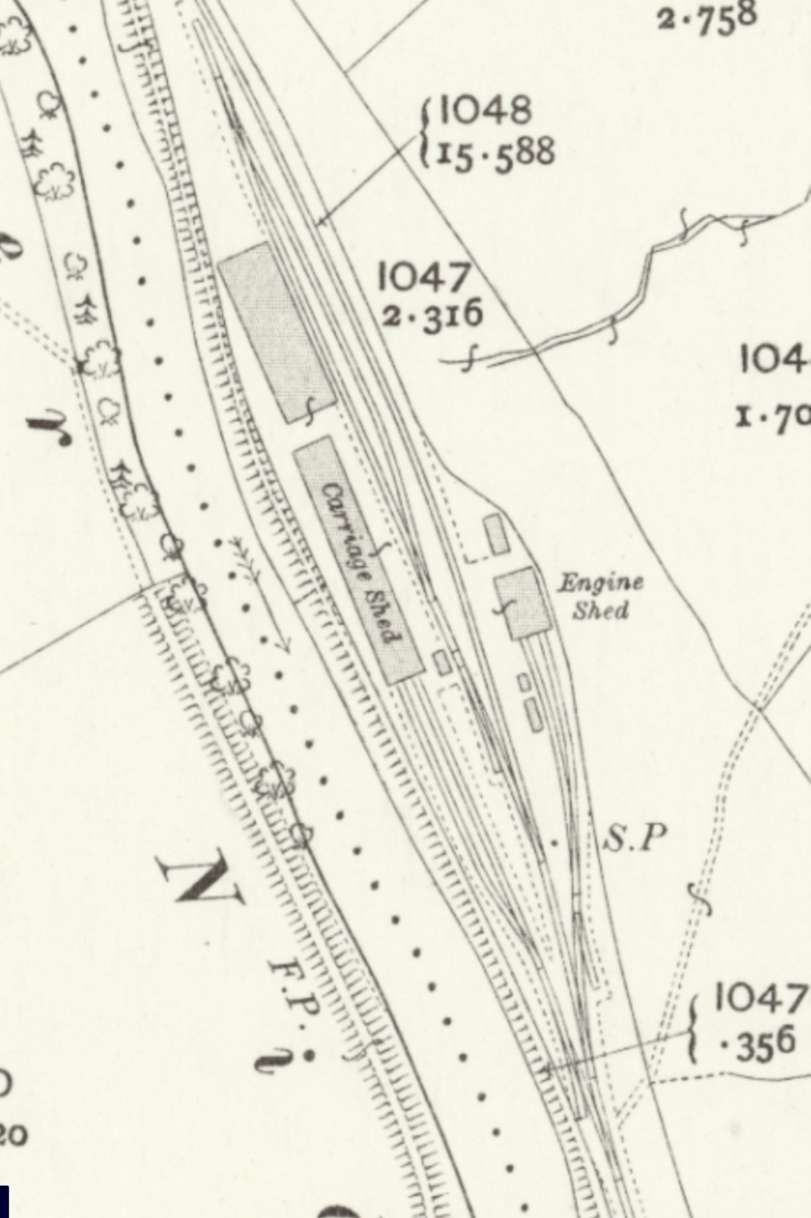

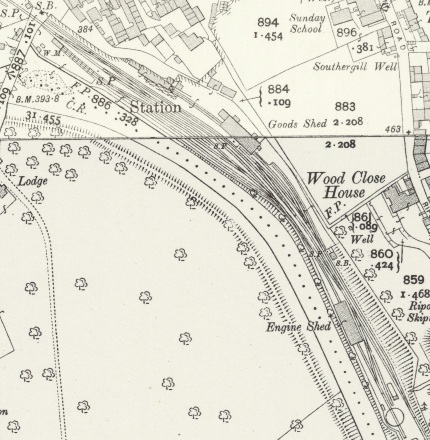
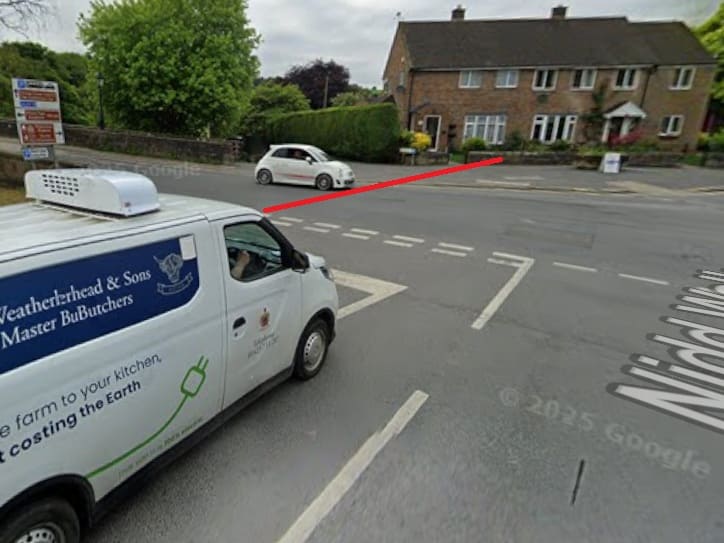
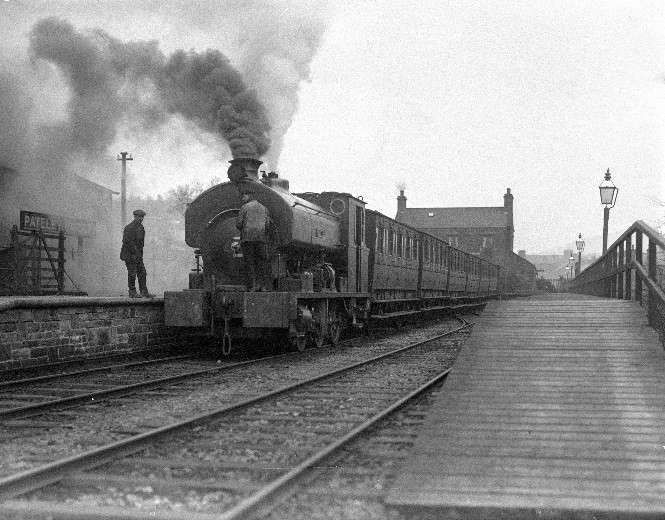
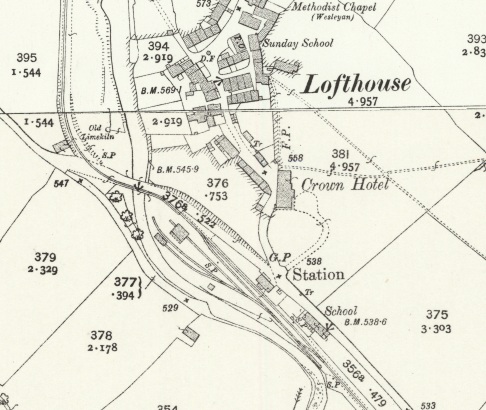
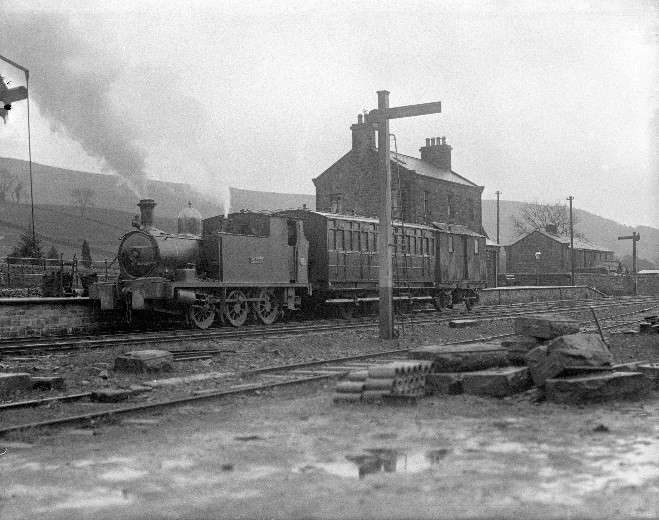
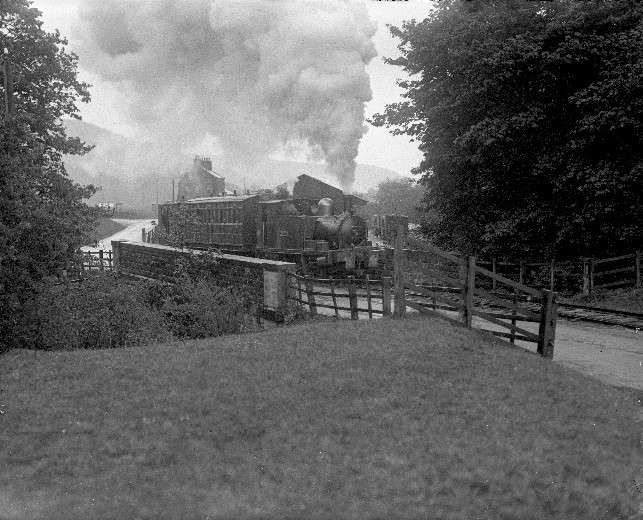
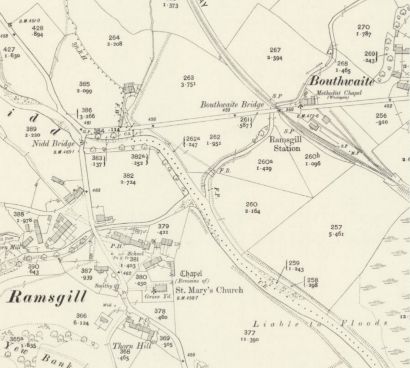
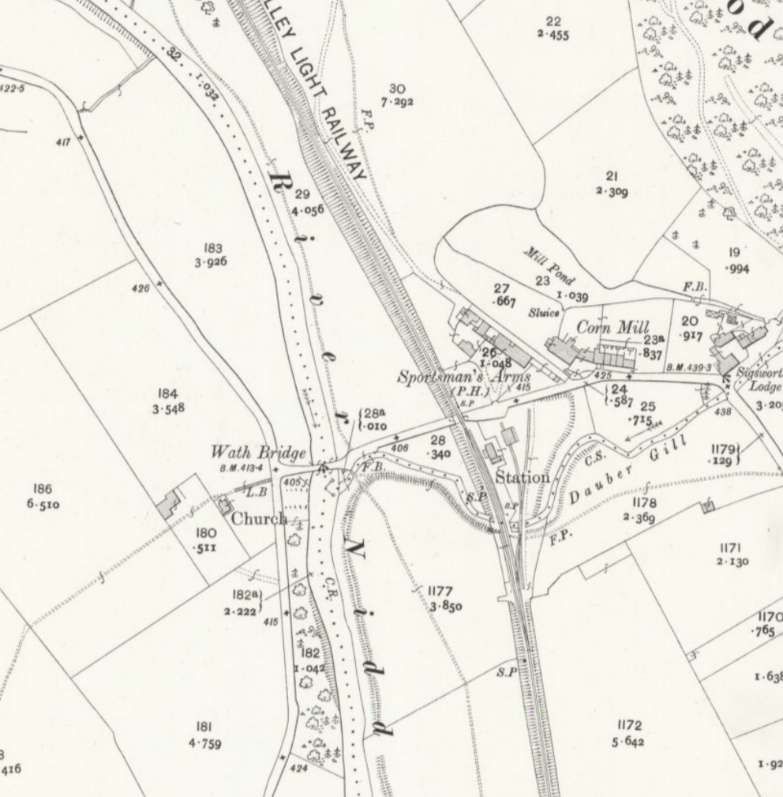
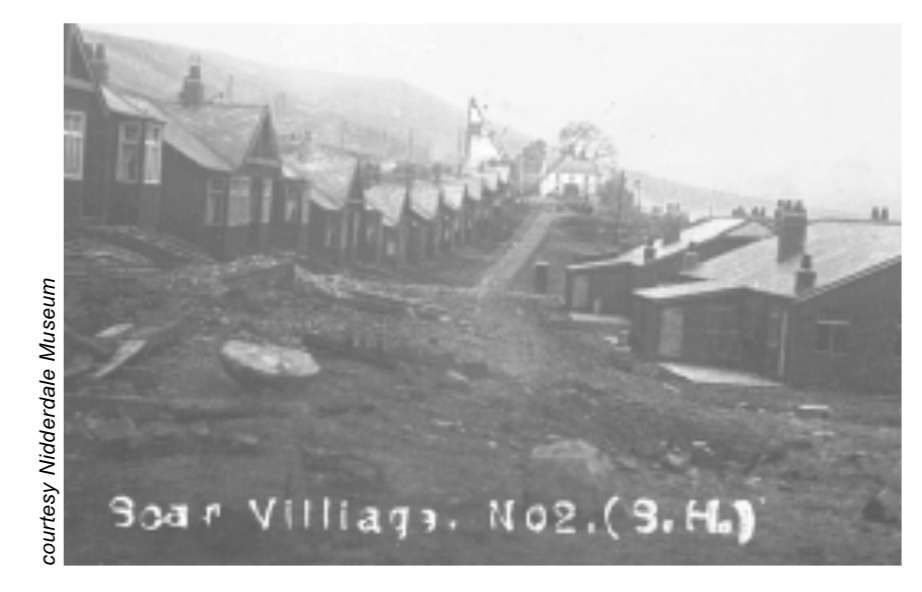
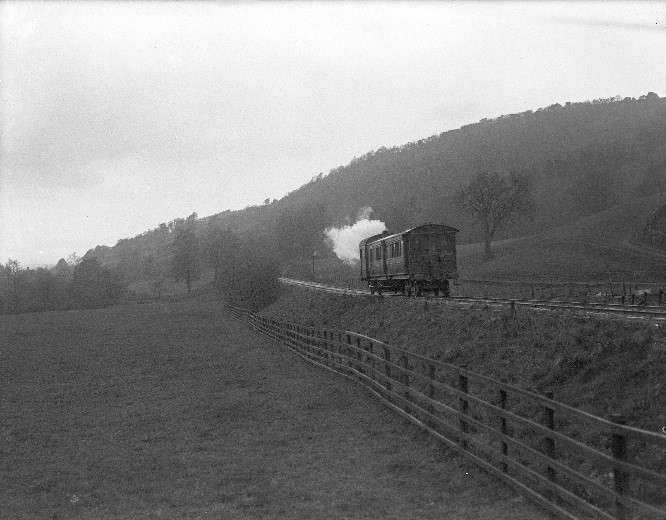
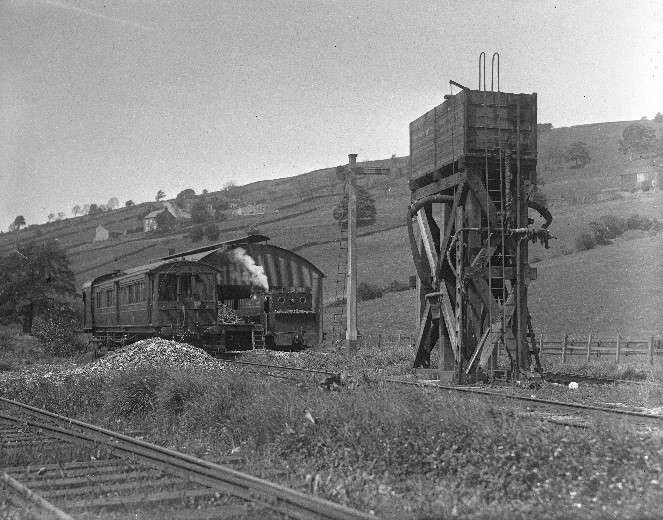
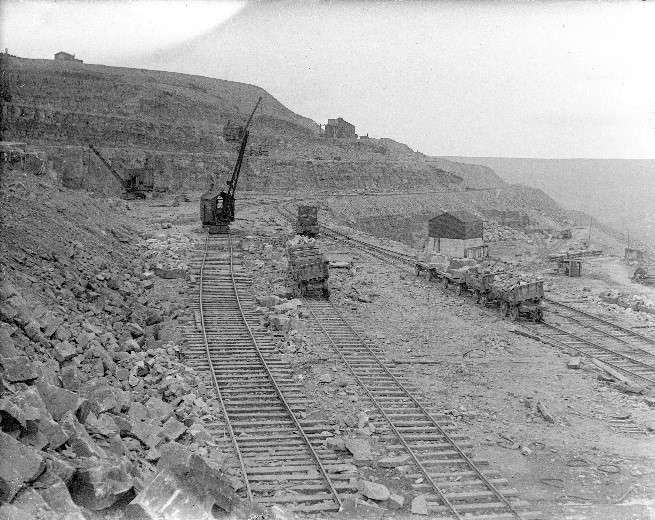
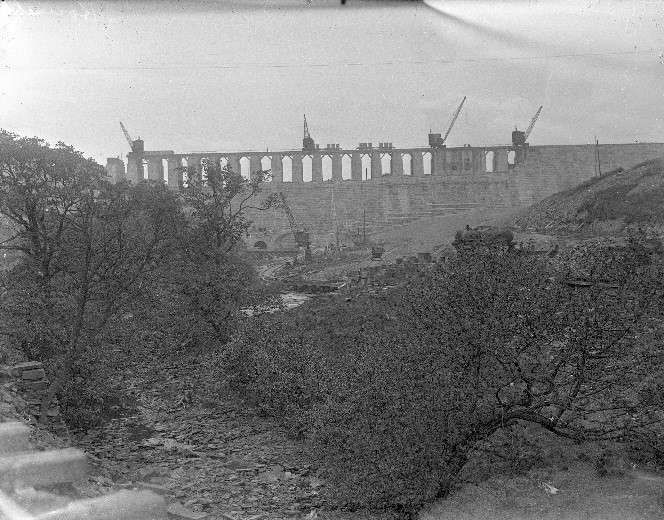
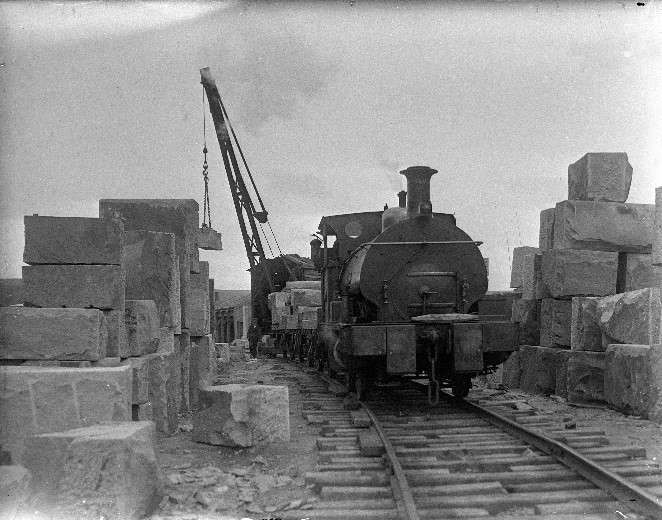
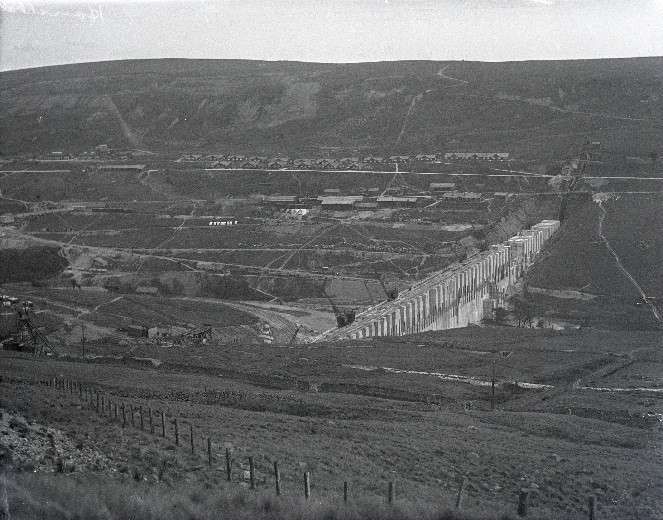
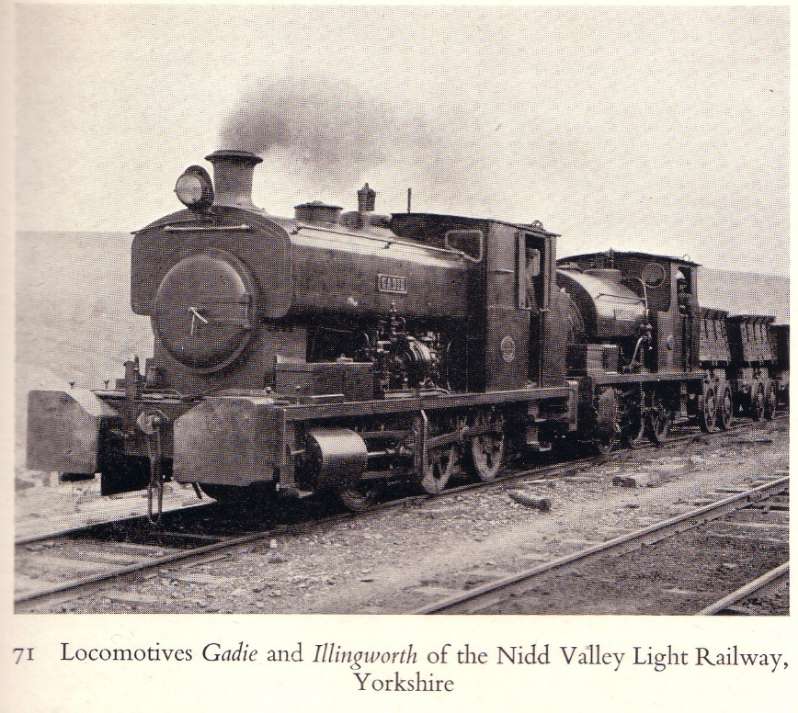

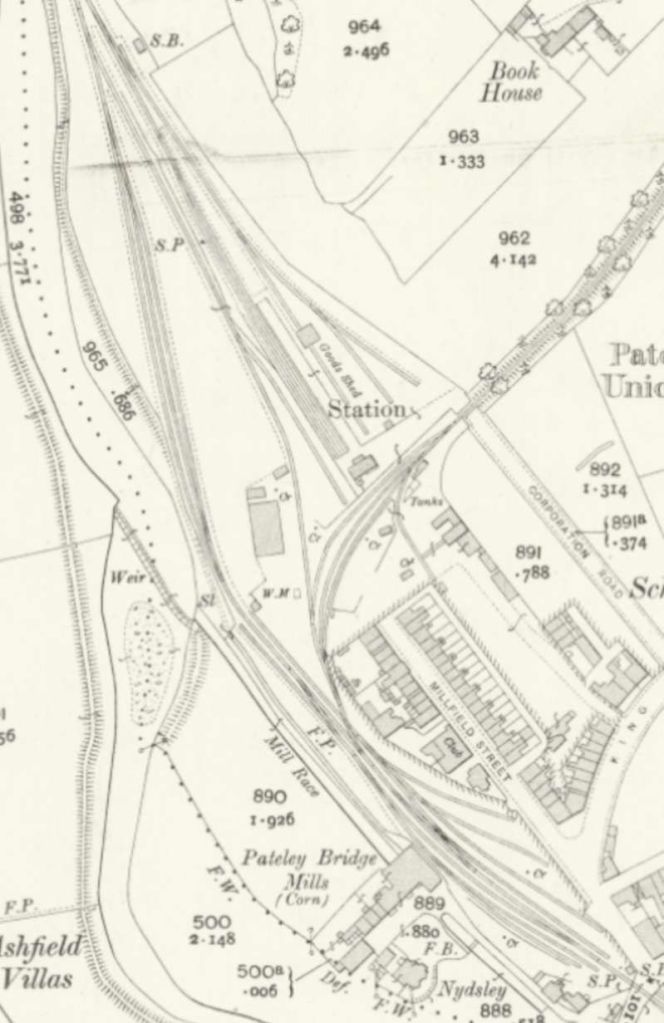
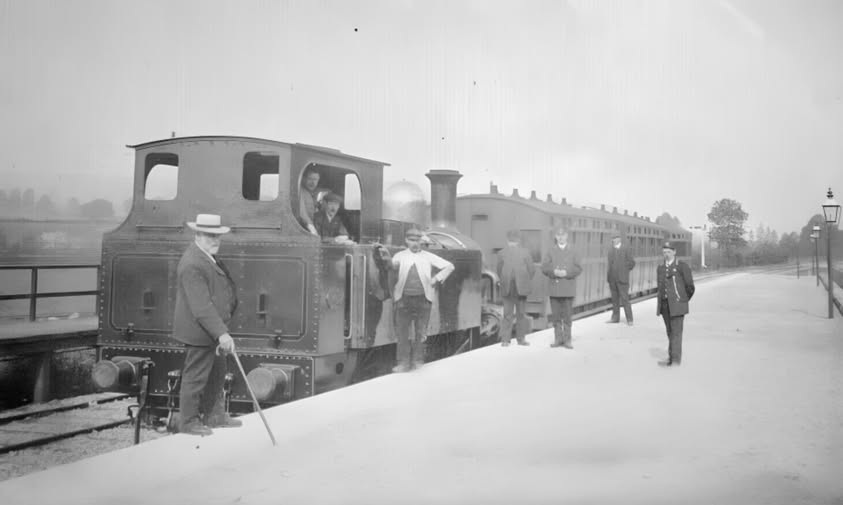
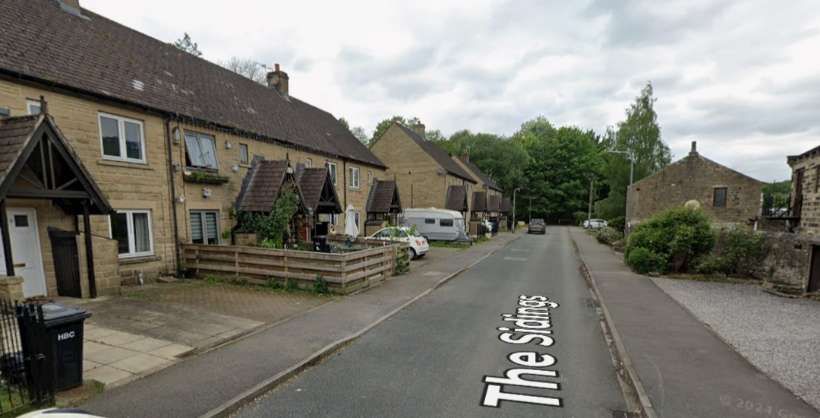
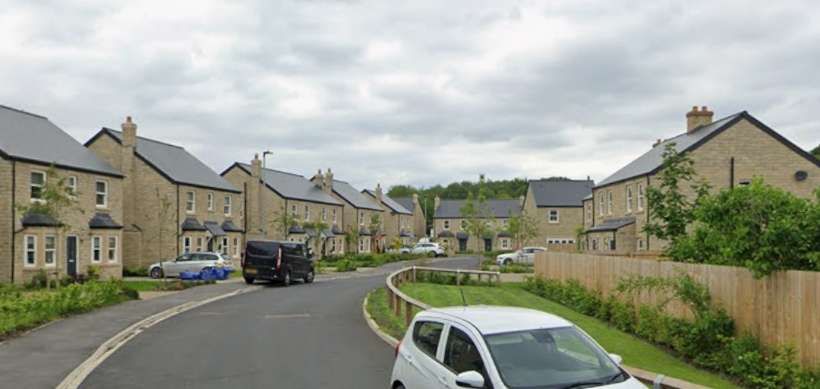
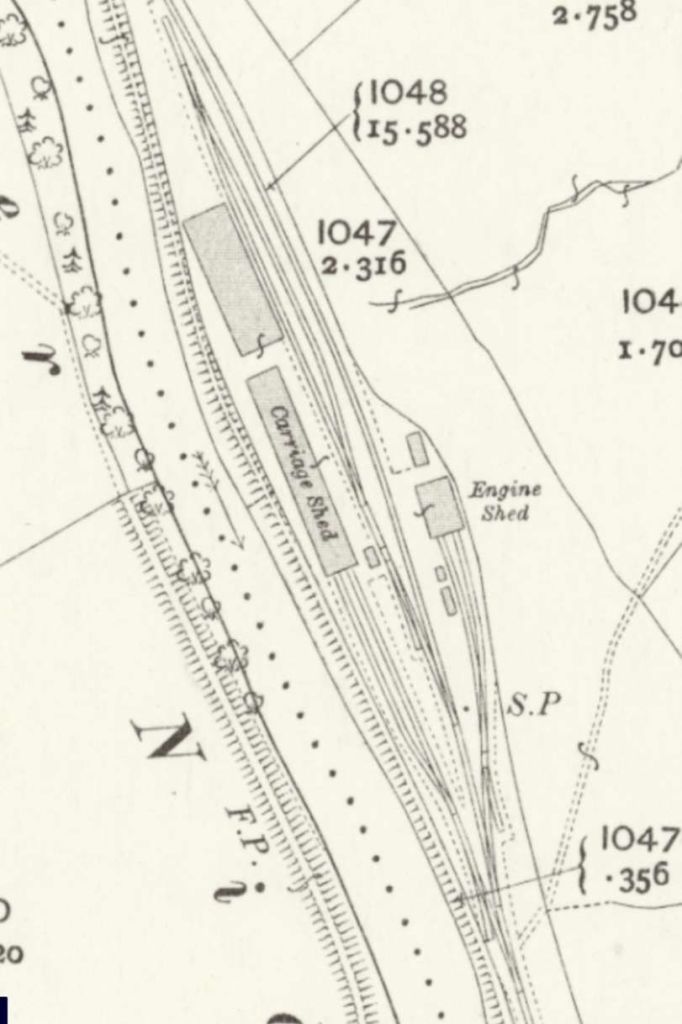
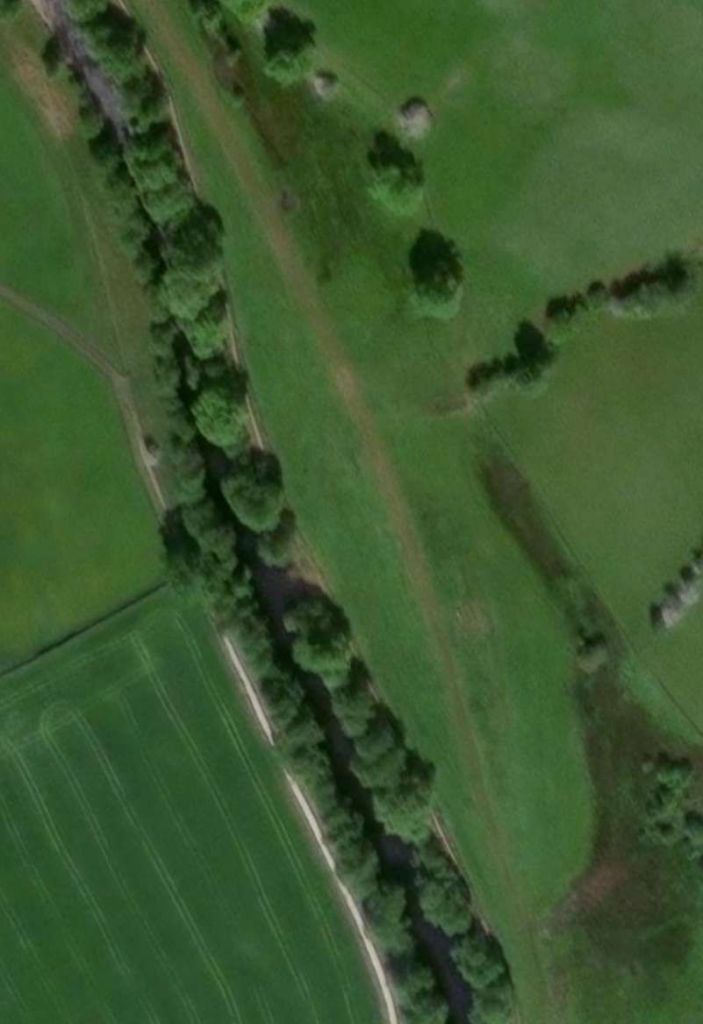
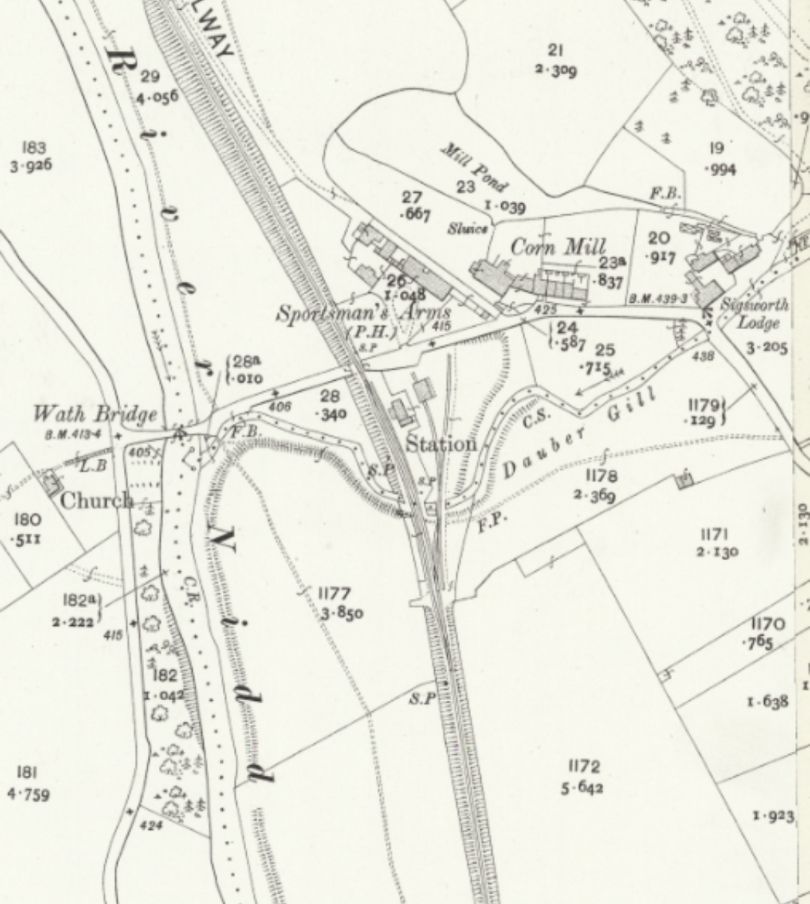
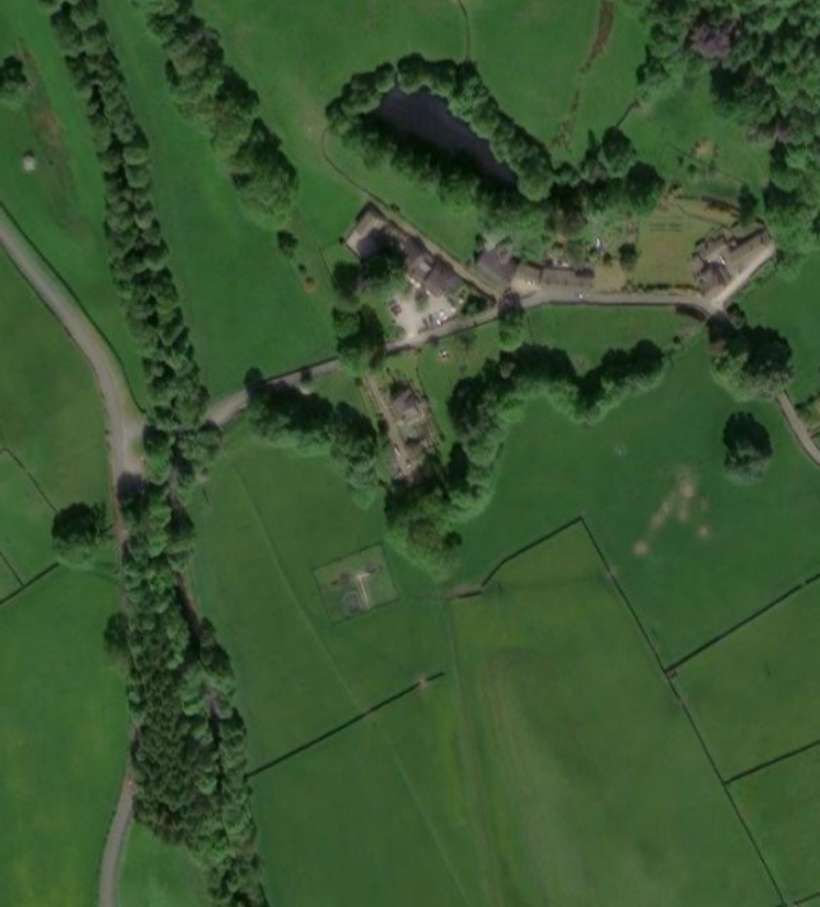
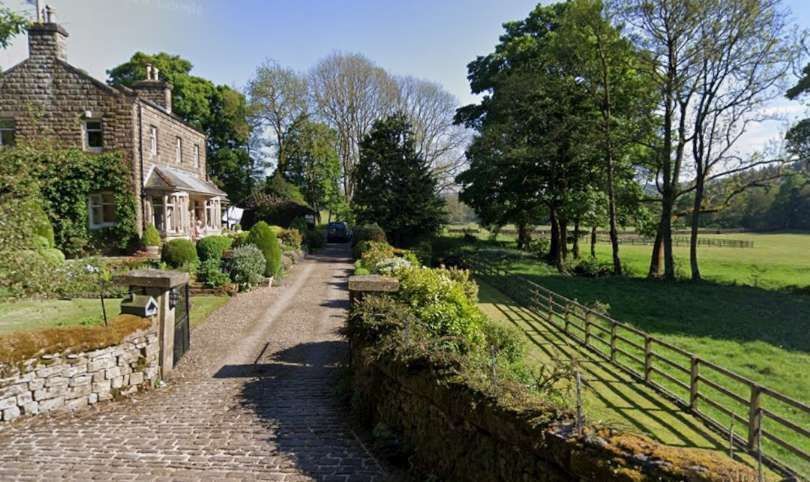

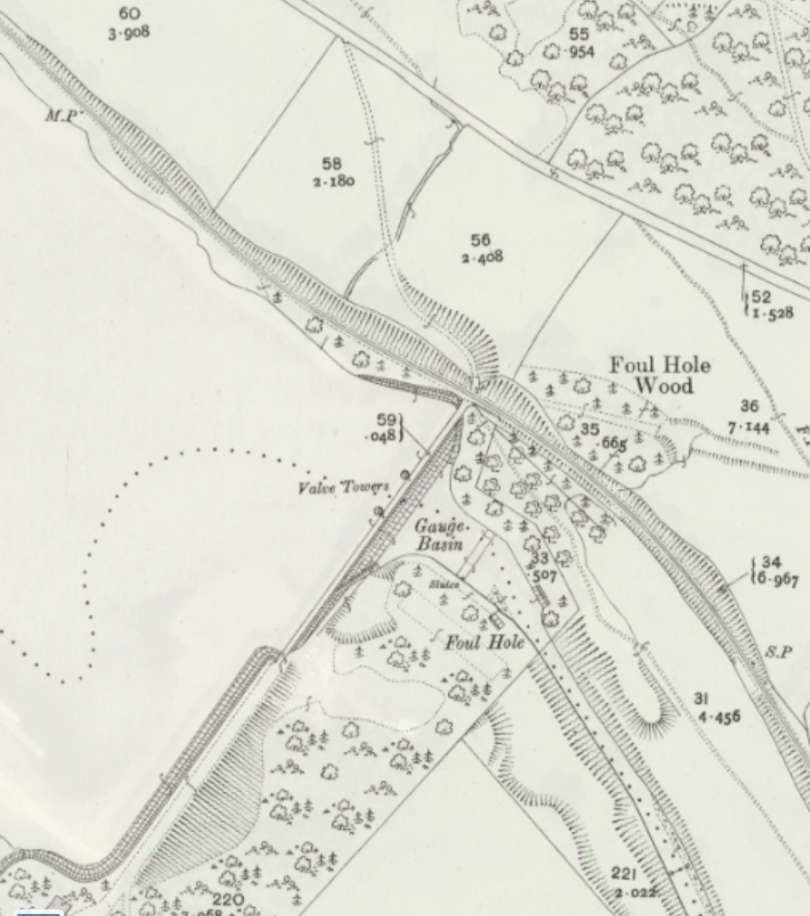
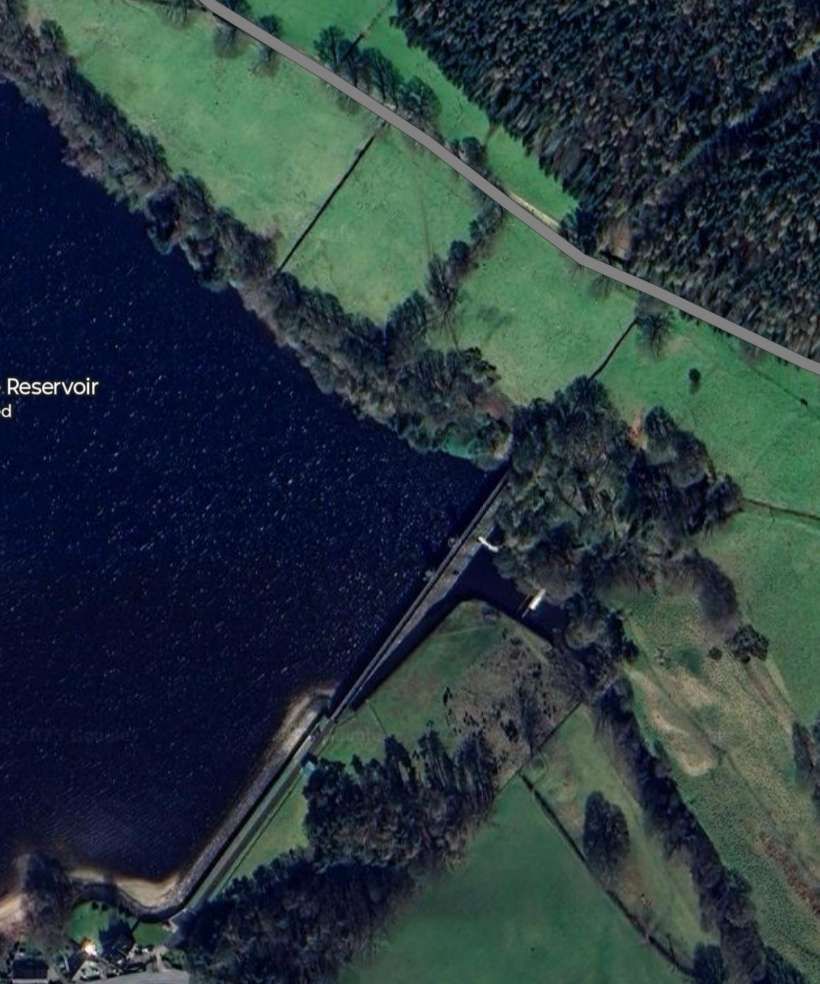
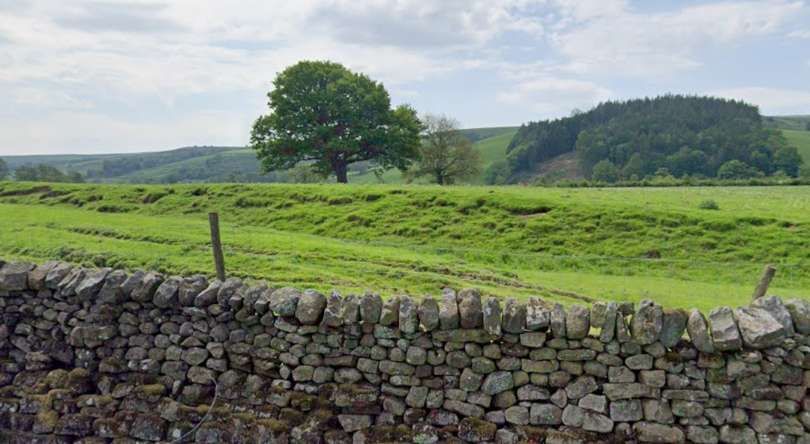
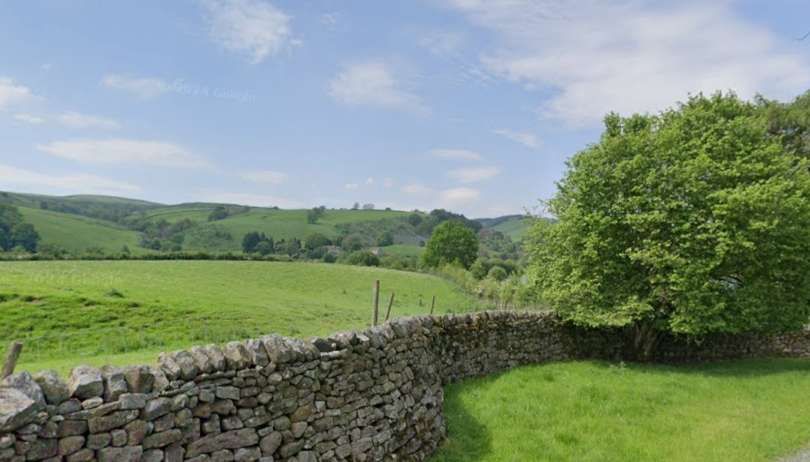
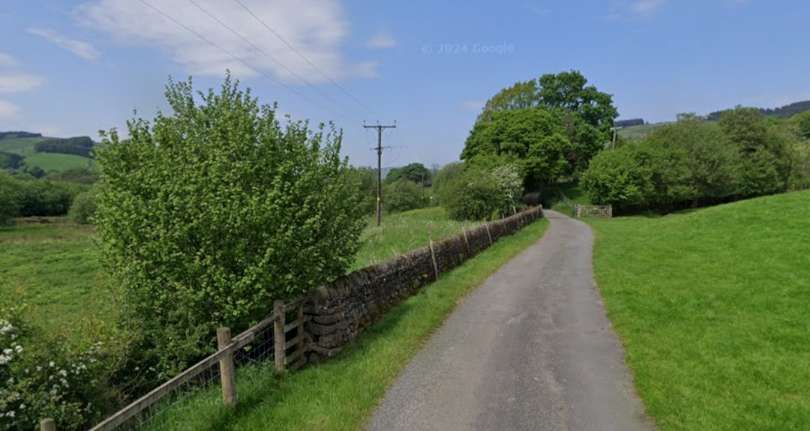
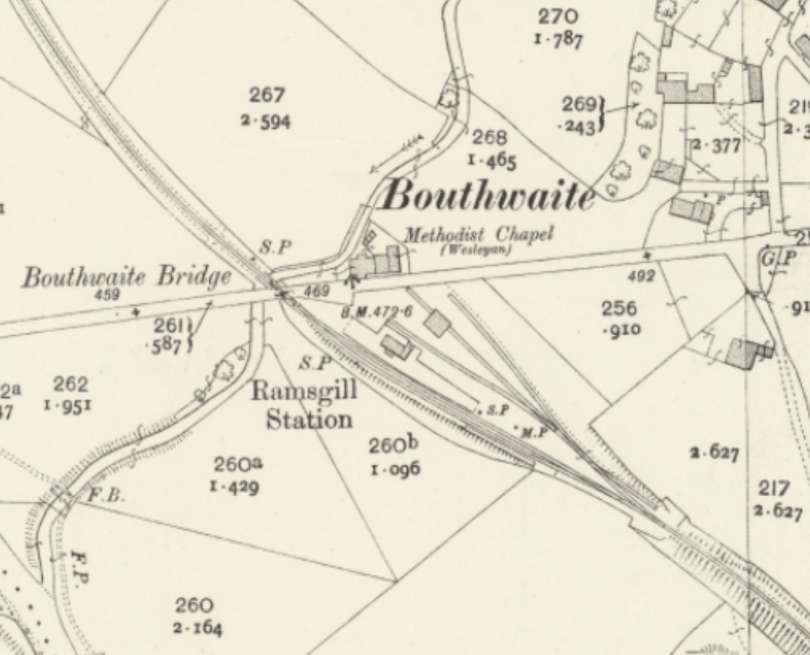
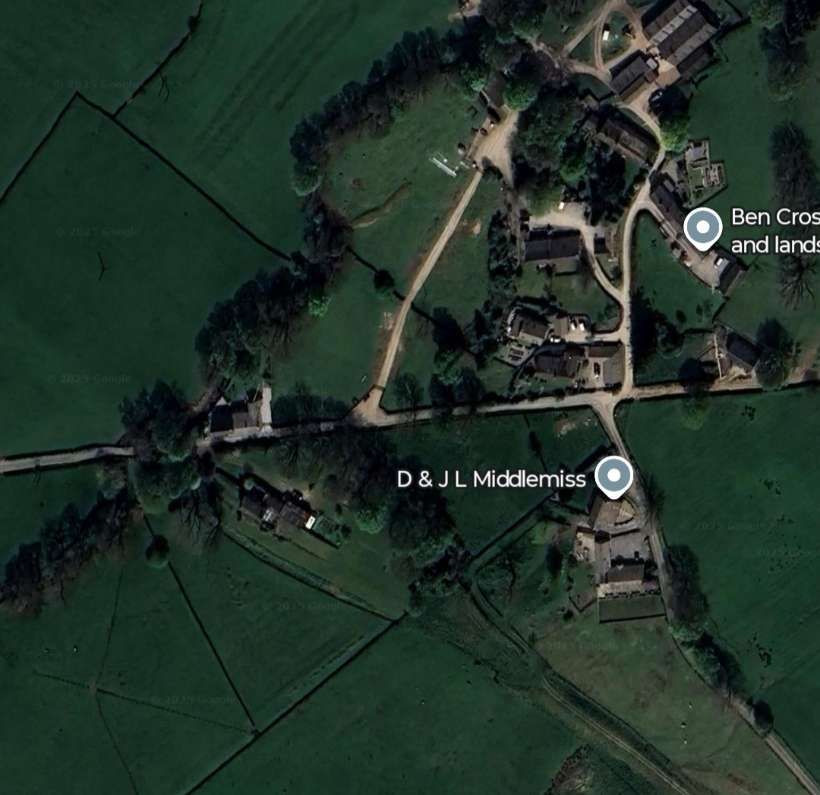
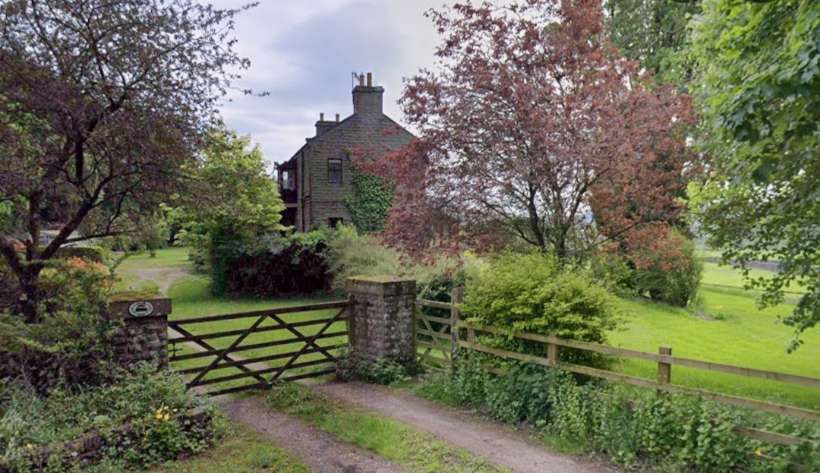
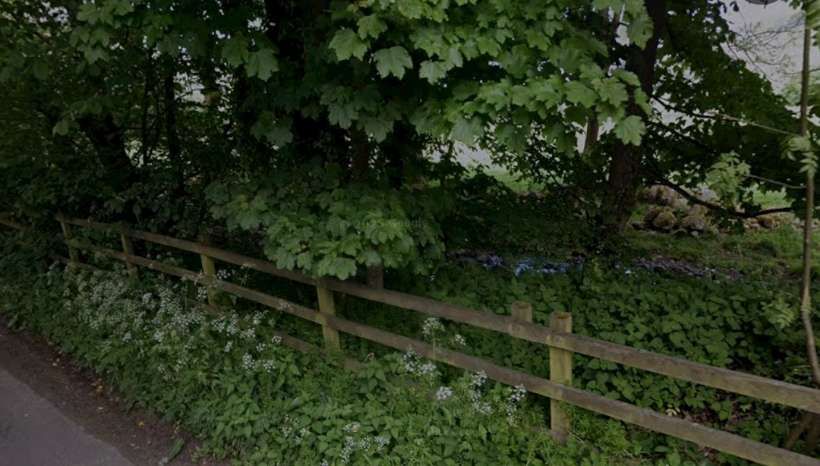
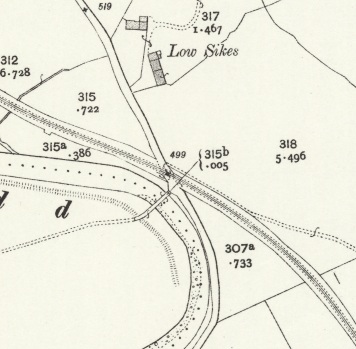
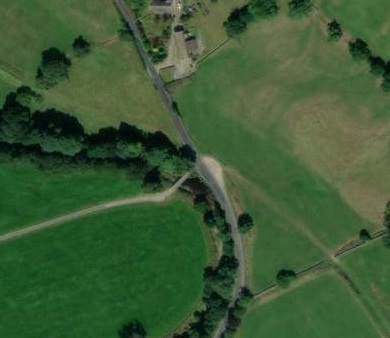

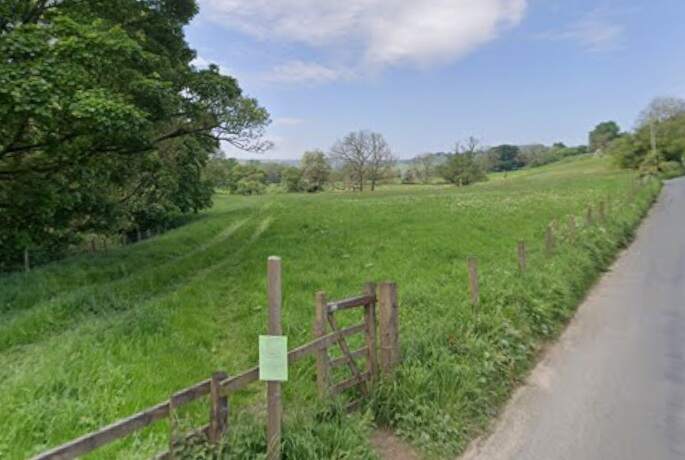
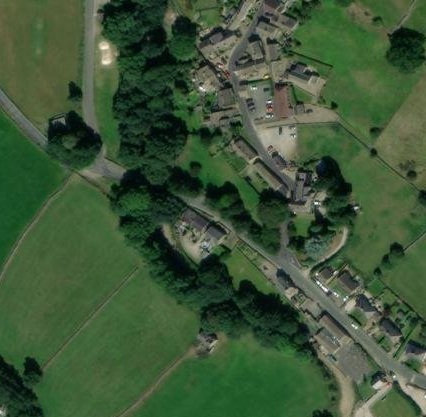
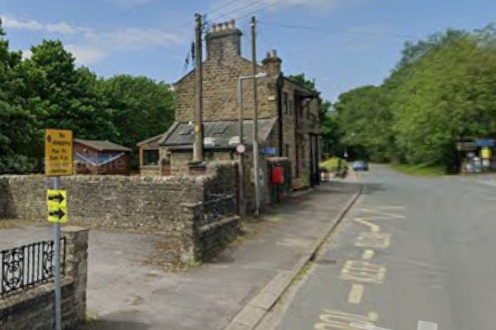
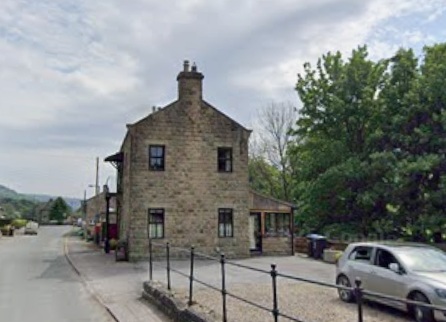

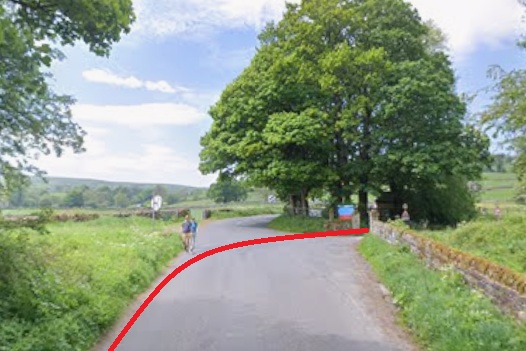

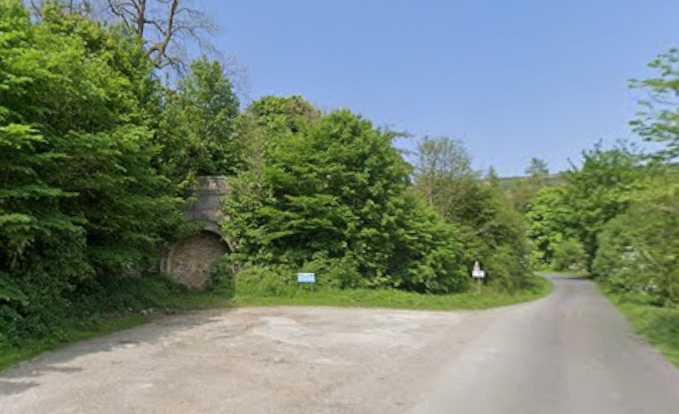

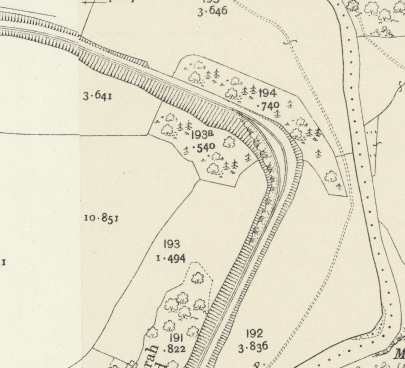
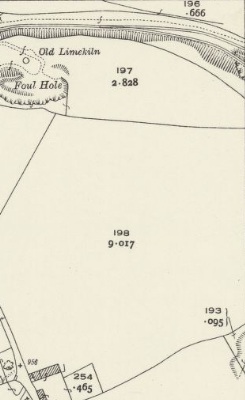
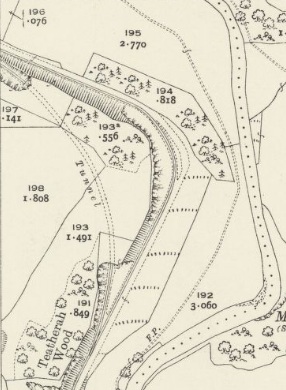

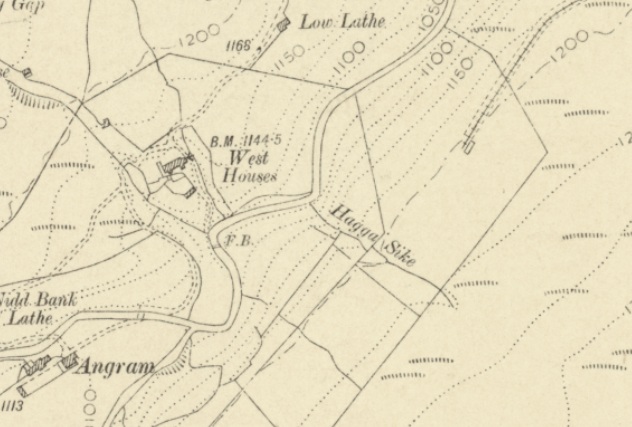
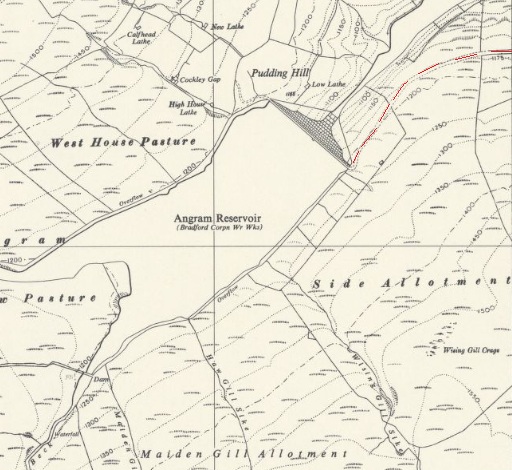
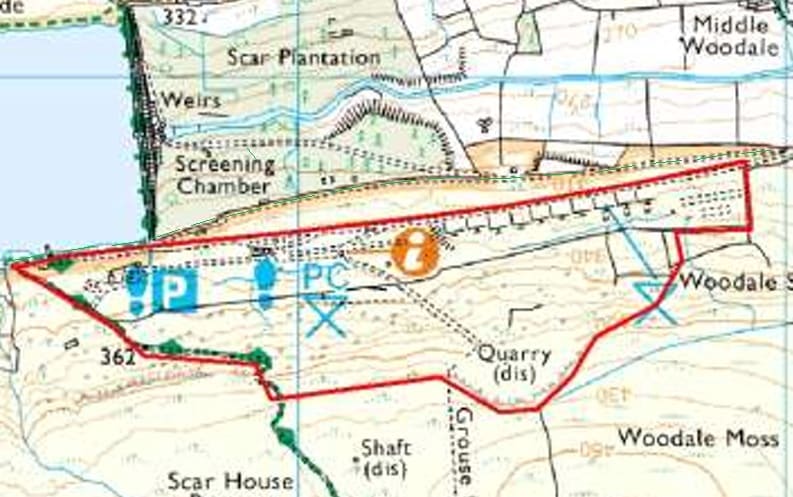
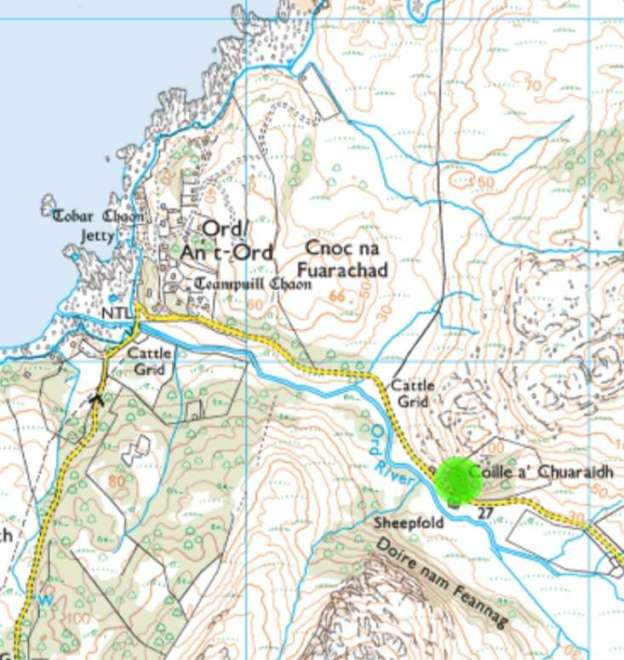
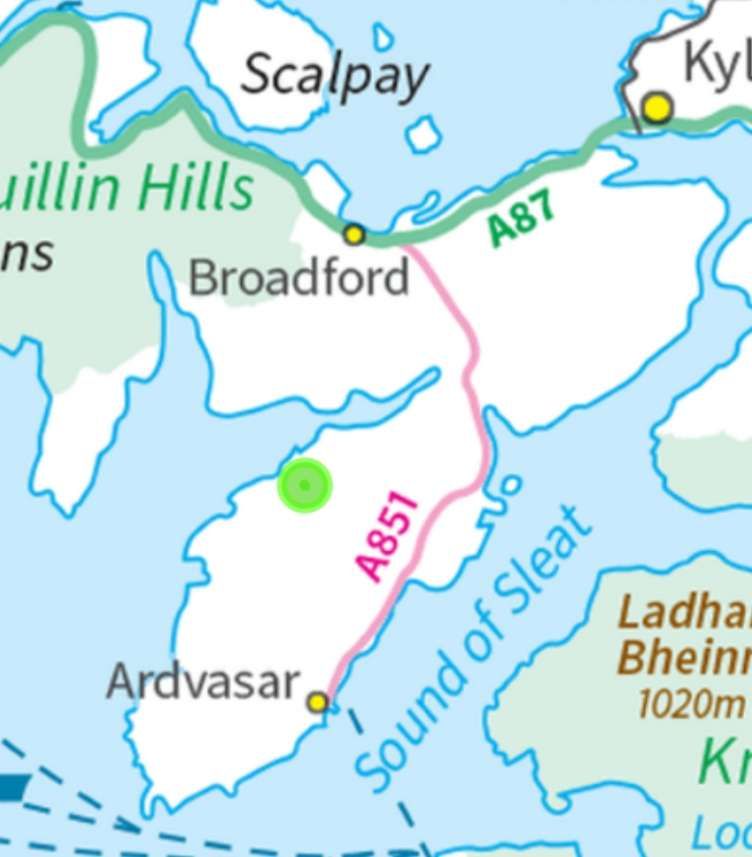

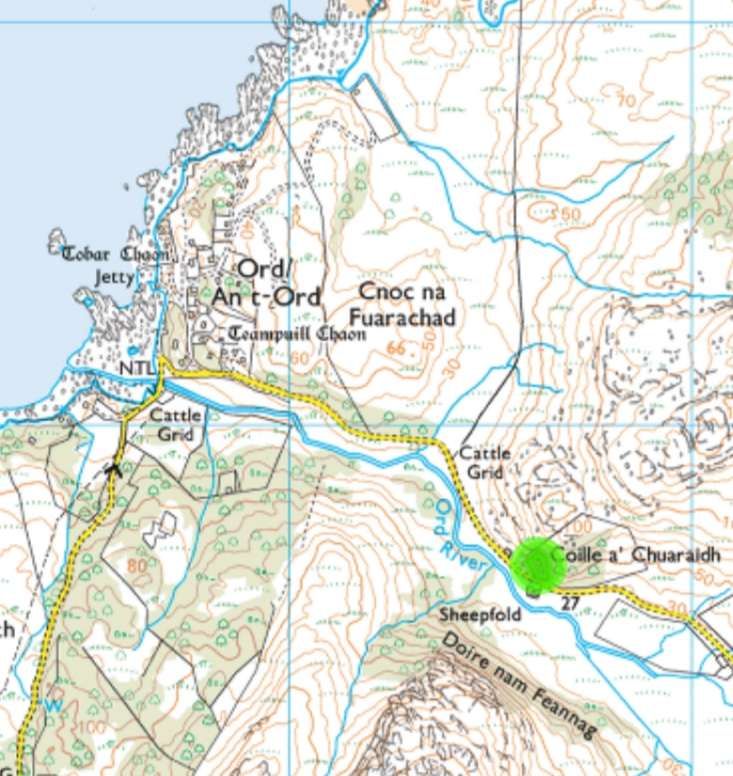
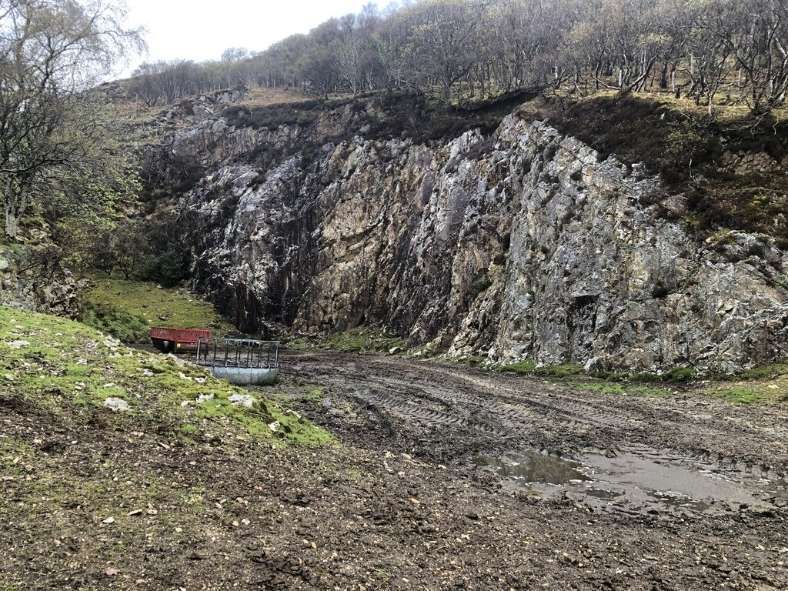

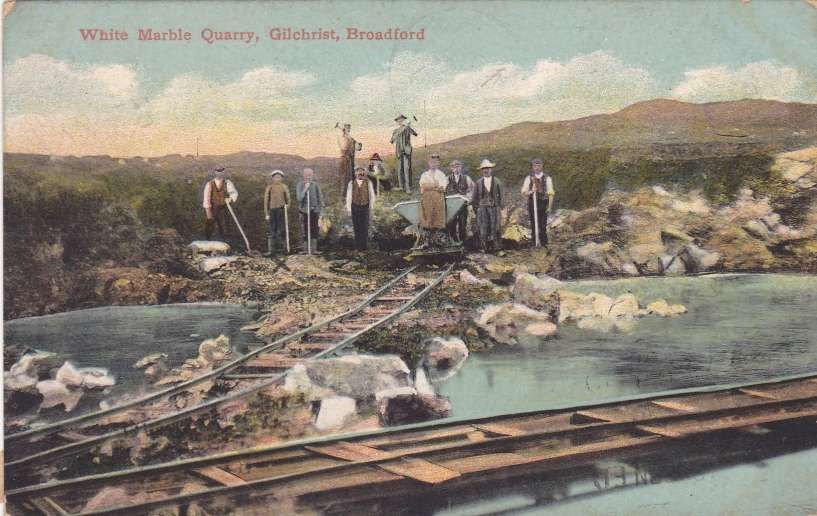
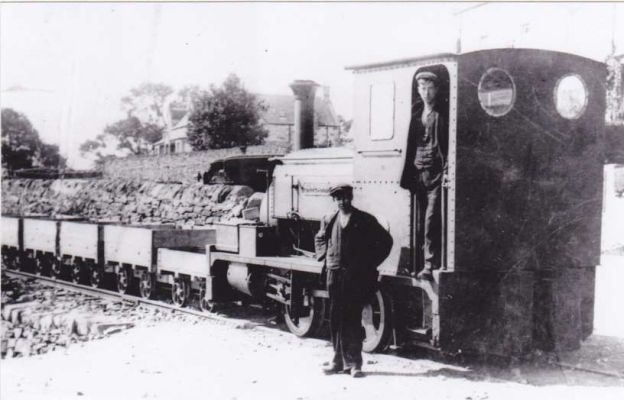
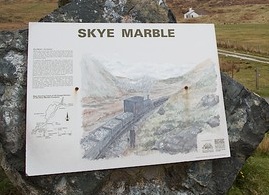
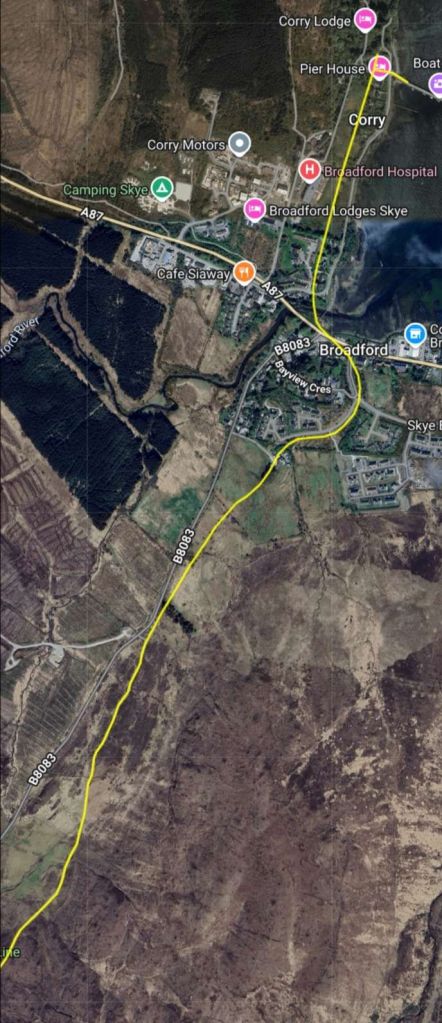
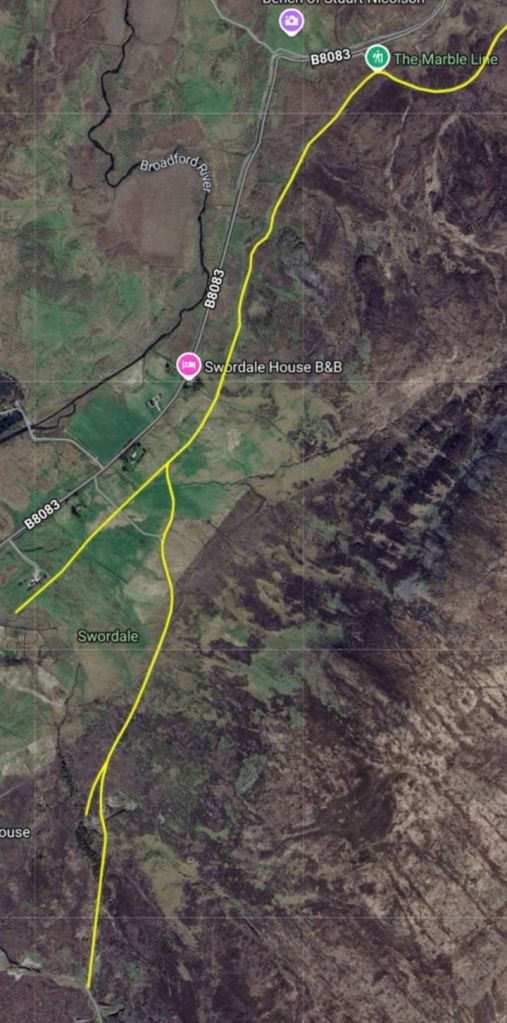
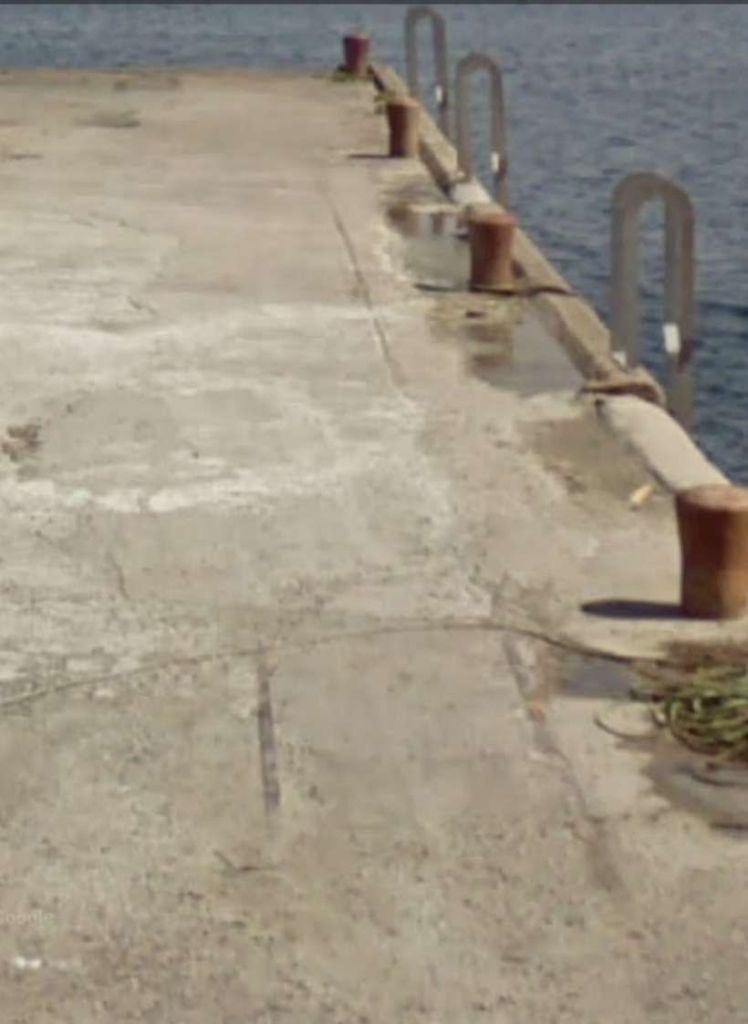
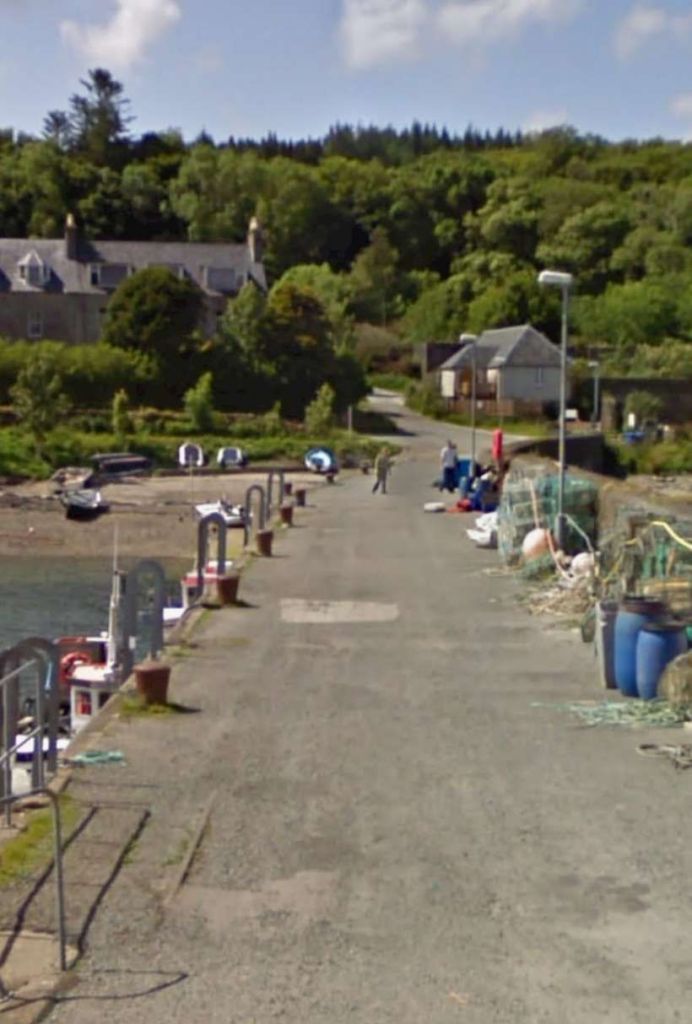
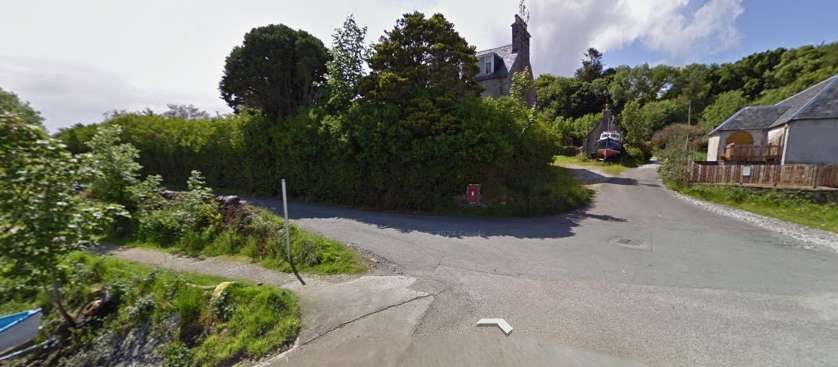
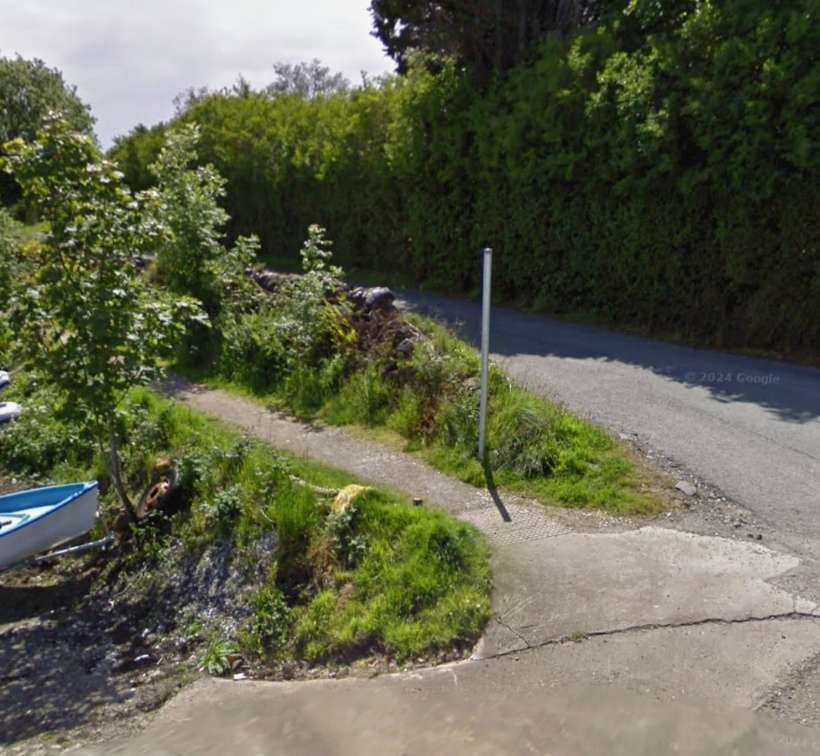
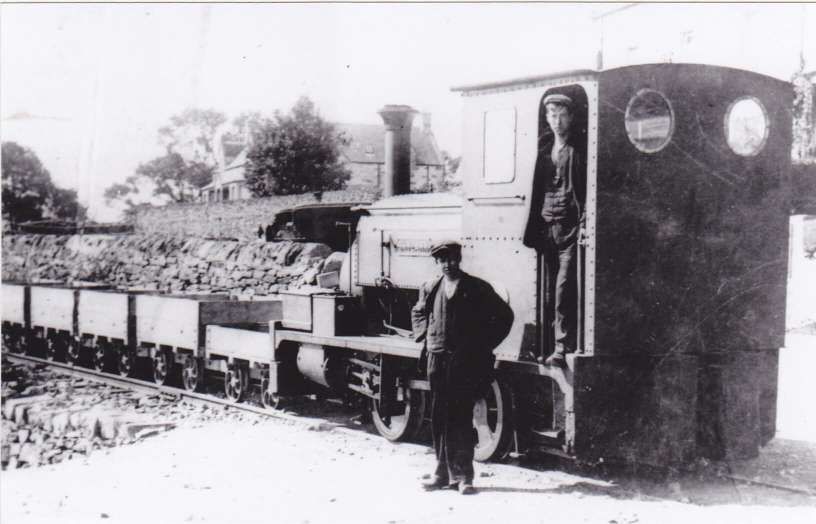
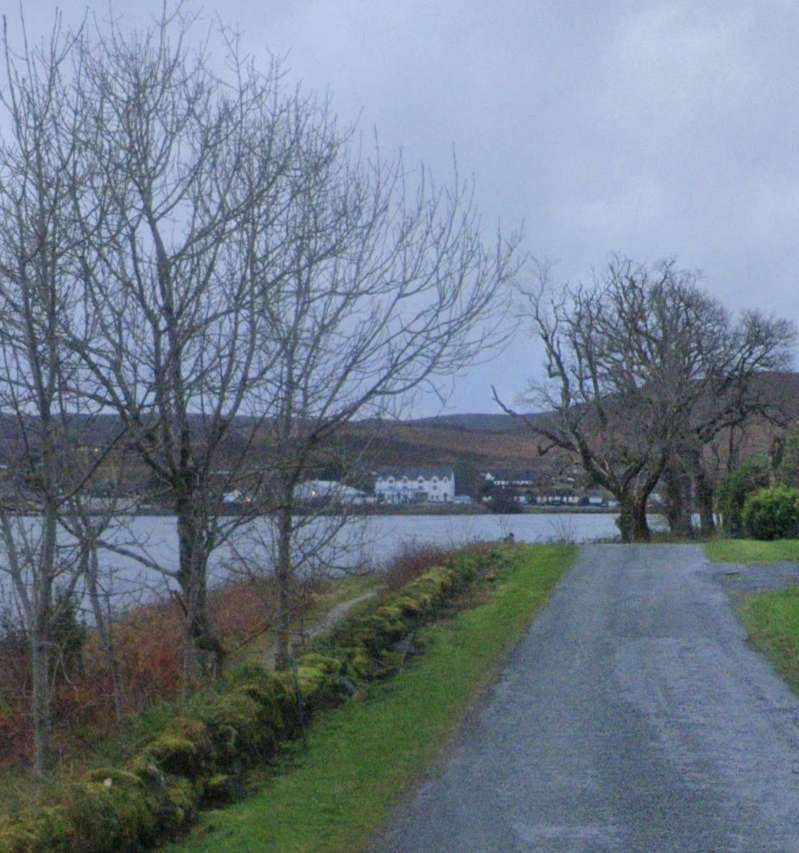
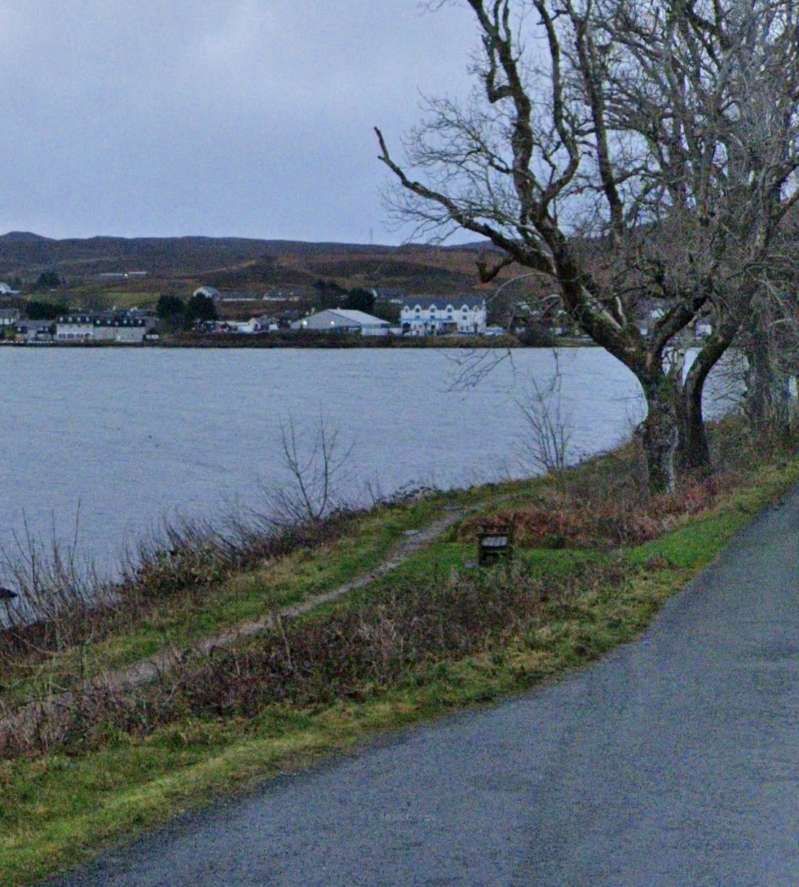
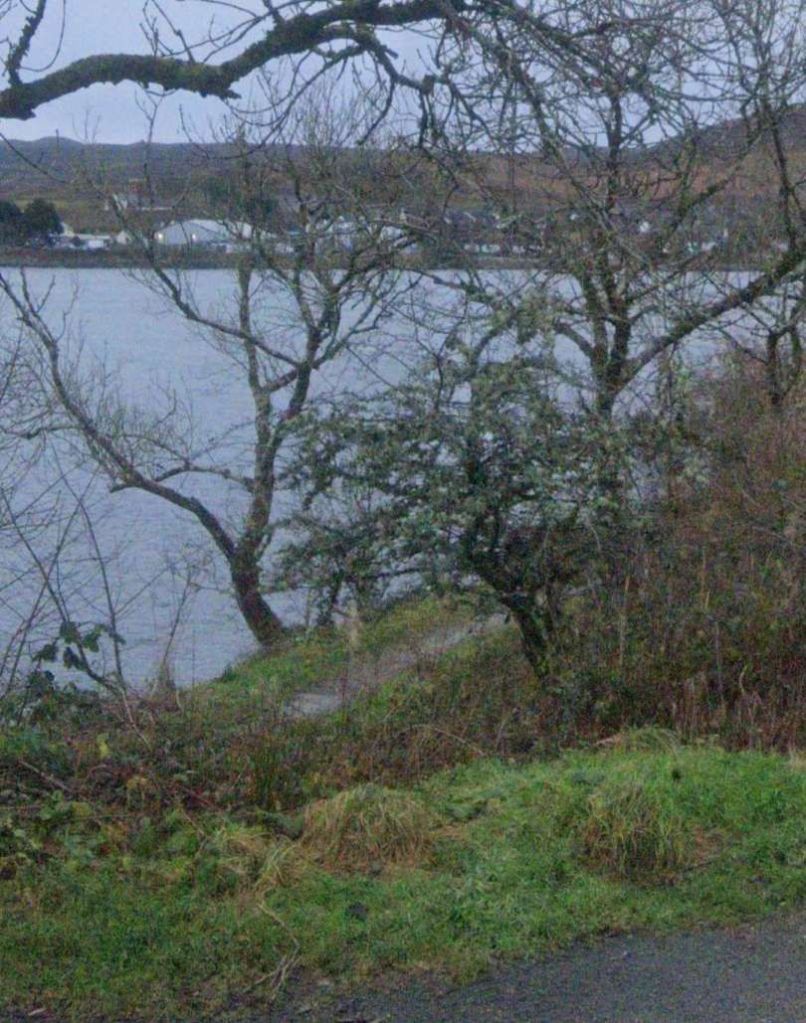
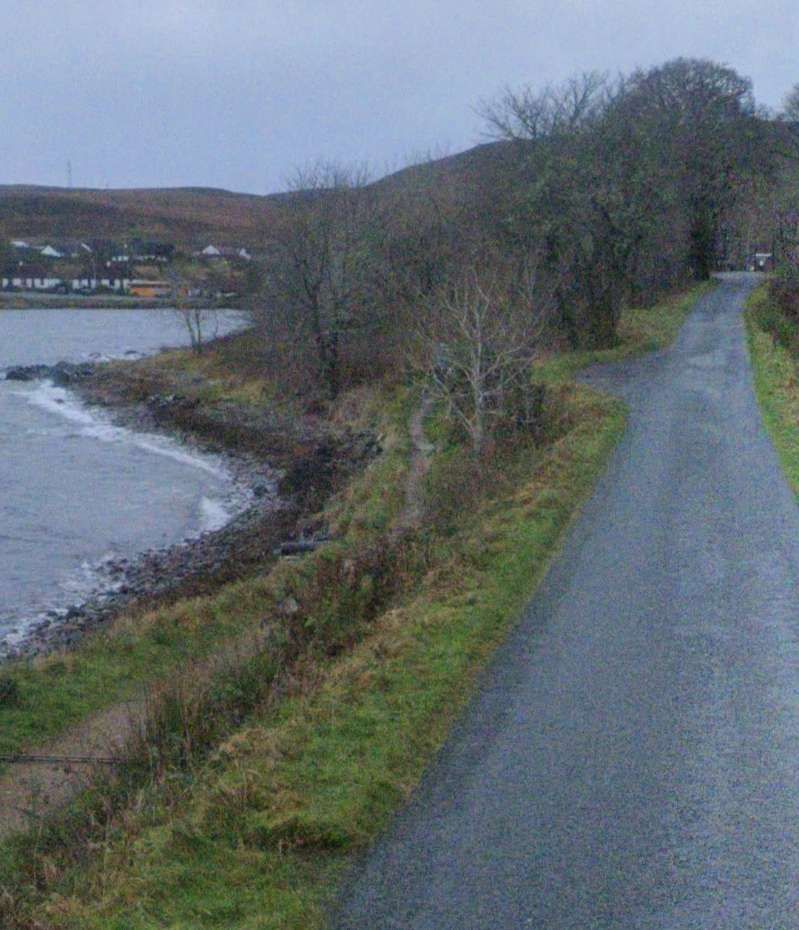
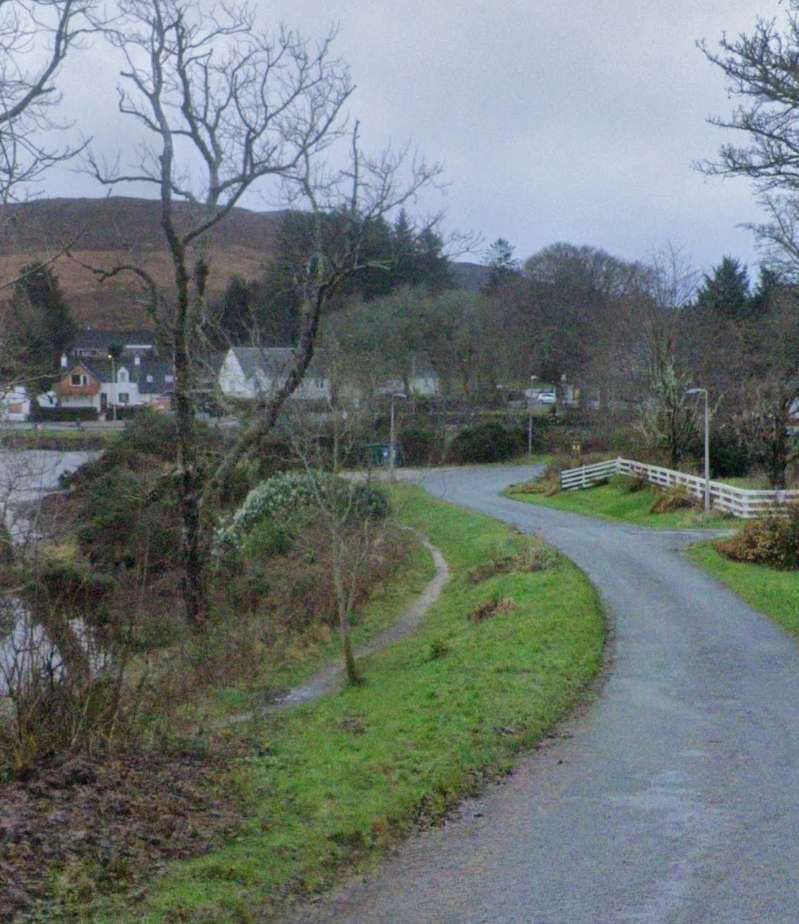
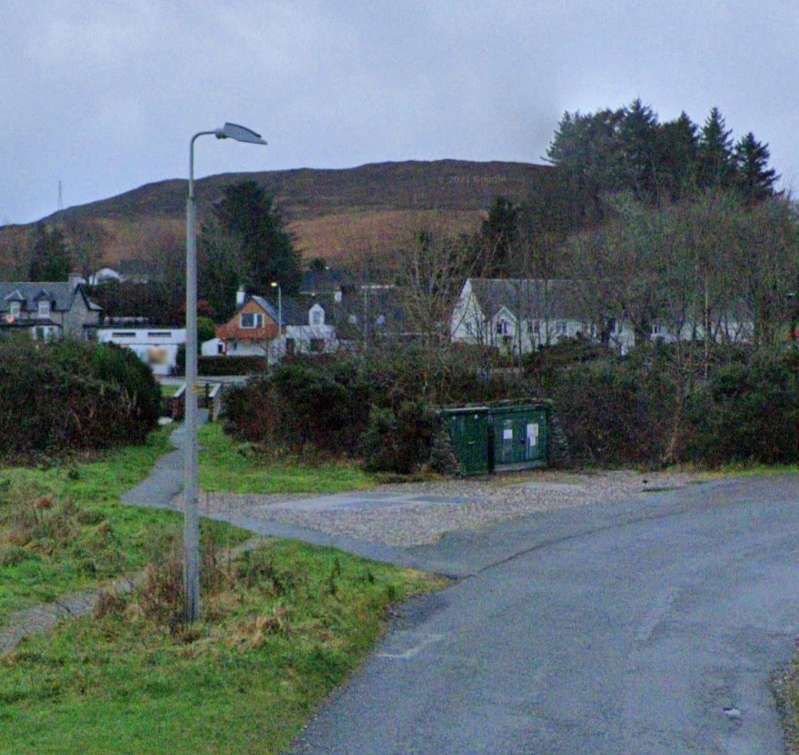
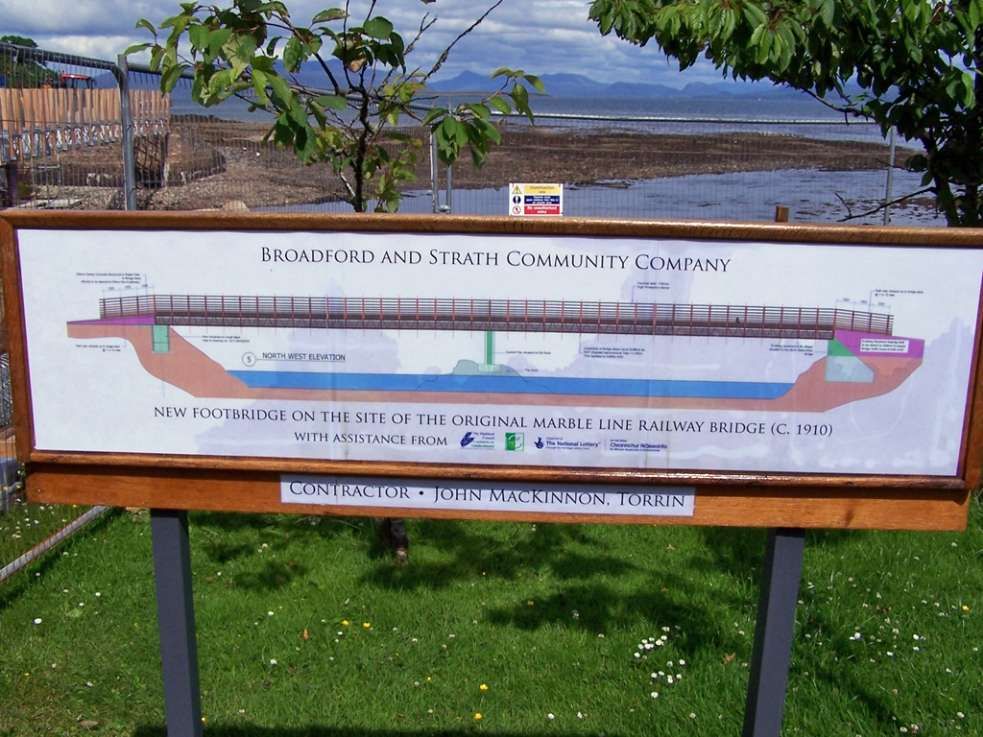
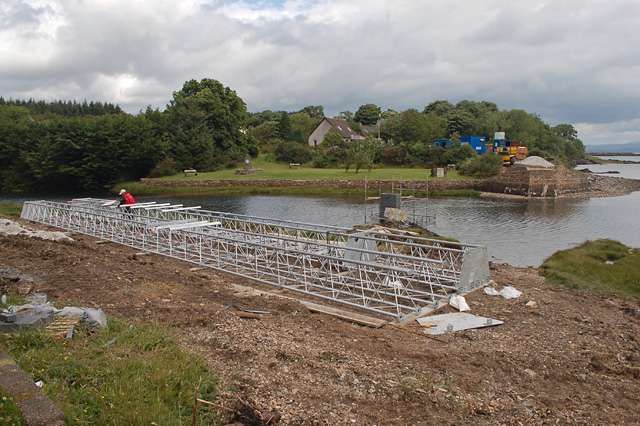
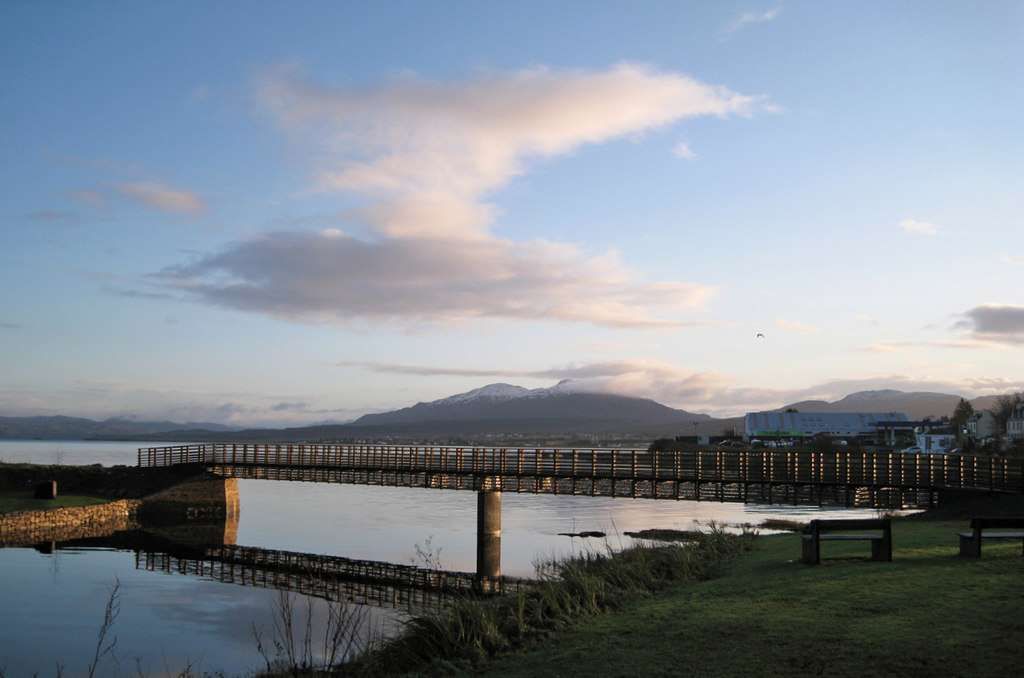
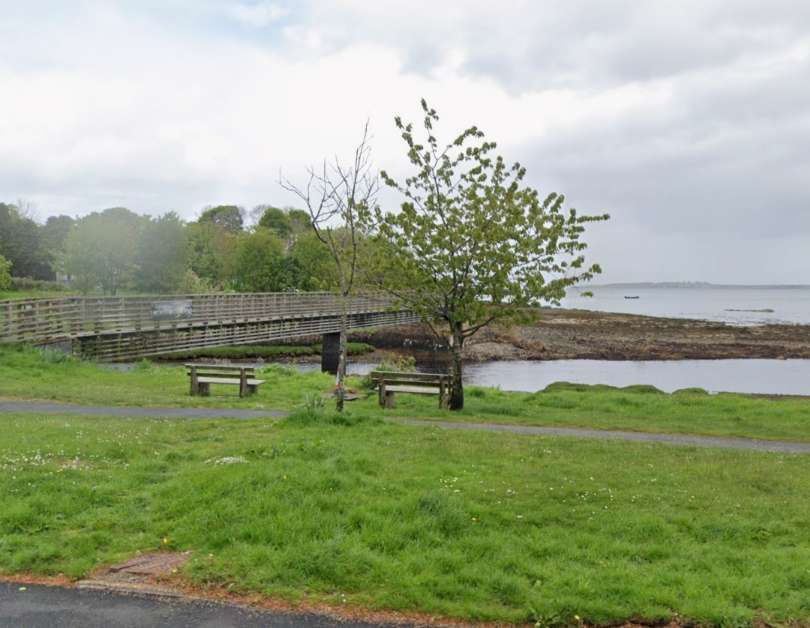
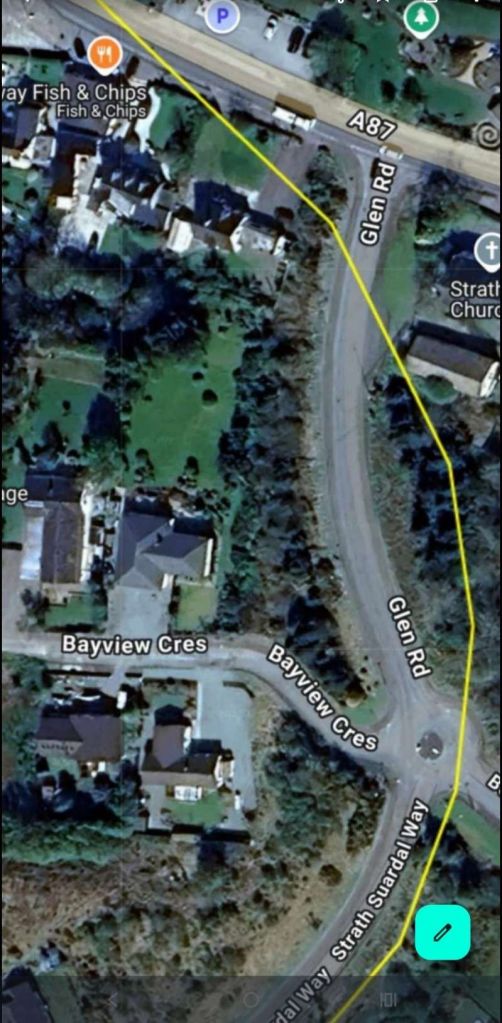
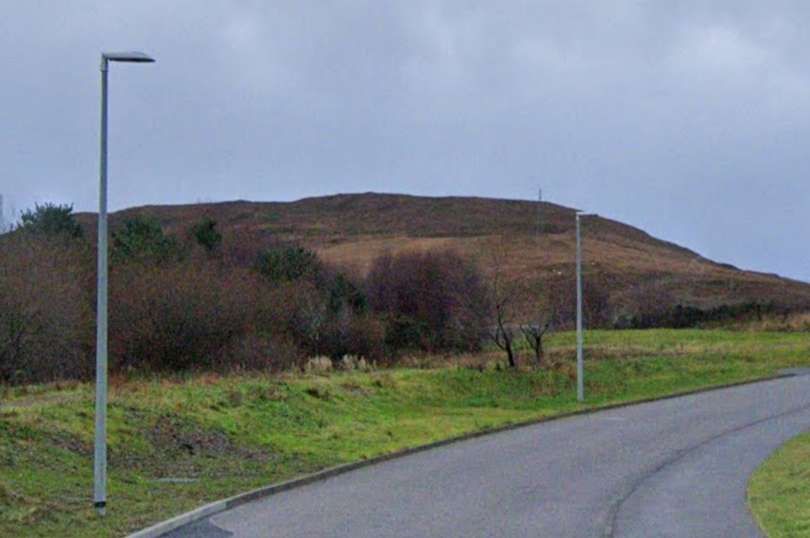
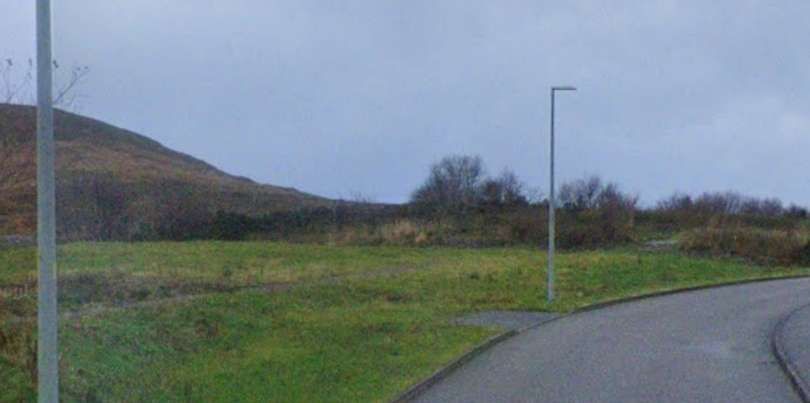
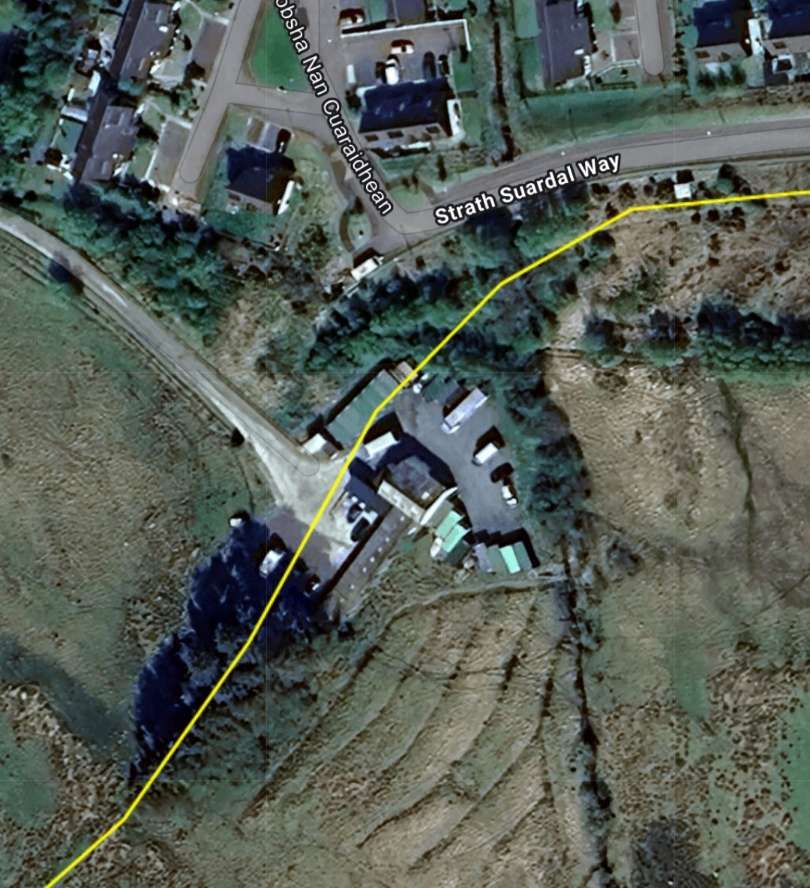
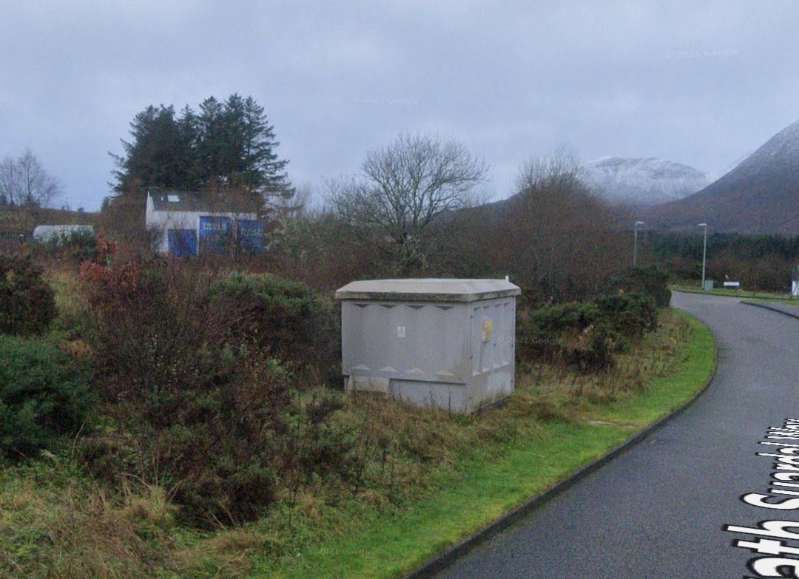
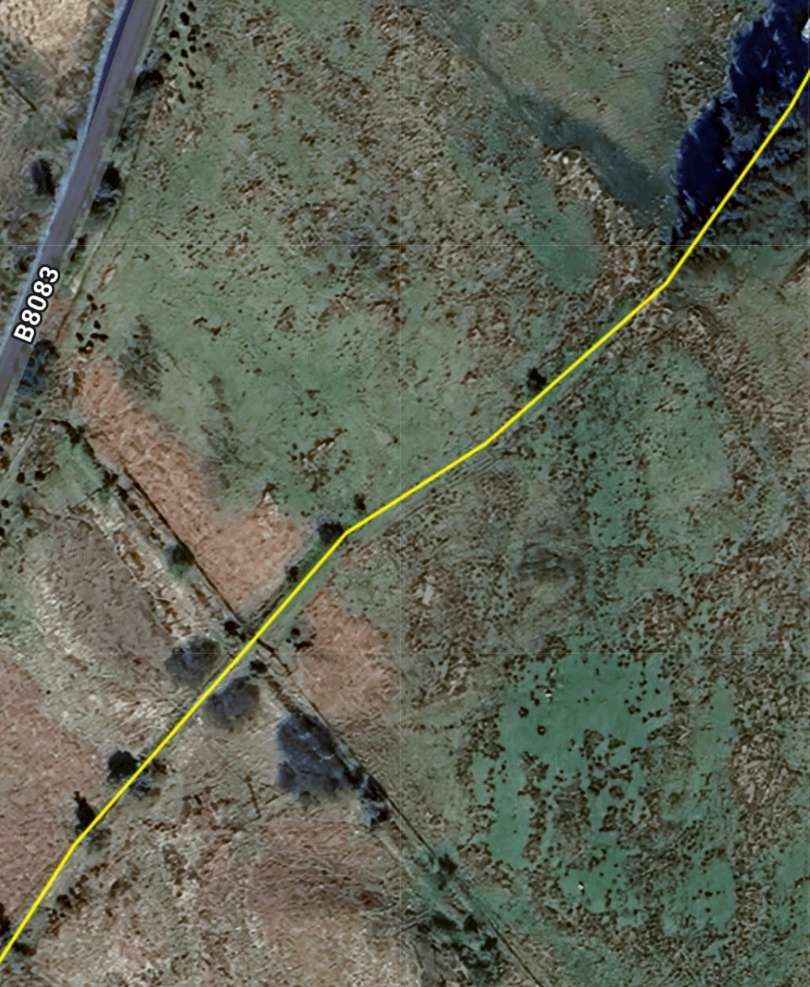

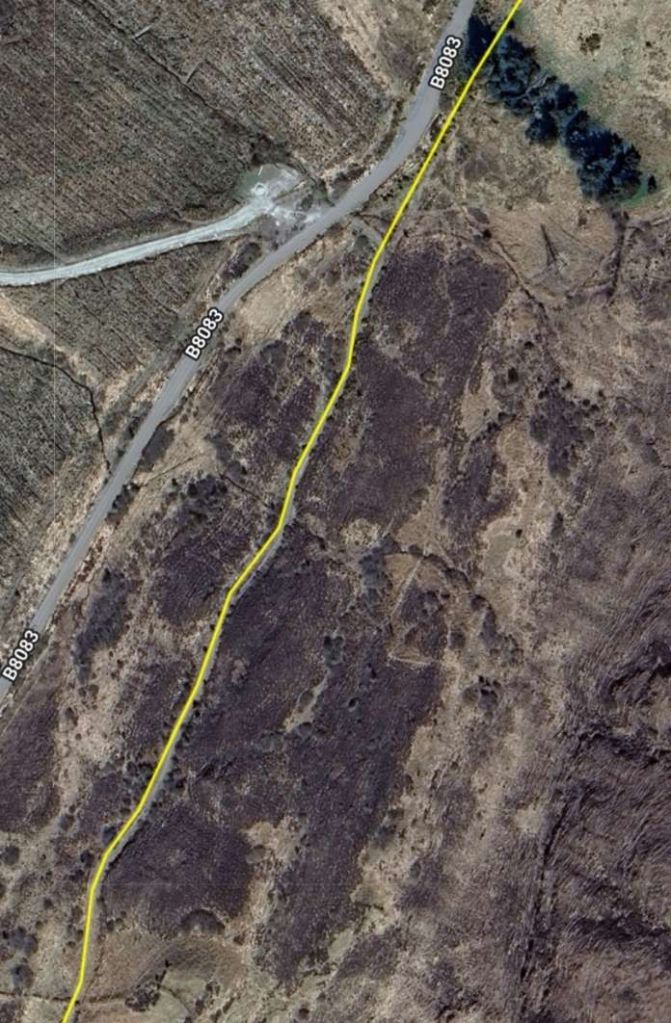
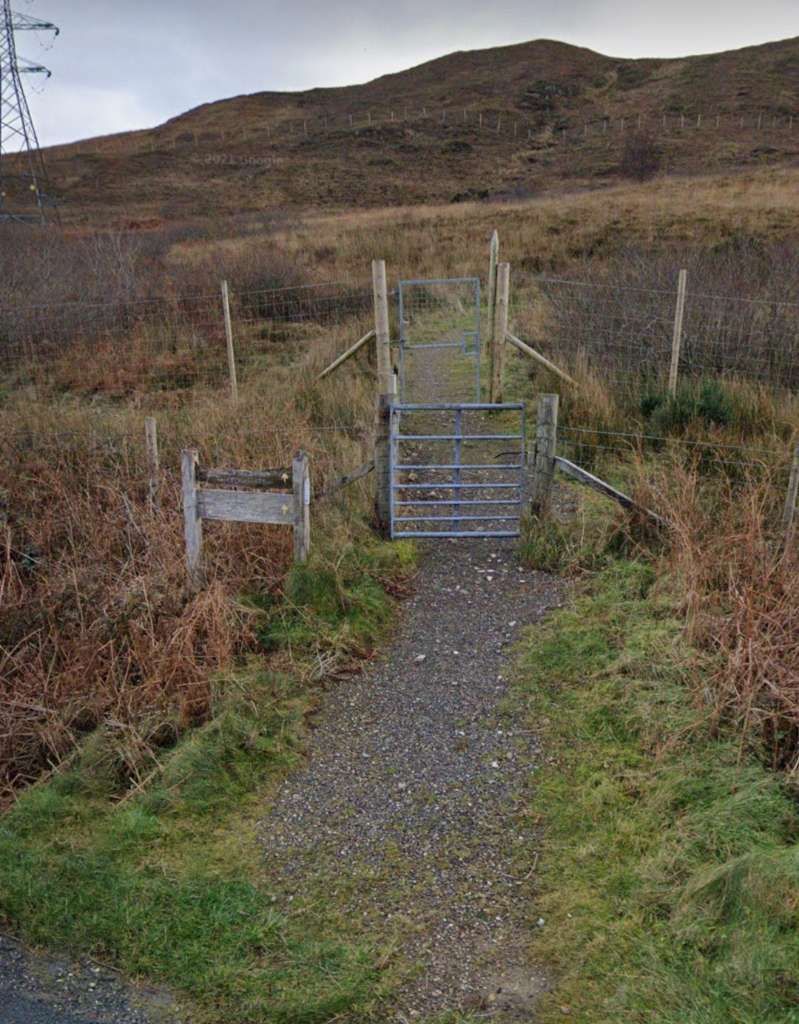
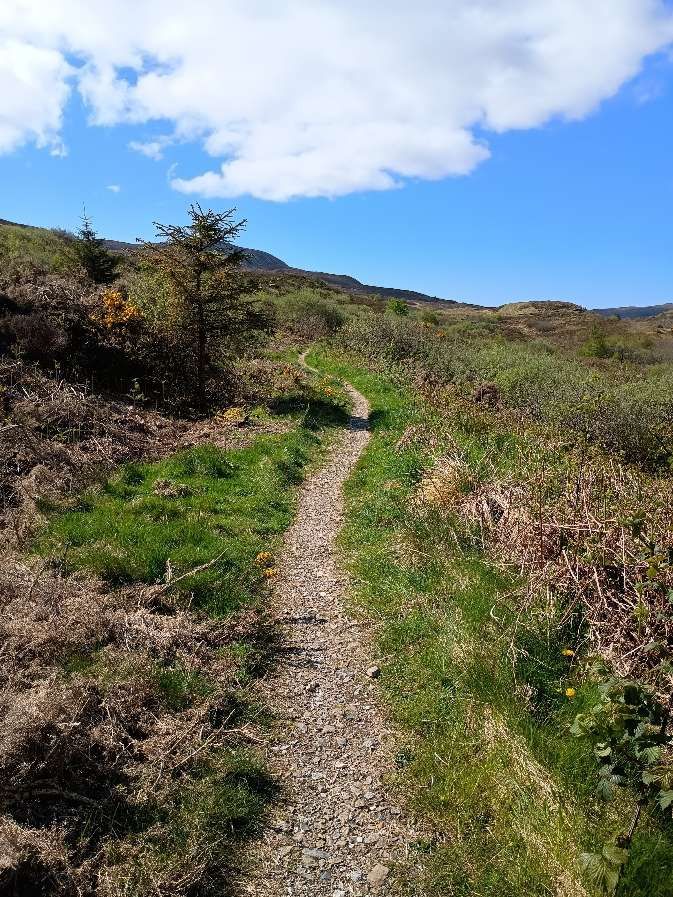
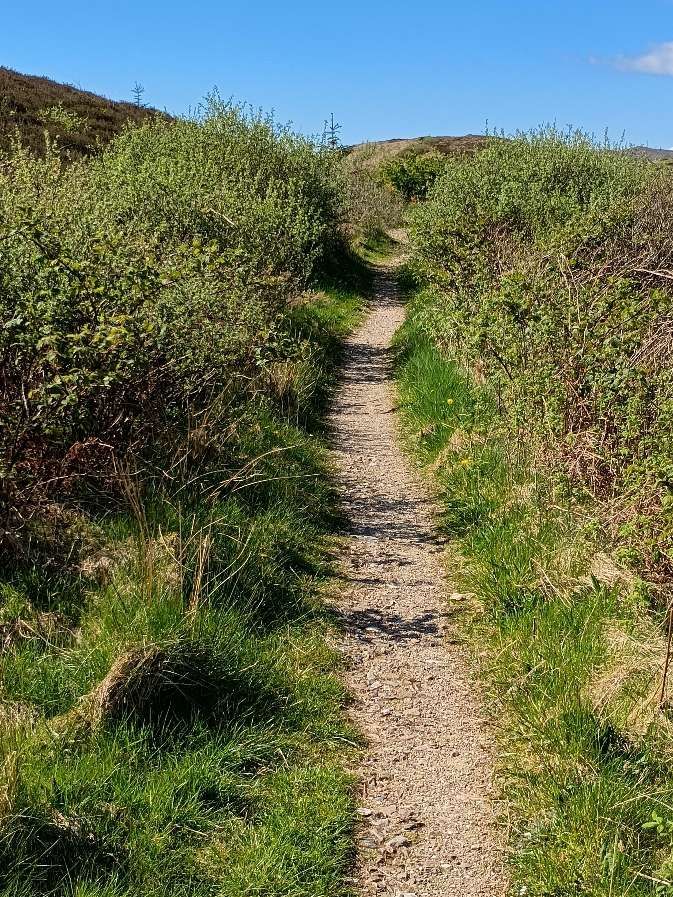
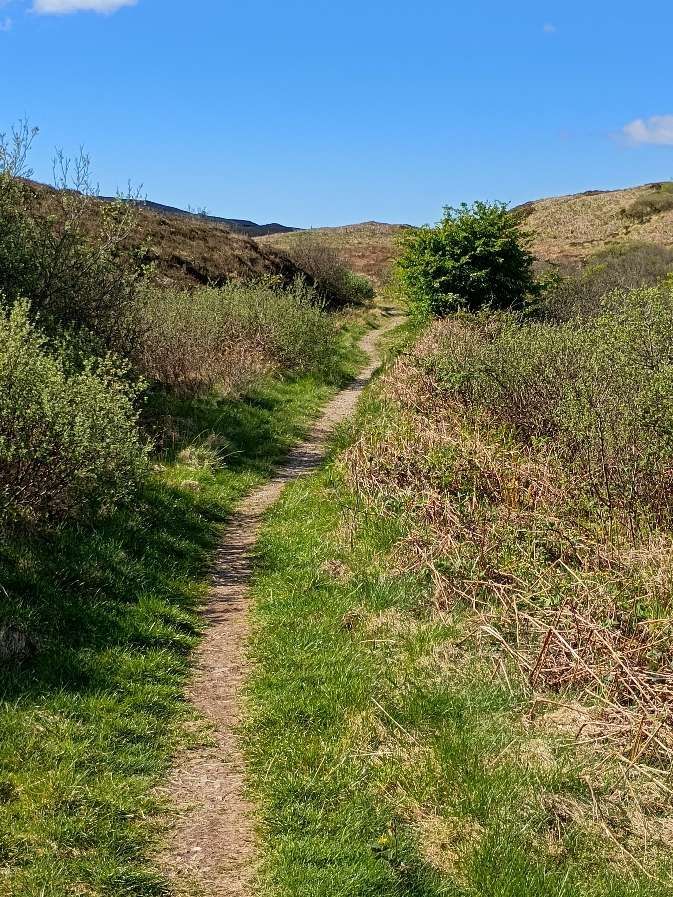
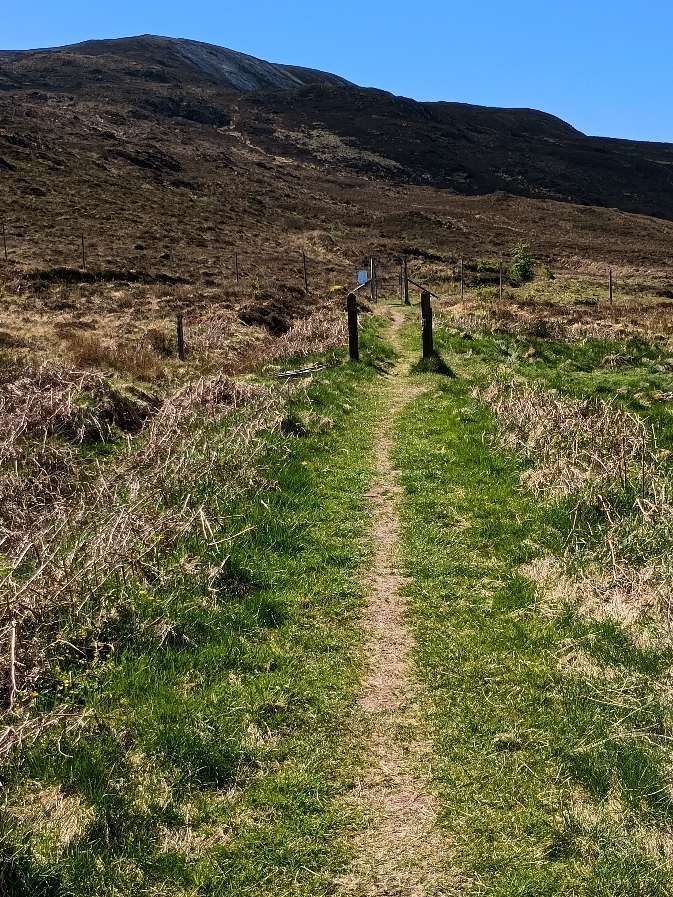
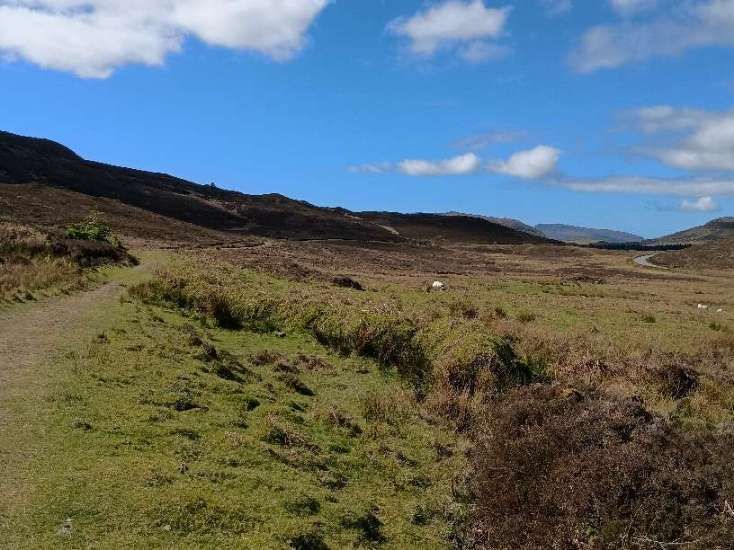
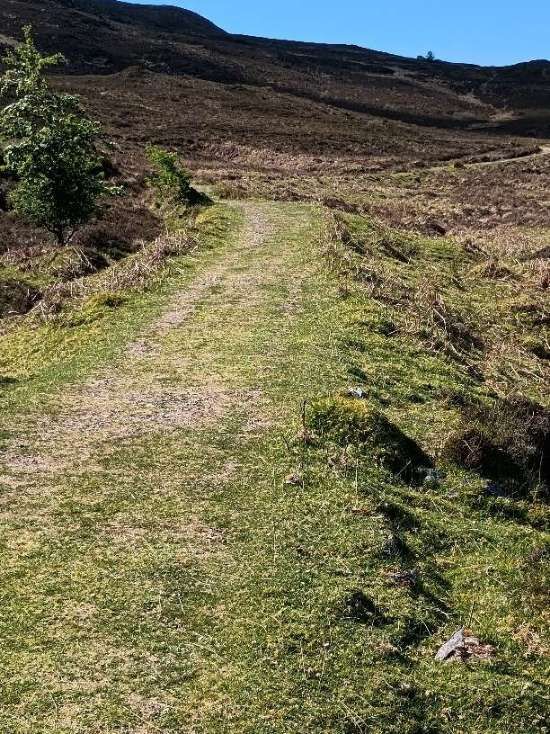
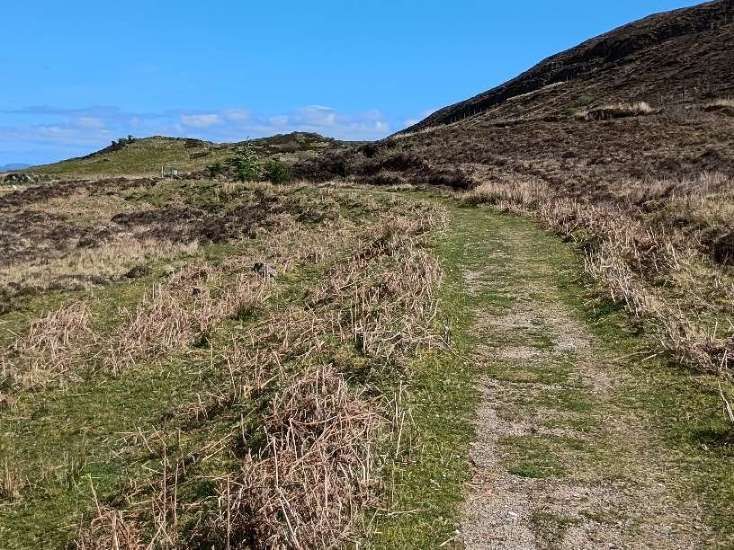
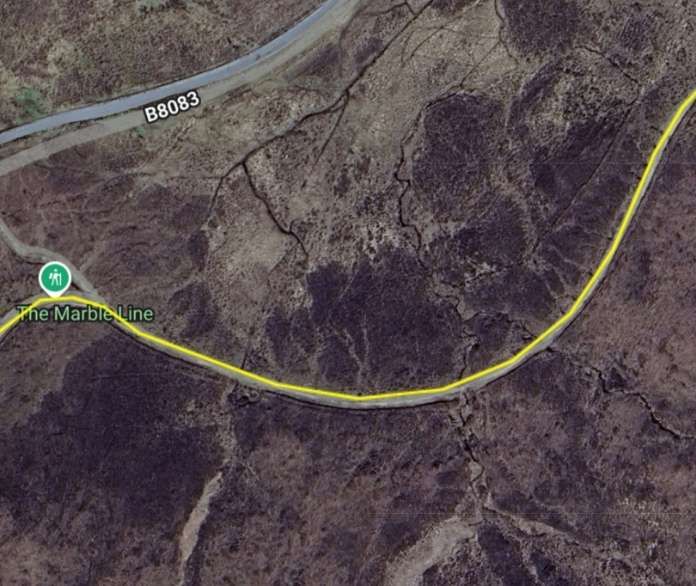
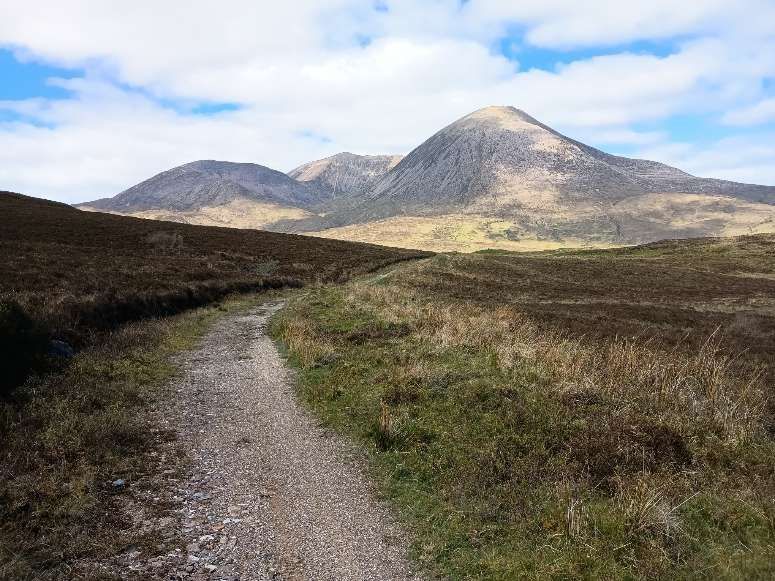
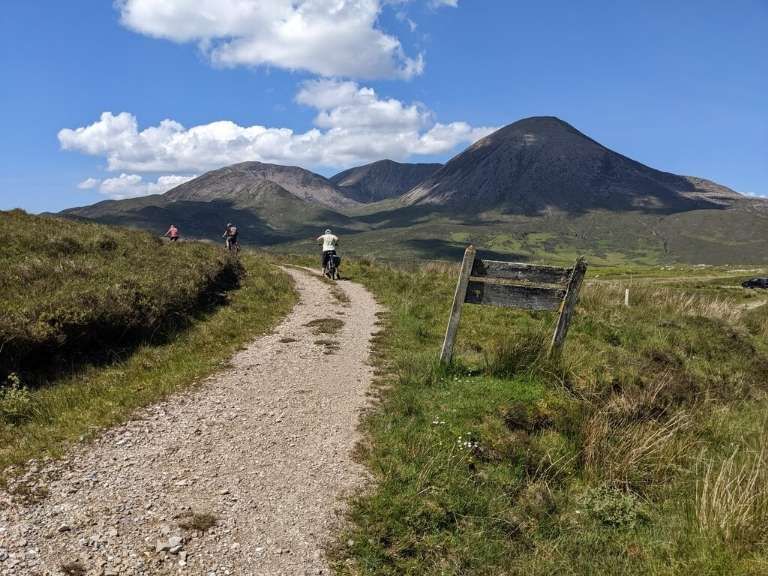
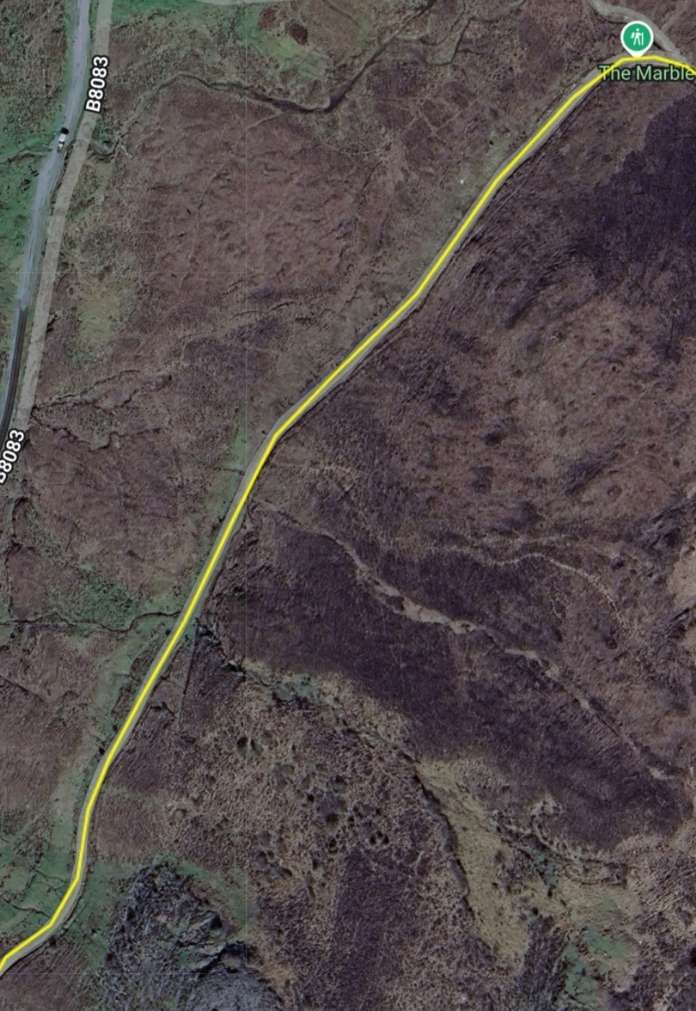
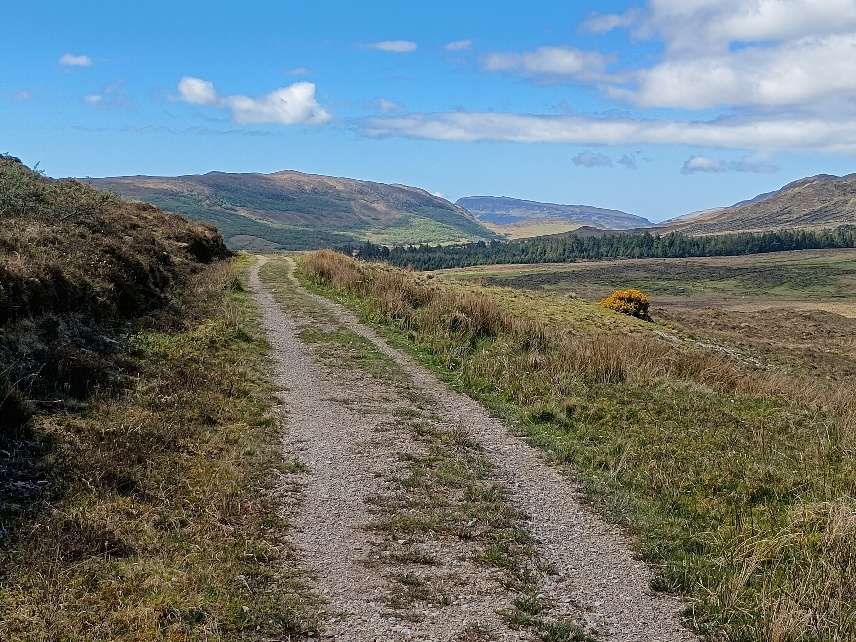
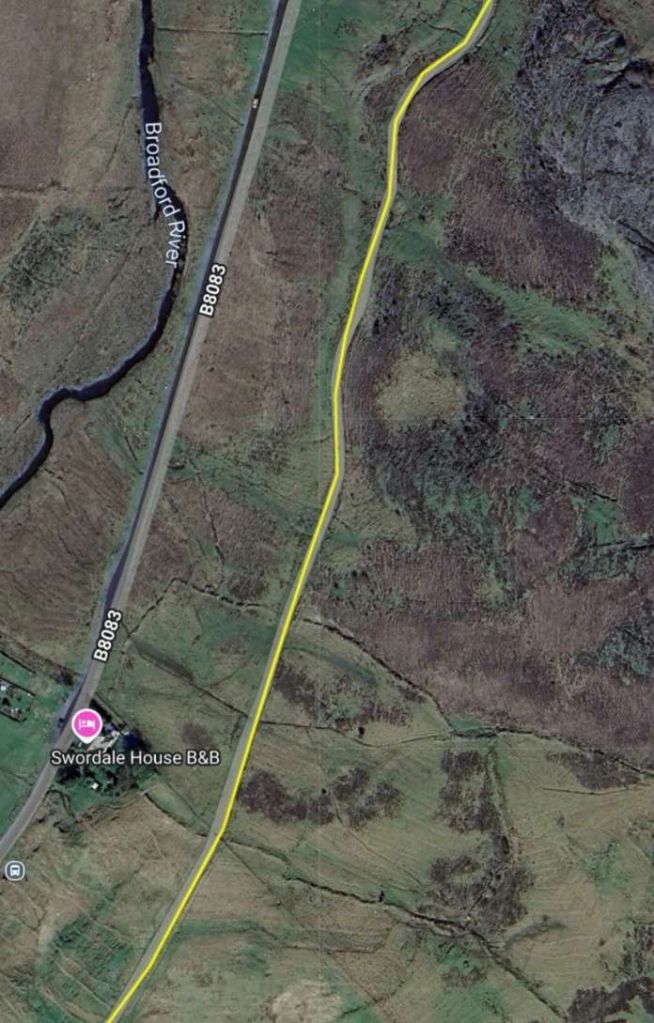
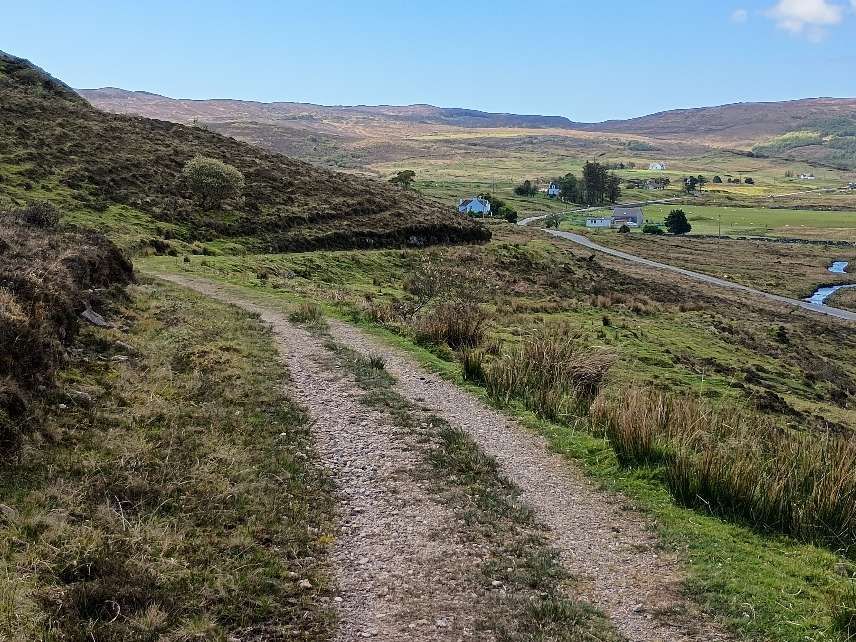
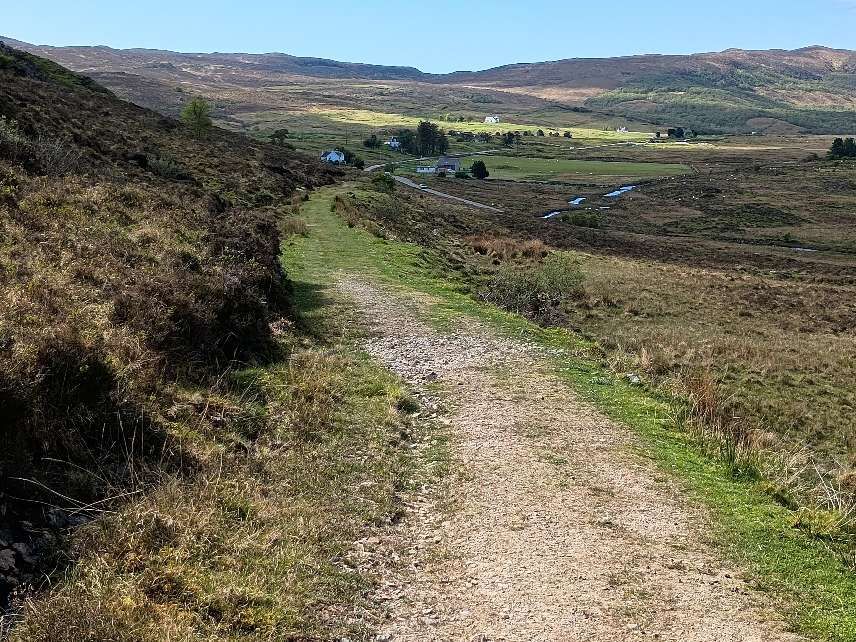
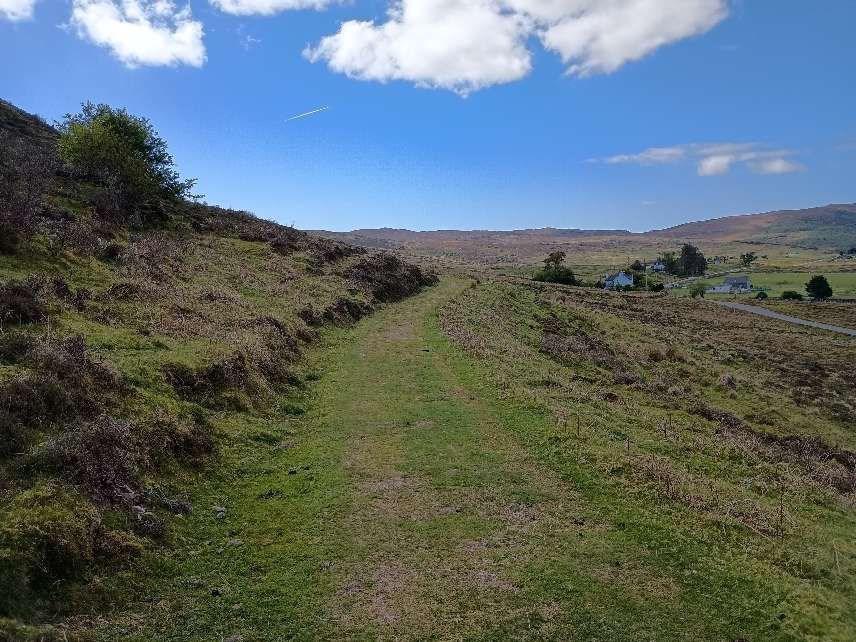
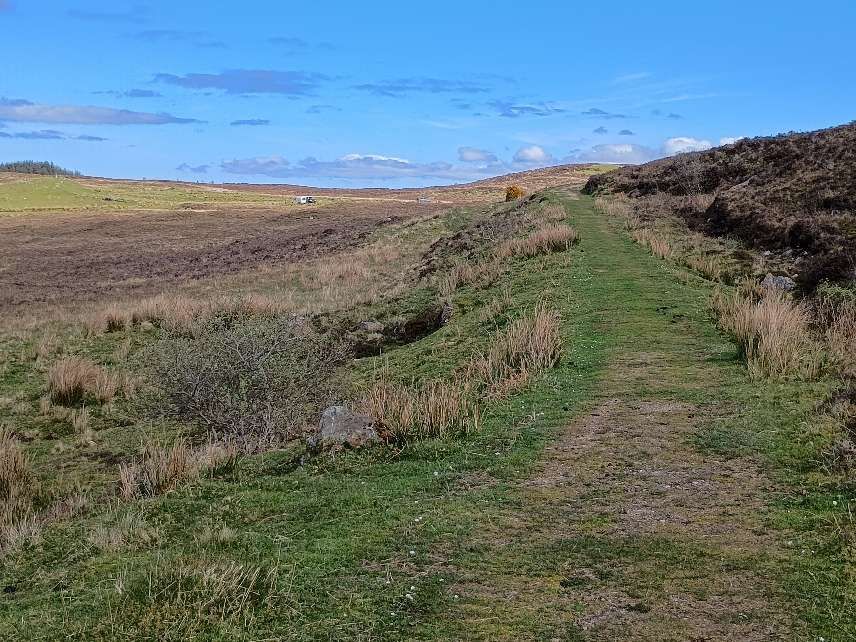
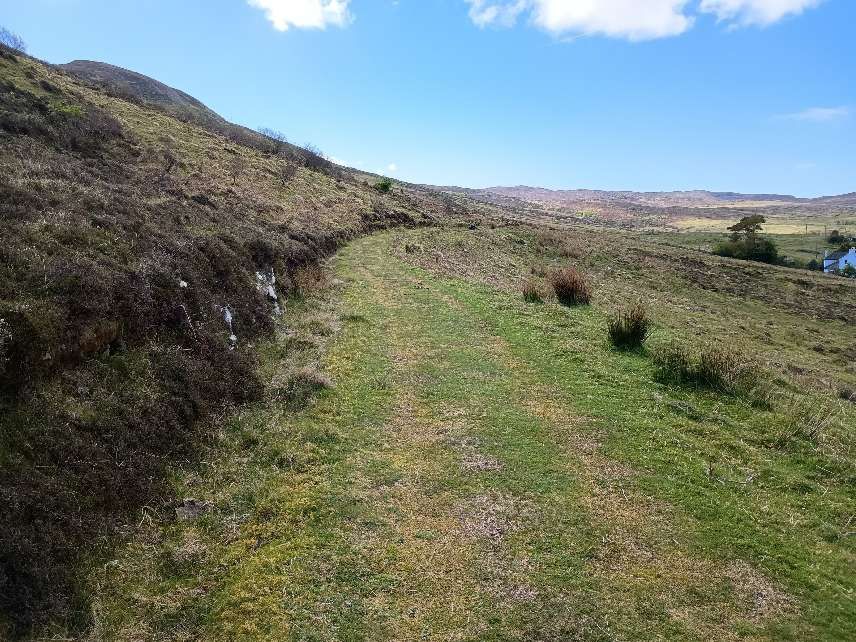


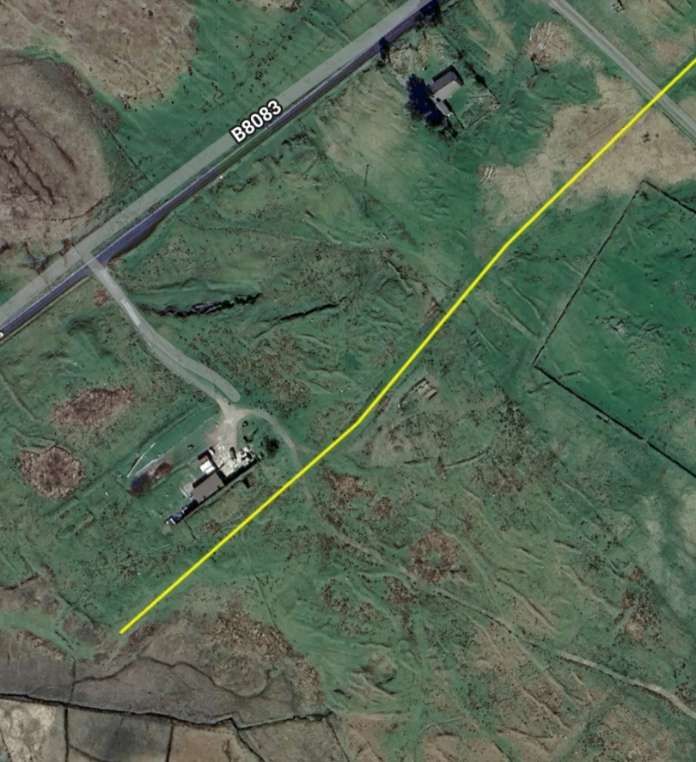
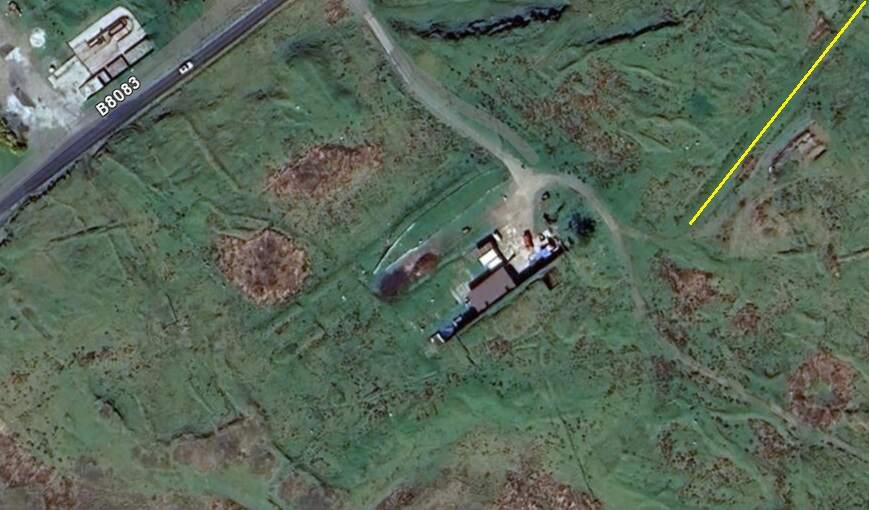
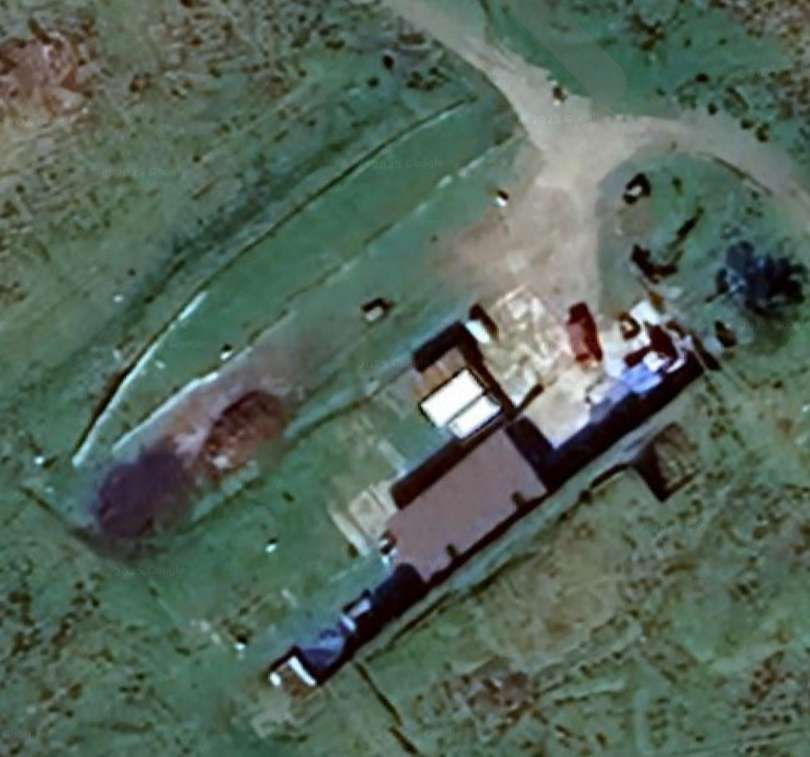
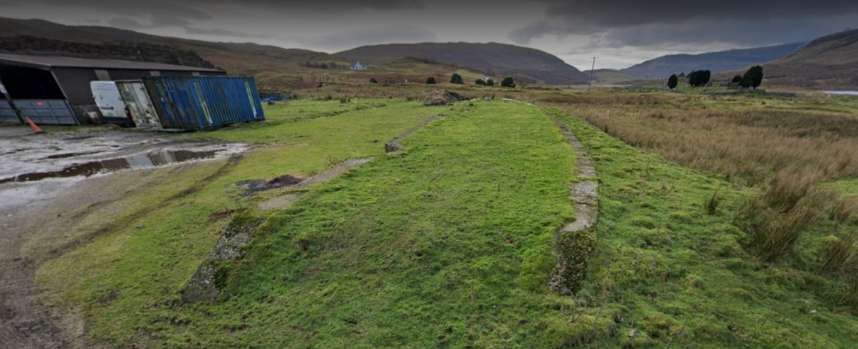
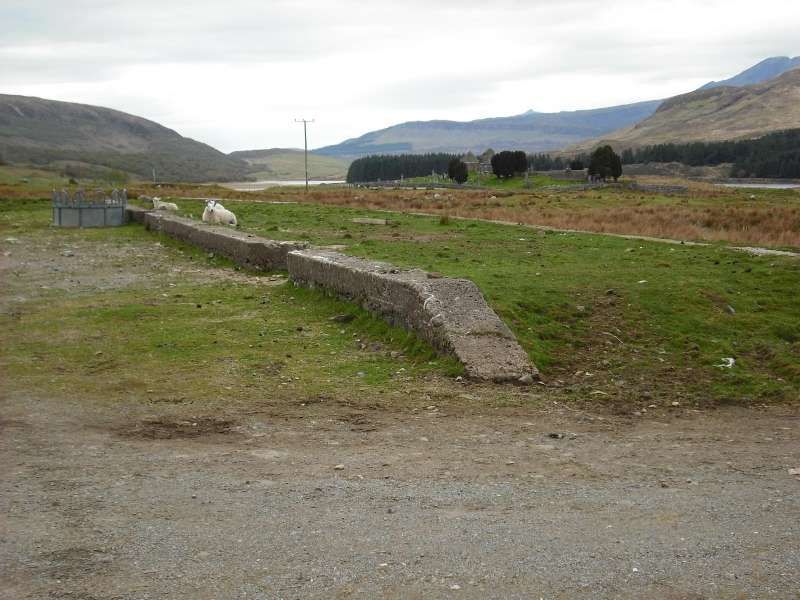
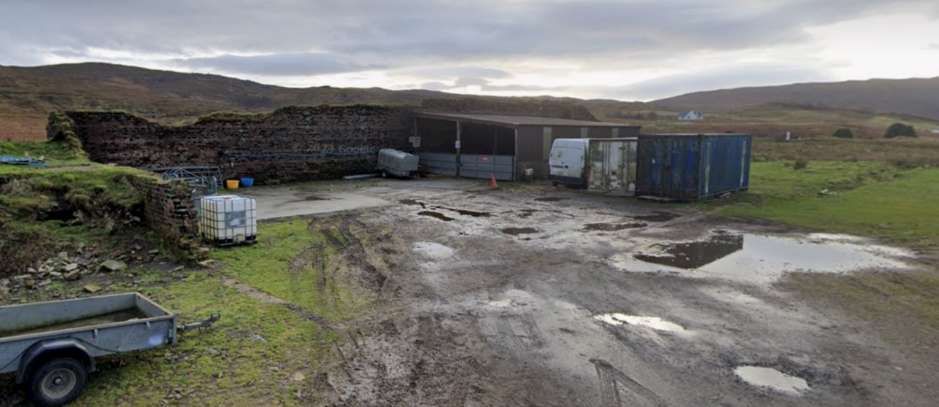
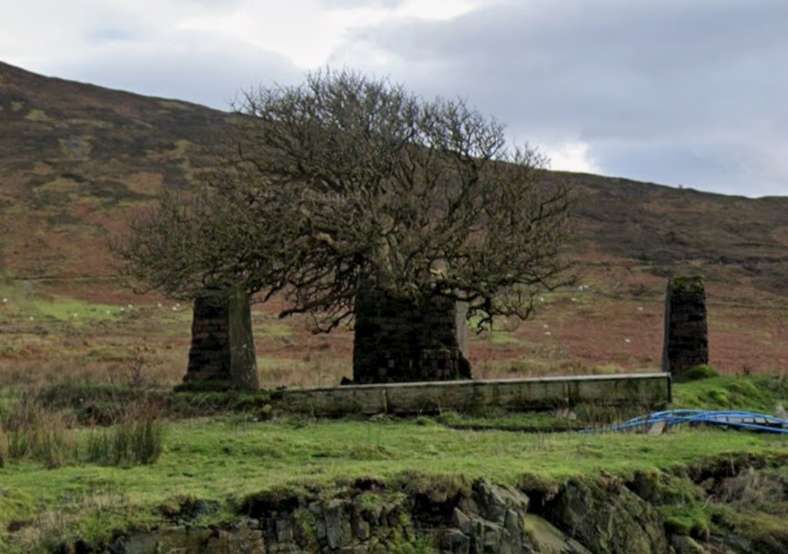
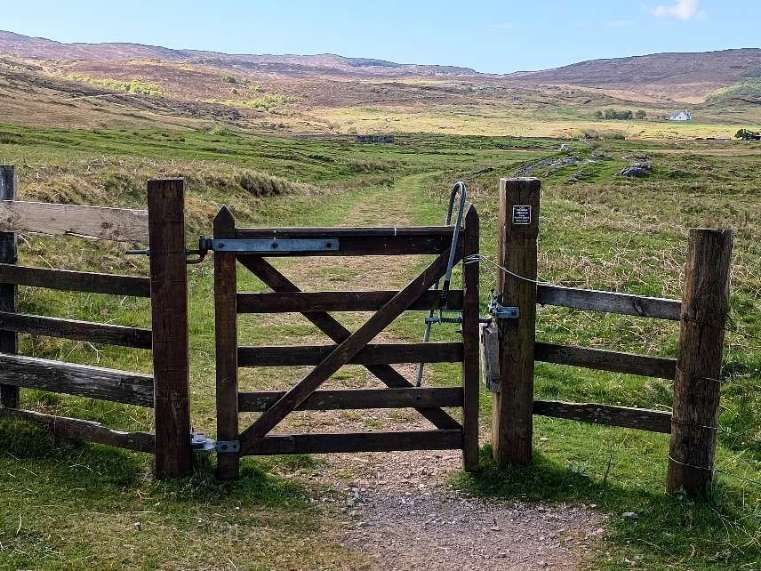
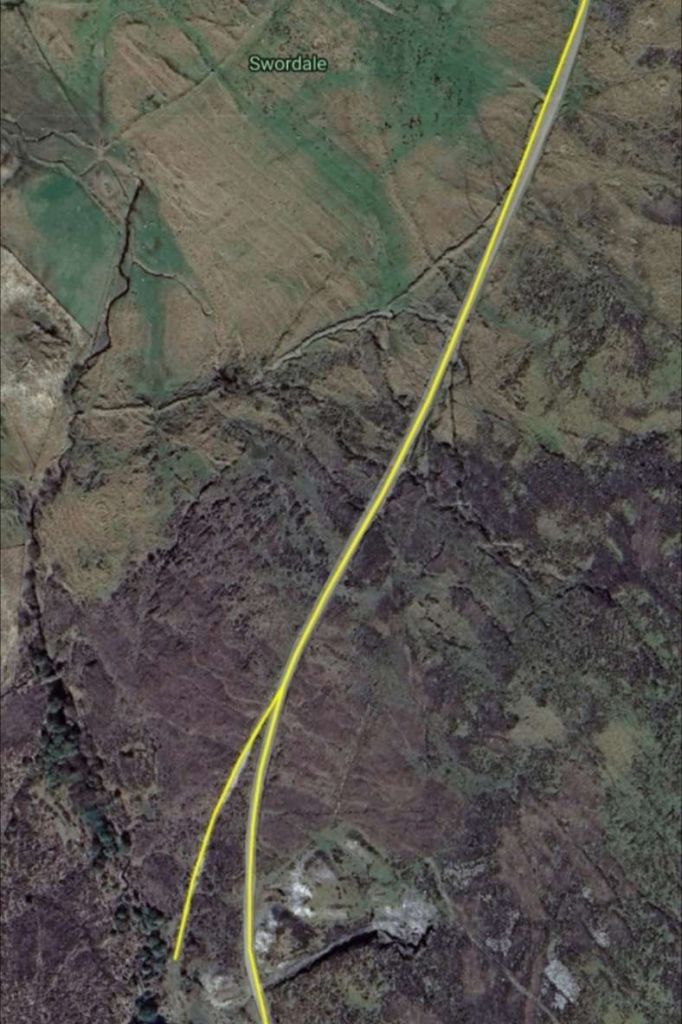
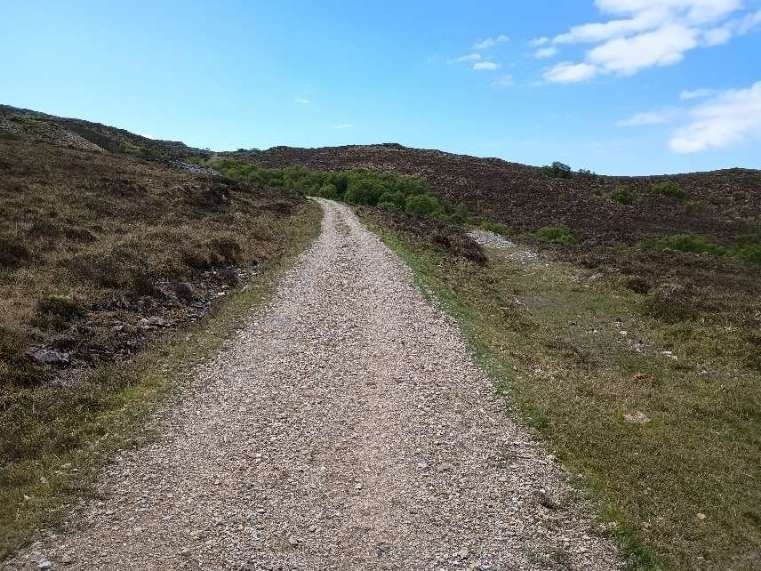
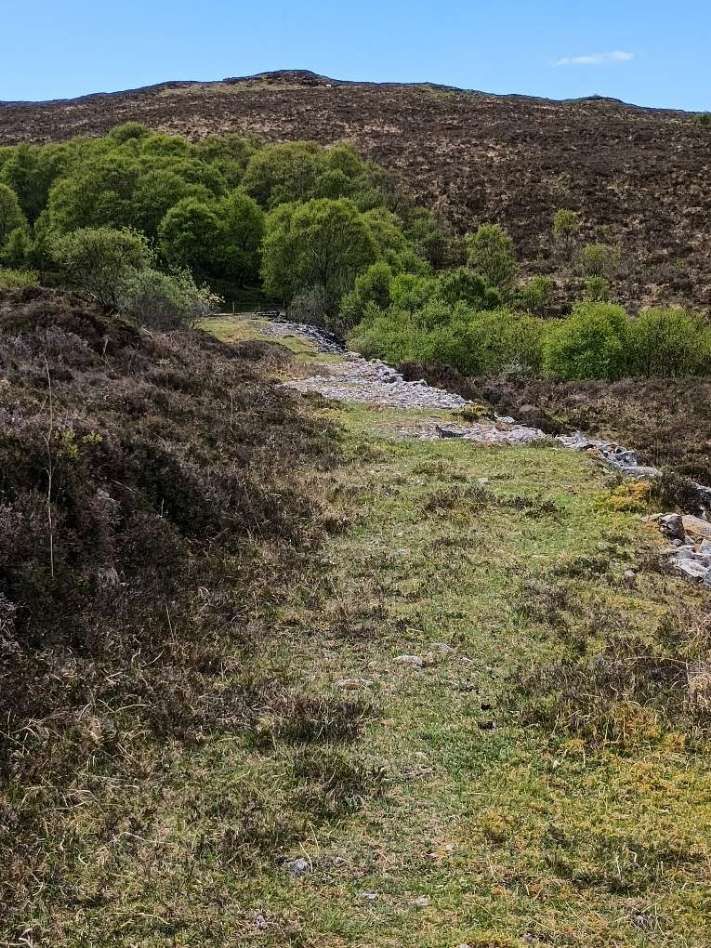
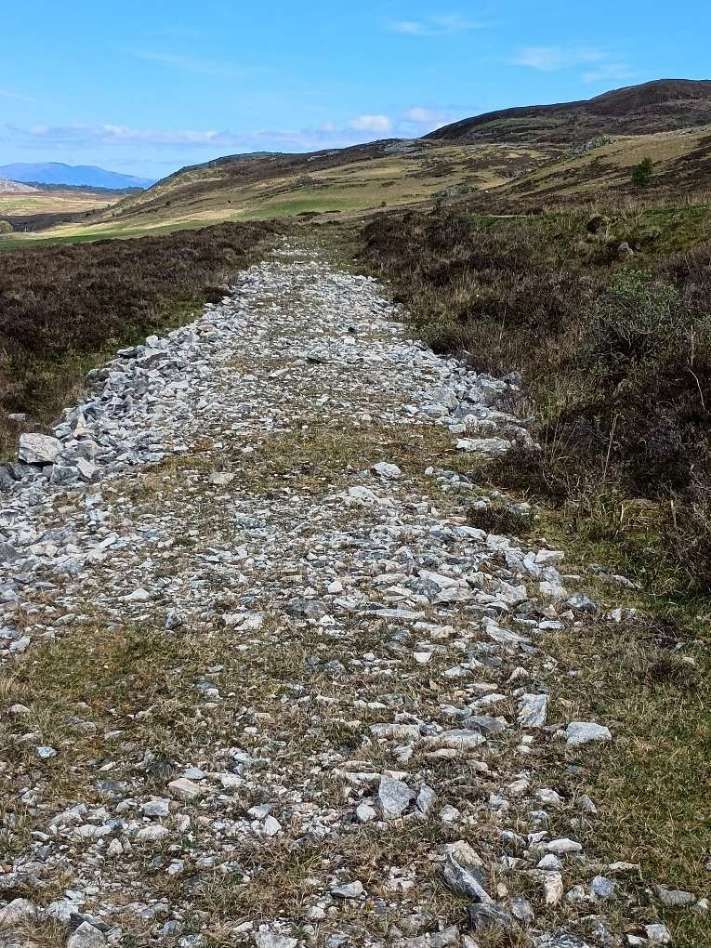
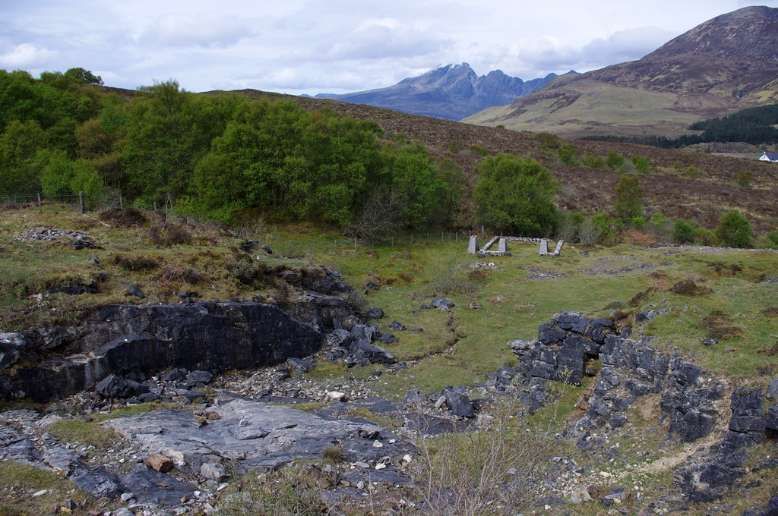
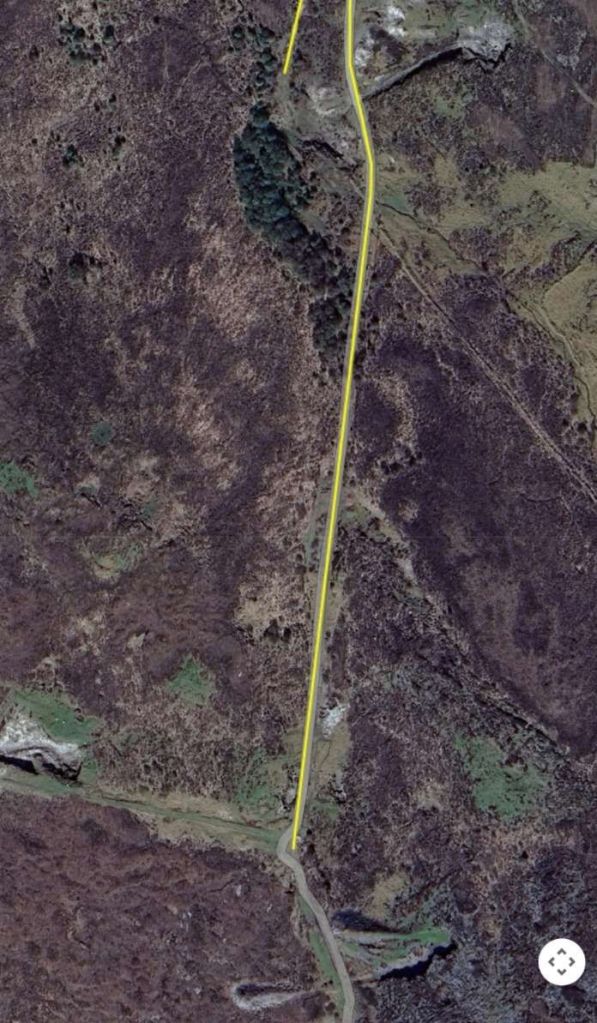
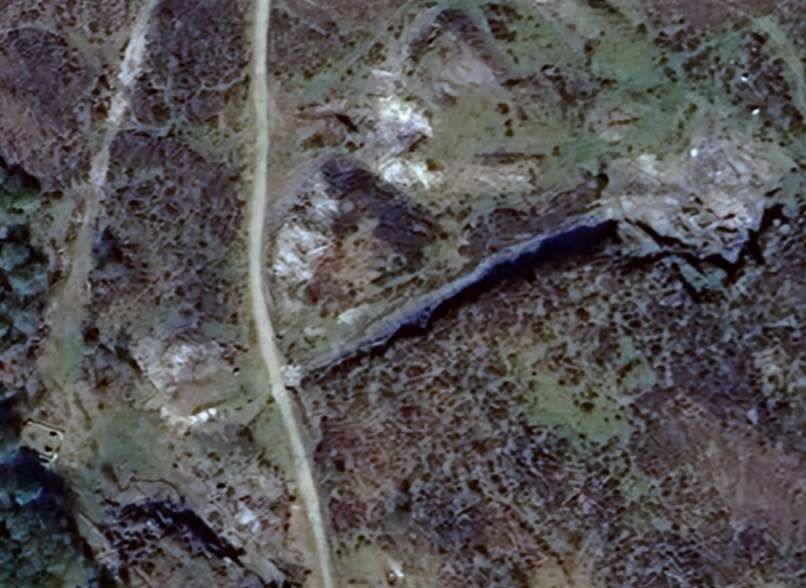
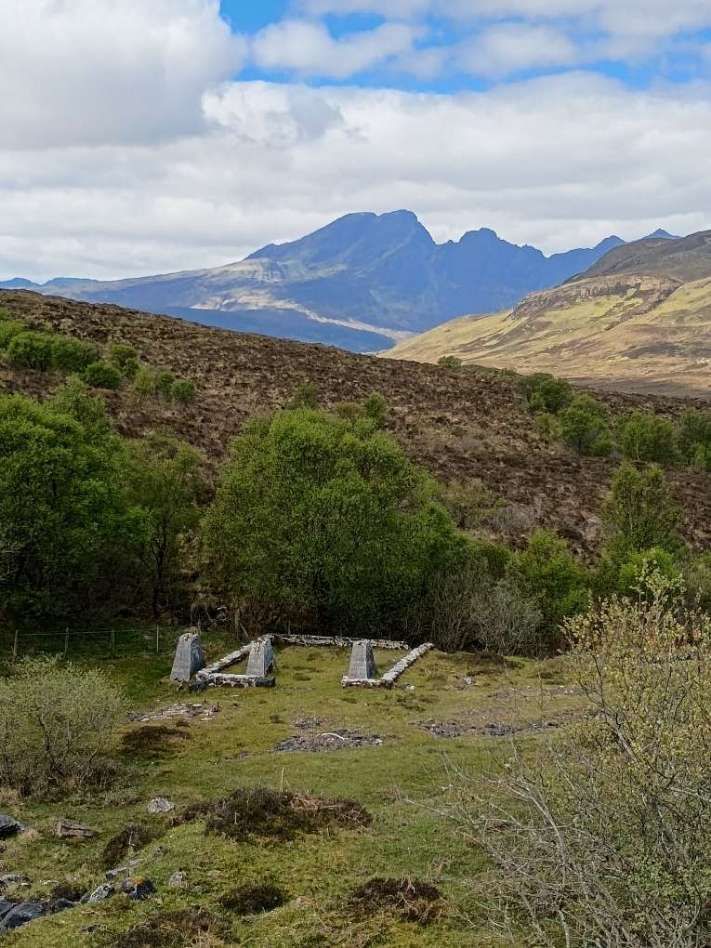
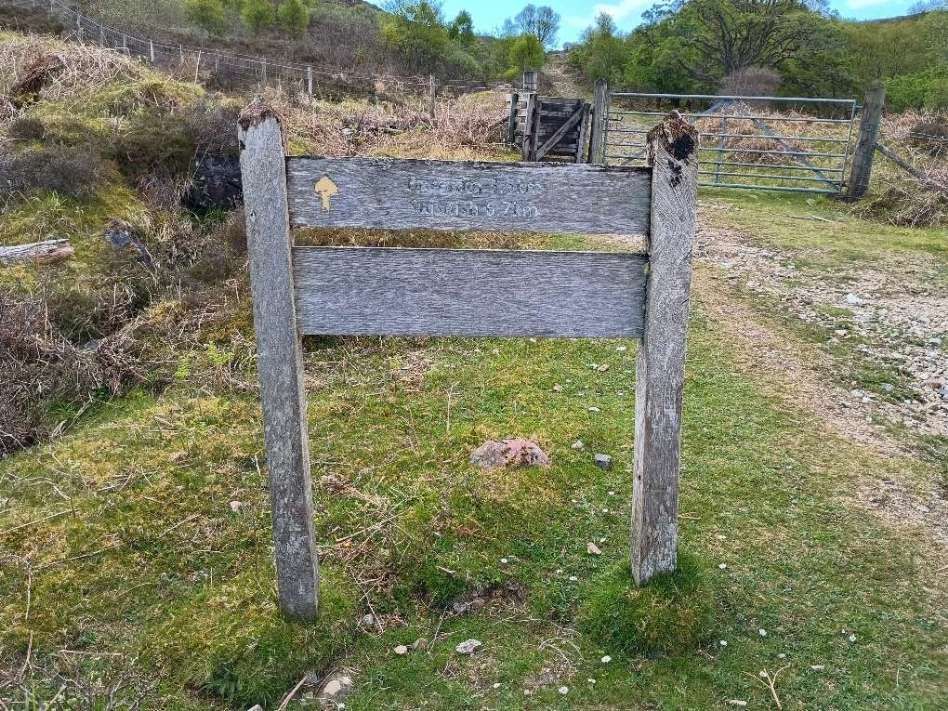

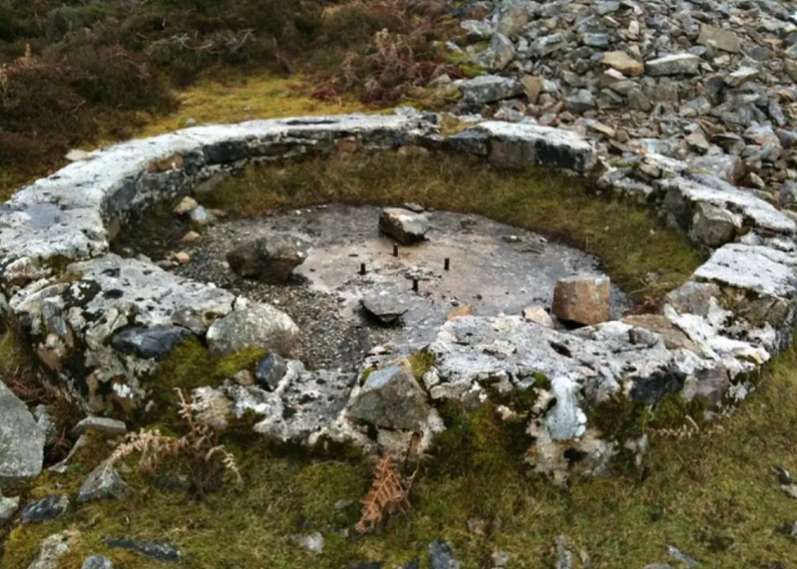
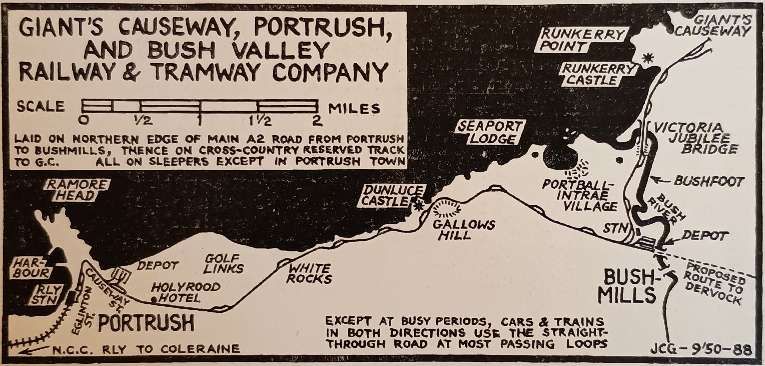

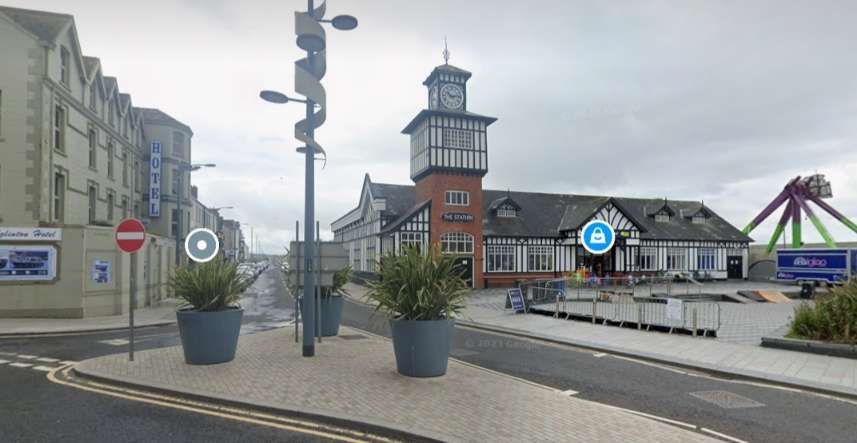
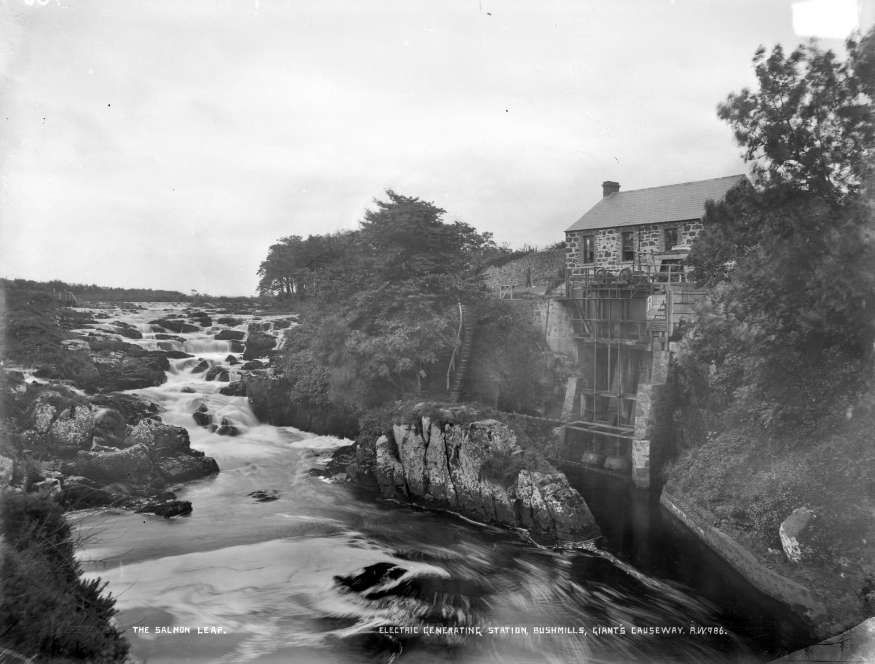

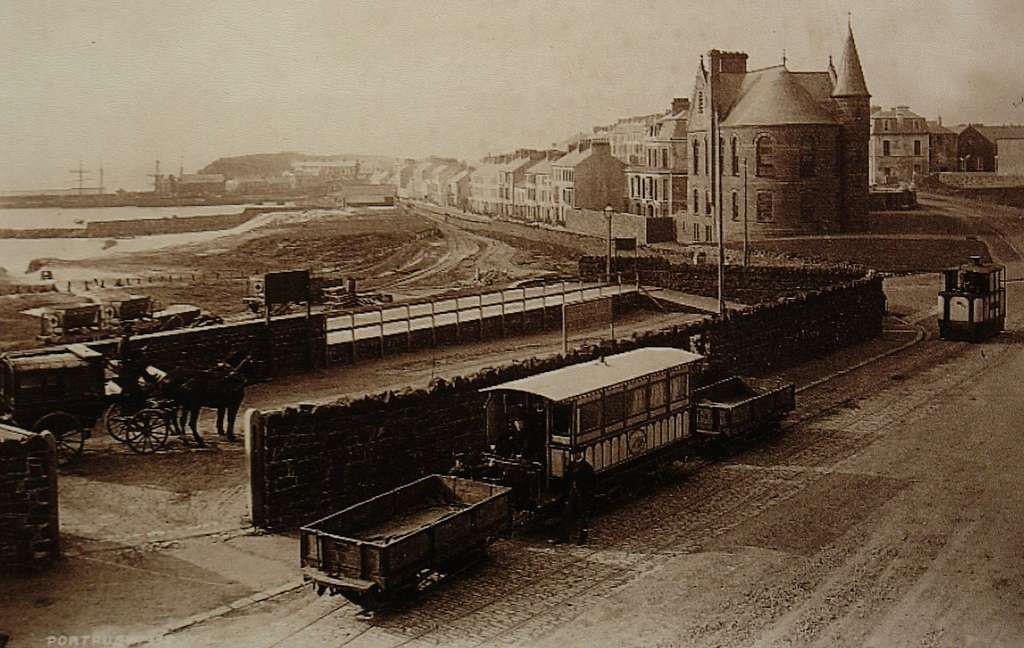
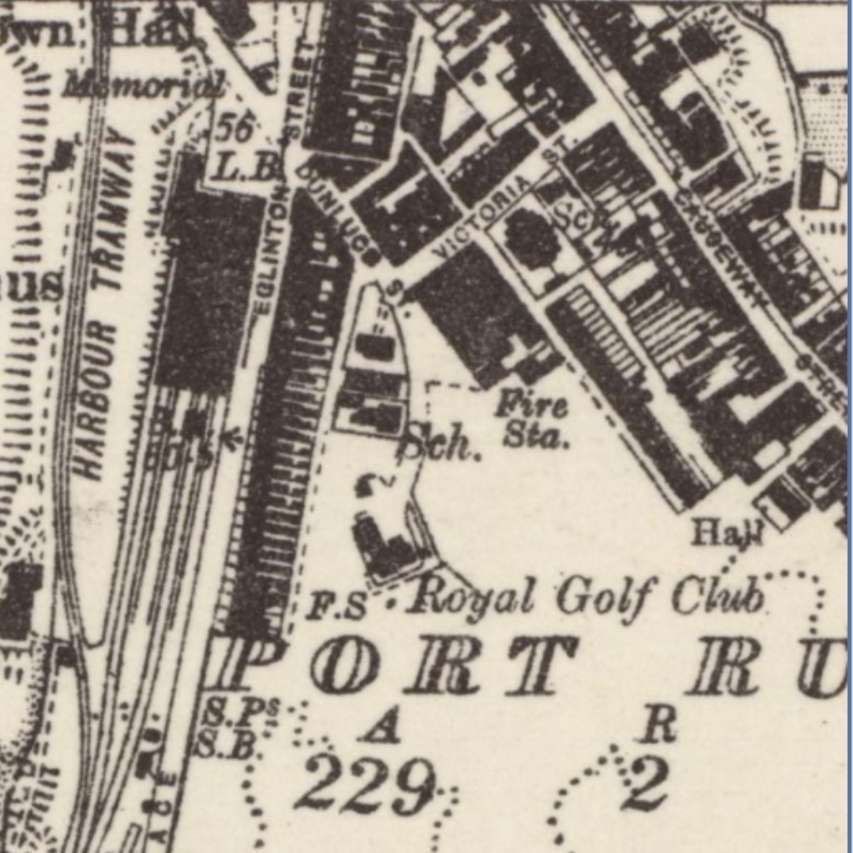
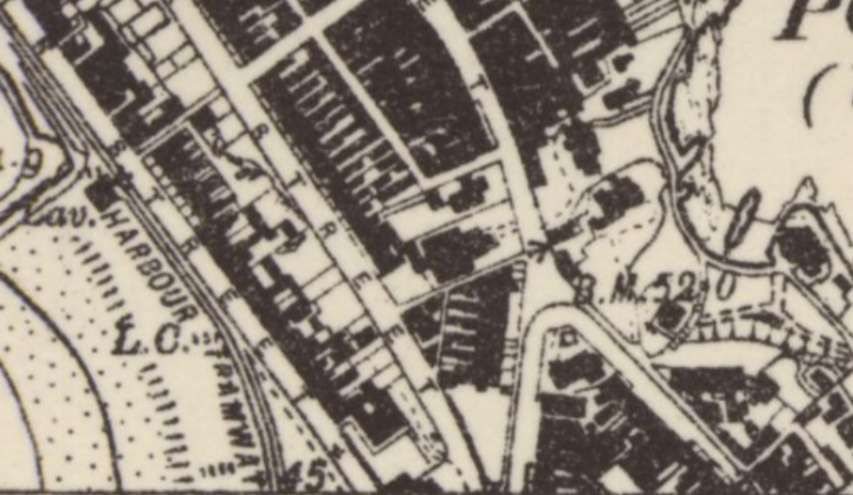
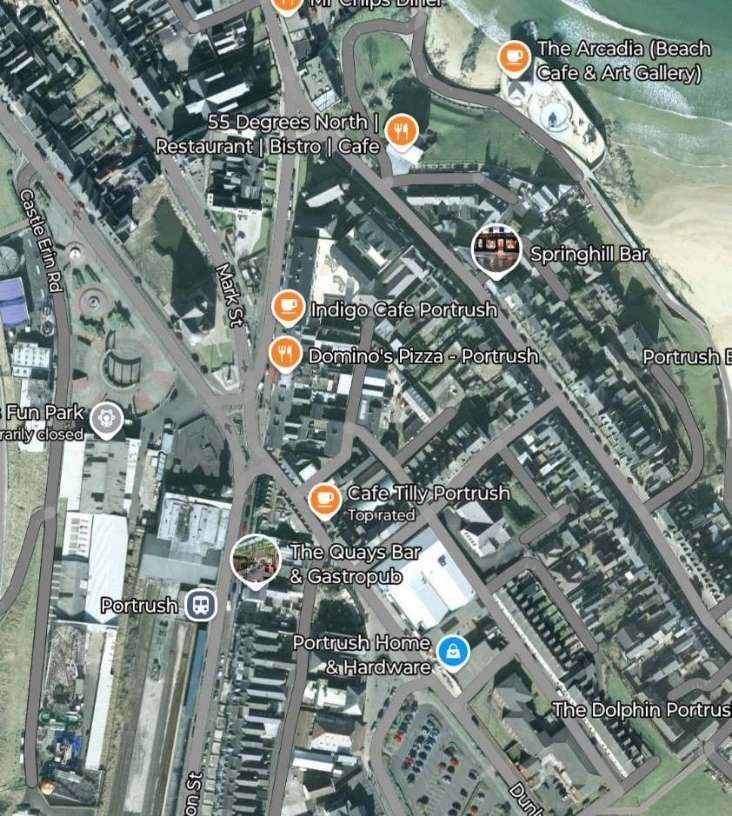
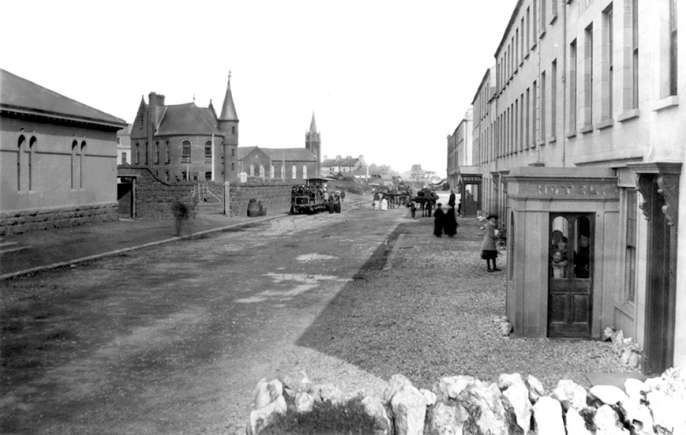
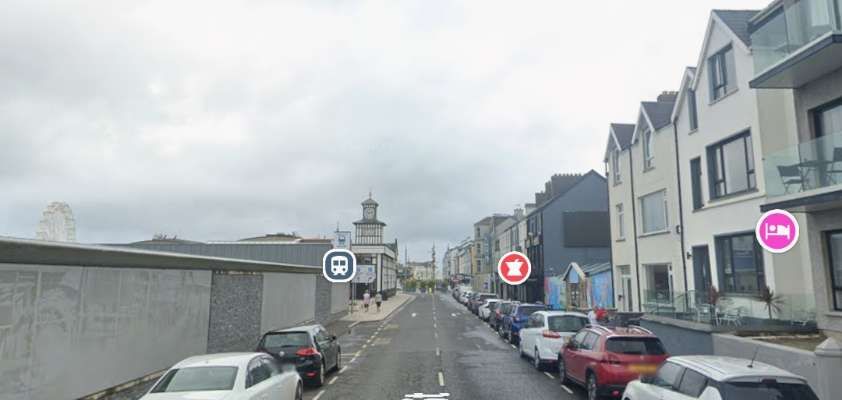
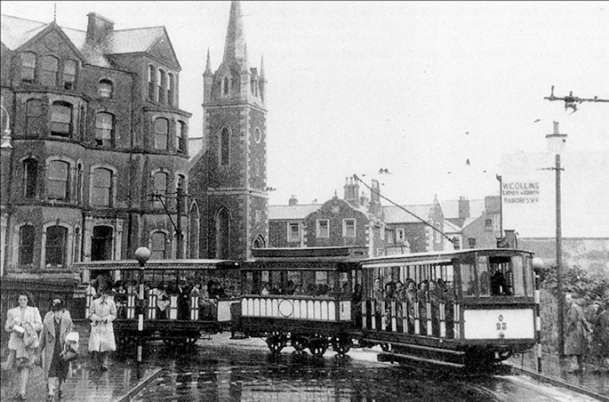
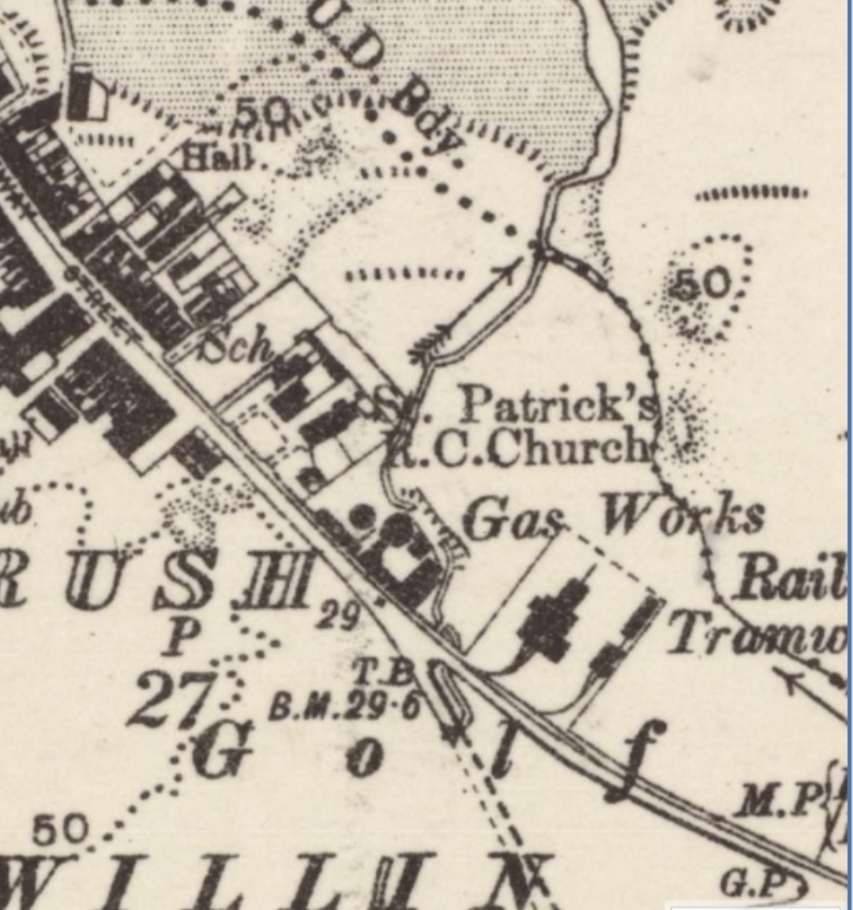
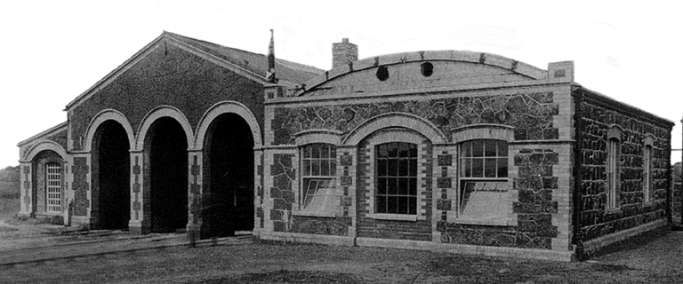
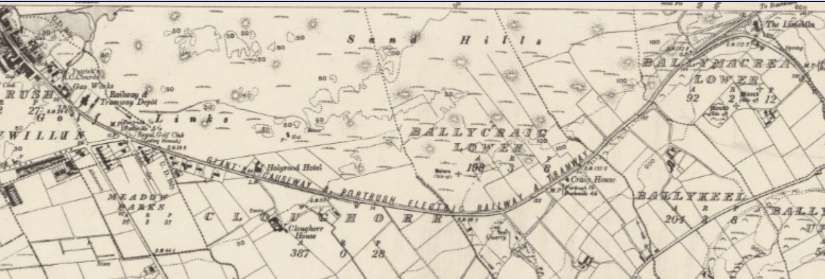
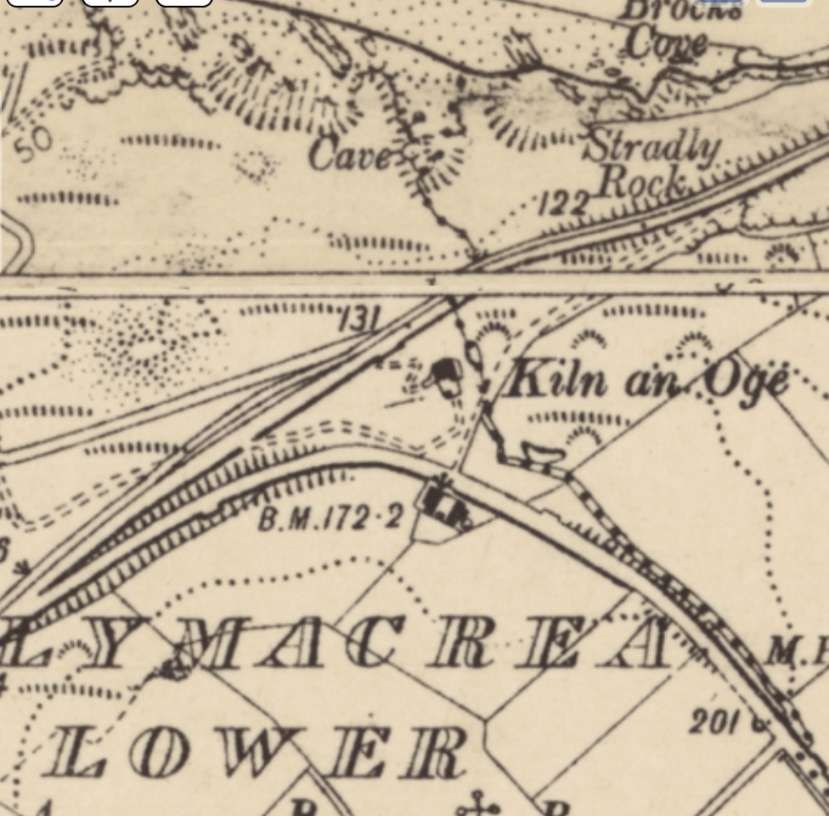
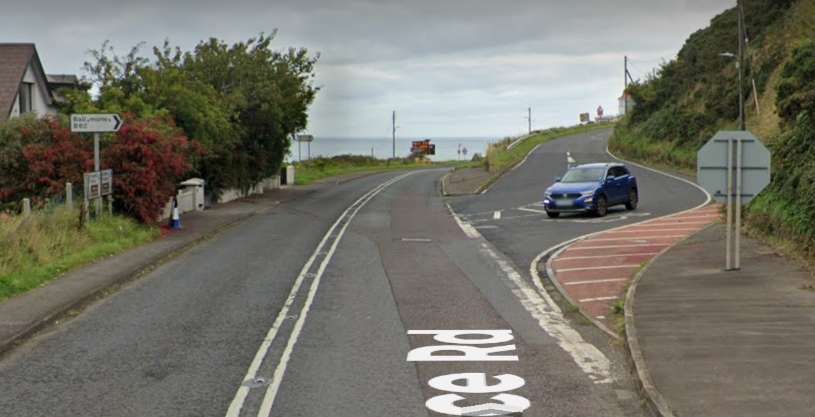

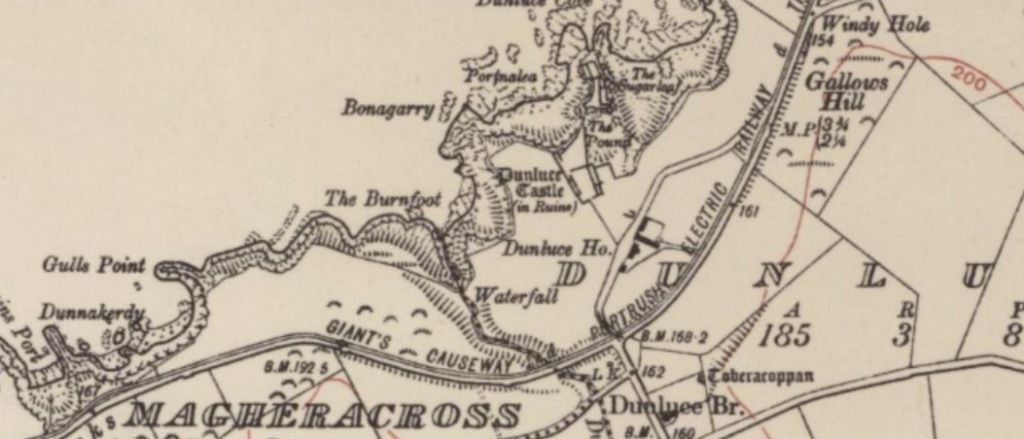
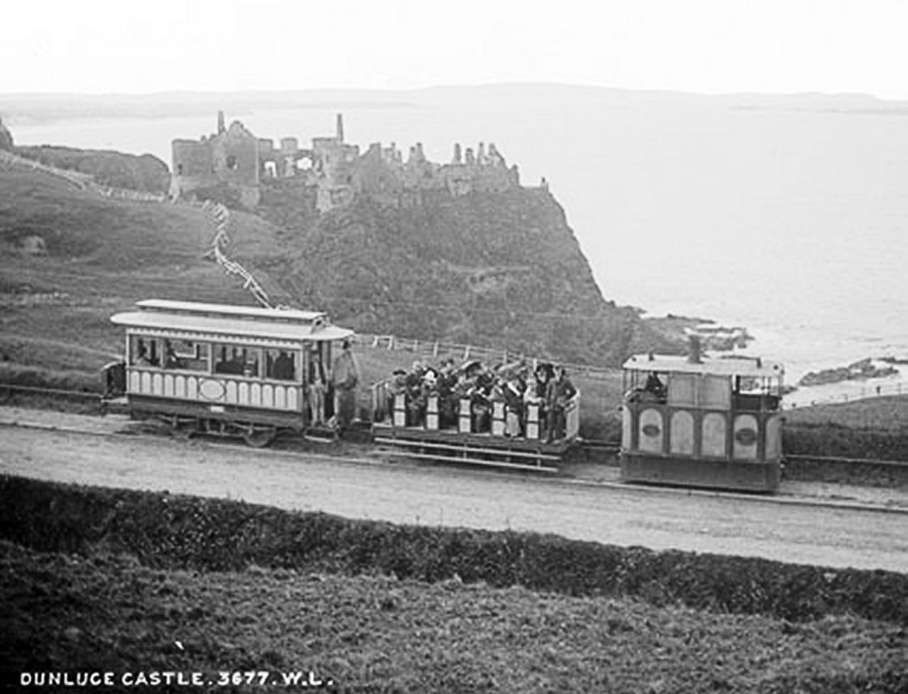
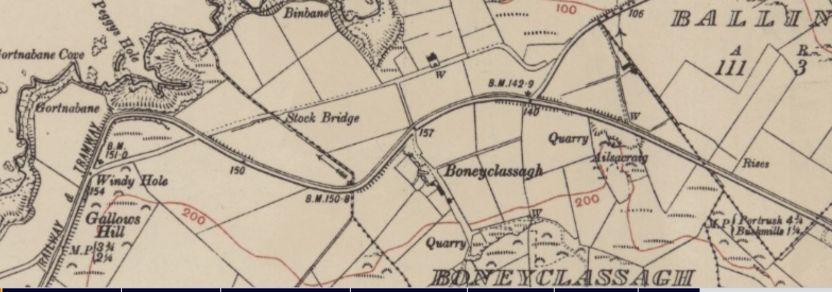
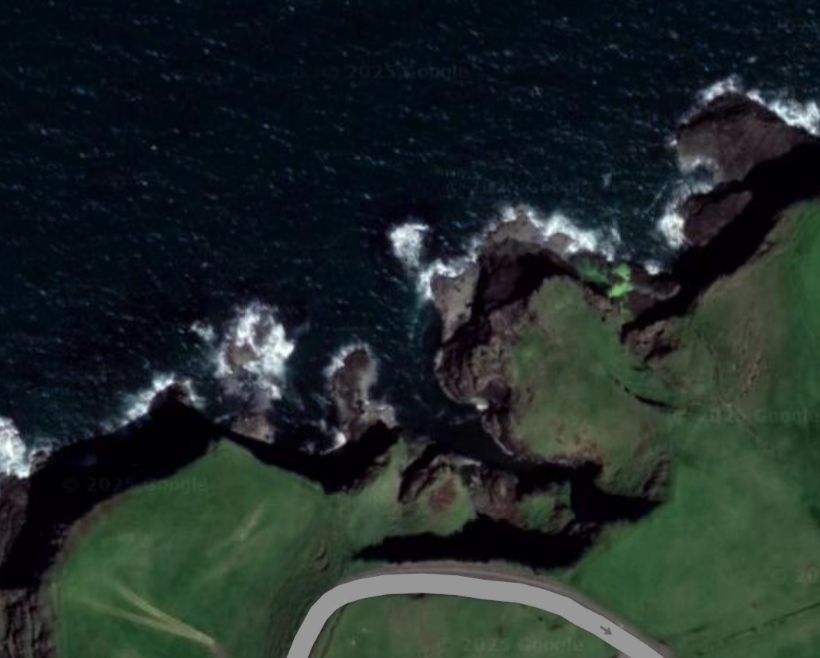
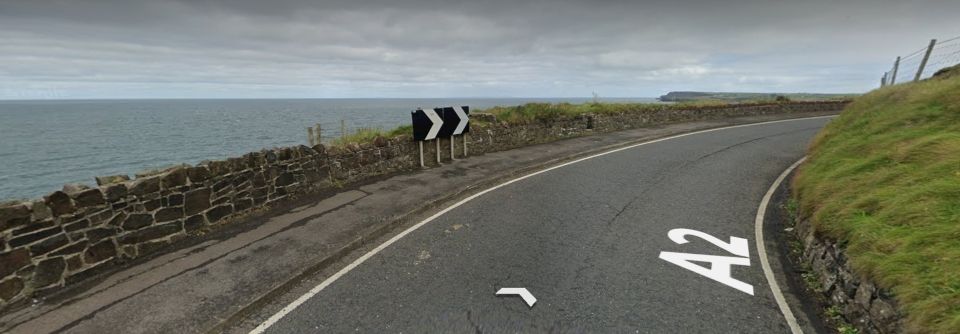
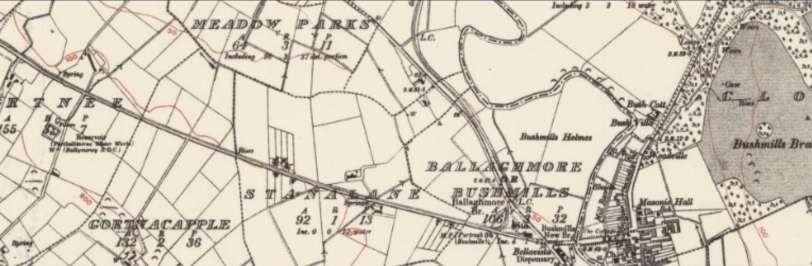
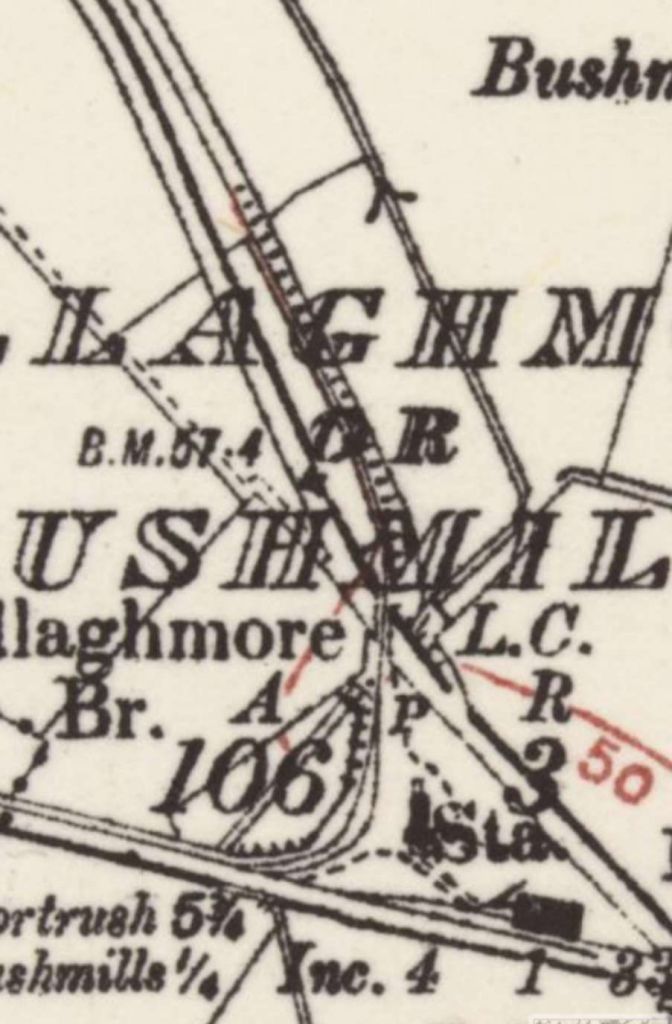
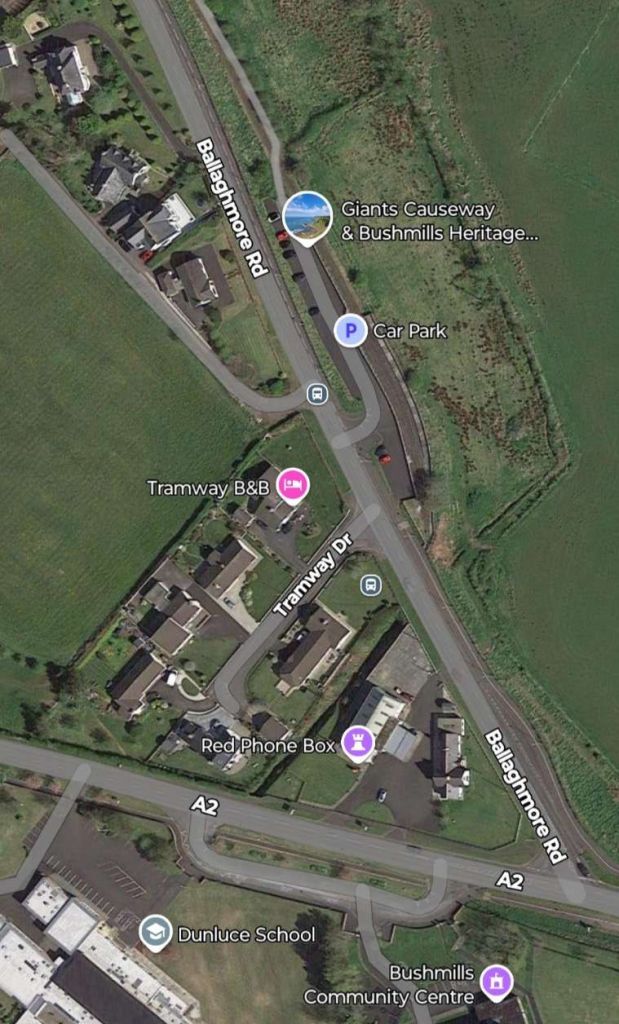
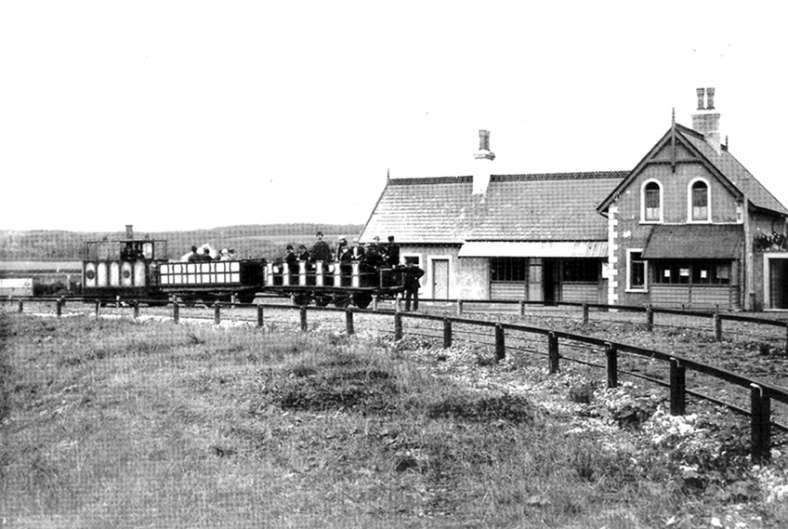
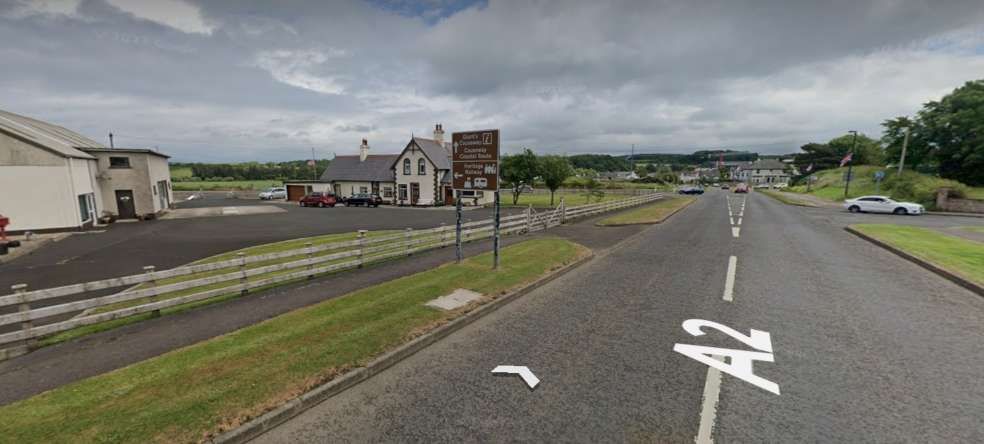
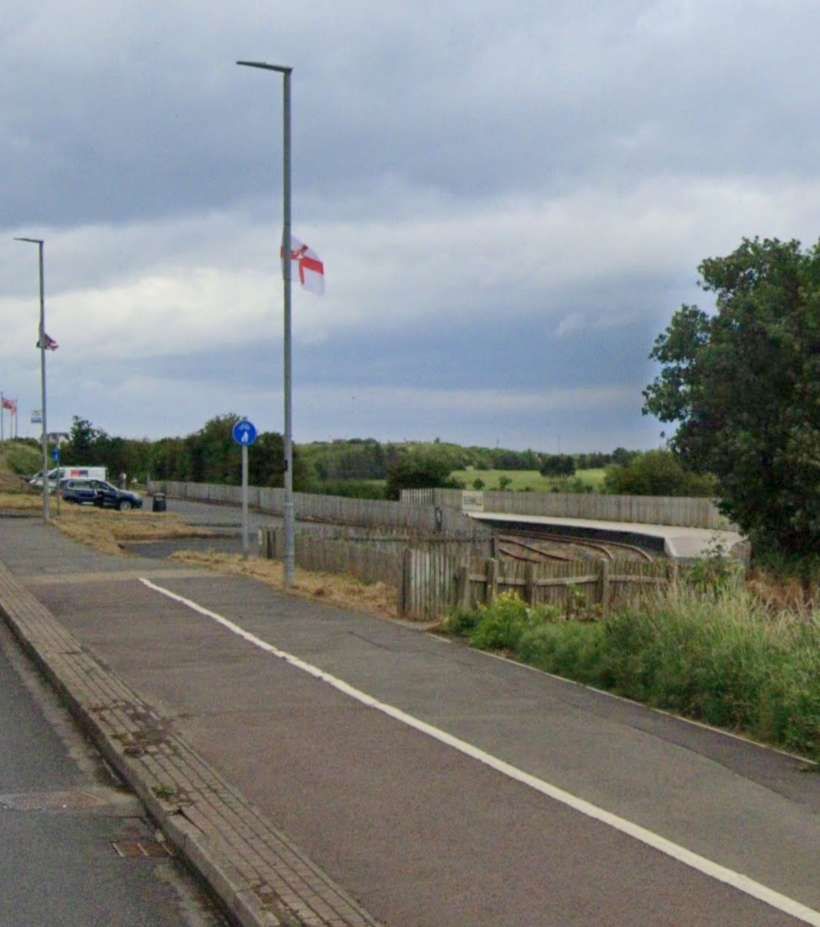

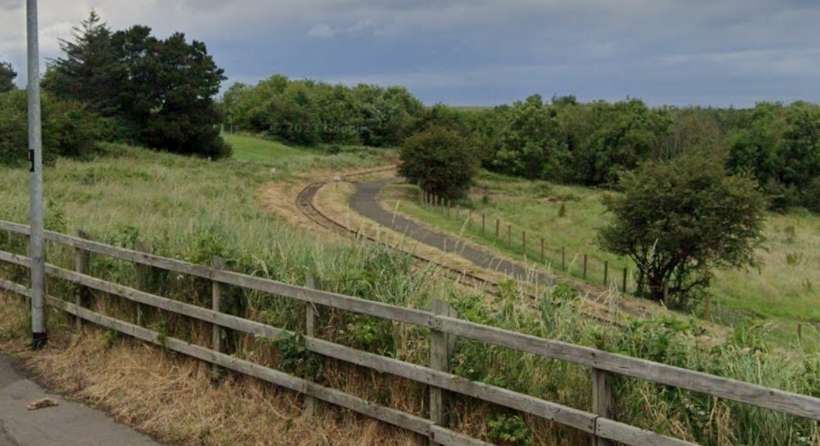
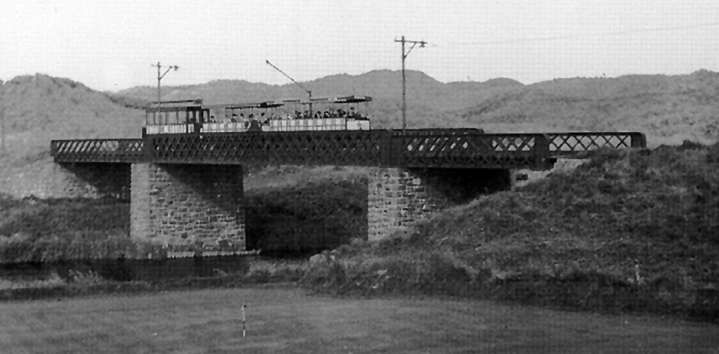
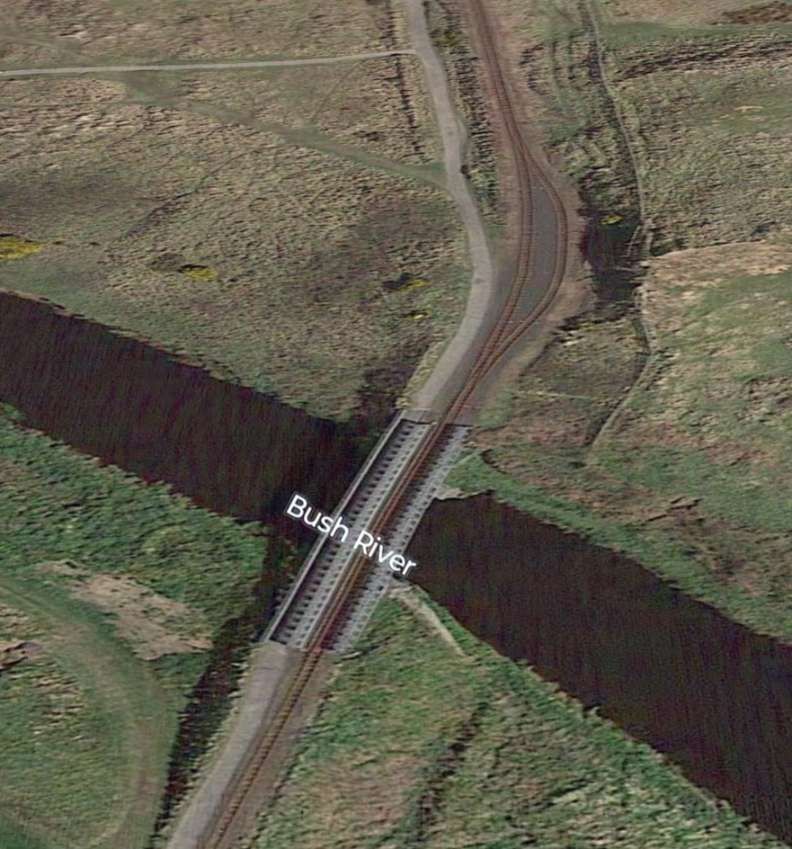
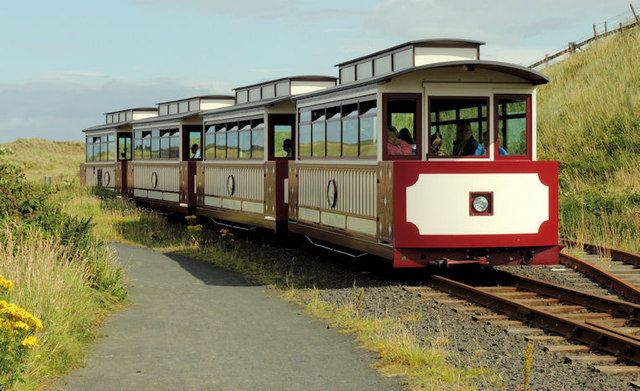
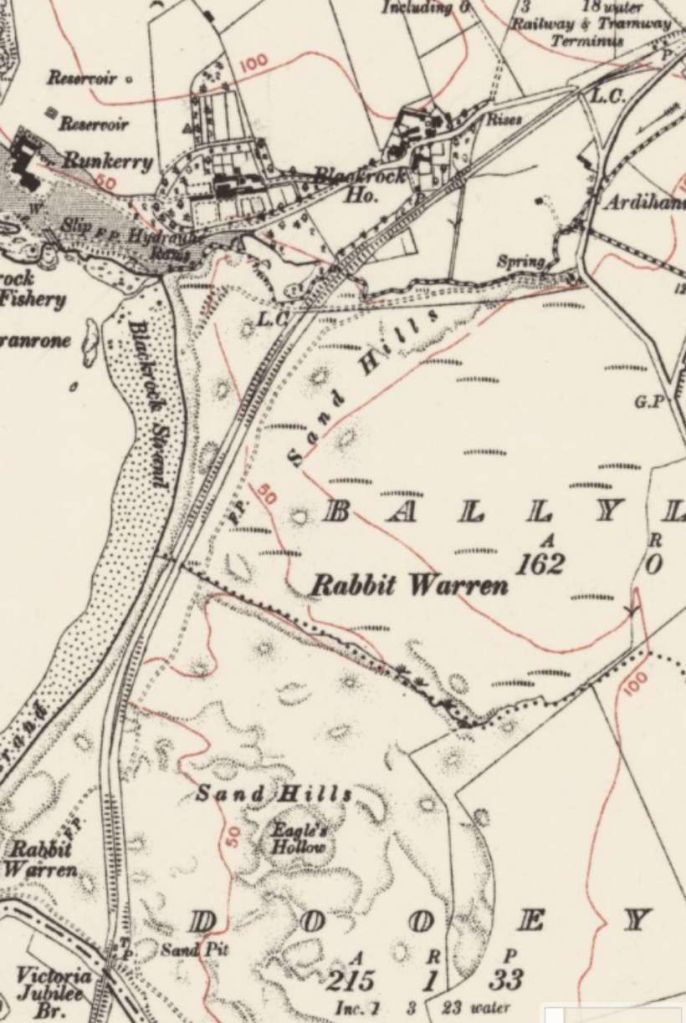


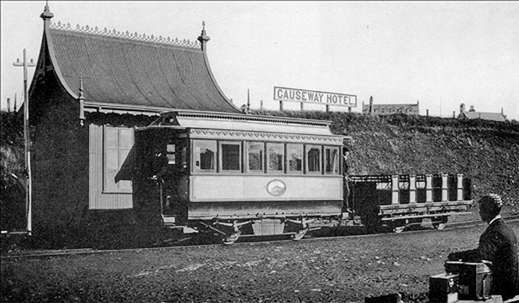
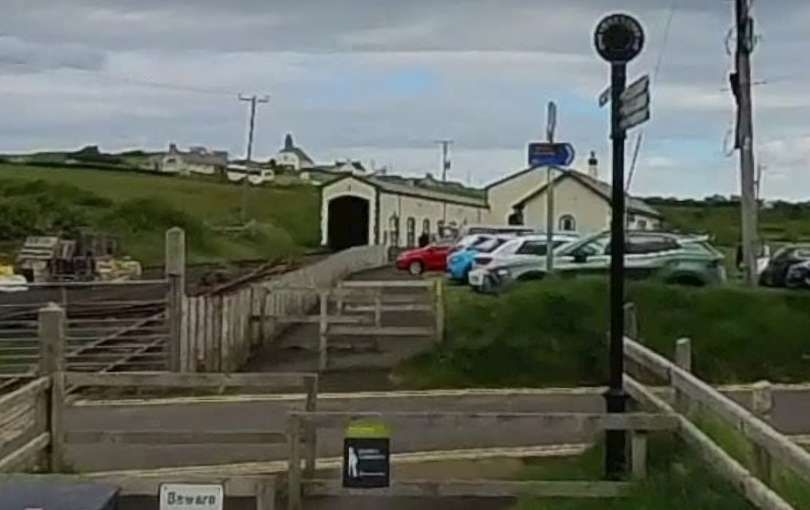
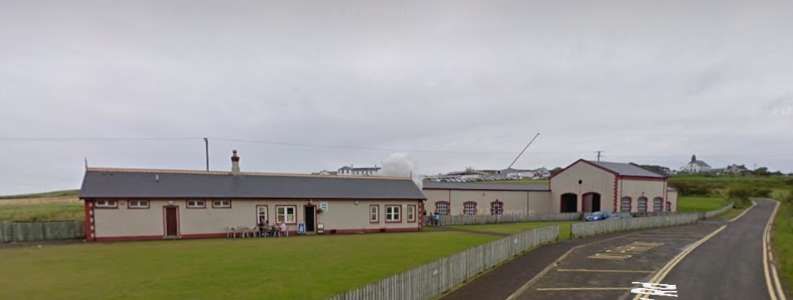
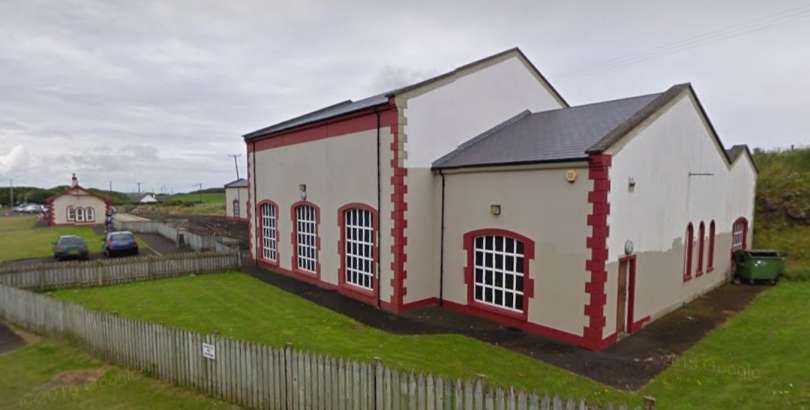
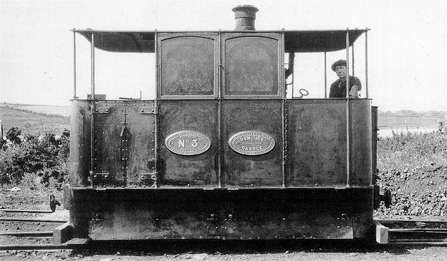

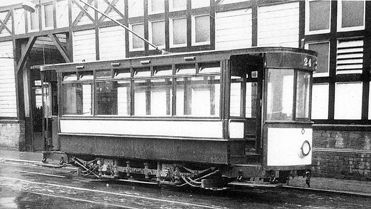
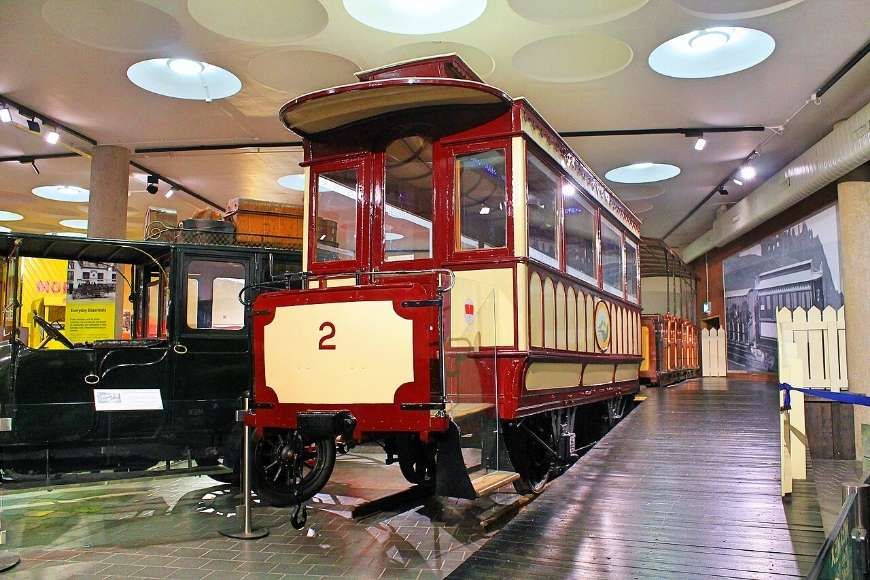
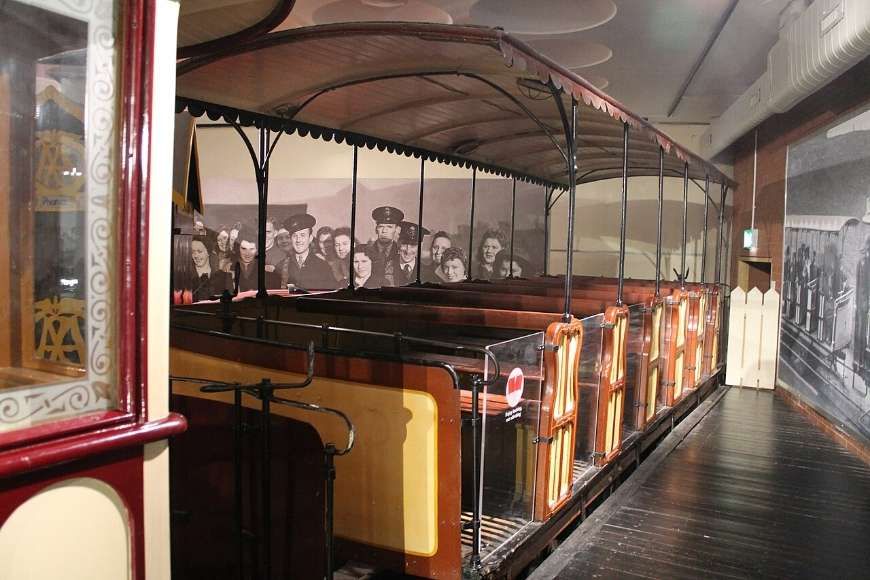
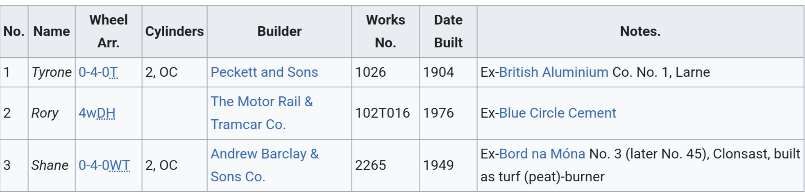
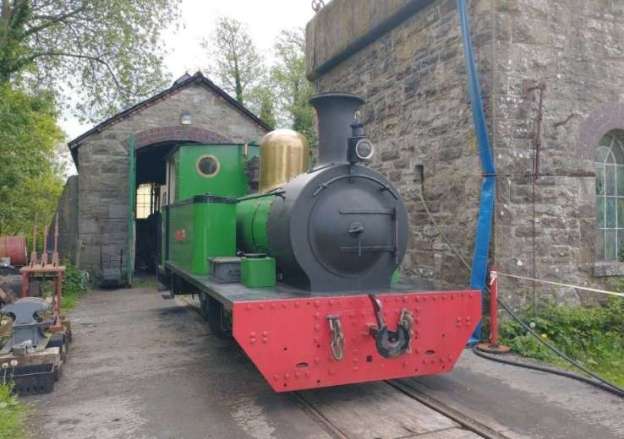
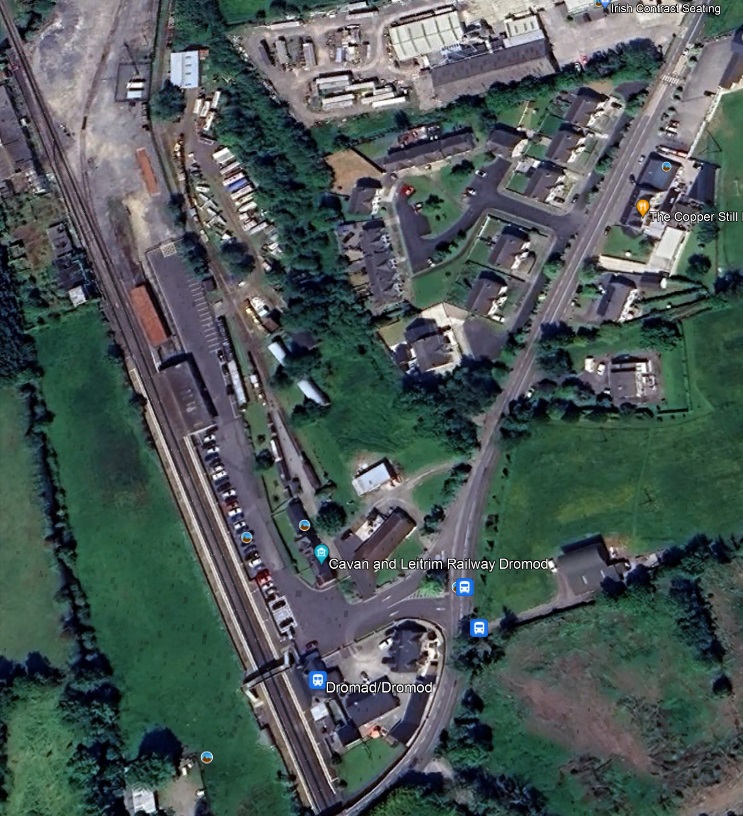

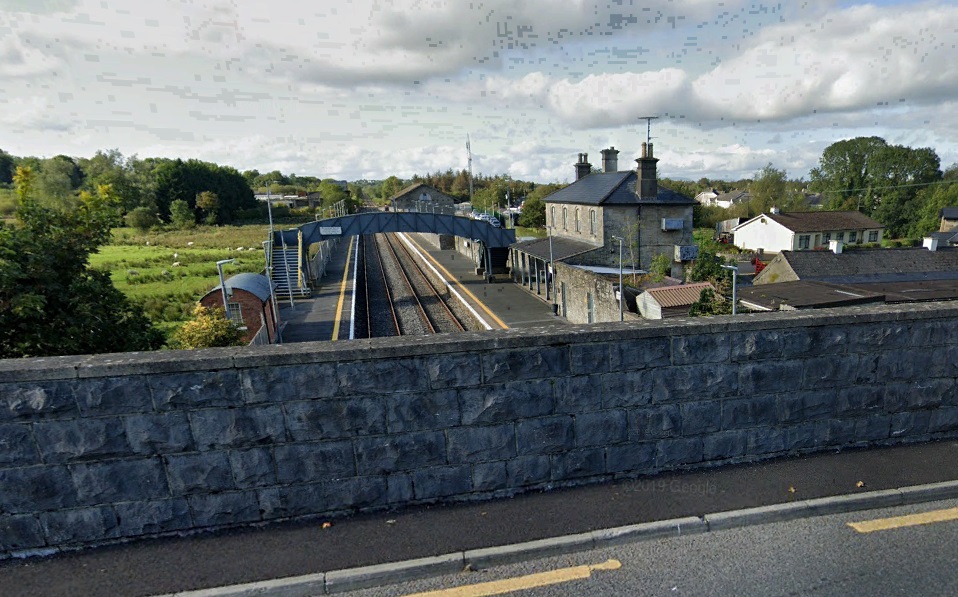

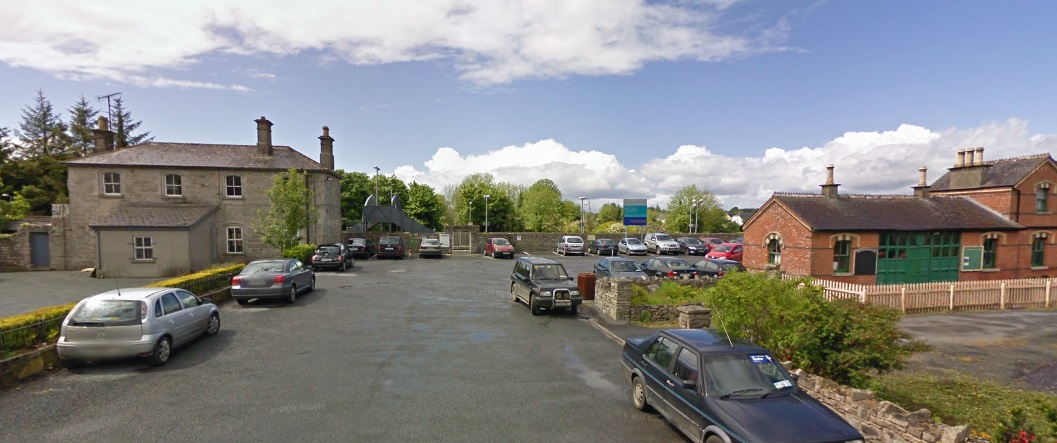
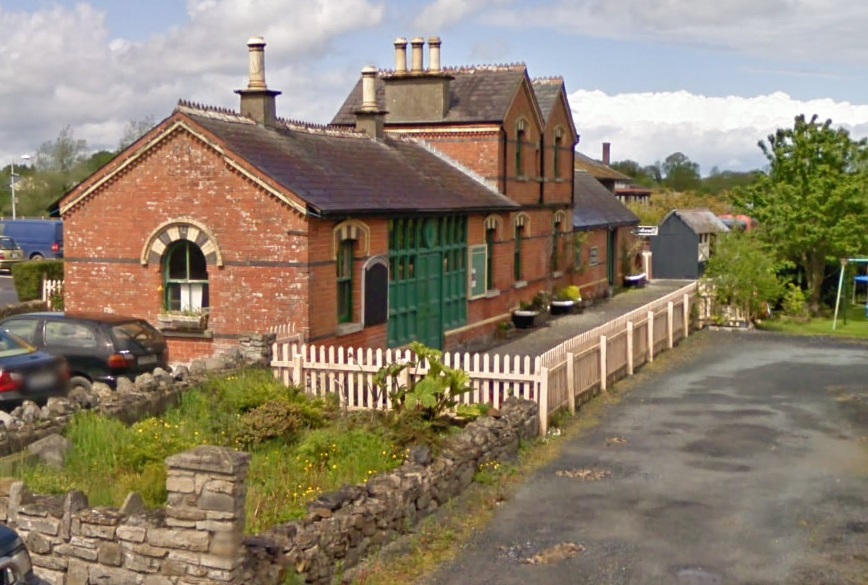

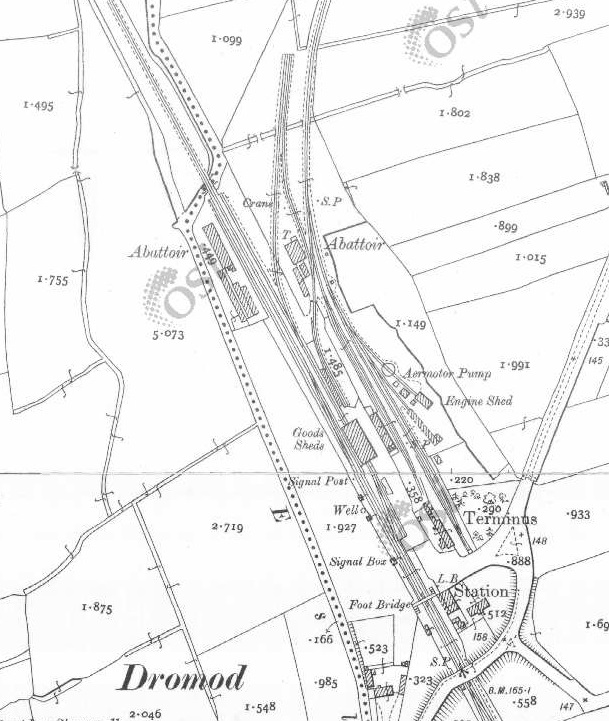
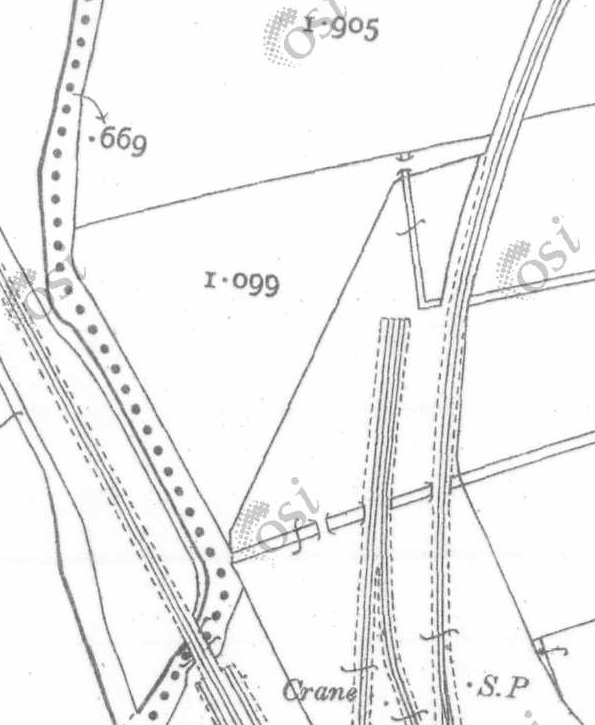
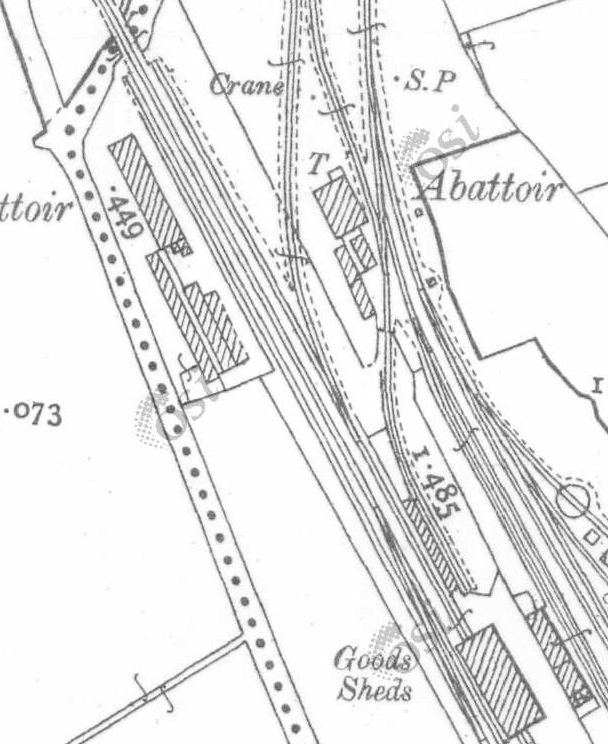
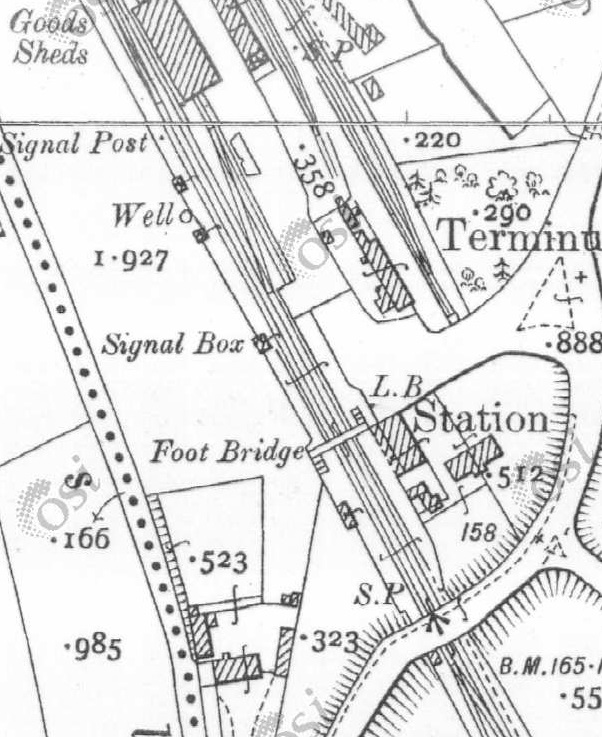

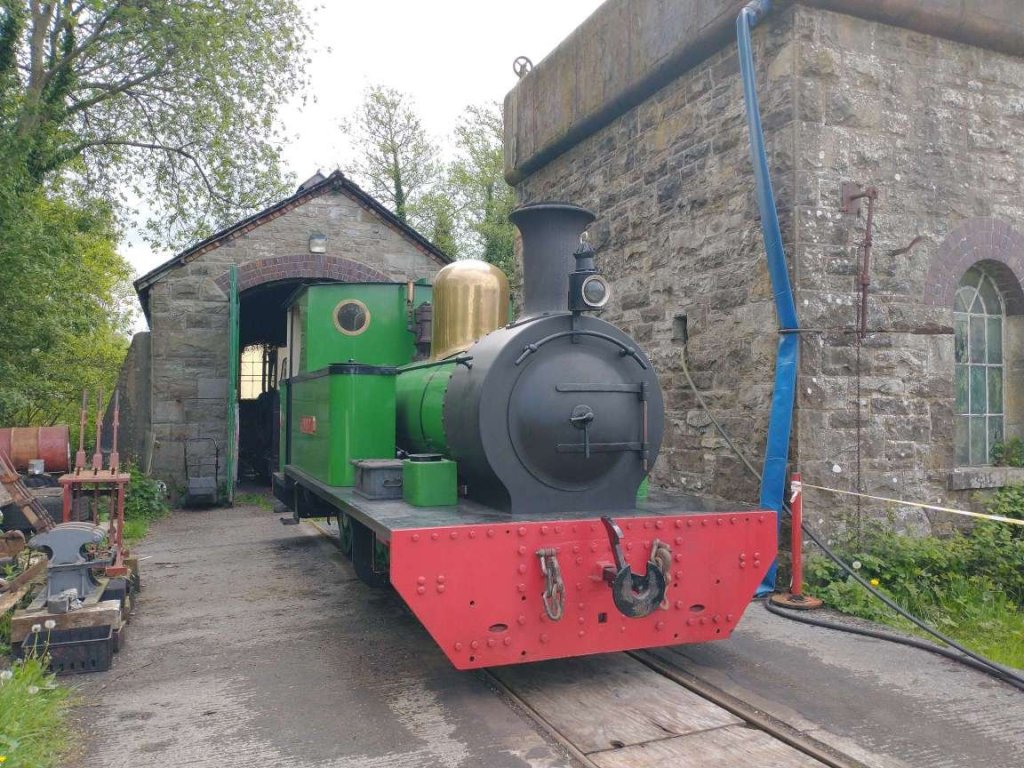
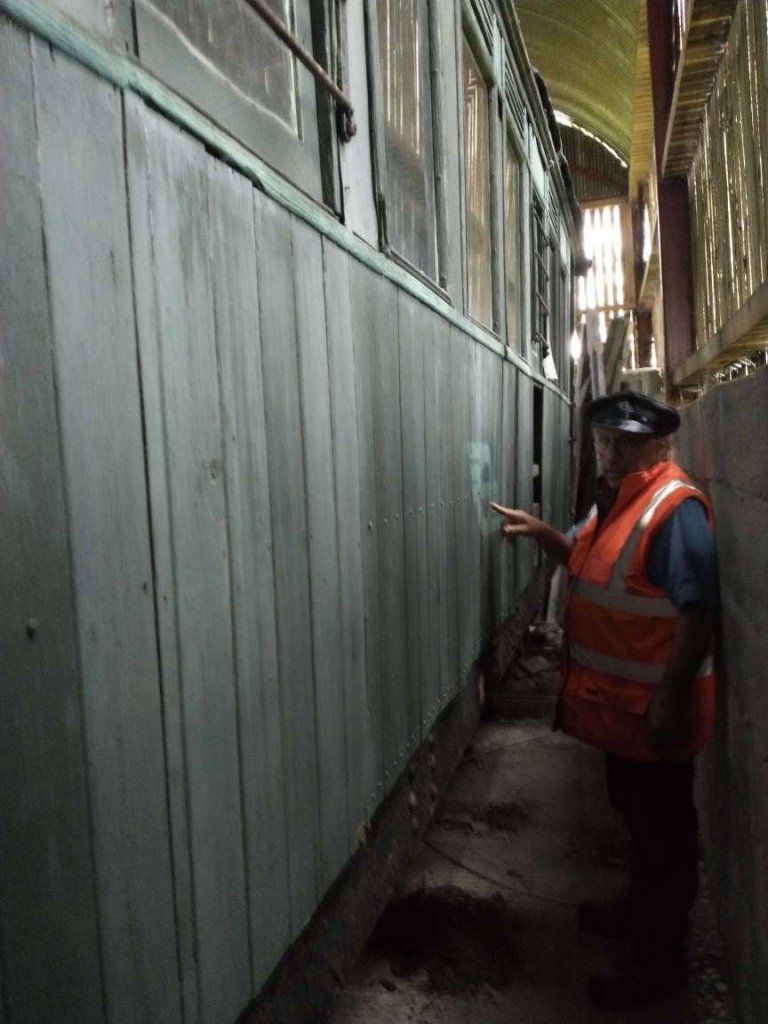

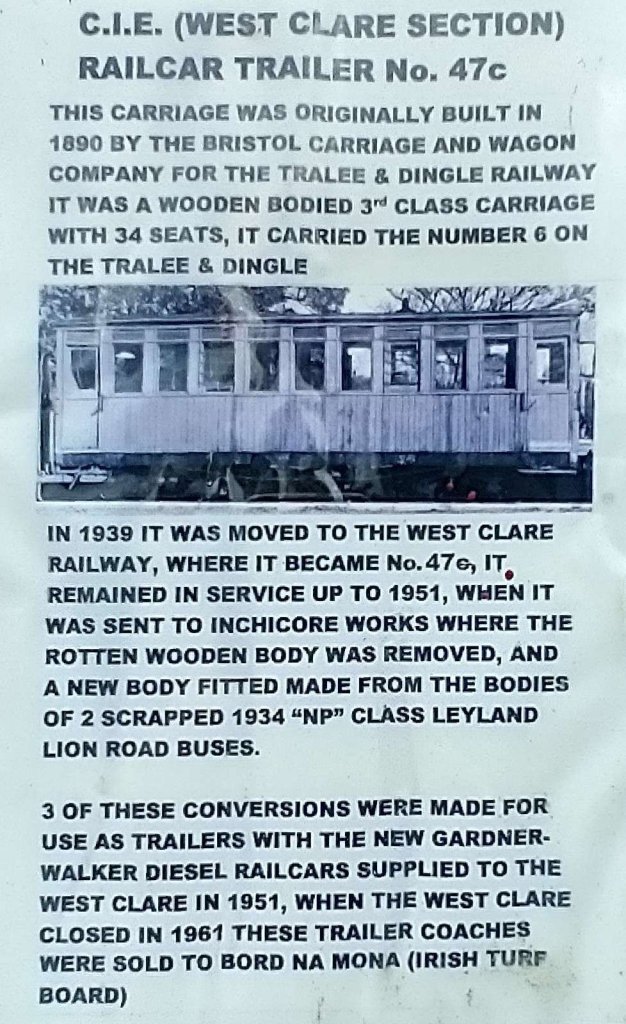
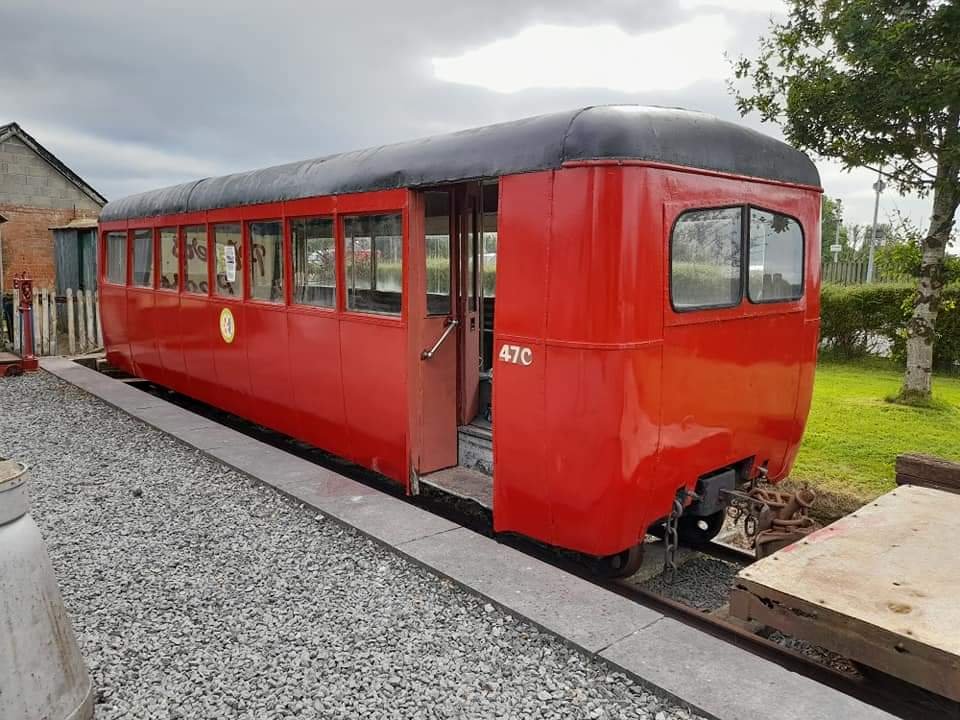
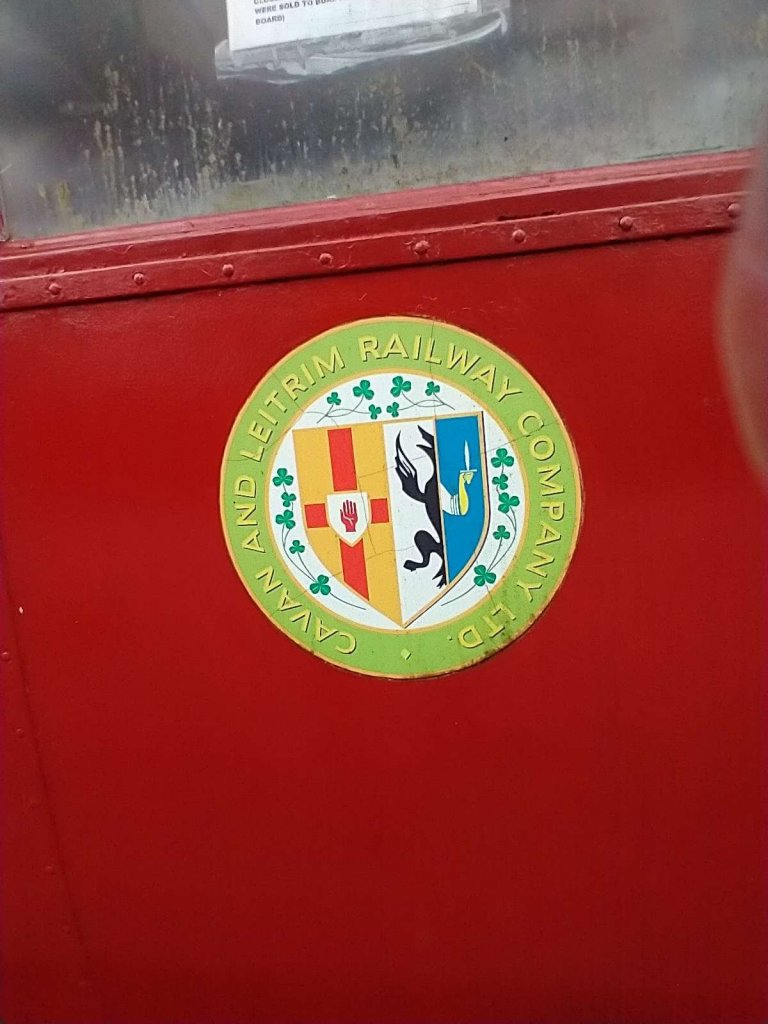
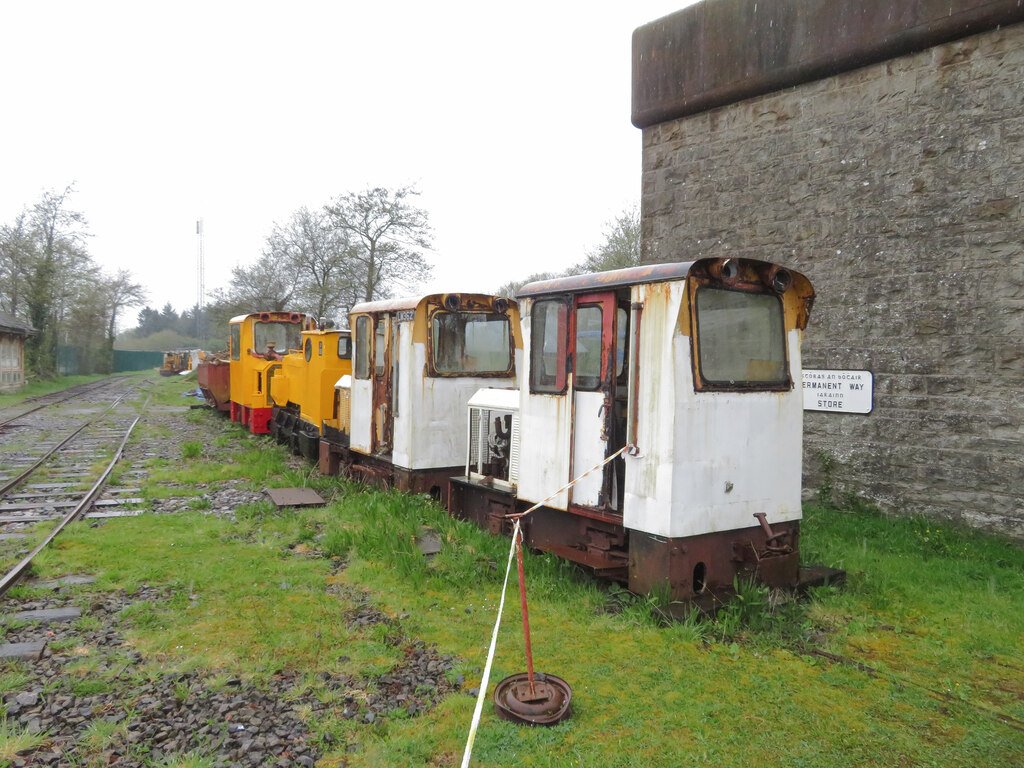
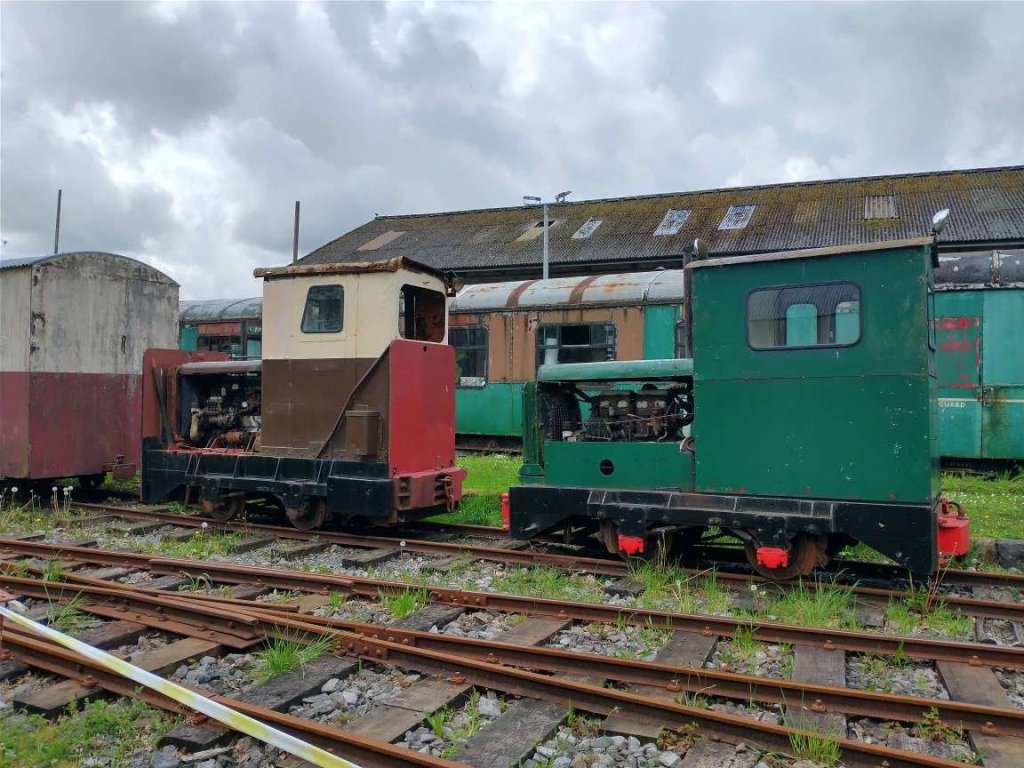
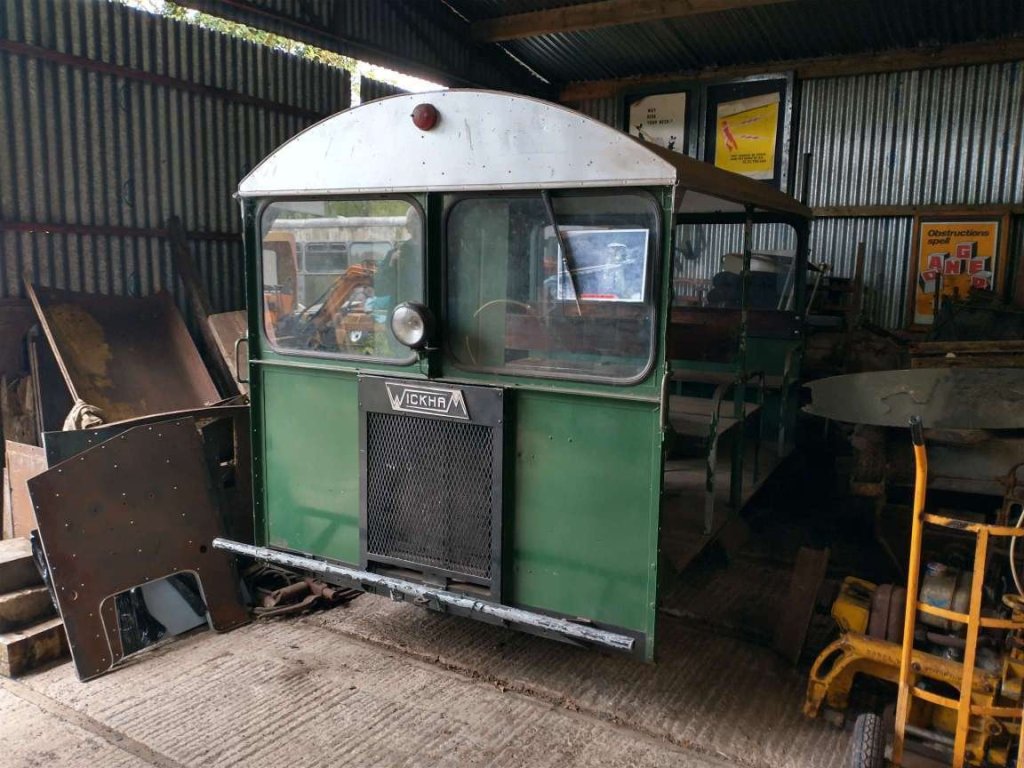
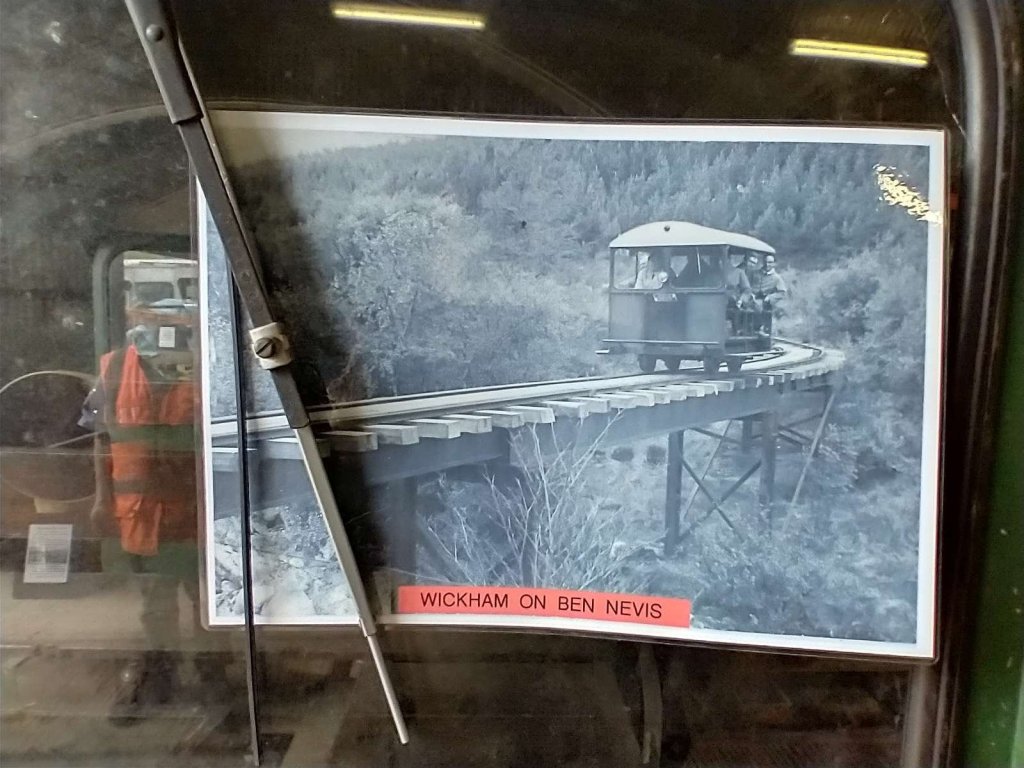
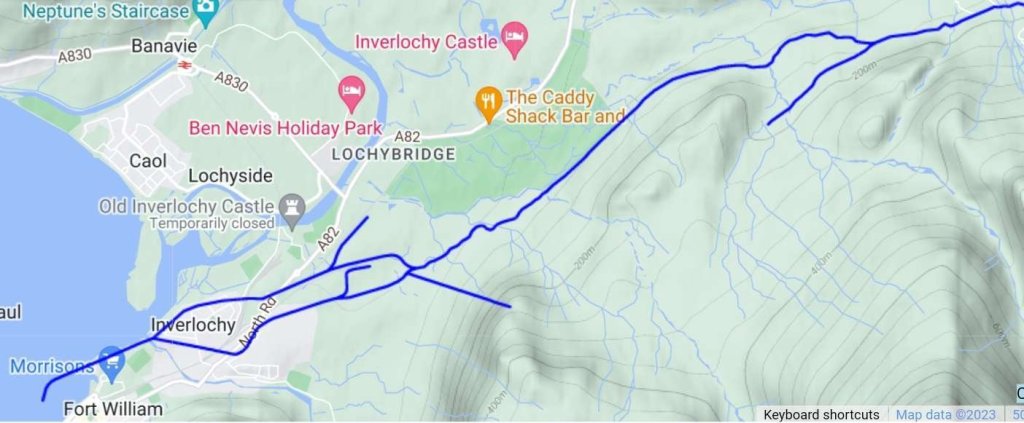
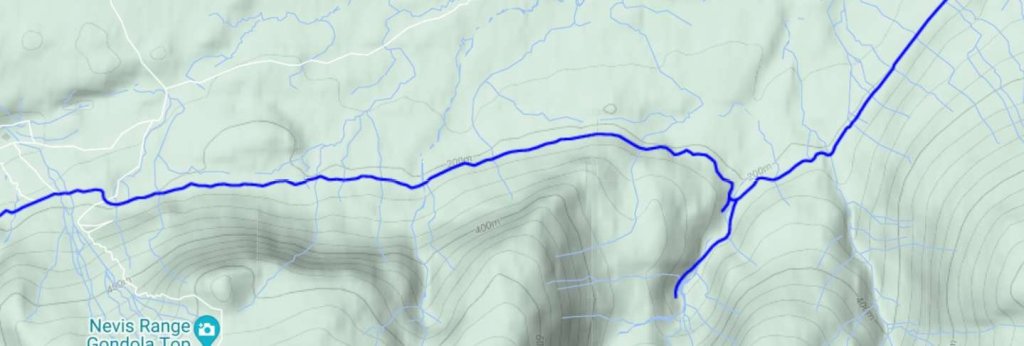
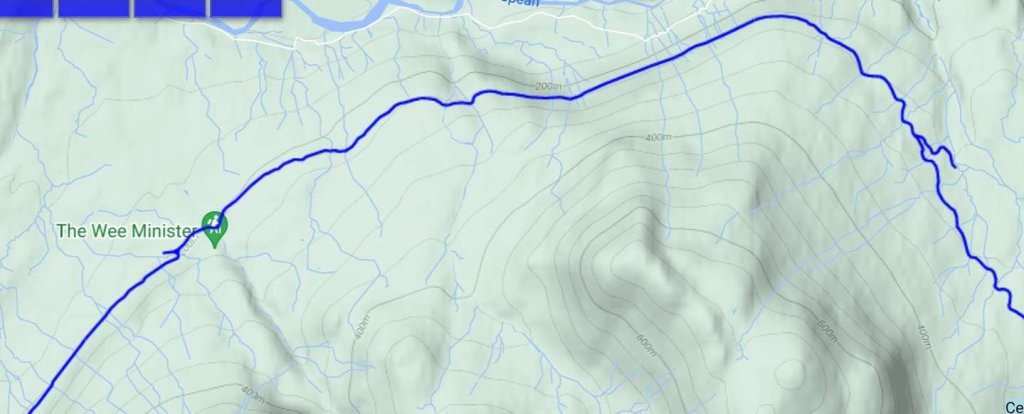
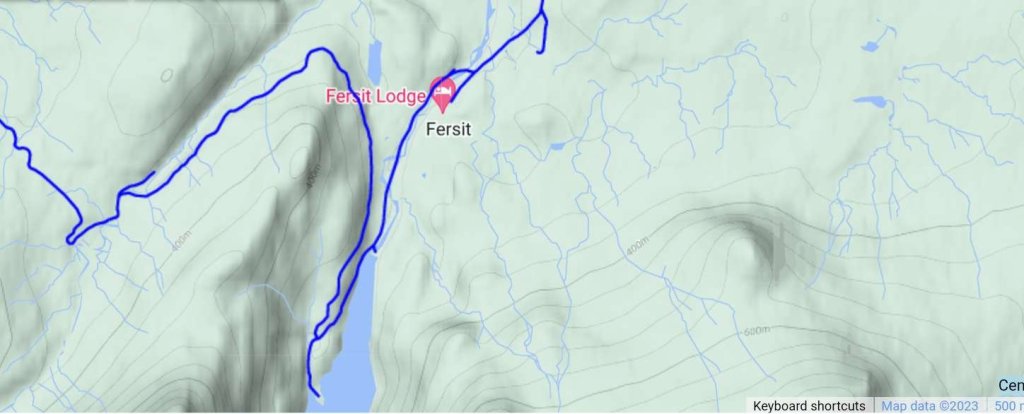
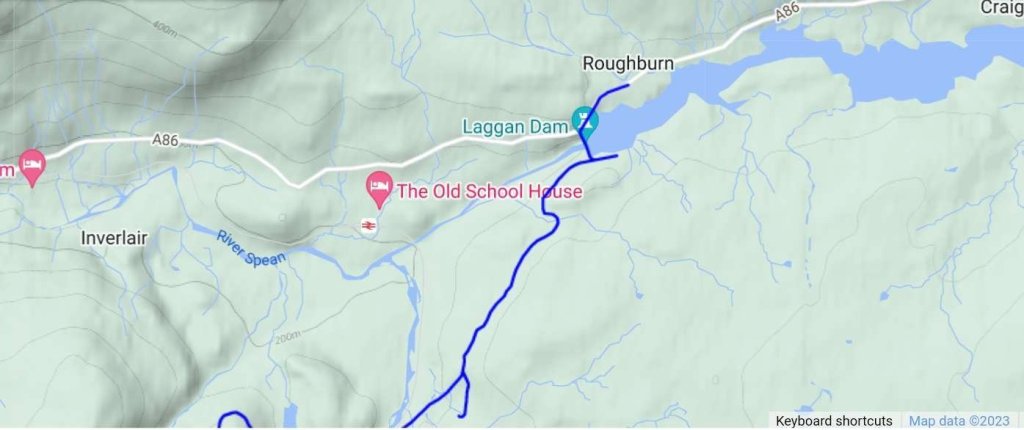

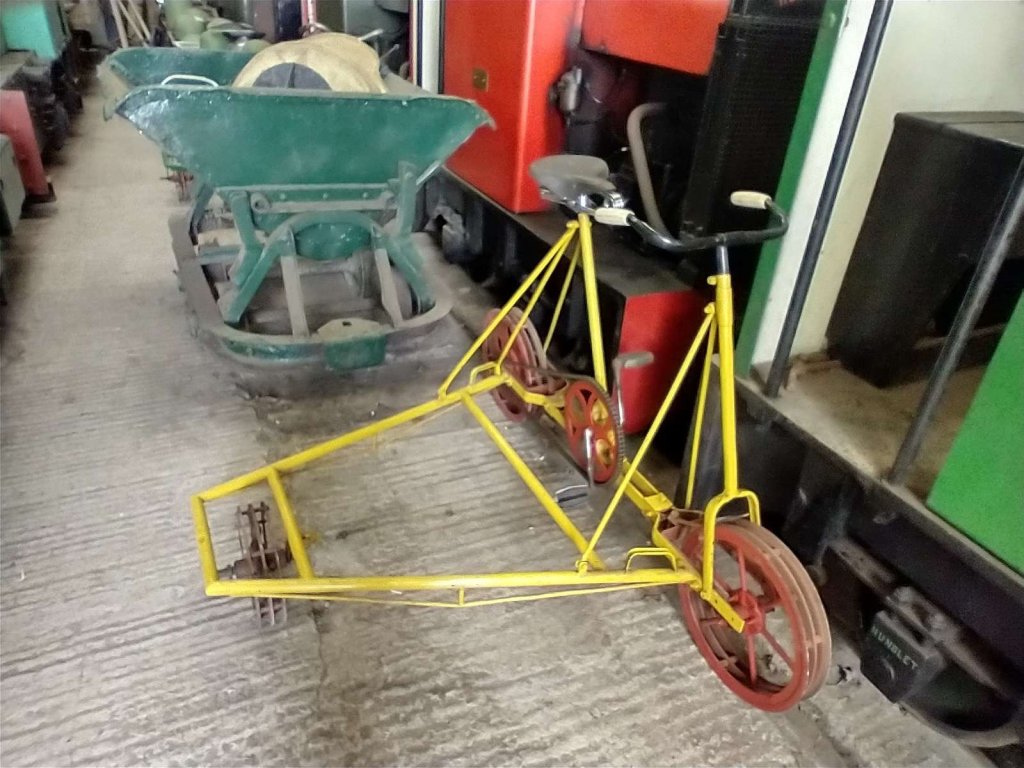
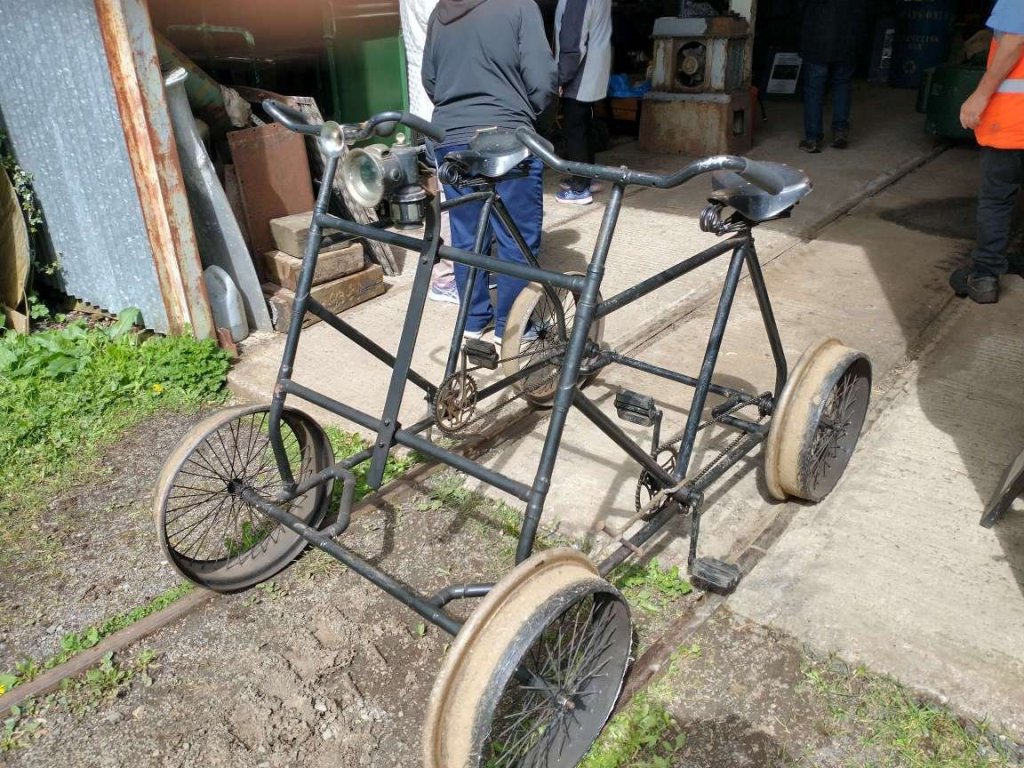
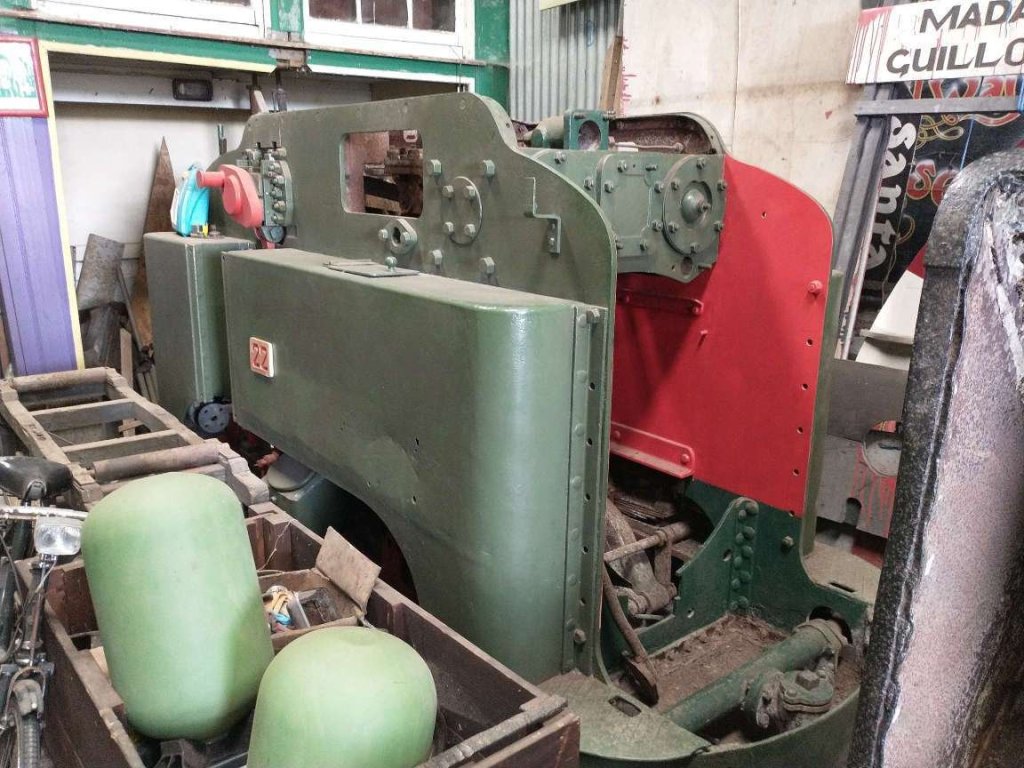

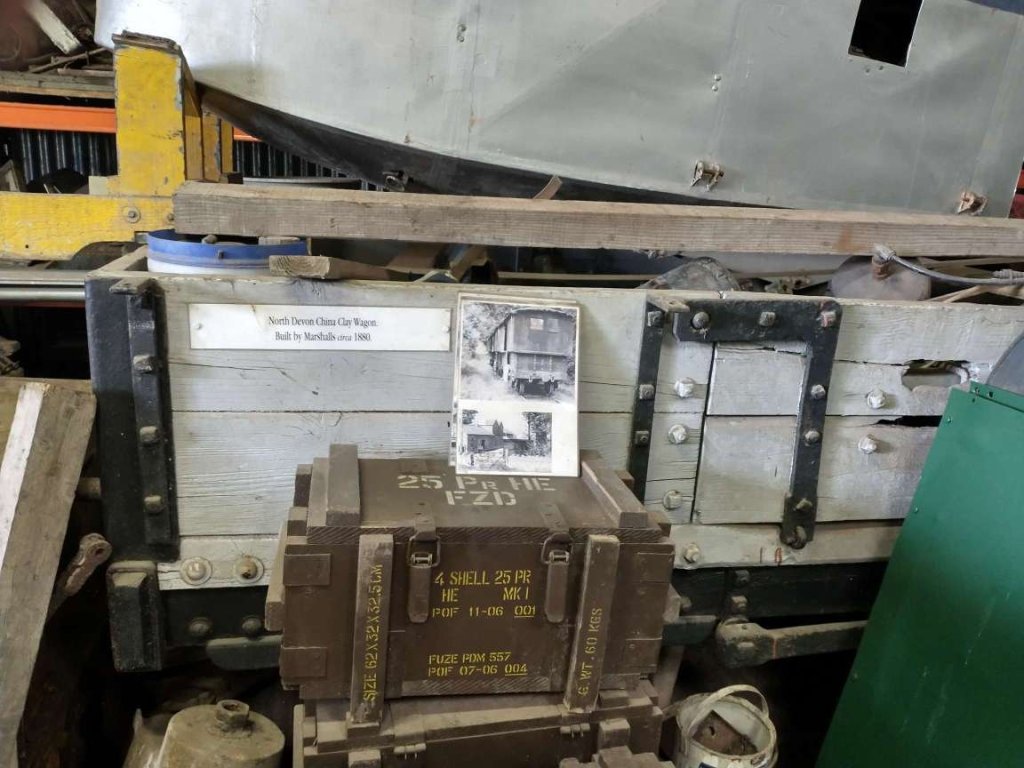
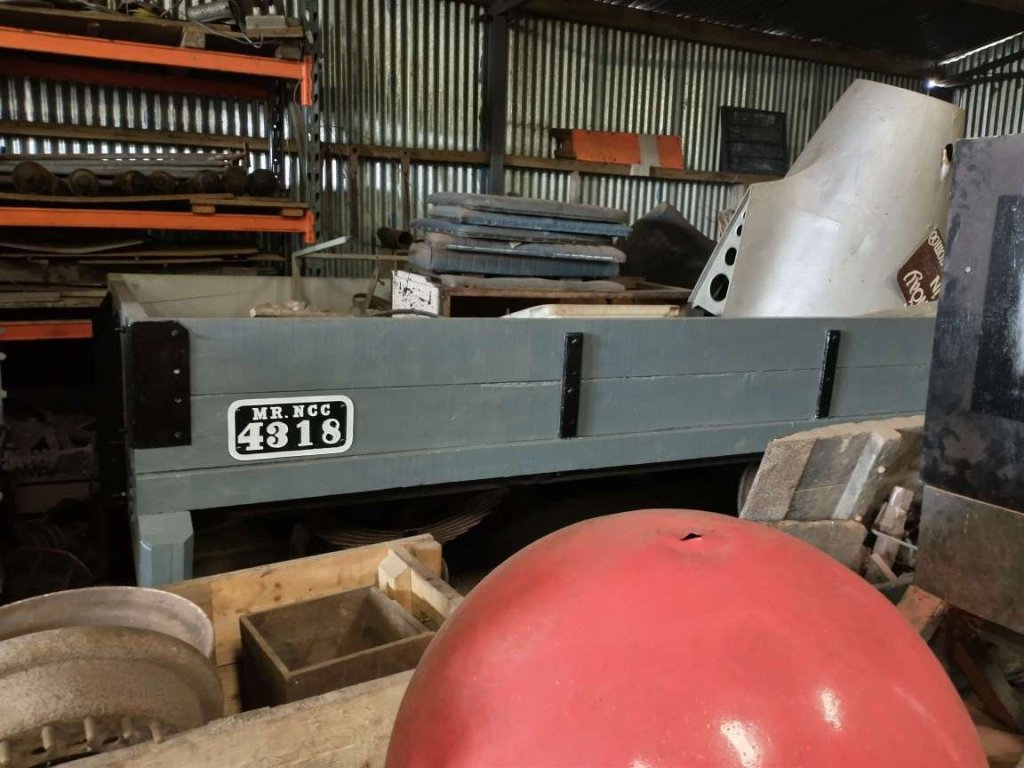
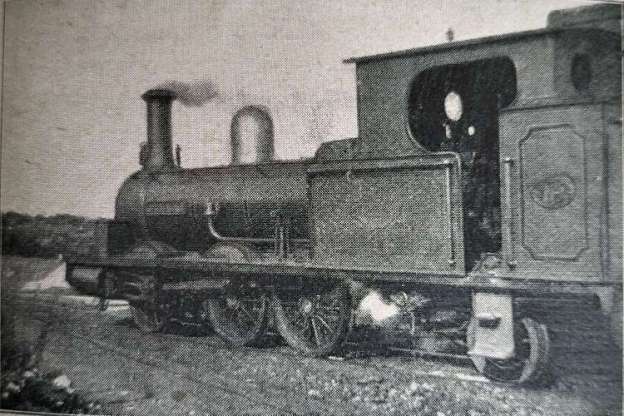
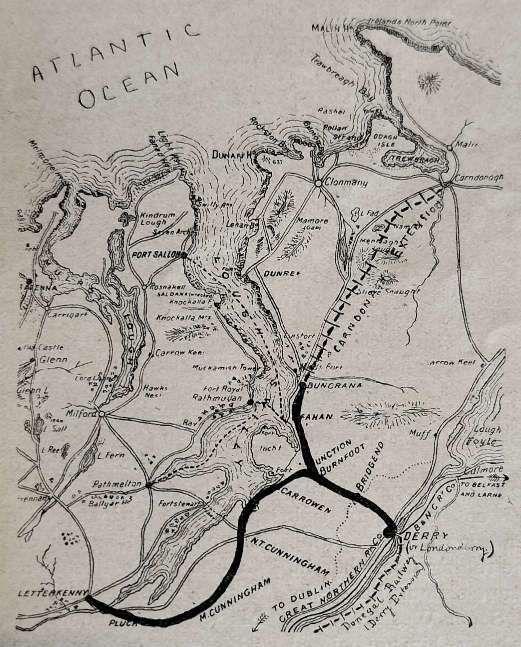
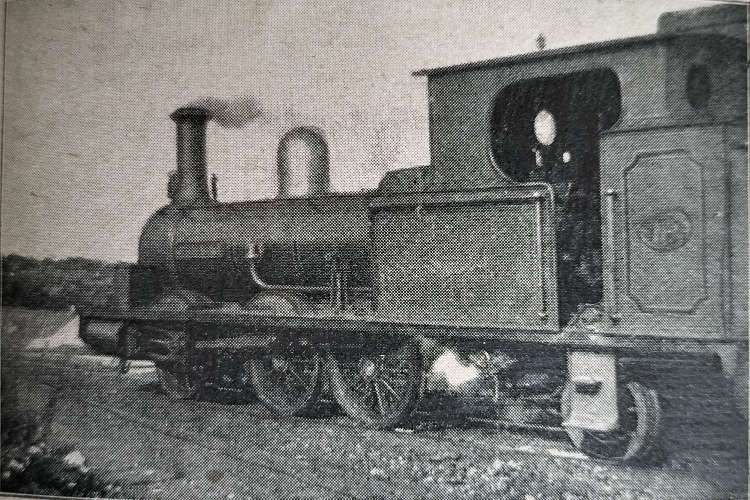
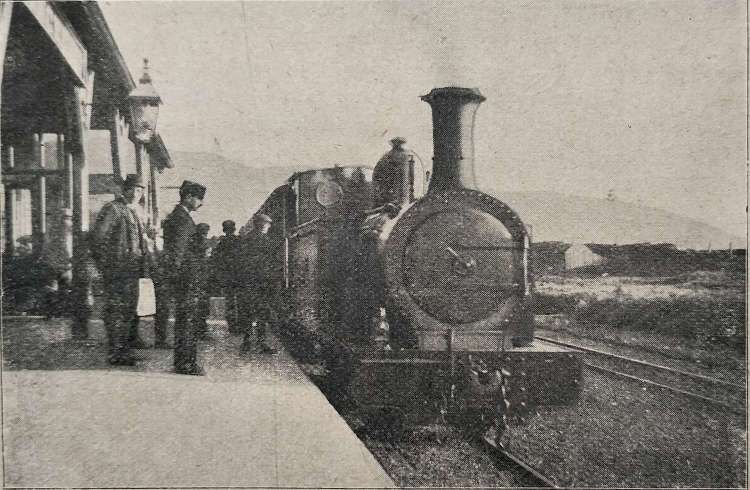


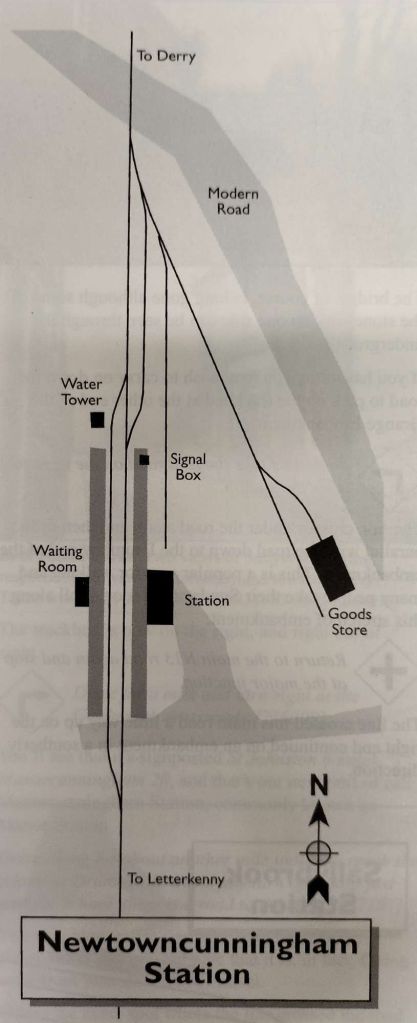
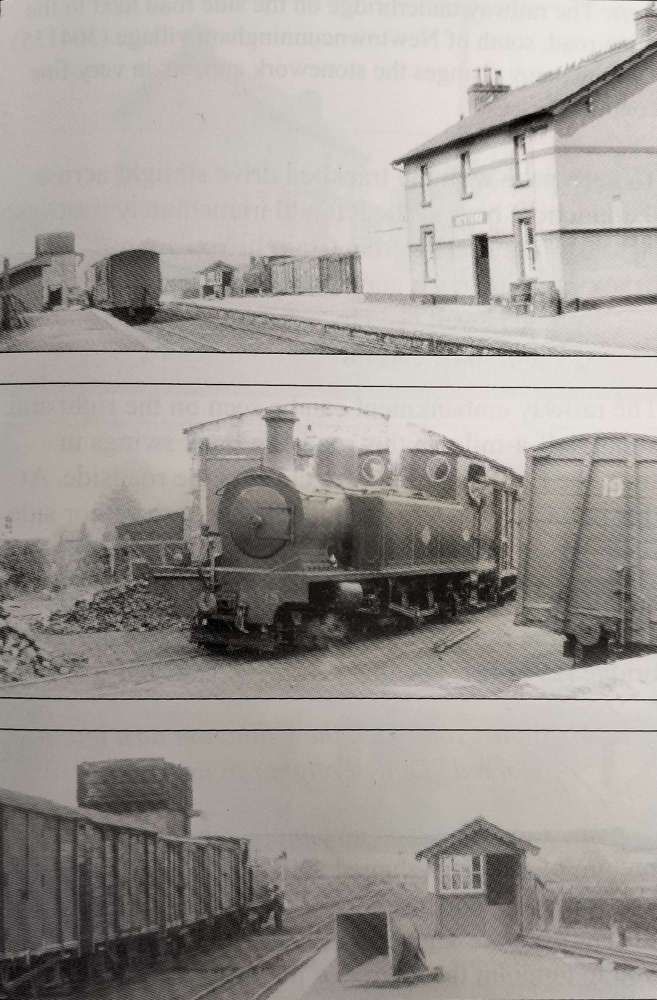


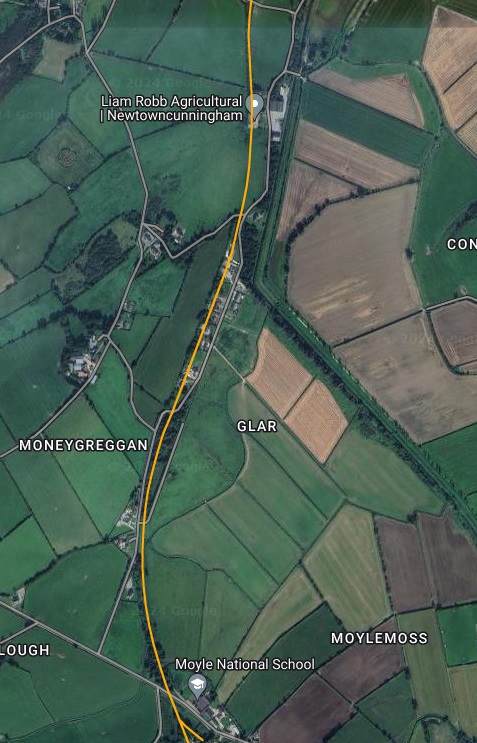


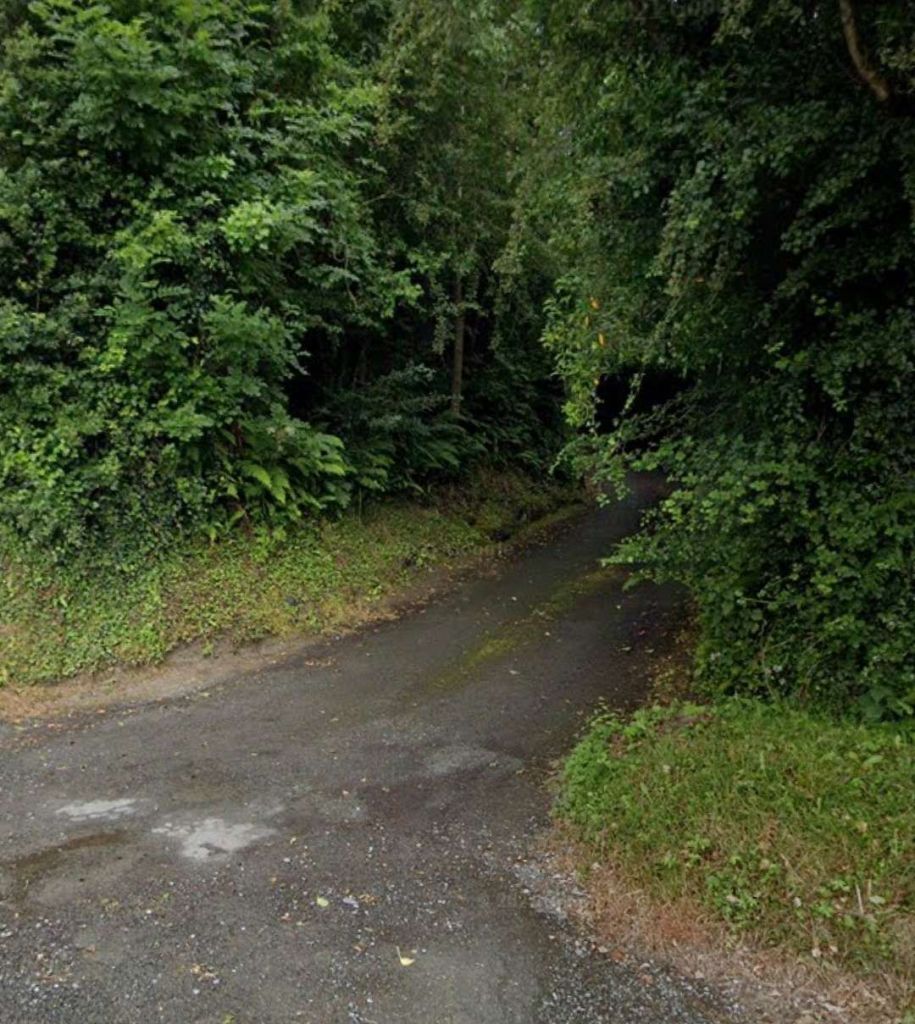

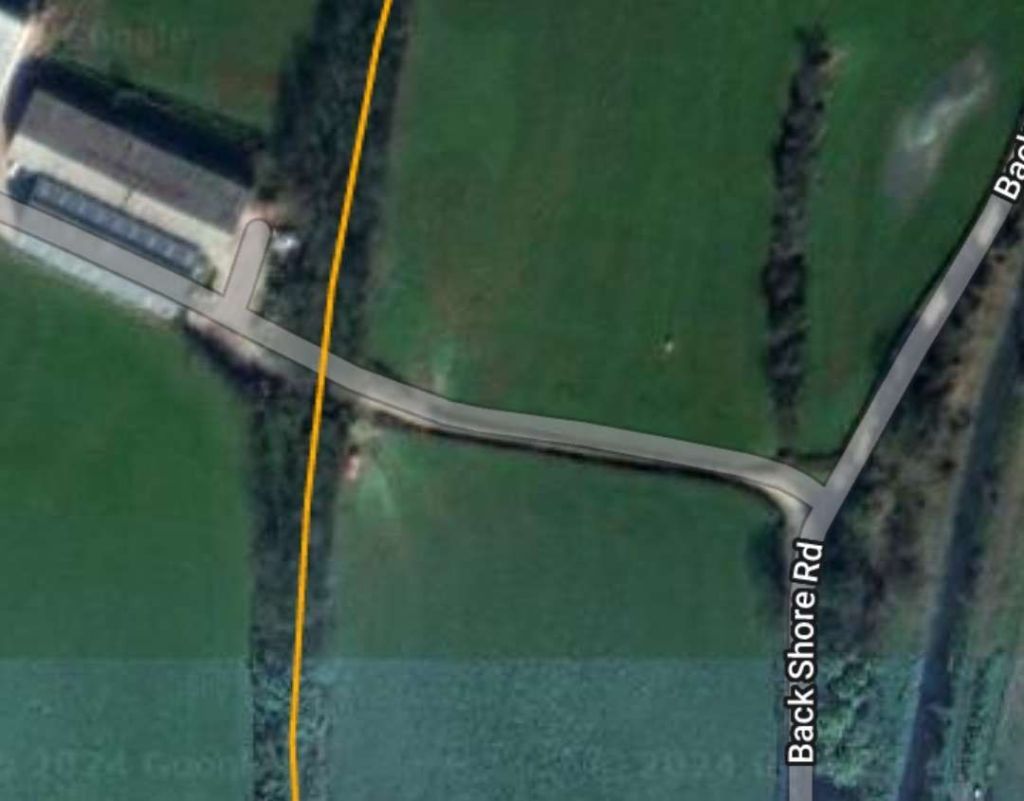


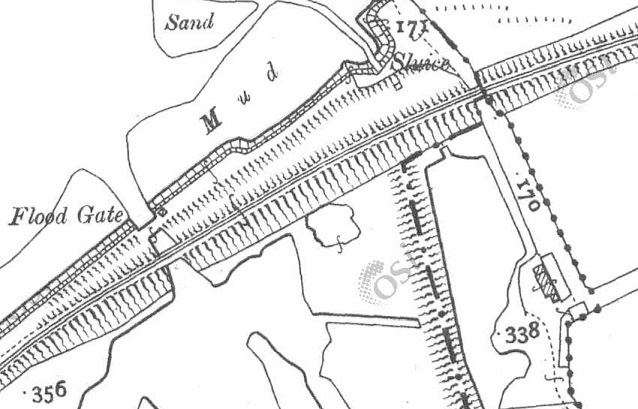

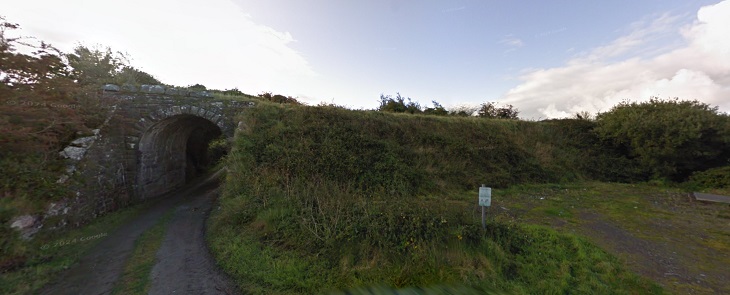


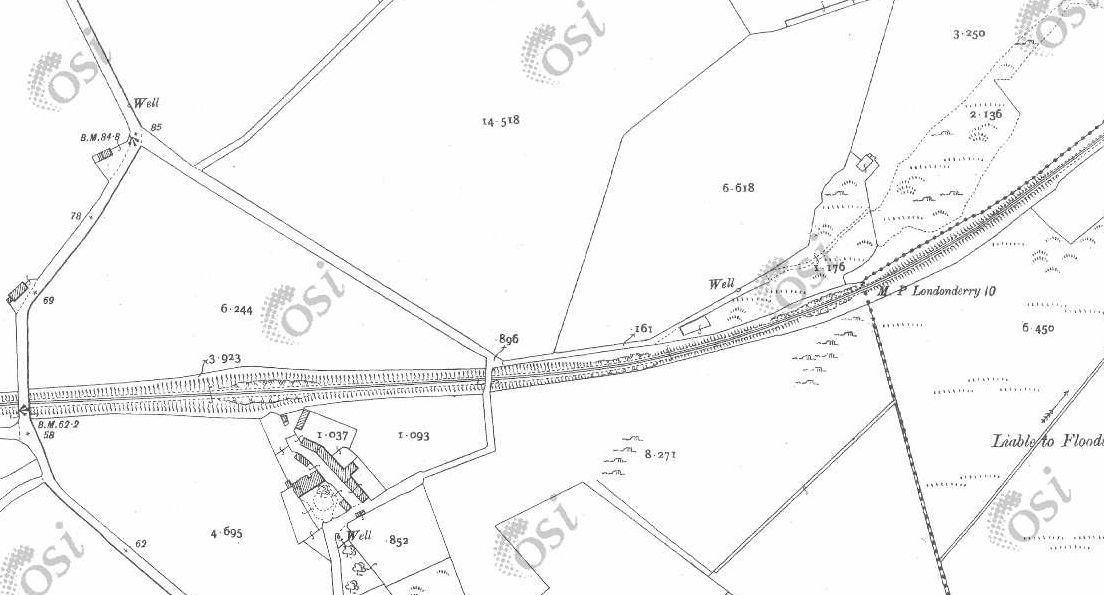

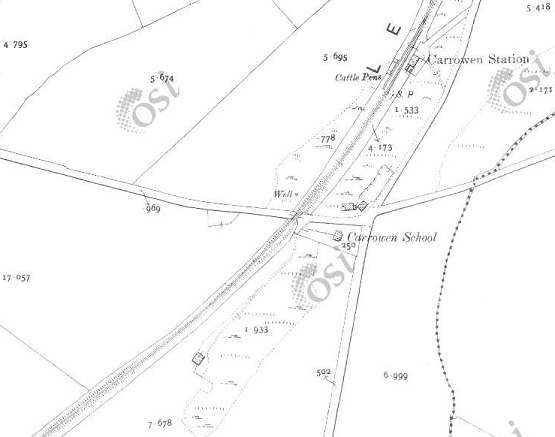


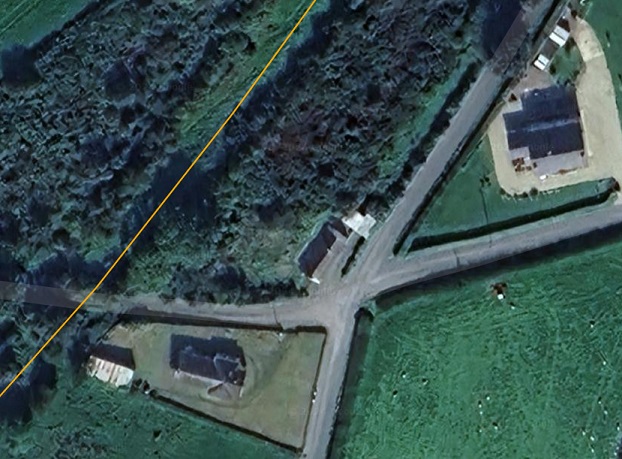
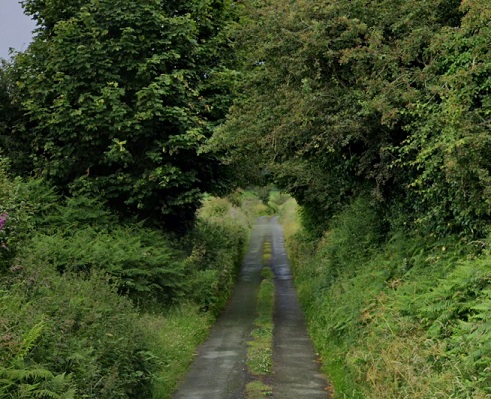


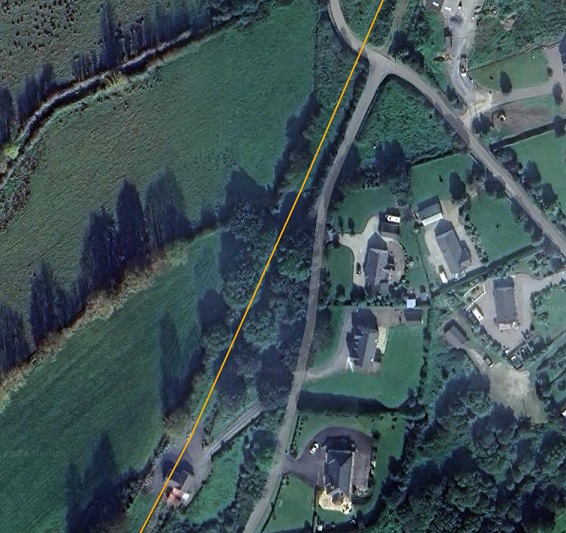


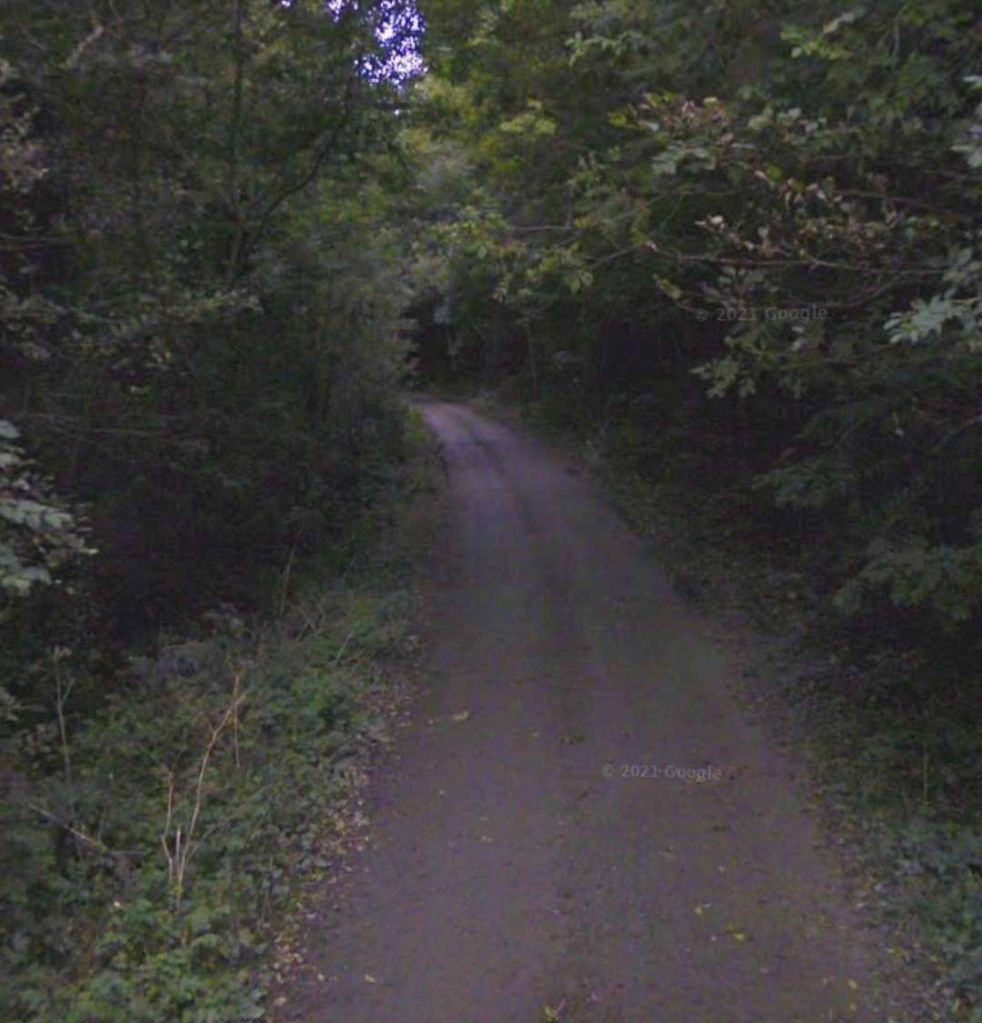
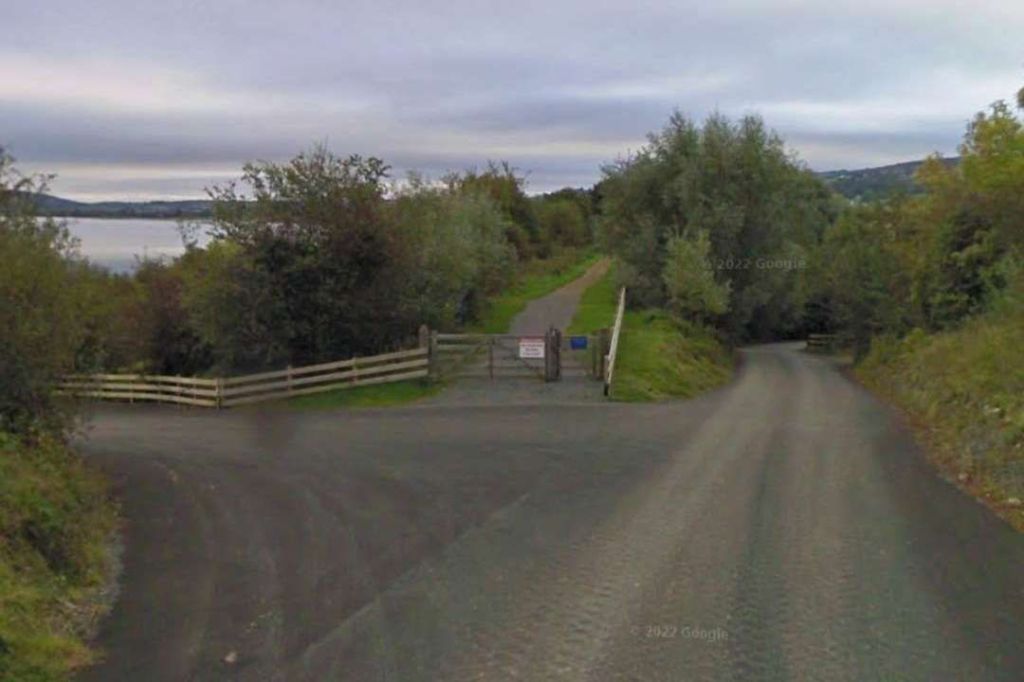


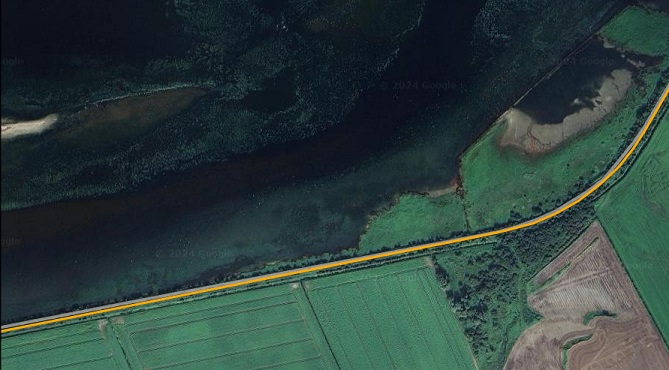
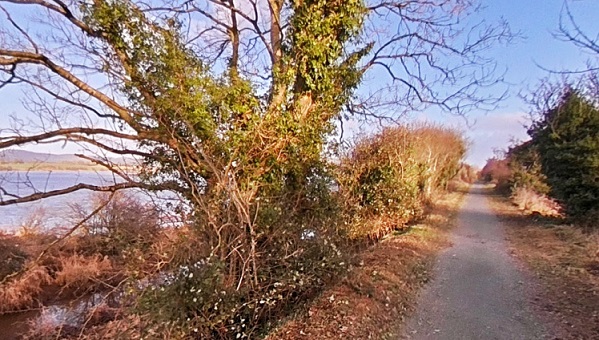


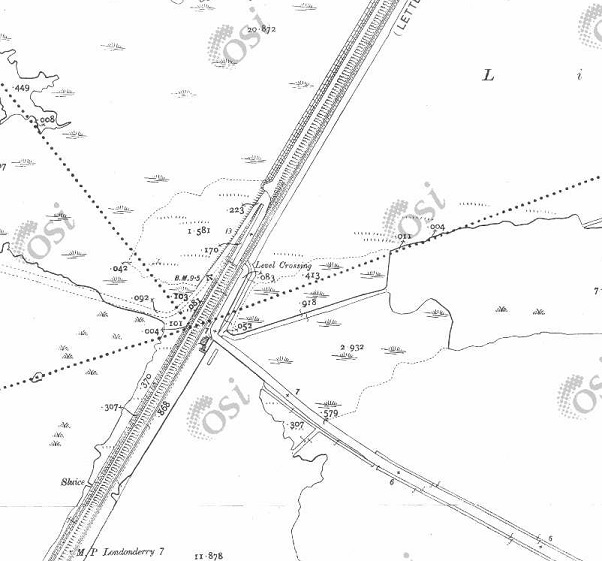


