
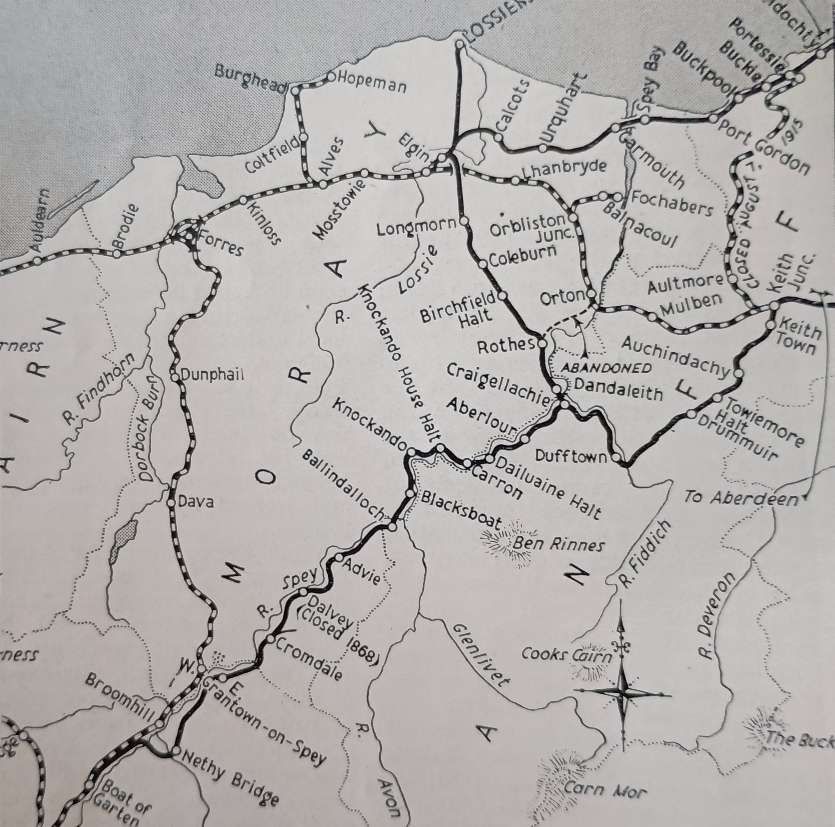
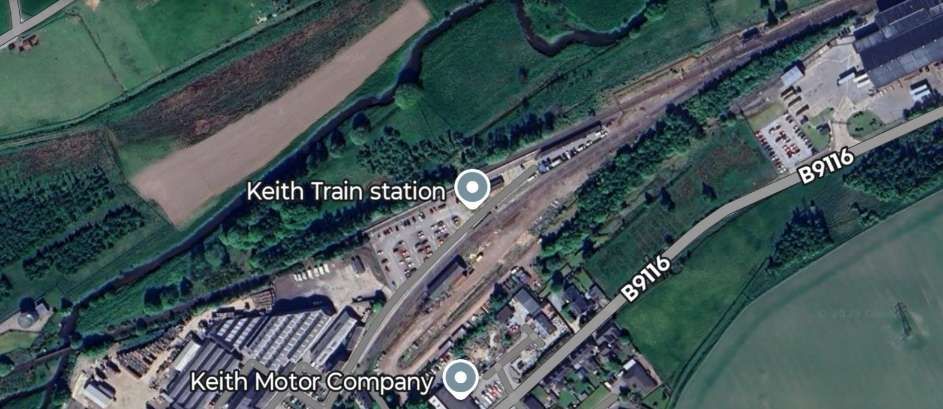
This is the third article following the Strathspey Line. The first can be found here. [3] The second can be found here. [4]
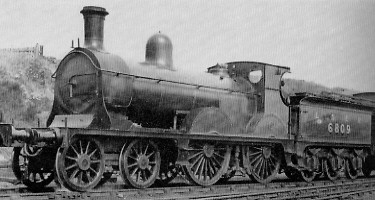
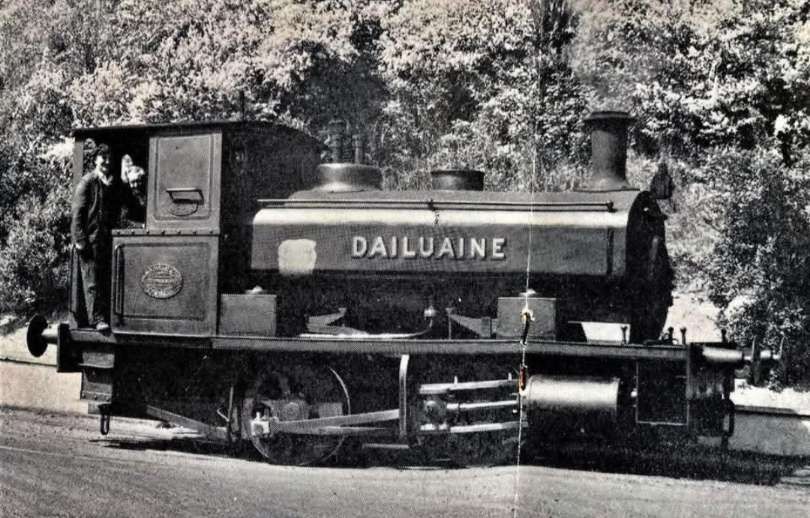
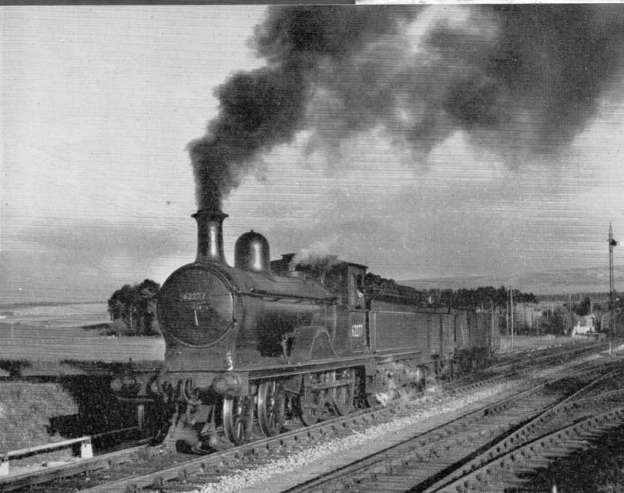
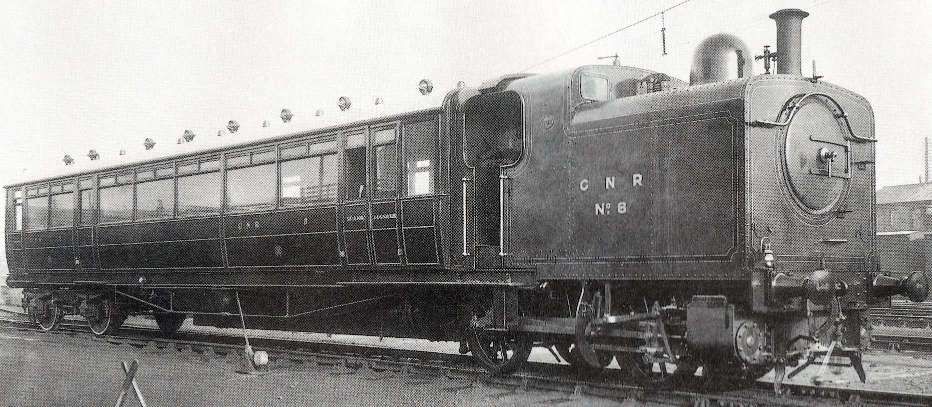
The featured image above is a Manson O class 4-4-0 locomotive. When the GNSR Directors requested larger engines to handle increasing passenger traffic loads, and Manson designed his Class O (LNER D42) locomotives to meet this need. Initially allocated to main line passenger duties between Aberdeen and Elgin, as later 4-4-0s (e.g..the D40s) were introduced, they were displaced to secondary duties. By the time of the Grouping (1923), they could be found across the GNSR system, including at Boat of Garten working the Speyside Line. [32]
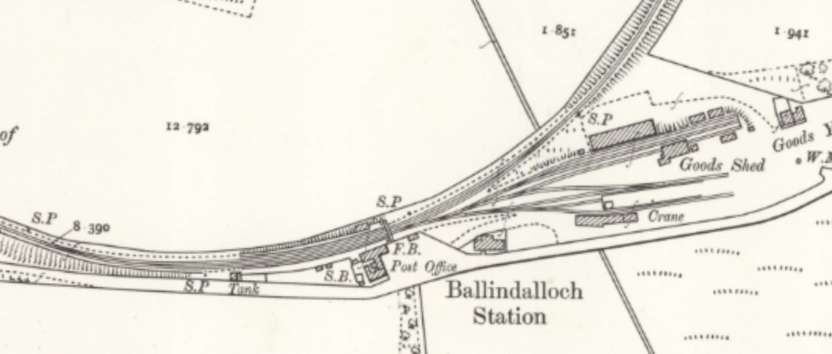
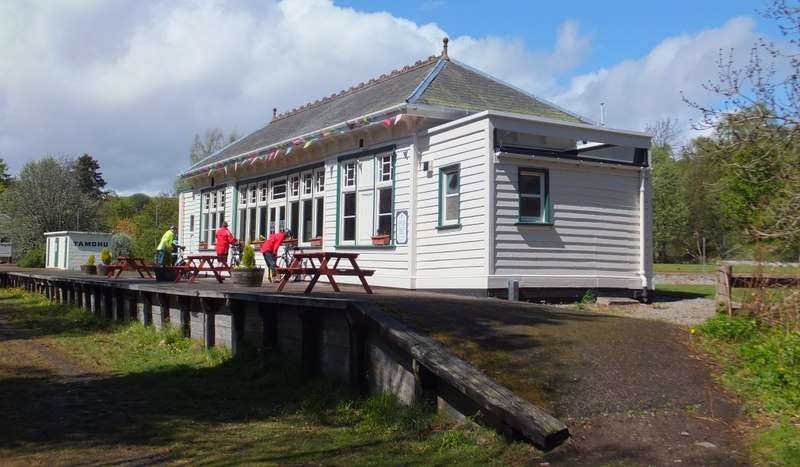
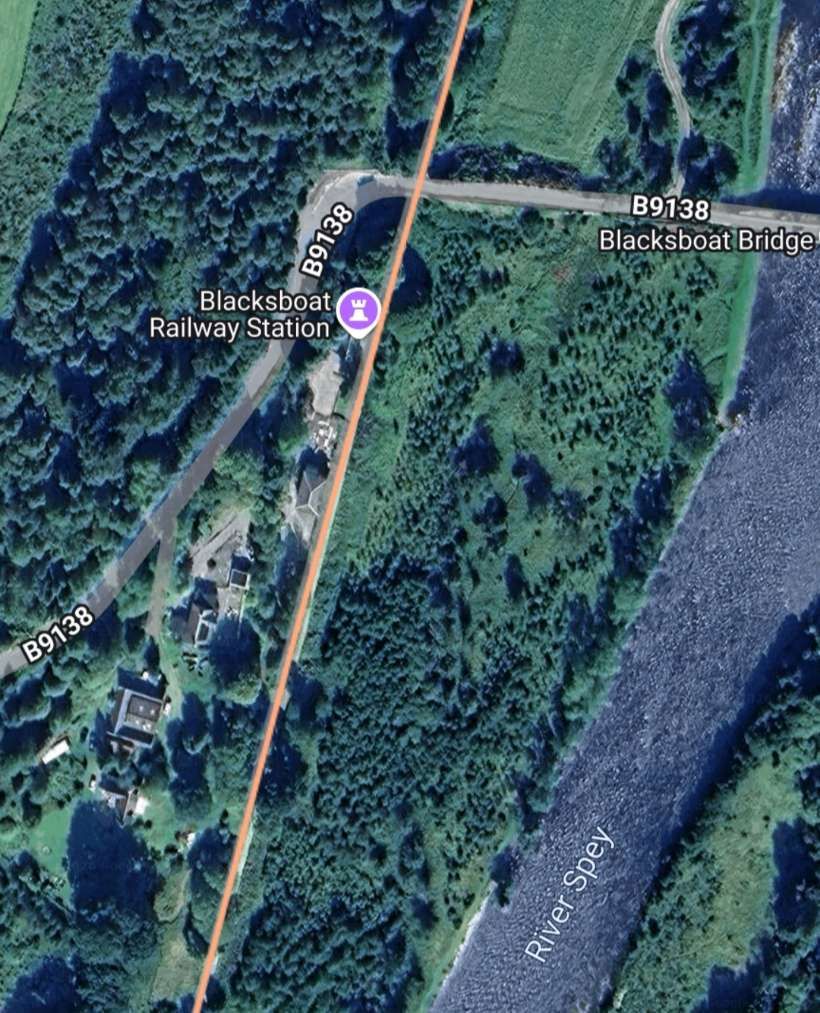
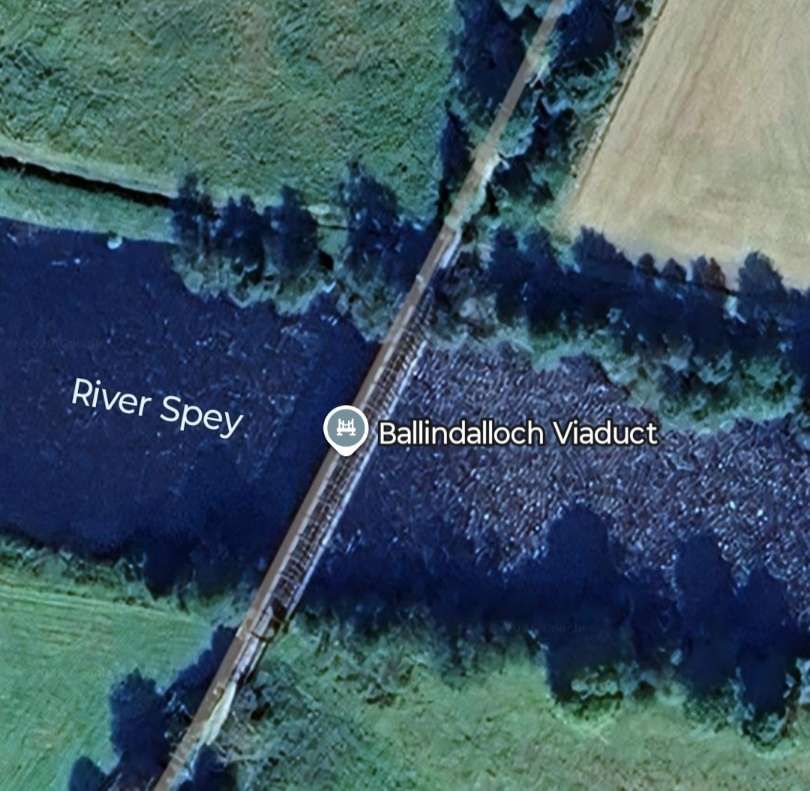
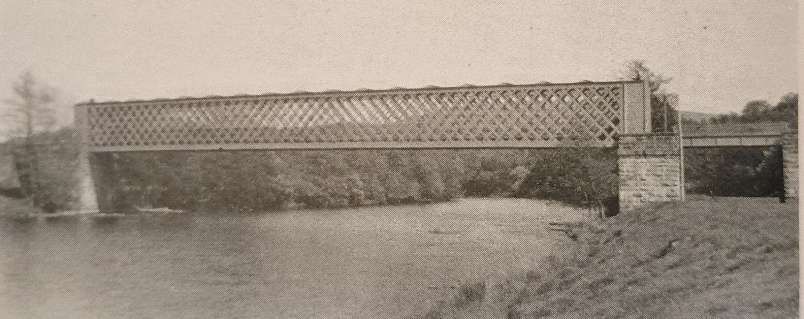
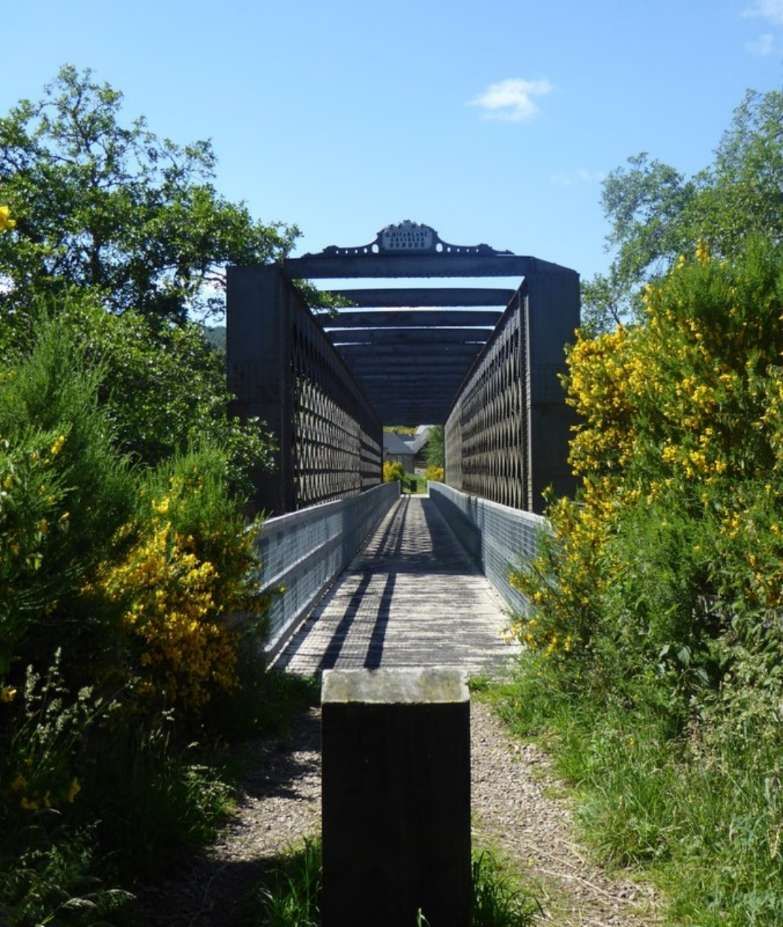
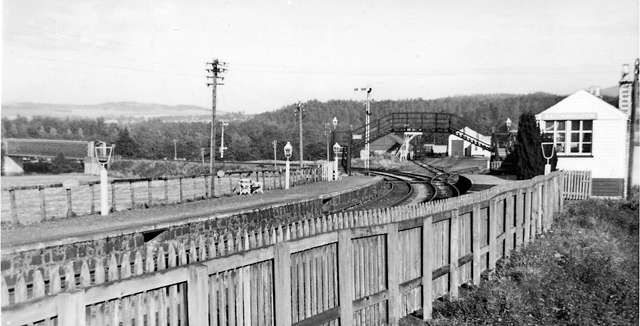
We start this next leg of the journey at Ballindalloch Railway Station.
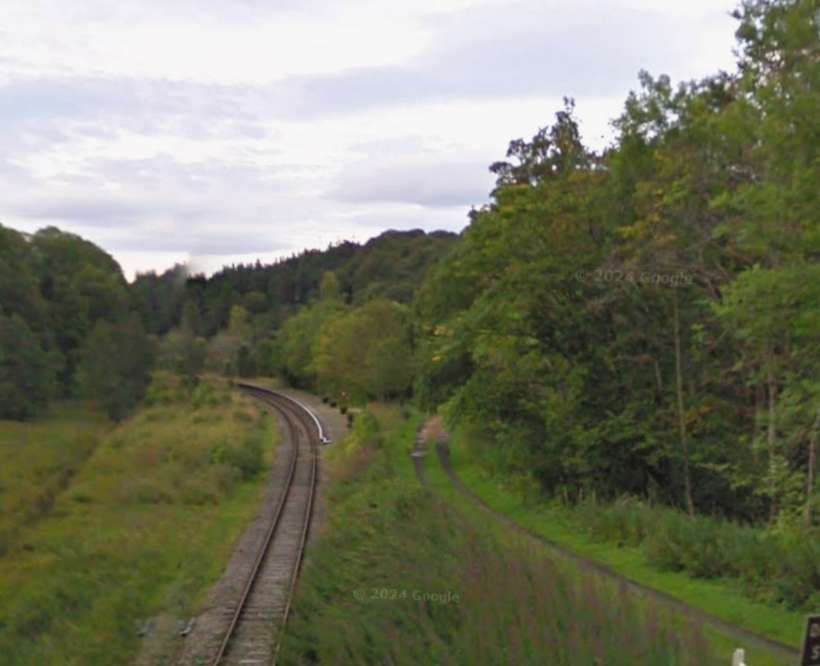
The scenery undergoes a change beyond Ballindalloch, and the woods that have so far characterised the journey give place to the wilder moorland country of upper Strathspey. [2: p6]

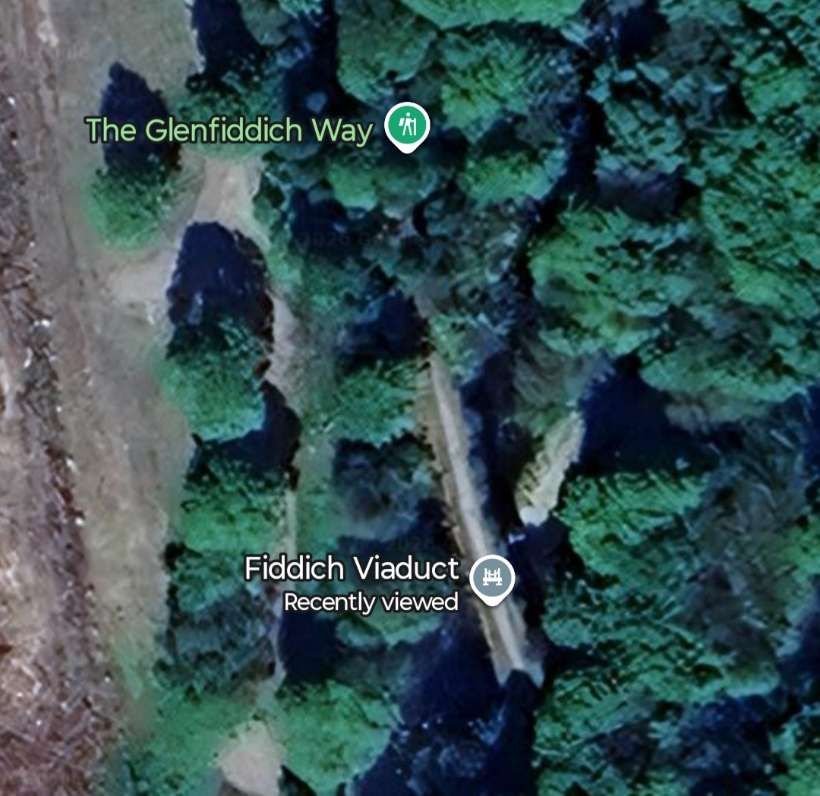
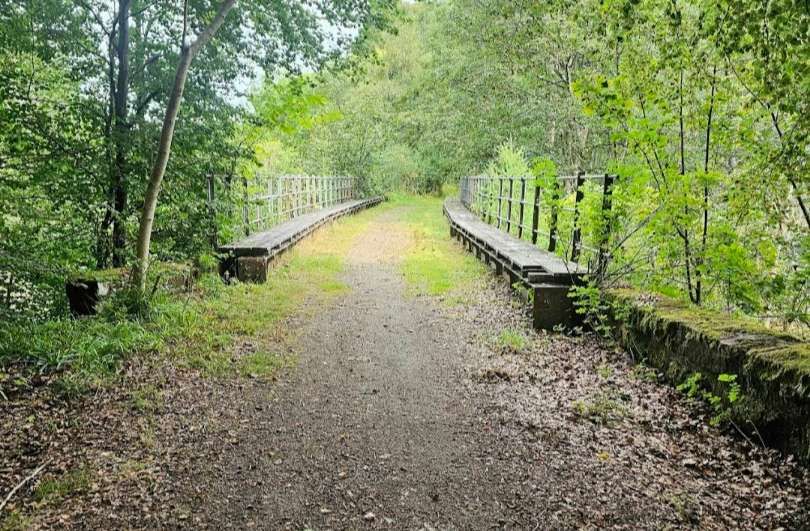
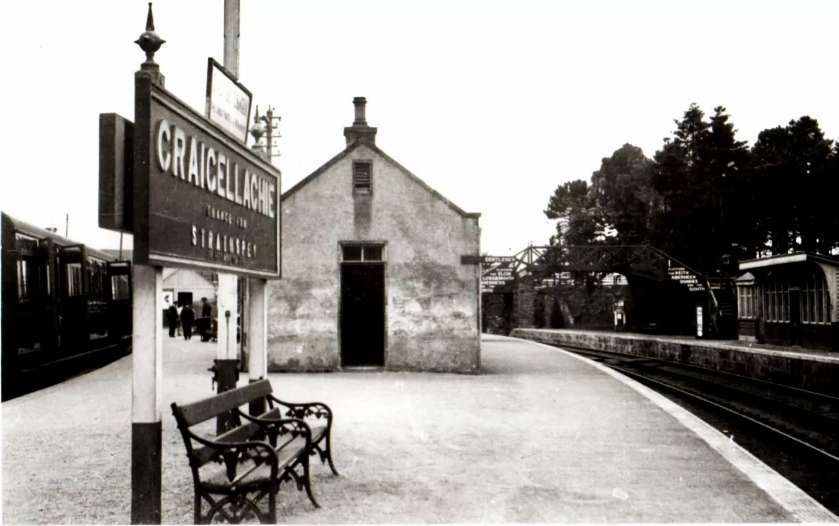
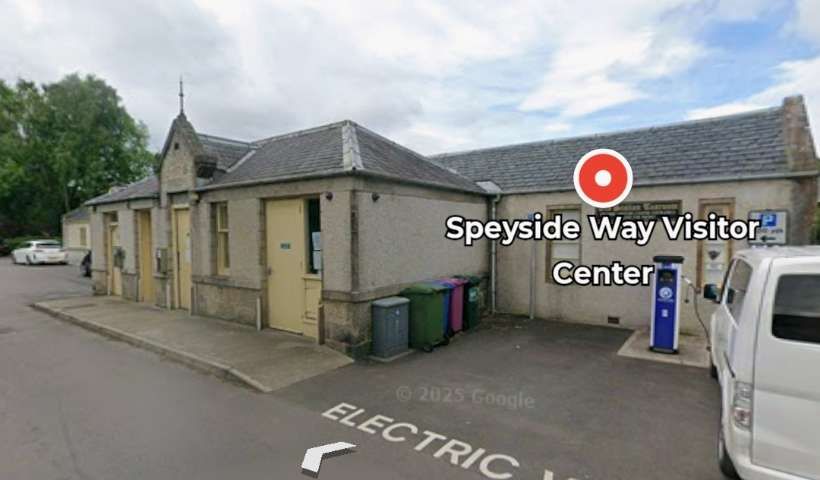
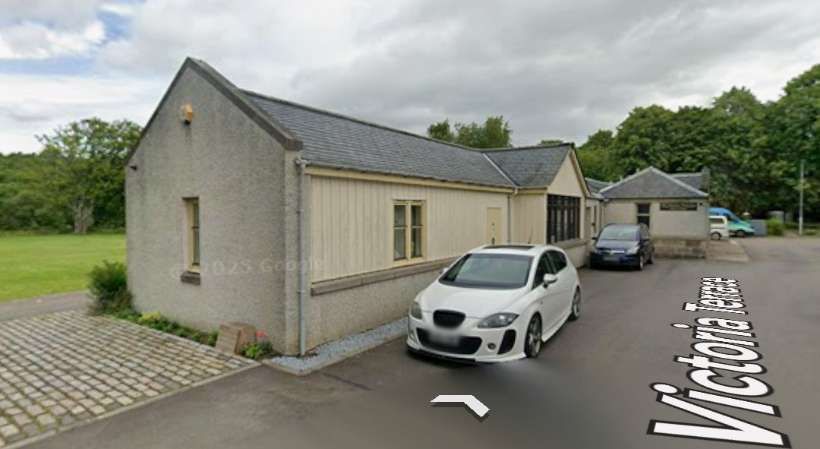
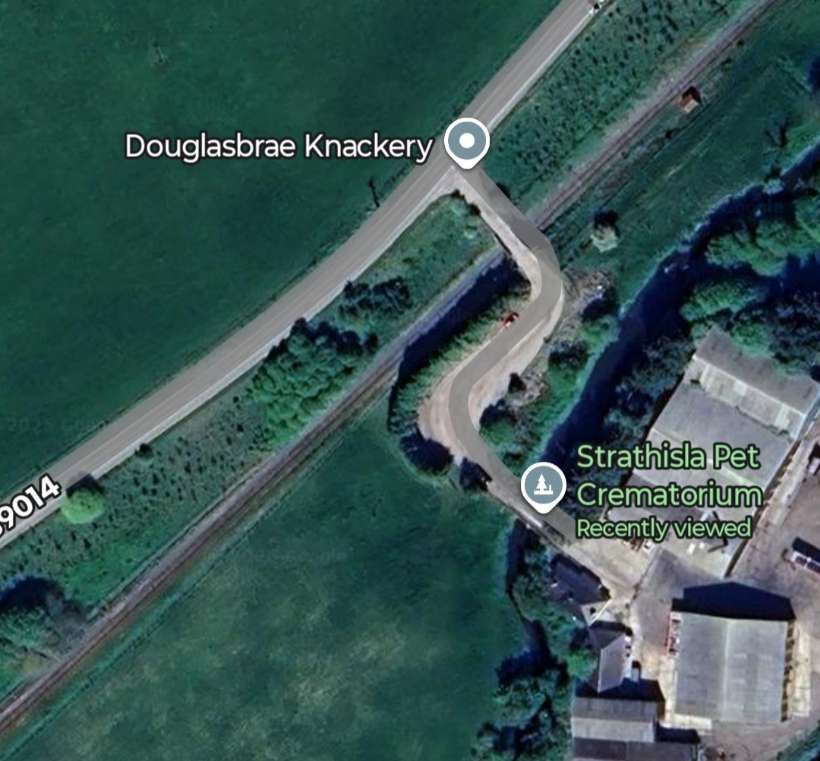
Photographs of Advie Station when the line was operating and after the track had been lifted can be found here. [15]
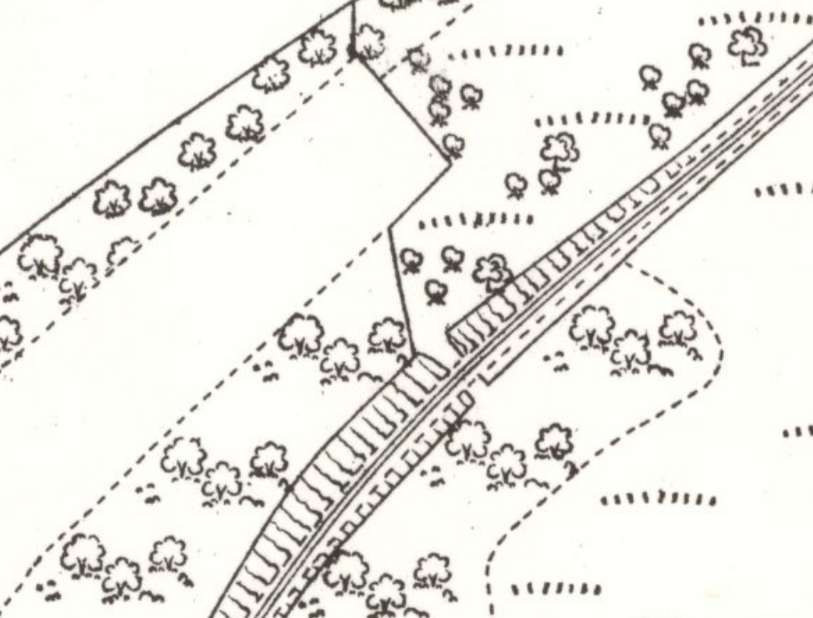
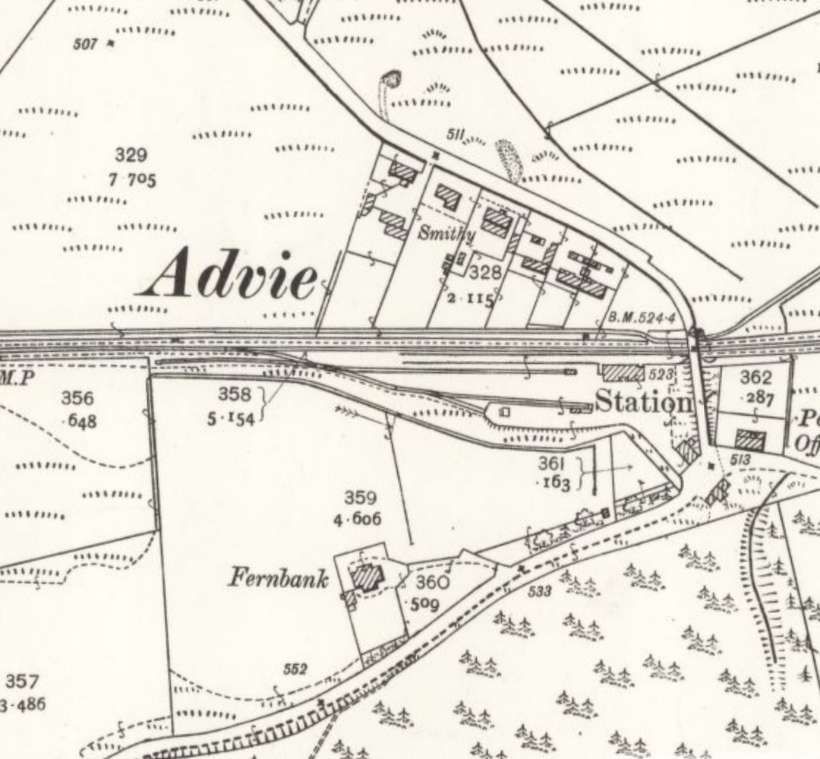
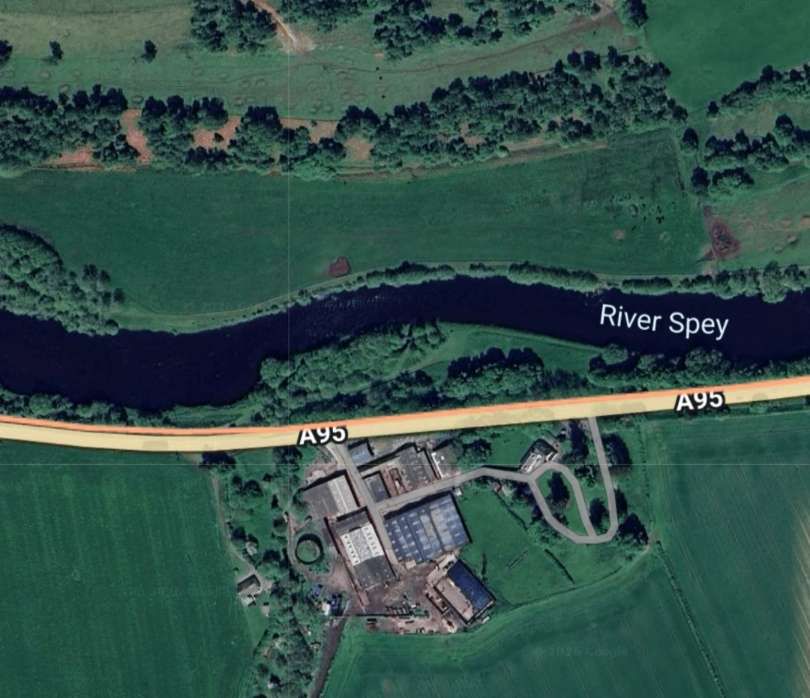
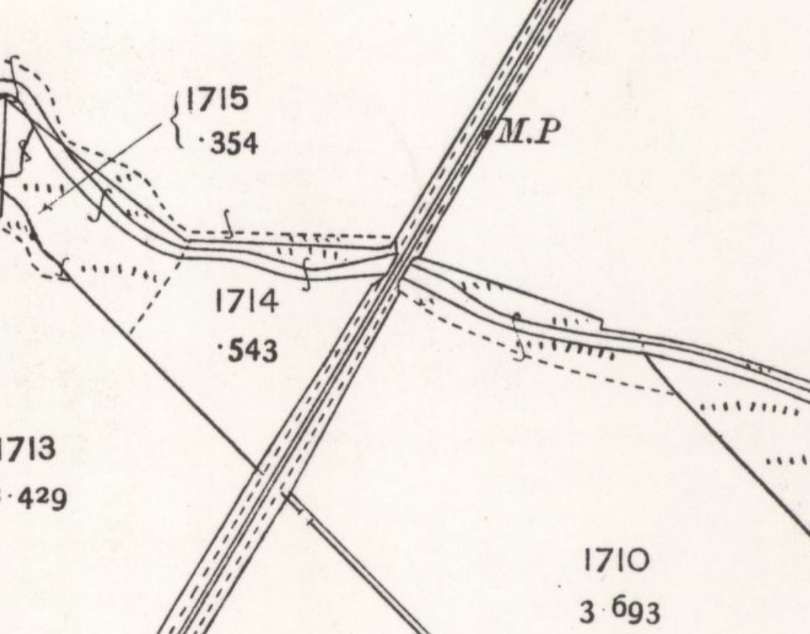
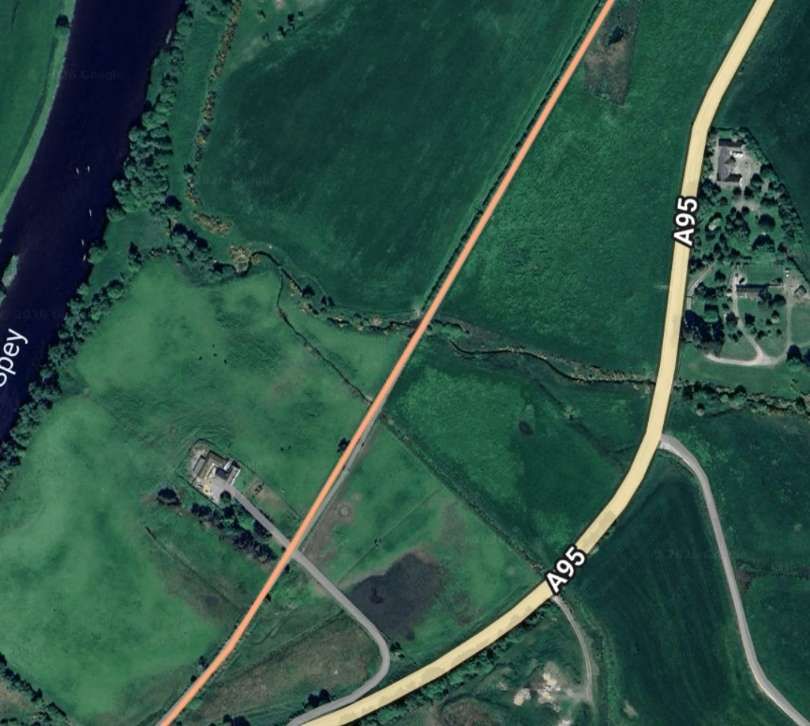
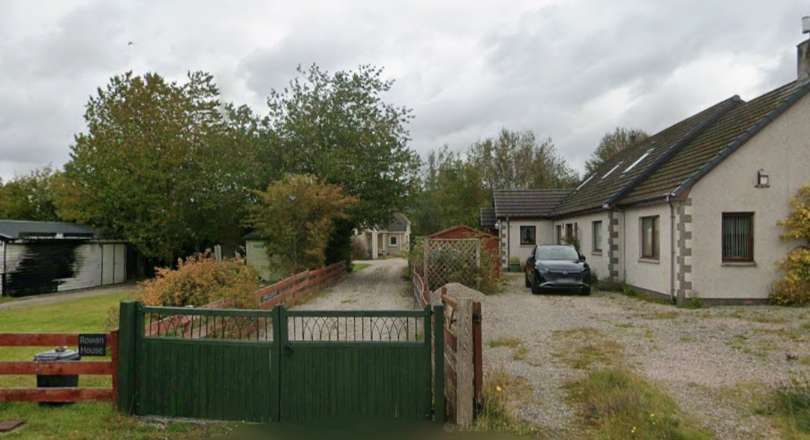
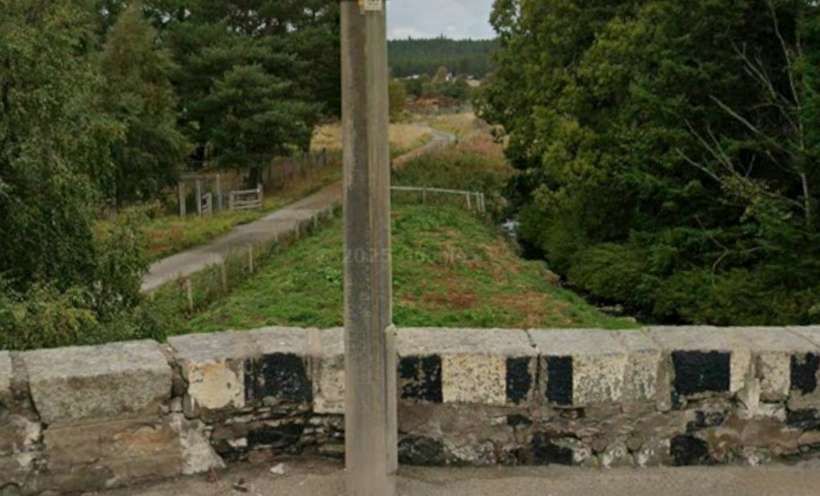
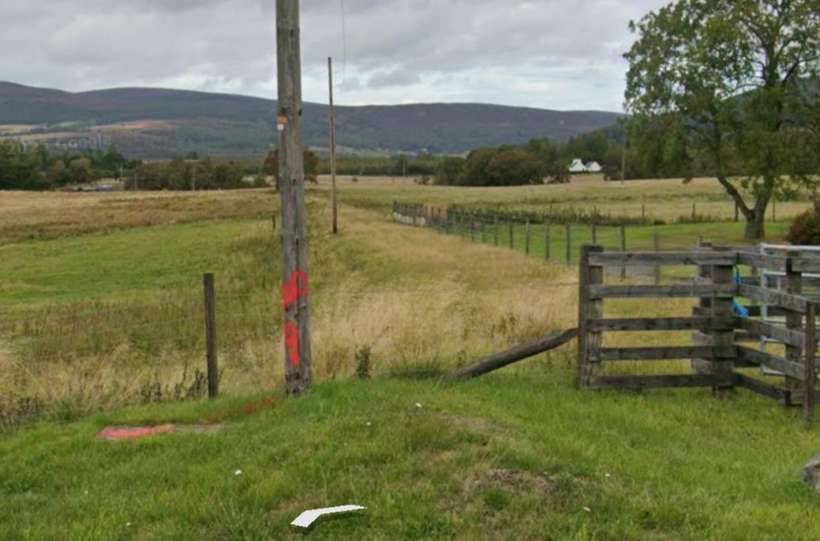
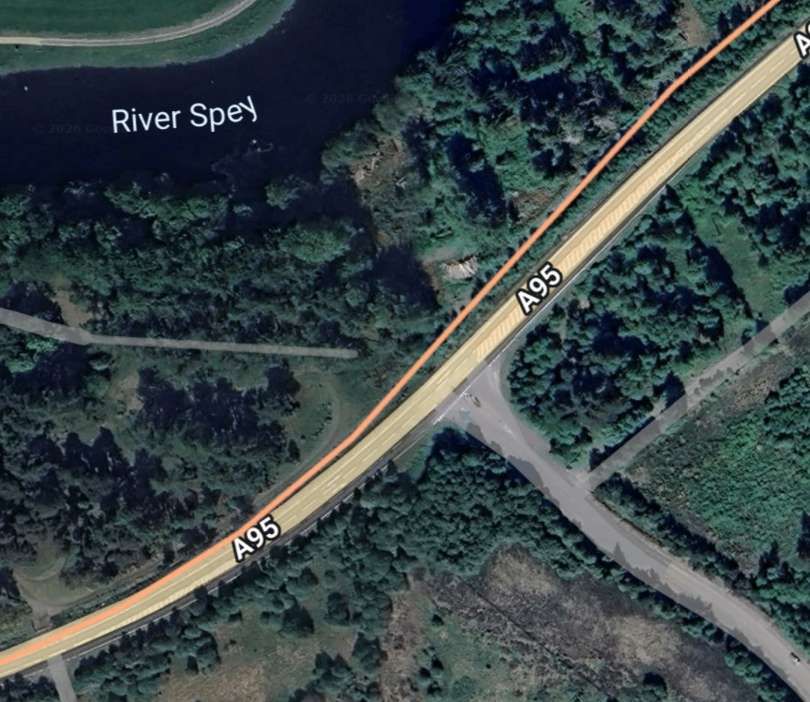
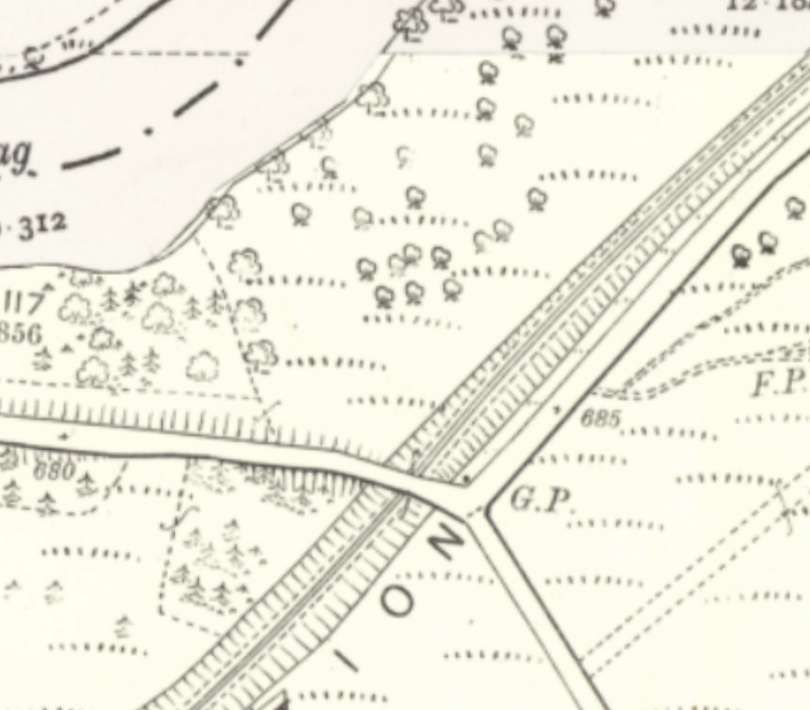
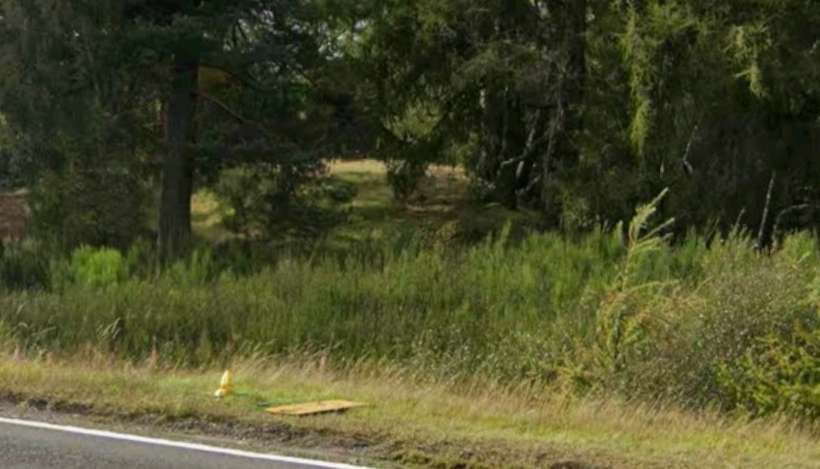
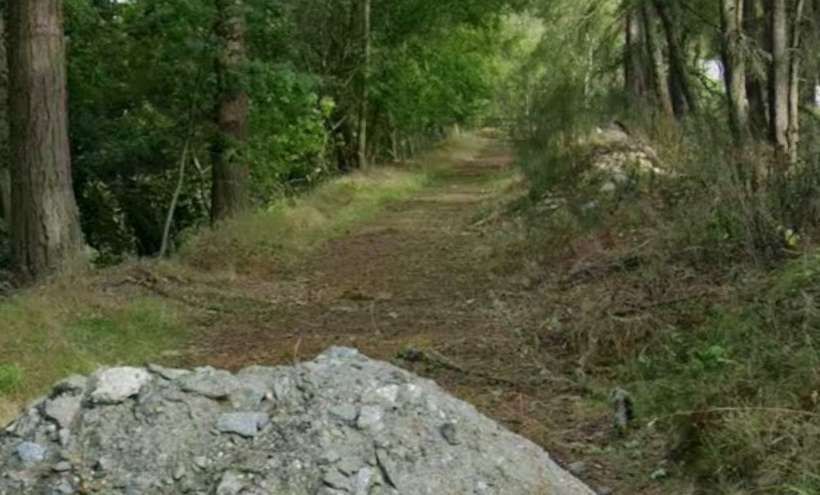
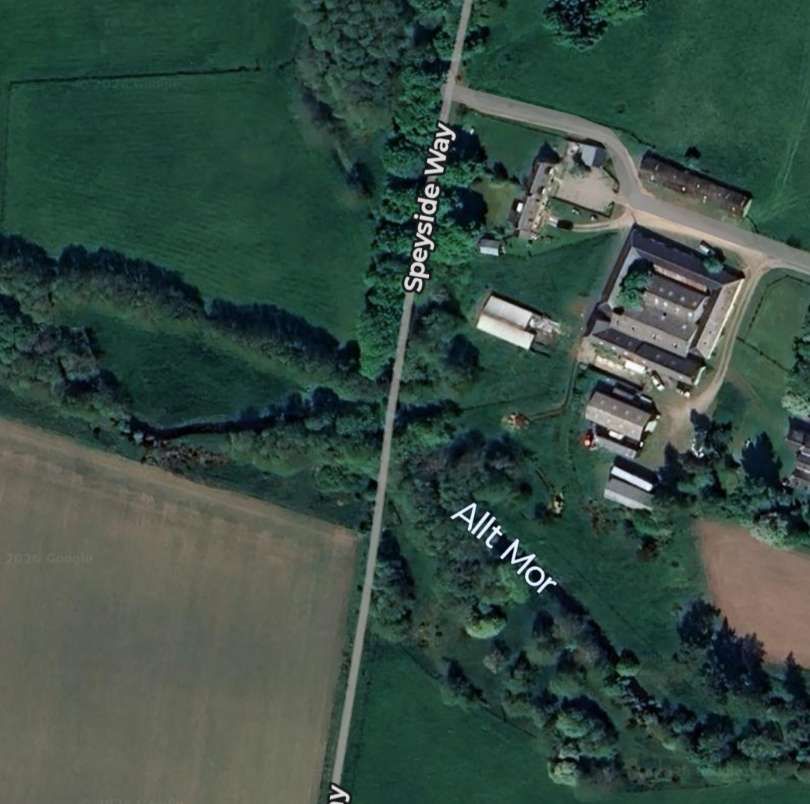
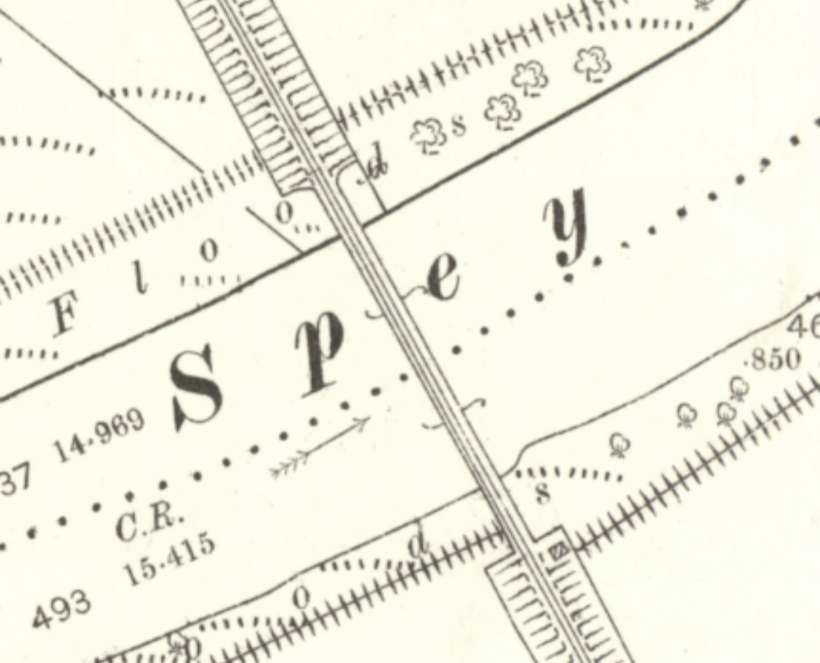
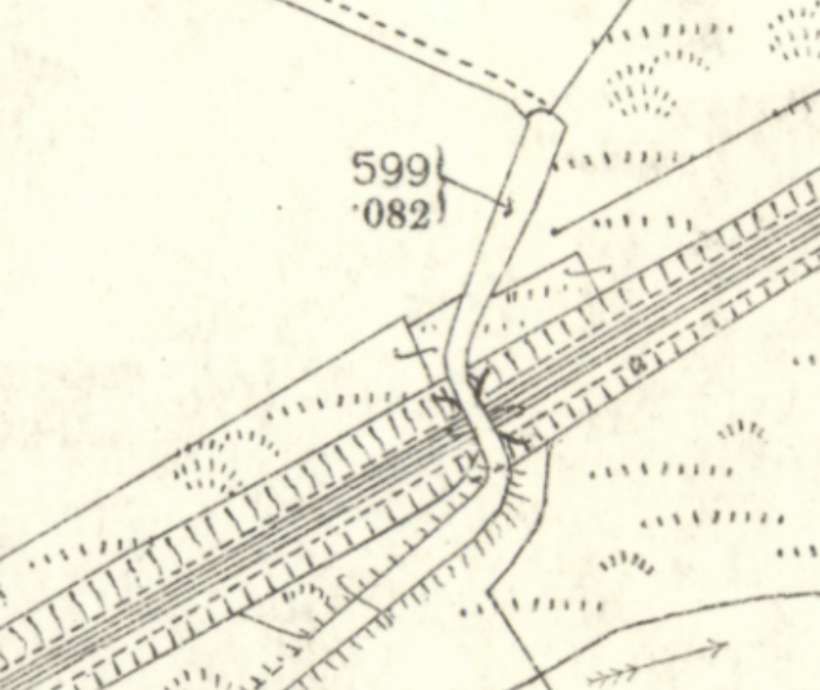
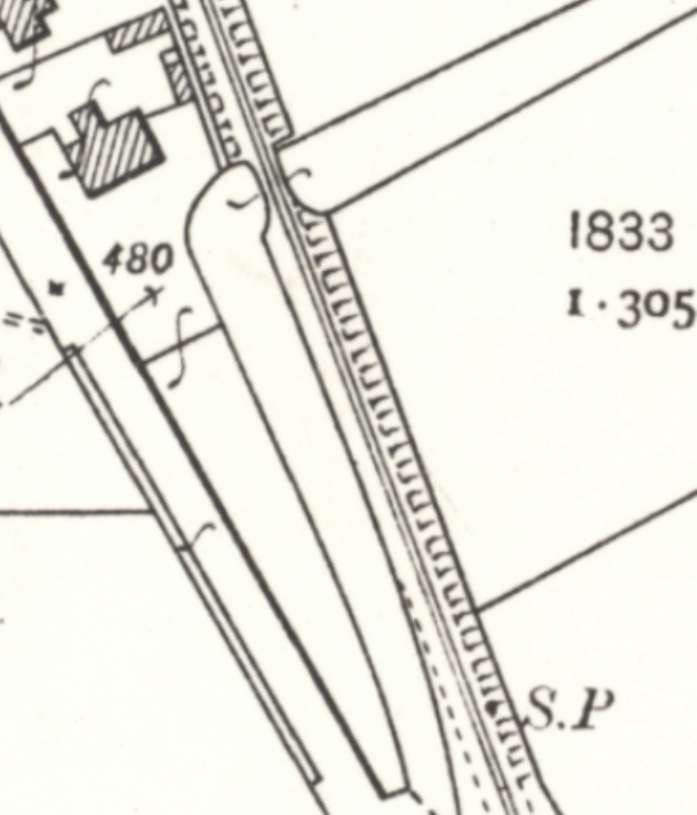
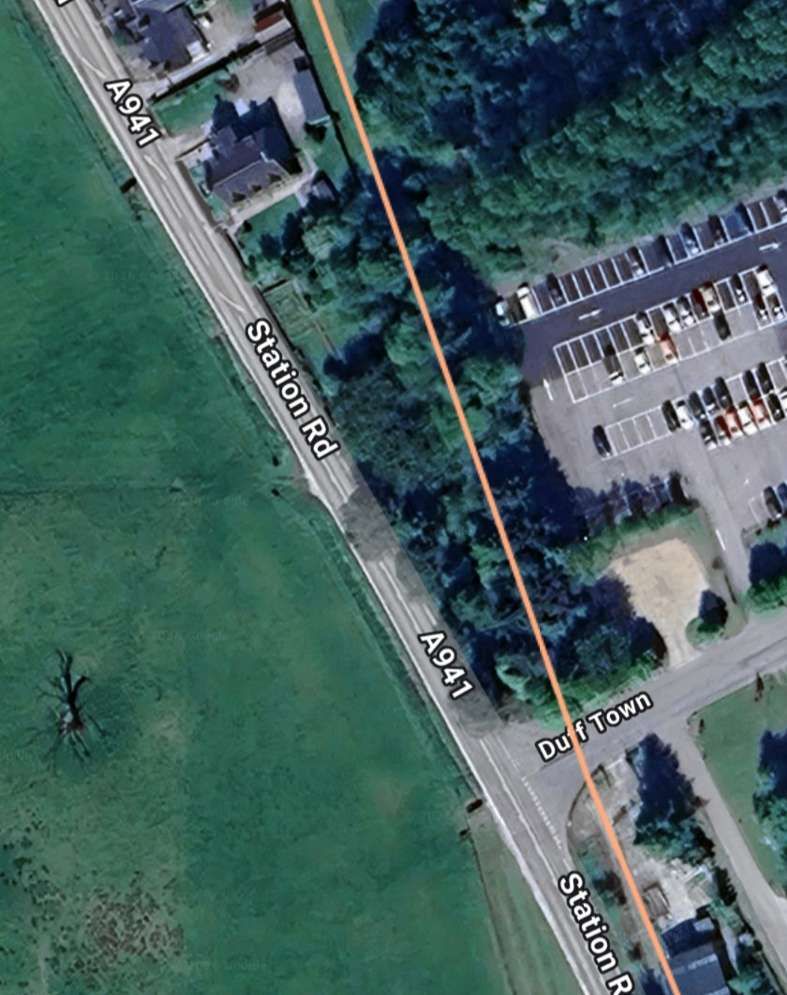
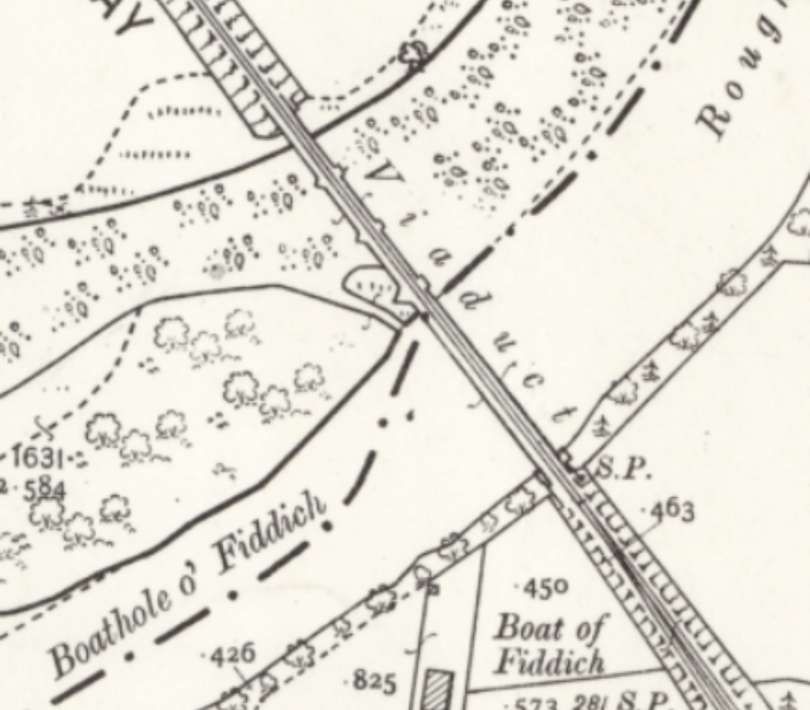
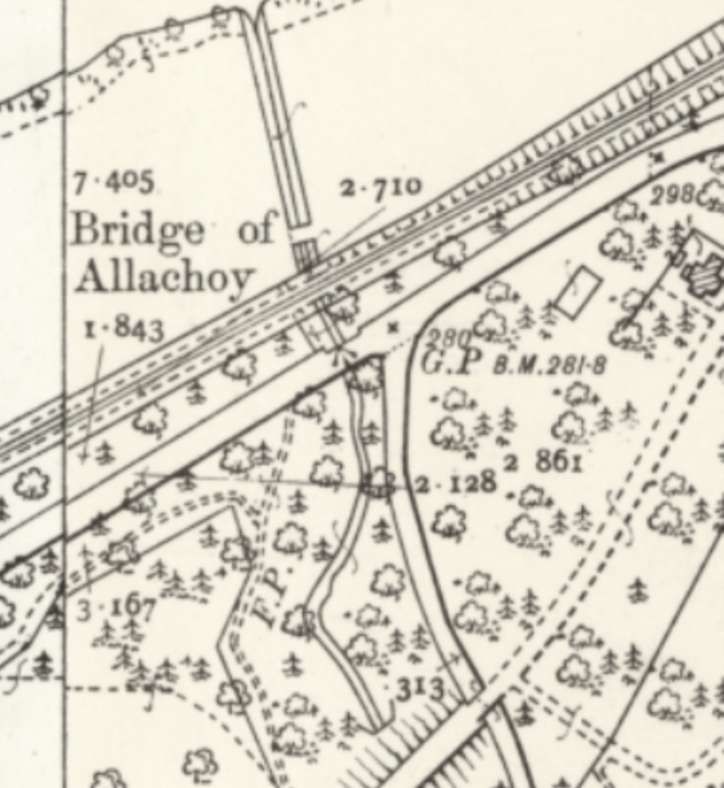
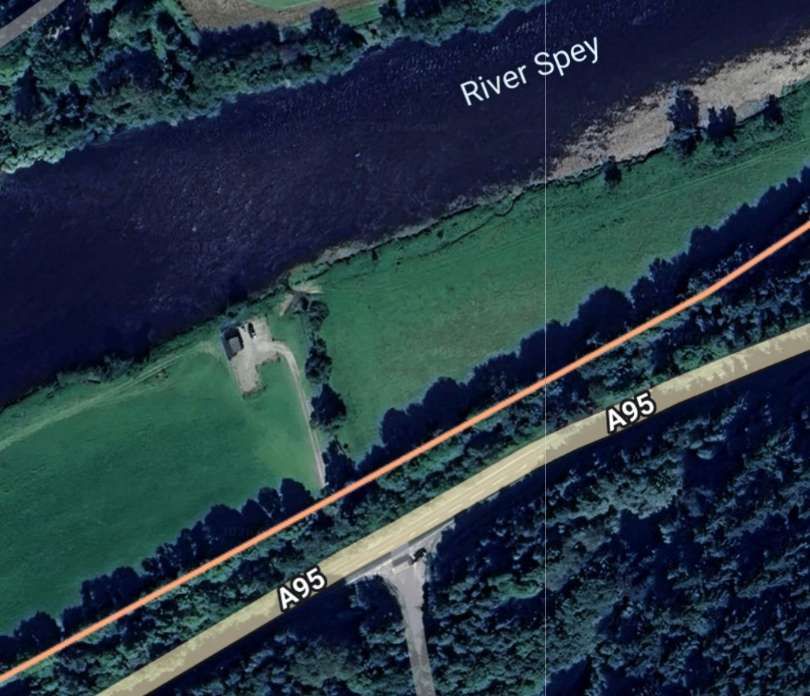
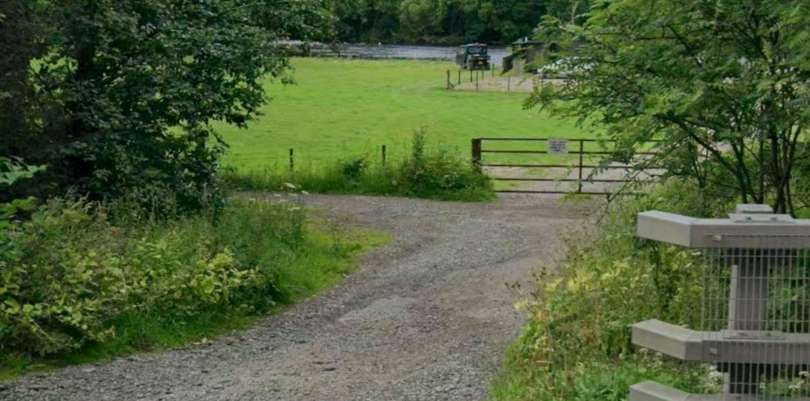
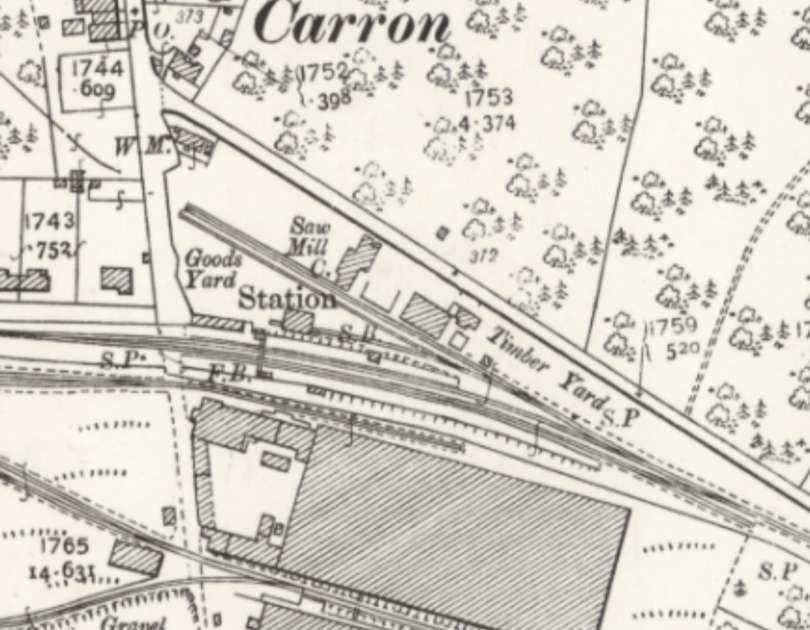
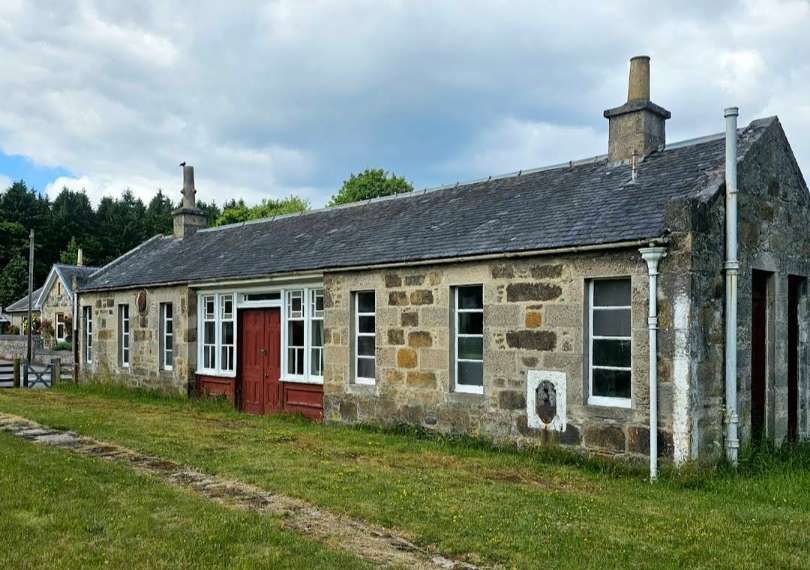
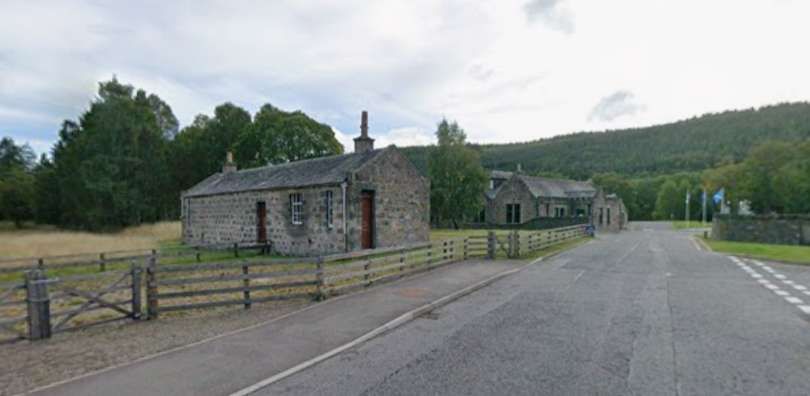
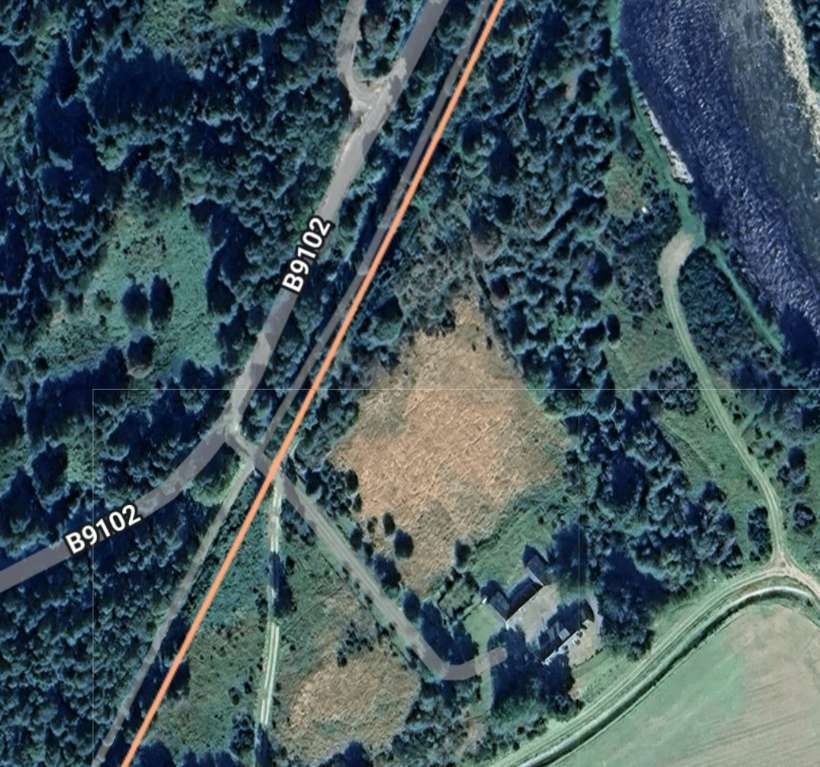
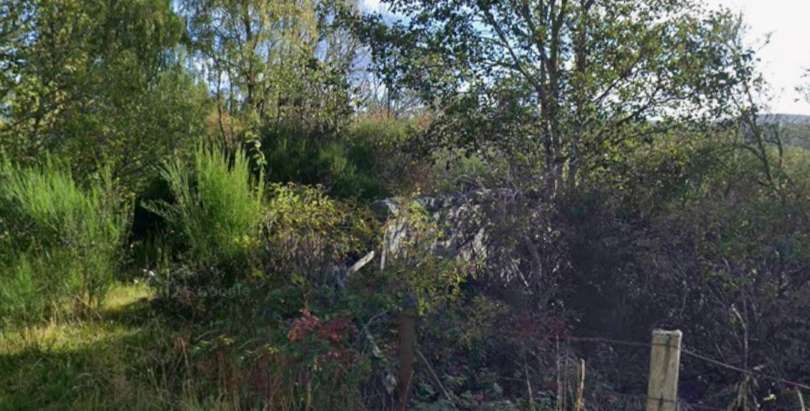
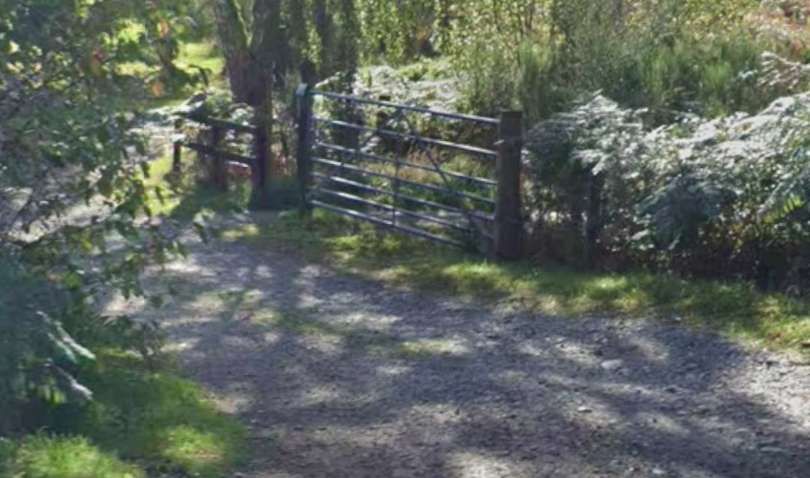
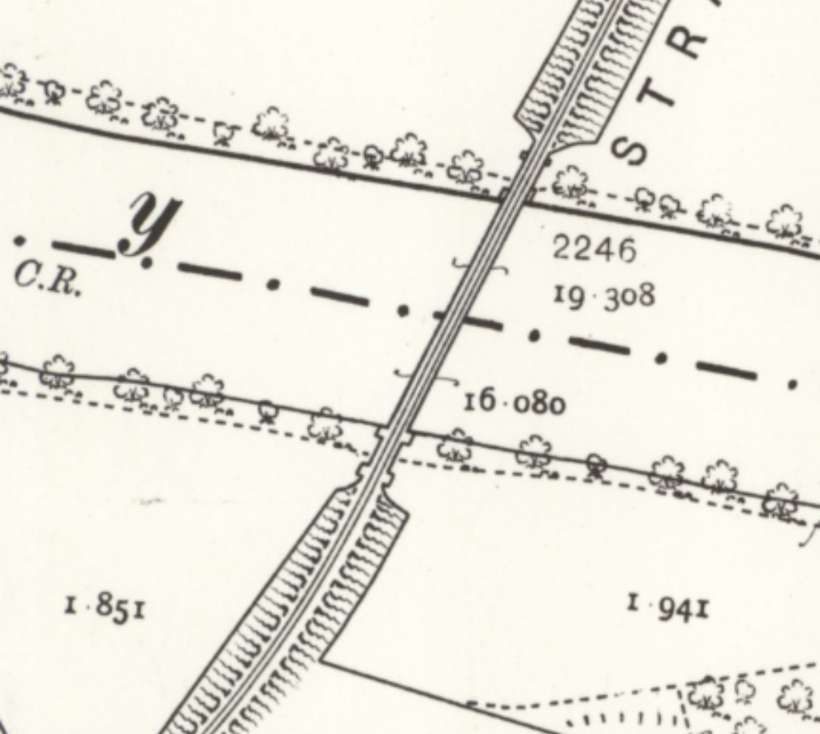
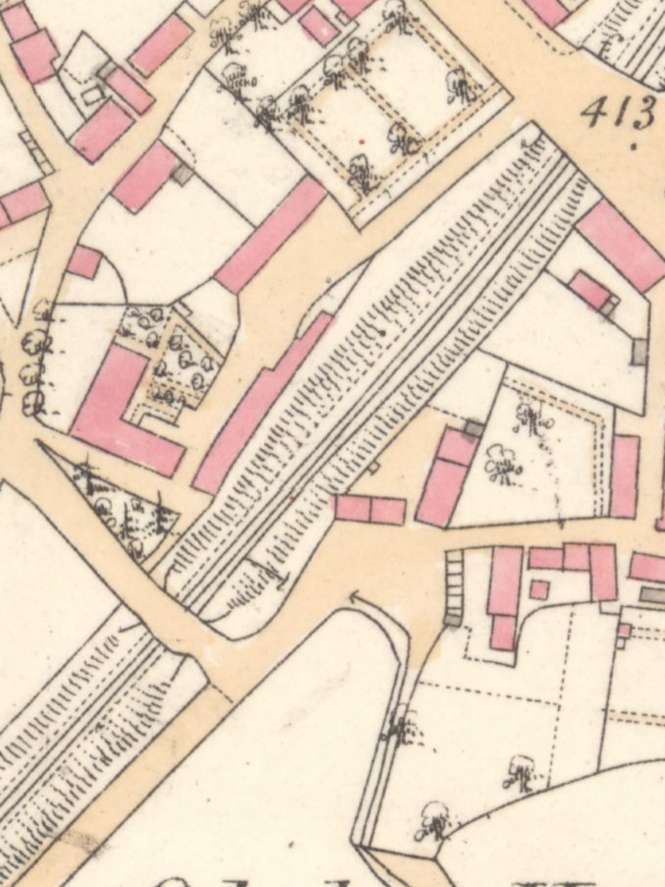
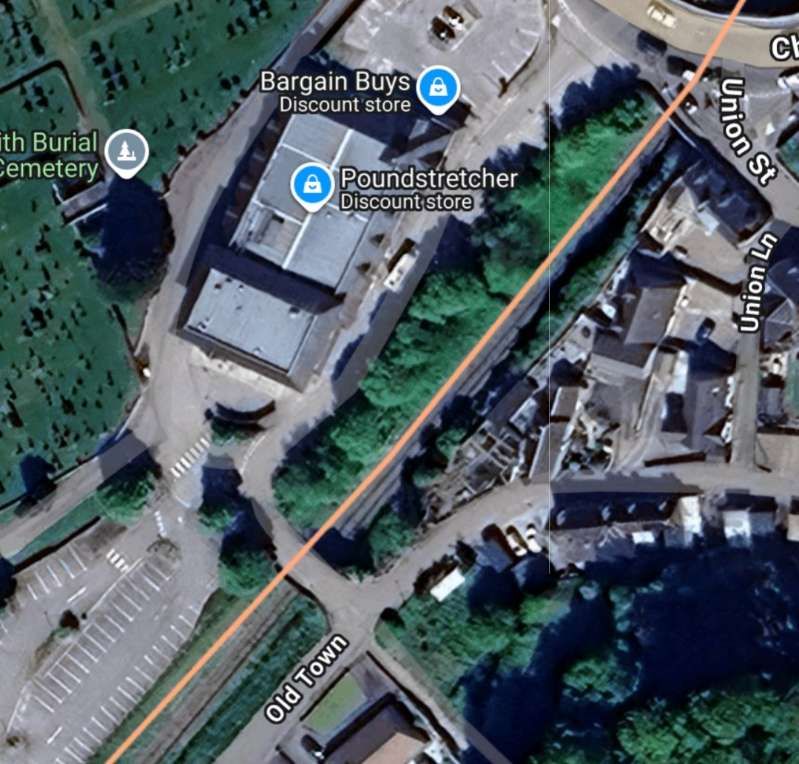
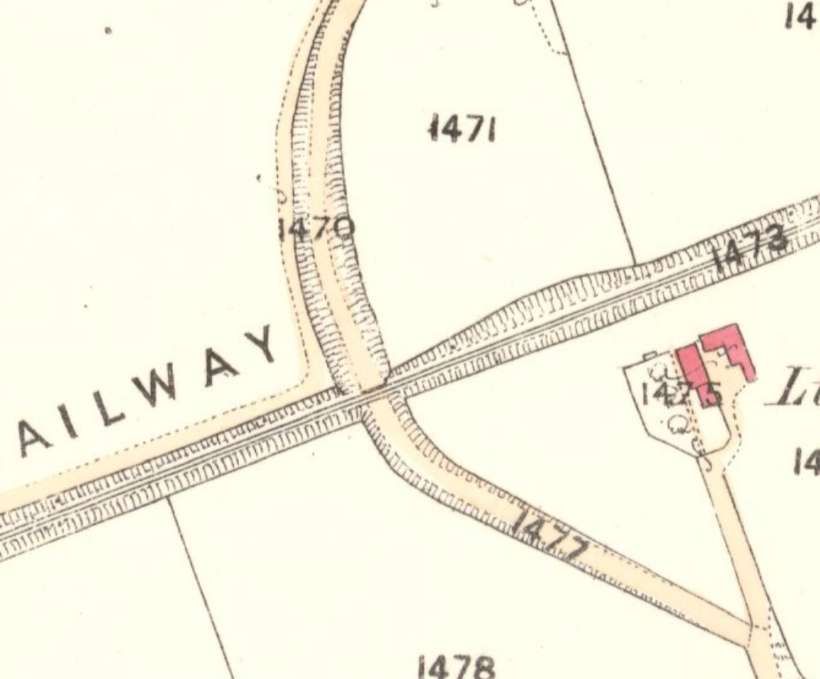
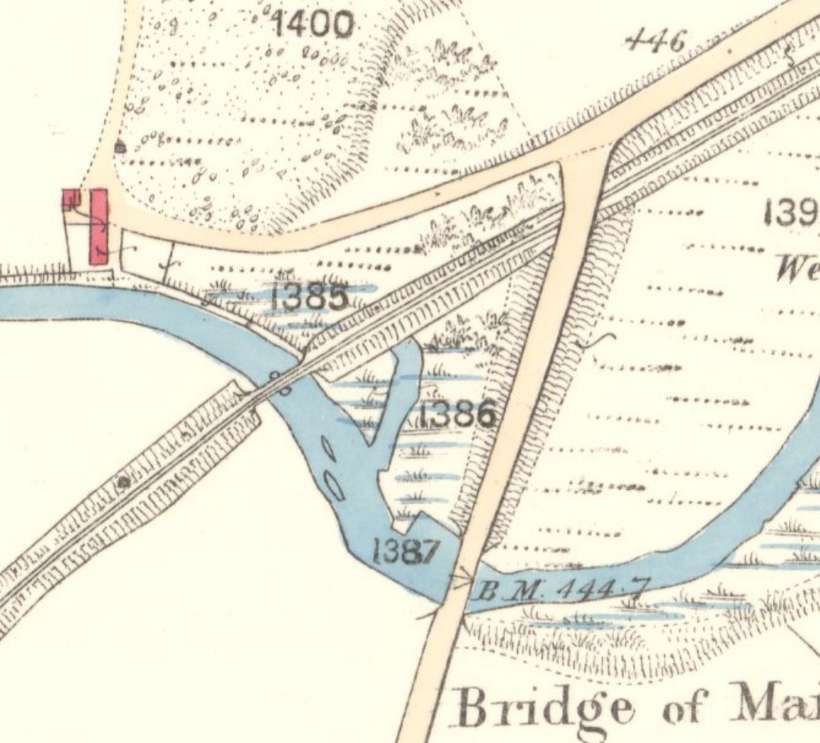
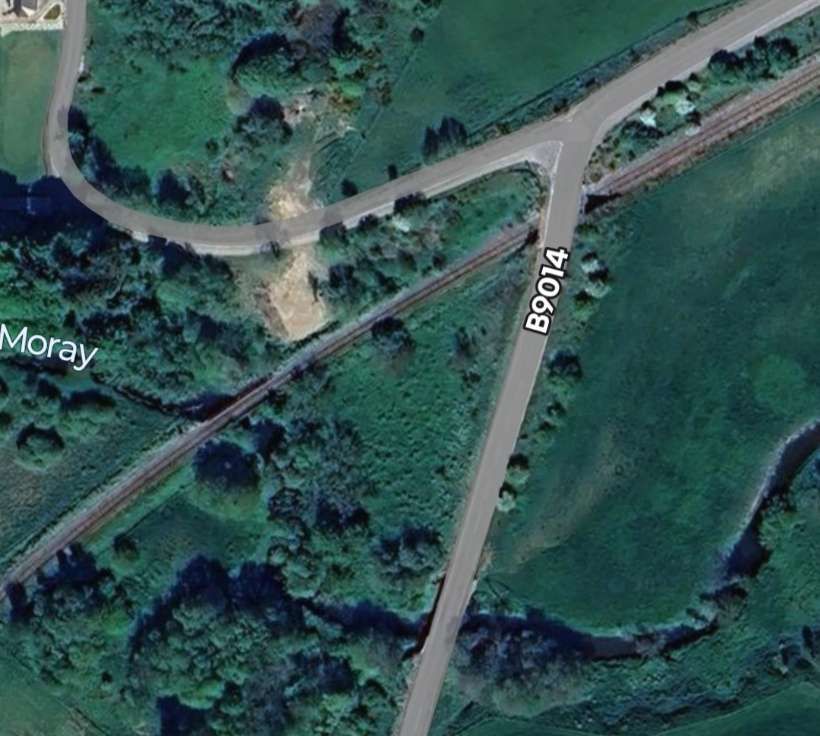
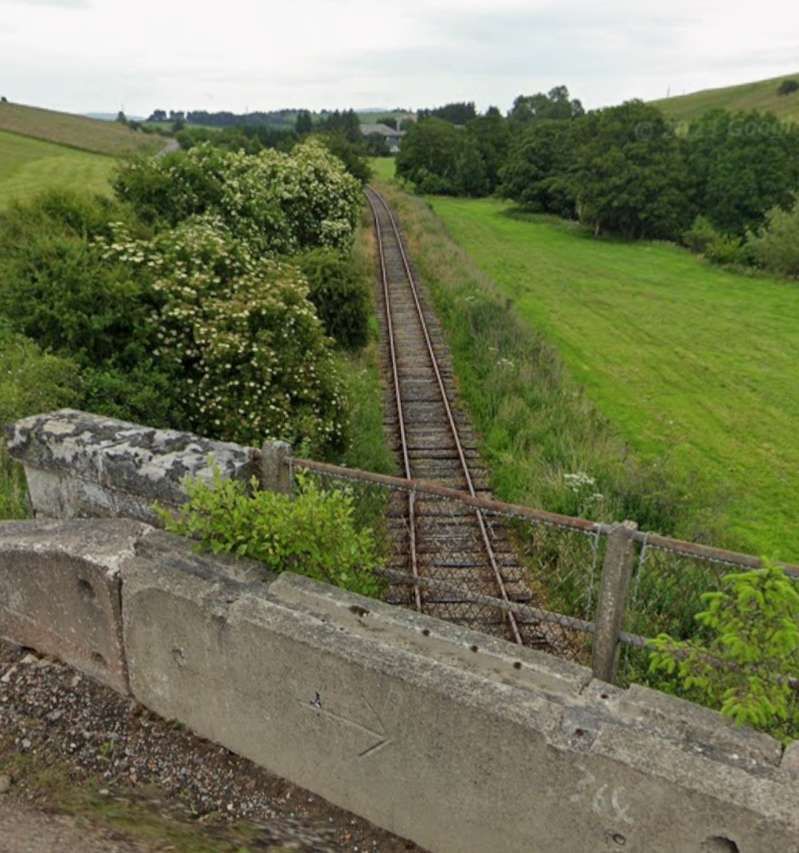
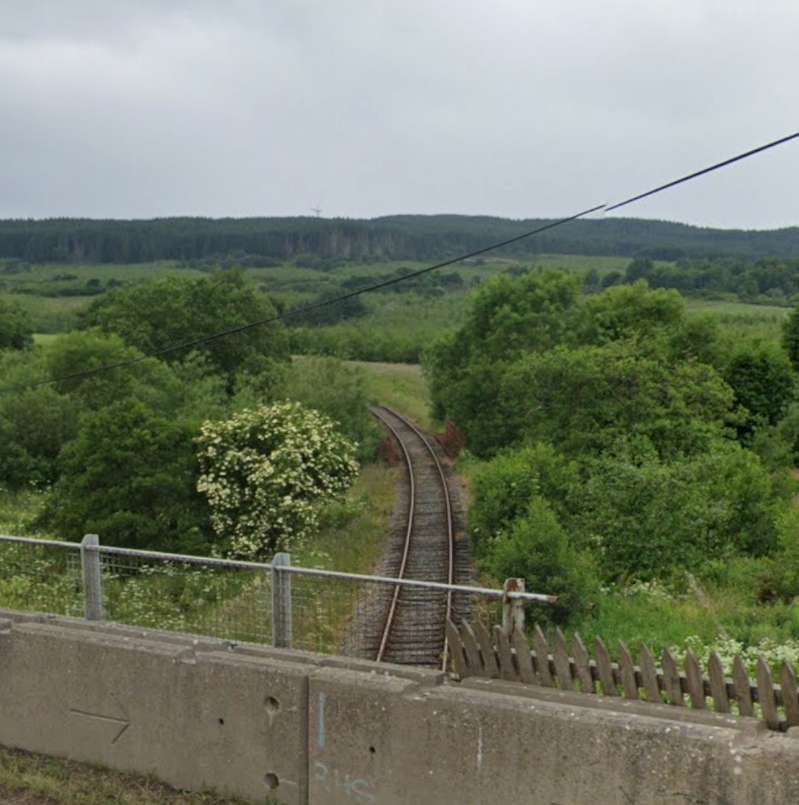
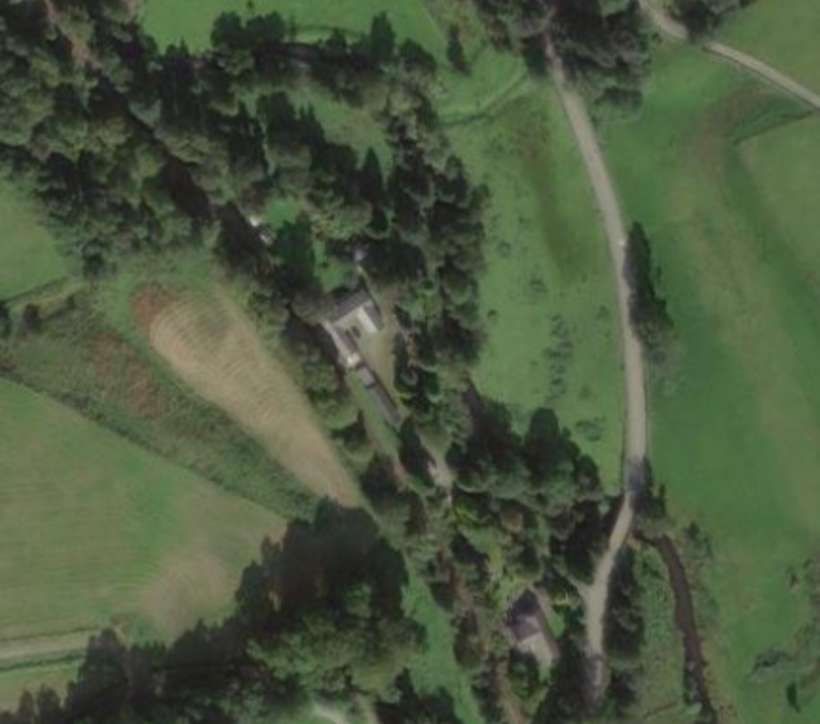
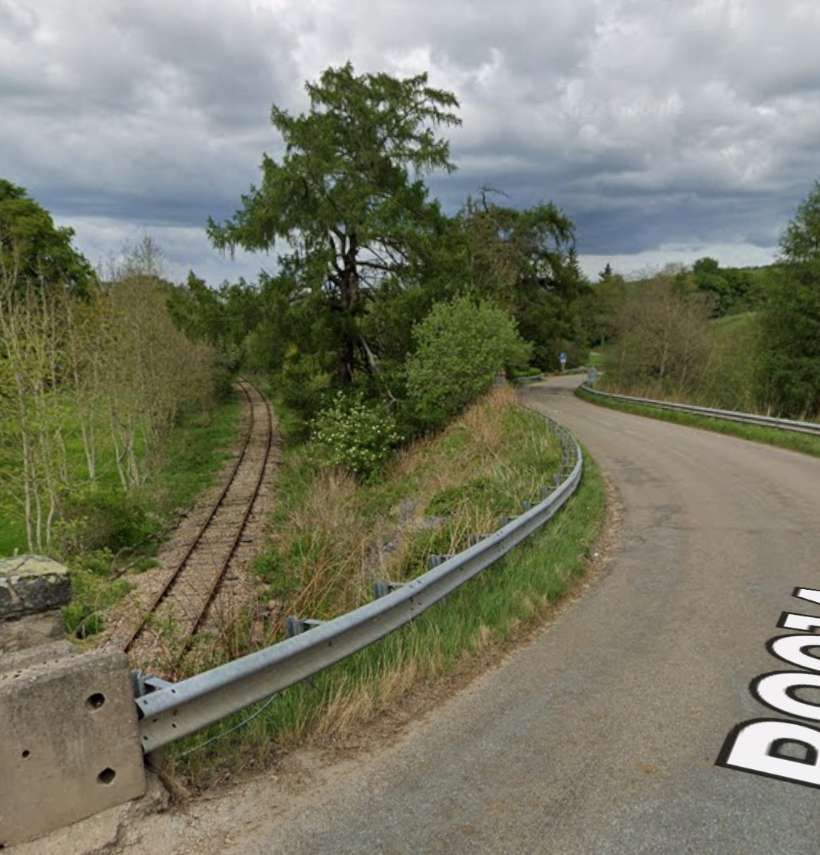
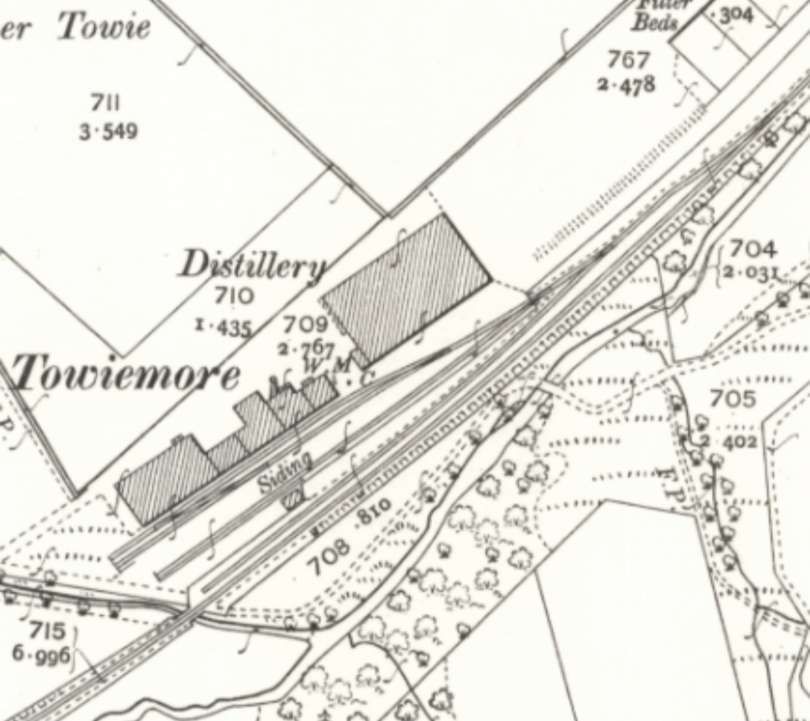
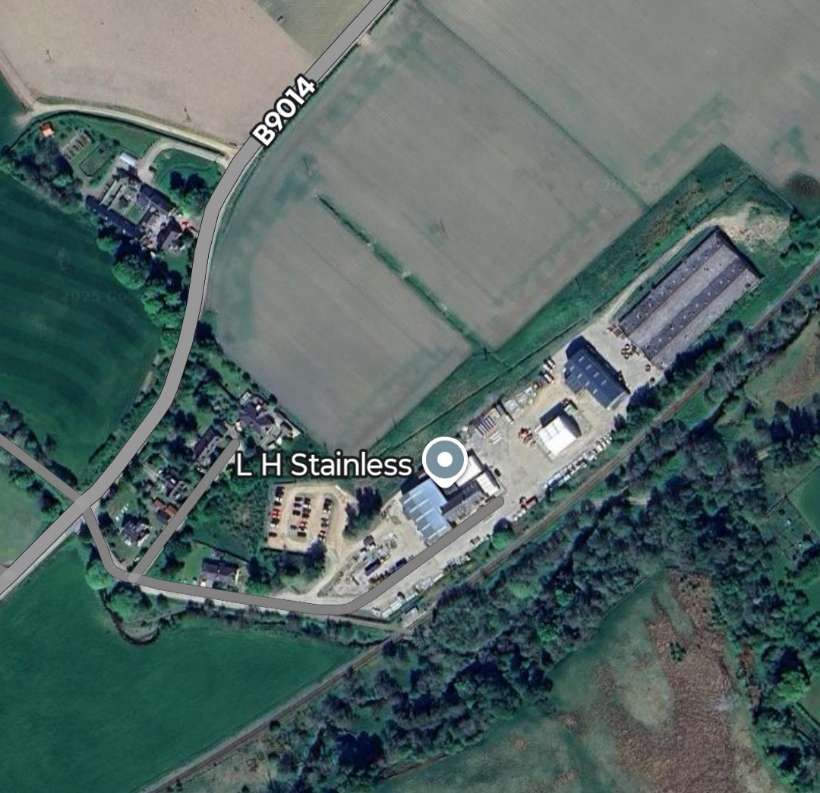
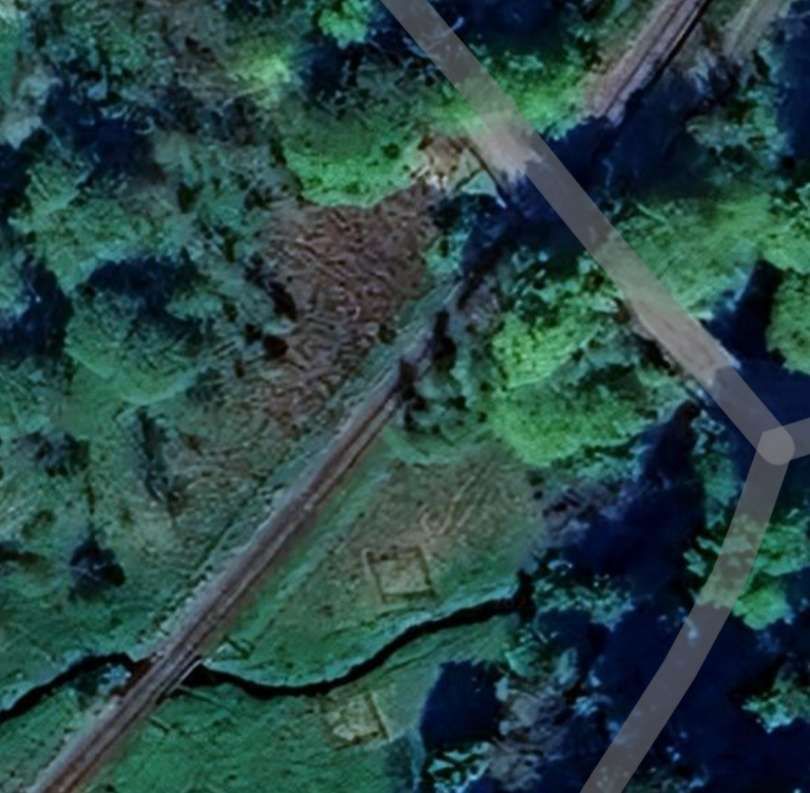
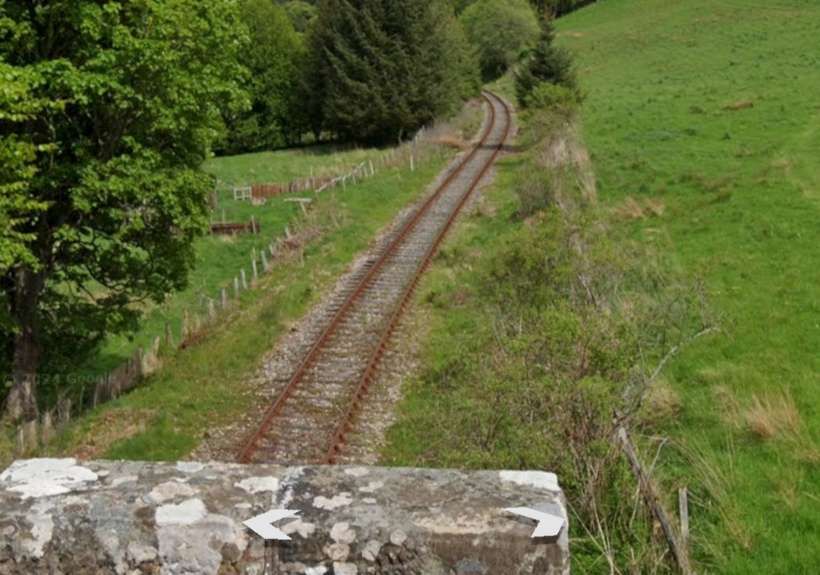
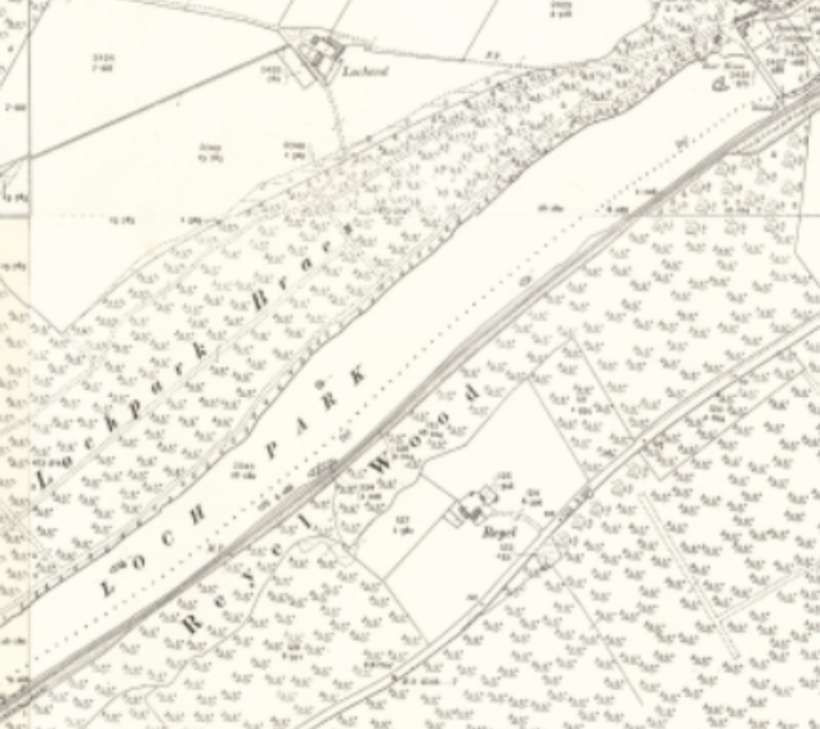
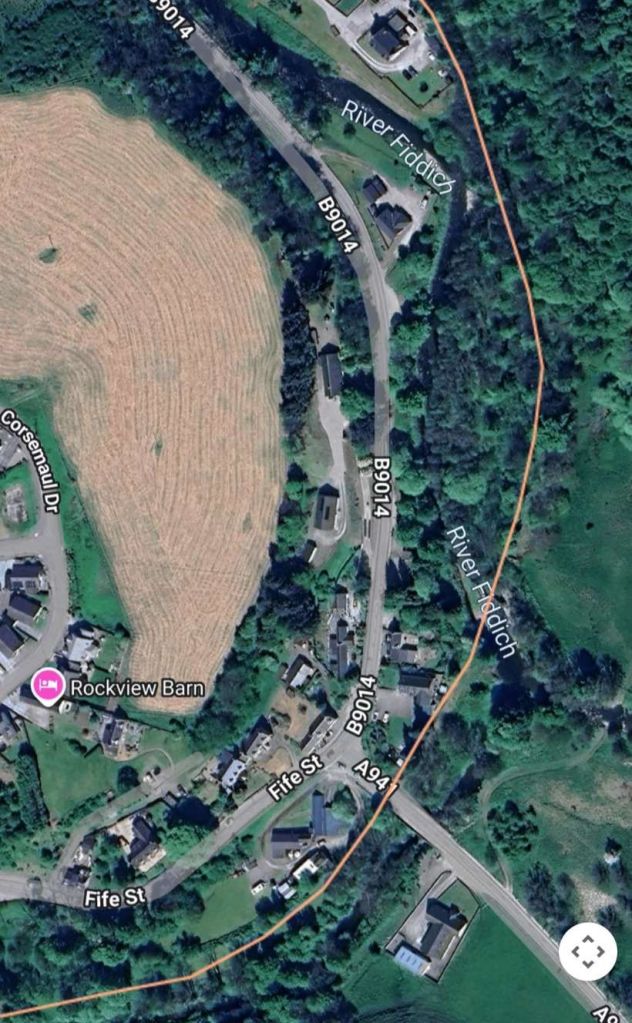
The original Advie station, opened on 1st July 1863 as a simple halt at the north end of the road from Mains of Advie, was short-lived and relocated westward, with the replacement Advie station opening on 1st September 1868 to better accommodate growing needs. This second station featured a single platform on the south side of the line, initially short but later extended, along with a timber waiting room building, a goods yard accessed from the west including a siding, and facilities supporting local freight such as agricultural produce and goods from nearby Tormore Distillery. Today, remnants of the station, including the platform and a former railway building, survive as part of the disused line now incorporated into the Strathspey Way long-distance footpath. [11]
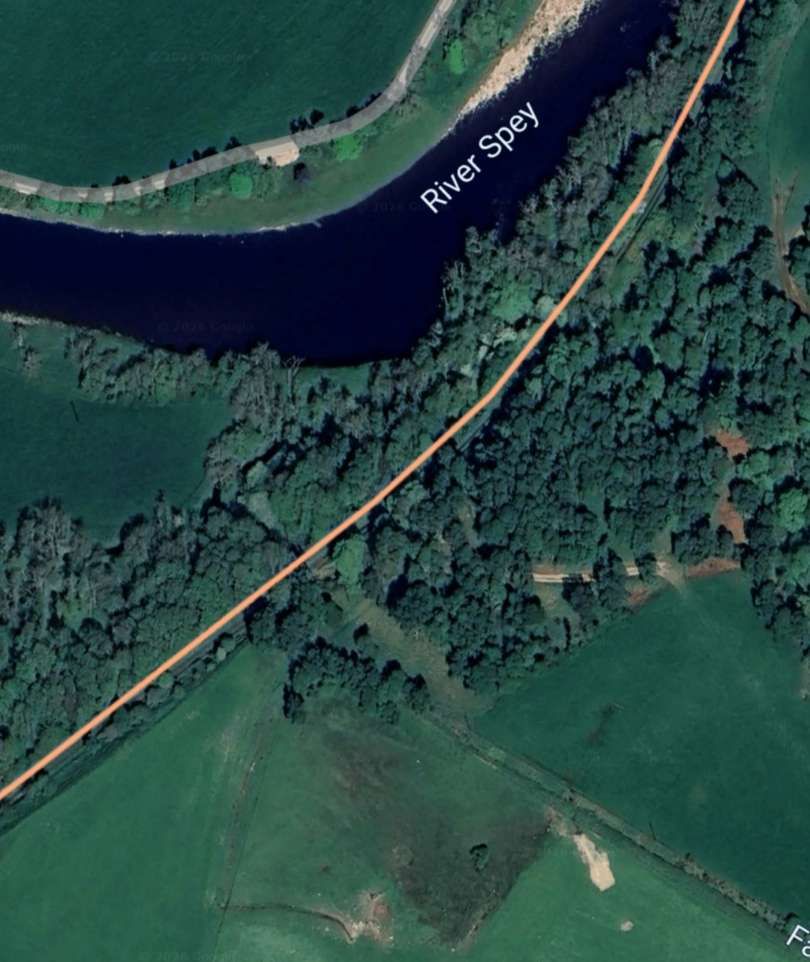
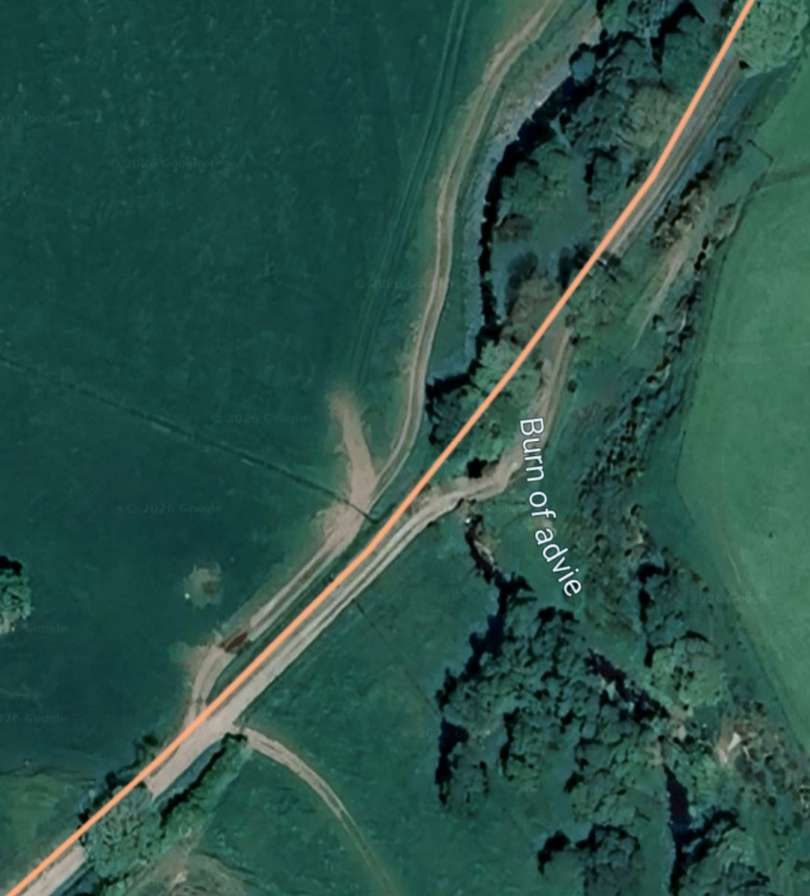
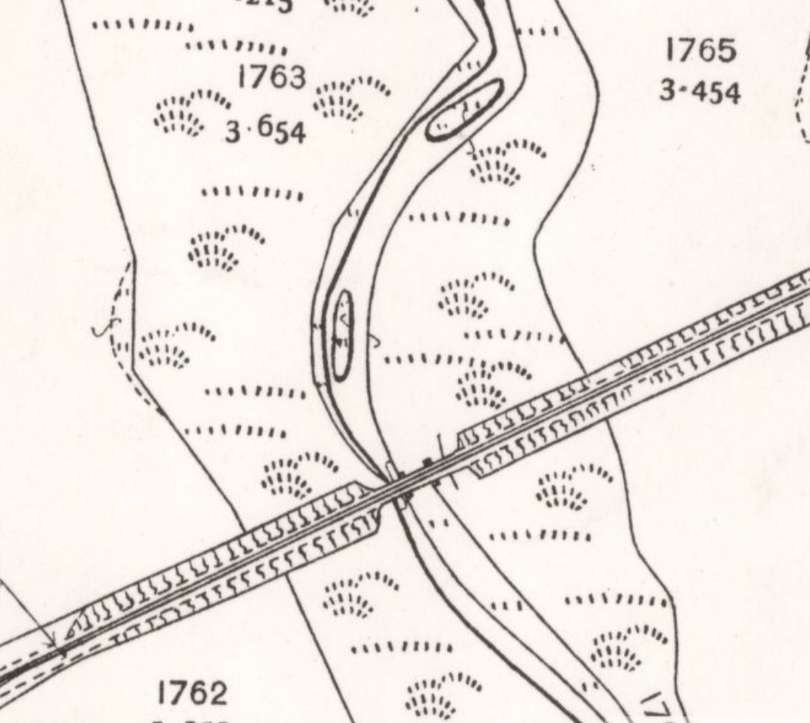
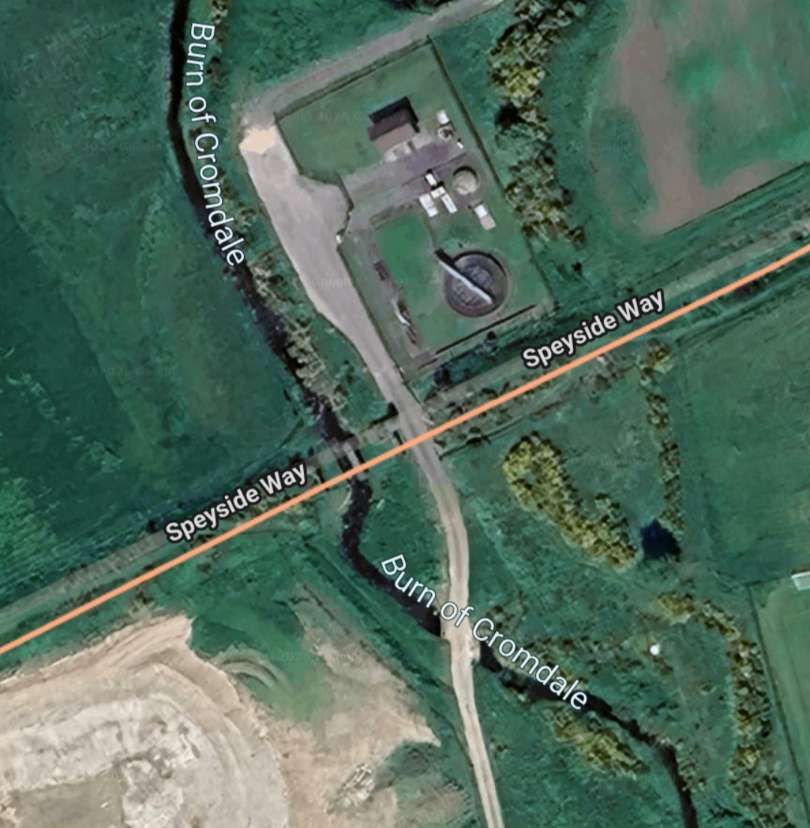
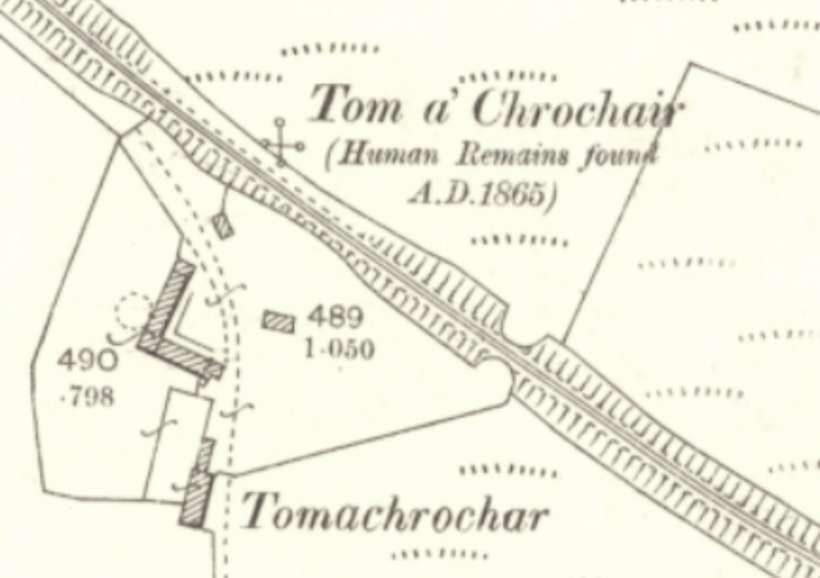
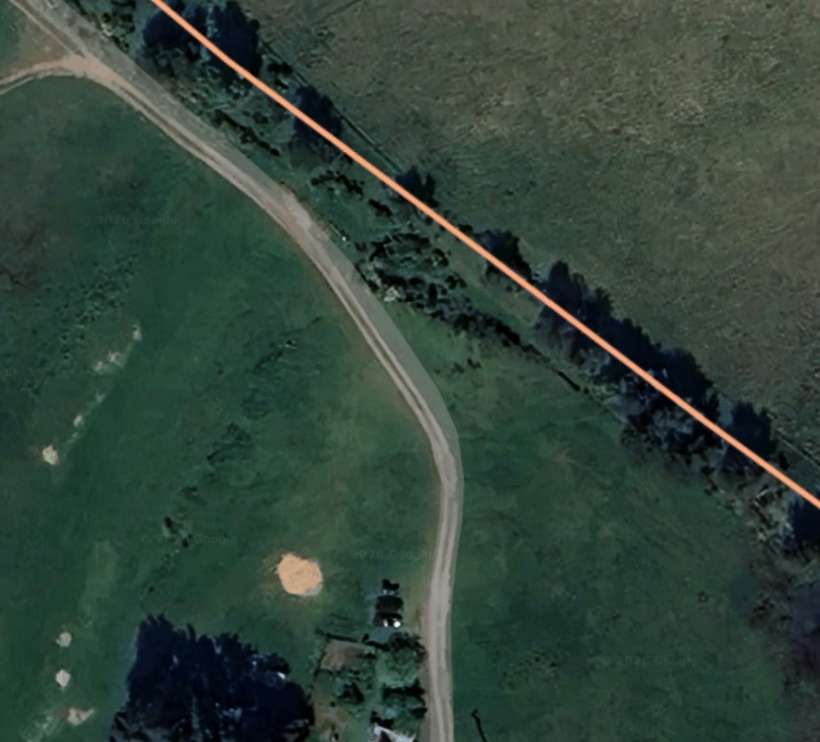
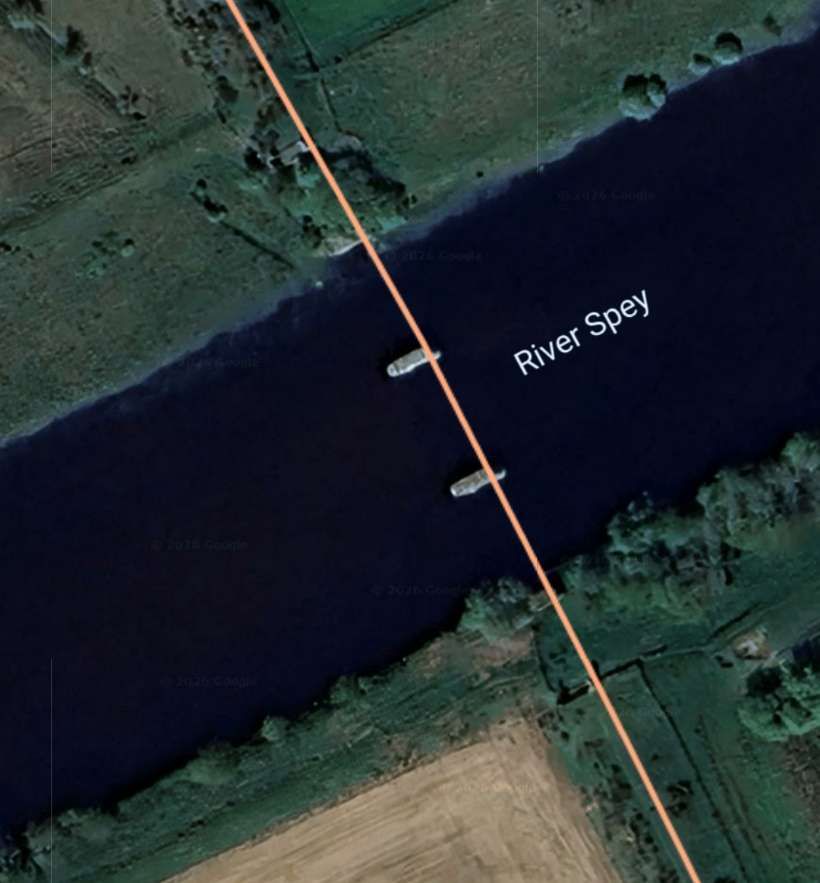
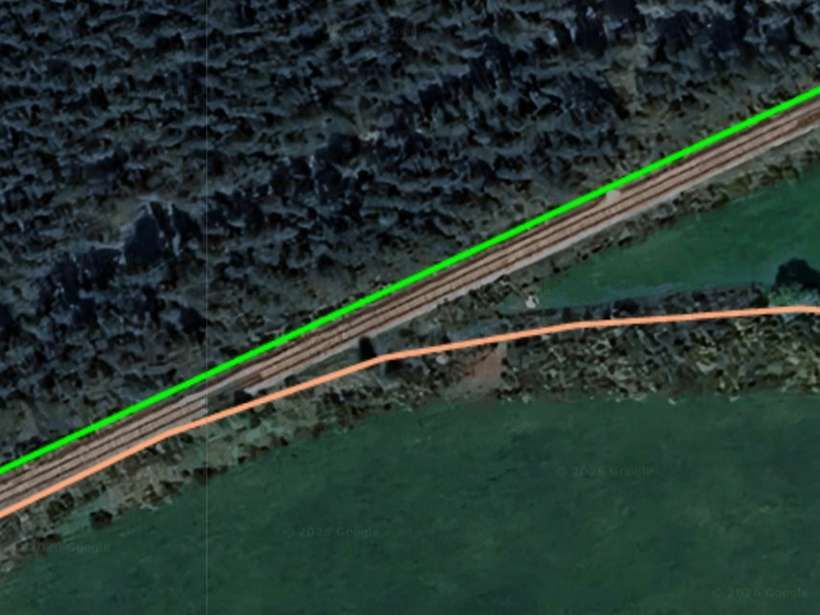
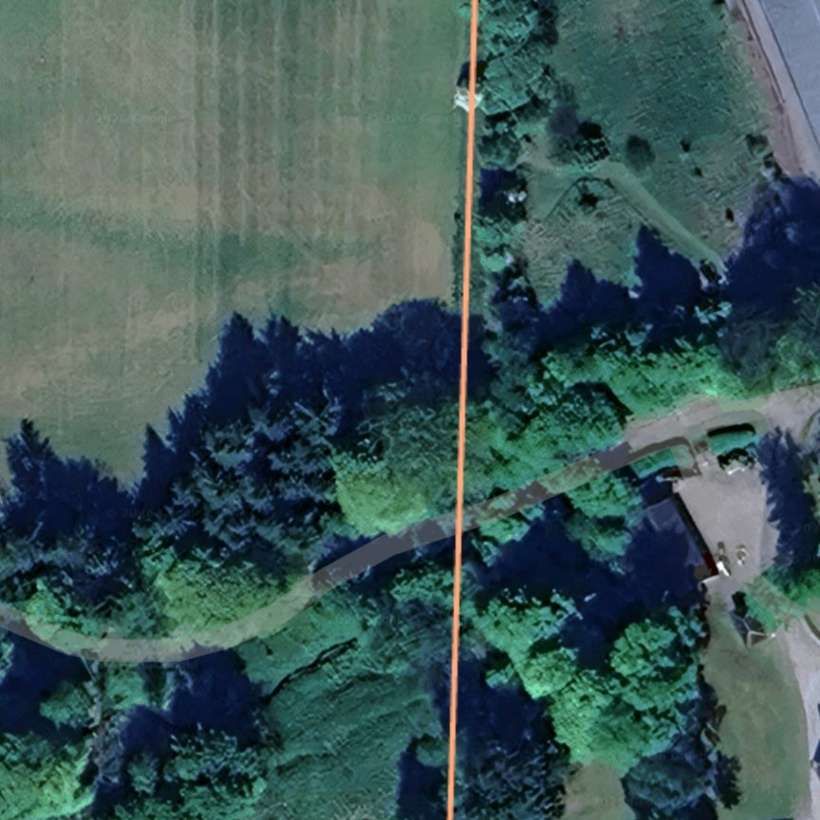
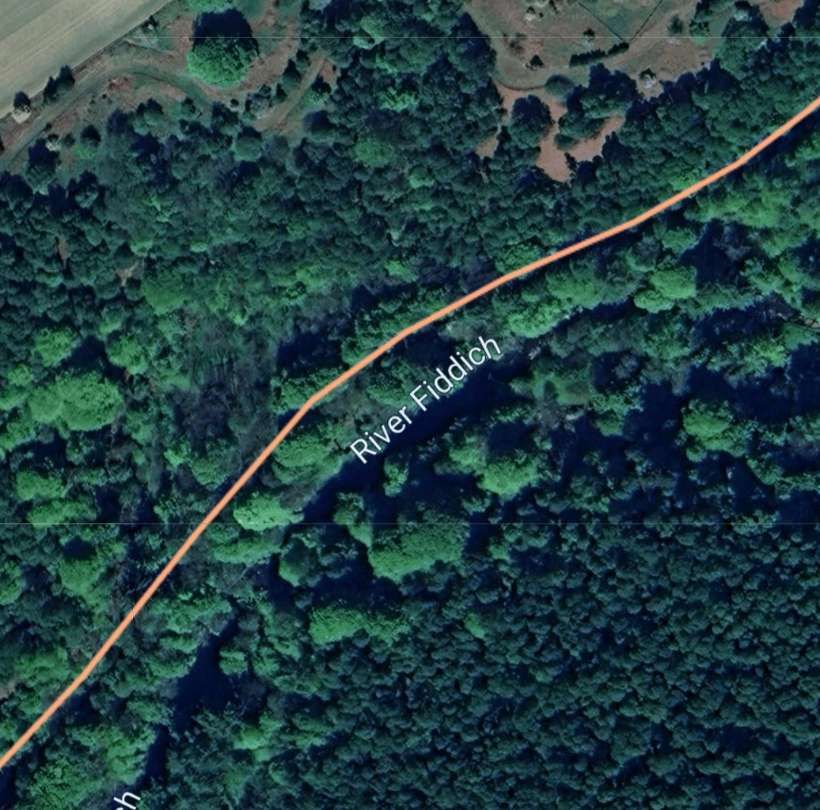
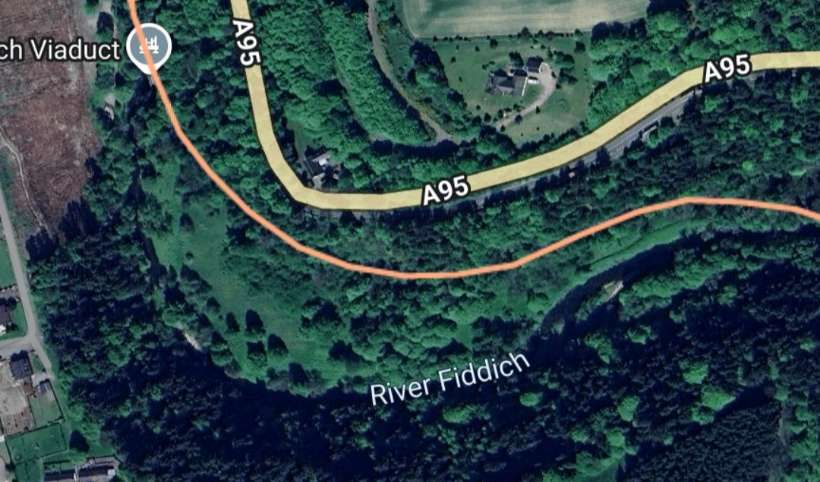
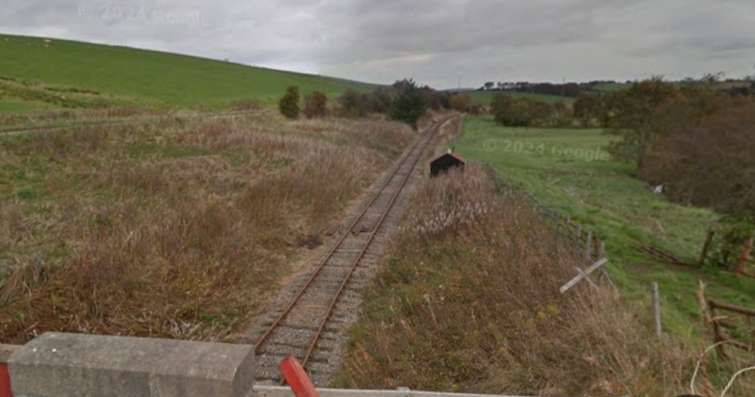
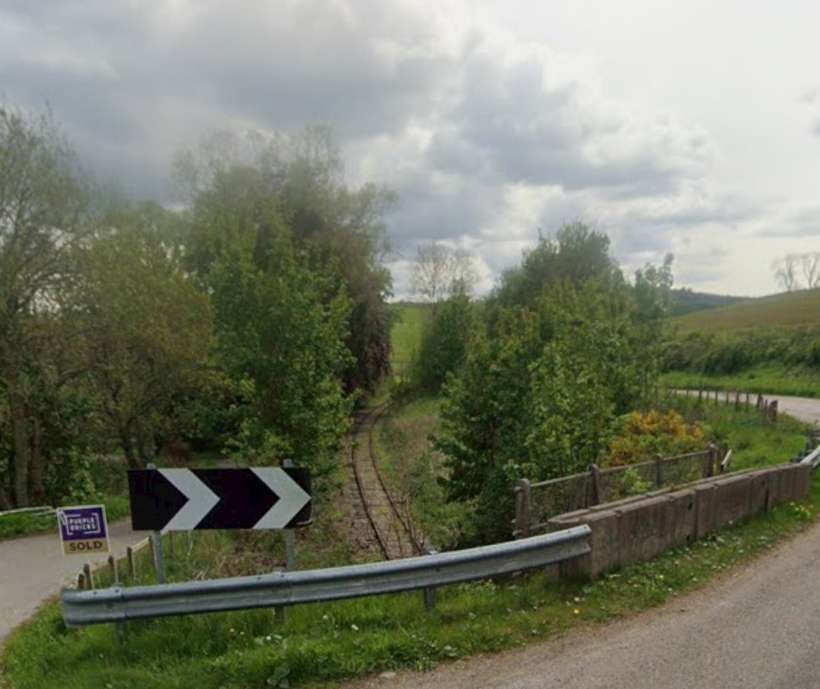
The line curved round to the South following the river.
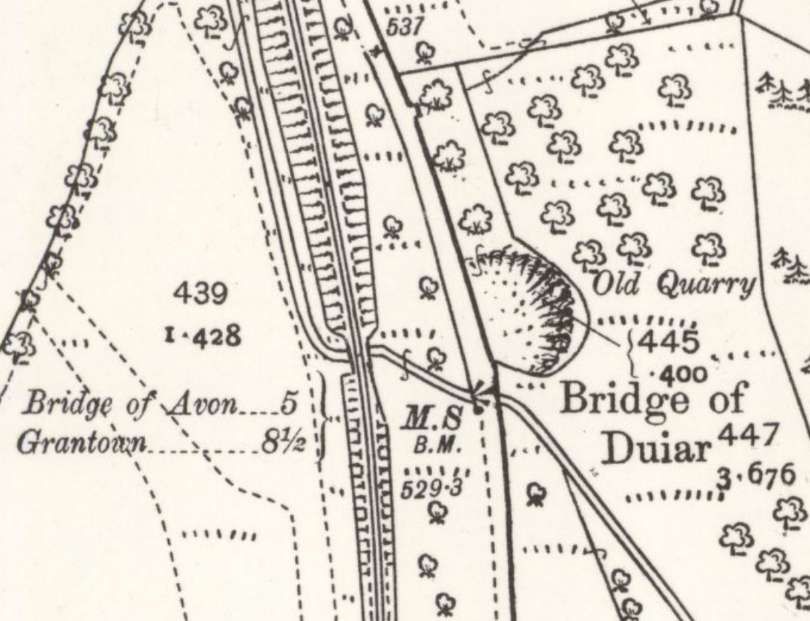


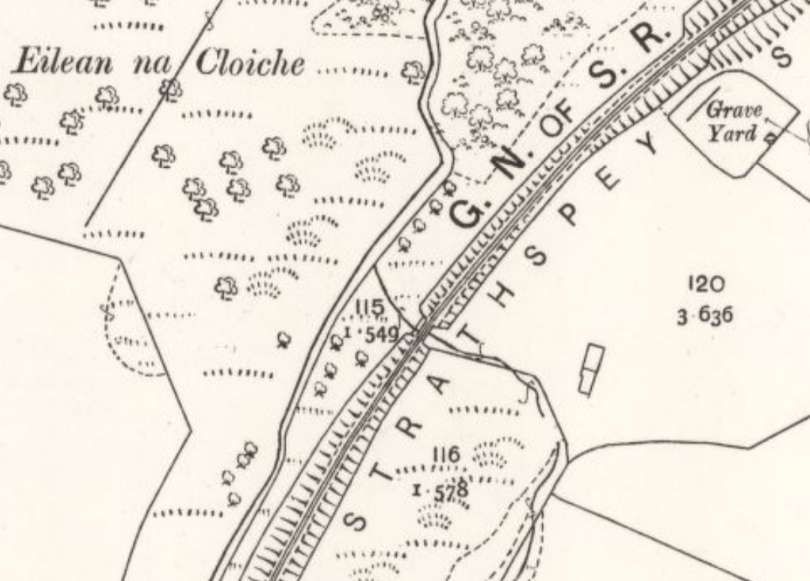
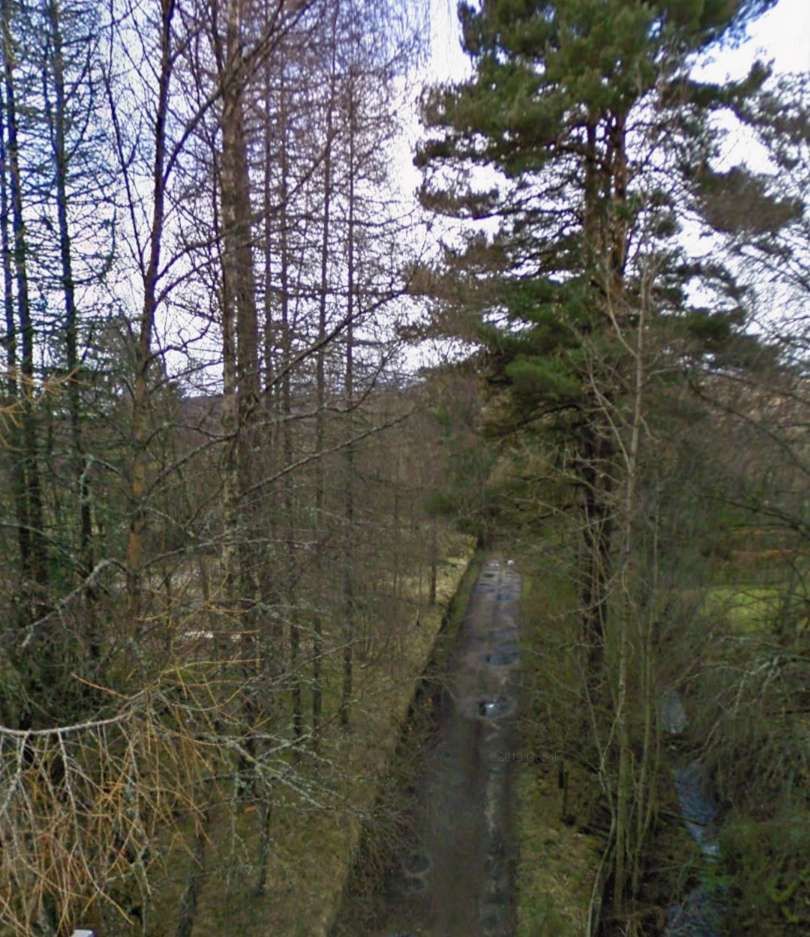
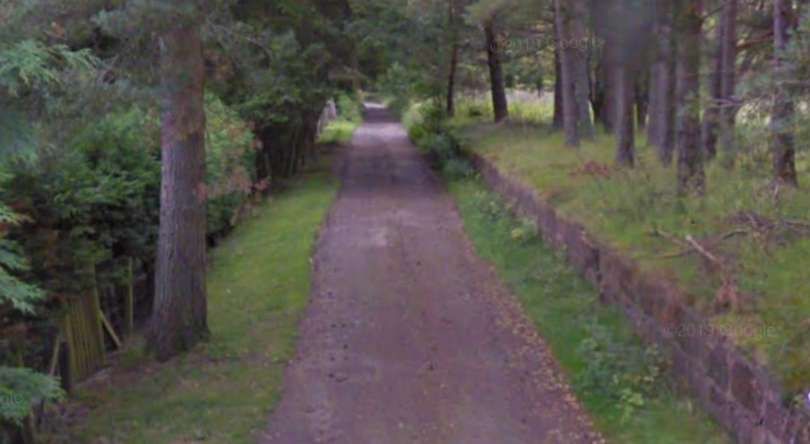
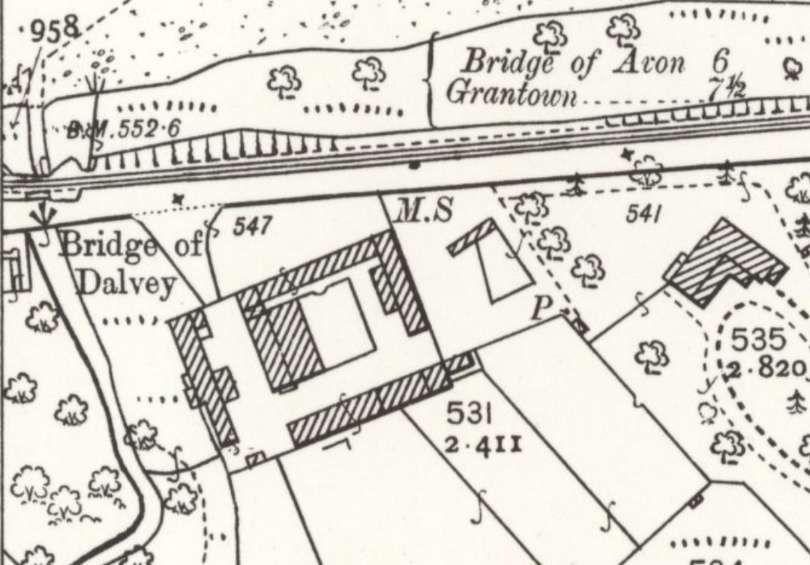
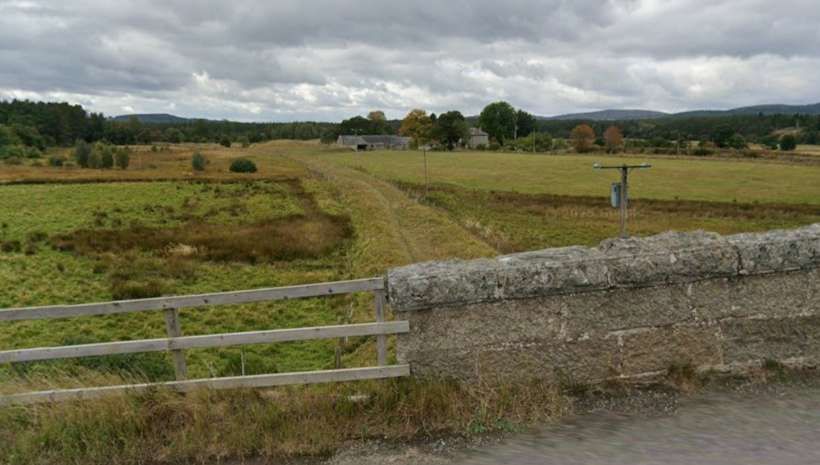
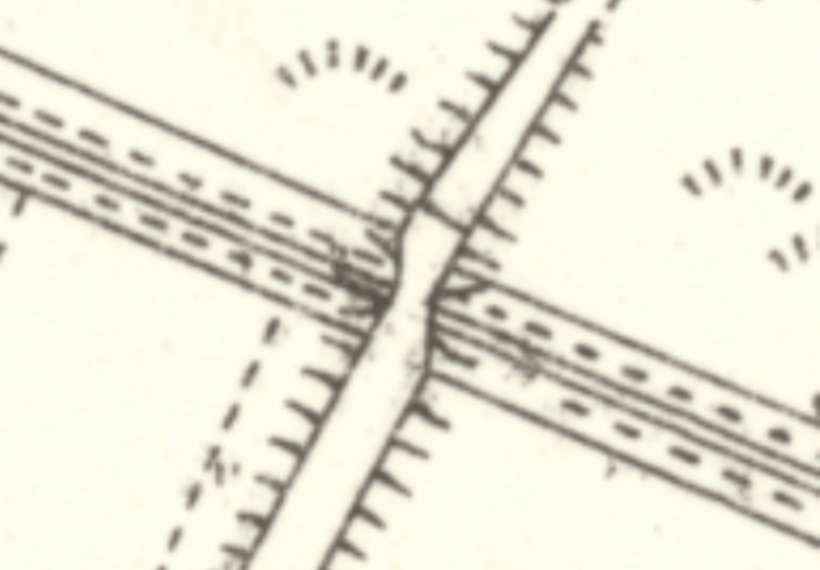
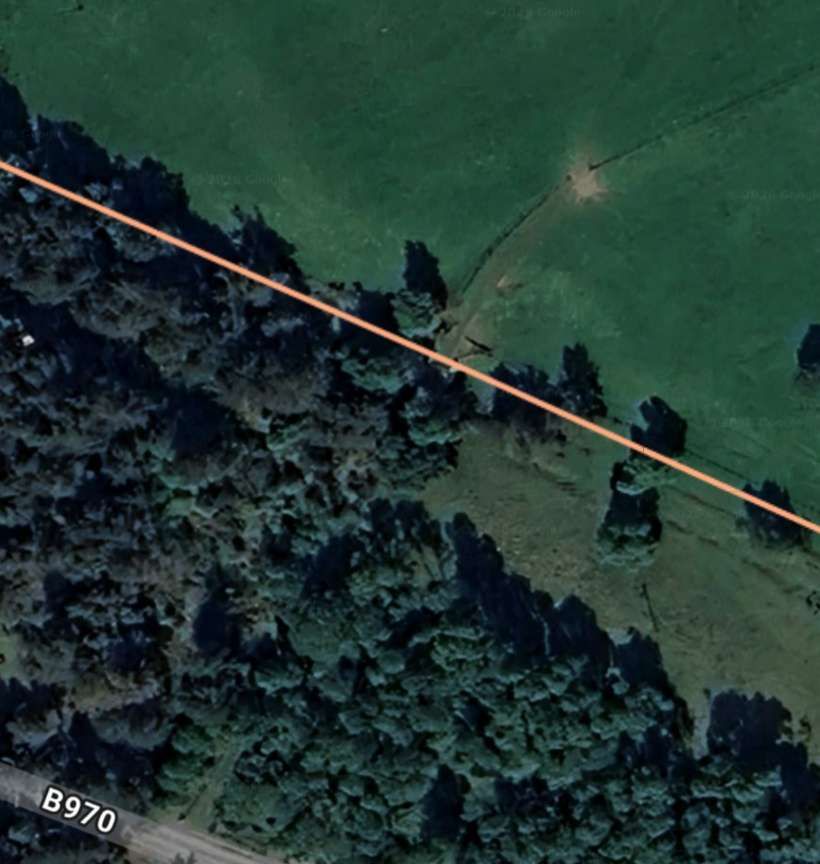
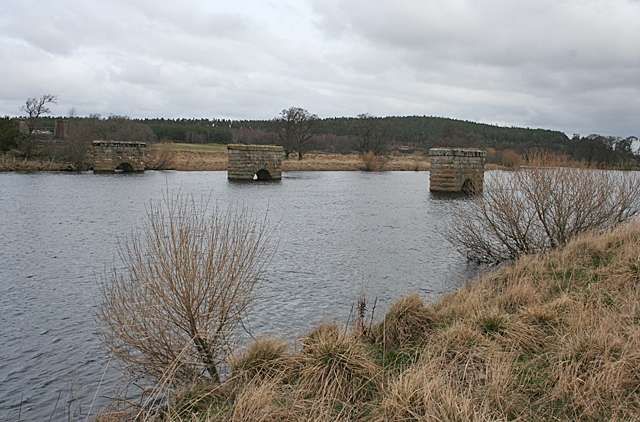
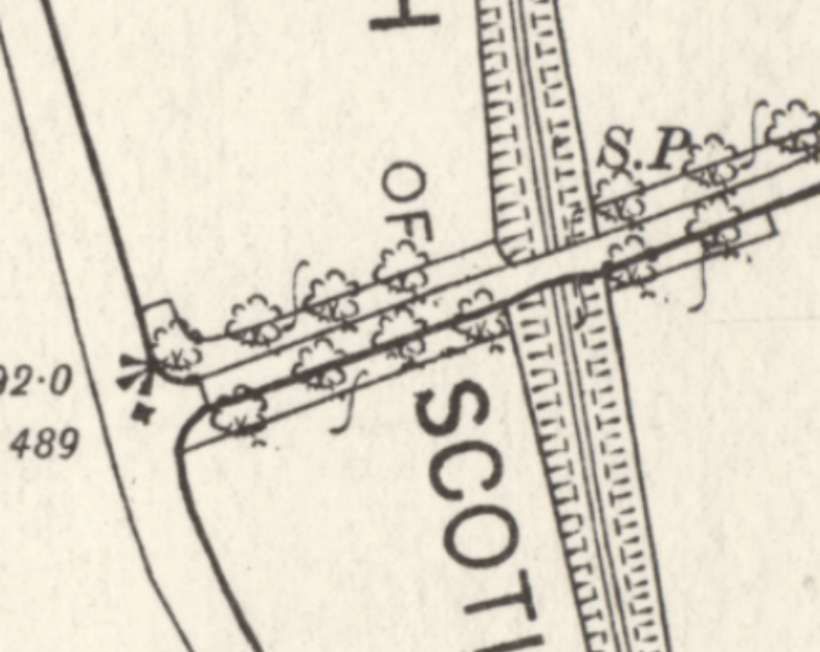
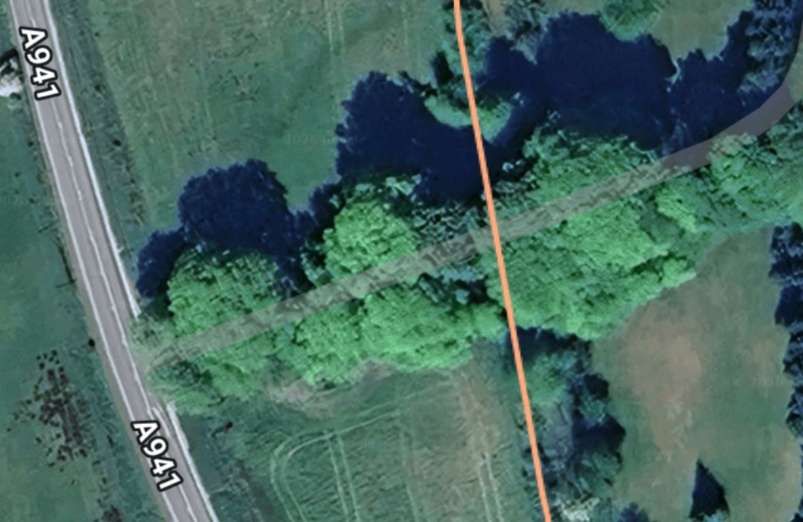
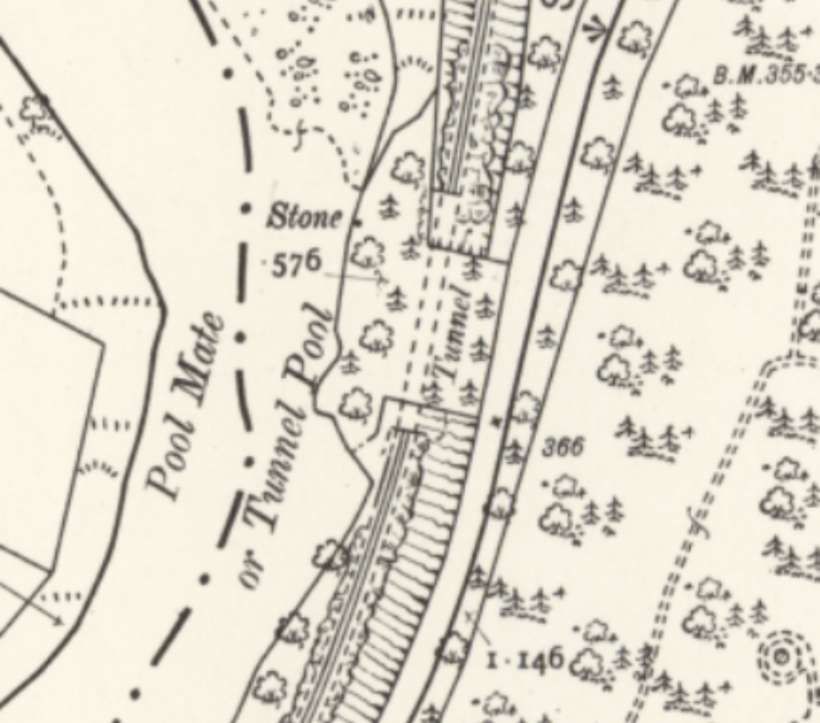
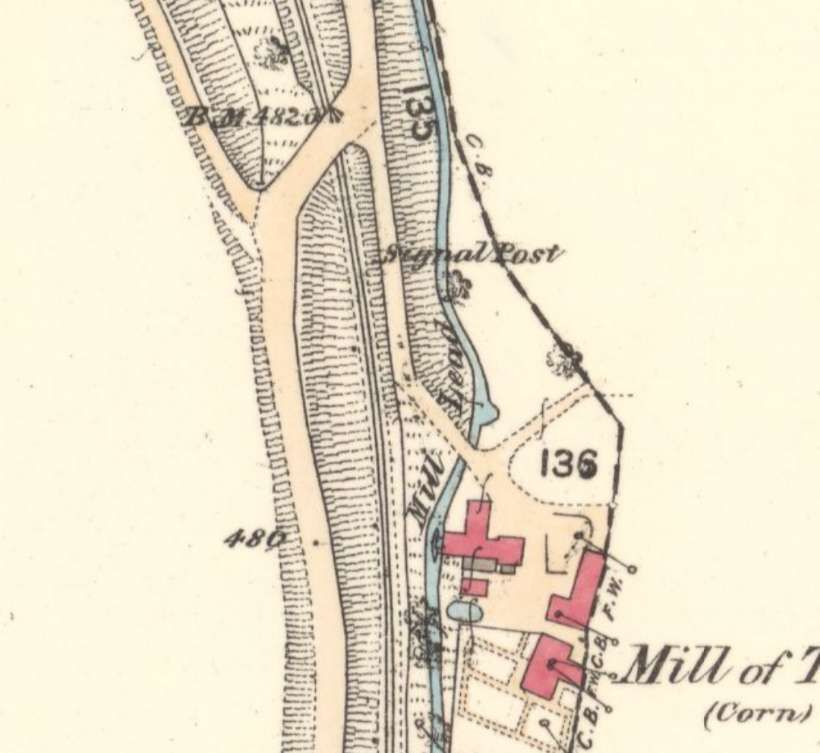
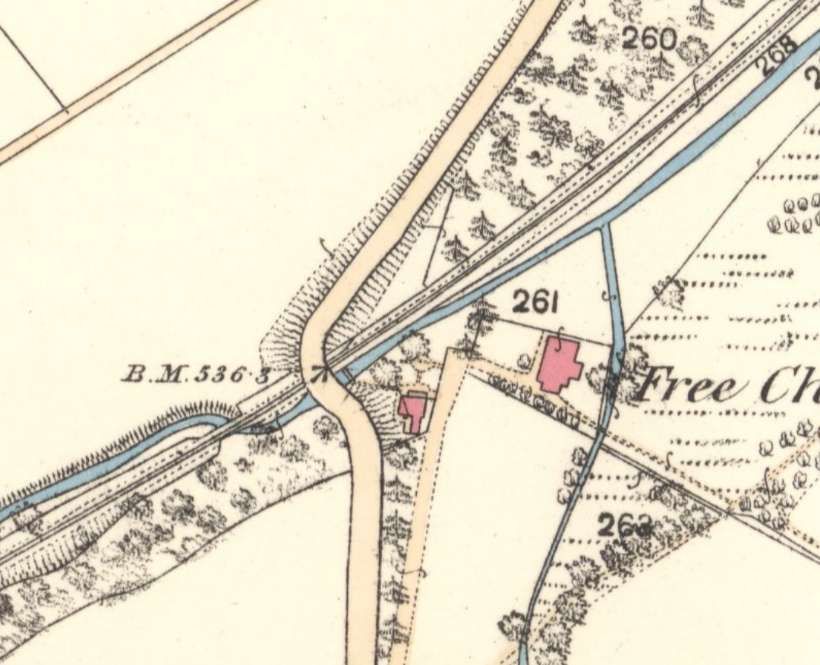
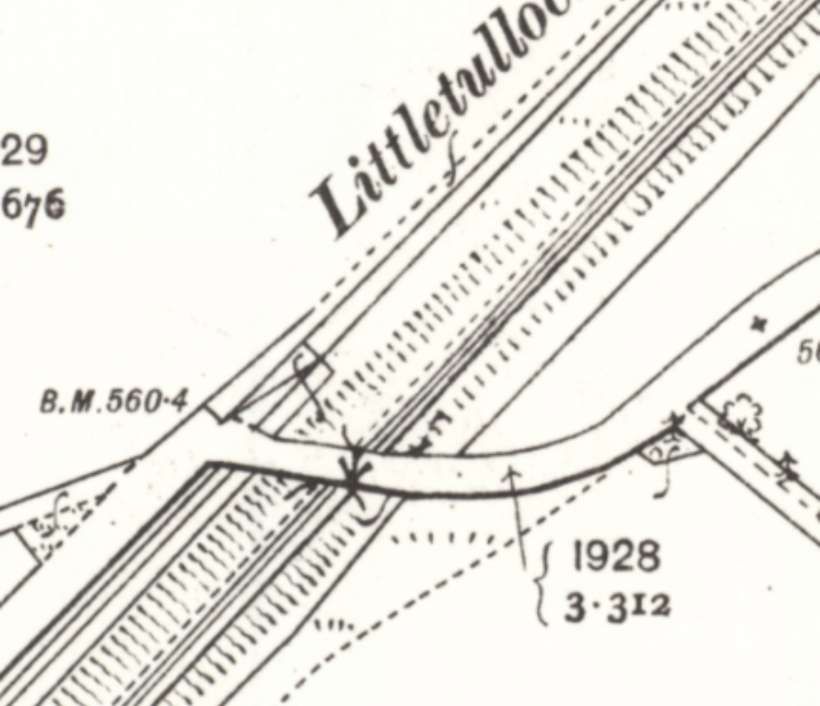
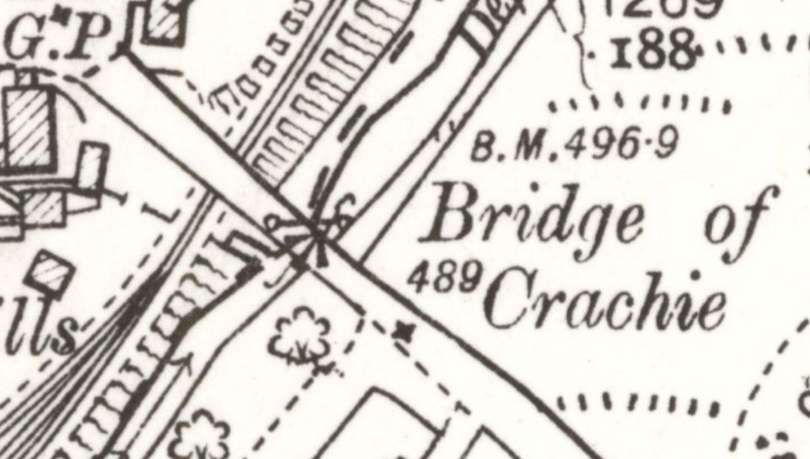
“Six miles separate the non-crossing stations of Advie and Cromdale, but when the line was opened this section was broken by a rather isolated station at Dalvey (spelled Dalvie in the very early timetables). Closed in 1868, the buildings and platform have long since been dismantled, but the site of the station, some three miles from Advie, can still be identified.” [2: p6]

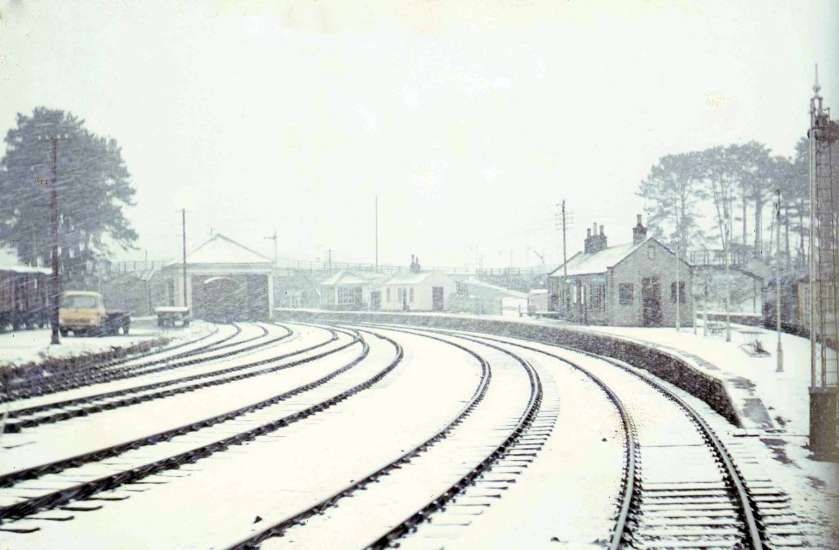
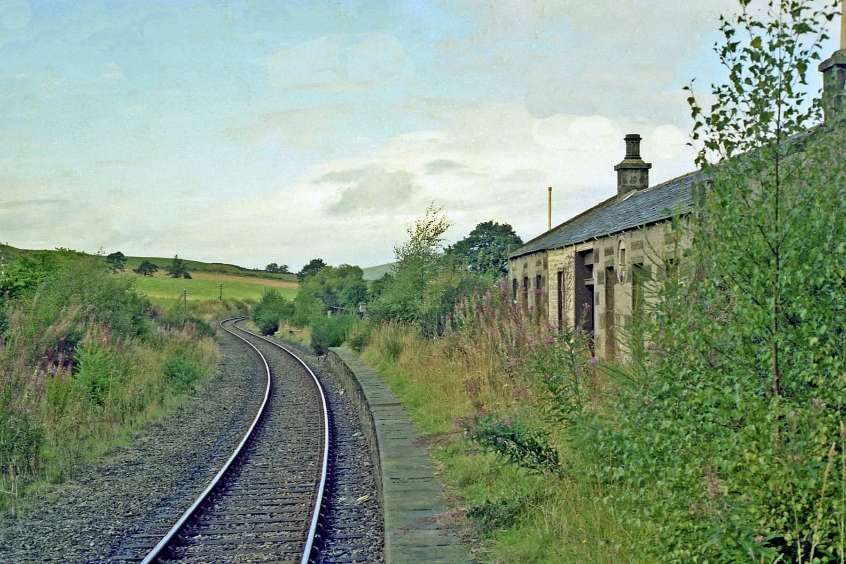
Photographs of the station during the diesel era can be found here. [17]
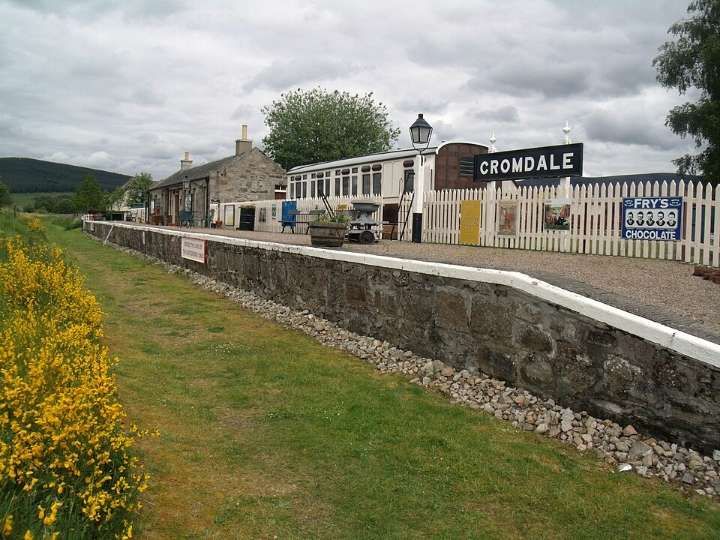
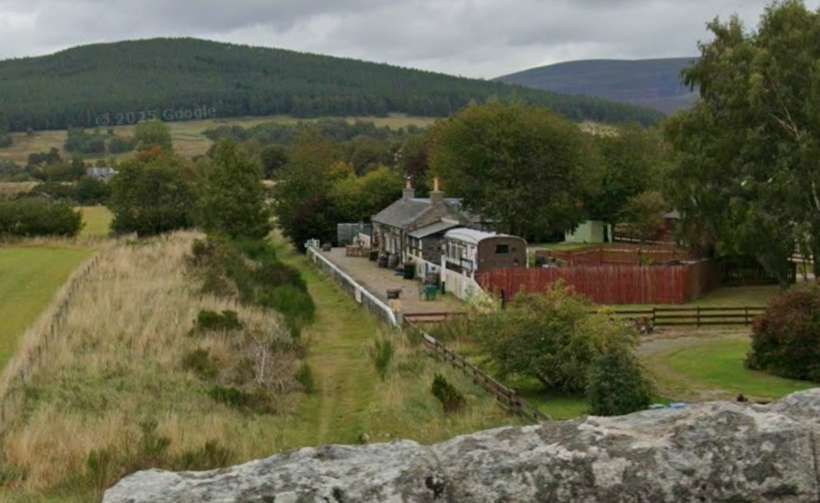
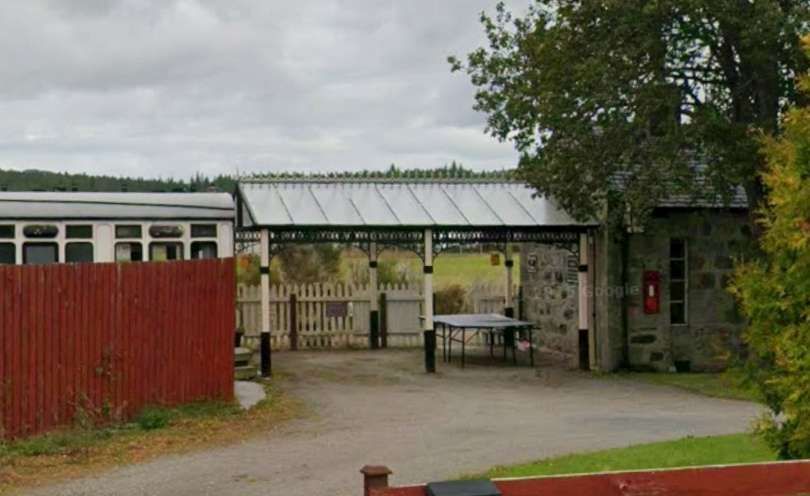
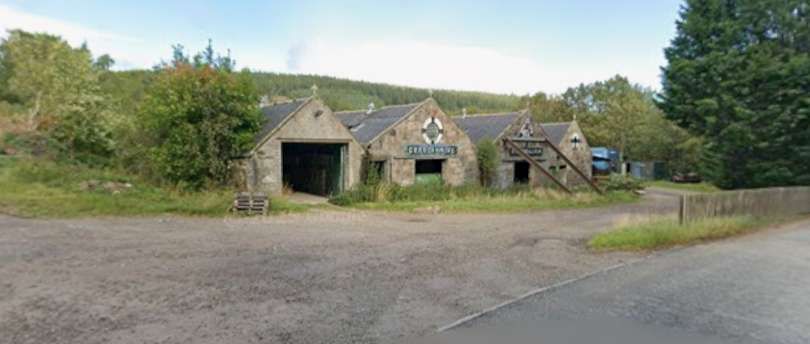
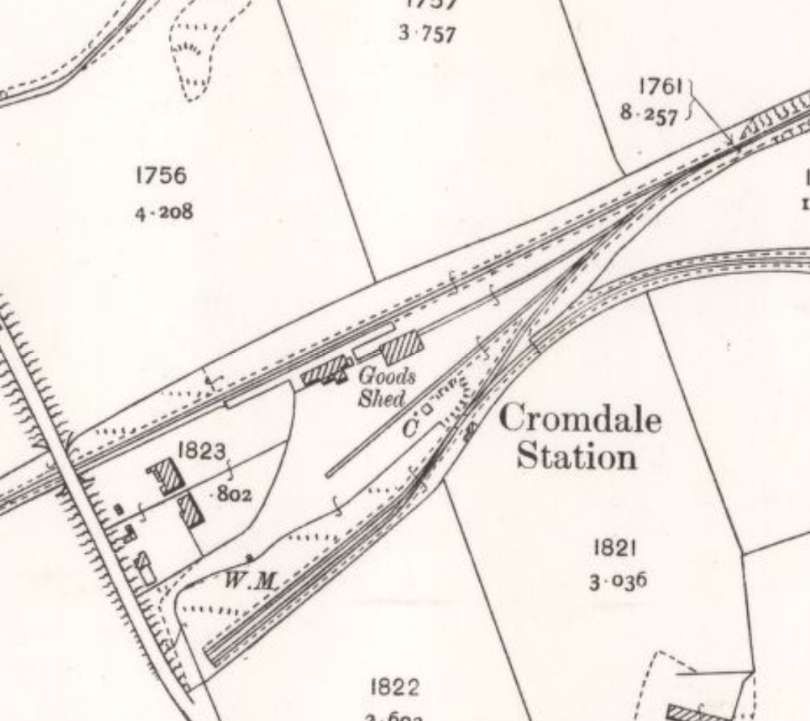
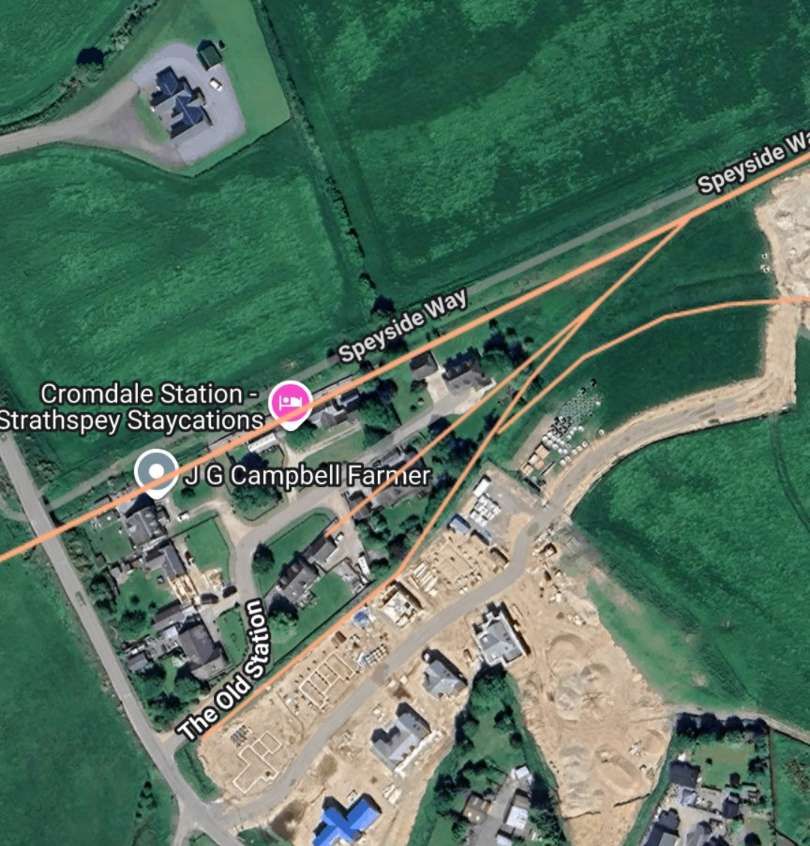
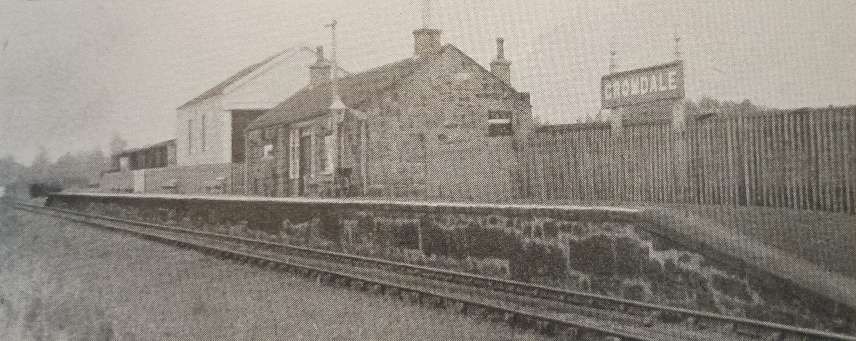
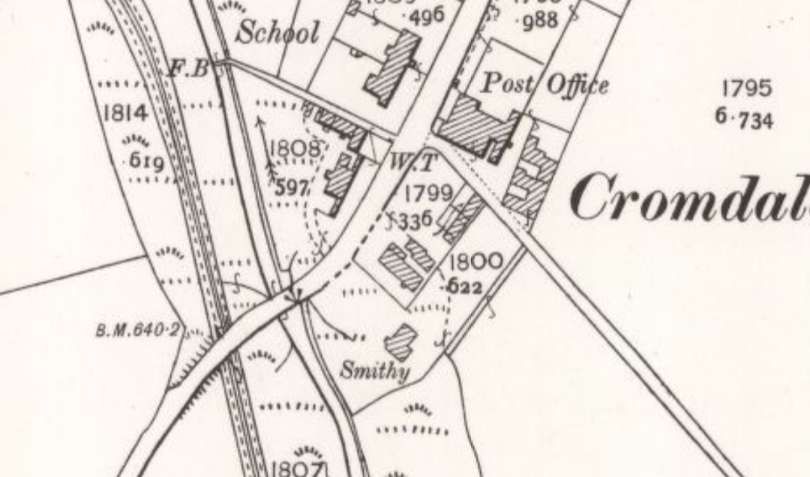
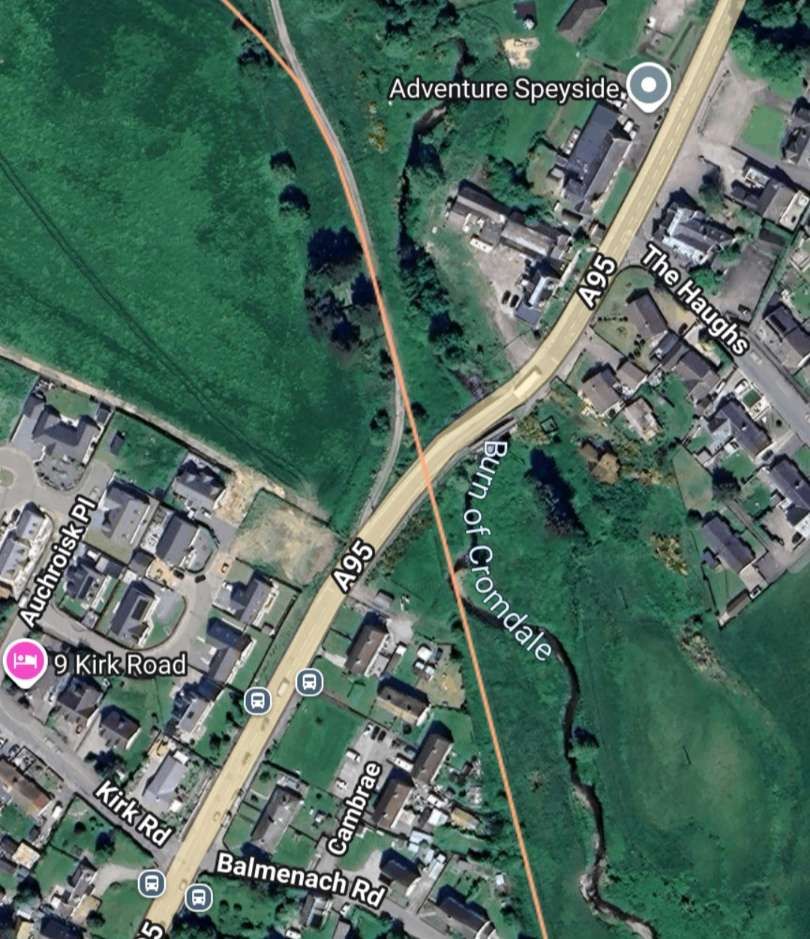
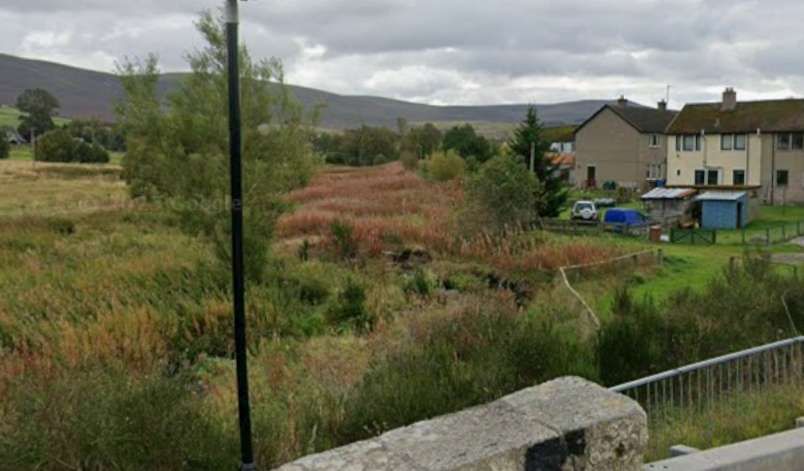
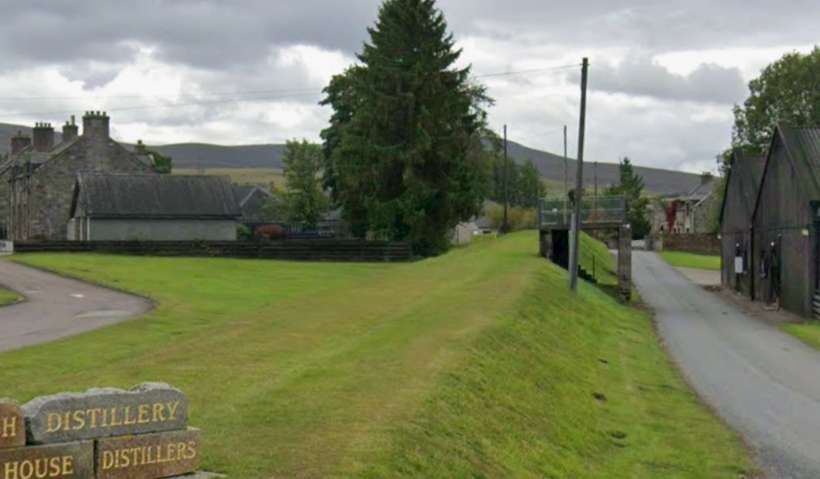
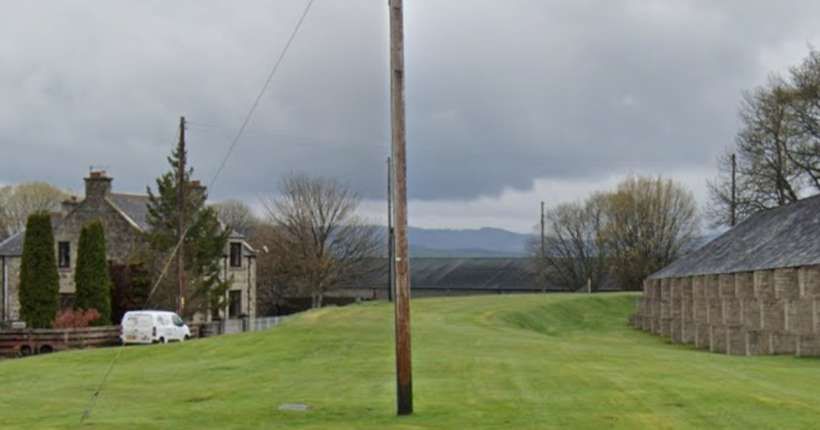
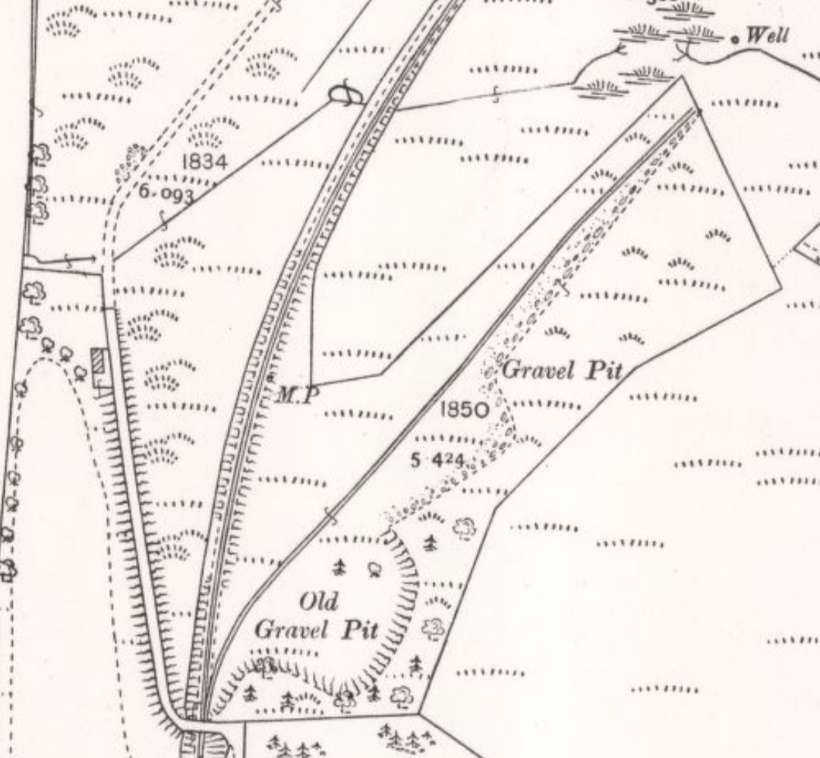
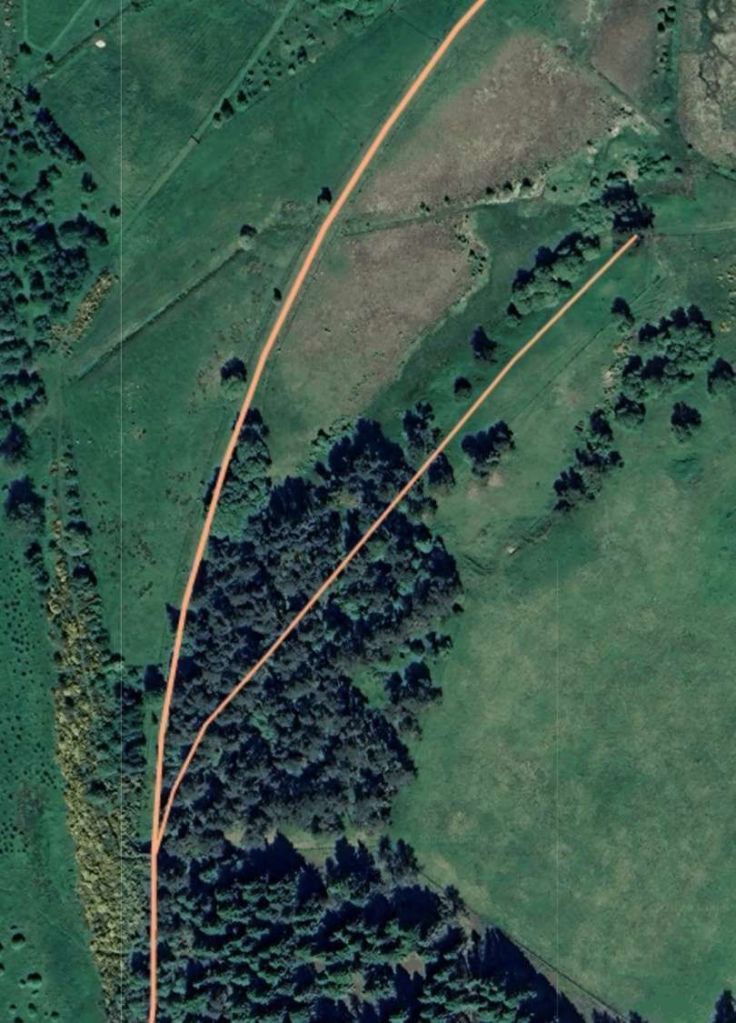
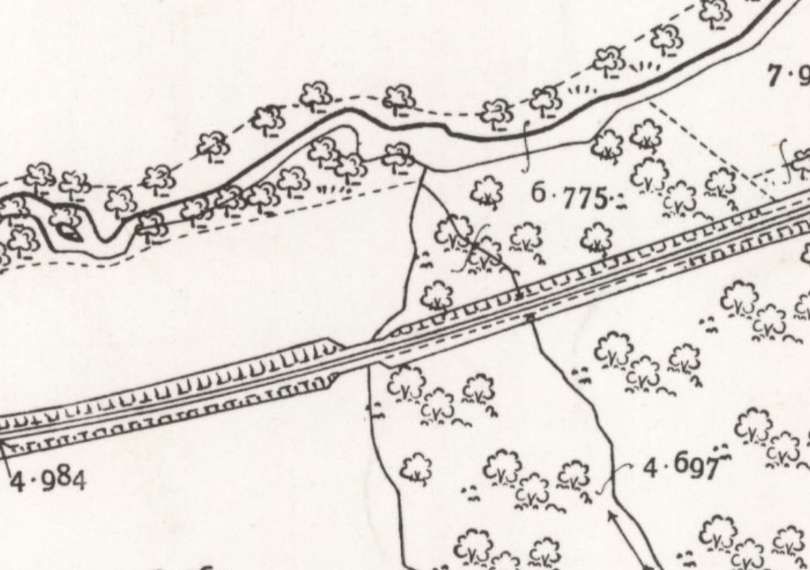
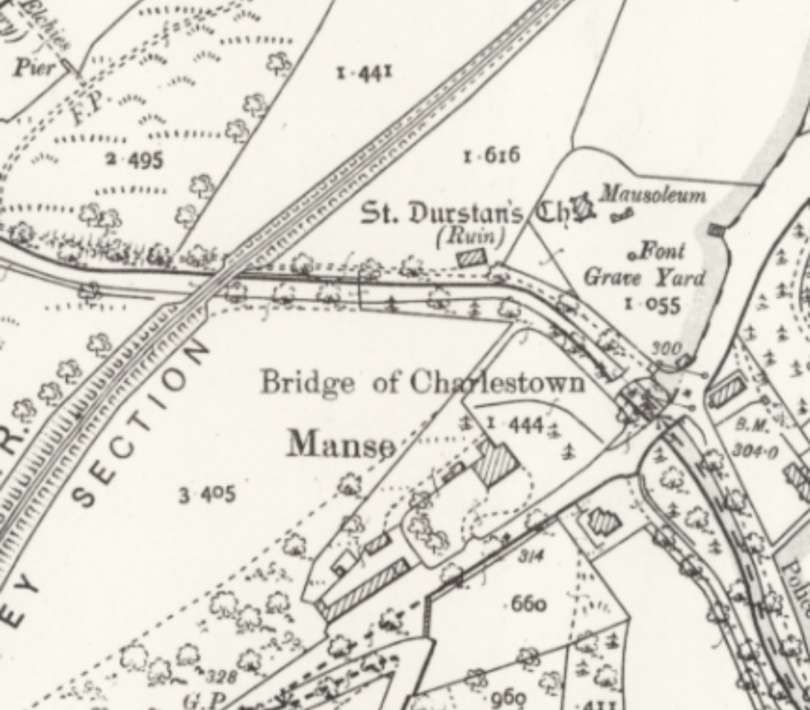
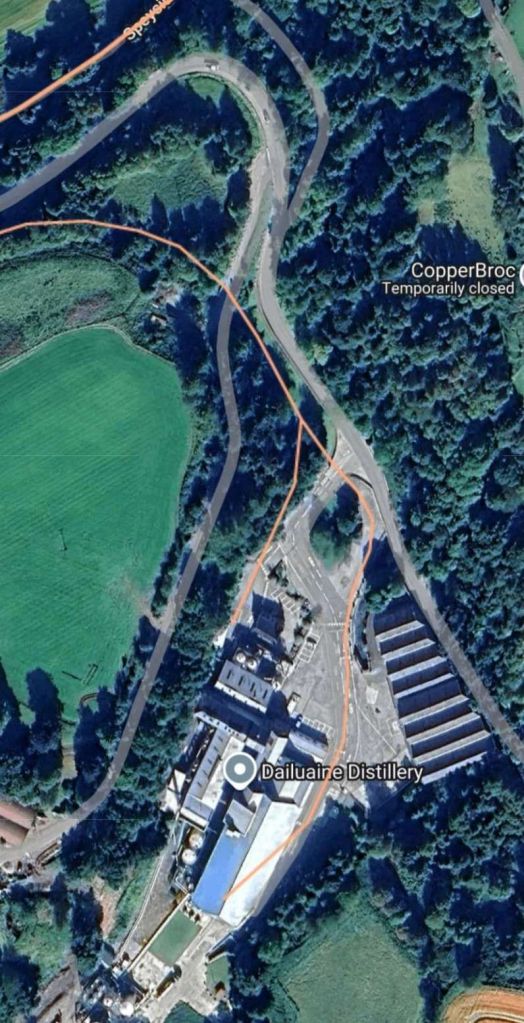
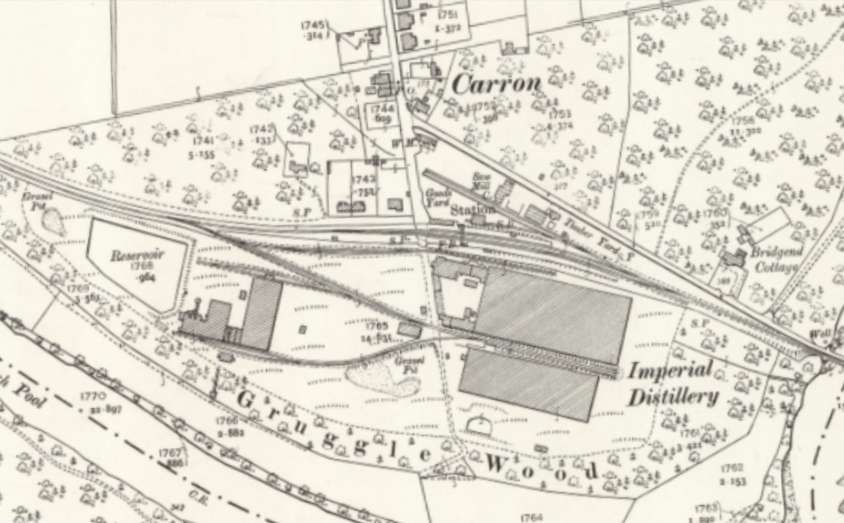
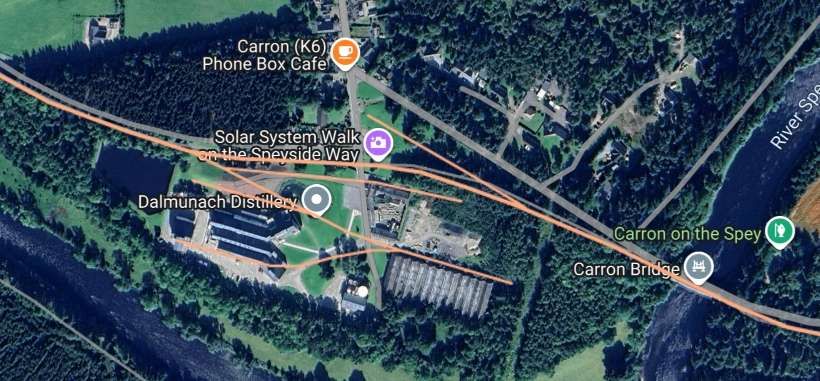
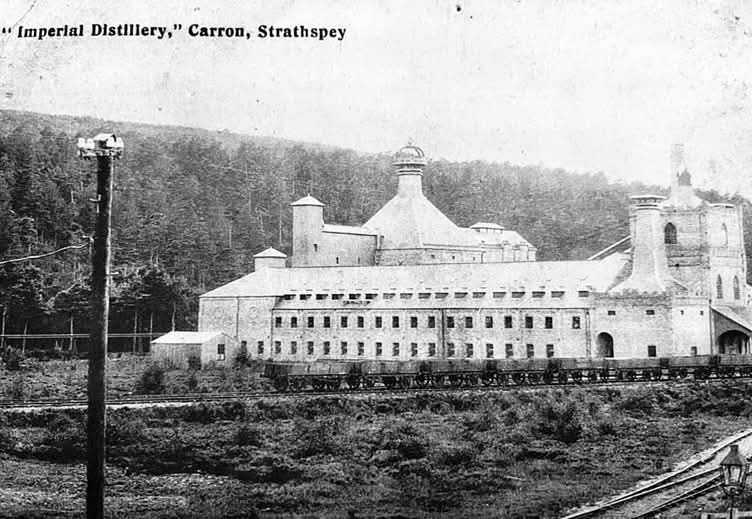
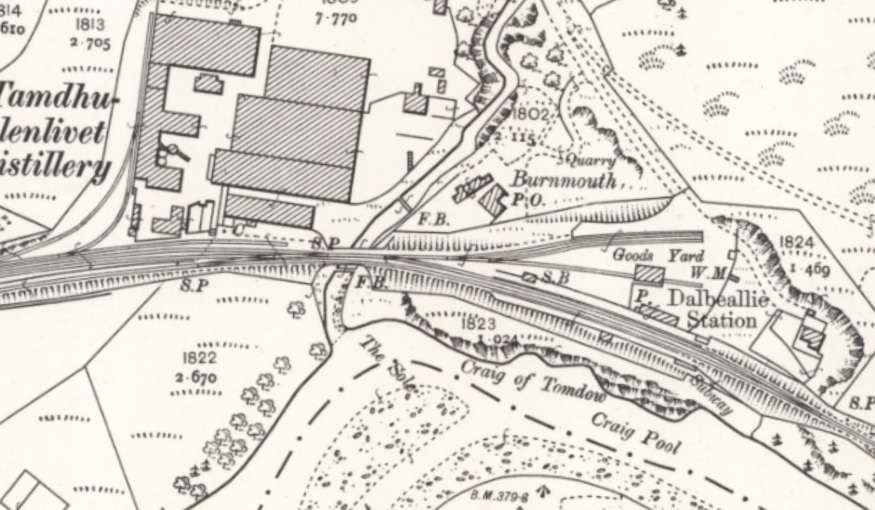
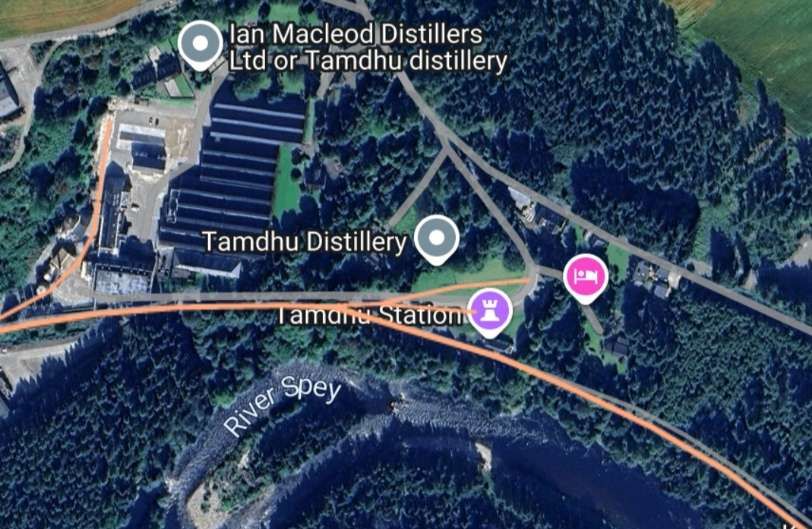
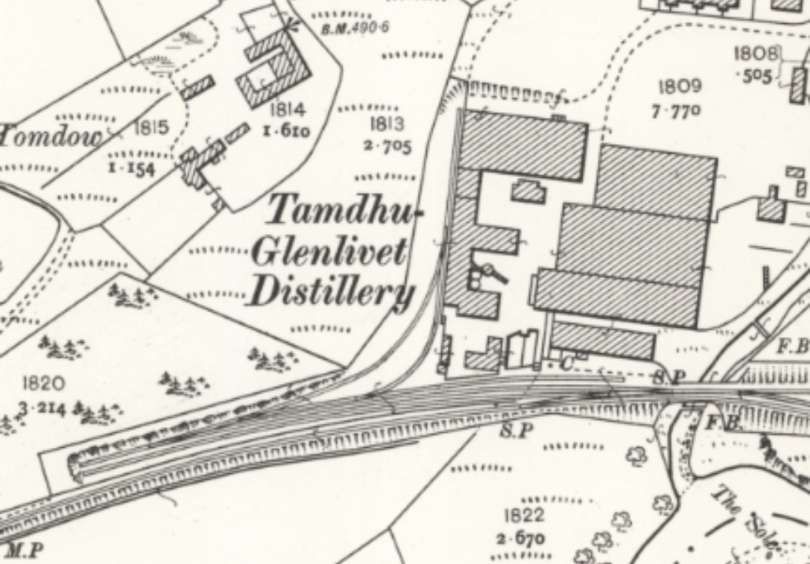
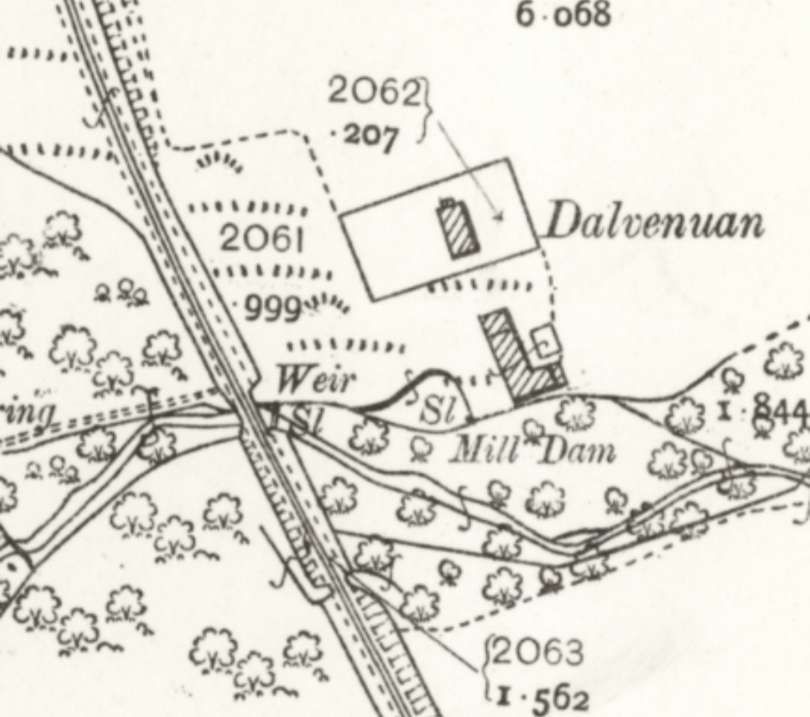
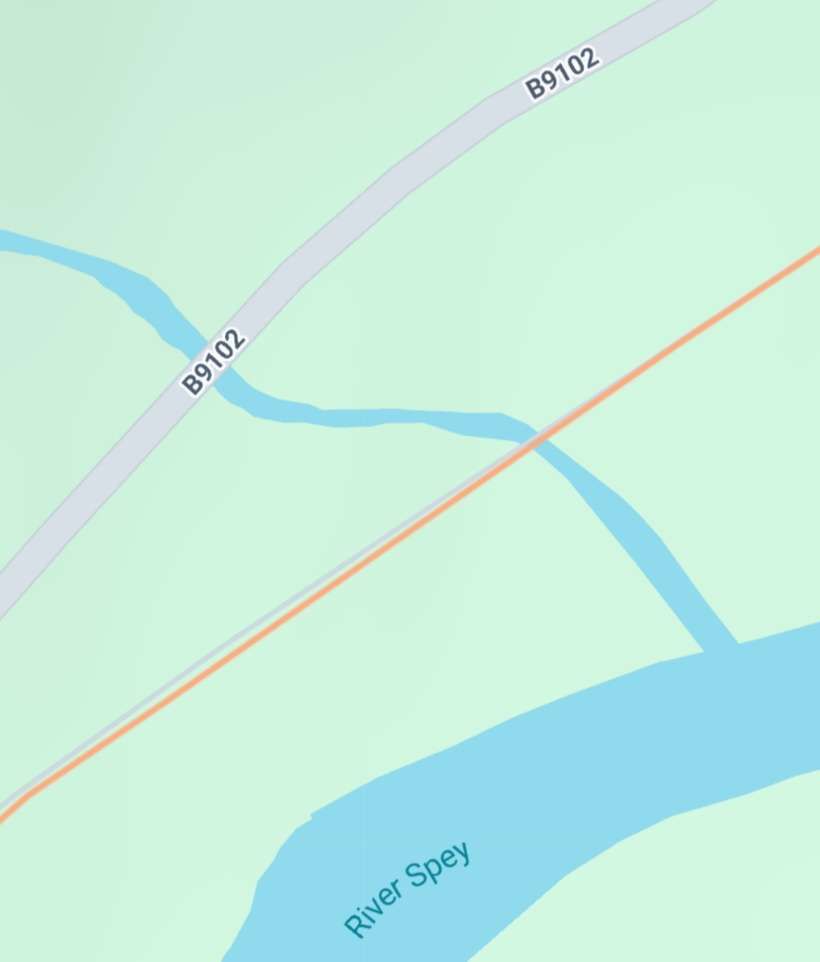
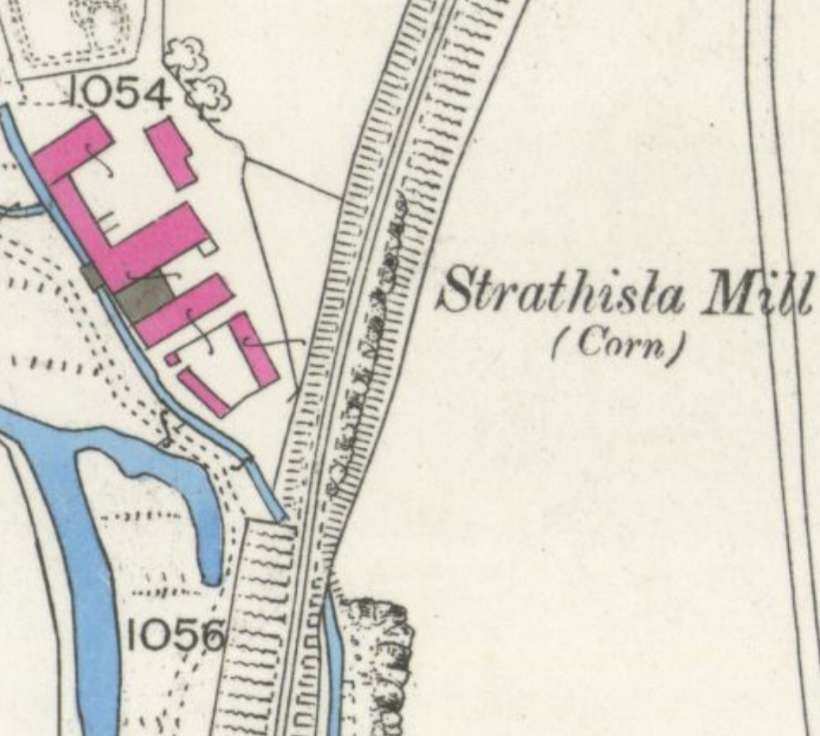
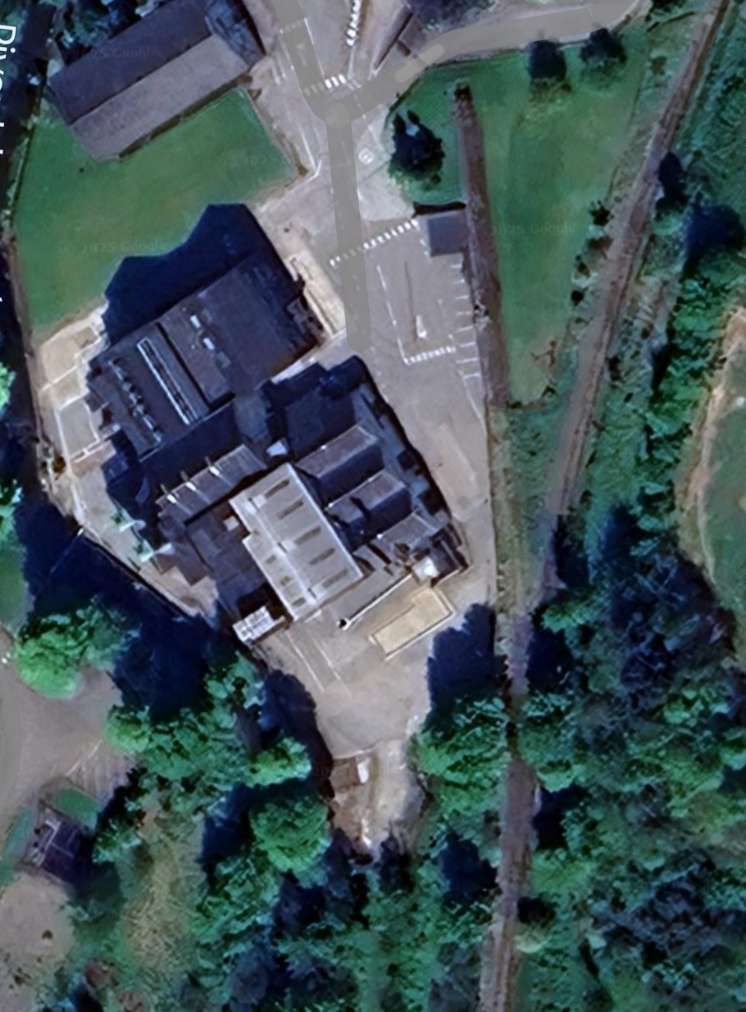
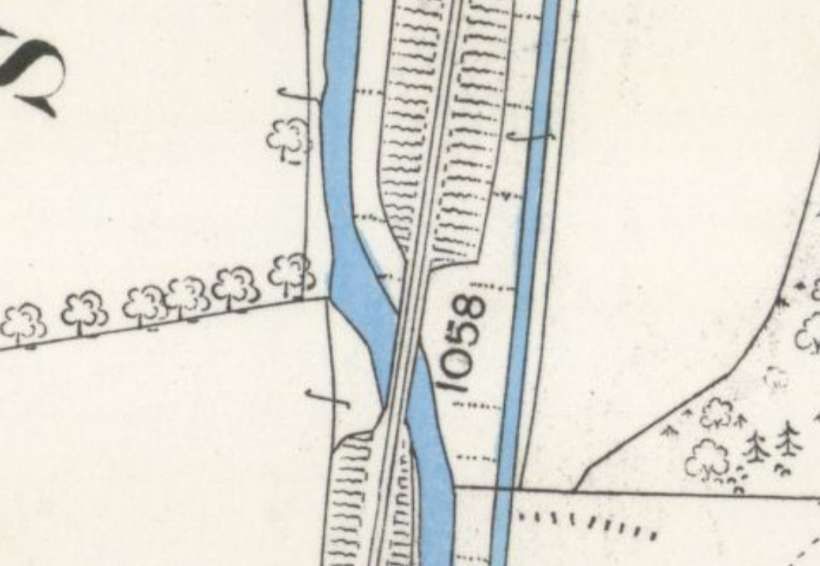
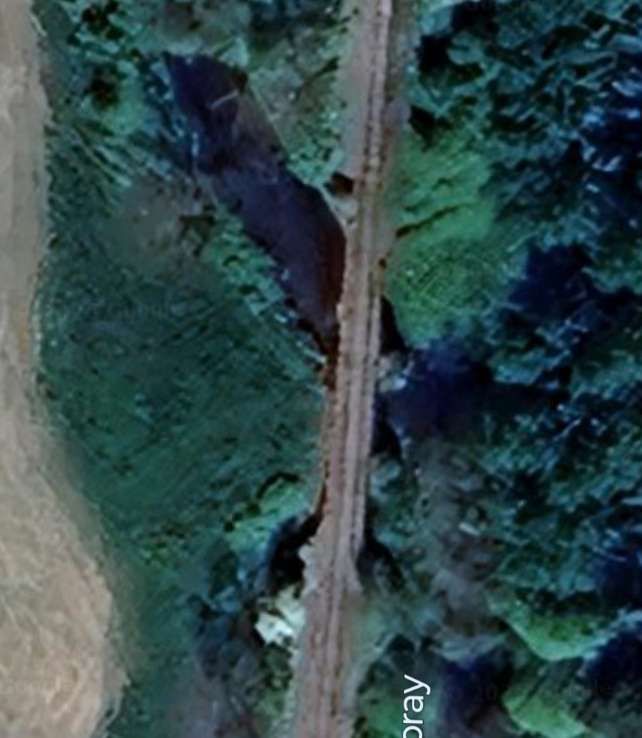
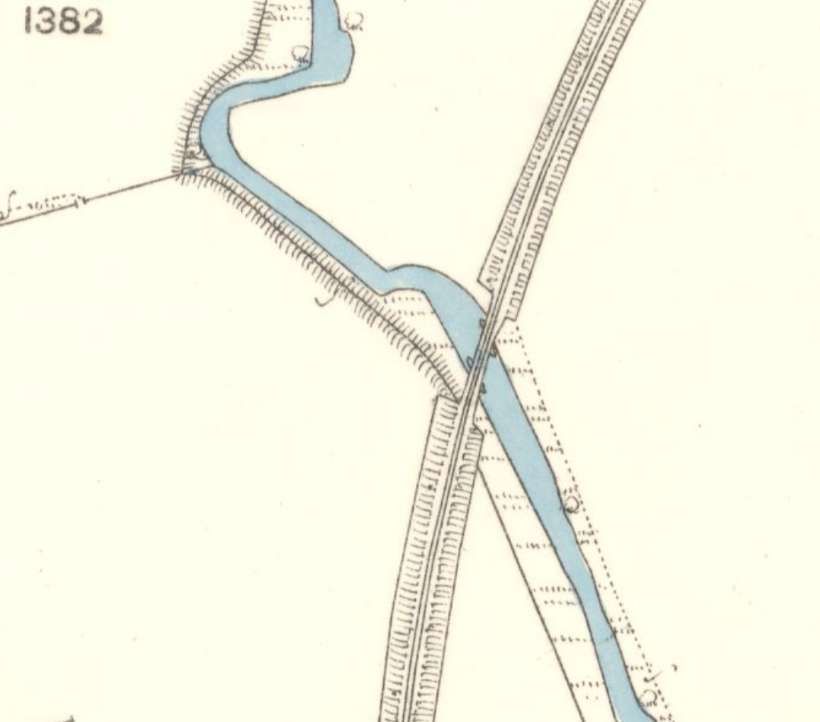
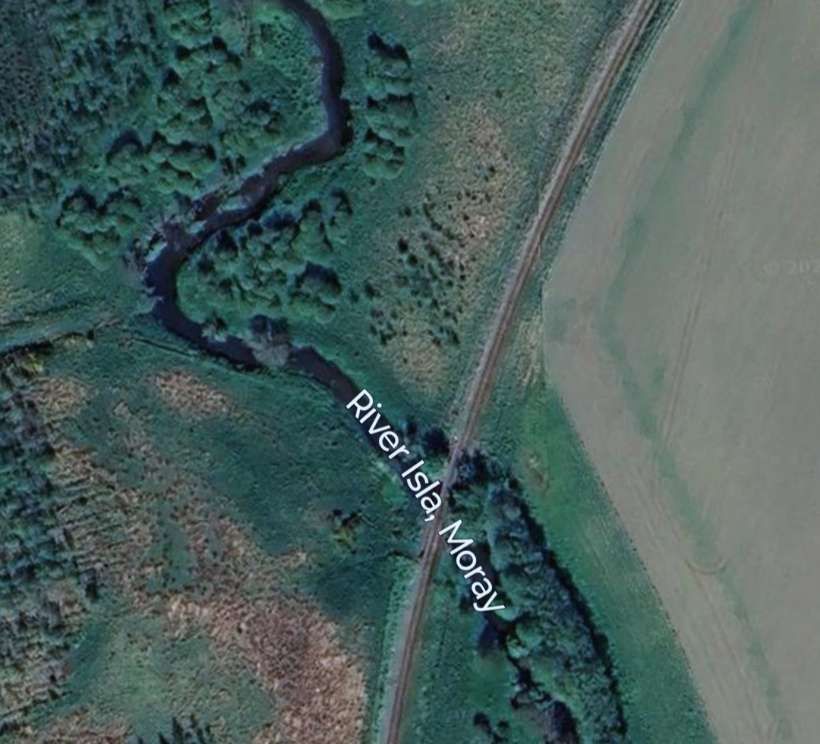
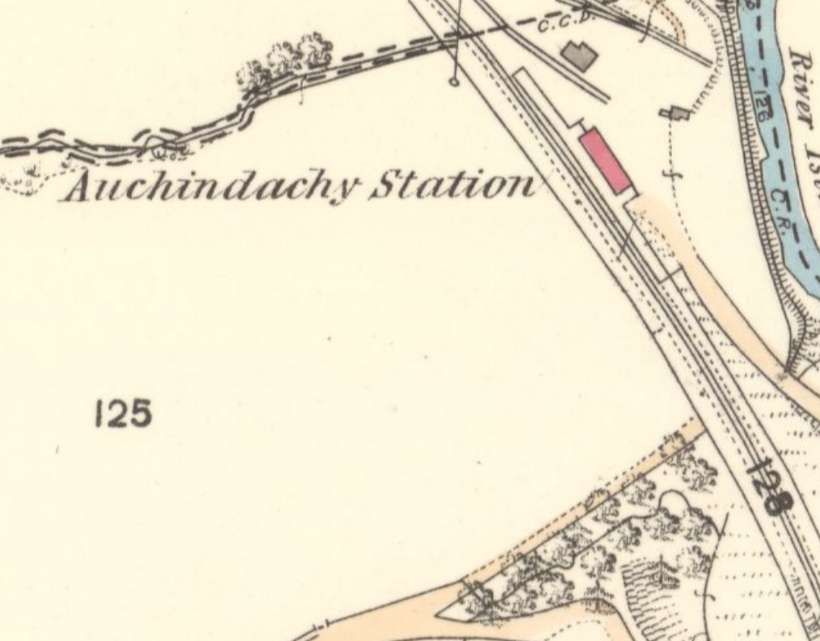
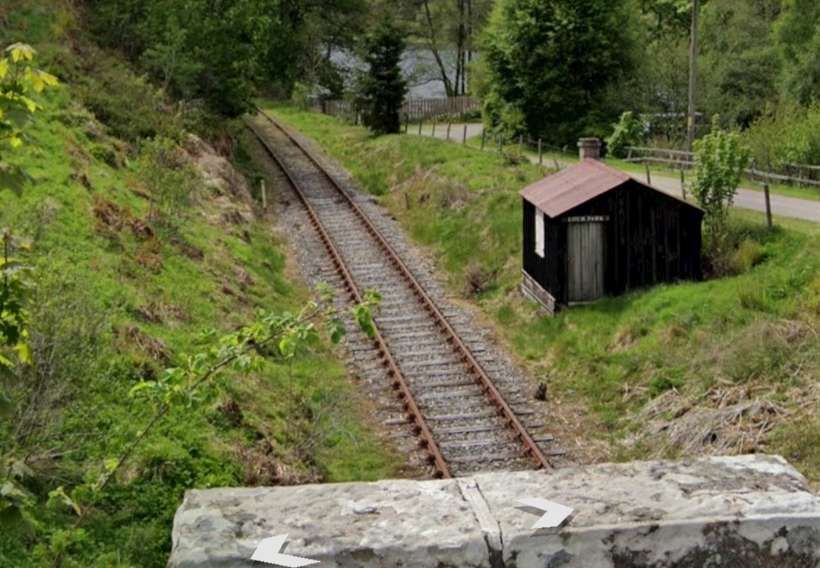
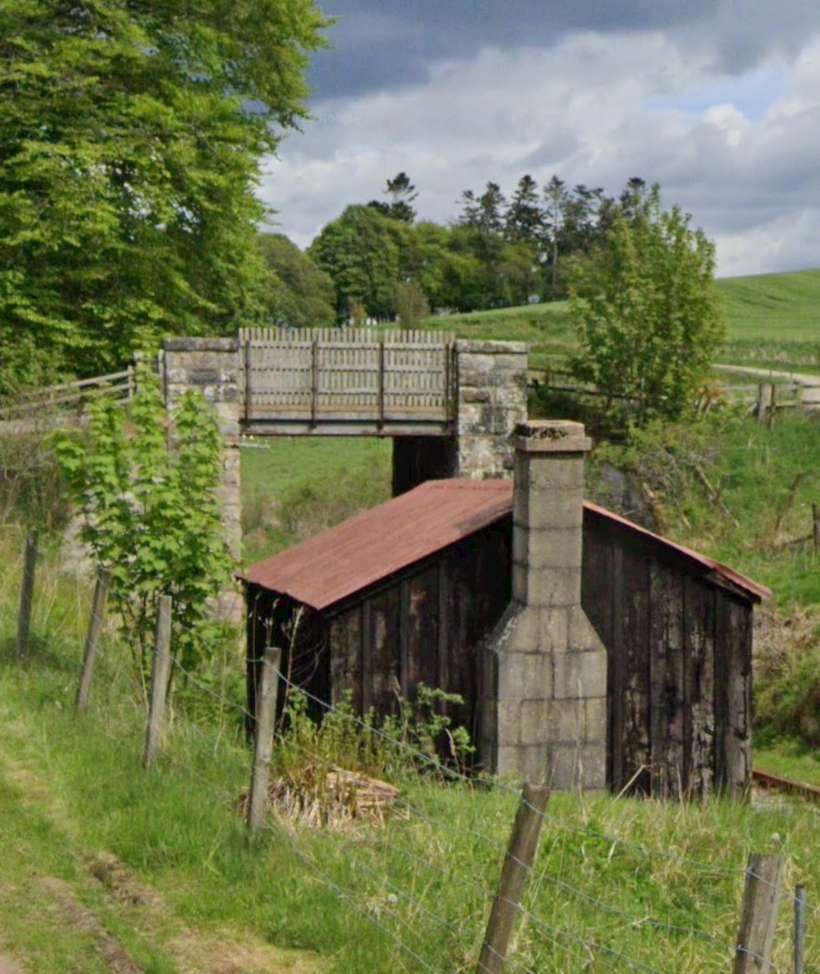
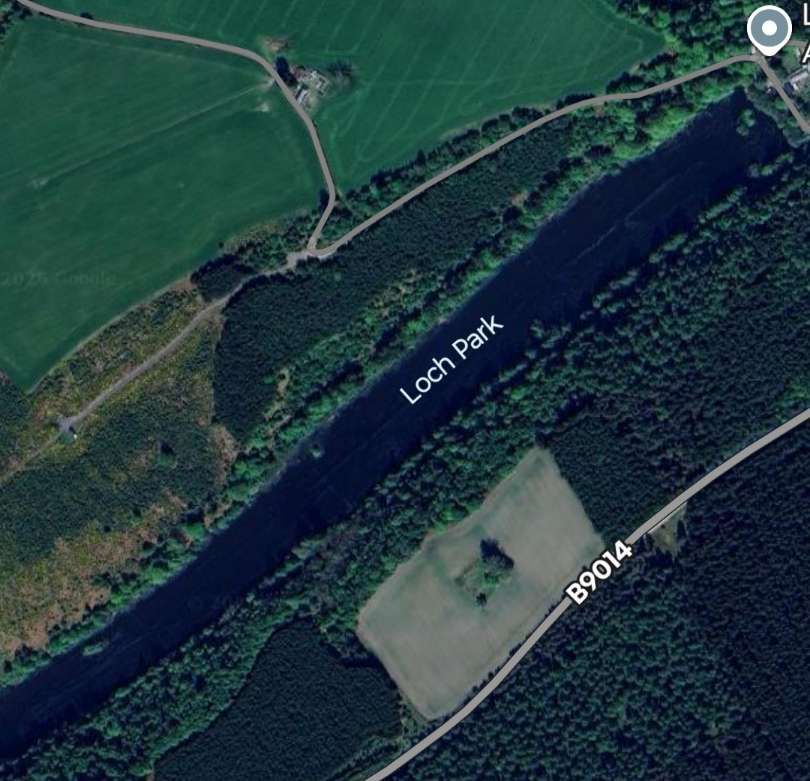
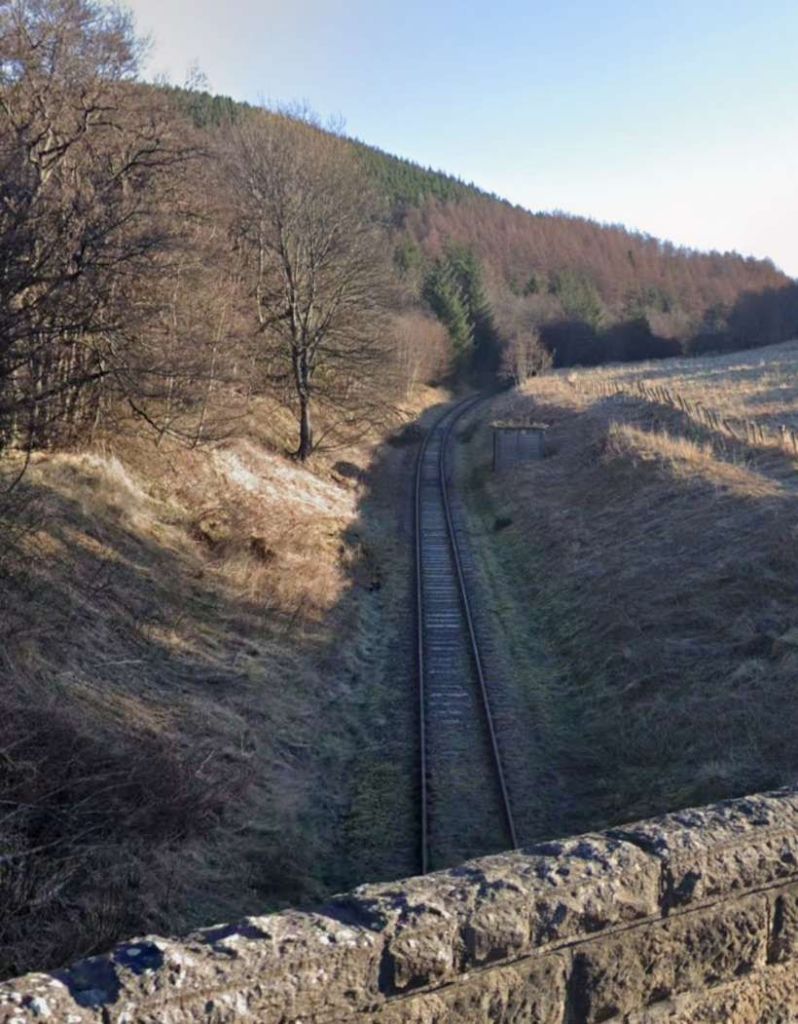
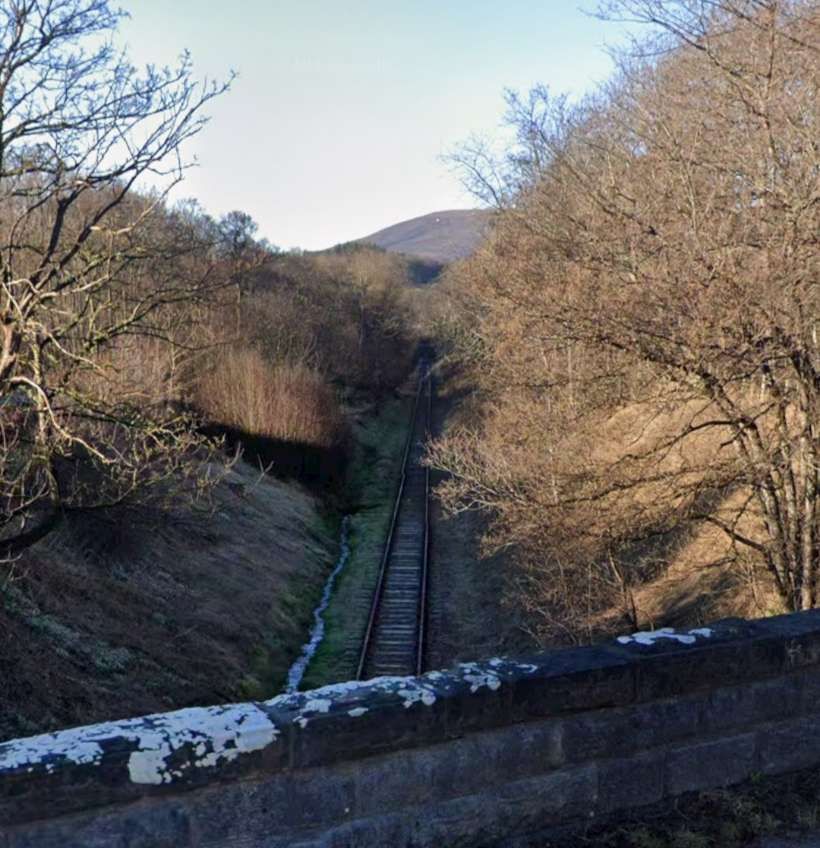
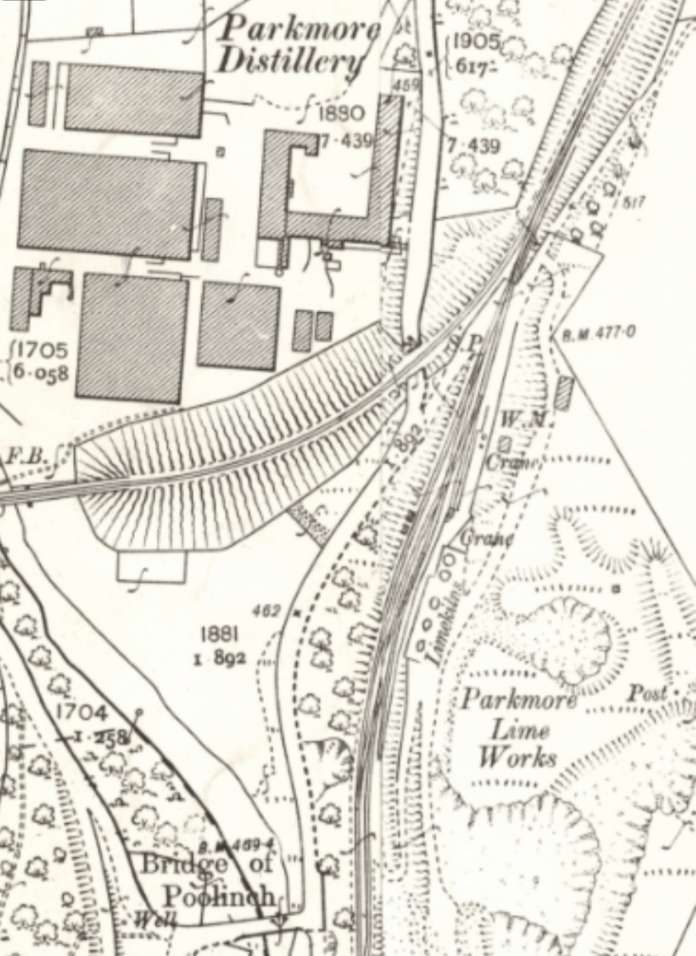
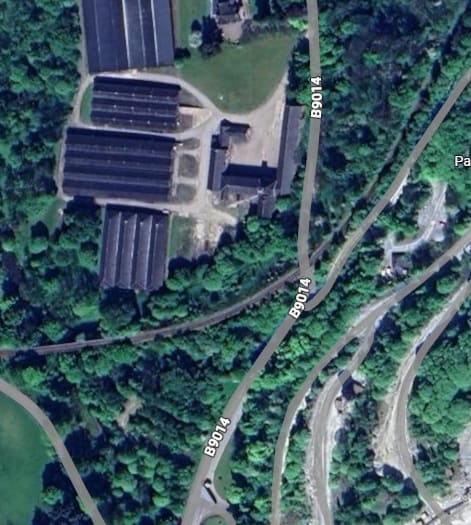
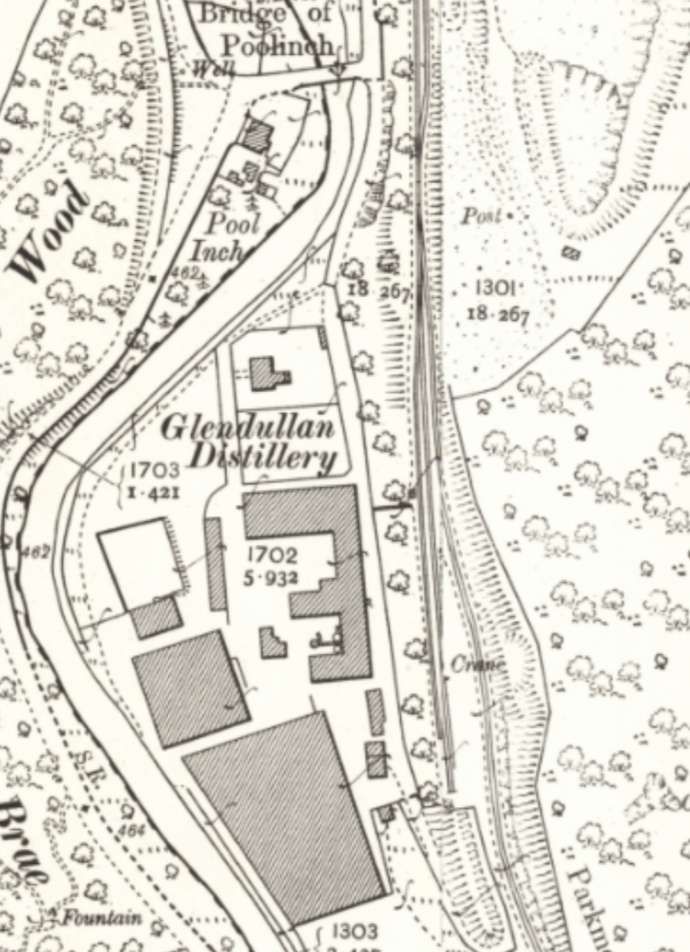
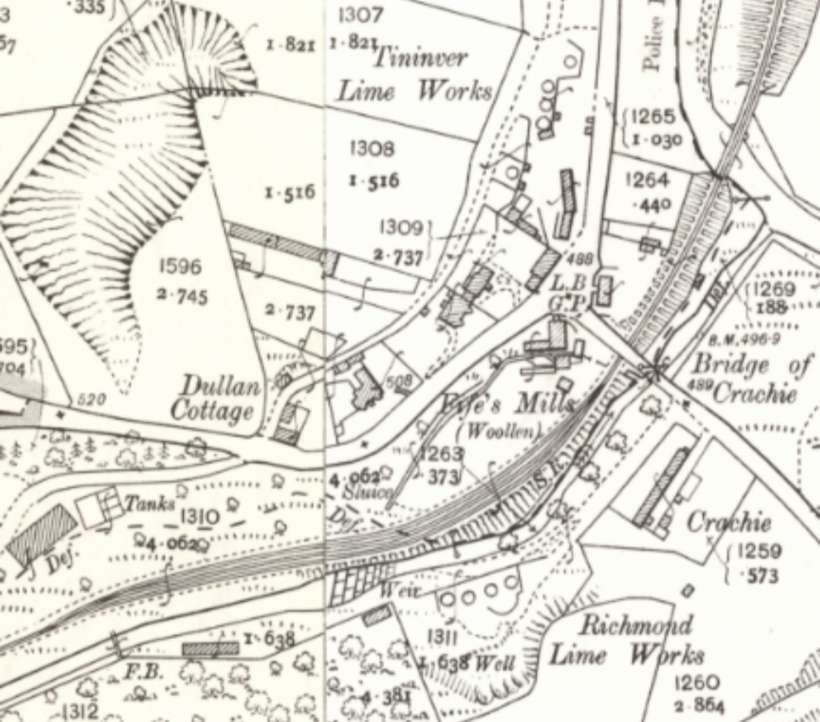
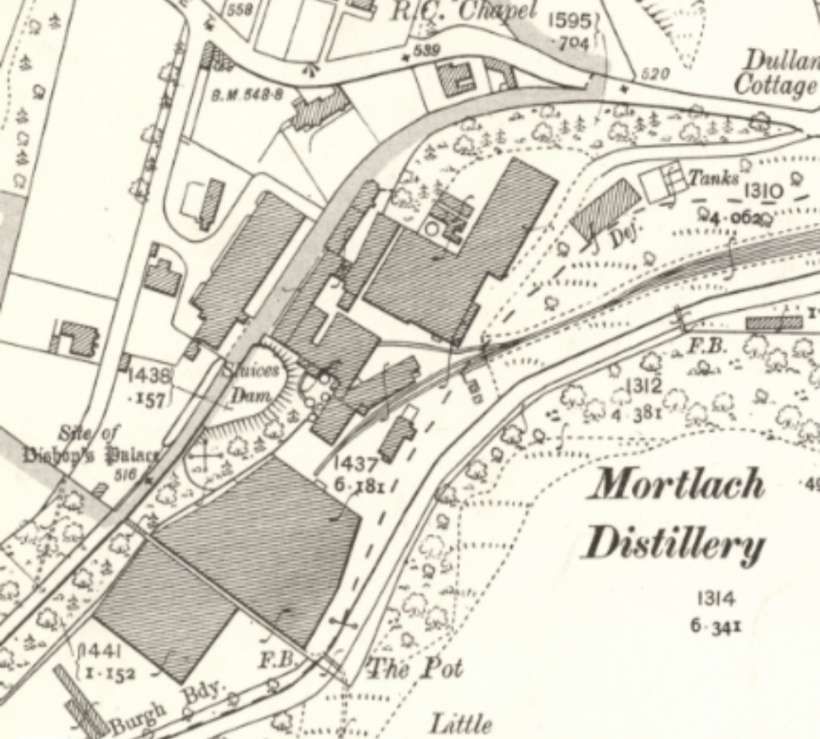
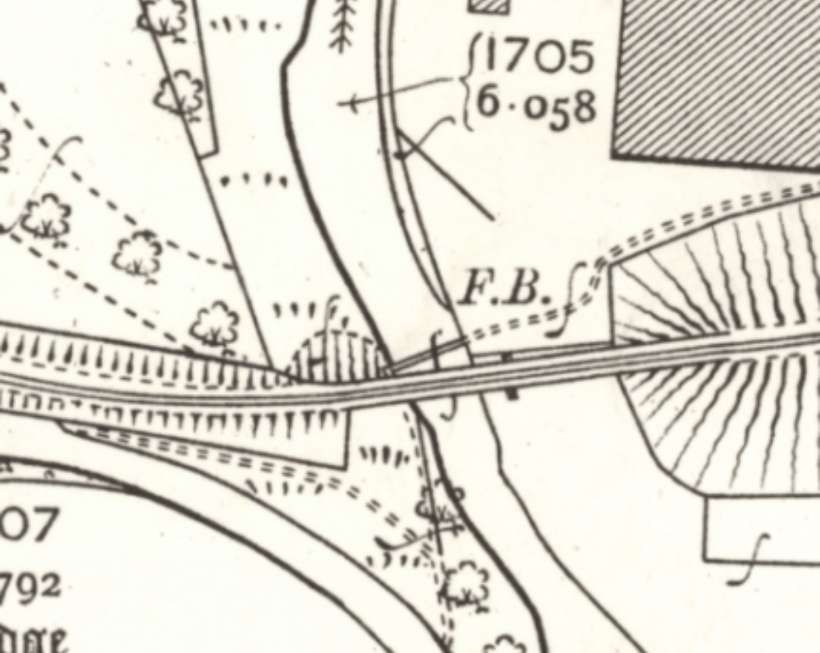
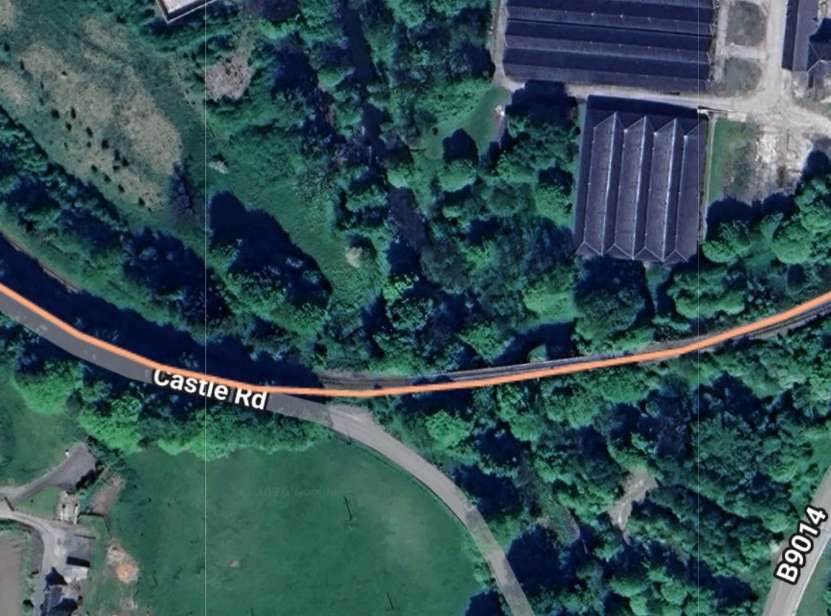
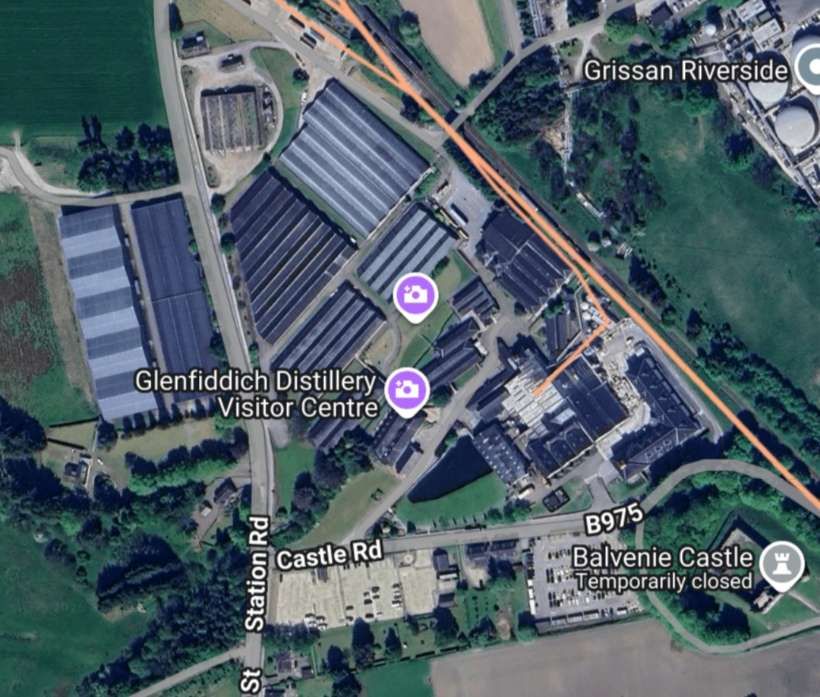
“At Cromdale, a branch serves a distillery more than a mile south-east of the station.” [2: p6] We will follow the line of this branch before returning to the Strathspey Line Southwest of Cromdale Station.
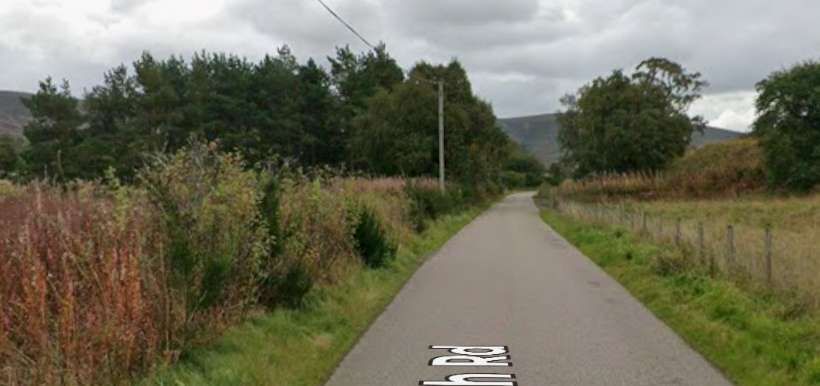

Beyond Cromdale, “The train crosses the boundary between Morayshire and Inverness-shire beyond Cromdale, and reaches Grantown-on-Spey, 24.25 miles from Craigellachie.” [2: p6]
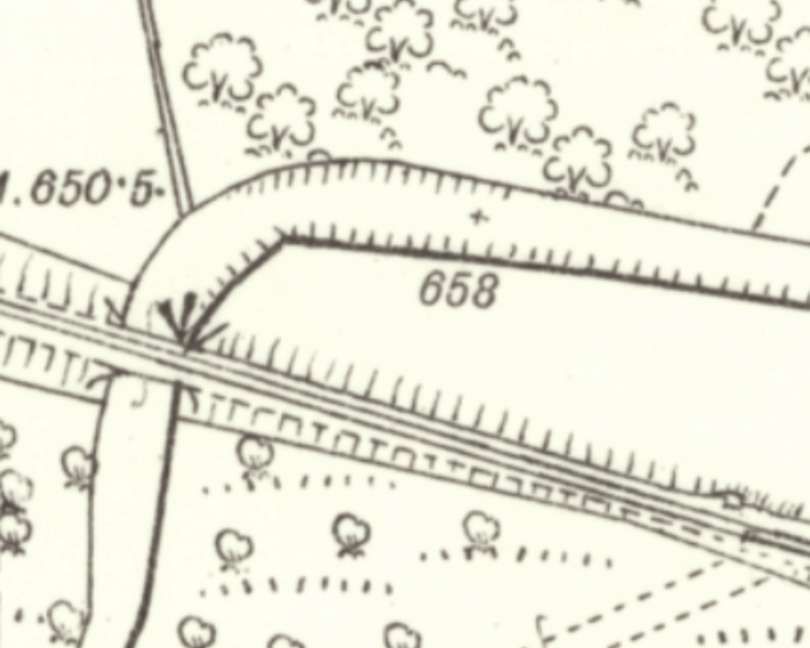
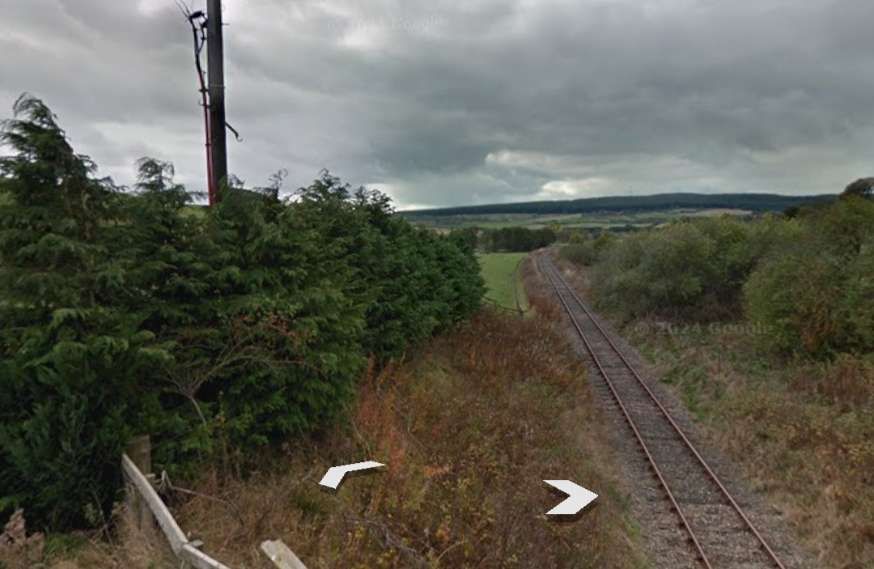
Continuing Southwest on the Strathspey Line. ….
The line curved round to the South and began to run alongside the Spey once again. …..

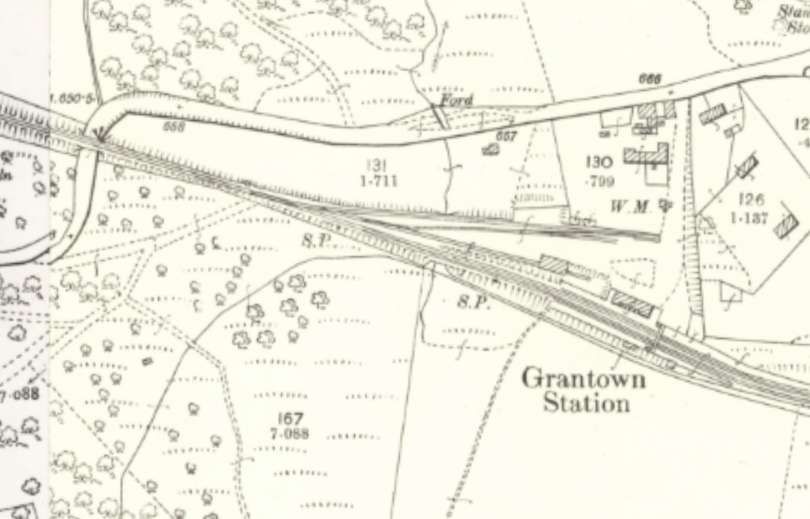
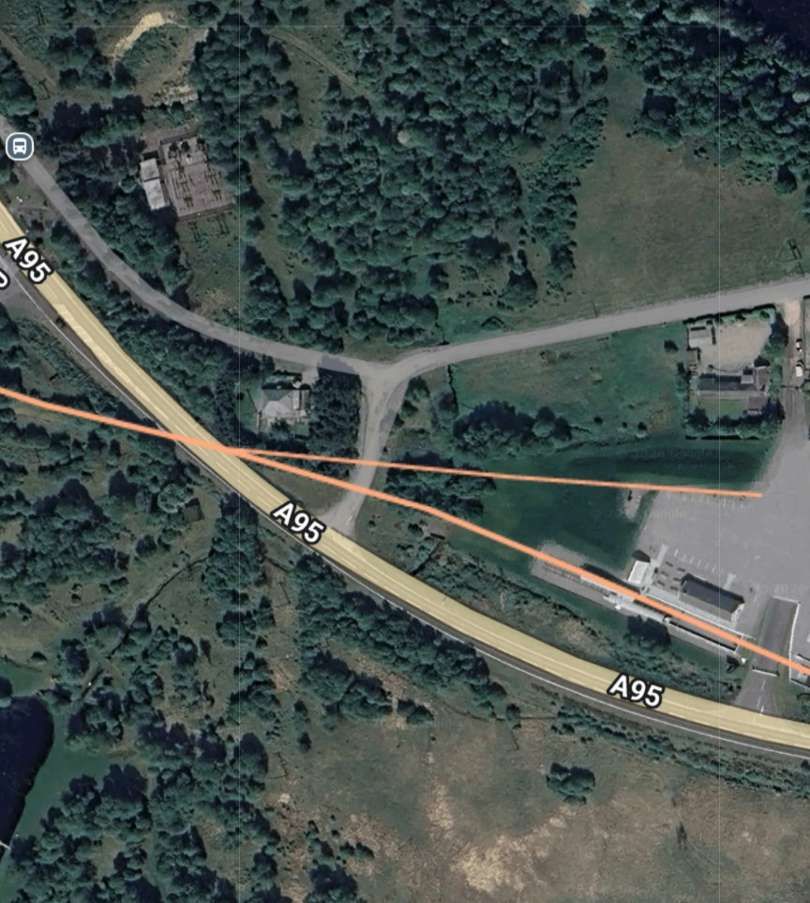
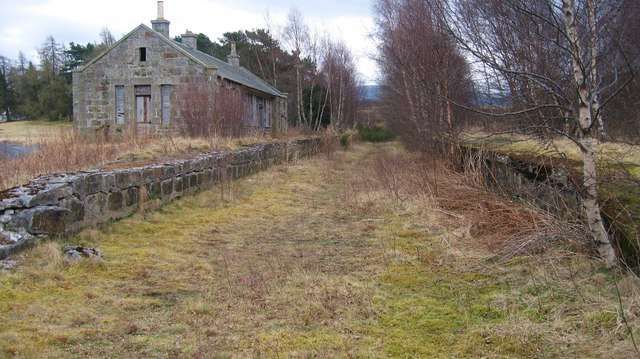
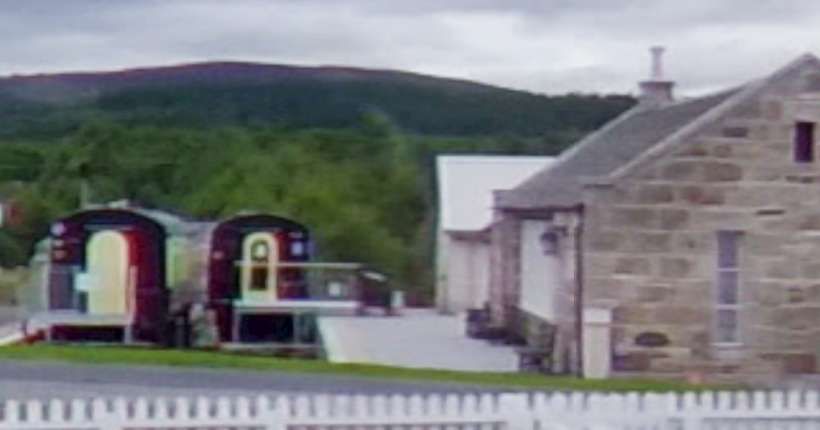
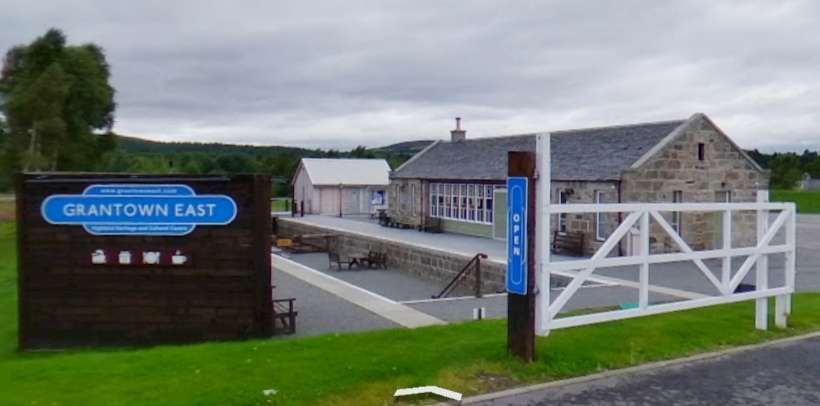
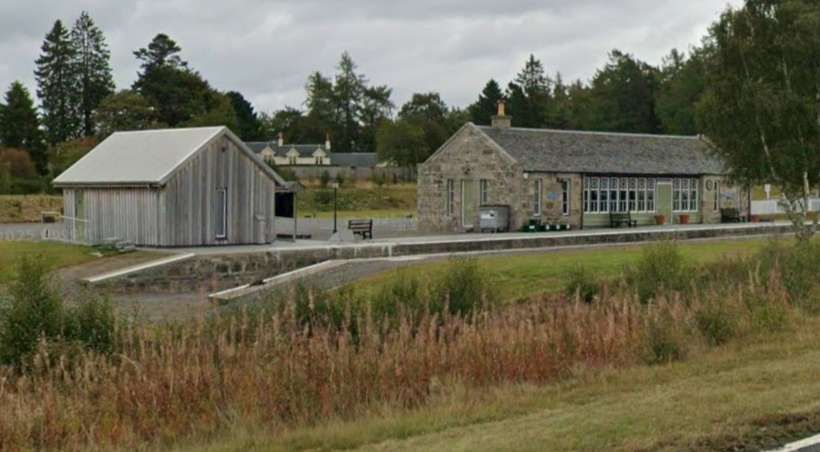
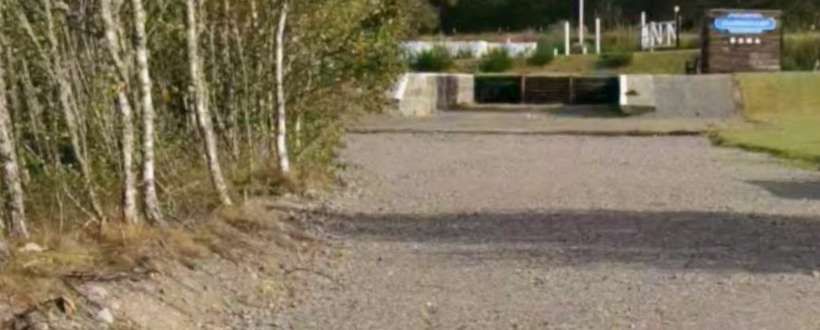
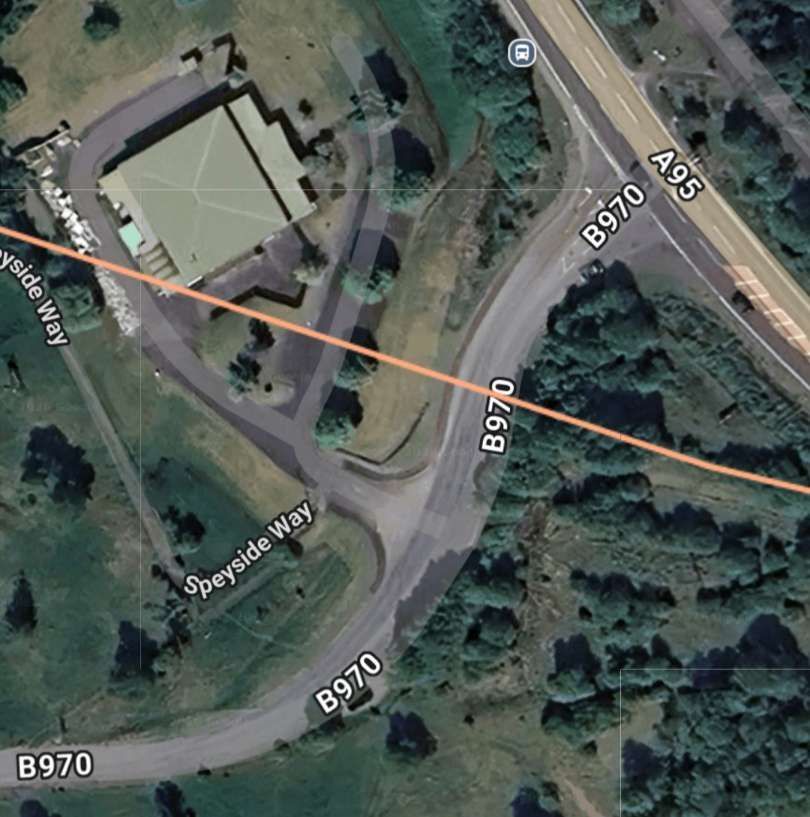
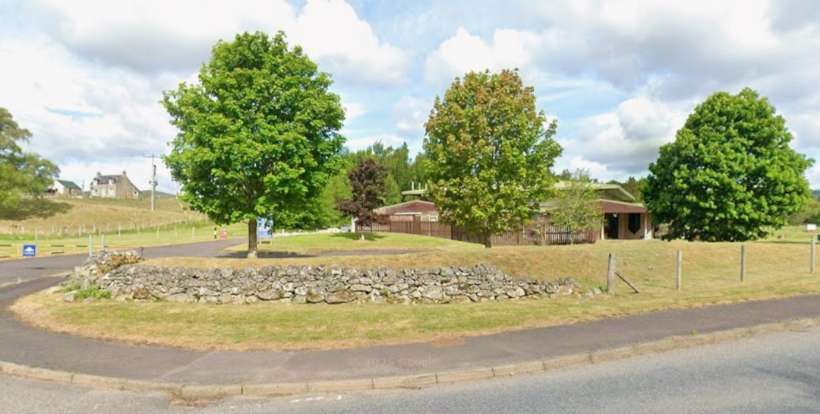
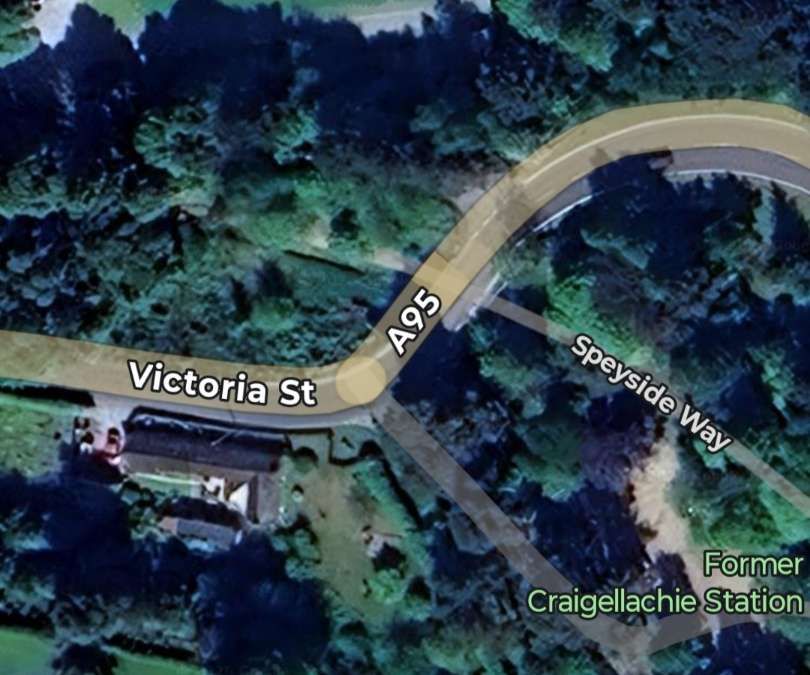
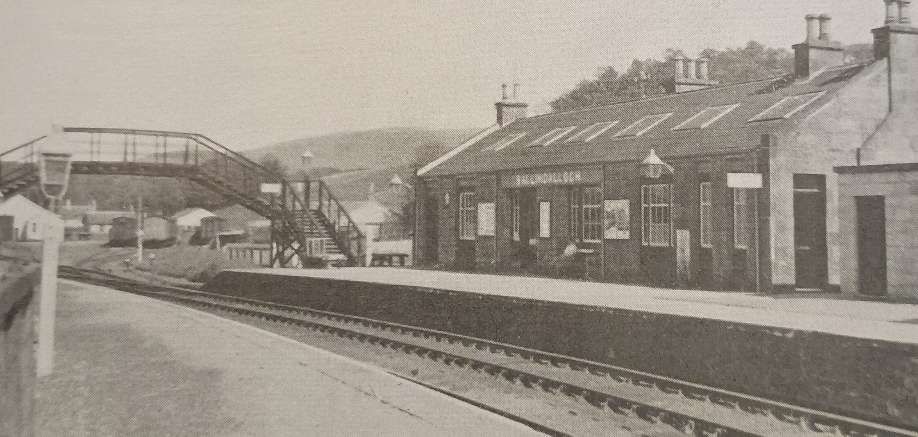
Across the River Spey from Speybridge the railway ran into Grantown Railway Station. …
More photographs of the station can be found here. [29]
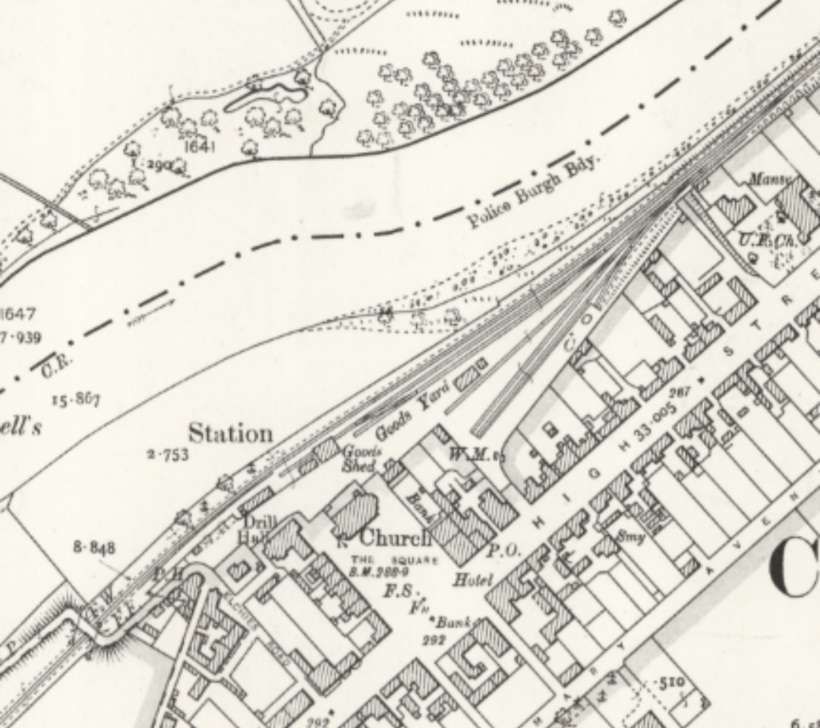
“Founded in 1776, Grantown-on-Spey is laid out on a spacious and regular plan on the western (Morayshire) side of the Spey. In addition to its importance as a local business centre, it enjoys considerable favour as a holiday resort. The station on the Strathspey line (now designated Grantown-on-Spey East, to distinguish it from the former Highland Railway station) is on the opposite side of the river, in a rather isolated position, more than a mile from the town, and is in Inverness-shire. The layout and the buildings are similar to those at the other crossing stations.” [2: p6]
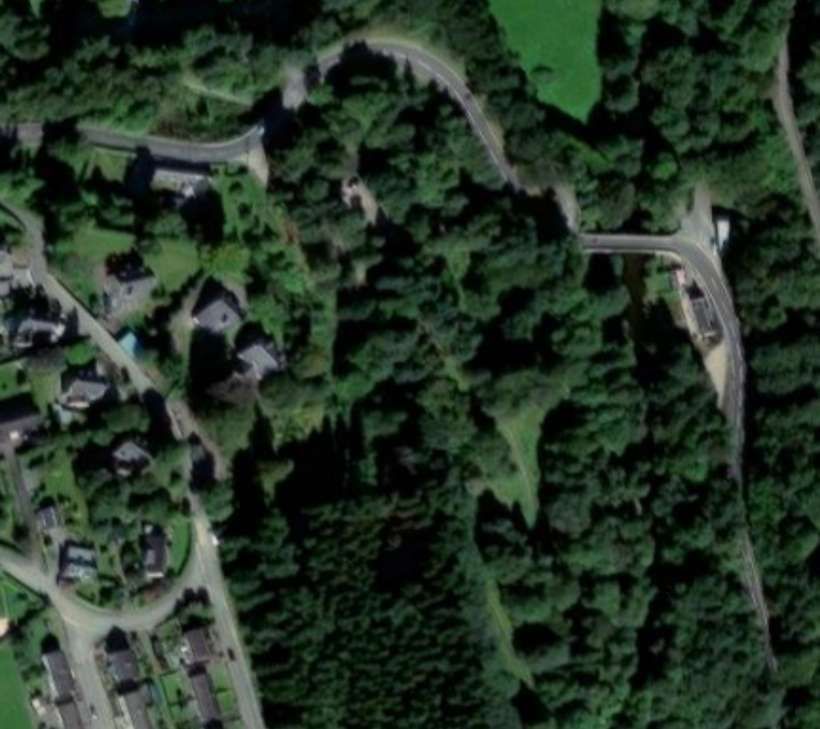
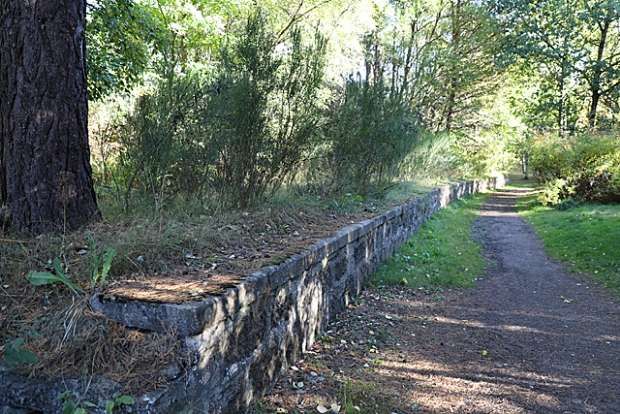
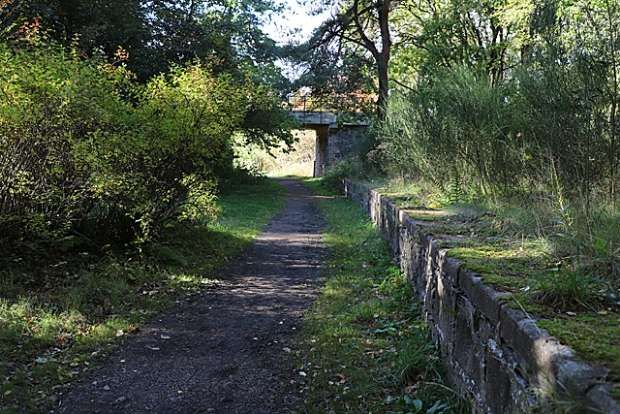
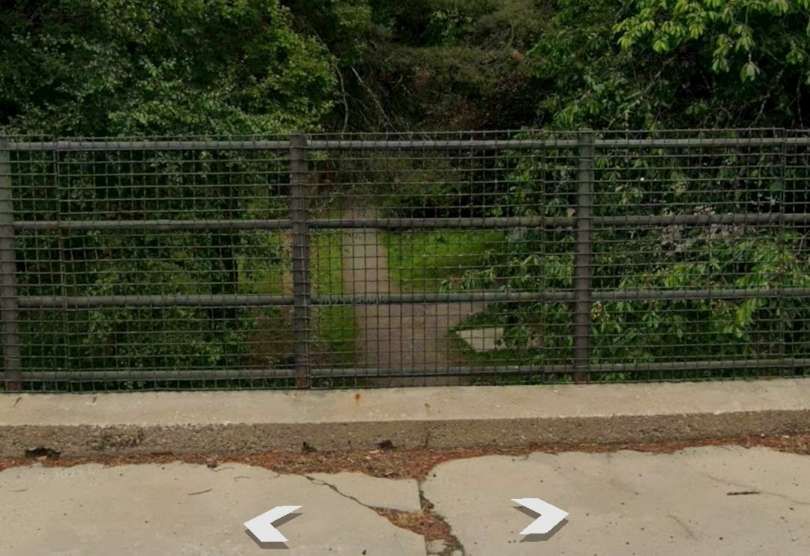
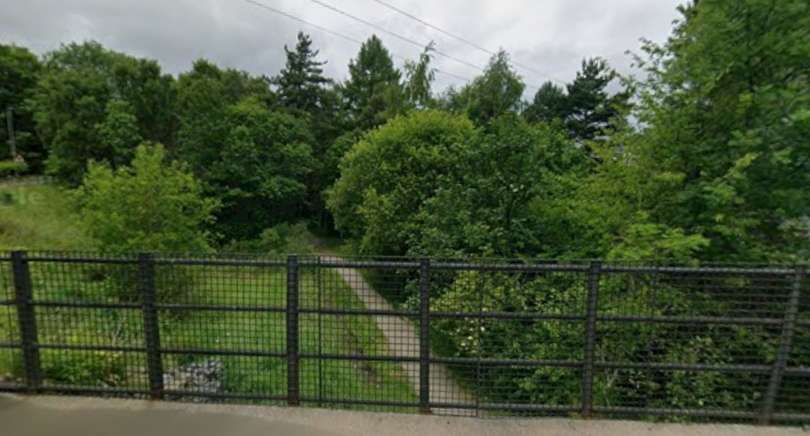
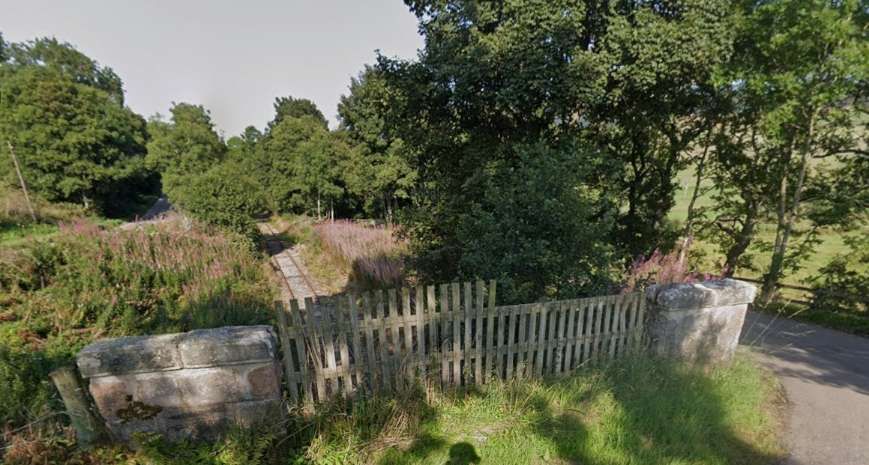
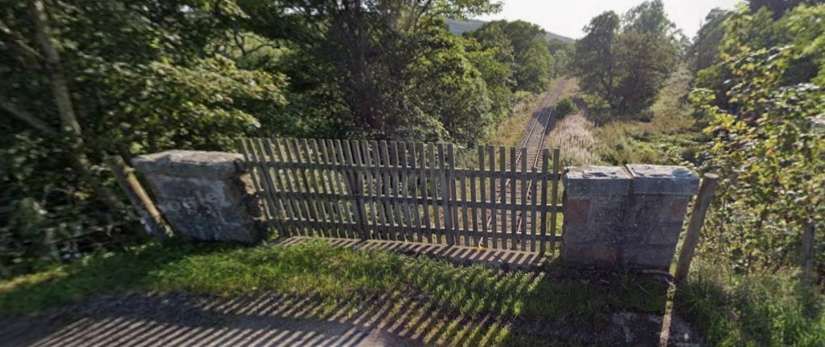
Three images follow below, of the site of Grantown East Railway Station as it appears in the 21st century. …
“Between Grantown and Nethy Bridge, the railway reaches its summit, 702 ft. above sea-level, the highest on the former Great North of Scotland Railway. The gradual ascent from Craigellachie (270 ft. above sea-level) is in complete contrast to the steep fall into Strathspey from Dufftown, and involves no gradient steeper than 1 in 75, and that for short distances only. The summit is in open moorland country, and snow fences protect the railway from drifts during winter blizzards.” [2: p6 & 8]
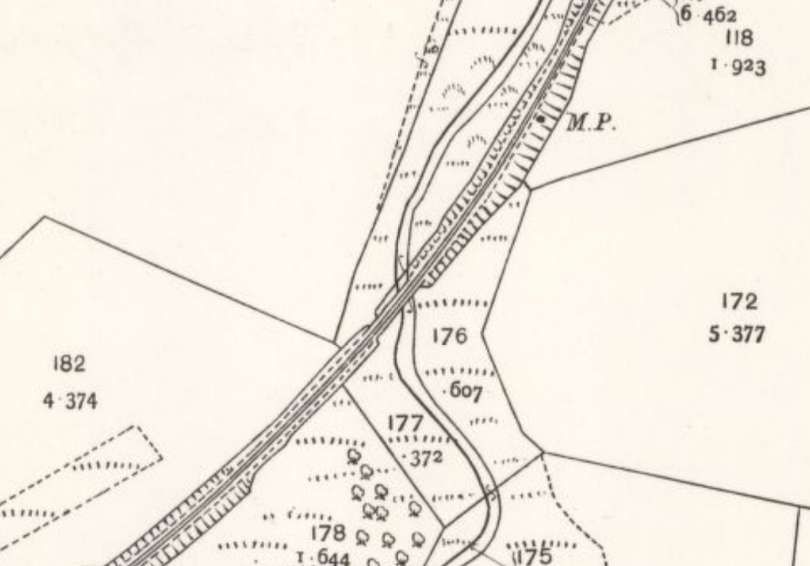
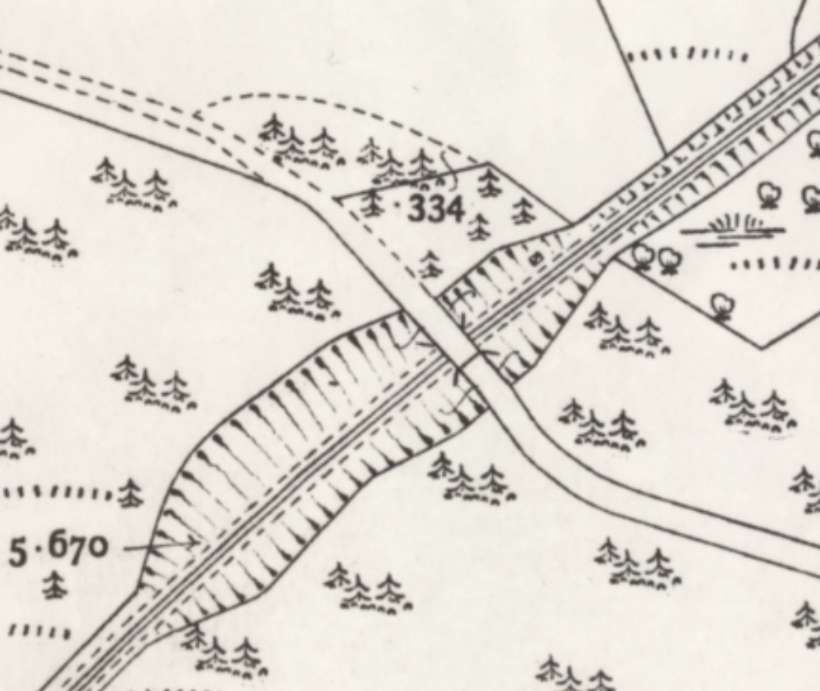
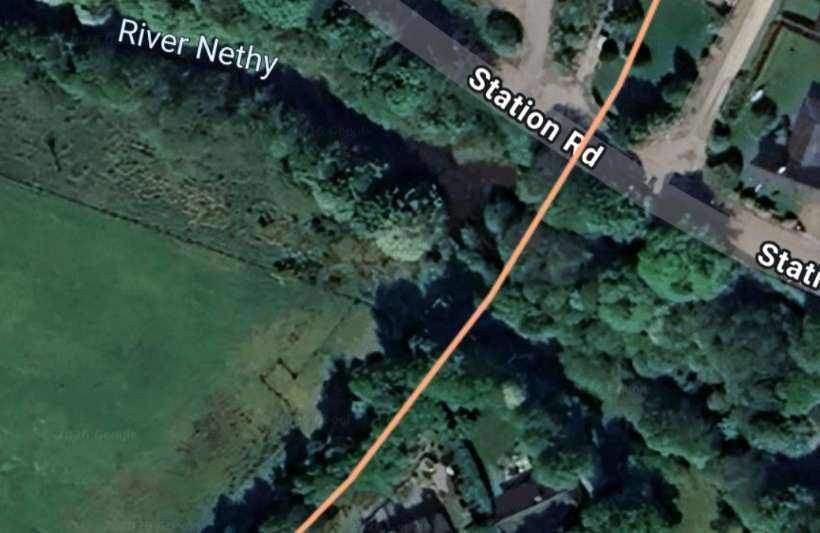
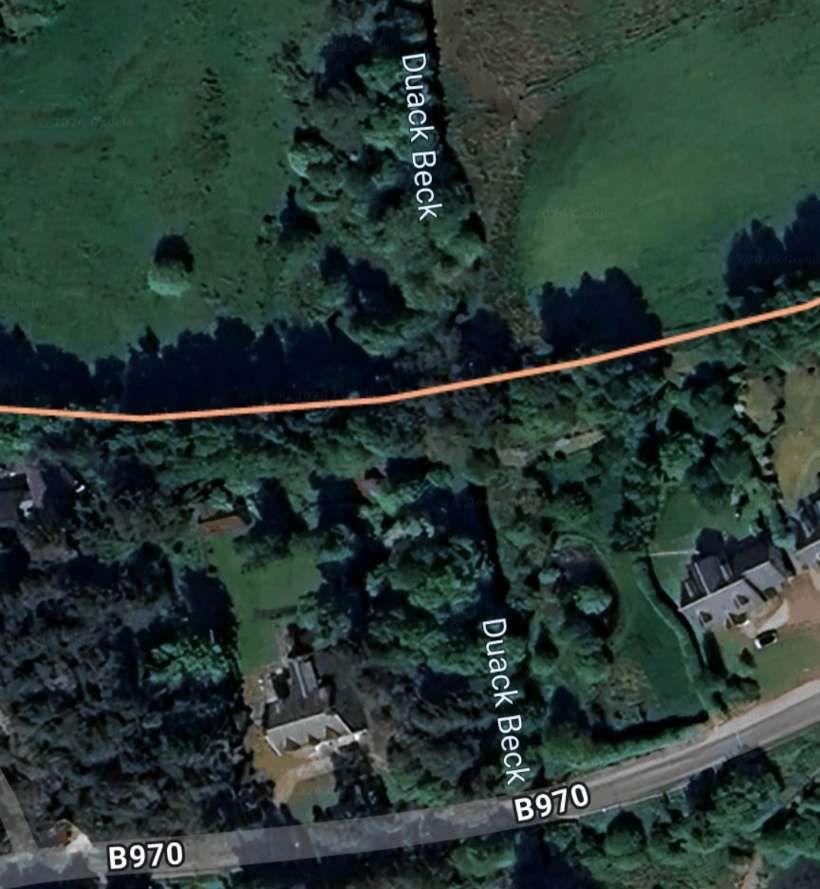
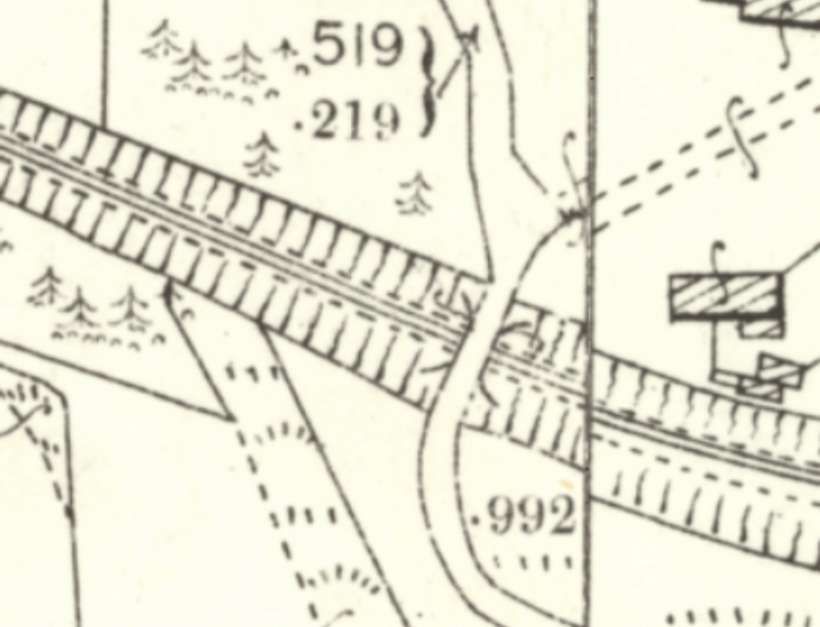
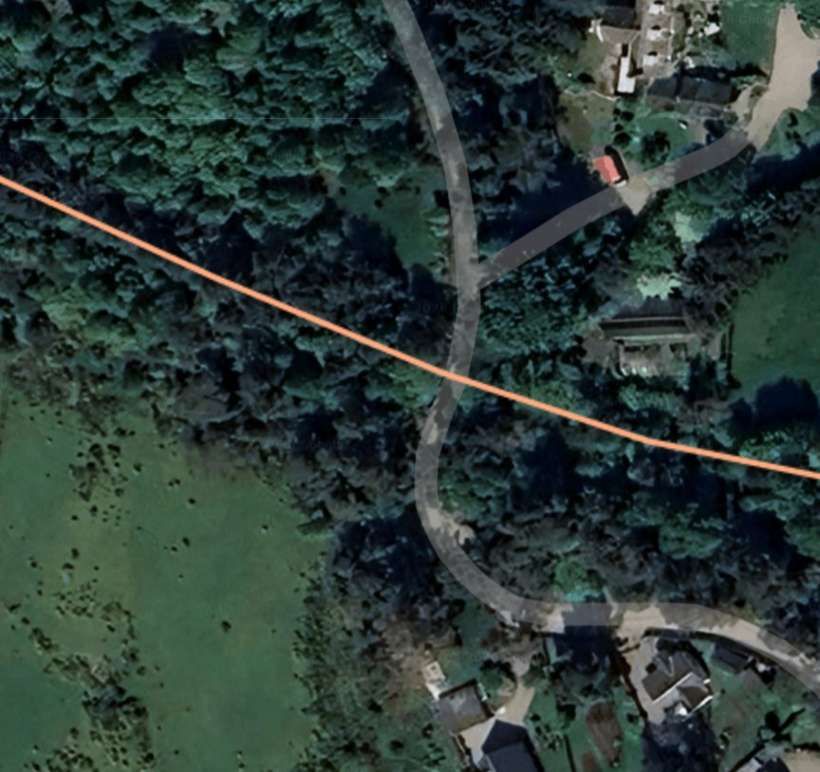
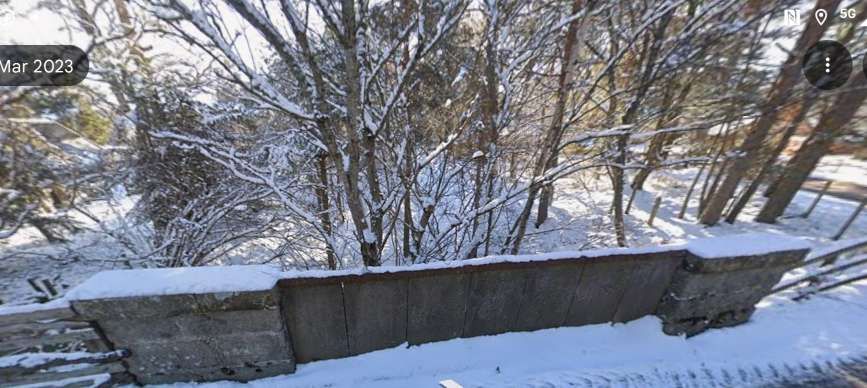
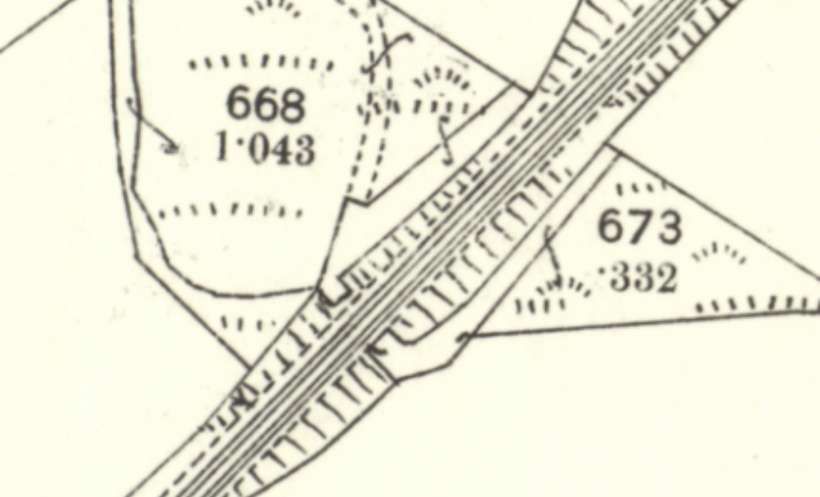
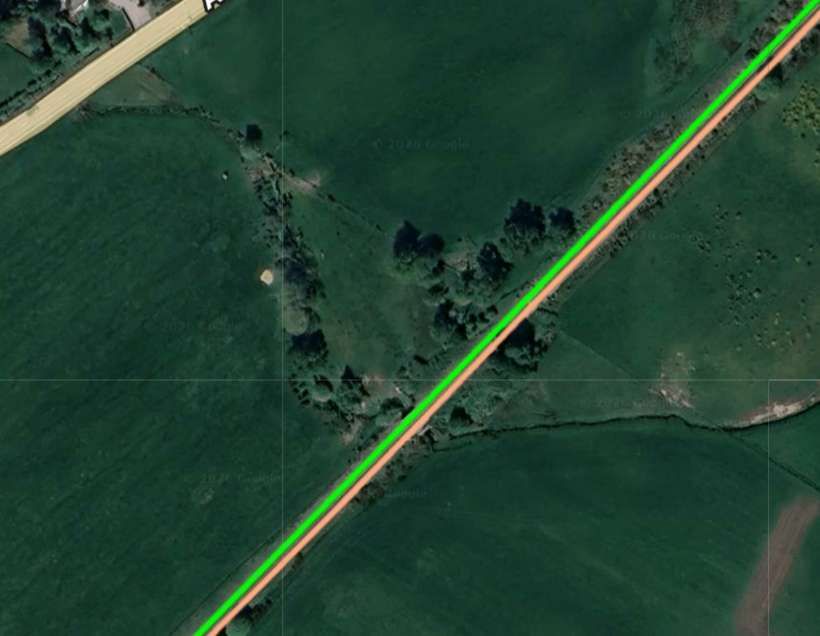
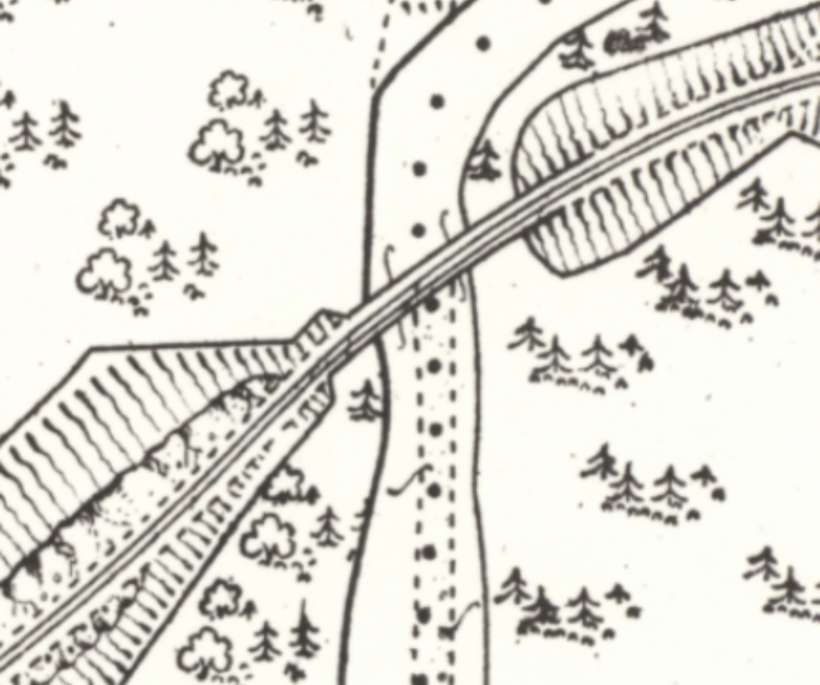
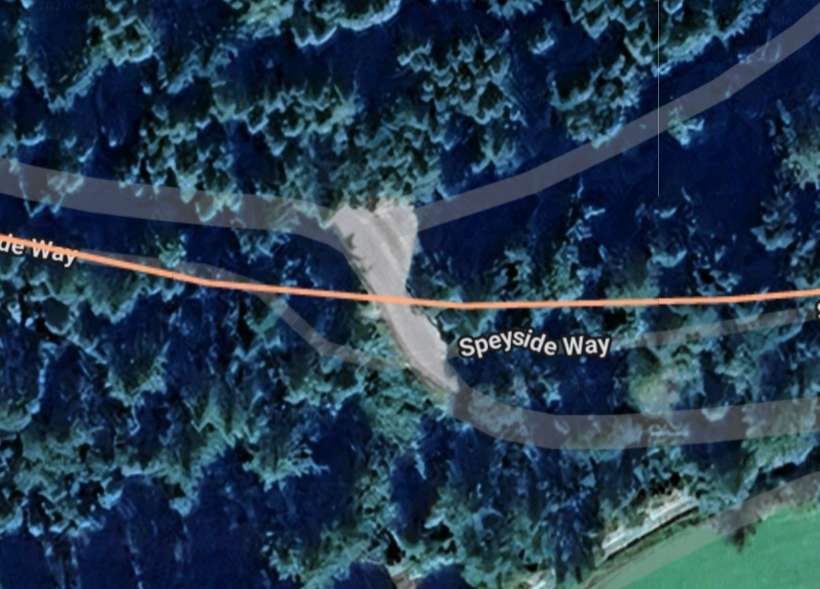
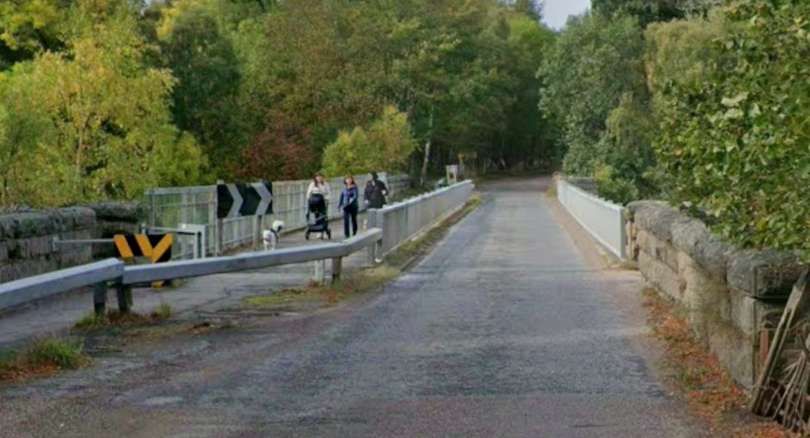
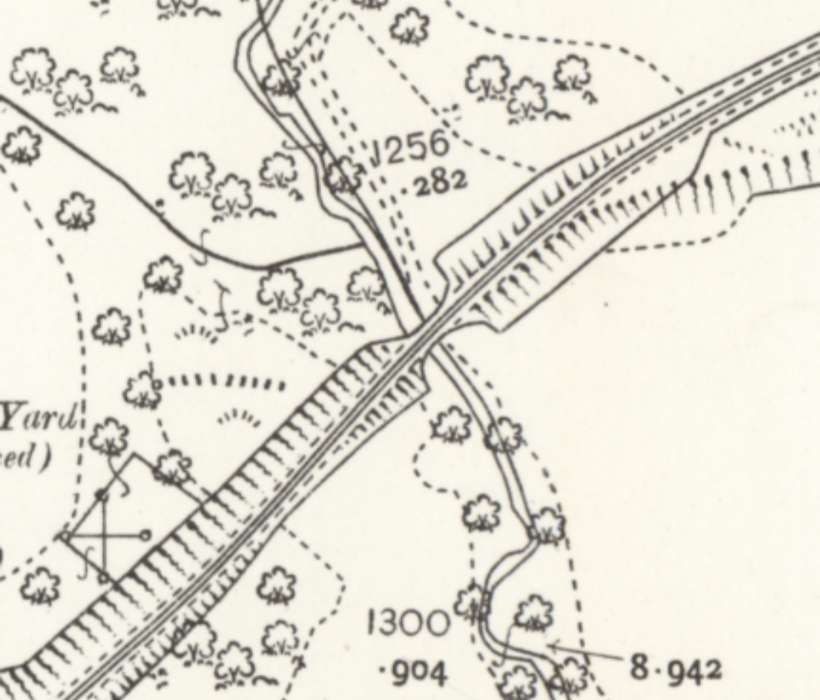
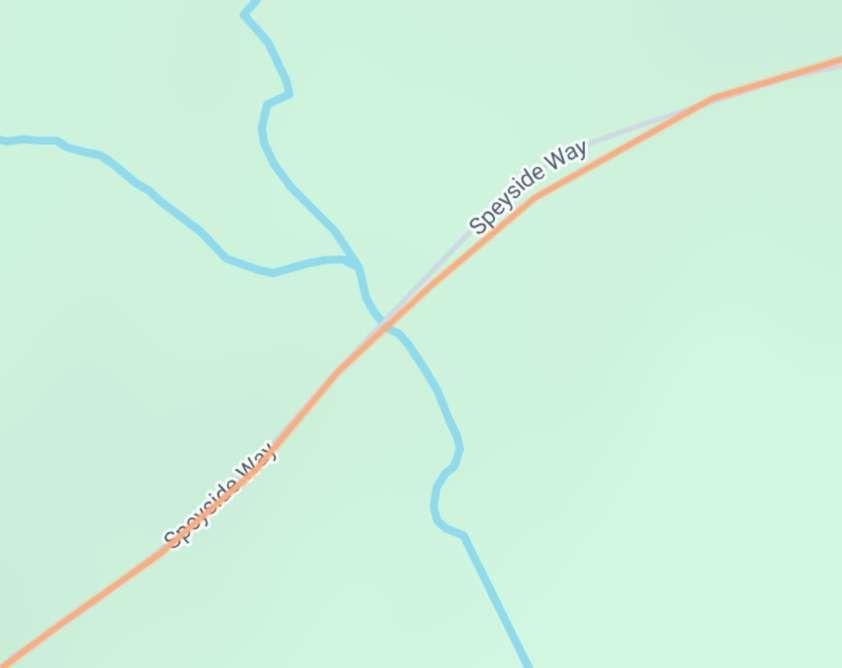
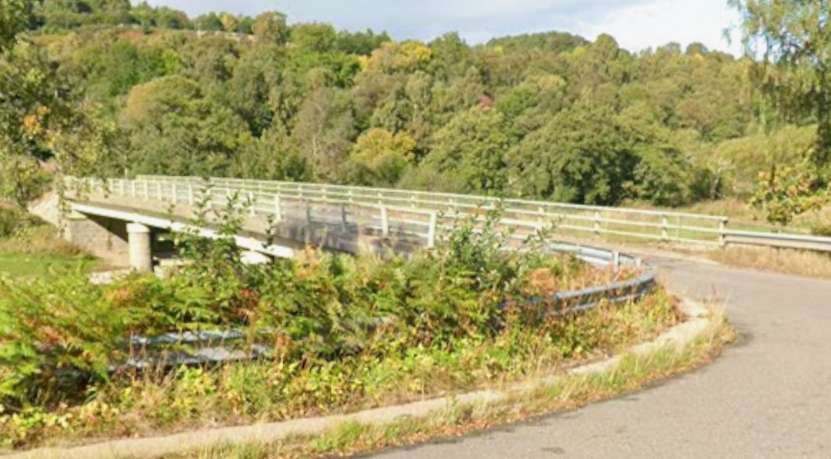
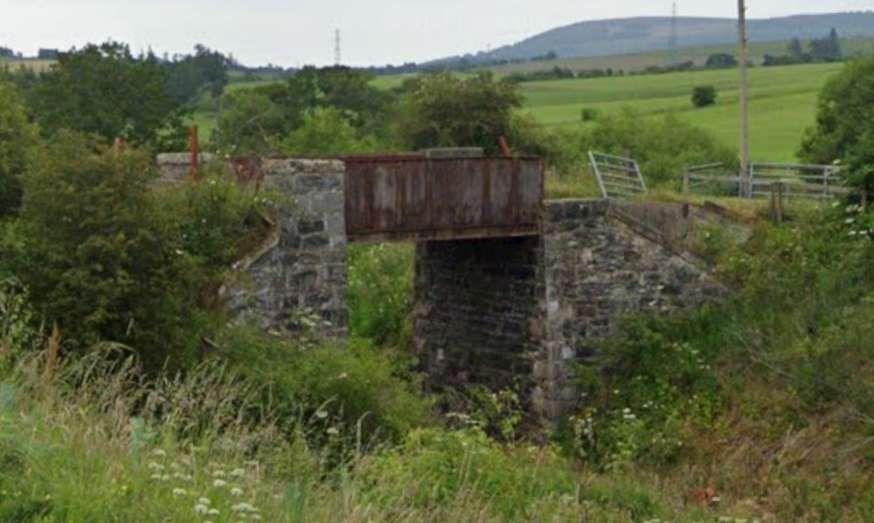
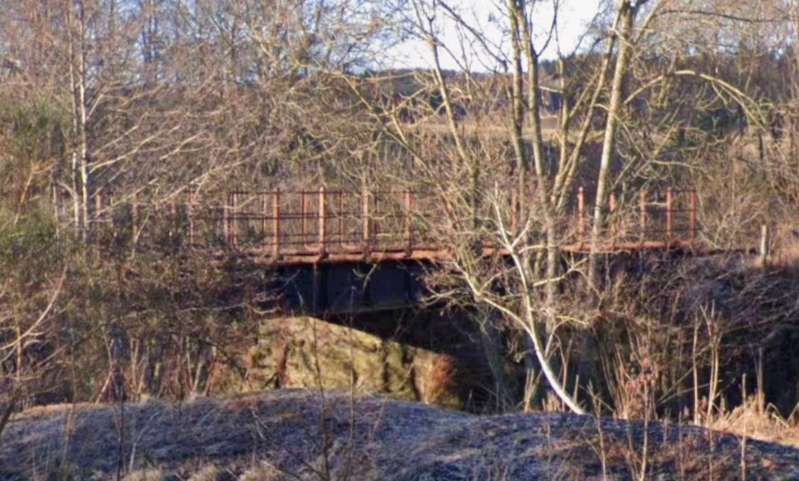
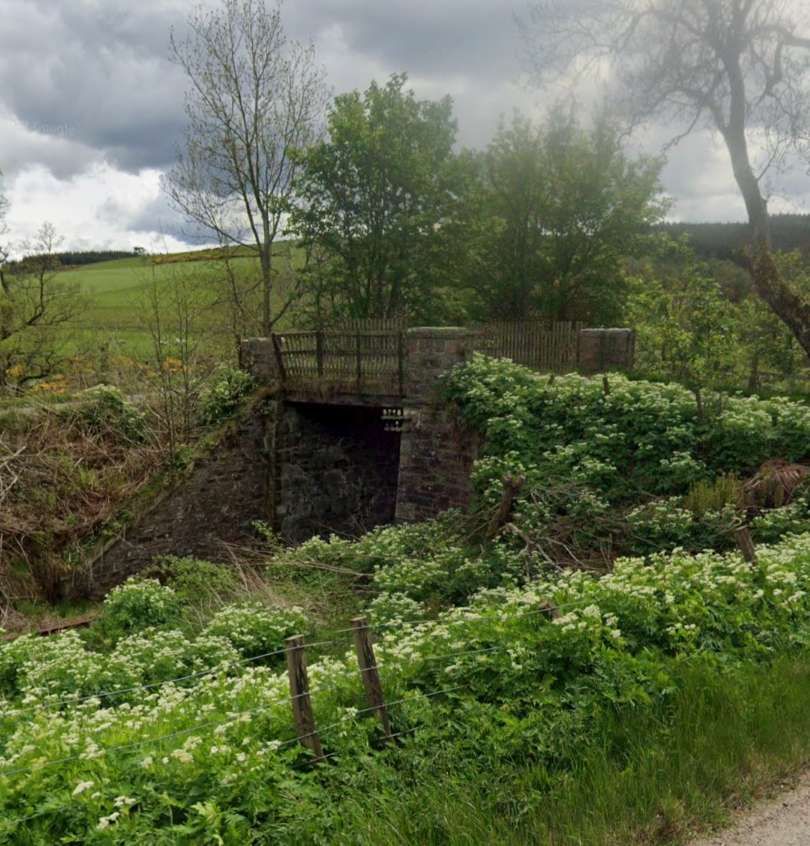
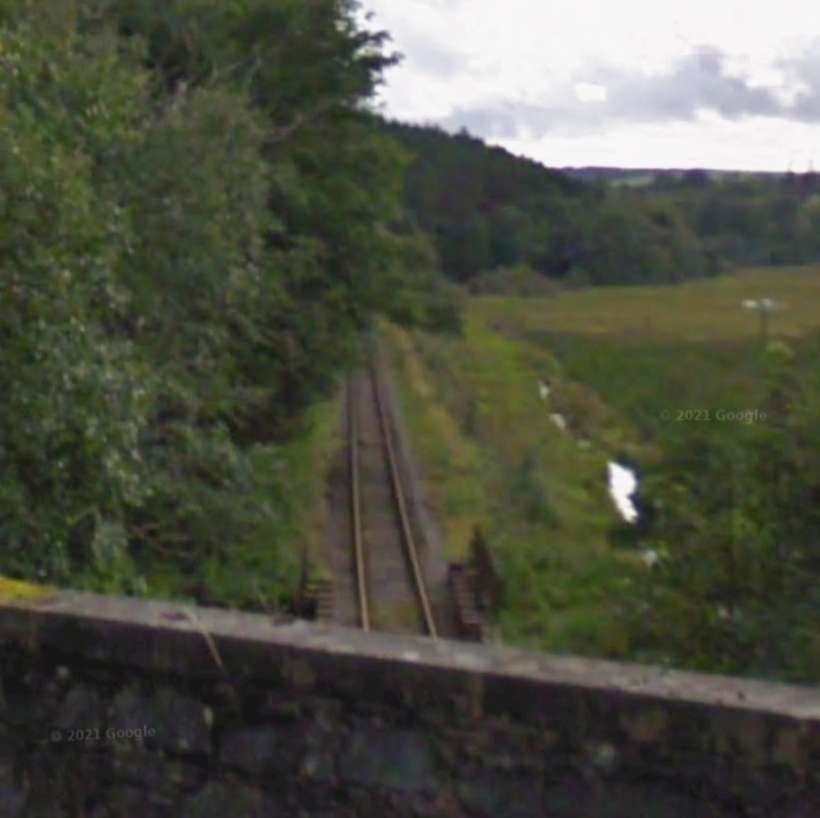
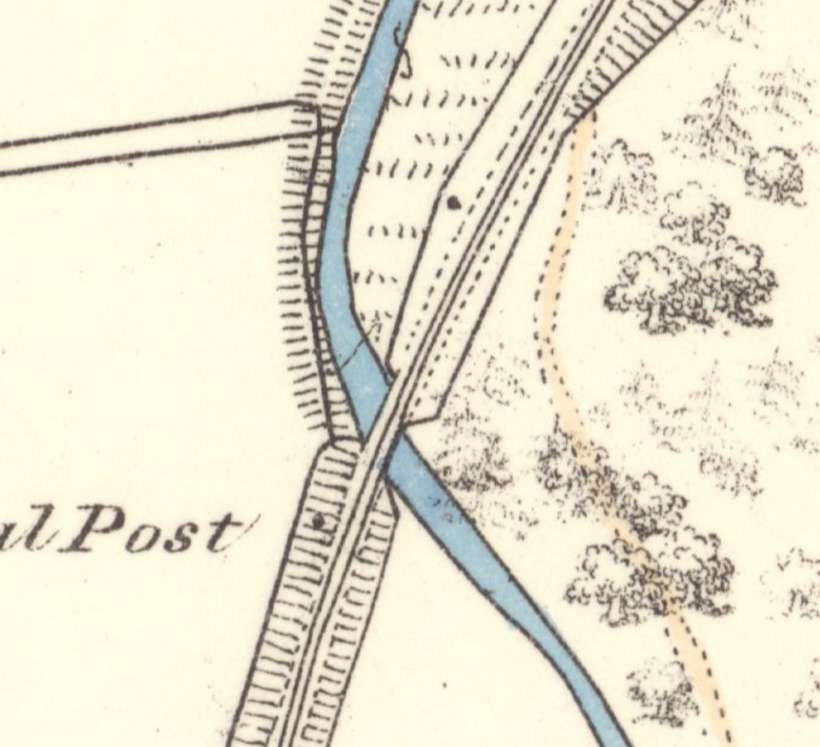
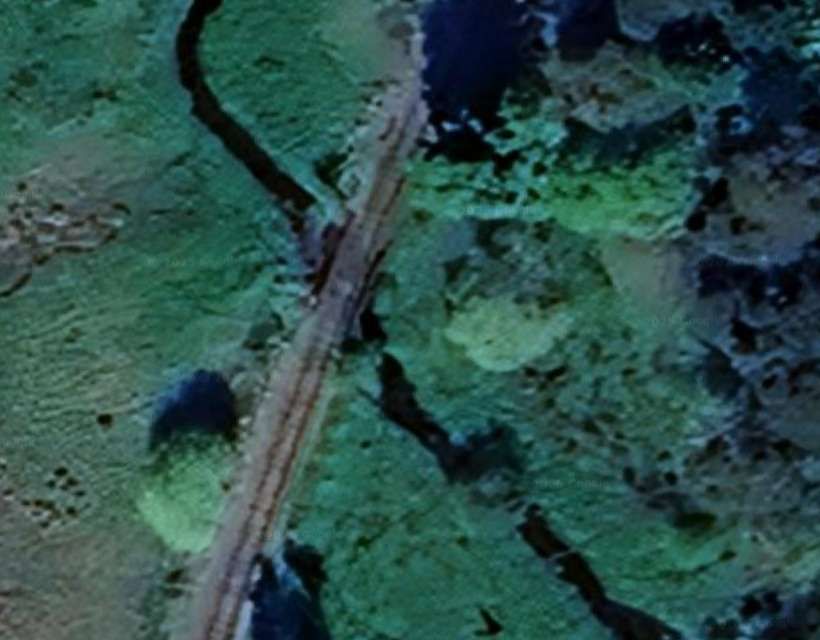
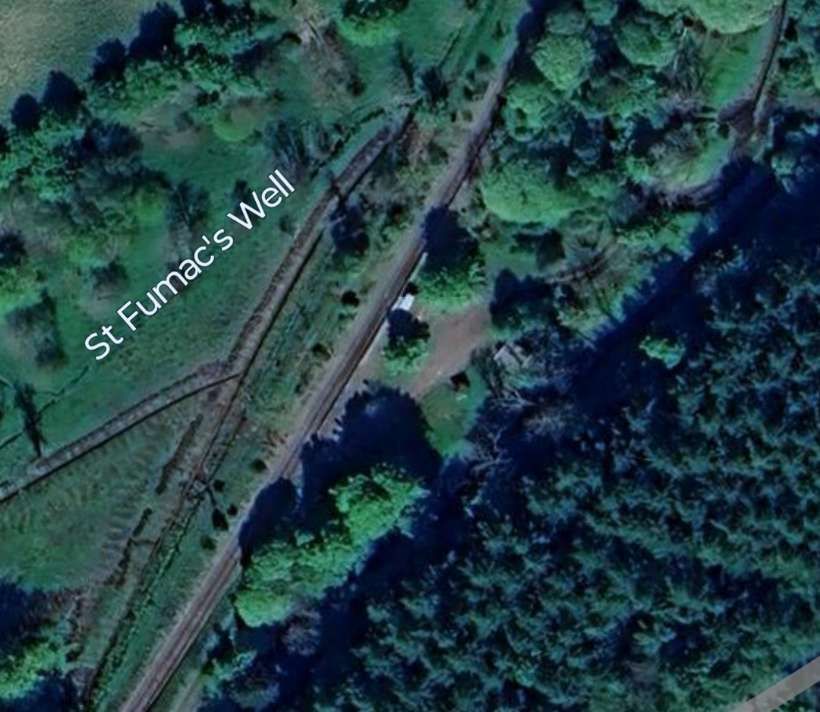
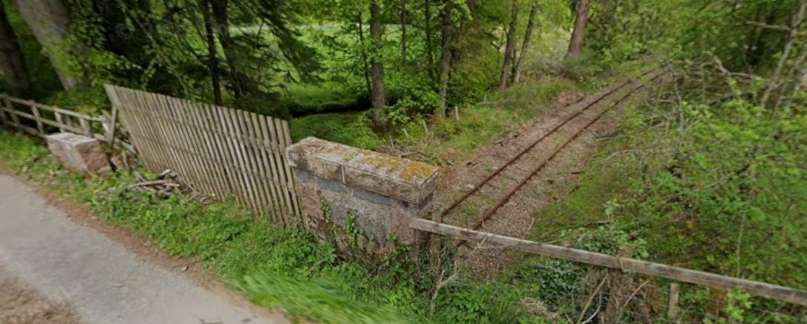
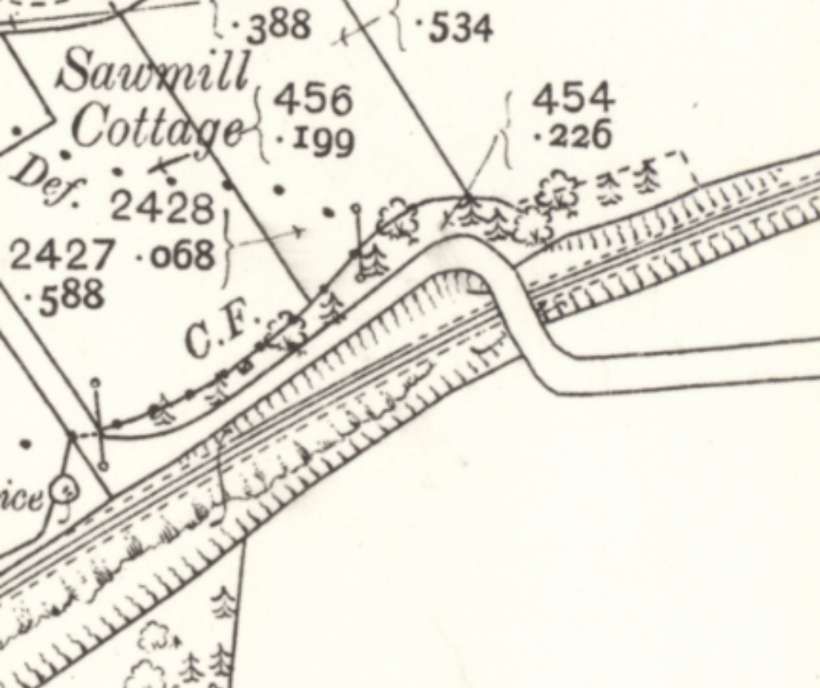
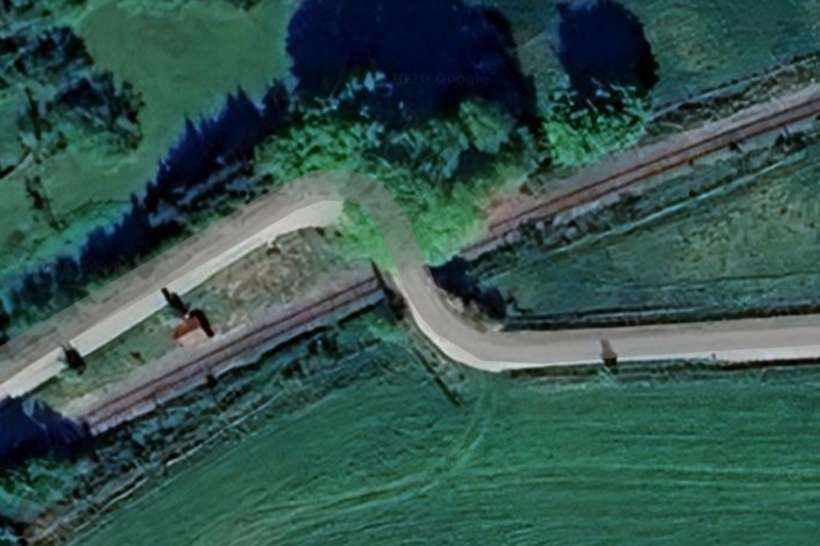
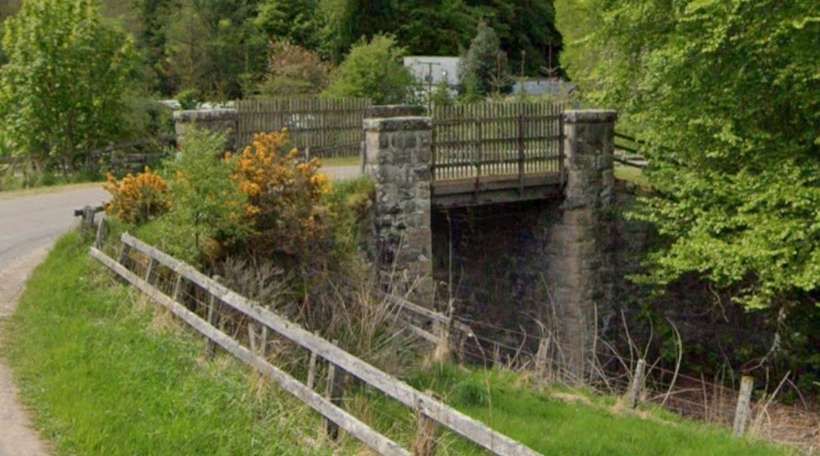
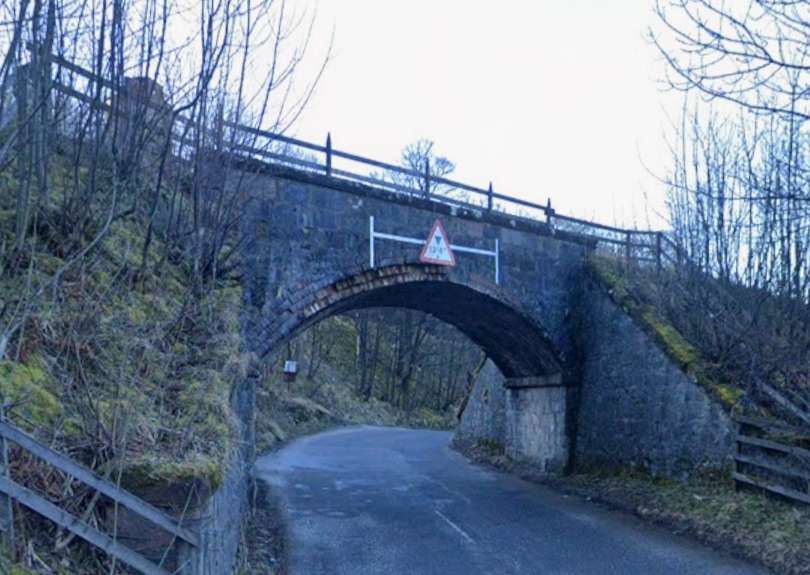
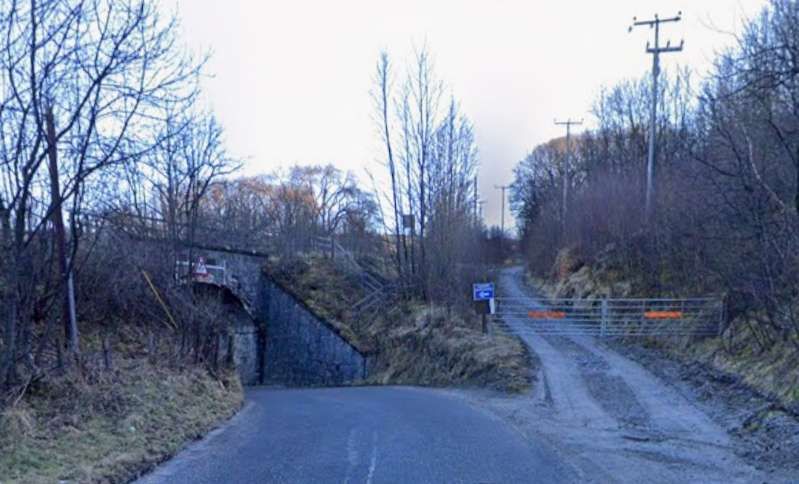
A short distance along the line it spanned three streams in short succession.

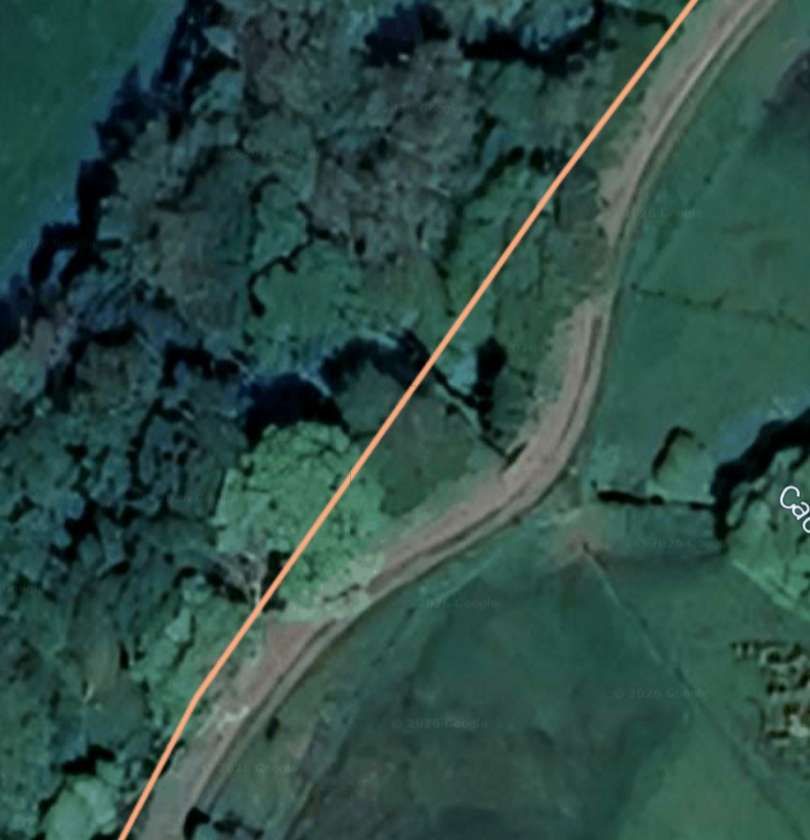
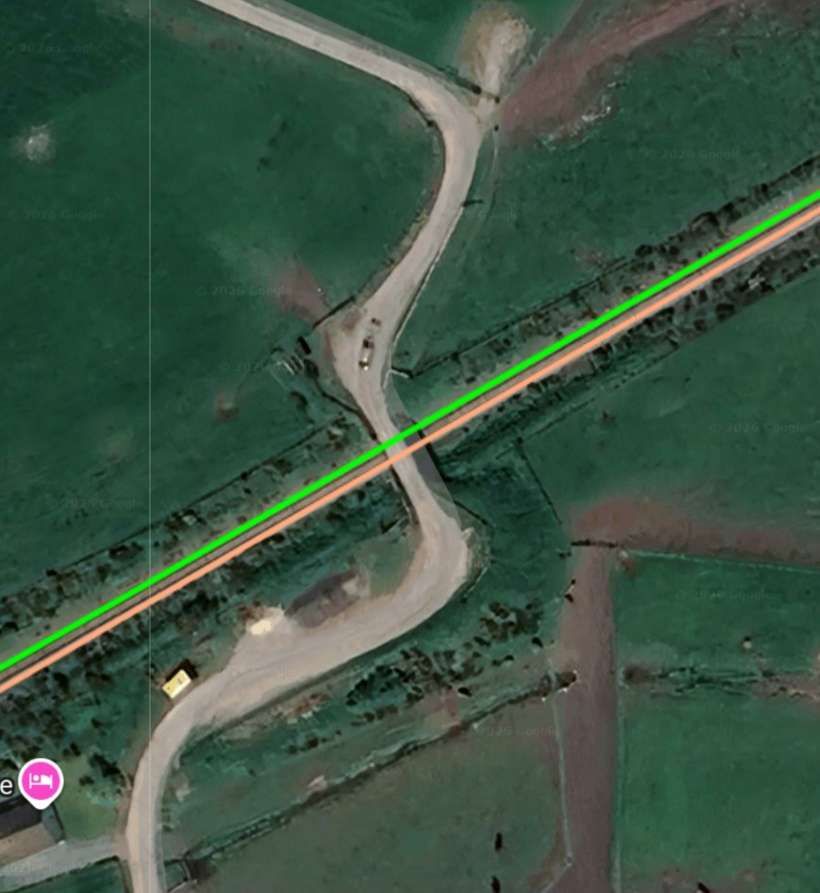
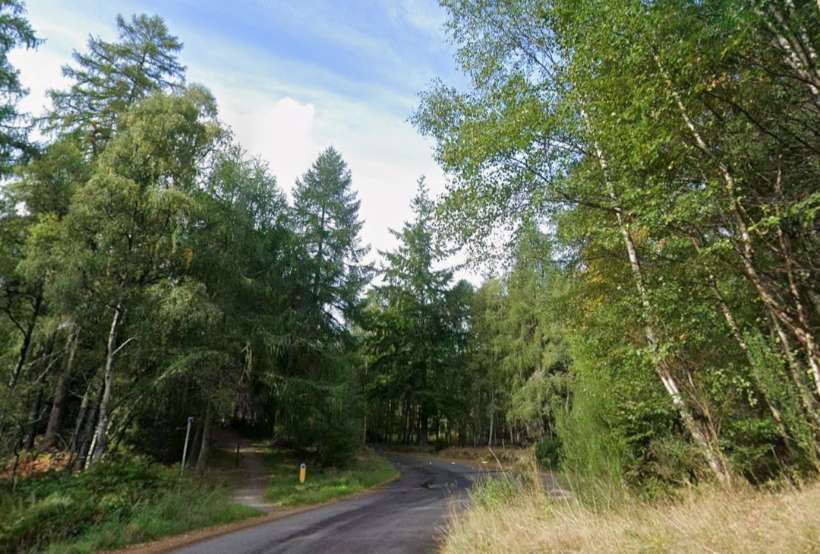
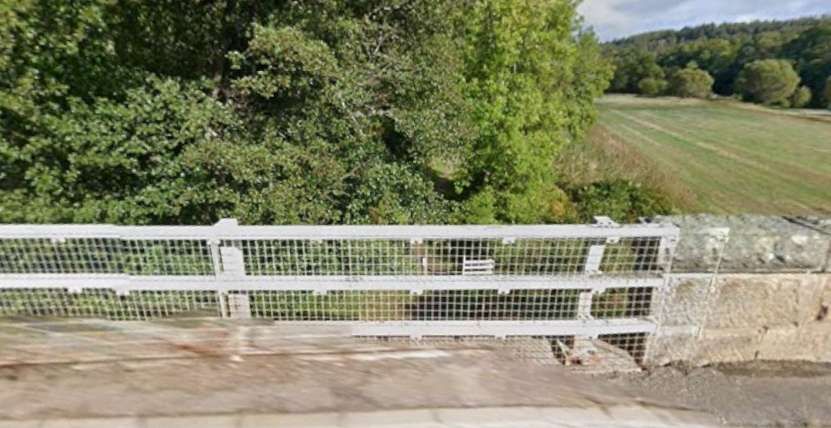
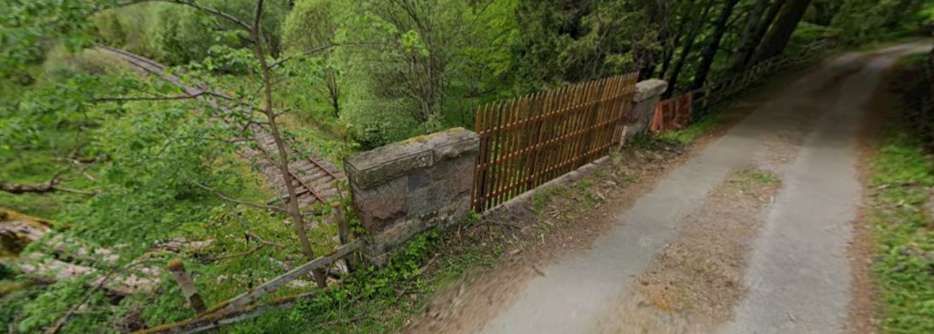
The line was then bridged by an access road. …

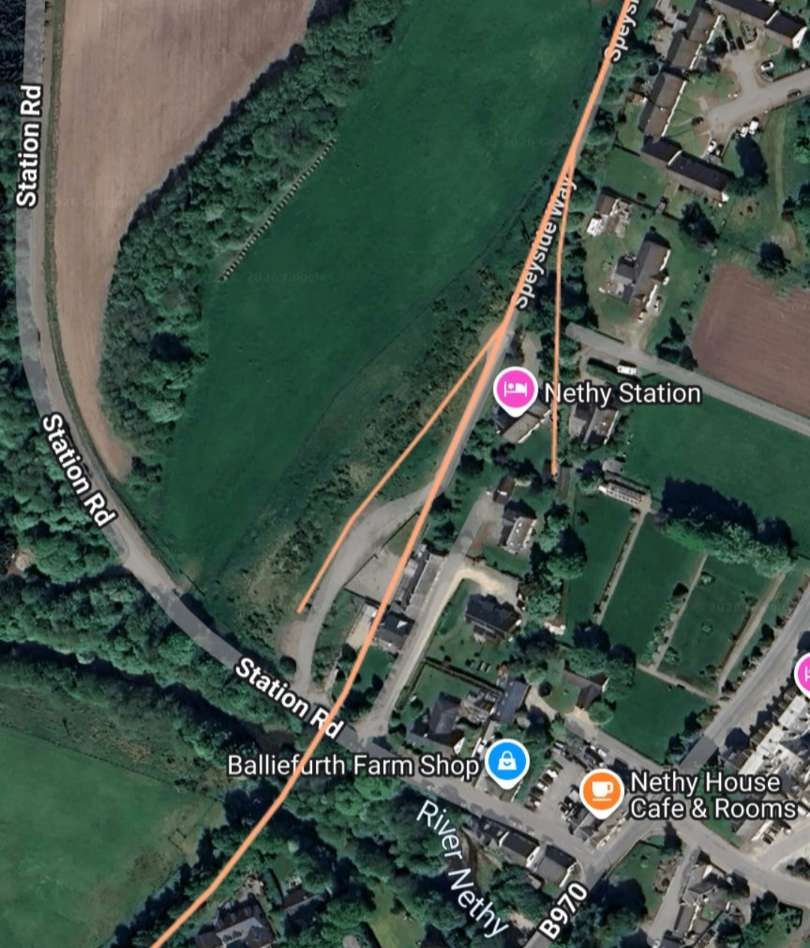
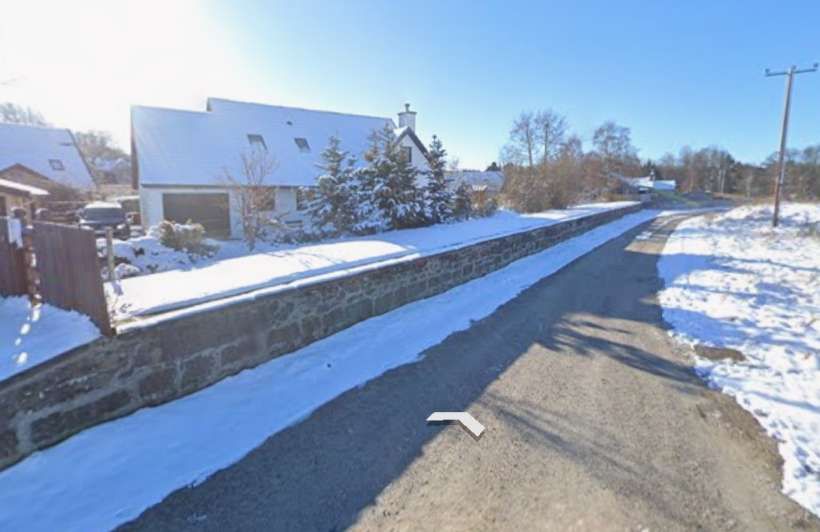
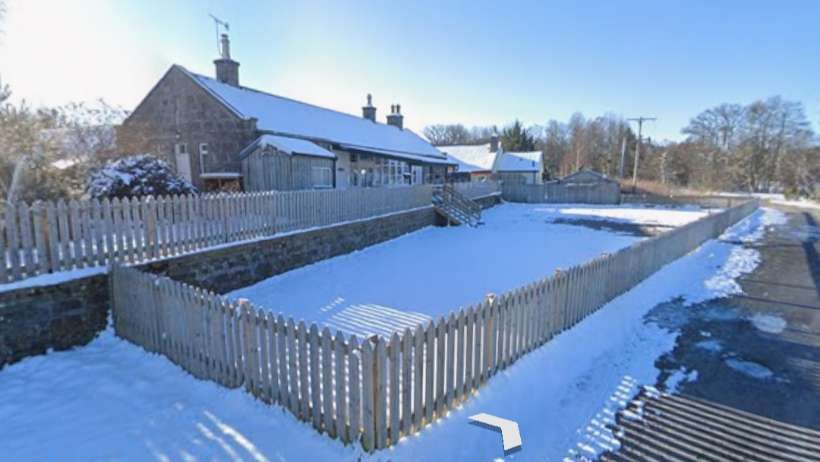
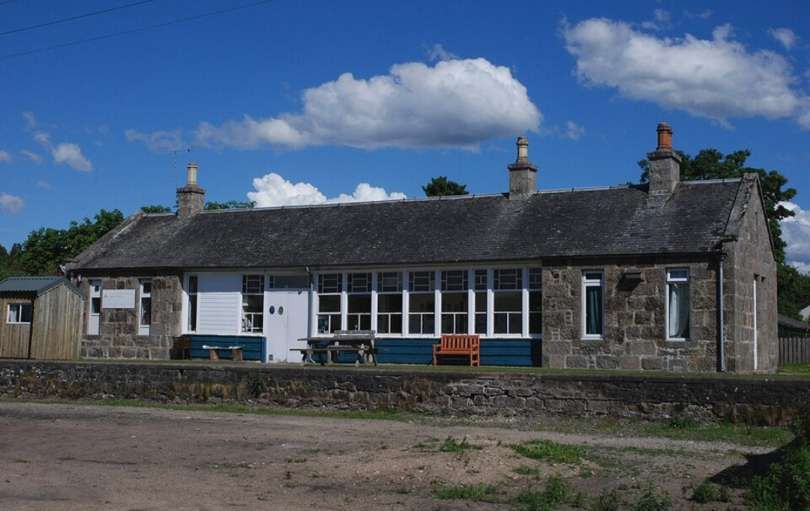
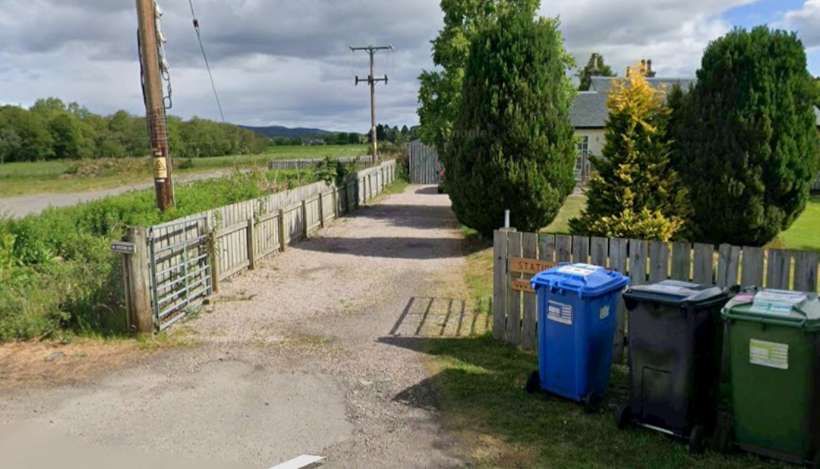
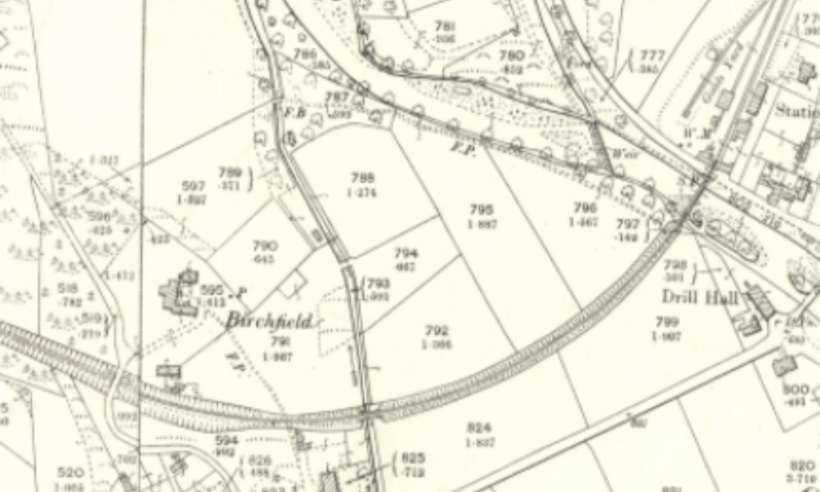
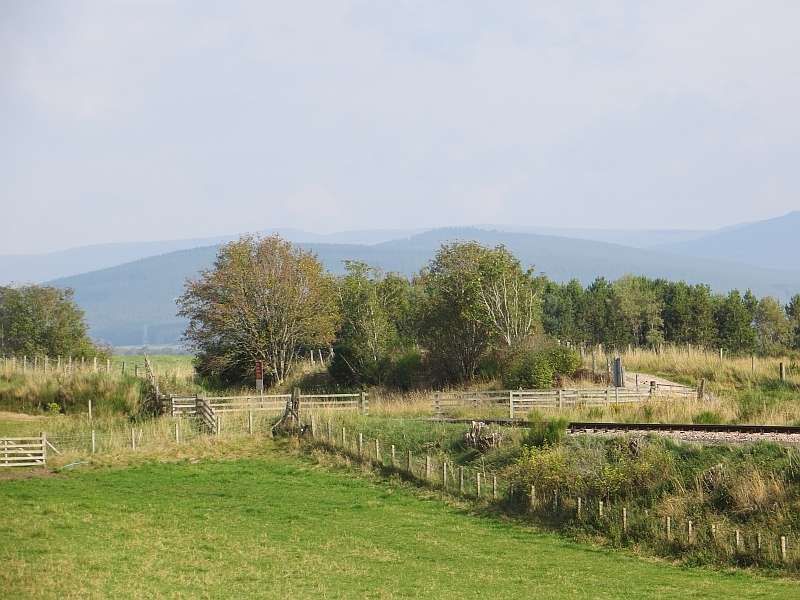
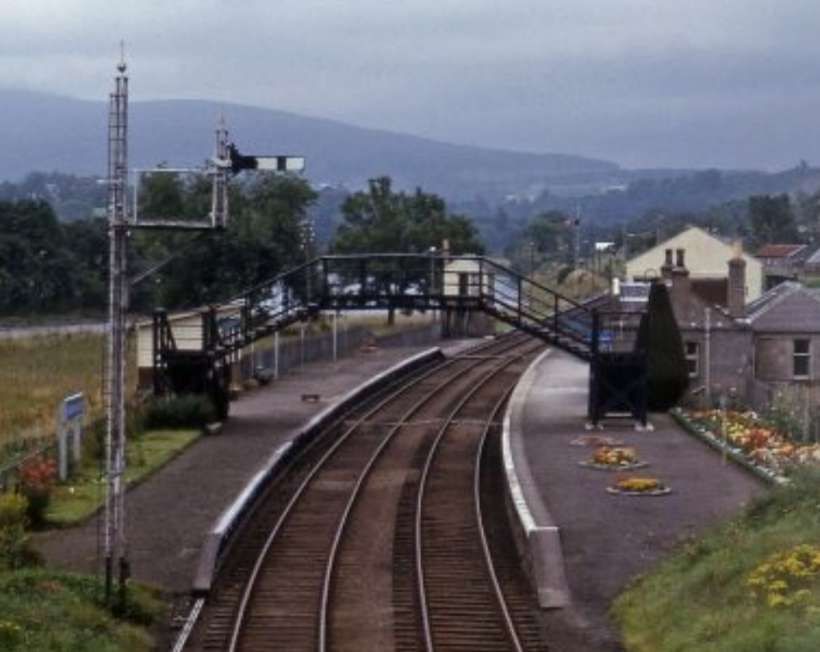
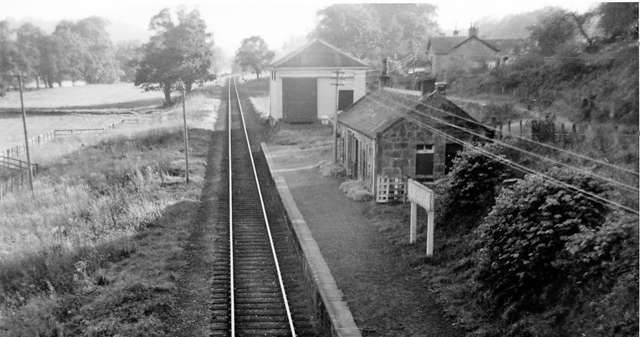
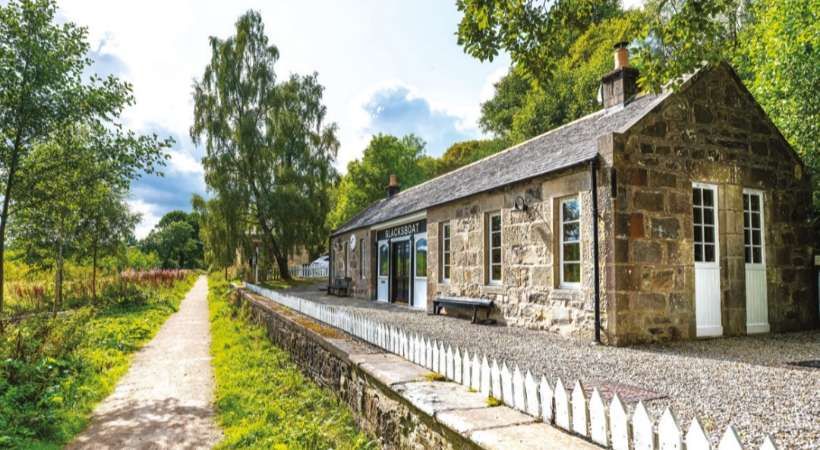
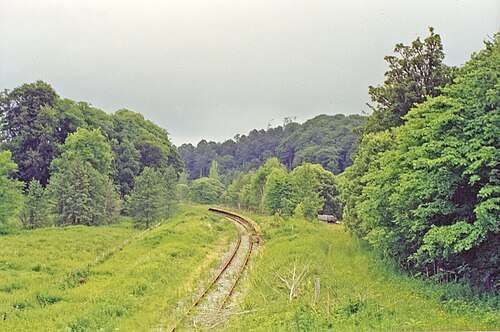
A series of photographs of Nethy Bridge Railway Station can be found here. [30]
“Originally named Abernethy when it opened on the Strathspey Railway, the station was renamed Nethy Bridge on 1st November 1867 to avoid confusion with another Abernethy station near Perth, after which misdirected goods deliveries occurred.” [31]
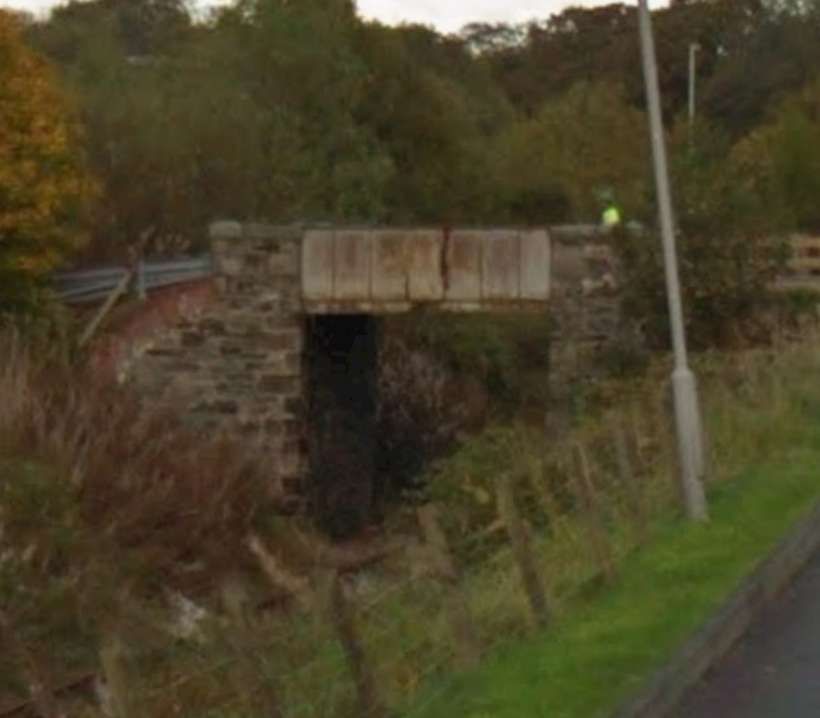
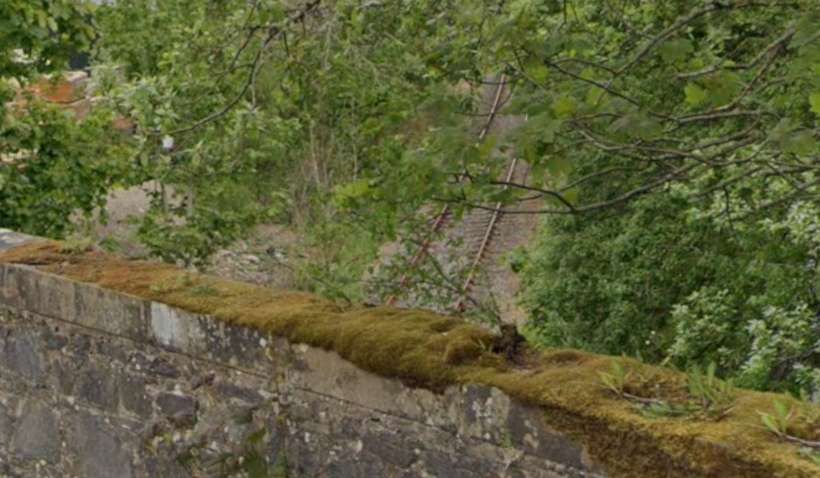
“Construction of the station was straightforward, reflecting its rural setting in the sparsely populated Abernethy area, with a basic single-platform layout designed for modest traffic volumes. Key engineering features included a substantial rail bridge spanning the River Nethy immediately adjacent to the station, whose stone supports remain visible today as remnants of the original infrastructure.” [31]
“The name change for the station prompted a corresponding renaming of the nearby village from Abernethy—known in Scottish Gaelic as Obar Neithich—to Nethy Bridge, reflecting the influence of the expanding rail network on local identity; however, Abernethy remains in common local use for the broader parish area.” [31]
“In the station’s early years through the late 19th century, operations focused on fundamental passenger and goods handling along the single-track Strathspey Railway, which connected remote Highland settlements to broader networks at Craigellachie and later Boat of Garten. The station primarily accommodated local residents traveling for work, markets, and social purposes, while also supporting the nascent tourism to Speyside’s scenic landscapes and sporting estates, with basic platforms and a modest goods shed facilitating timber, agricultural produce, and visitor luggage.” [31]
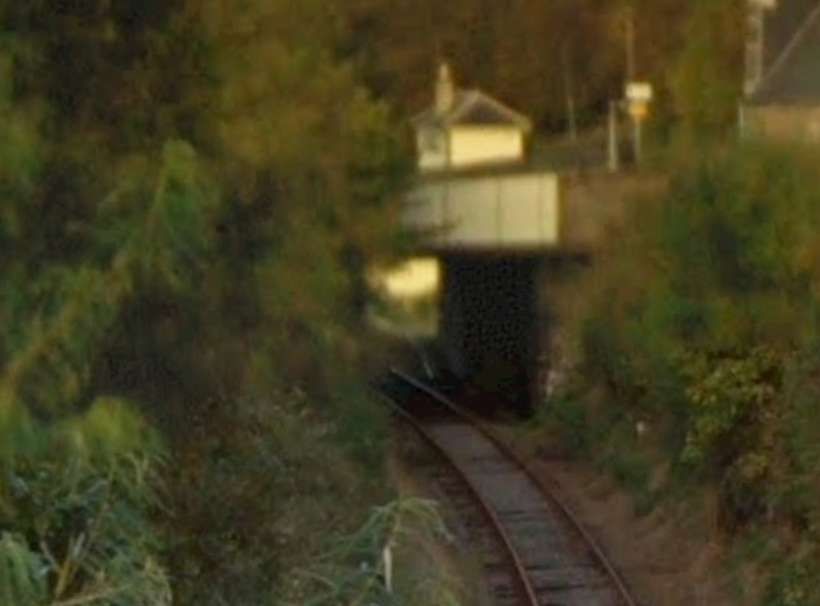
“Safety measures were implemented from the outset on this lightly trafficked branch line, including a signal box to control train movements and manned level crossing gates at the nearby road intersection, essential for managing single-line working and preventing collisions in the rural setting.” [31]

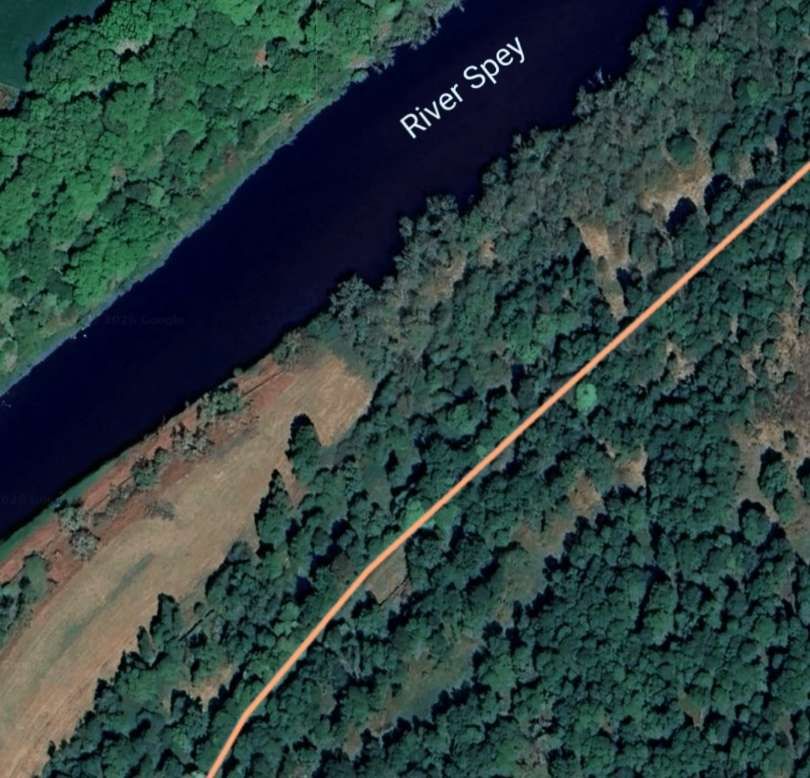
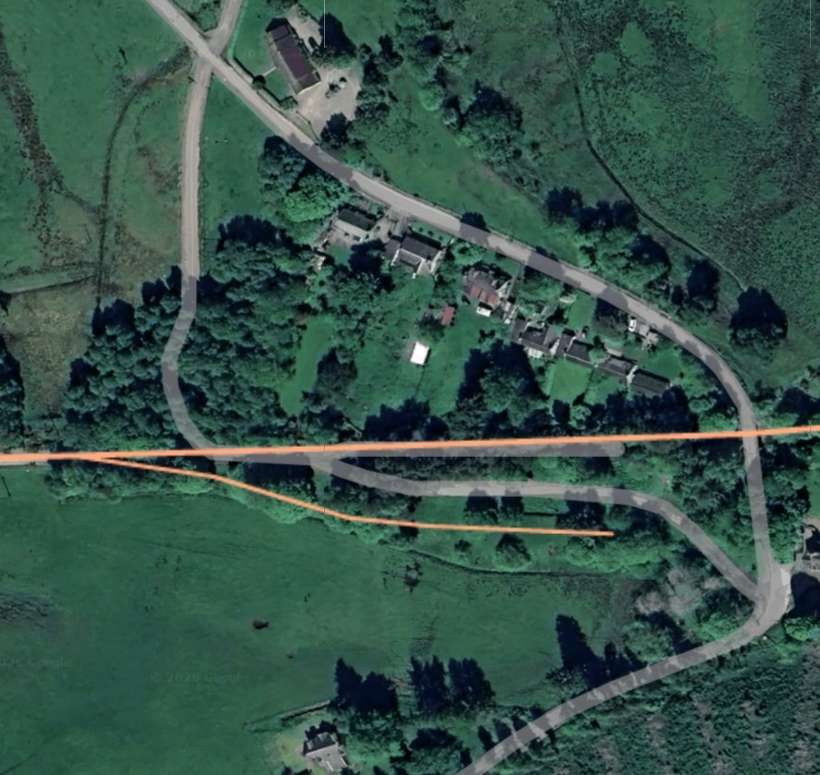
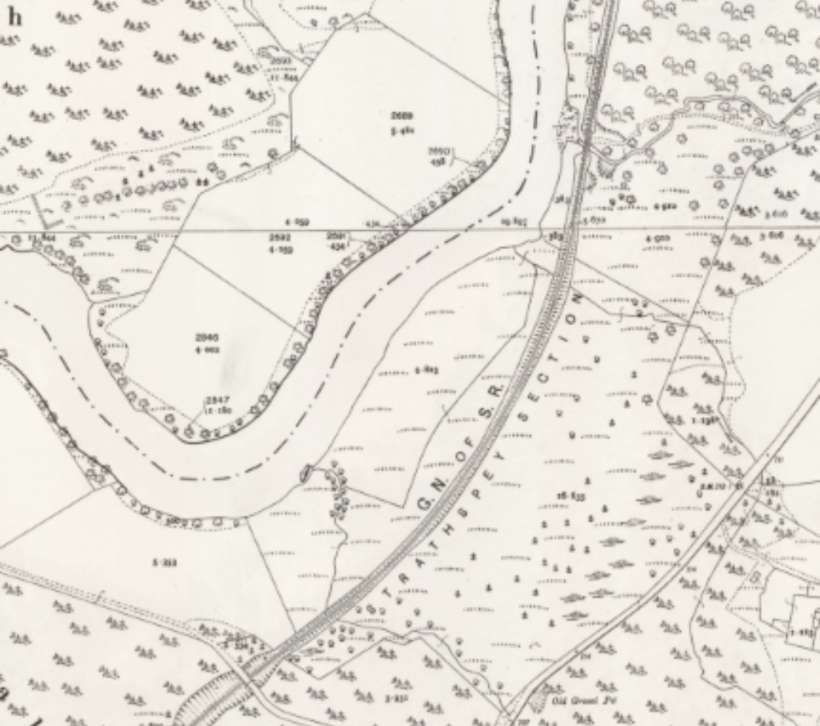
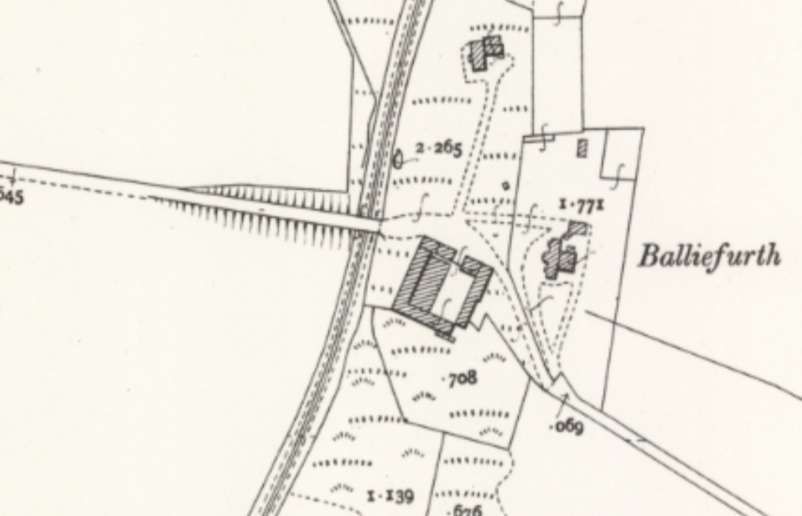
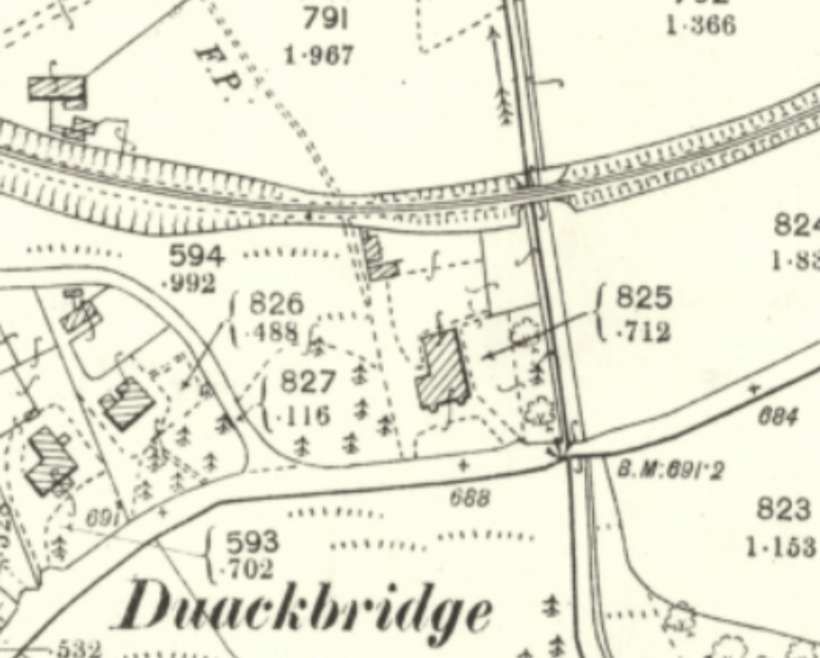
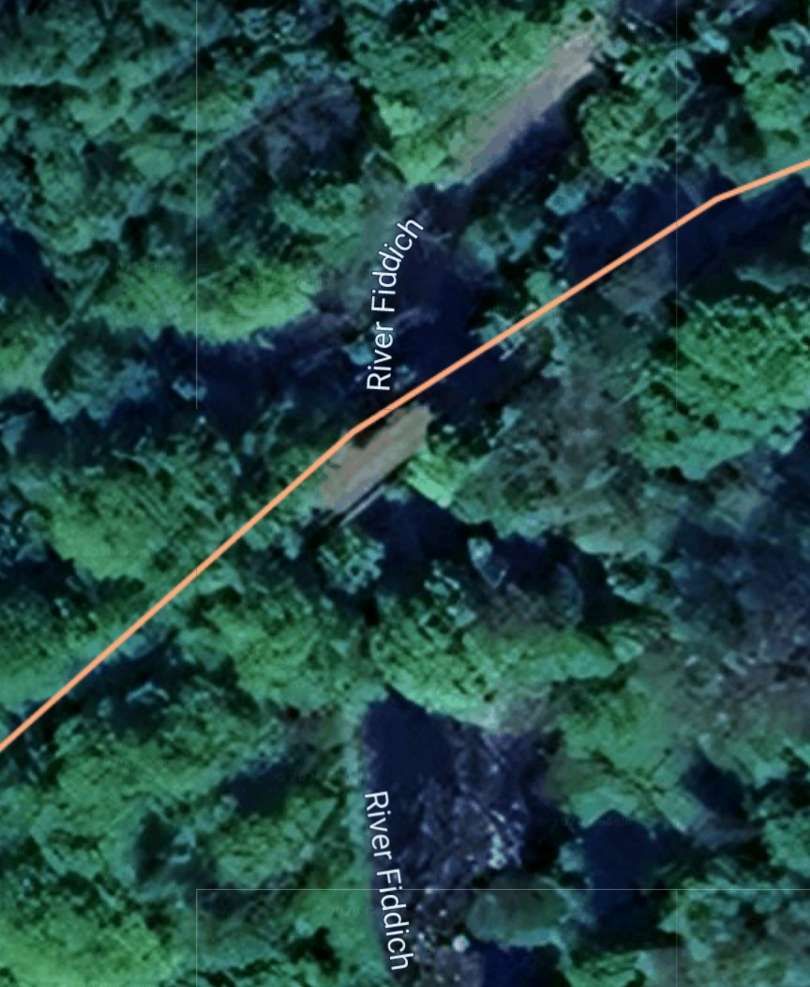
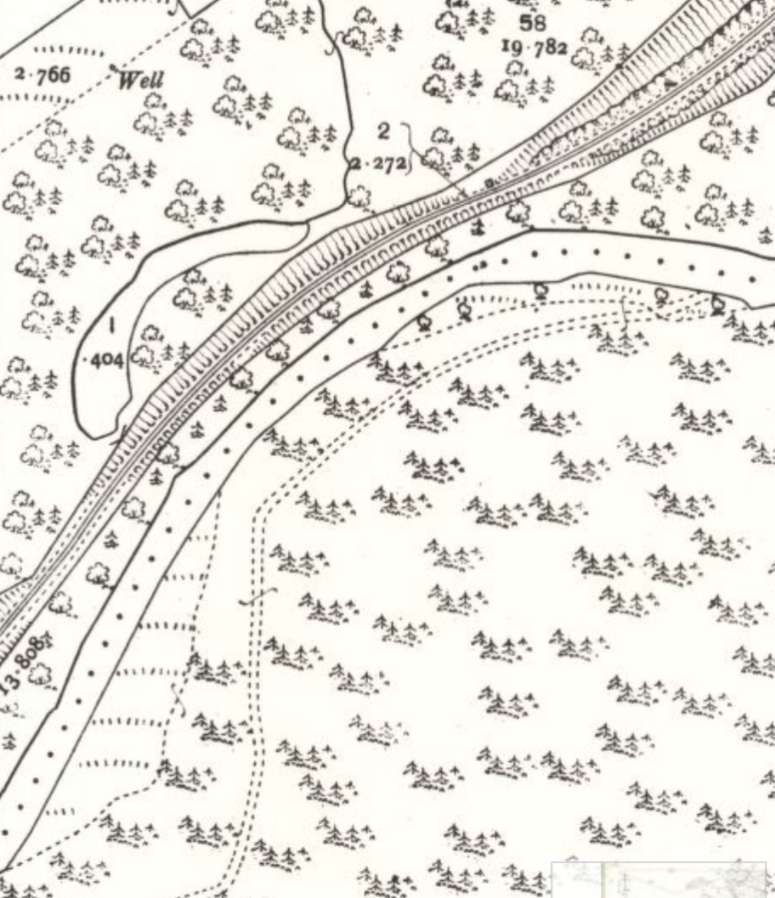
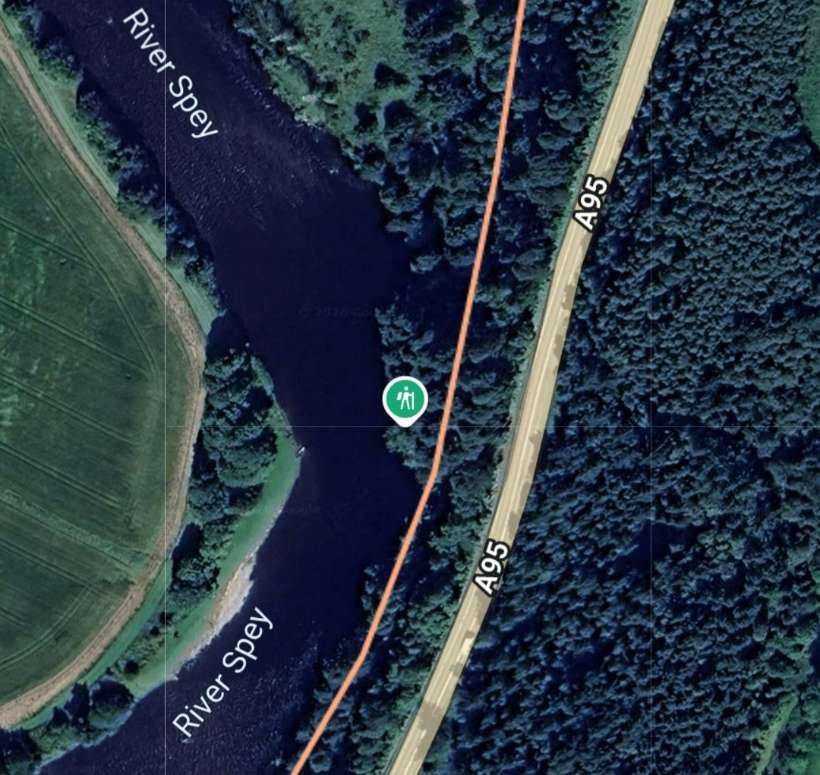
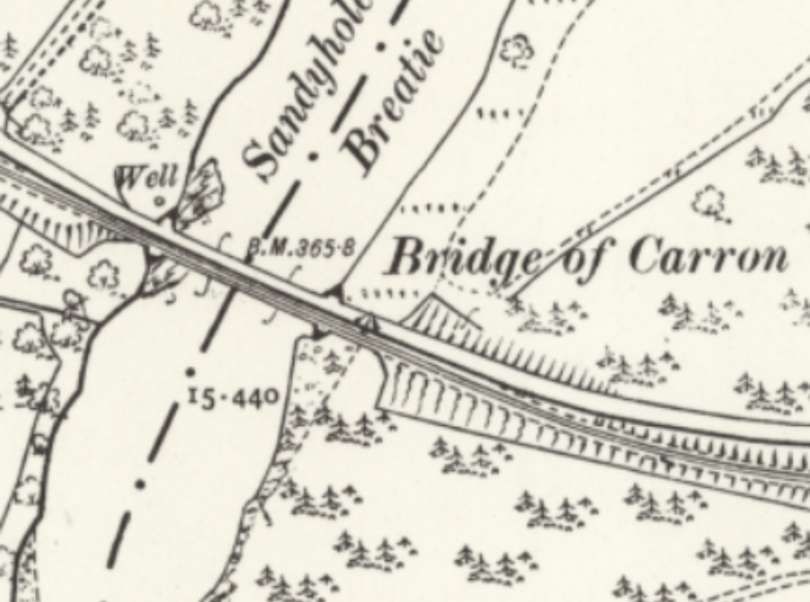
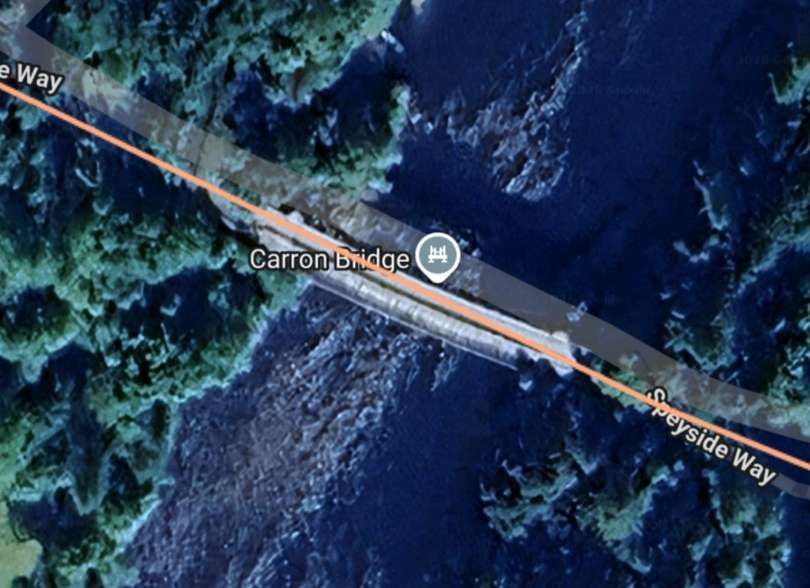
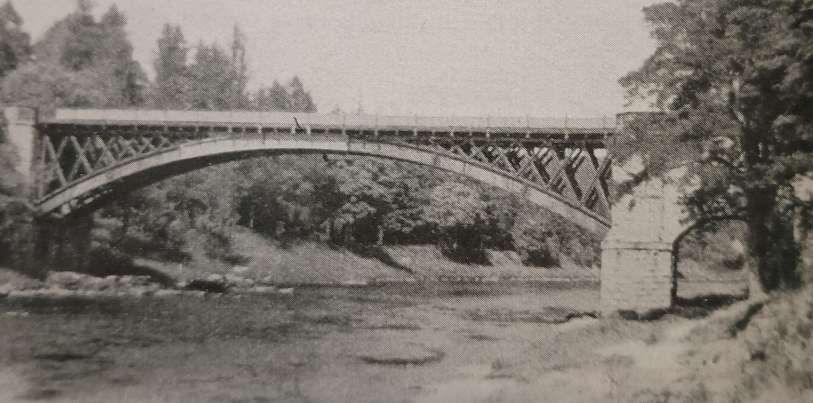
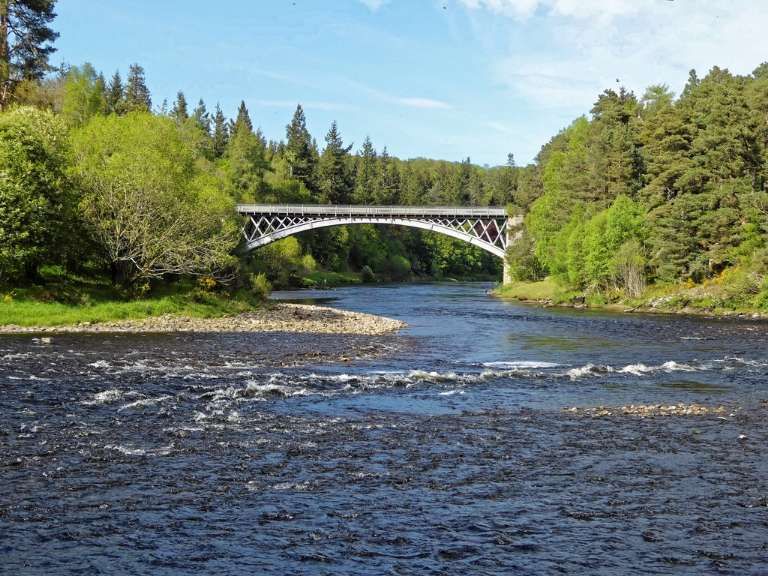
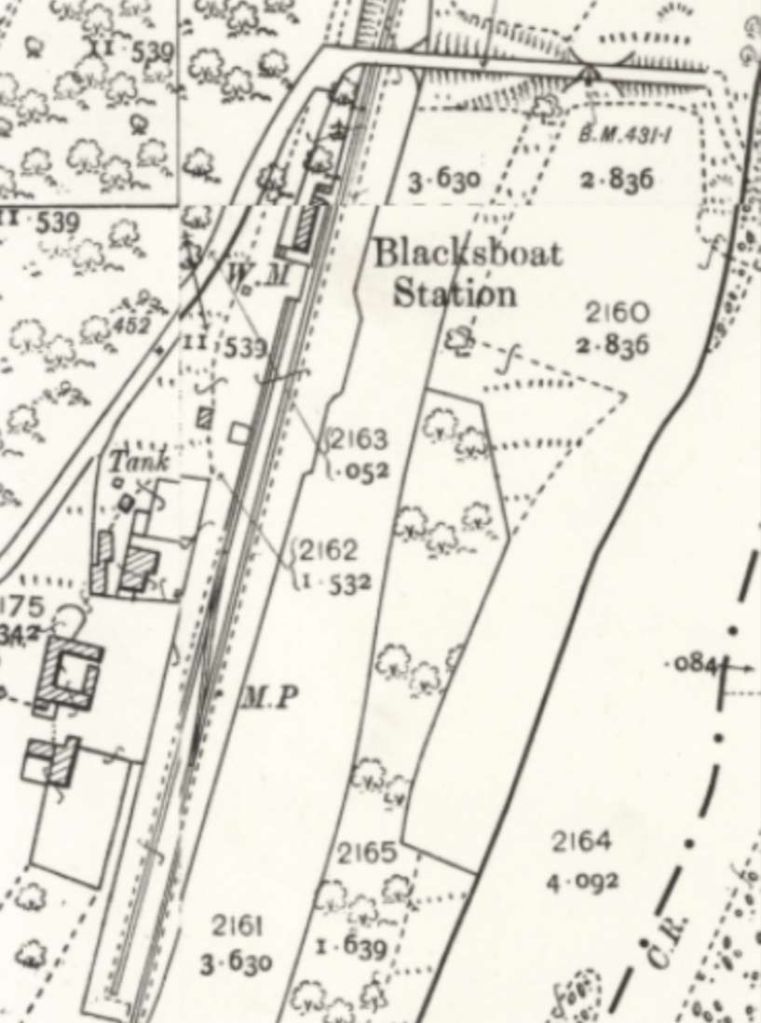
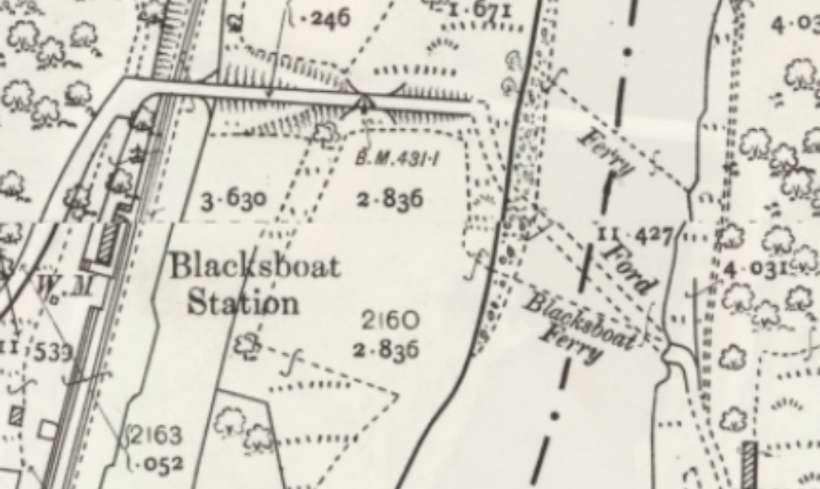
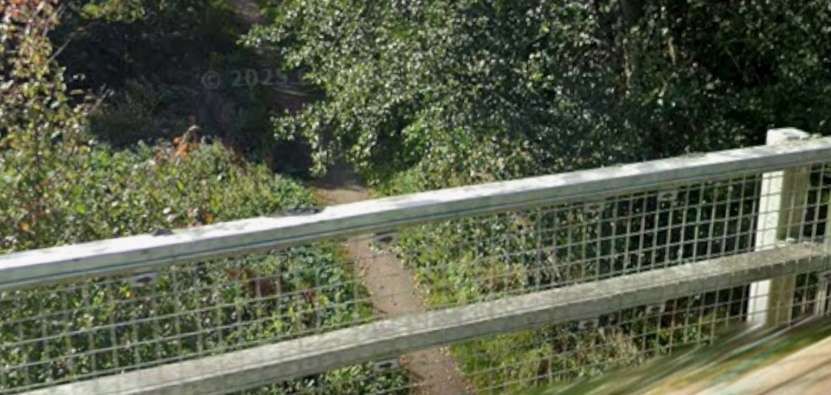
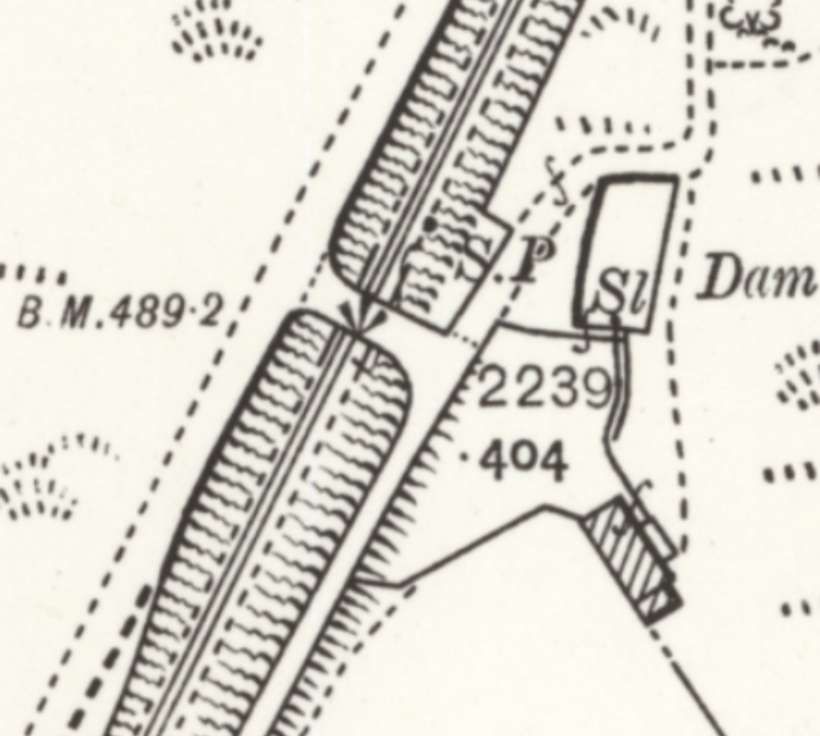
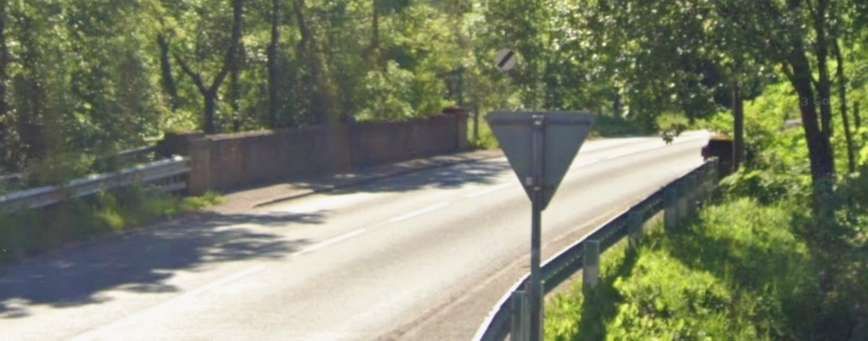
Immediately after crossing the road at the South end of the station site, the railway bridged the River Nethy. The railway then turned “sharply westward, and crosses the Spey for the third time on a girder bridge of five spans supported on masonry piers. It then curves back towards the south, and runs beside the main line of the former Highland Railway to Boat of Garten, 33.5 miles from Craigellachie. Throughout the final stages of the journey, the Cairngorms rise boldly on the eastern horizon, their dark outlines relieved by the snow which frequently lingers in the corries until midsummer.” [2: p8-9]


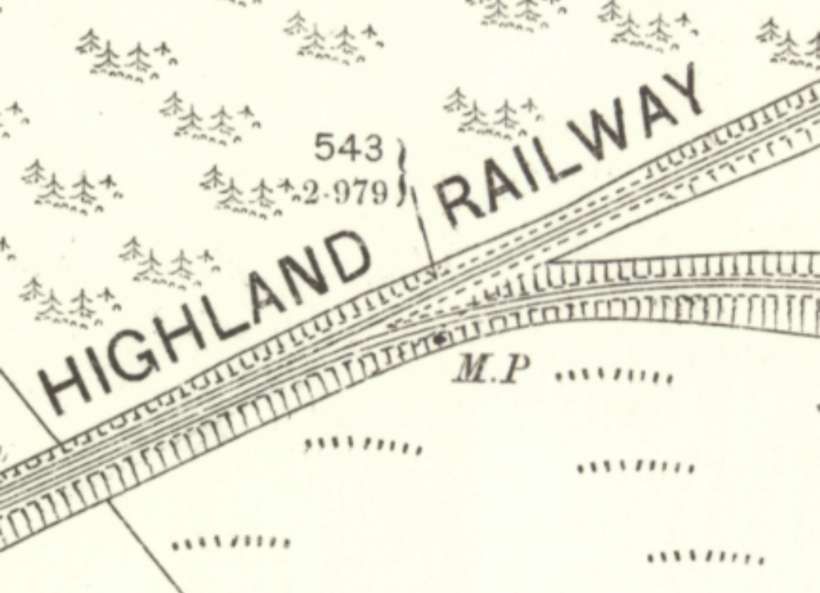
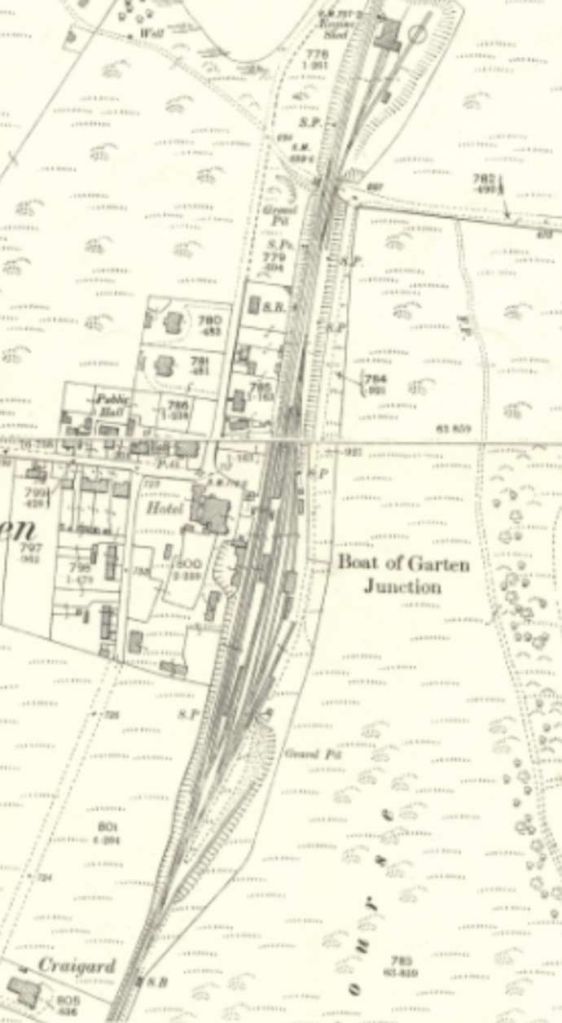
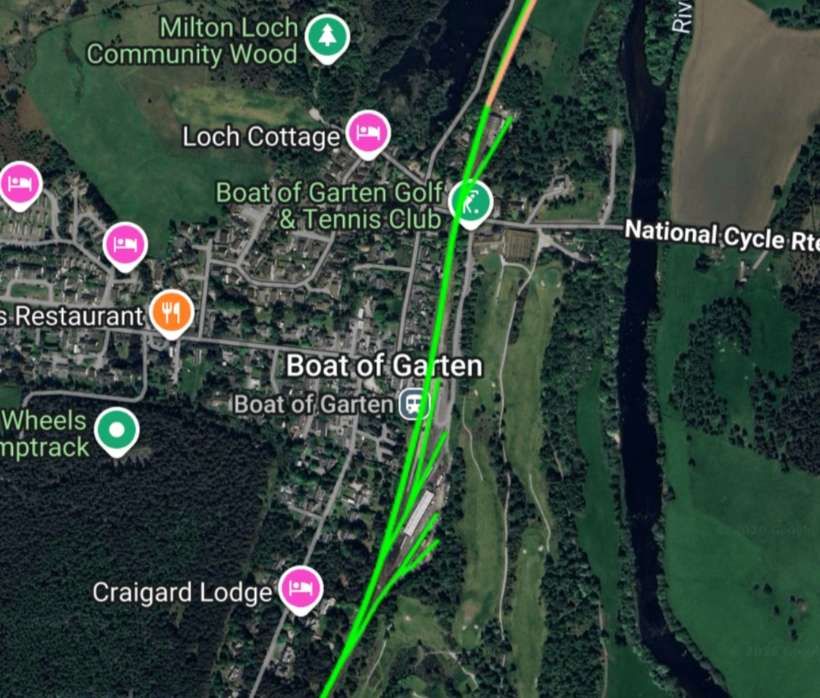
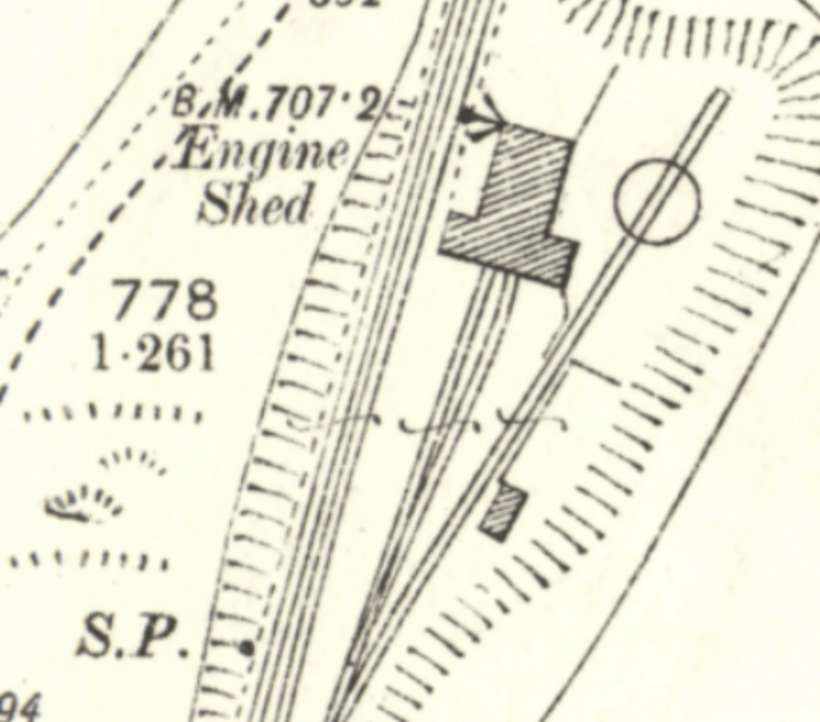

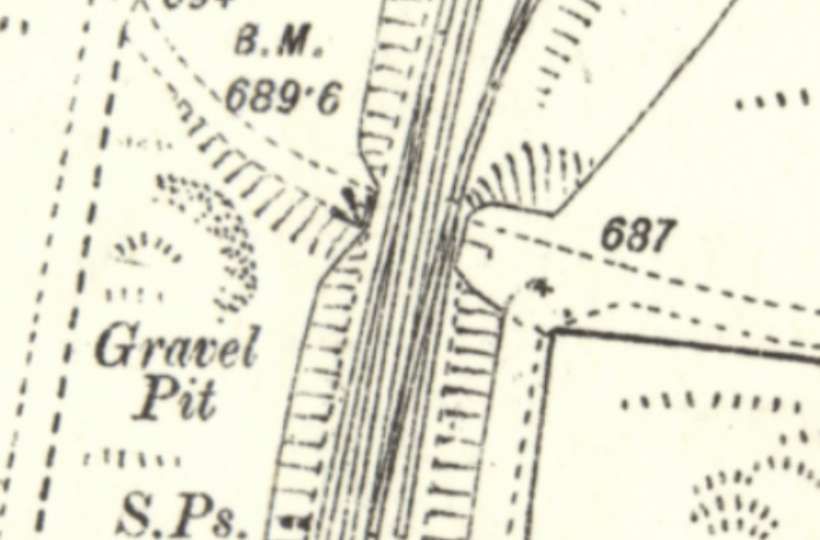
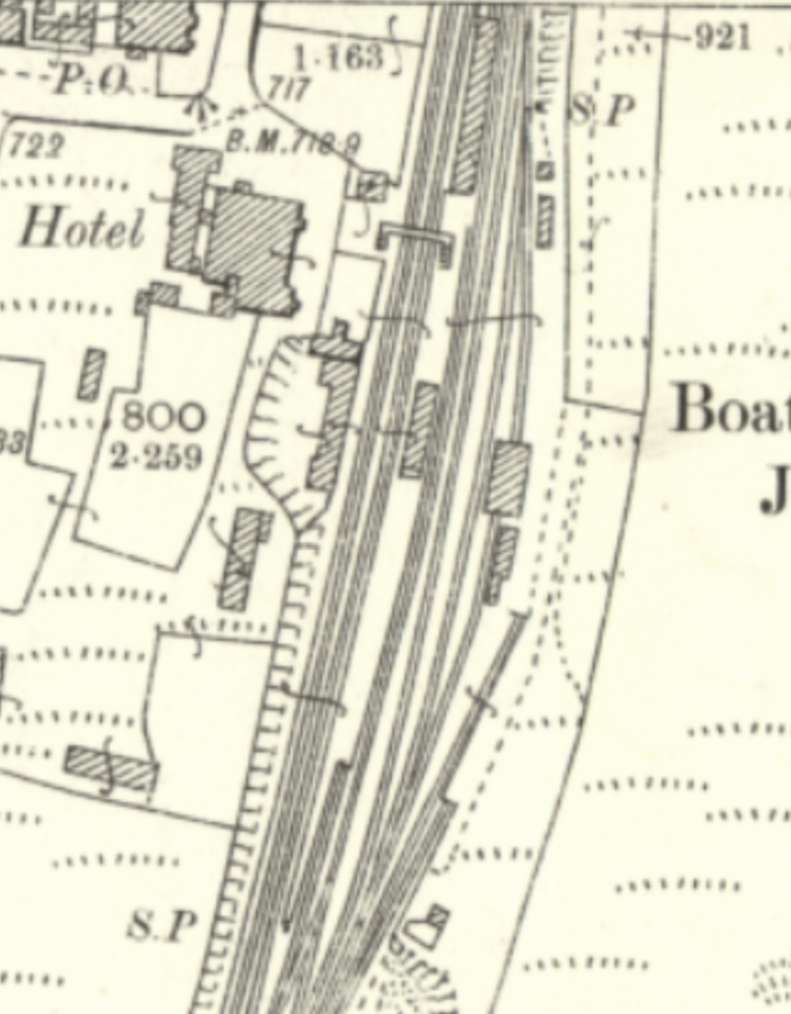
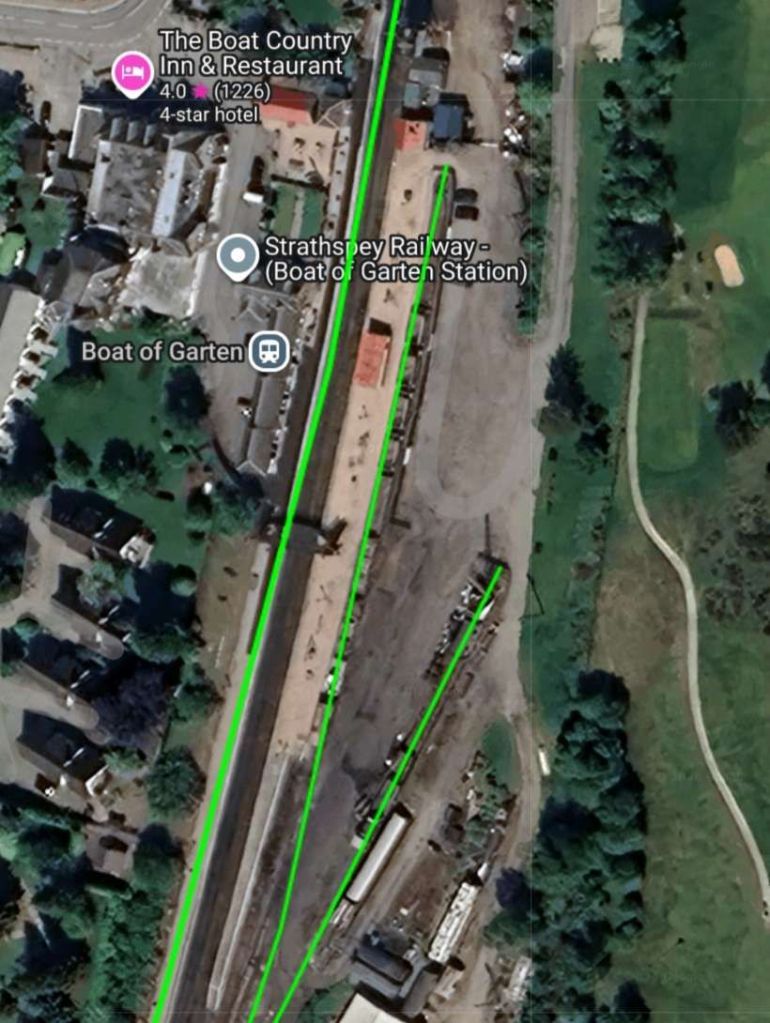
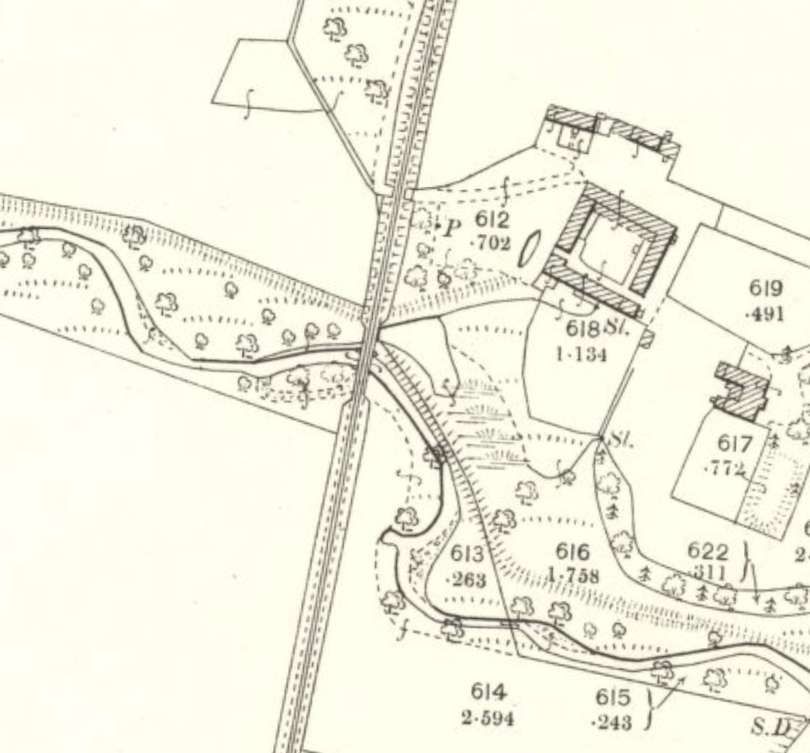
“The southbound platform at Boat of Garten Station is an island, the outer face of which is used by the Strathspey trains. The layout includes a run-round loop, and sidings for the exchange of traffic. The only physical connection between the two railways formerly was at the south end of the station, but [in the 1950s] an improved junction, allowing trains to run direct between Strathspey line and the Highland line platforms, [was] provided at the north end.” [2: p9]
Services on the Strathspey Line
H.A. Vallance describes services on the line: “The early train services on the Strathspey line call for little comment. The trains stopped at all stations, and were characterised by their leisurely progress. There were three trains in each direction in summer, and two in winter, but with the gradual improvement of services on the Great North after the early 1880s, the number of services was increased, and there was some improvement in speed. At least three trains were run throughout the year, and in summer there were additional trains, some of which worked only between Craigellachie and Ballindalloch. The services suffered some reduction during the first world war from which they never fully recovered. In [the period before Vallance was writing] there [were] three trains in each direction, and the journey time for the 33.5 miles between Craigellachie and Boat of Garten [was] about 1.25 hour.” [2: p9]
“In the early years of the [20th] century, the GNSR introduced a summer programme of long-distance half-day excursions by special trains from Aberdeen on Wednesdays and Saturdays. The first of these trips to the Speyside line was on 17th June 1905, and the fare for the return journey to Boat of Garten (101.25 miles each way) was 2s. 6d. The train ran non-stop between Aberdeen and Craigellachie (68 miles) in 85 min., and reached Boat of Garten in 2.25 hours.” [2: p9]
During the summer of 1906, the journey “was extended for 17 miles over the Highland Railway, from Boat of Garten to Kingussie, but this innovation lasted for one season only. By 1909, the non-stop run had been shortened to 64 miles by the addition of a stop at Dufftown. The GNSR. had no restaurant cars, but lunches provided by the Palace Hotel, Aberdeen, owned by the railway company, were served on the outward journey in saloon carriages fitted with tables. Teas were served on the return journey.” [2: p51]
“After being withdrawn during the first world war, these excursions were re-introduced by the London & North Eastern Railway, but at increased fares. The catering arrangements were improved by the provision of a fully-equipped restaurant car, and the trains also ran on Sundays, thus becoming the first Sunday services on the Strathspey line. The trains were again withdrawn on the outbreak of the second world war, and [were not] restored.” [2: p5]
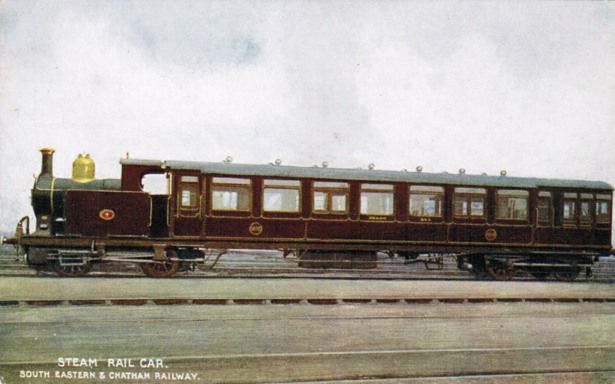
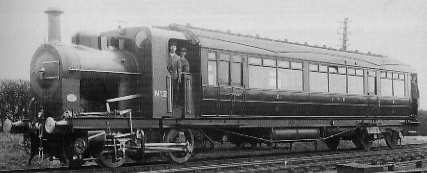
“The sharp curves on the lines between Keith and Elgin are said to have led the GNSR to use locomotives with a leading bogie at an early date. For many years after its opening in 1863, the Strathspey line was worked by some of the first 4-4-0s built for the company. ” [2: p51]
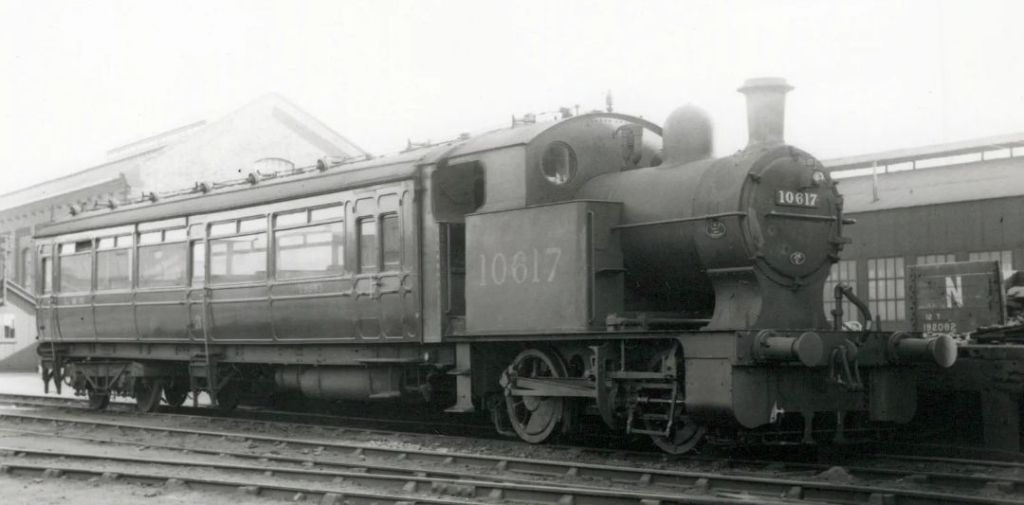
“Successive locomotive superintendents perpetuated the 4-4-0 wheel arrangement for general mixed-traffic duties, and, as the older locomotives were withdrawn from service, several of these types appeared on the Boat of Garten trains. Six-coupled engines were unknown on the line until after grouping, when 4-6-0s from the former Great Eastern Railway were sent to North-East Scotland, and were used on the Strathspey excursion trains. In [the 1950s], British Railways standard 2-6-0s … worked the passenger services, and class “K” 2-6-0s [worked] goods trains.” [2: p51]
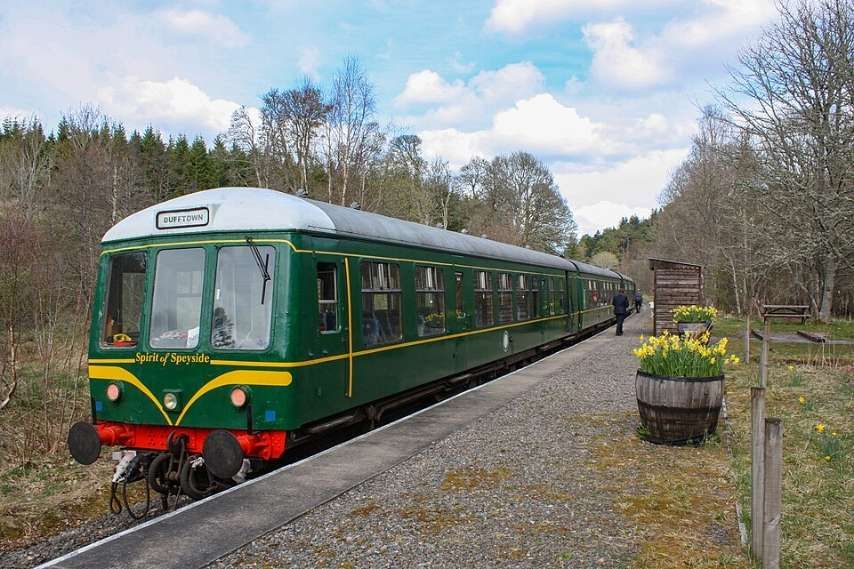
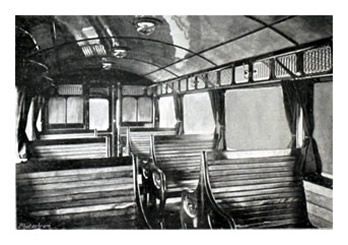
“On 3rd November 1958, the services on the Strathspey line were re-organised by the introduction of one of the new diesel railbuses. … These vehicles, which [had] seats for 56 passengers, and a top speed of 55 m.p.h., [were] designed for use on routes on which traffic [was] light. The railbus [made] three journeys in each direction daily on the Strathspey line, and the only remaining steam-hauled passenger service [was] the late evening train from Craigellachie, on Saturdays only, which convey[ed] a through coach from Aberdeen.” [2: p51]
“Advantage [was] taken of the ease with which a diesel unit can be reversed to extend the railbus journeys over the main line between Craigellachie and Elgin. The introduction of through services between Strathspey and Elgin was among the suggestions made in an article on the possibilities of light diesel units in the North of Scotland, which appeared in The Railway Magazine for January, 1956. Two journeys in each direction also [were] extended between Boat of Garten and Aviemore. distance from Aviemore to Elgin via Craigellachie is 51 miles, and the railbus [was] thus covering a daily mileage of almost 300, or 1,800 miles a week.” [2: p51]
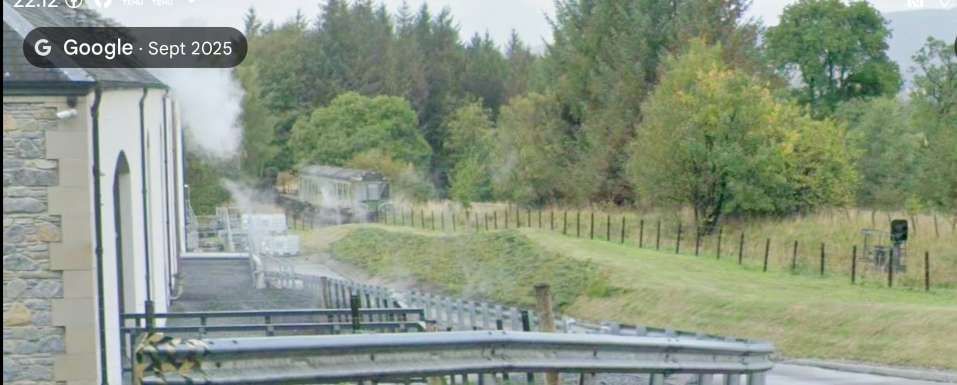
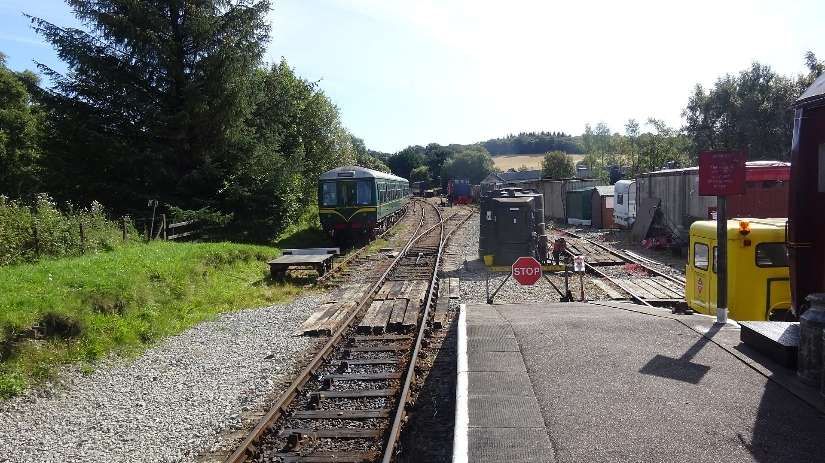
A significant series of photographs at locations along the line can be seen here. [42]
References
- The Railway Magazine Volume 105 No. 693, Tothill Press, London, January 1959.
- H.A. Vallance; The Strathspey Line; in The Railway Magazine Volume 105 No. 693, Tothill Press, London, January 1959, p3-9 & 51.
- https://rogerfarnworth.com/2026/01/16/the-strathspey-line-part-1-keith-to-dufftown
- https://rogerfarnworth.com/2026/01/29/the-strathspey-line-part-2-dufftown-to-ballindalloch
- https://maps.nls.uk/geo/explore/#zoom=16.2&lat=57.41331&lon=-3.38888&layers=168&b=ESRIWorld&o=100, accessed on 30th January 2026.
- https://railmaponline.com/UKIEMap.php, accessed on 30th January 2026.
- https://maps.nls.uk/view/82870827, accessed on 30th January 2026.
- https://maps.nls.uk/view/82870824, accessed on 30th January 2026
- https://maps.nls.uk/view/82879632, accessed on 30th January 2/26.
- https://maps.nls.uk/view/82879599, accessed on 30th January 2026
- https://grokipedia.com/page/advie_railway_station, accessed on 30th January 2026.
- https://maps.nls.uk/view/82879605, accessed on 31st January 2026.
- https://maps.nls.uk/view/82879617, accessed on 31st January 2026
- https://maps.nls.uk/view/82879665, accessed on 31st January 2026.
- http://gnsra.org.uk/advie%20station.htm, accessed on 31st January 2026.
- https://www.geograph.org.uk/photo/2992200, accessed on 31st January 2026.
- http://gnsra.org.uk/cromdale%20station.htm, accessed on 31st January 2026.
- https://maps.nls.uk/view/82879665, accessed on 1st February 2026.
- https://maps.nls.uk/view/82879668, accessed on 1st February 2026.
- https://maps.nls.uk/view/82887360, accessed on 1st February 2026.
- https://maps.nls.uk/geo/explore/#zoom=17.4&lat=57.31730&lon=-3.59117&layers=168&b=ESRIWorld&o=100, accessed on 1st February 2026.
- https://maps.nls.uk/geo/explore/#zoom=16.9&lat=57.31647&lon=-3.59883&layers=168&b=ESRIWorld&o=100, accessed on 1st February 2026.
- https://maps.nls.uk/geo/explore/#zoom=16.4&lat=57.30237&lon=-3.62673&layers=168&b=ESRIWorld&o=100, accessed on 1st February 2026.
- https://maps.nls.uk/geo/explore/#zoom=17.3&lat=57.29968&lon=-3.62981&layers=168&b=ESRIWorld&o=100, accessed on 1st February 2026.
- https://maps.nls.uk/geo/explore/#zoom=16.6&lat=57.27186&lon=-3.65567&layers=168&b=ESRIWorld&o=100, accessed on 1st February 2026.
- https://maps.nls.uk/geo/explore/#zoom=16.6&lat=57.26688&lon=-3.65847&layers=168&b=ESRIWorld&o=100, accessed o. 1st February 2026.
- https://maps.nls.uk/geo/explore/#zoom=16.6&lat=57.29298&lon=-3.63738&layers=168&b=ESRIWorld&o=100, accessed on 1st February 2026.
- https://www.geograph.org.uk/photo/776038, accessed on 1st February 2026.
- https://www.railscot.co.uk/locations/G/Grantown-on-Spey_East/slideshow.html, accessed on 1st February 2026.
- https://www.railscot.co.uk/locations/N/Nethy_Bridge/slideshow.html, accessed on 1st February 2026.
- https://grokipedia.com/page/nethy_bridge_railway_station, accessed on 1st February 2026.
- https://www.lner.info/locos/D/d42.php, accessed on 3rd February 2026.
- https://www.geograph.org.uk/photo/1375905, accessed on 3rd February 2026.
- https://maps.nls.uk/geo/explore/#zoom=16.2&lat=57.26571&lon=-3.66131&layers=168&b=ESRIWorld&o=100, accessed on 3rd February 2026.
- https://maps.nls.uk/geo/explore/#zoom=17.3&lat=57.26749&lon=-3.67683&layers=168&b=ESRIWorld&o=100, accessed on 3rd February 2026.
- https://maps.nls.uk/geo/explore/#zoom=17.3&lat=57.27007&lon=-3.68530&layers=168&b=ESRIWorld&o=100, accessed on 3rd February 2026.
- https://maps.nls.uk/geo/explore/#zoom=17.3&lat=57.27306&lon=-3.69028&layers=168&b=ESRIWorld&o=100, accessed on 3rd February 2026.
- https://maps.nls.uk/geo/explore/#zoom=17.3&lat=57.27654&lon=-3.69814&layers=168&b=ESRIWorld&o=100, accessed on 3rd February 2026.
- https://maps.nls.uk/geo/explore/#zoom=17.3&lat=57.27240&lon=-3.71136&layers=168&b=ESRIWorld&o=100, accessed on 3rd February 2026.
- https://maps.nls.uk/geo/explore/#zoom=17.3&lat=57.26156&lon=-3.73707&layers=168&b=ESRIWorld&o=100, accessed on 3rd February 2026.
- https://maps.nls.uk/geo/explore/#zoom=16.5&lat=57.24988&lon=-3.75161&layers=168&b=ESRIWorld&o=100, accessed on 3rd February 2026.
- https://www.railscot.co.uk/companies/S/Strathspey_Railway/22.html, accessed on 3rd February 2026.
- https://www.geograph.org.uk/photo/6104082, accessed on 3rd February 2026.
- https://www.geograph.org.uk/photo/4176571, accessed on 3rd February 2026.
- https://www.geograph.org.uk/photo/3448622, accessed on 3rd February 2026.


.jpg)
.jpg)