The Humber Arm Railway linked an earlier canal branch (which ran from the Newport Branch of the Shropshire Union Canal at Kynnersley to a wharf at Lubstree close to The Humbers, a small hamlet North of the old LNWR mainline through Donnington and on the North side of Venning Barracks, the base of the 11th Signal Brigade and Headquarters West Midlands, part of the British Army’s 3rd UK Division.) with the Lilleshall Company’s private rail network. [1]
The Canal was opened to traffic in May 1844 and was initially served by a tramway which ran from Lubstree Wharf to Lodge Furnaces. Between the Canal and the tramway the distance from the Shropshire Union Canal to Lodge Furnaces was about 4 miles (1 mile of canal and 3 miles of tramway).
The canal arm was authorised by an Act of parliament in 1827. If built at that time it would have been part of the Birmingham and Liverpool Junction Canal. Its successor was the Shropshire Union Canal. It seems that the Duke of Sutherland landowner and influential partner in the Lilleshall Company built both the canal arm and the associated tramway. [2: p41]
Charles Hadfield notes that two branches were authorized from canal serving Newport, “one to Edgmond that was never built, and one, to be a cut with 7 locks or a tramroad, to Lilleshall. This, on a different line and without locks, became the Humber Arm, … leading to the Marquess of Stafford’s Lubstree wharf, which opened for business in 1844.” [29: p185]
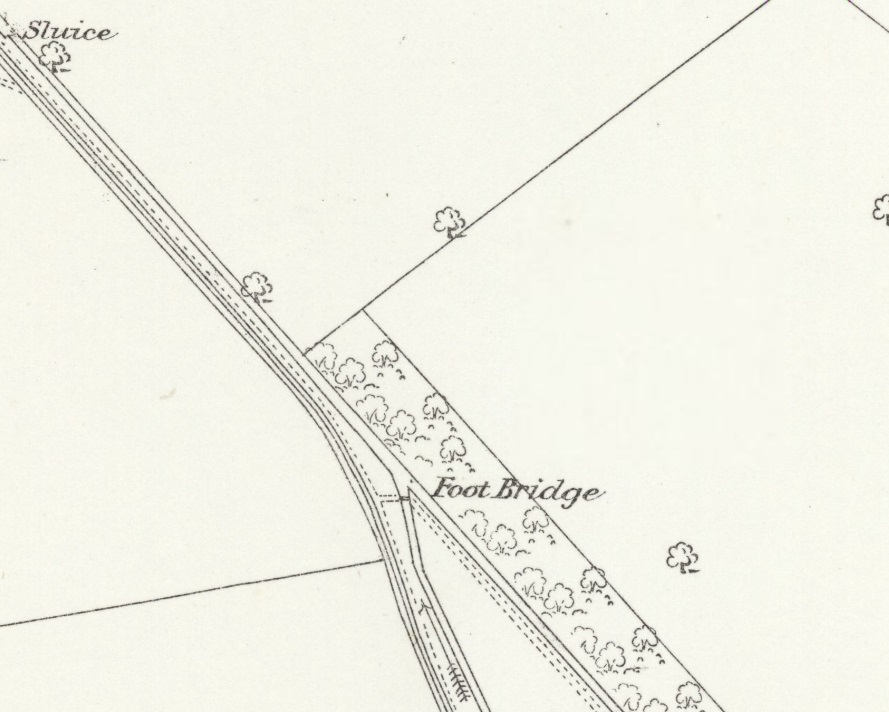
The six map extracts immediately below are mostly taken from the 25 inch Ordnance Survey of 1881/1882 and they show the full length of the canal. Traffic on the Humber Arm ended in 1922, when the fifth Duke of Sutherland closed the wharf and the railway line to Lilleshall. [3]
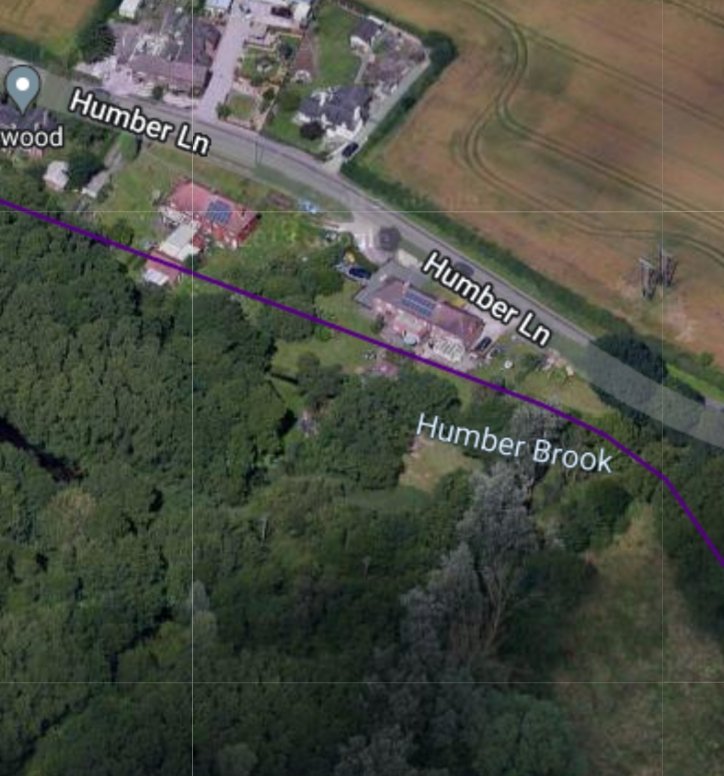
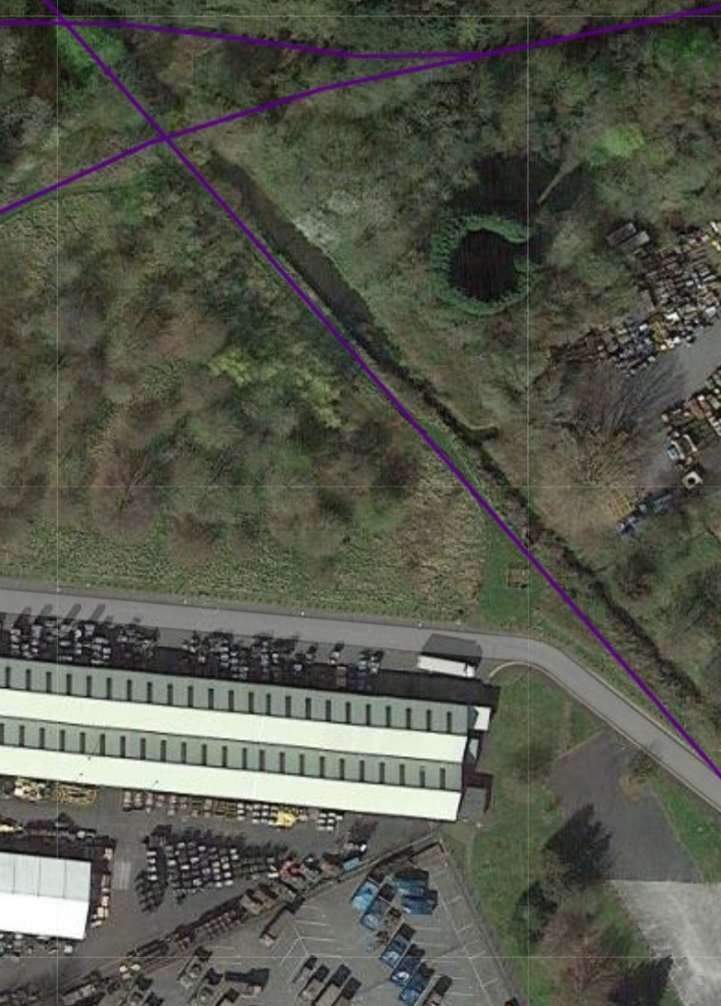
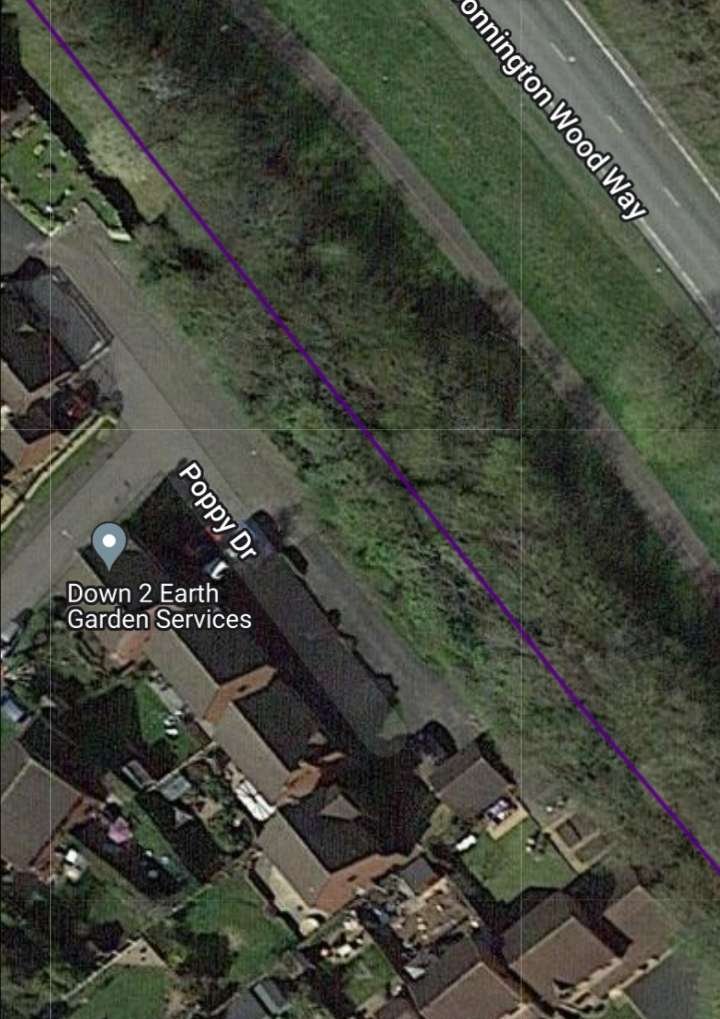
The junction of the Shropshire Union Canal Newport Branch and the Humber Arm which was just a few tens of metres to the South of the aqueduct shown above. The junction was to the East of Kynnersley. The Humber Arm heads Southeast from the Newport Branch. very little changed at this location from the opening to the closing of the Humber Arm. This map comes from the 1901 25″ Ordnance Survey. The following three images are extracts from the next sheet from the Ordnance Survey of 1881.[4]Three successive map extracts cover the length of the Humber Branch (Humber Arm of the Shropshire Union Canal) which appears to the bottom left of the relevant 1881 Ordnance Survey sheet. [5]The remainder of the Canal Arm is on the next 25″ Ordnance Survey sheet to the South which was published in 1882. This length brings the canal to the North end of Lubstree Wharf. [6]The Canal Wharf at Lubstree. 25″ Ordnance Survey of 1882. [6]Approximately the same area as shown on the last map extract above as it appears on the RailMapOnline.com satellite imagery. The purple lines are the approximate line of the Mineral Railway that replaced the tramway we will following first. Satellite imagery shows nothing of the Canal Arm to the North of this image. Heading to the North from here, the line if the canal traverses open fields and then Aqueduct plantation. The trees in the plantation obscure any direct evidence of the old canal arm from above and, similarly, the location of its junction with the Shropshire Union Canal Newport Branch. [10]
While it is true that direct evidence of canal remains cannot be seen, tree growth differs along the line of the two old canals as this next satellite image from Google Maps shows.
Tree growth patterns highlight both the line of the Humber Arm and the Shropshire Union Canal Newport Branch. [Google Maps, July 2023]
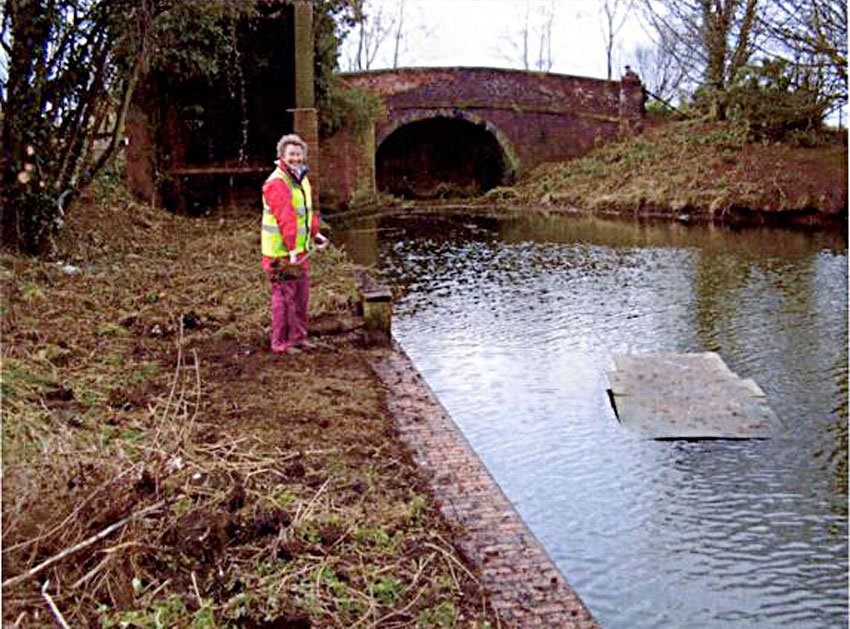
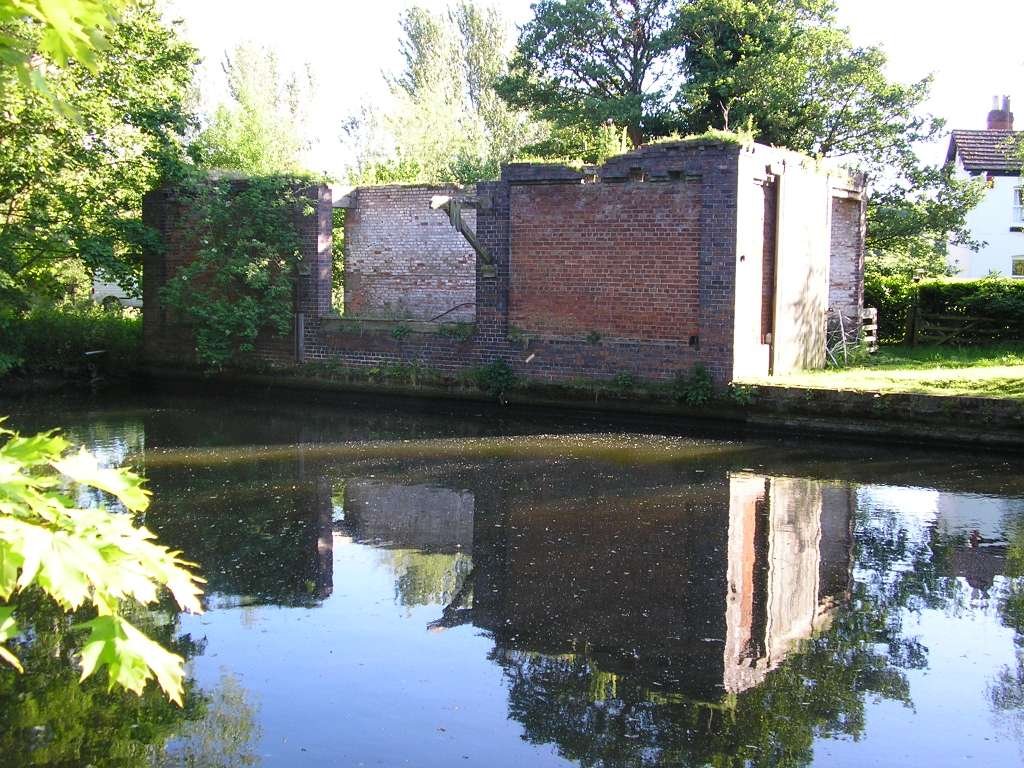
Derelict structures once sat adjacent to the remaining length of canal at Lubstree Wharf.
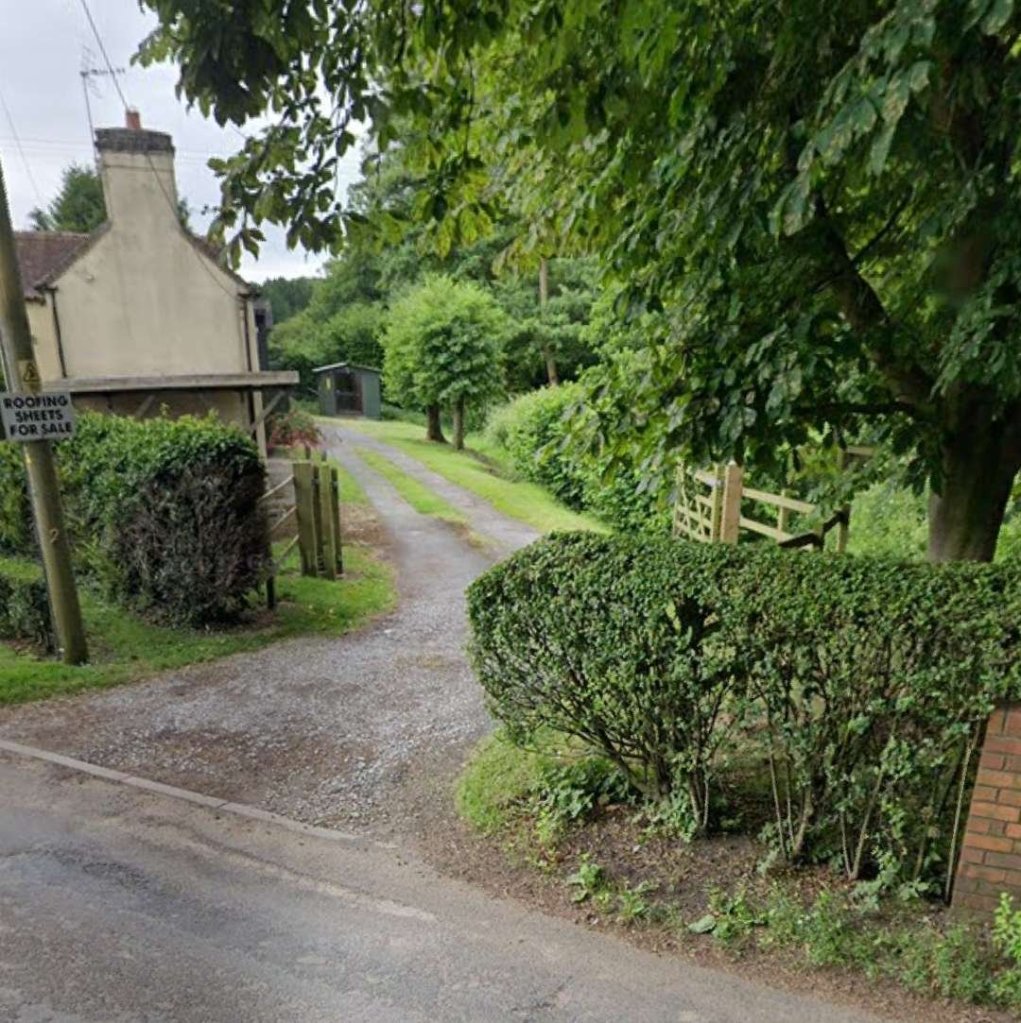
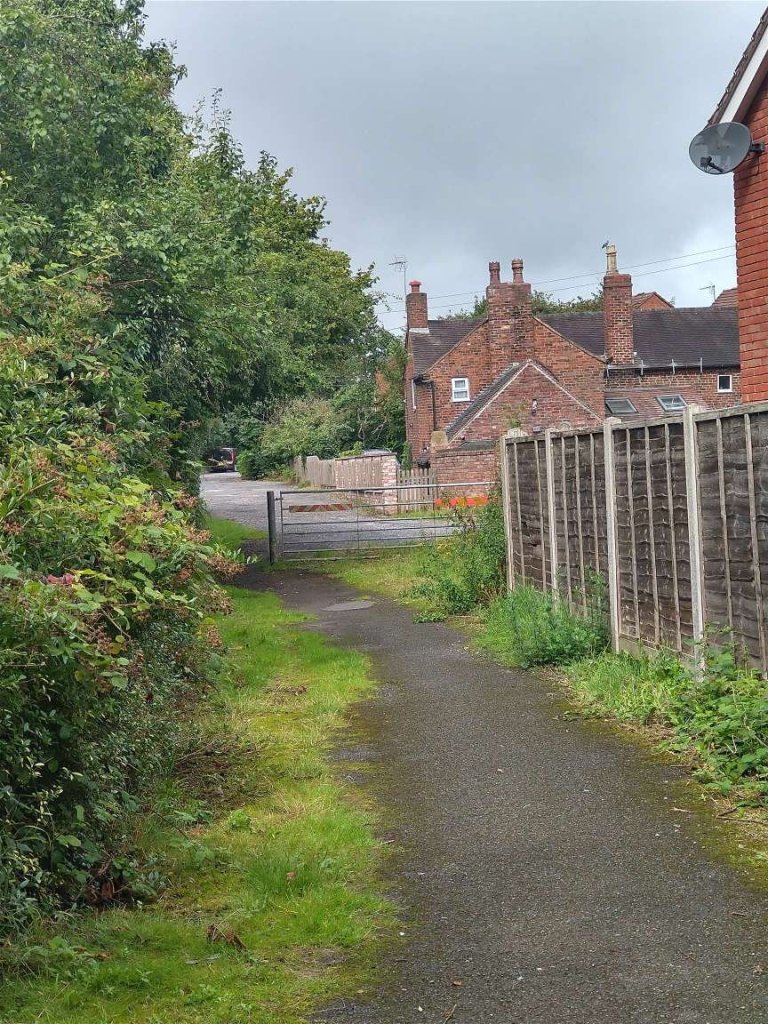
The West elevation of the Engine Shed. [13]The Engine Shed at the top end of the remaining length of canal close to the bridge which used to span the Humber Arm but which now forms a scenic break with no canal beyond. [18]The view South from the ‘bridge’ alongside the Engine Shed in the mid 20th century. The remaining length of the canal alongside Lubstree Wharf was not always full of water. [19]The view South from alongside the Engine Shed down the line of the tramway/railway which served the Wharf. [13]The transhipment shed at Lubstree Wharf in the 20th century before major deterioration set in and the roof was lost. [16]The transhipment shed early in the 21st century before reconstruction started. [17]Looking North-northwest from Humber Lane the remaining length of the canal can be seen to the right of the centre if this image. The Goods Shed which appears on the map extract and satellite image above can be seen to the left of the young tree close to the camera. It appears to be being refurbished. [Google Streetview, June 2022]
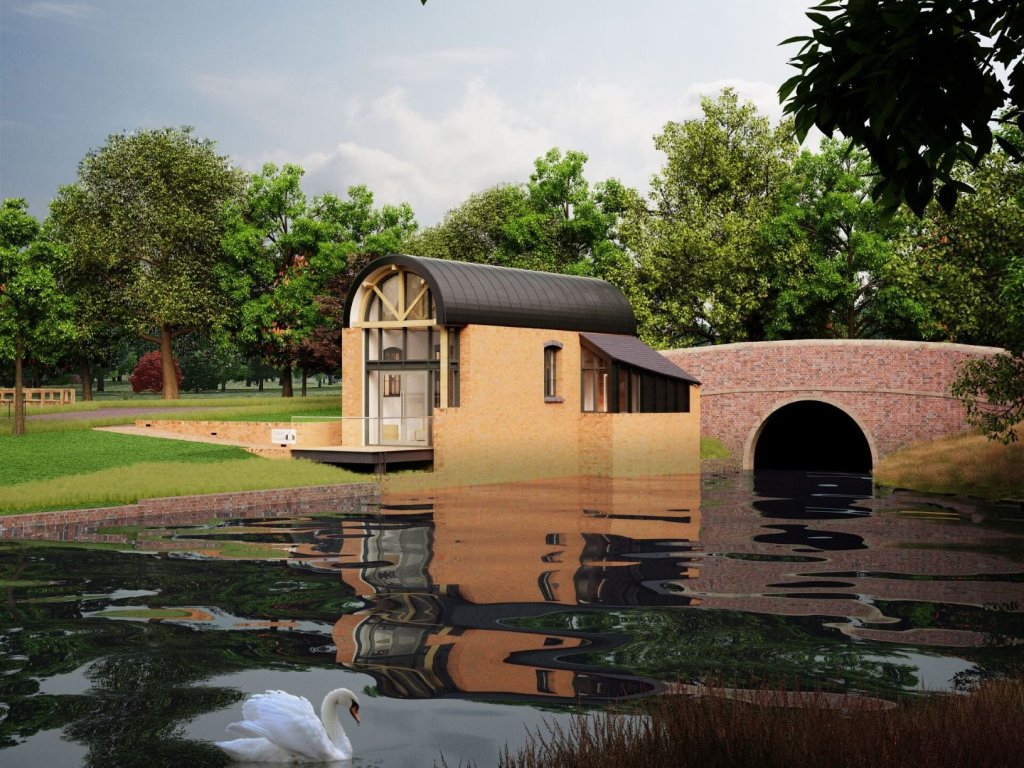
The site was advertised for sale online by Barbers Rural Estate Agents with planning permission, granted on 31st January 2019. [13] At the time the above image was taken (June 2022) the old Goods Shed/transfer facility was being refurbished as a dwelling. The three images below come from the Estate Agent’s site and show what the architect planned for the Goods Shed and the Engine Shed.
The proposed dwelling built out of the remains of the Goods Shed. [13]The computer-aided 3-D design drawings look very realistic. This image shows the planned refurbishment of the Goods Shed, the remaining length of the canal, and in the distance a refurbished Engine Shed! [13]The proposed refurbishment of the Engine Shed adjacent to the bridge which once spanned the Canal, but which now forms a ‘scenic-break’. The is no canal to the North of the bridge. [13]
The tramway was replaced by a standard-gauge railway as part of the Lilleshall Company’s network of private railways in 1870.
The Tramway
I have not been able to find earlier maps than the 1881/1882 Ordnance Survey that would show the tramway. It is, however, reasonable to assume that, at least as far as the tunnel under the LNWR mainline, the railway was built on the formation of the old tramway. The last map extract above shows the terminus of the railway (which would have also been the tramway terminus) alongside the canal wharf, the next series of map extracts show the railway (and so also the route of the tramway), running South to pass under the LNWR railway line.
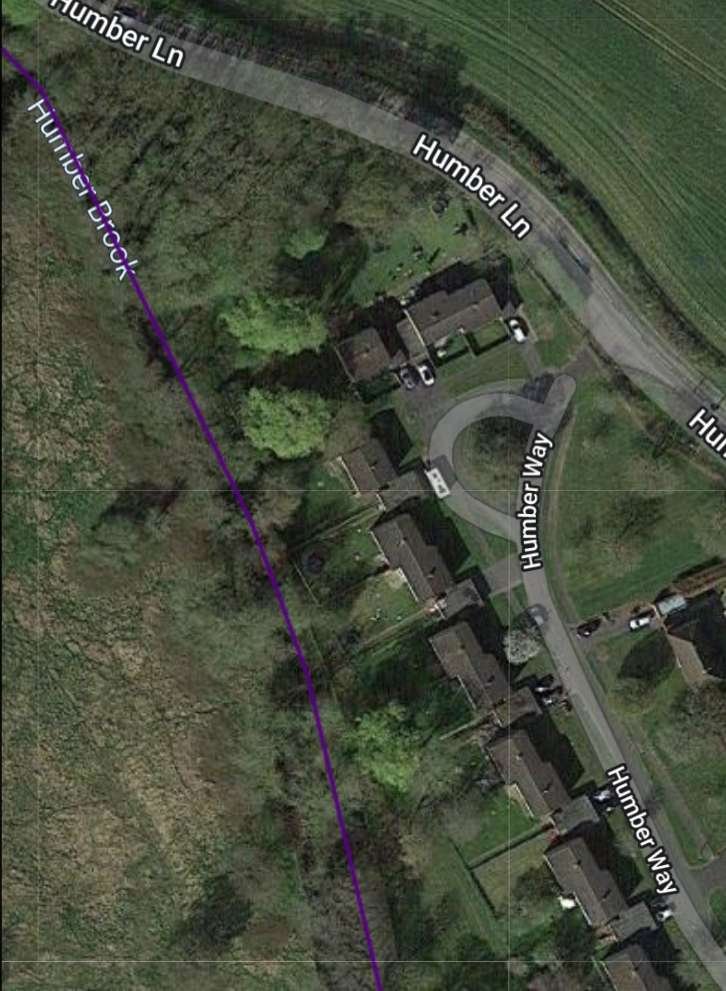
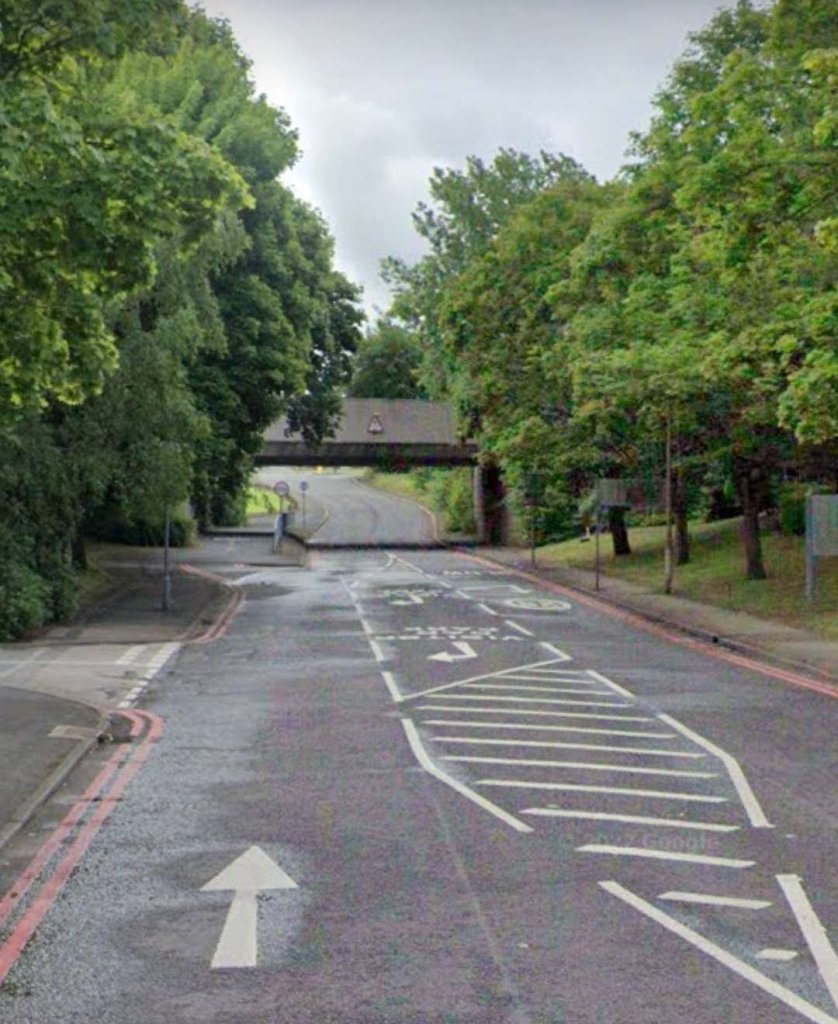
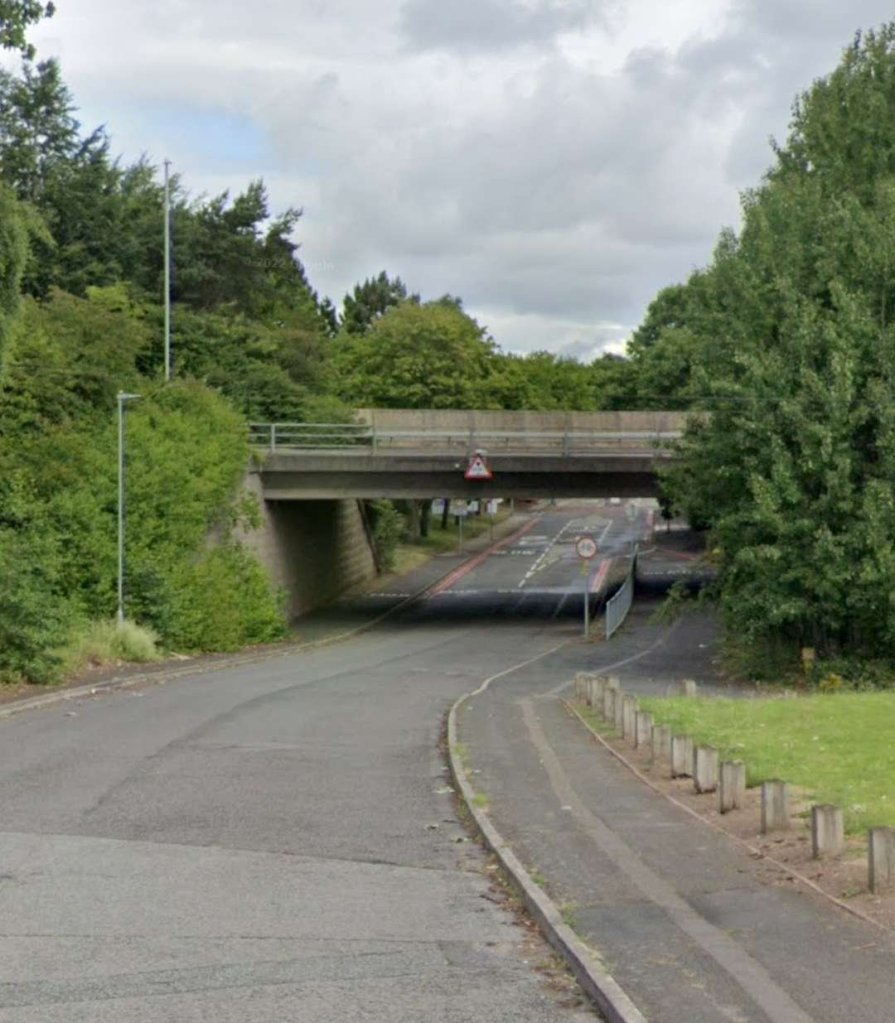
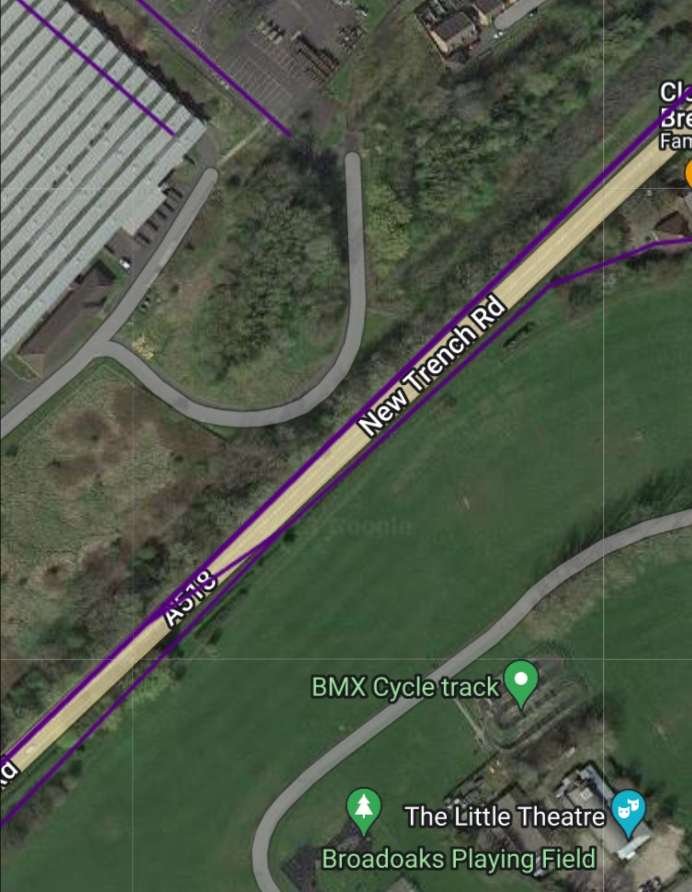
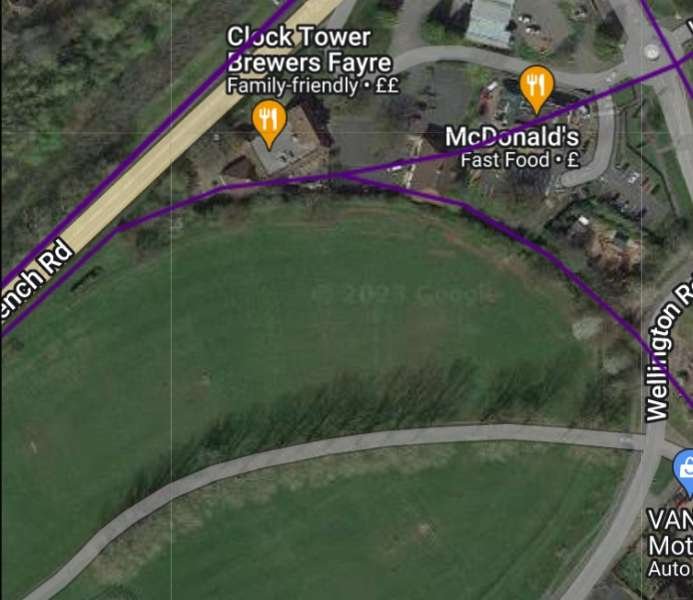
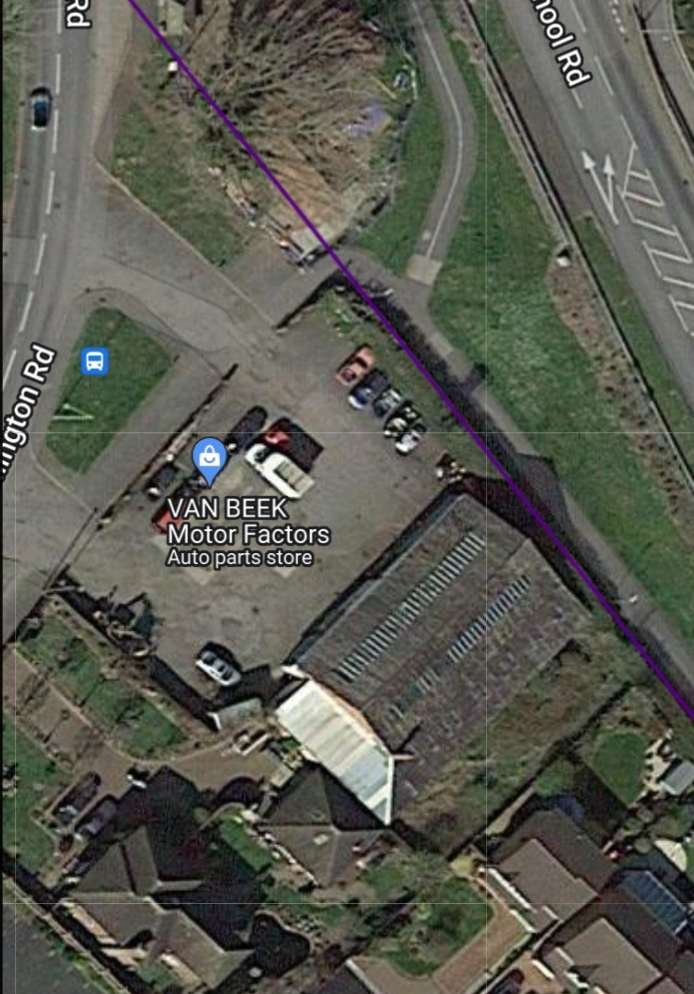
The Humbers hamlet at the end of Lubstree Wharf. The end of the canal can be seen in the top-left of the extract. The tramway/railway crossed the lane through the hamlet at the end of the canal. The Humber Brook runs to the South side of the tramway/railway. [6]These two extracts from RailMapOnline’s satellite imagery cover the same length of the tramway/railway as the map extract above. [10]A wide-angle view looking West-southwest along Humber Lane. The tramway/railway crossed the lane closer to the camera than the bridge which carried Humber Lane across Humber Brook. [Google Streetview, June 2022]The camera is just to the East of the bridge over Humber Brook and is looking Southeast. The brickwork to the right edge of the picture is the end of the parapet of the bridge carrying the lane across the brook. The tramway/railway used to run along the modern driveway, heading Southeast. [Google Streetview, June 2022]This photograph is taken from a point further to the East along Humber Lane. The old tramway/railway ran just beyond the vegetation on the left of the image and behind the properties visible in the right of the picture. [Google Streetview, June 2022]The old tramway/railway continued in a South-southeast direction. [6]Again, this RailMapOnline satellite image shows roughly the same length of line as the map extract above. [10]The old tramway/railway continued following the East bank if the Humber Brook. [6]This satellite image shows the same length of line as the map extract above. [10]This map extract shows the old tramway/railway turning towards the Southeast. The Humber Brook turns away to the West. An open drain crosses under the railway and runs parallel to the old tramway/railway as it heads Southeast. [6]A similar area to that shown on the top-left of the map extract above. The purple line indicating the route of the old tramway/railway is crossed by other purple lines which mark later rails serving MOD Donnington. [10]This RailMapOnline covers approximately the same length of line as the bottom-right quadrant of the last map extract and the top-left quadrant of the map extract below. [10]The old tramway/railway turns once again to the South-southeast and is shadowed by one arm of the open drain. [6]This satellite image extends just a little further to the South than the map extract above. [10]Two map extracts showing the South-southeast trajectory of the line as it came closer to the LNWR mainline. The next map extract takes the tramway/railway on to another 25″ map sheet. [6]The approach to the point where the LNWR line crossed the route of the tramway/railway. [7]A series of three extracts from RailMapOnline’s satellite imagery which bring the purple line to approximately the position as the bottom of the last map extract above. The gate into MOD Donnington can be picked out under the purple line adjacent to the Babcock building. [10]Looking North through the gates to MOD Donnington the road running North-northwest (directly ahead of the camera) from the gate follows the line of the old tramway/railway. [Google Streetview, June 2022]Looking South-southeast from a very similar location. The bridge ahead carries the A518 over the access road to MOD Donnington. It is at the same location as the bridge which carried the old LNWR mainline over the old tramway/railway. [Google Streetview, June 2022]This extract from the 1882 25″ Ordnance Survey shows the point at which the LNWR bridged the Lilleshall Company’s tramway/railway. It also shows the old tramway route continuing to the South-southeast and the later standard-gauge mineral curving round to the Northeast to run parallel to the LNWR main line. [7]This final RailMapOnline satellite image shows the features noted on map extract above and shows the dramatic changes which have occurred in the immediate vicinity of the old tramway. The tramway route is not followed by RailMapOnline South-southeast of Wellington Road. [10]Looking North-northwest towards the bridge carrying the A518 across the entrance road to MOD Donnington. As we have already noted, the bridge is at the same location as that which carried the LNWR line over the old tramway/railway. The road leading under the bridge to the site gates of MOD Donnington follows the line of the old tramway/railway. The camera is at the approximate location where the old tramway route separated from the newer mineral railway. The mineral railway curved away to the right of this image after passing under the old bridge. [Google Streetview, June 2022]
The last map extract above shows the route of the old tramway extending South-southeast from the LNWR mainline with the more modern standard-gauge mineral railway curving round after passing under the mainline and climbing on a gradient of about 1 in 77 to run alongside the LNWR line.
This image is a further extract from the 25″ 1881/1882 Ordnance Survey. It shows the route of the old tramway crossing what became Wellington Road and continuing along what became Wrekin Drive. [7]
South of this point the old tramway continued in a South-southeasterly direction. It crossed what became Wellington Road as can be seen below on the next extract from the 1881/1882 25″ Ordnance Survey. As can also be seen on the map extract, South of the road the old tramway formation was by 1882 being used as a road/track. Which ultimately became Wrekin Drive.
The next two satellite images are taken from the ESRI images provided by the National Library of Scotland. They show the long straight length of the tramway route which is followed by modern roads.
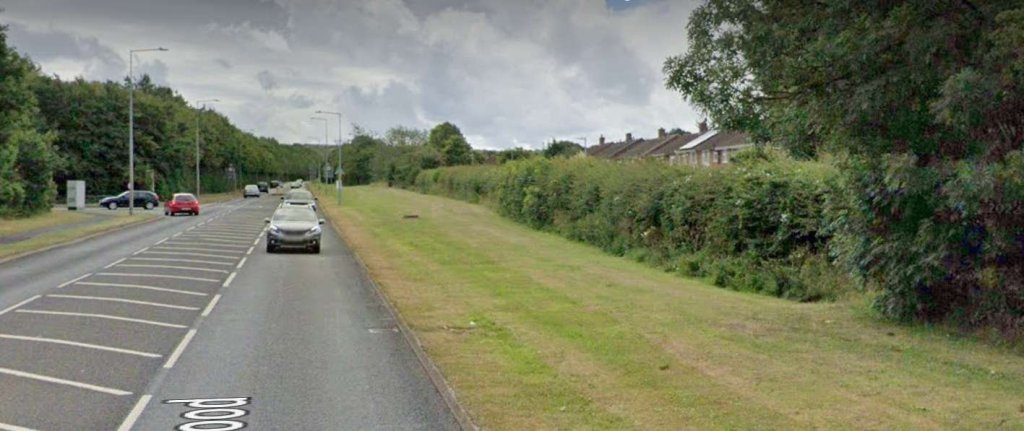
This satellite image is taken from the ESRI image set supplied by the National Library of Scotland. The road shown running North-northwest to South-southeast across the centre of the image follows the formation of the old tramway/railway. In the bottom right of the image a bridge carries the modern A518 over the road just mentioned. That bridge and the A518 are on the line of the old LNWR mainline through Donnington. The bridge is at the same location as the bridge carrying the LNWR line over the tramway/mineral railway. [8]At the same scale as the satellite image above, this ESRI image shows the road with continues to follow the route of the old tramway. The later mineral railway turned away to the East in the top left of this image, rising to run alongside the old LNWR mainline. The smaller of the two roundabouts was built over the line of the old tramway. The road running South-southeast from the roundabout is Wrekin Drive which was also built over the line of the old tramway. [9]Looking South-southeast across the smaller of the two roundabouts mentioned above. Wrekin Drive is the road directly ahead of the camera and it follows the line of the old tramway. [Google Streetview, June 2022]
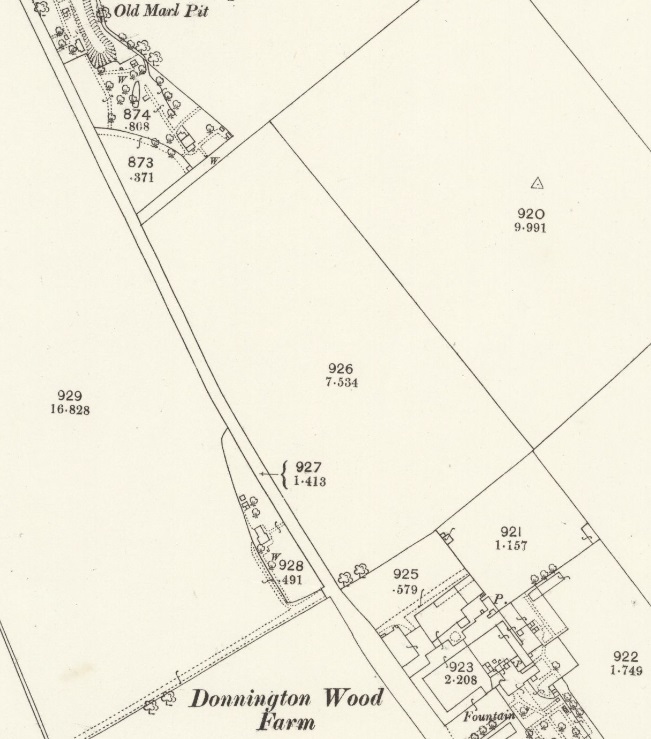
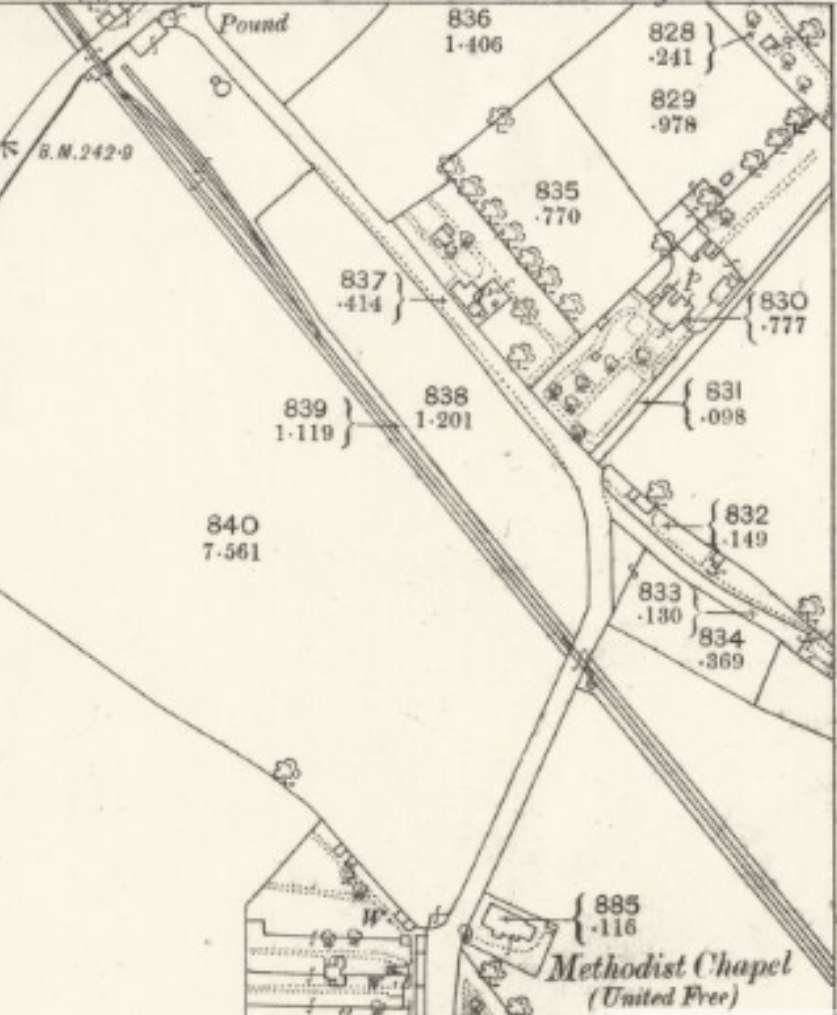
The on-going tramway route is followed on the 25″ Map extracts below but as a smaller scale than the images above. It passed Donnington Wood Farm and crossed Queens Road and then following the route of what became St.George’s Road it crossed the Donnington Wood Canal. At this point the map extract shows that the tramway tracks remained in place to serve an old ironstone mine/shaft.
It was then only a short distance further south that the tramway met the wider network of tramways in the Donnington area.
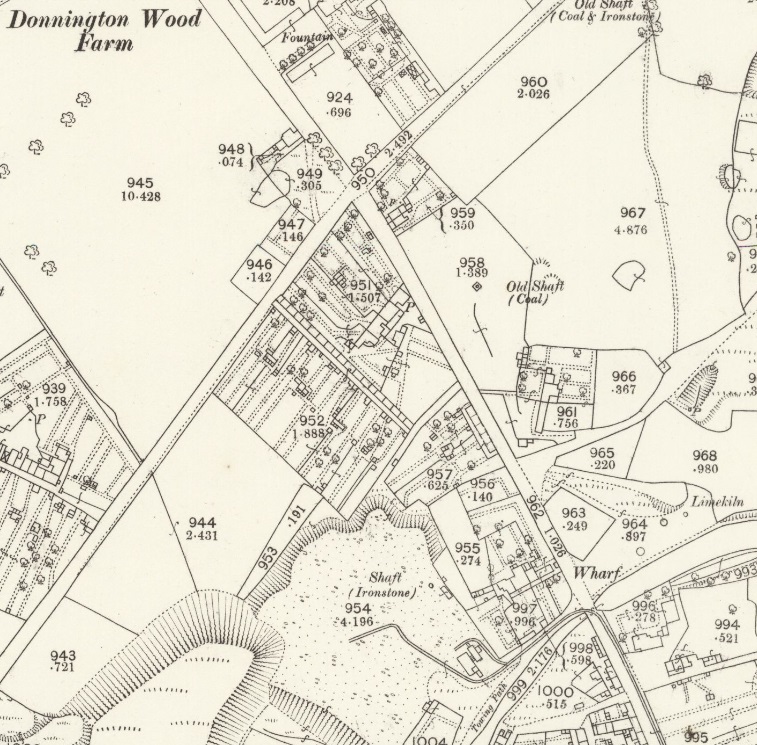
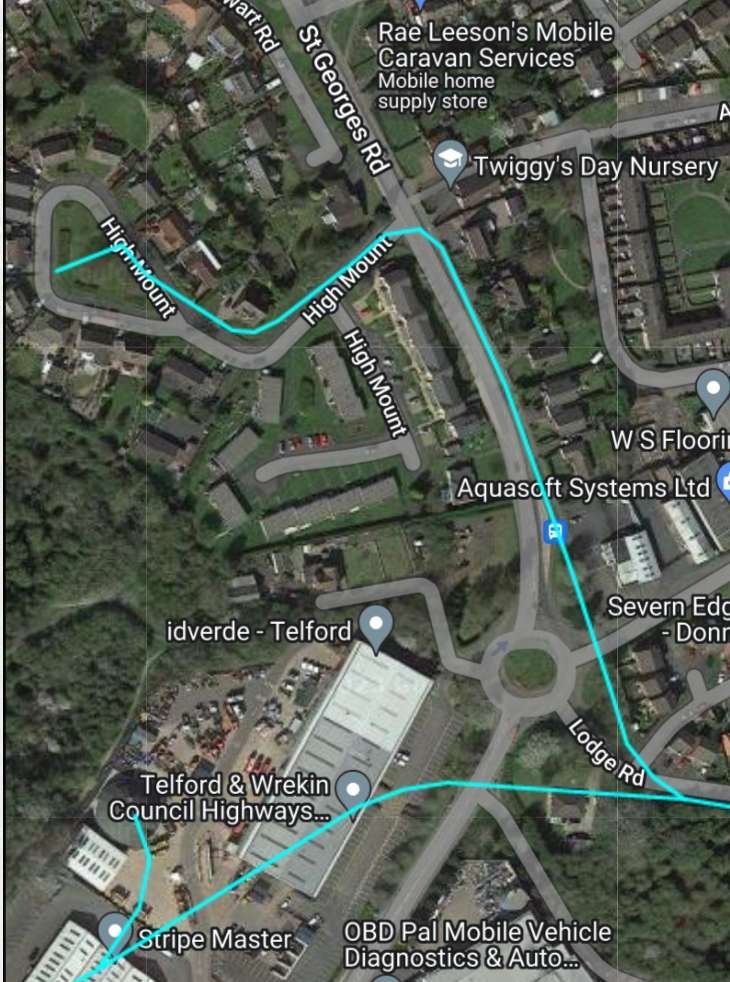
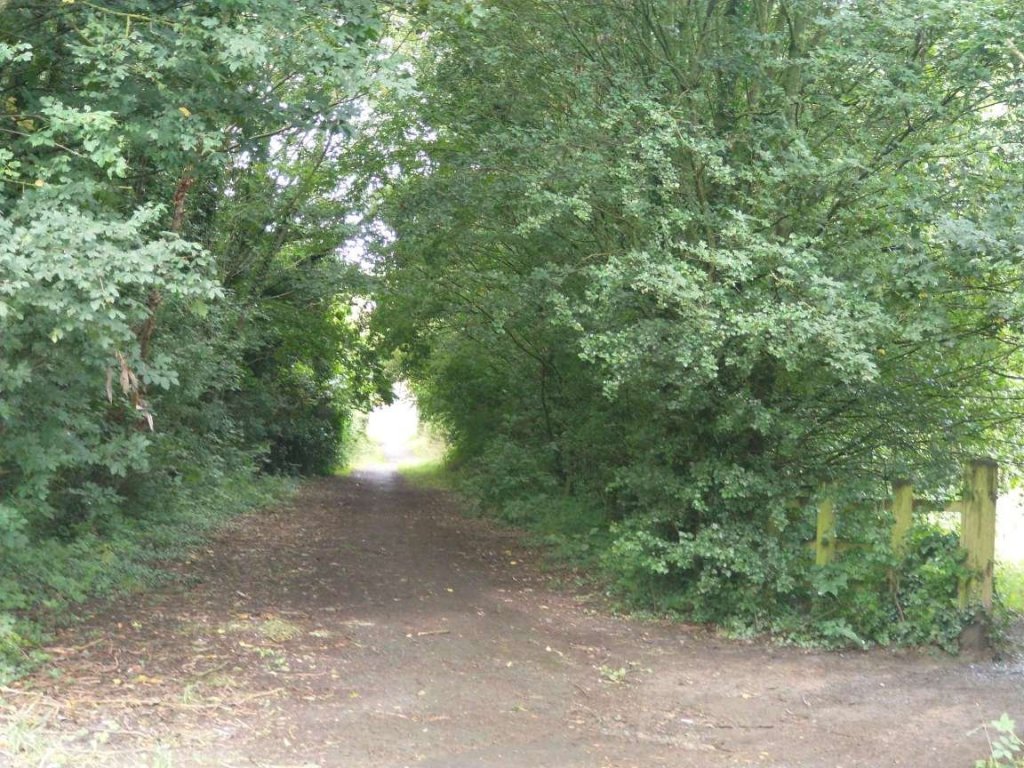
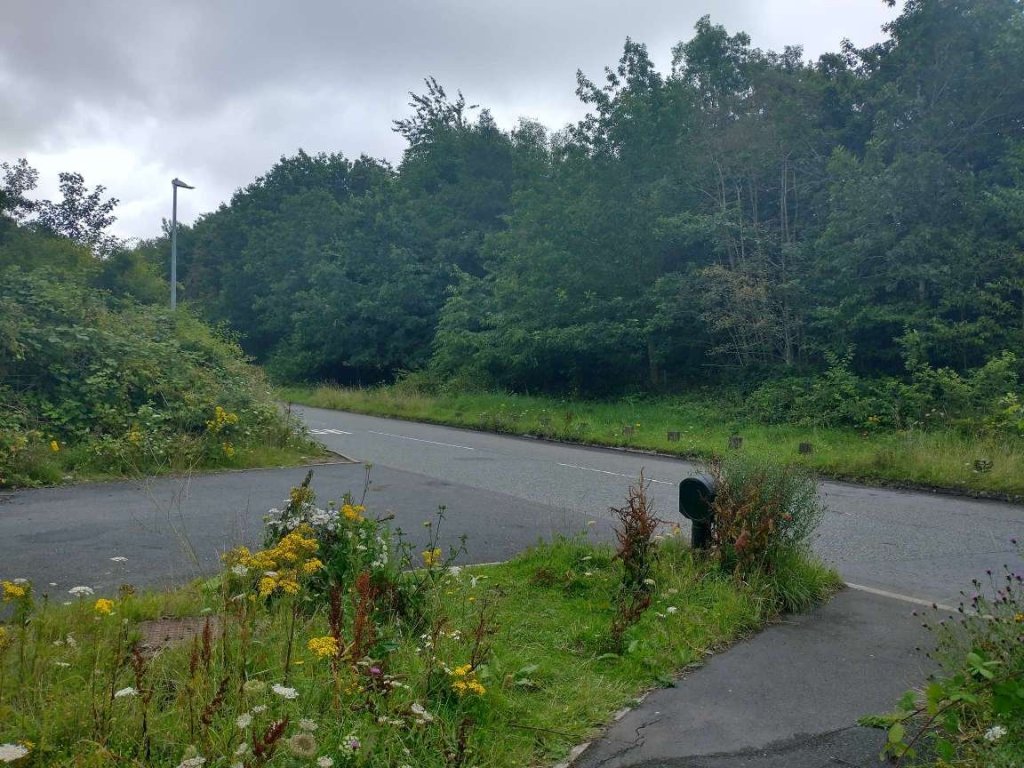
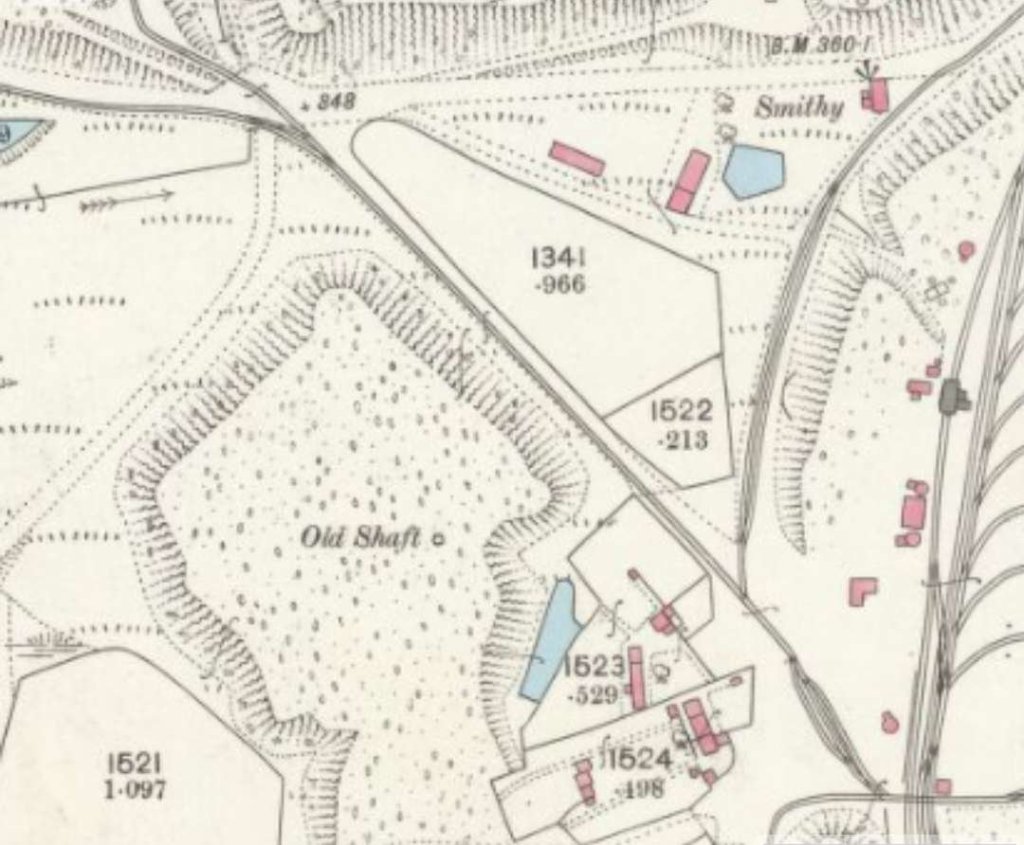
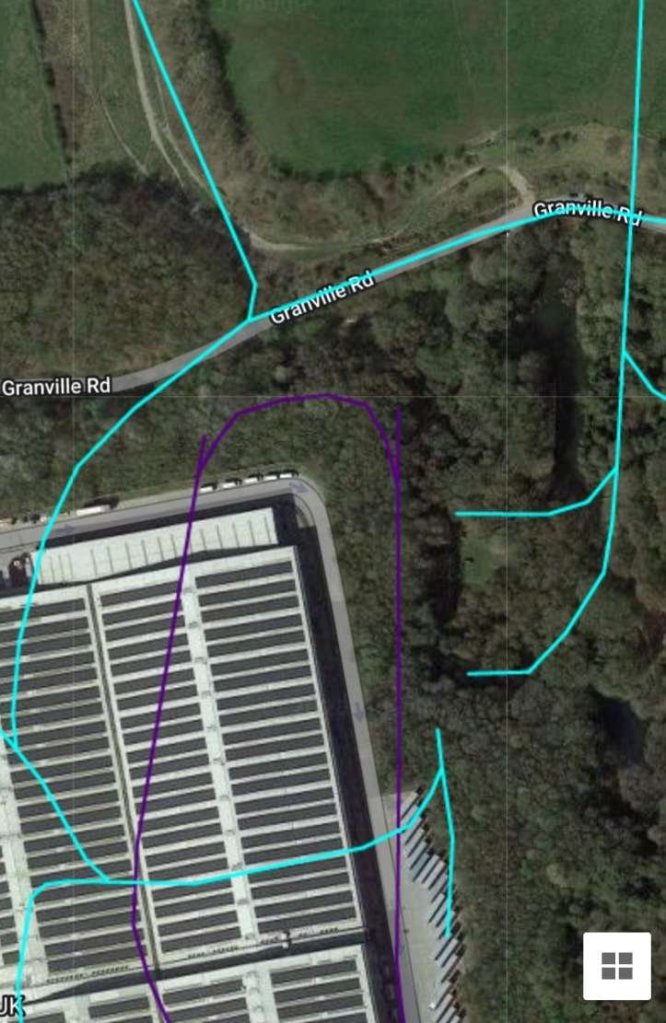
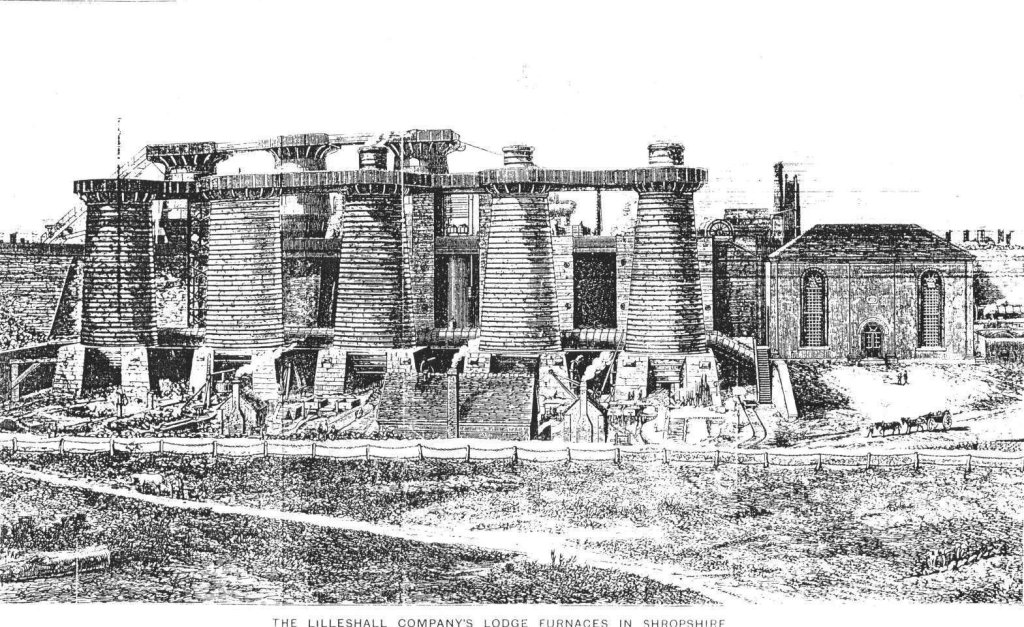
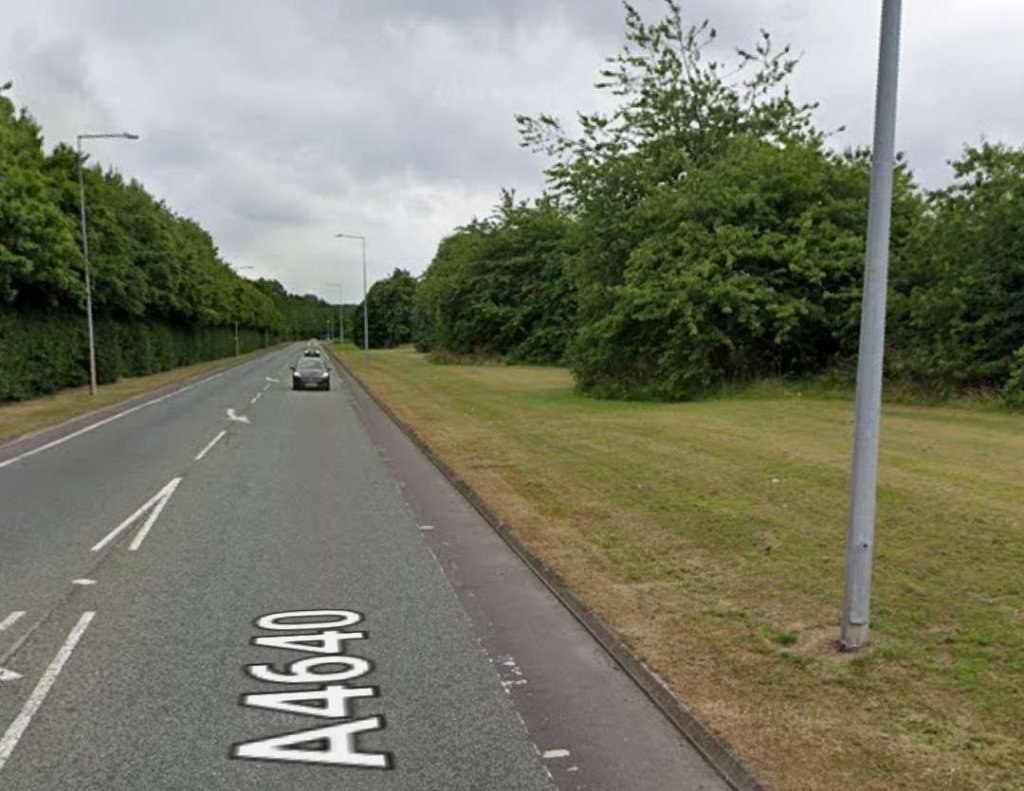
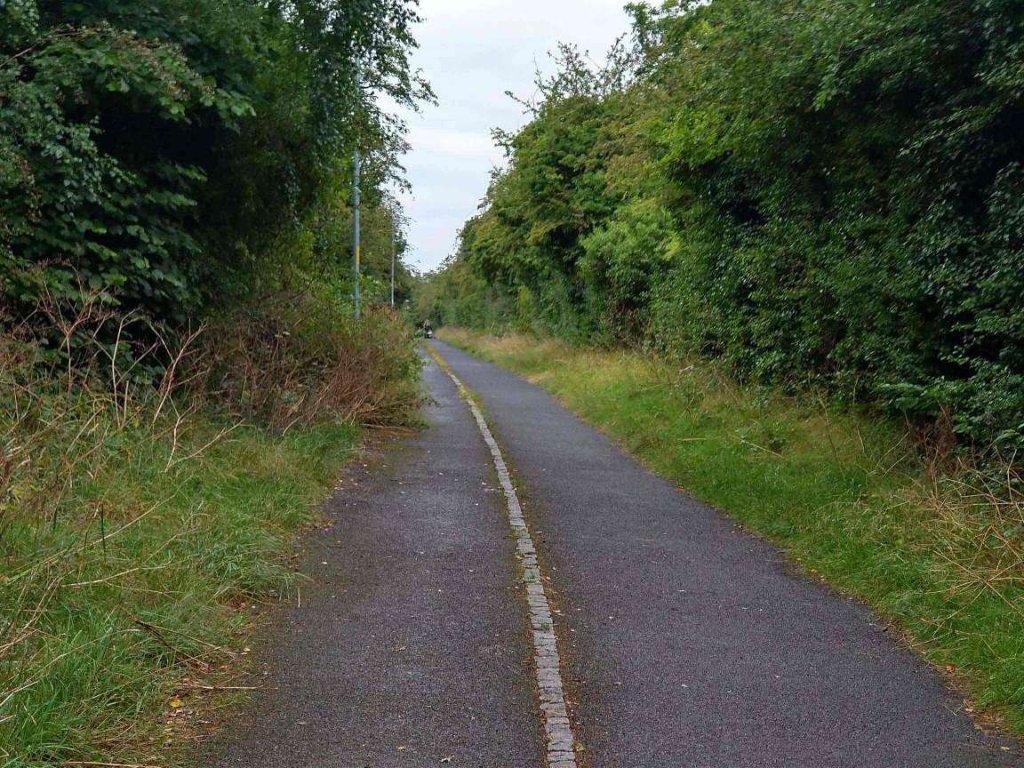
A first smaller-scale extract from the 25″ Ordnance Survey of 1882. [7]Following Wrekin Drive to the South on Google Streetview, the road entering the image from the left is Turreff Avenue. [Google Streetview, June 2022]Wrekin Drive heading towards its junction with Queen Road/Oakengates Road, still on the line of the old tramway. [Google Streetview, June 2022]This 25″ map extract from the 1882 Ordnance Survey shows (centre-top) the point at which the old tramway route crossed what is now the junction between Wrekin Drive and Queens Road/Oakengates Road. From this point on the road name changes to St. George’s Road. In the bottom-left the crossing point over the Donnington Wood Canal can be seen with tramway rails still in place to serve the Ironstone shaft which appears centre-bottom of the extract. [7]This extract from Google Maps covers the length of the old tramway route from the North edge of the extract above to the South edge of the next map extract below. [Google Maps, July 2023]This extract from the RailMapOnline satellite imagery shows the old tramway in turquoise overlaid on St. George’s Road and Lodge Road. [10]The view South from Wrekin Drive onto St. George’s Road at the crossroads with Queen’s Road and Oakengates Road. [Google Streetview, June 2022]The view South across the point where the old tramway crossed the Donnington Wood Canal. The road on the right is High Mount which follows the old canal towpath. The canal itself is long-gone. [Google Streetview, June 2022]Further to the South, the connection is made between the tramway crossing the Canal and the wider tramway network. The road entering the bottom the extract and running Northeast toward the tramway is now St. George’s Road. Its extension to the East of the tramway is Bradley Road. The tramway curves round from what is now the South-southeast bound St. George’s Road onto what is now Lodge Road. [7]As St. George’s Road veers to the right to meet the roundabout ahead the old tramway alignment runs through the bus stop and trees parallel to the footpath on the left of the image. [Google Streetview, June 2022]The old tramway crossed what is now Bradley road and then turned to the left along what is now Lodge Road, joining the wider tramway network. [Google Streetview, June 2022]The view Southeast from the roundabout along Lodge Road. The old tramway ran on the South side of the road. [Google Streetview, June 2022]The tramway followed the South side of what became Lodge Road. [7]The tramway and Lodge Road only just touched the top-right corner of this 25″ OS sheet published in 1882. [14]This RailMapOnline image shows the approximate route of the tramway from the modern roundabout and across Donnington Wood Way heading towards Old Lodge Furnaces in what is now Glanville Country Park. Its Eastern edge is in approximately the same location as the Eastern edge of the OS map extract immediately above. The turquoise line running left to right across the image is the approximate line of the tramway. The 1882 OS map extracts show the line running within the carriageway, but on the South side, of Lodge Road. [10] Lodge Road looking East. The track on the left is an arm of Lodge Road. Ahead the road is gated and now-a-days narrows to a tarmacked footpath leading towards Donnington Wood Way. [Google Streetview, July 2018]Looking West along Lodge Road footpath from a point 30 metres or so beyond the gate. [My photograph, 27th July 2023]Looking East along Lodge Road towards Donnington Wood Way. [My photograph, 27th July 2023]Looking back West along Lodge Road from the pelican crossing on Donnington Wood Way. [My photograph, 27th July 2023]Looking East across Donnington Wood Way from the same location. The bollards on the opposite side of the road mark the continuing line of Lodge Road and the old tramway. [My photograph, 27th July 2023]Travelling further to the East and on the next OS sheet, the tramway continues East-southeast along Lodge Road which is shown as a relatively wide track. [15]This image from RailMapOnline covers a similar length of the tramway as does the OS map extract above. [10]Looking Southeast from Donnington Wood Way along the route of the tramway. In the past Lodge Road was a wider track, the tramway continued to run just inside the South verge of the track. [Google Streetview, June 2022]Looking back along the line of the old tramway towards the modern Donnington Wood Way. [My photograph, 27th July 2023]Turning through 180°, this is the view Southeast along the line of the tramway. [My photograph, 27th July 2023]Around 100metres further to the Southeast, this is the view back towards Donnington Wood Way. [My photograph, 27th July 2023]And again, Turning through 180°, this is the view Southeast towards Old Lodge Furnaces. [My photograph, 27th July 2023]At the bottom-right of the satellite image above, and at the top-left of the satellite image below, this is the view along the line of the old tramway where it crosses Granville Road. The line ran through the trees ahead curving round a little towards the South but still generally on a Southeast bearing. [My photograph, 27th July 2023]This next map extract from the 25″Ordnance Survey published in 1882 shows the line curving round to the Southeast and passing a series of spoil heaps before arriving at the site of Old Lodge Furnaces. [15]This RailMapOnline image is approximately the same width as the map extract above. The tramway route we have been following enters top-left and runs diagonally across to the right edge of the image. Modern industry now occupied the Western part of the Old Lodge Furnaces site. [10] The site of Old Lodge Furnaces as it appears on the 25″Ordnance Survey of 1882. The tramway enters the site at the bottom-left of this map extract. [15]Covering approximately the same area as the map extract above, this image, from the RailMapOnline satellite imagery shows the area of Old Lodge Furnaces as it appears in the 21st century. The turquoise lines are tramways, the purple lines are the later standard-gauge Mineral Railways of the Lilleshall Company. [10]This is a close-up of part of an information board in Glanville Country Park. It shows Old Lodge Furnaces as they would have appeared when the tramways provided for their transport needs. The view is from the Northeast. [My photograph, 27th July 2023]
This is as far as we follow the old tramway which served the Humber Arm, as the tramways near Old Lodge Furnaces will be covered in greater detail elsewhere. It is worth noting that a significant investment was made in the transport facilities at the site which depended, while open, on a series of tramway branches to supply the furnaces and to take away the iron that they produced.
Old Lodge Furnaces. [21]
The Friends of Granville Country Park’s website provides a general introduction to the history of the Old Lodge Furnaces: … [22]
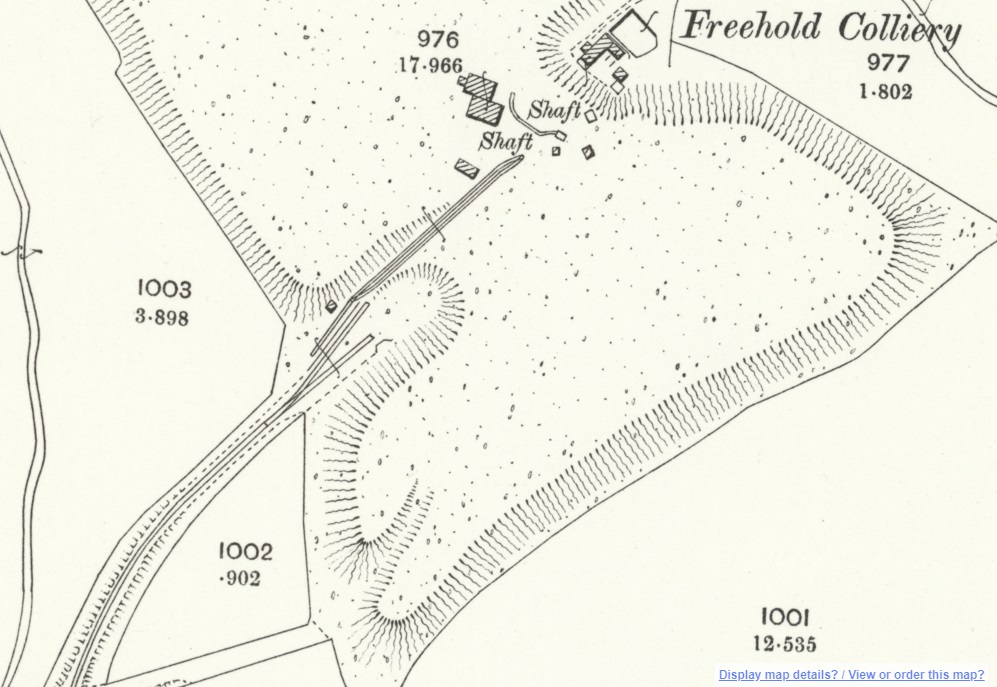
In 1824 the company brought into blast two new furnaces near the site of the Old Lodge. They were named the Old Lodge furnaces because of their proximity to the site of an old hunting lodge which was demolished in 1820. In March 1825 the Lilleshall Company paid the Coalbrookdale Company £2392 for (presumably) a Blast Engine. George Roden, a stonemason from the Nabb, was paid £425 in 1825 and £777 and 5 shillings in 1826 for erecting loading ramps and the retaining walls. In 1830 the Donnington Wood and the Old Lodge ironworks together produced 15,110 tons. A third furnace was added in 1846 and two more in 1859.
New blast beam engines, manufactured by the Lilleshall Company, were installed in 1862 and the height of the furnaces was increased from 50 to 71 feet at about the same time. Limestone came, via the canal, from the Lilleshall quarries and the coal (coke) and iron stone from the local pits via an extensive system of tramways, some of which, were later converted to standard gauge railways. The 1882 map show this series of transport plateways to transport the materials to the top of the furnace, and remove pig iron the furnace bottom.
The Old Lodge Furnaces produced cold-blast pig iron of the finest quality, but eventually it could not compete with cheaper iron made elsewhere and in 1888 the last of the Old Lodge furnaces was blown out 1888. The furnaces were demolished in 1905 by Thomas Molineaux Jnr, including a tall chimney 140 feet high by 13 feet diameter, known locally as “The Lodge Stack”. In 1956 the stone was reused for St Mathew’s Church. Thereafter the company concentrated all its iron and steel making at Priorslee. [22]
The Mineral Railway
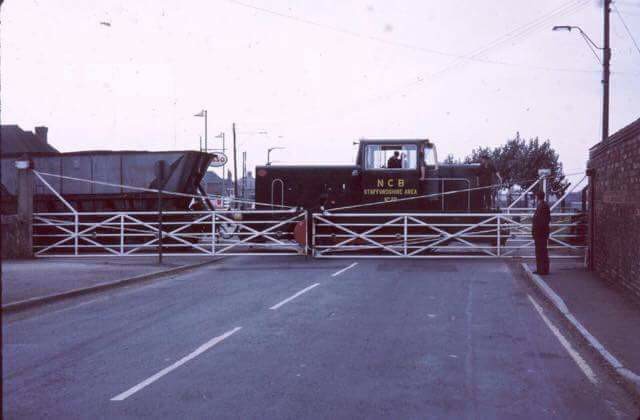
We return now the the overbridge which carried the LNWR over the tramway and the later mineral railway which curved round to the East after passing under the bridge. The length from Lubstree Wharf to the LNWR overbridge is covered above. Charles Hadfield explains that in 1870, anxious to save money on the Trench Incline, the Canal company “agreed to lease Lubstree wharf on the Humber Arm of the Newport branch from the Duke of Sutherland and pay a wharfage rate of 0.5d/ton, so that the coal and other traffic from Lilleshall could be shipped there. To carry it, 30 boats were taken from the company’s fleet, and others ordered to replace them. New accommodation was provided, and a railway line built from Lubstree to the Lilleshall Company’s works.” [29: p239]
However, by 1880, “the Humber Arm was only carrying fluxing stone, though two years before the iron ore toll from Ellesmere Port had been specially reduced for the Lilleshall Co. Negotiations for its better use followed, and the [canal] company agreed to take 300-400 tons a week of limestone and 100-150 tons of ore at agreed rates. The Shropshire Union also hoped for a coal trade outwards, and pig-iron to be carried for transhipment to the L.N.W.R. Business seems to have remained brisk for some time after that, for in 1891, when the wharf lease was renewed, another siding was built. In 1905 it was renewed for another fourteen years.” [29: p242]
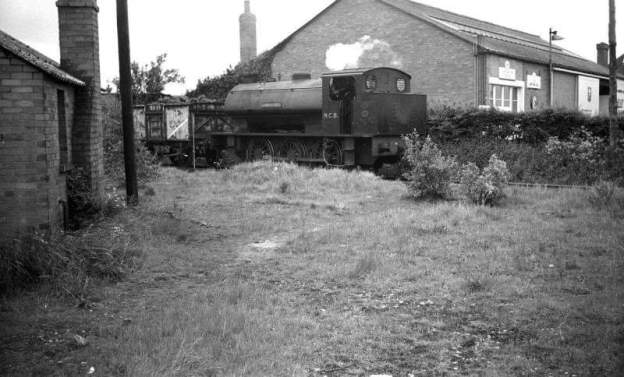
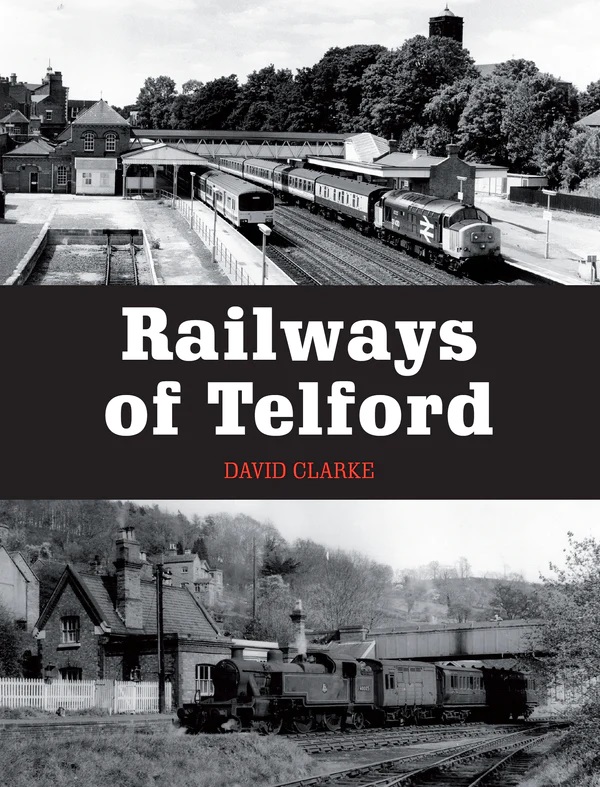
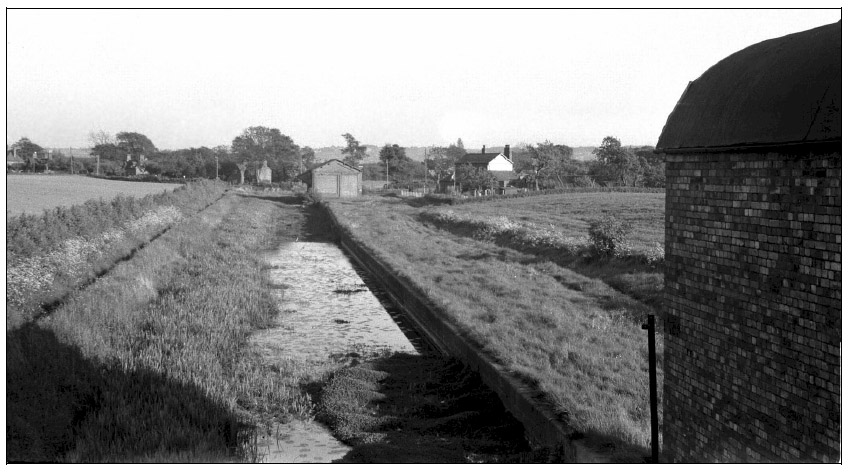
David Clarke the photographer of the image above is also the author of a book about the Railways in the Telford Area published by the Crowood Press. You can find a review of the book on this link.
The canal route can be followed on the Captain Ahab’s Watery Tales blog, so there is no need to repeat it here. [27] The remaining length of the mineral railway to Muxton Bridge Colliery is covered below.
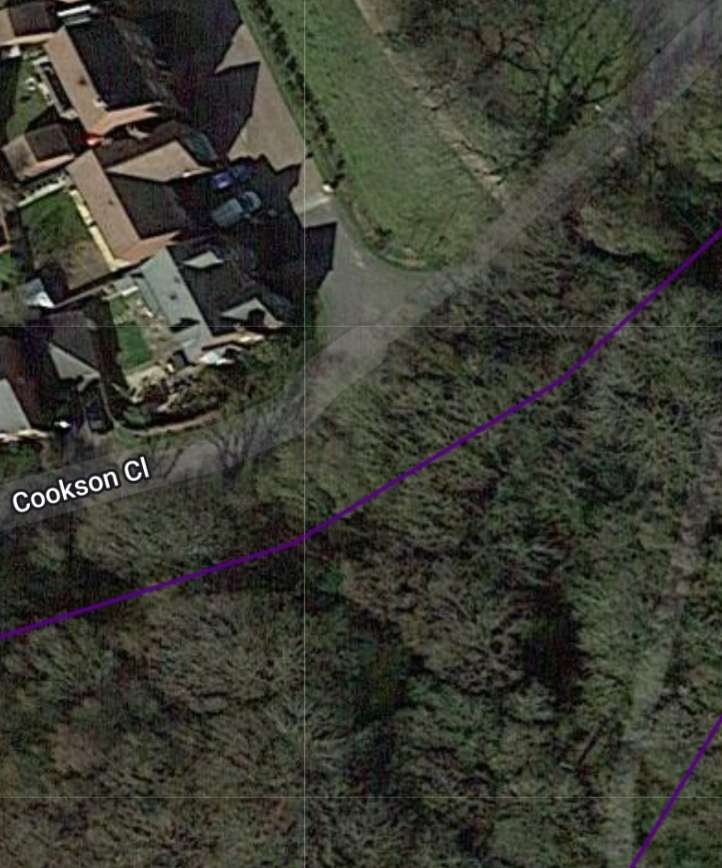
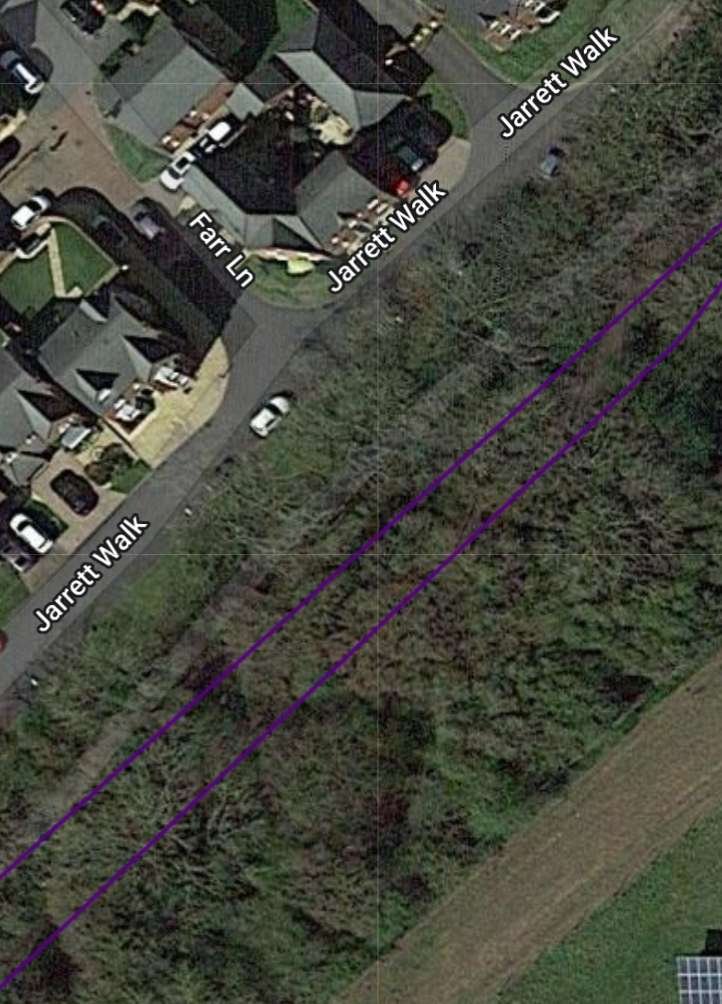
This sequence of 9 extracts from RailMapOnline.com show the same length of the mineral railway as covered by the Ordnance Survey extract above the sequence. [10]Looking Southeast along Cookson Close from a point close to the roundabout on Donnington Wood Way. The old tramway ran through the trees to the right of the fence visible in this image. It ran at a higher level. [Google Streetview, June 2022]Further Southeast, this view looks East along Cookson Close. The old tramway was at a higher level. Its route runs beyond the fence and trees at the right of this image. [Google Streetview, June 2022]Cookson Close curves round towards the Northeast before reaching a modern development boundary. A short footpath takes us to Jarrett Walk. This photograph is taken at the point where we join Jarrett Walk and looks Northeast. The old tramway route ran at a higher level beyond the fence and trees to the right of this image. [Google Streetview, June 2022]As we reach the far boundary of this development, Jarrett Walk turns away to the Northwest. The old tramway route continues ahead parallel to but beyond the fence to the right and at a higher level. [Google Streetview This next extract from the 1881 25″ Ordnance Survey shows Muxtonbridge Colliery, which was served by the mineral railway, Muxtonbridge Farm and the Donnington Wood Canal arm meandering its way Northeast towards Lilleshall Grove Lilyshall Abbey and Lilyhurst Road. [26]These last two extracts from RailMapOnline.com show the last length of the mineral railway that served Muxtonbridge Colliery. [10]
Both Waxhill Barracks Collery and Muxtonbridge Colliery closed at around the same time at the turn of the 20th century. [22] Muxtonbridge Colliery was active from 1890 to 1905. Waxhill Barracks Colliery had a longer life, 1818 to 1900.
The remains of Muxton Bridge Colliery pumping engine house is a listed ancient monument. [28]
We have now looked beyond the immediate length of the Humber Arm of the Newport Branch of the Shropshire Union Canal and the Lilleshall Company’s tramways and mineral railways in the immediate area of the canal arm. We have covered the old tramway between the Canal and Old Lodge Furnaces and a significant length of the later Mineral Railway, so as to get an impression of the area that the Lubstree Wharf served when it was active.


Pingback: The Canals, Tramways and Railways of East Shropshire – The Lilleshall Company – Old Lodge Furnaces and Granville Colliery | Roger Farnworth