In the first two articles about tramroad routes centred around Malinslee I have looked at the tramroads which appear on the 6″ OS Map of 1881/82 (which was published in 1880) and which were located to the West of the Stirchley Ironworks. These can be read by following the links immediately below:
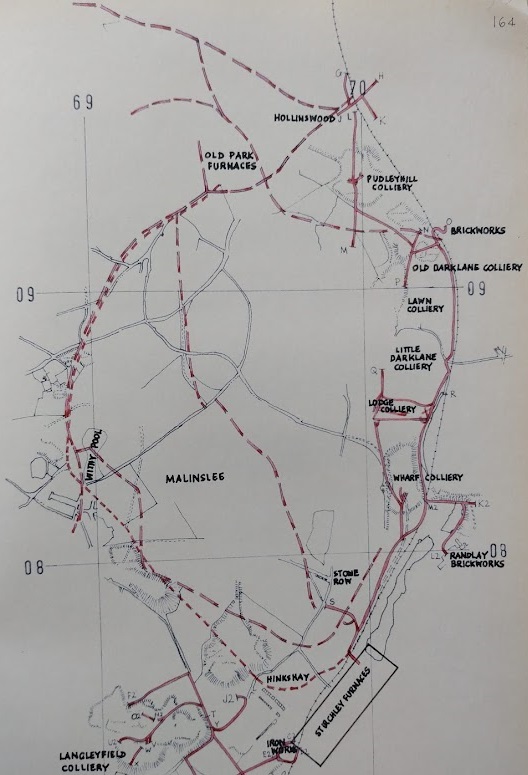
The map below traced by Savage & Smith in The Waggon-ways and Plateways of East Shropshire, shows how extensive the network of tramroads in the area was. [1: p164] Even so, the plan is not exhaustive. We have already encountered the tramroad which served Little Eyton Colliery. This appeared in the first part of this series centred on Malinslee for which the link is provided above.
It ran along the lane shown to the North of Langleyfield Colliery on the plan below. The slag heap from Little Eyton Colliery is shown on the sketch plan.
It is important to understand that the tramroads shown on the plan below did not necessarily all exist at the same time. Savage & Smith illustrated their routes with different symbols. The solid red lines denoted lines whose position is exactly known. The lines shown by the shorter dashes are those which appear on the 1833 1″ OS Map of Shropshire. Savage & Smith note that these lines are shown scaled up from the 1″ map but without any alteration to fit the landscape which is shown in more detail on later OS Mapping. [1: p103] The longer dashed lines are tramroad routes shown on the half-inch map of the Shropshire Railway from Shrewsbury to Wolverhampton of around 1836 and which have similarly been enlarged. Savage & Smith were confident, in 1965, with some degree of certainty, that the routes shown below were in commercial use at some time, many in the period prior to the coming of the standard-gauge railways. [1: p103]
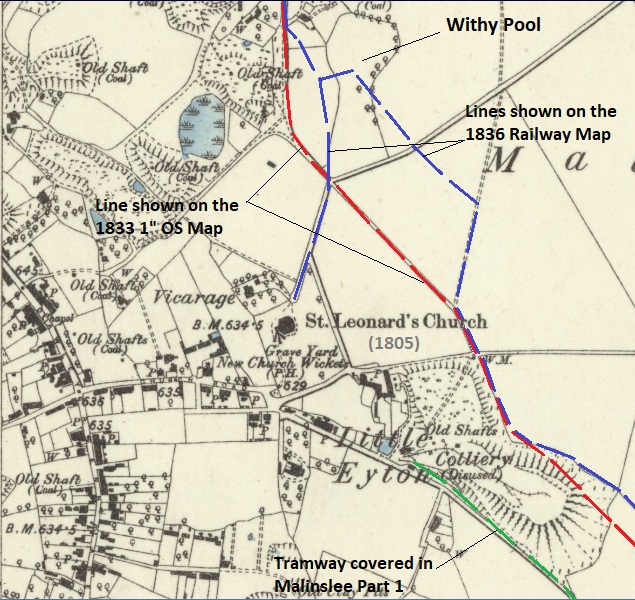
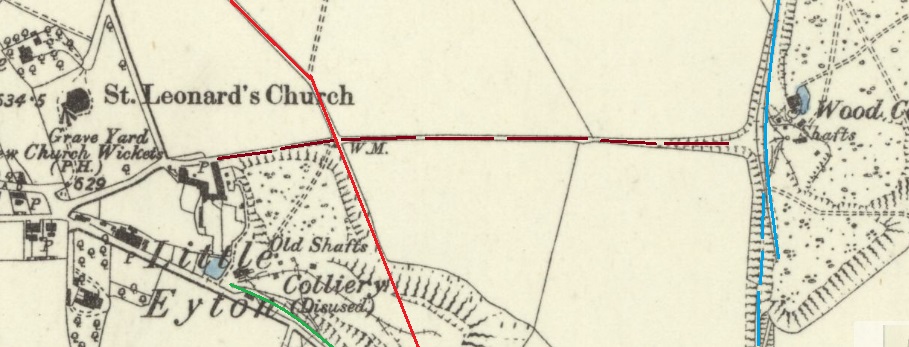
We begin this next survey by looking at the area immediately around St. Leonard’s Church. The Church is not shown on the tracing undertaken by Savage & Smith. Their traced routes have been transposed onto the 1881/82 6″ Ordnance Survey in the image below.
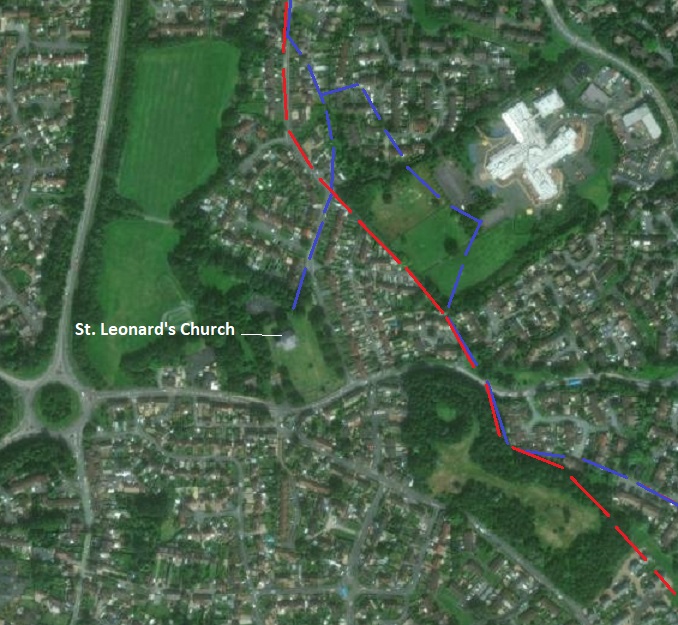
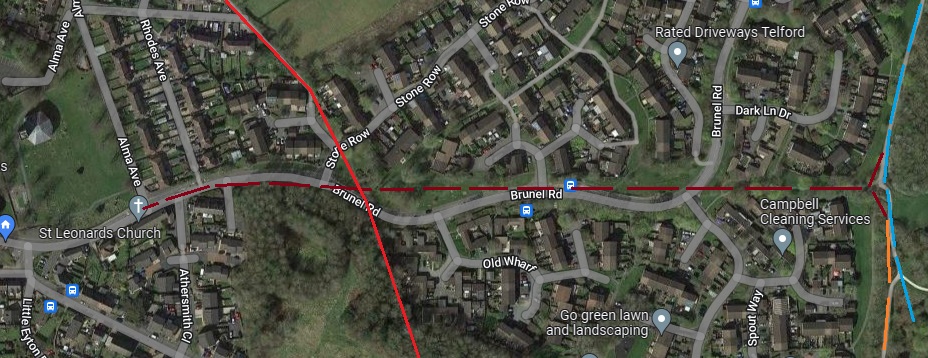
Tramroad routes superimposed on the 1881/82 6″ OS Map of the area immediately around St. Leonard’s Church Malinslee. The routes have been marginally adjusted from those shown by Savage & Smith to align with features on the 1881/82 mapping as appropriate [1: p164][2]This extract from the ESRI satellite imagery provided by the National Library of Scotland (NLS) shows approximately the same area as that covered by the 1881/82 OS Map extract above. The mauve and red lines on the map extract have been transferred onto the satellite image. It is relatively easy to follow the route of the tramroad as shown on the 1833 1″ Ordnance Survey (red line). In places it is much more difficult to do so for the tramroad line shown on the marginally later railway maps (mauve line). [3]
We start looking at the mauve line on the image above, which seems to run to St. Leonard’s Church from the North. We will follow the route Northwards to Hollinswood…
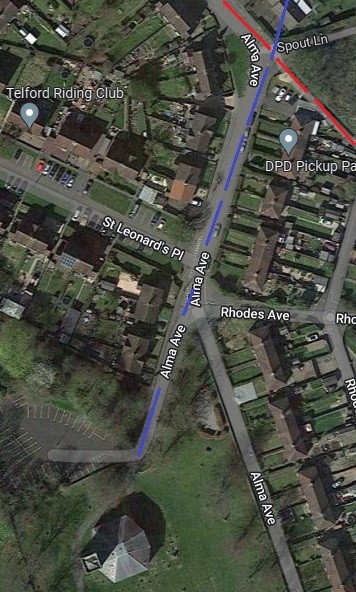
Google Earth provides a higher quality of satellite image than the NLS is able to do. This extract shows the church at the bottom of the image. The carpark area to the Northwest of the Church is where the old vicarage used to be sited. The route shown by Savage & Smith is marked in mauve. It is difficult, either from old maps or from the features still evident today to establish what this tramroad was intended to serve. The church was built in 1805. [4] This may possibly have postdated the tramroad and by its construction the then disused tramroad would have been severed?
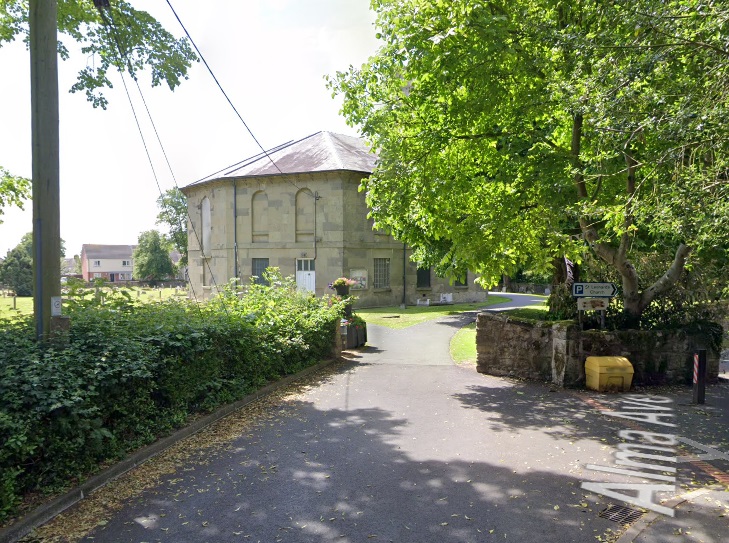
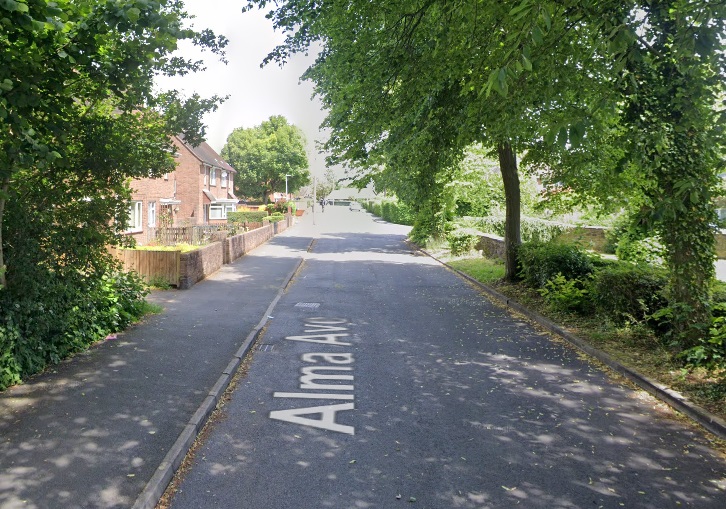
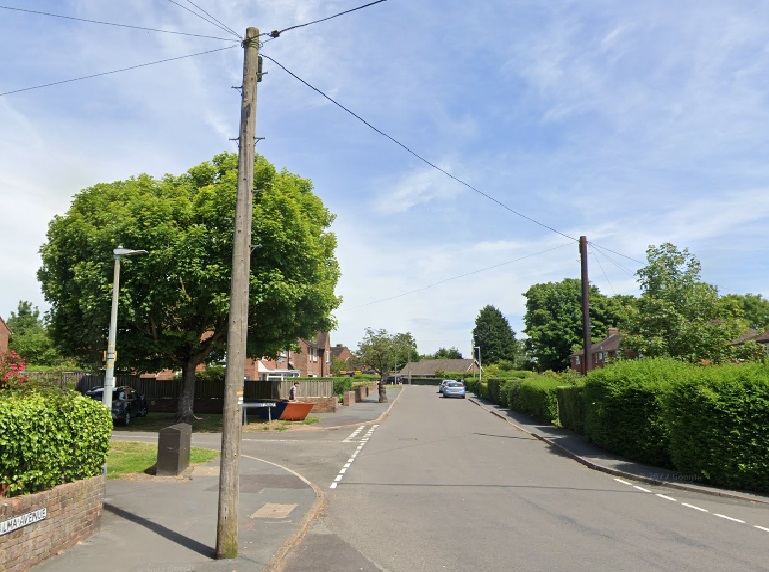
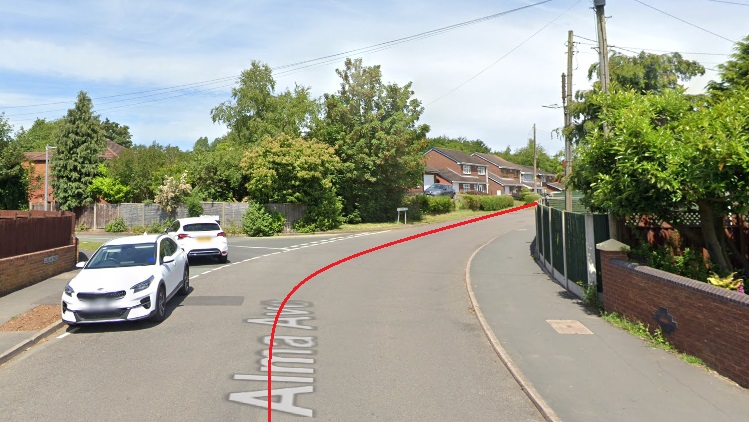
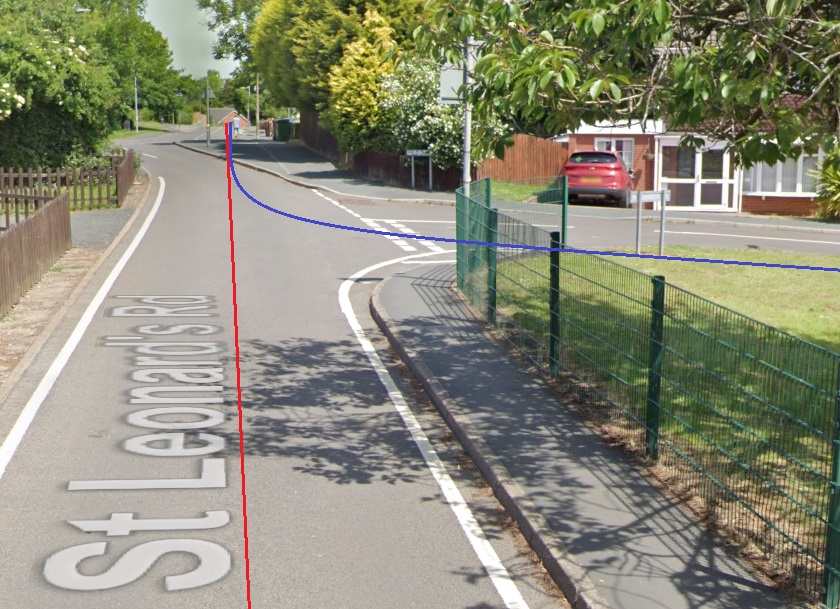
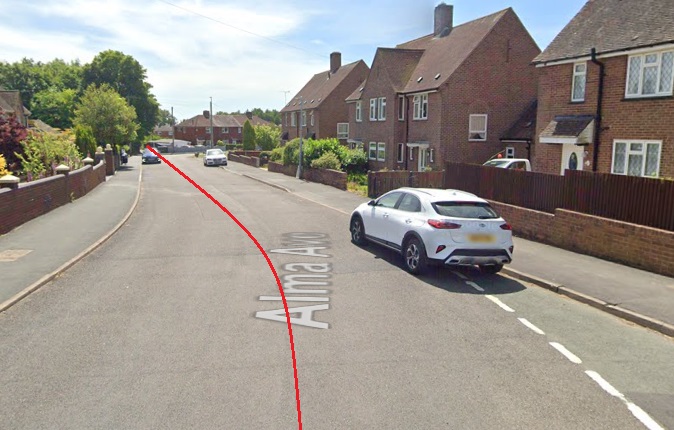
Looking Southwest along what may have been the truncated line of an old tramroad. [Google Streetview, June 2022]Lookin Northeast along the route of the tramroad from the same position. [Google Streetview, June 2022]This photograph is taken at the junction of Alma Avenue and St. Leonard’s Place looking North-northwest along the route of the tramway identified by Savage & Smith [Google Streetview, June 2022]The intersection of the two tramroad routes on Savage & Smith’s plan. Savage & Smith show the mauve route running under properties to the East side of Alma Avenue. We pick the route up again after following the red tramroad route for a short distance along Alma Road and then St. Leonard’s Road to the left. [Google Streetview, June 2022]The red route follows Alma Avenue and them St. Leonard’s Road. [Google Streetview, June 2022]The two tramroad routes coincide again close to the junction of St. Leonard’s Road with Field Close. [Google Streetview]
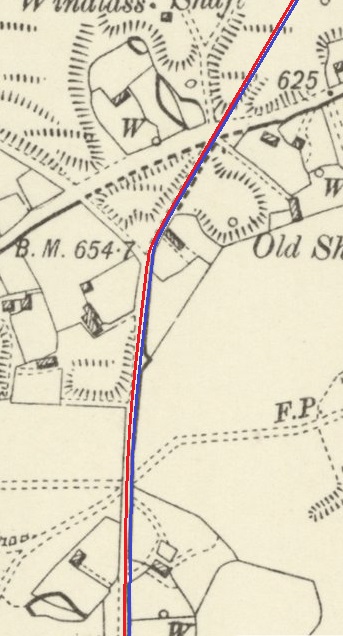
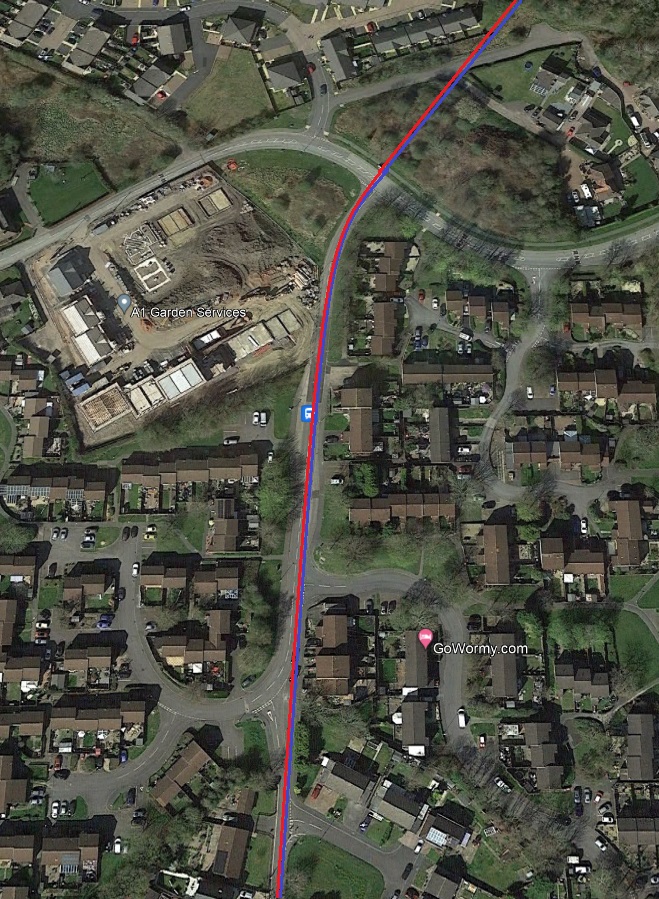
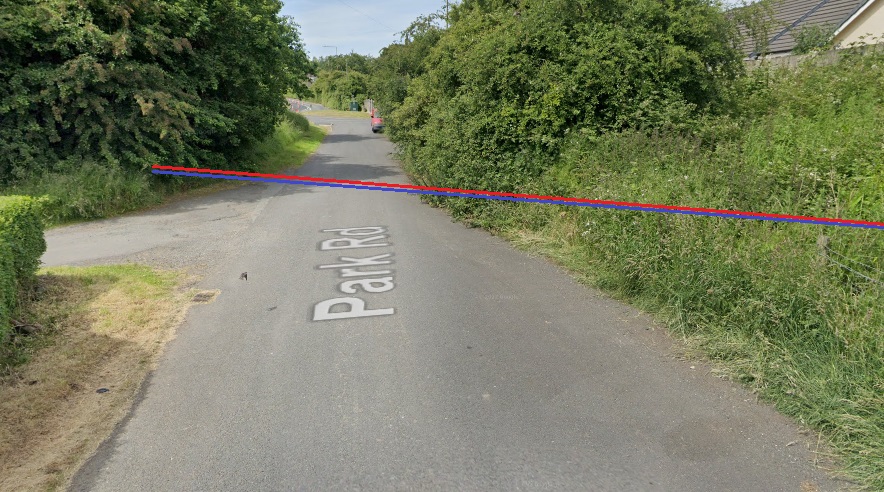
The next length northwards is imposed first on the 1881/82 6″ Ordnance Survey [2] and then on satellite imagery from Google Earth. [Google Earth, 4th April 2021]. There is little worthy of comment, over the majority of this length the old tramroad rout has been retained as a metalled road. Towards the top of the extracts the tramroad route is shown crossing what was a more major road (Park Road) until development of Telford New Town led to roads being realigned and replaced. Park Road as shown on the 6″ Map extract can be seen as terminating just to the East of the point where the old tramway route(s) crossed it on a relatively shallow angle. [5]
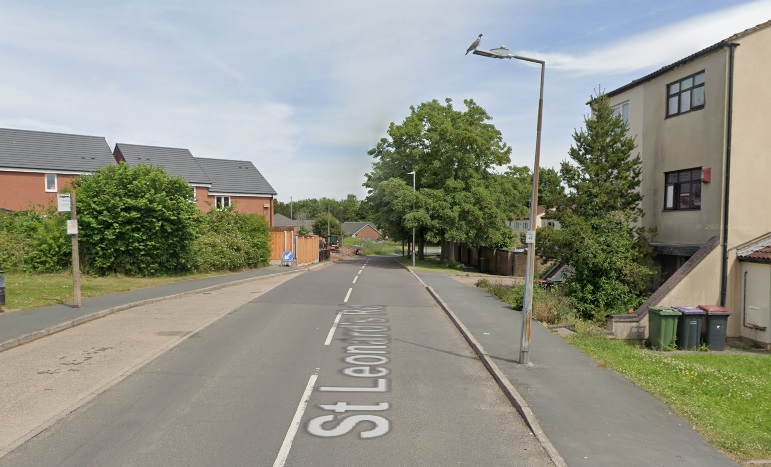
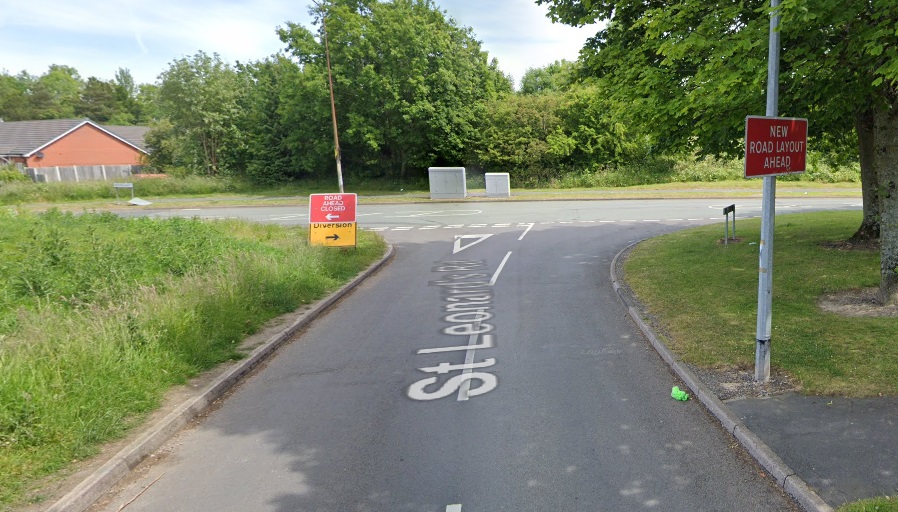
The line of the old tramroad imposed on modern satellite imagery. [Google Earth, 4th April 2021]Looking North along St. Leonard’s Road. The road follows the route of the old tramroad. [Google Streetview, June 2022]The junction of St. Leonard’s Road and Royal Way. The route of the old tramroad runs approximately through the gap between the two distribution boxes on the far side of Royal Way. Park Road runs in front of the fencing in the distance on the left side of this image. [Google Streetview, June 2022]Looking West along Park Road. The tramroad route crossed Park Road on the diagonal just to the West of the driveway shown on the left of this image. [Google Streetview, June 2022]
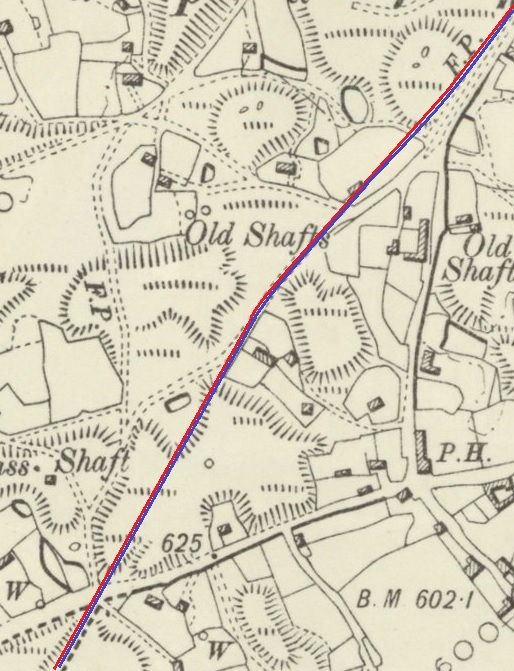
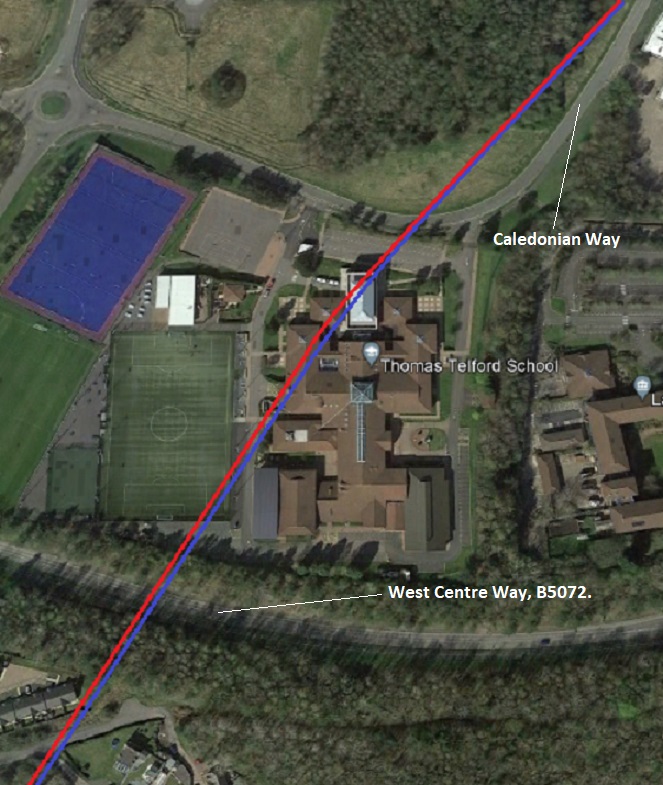
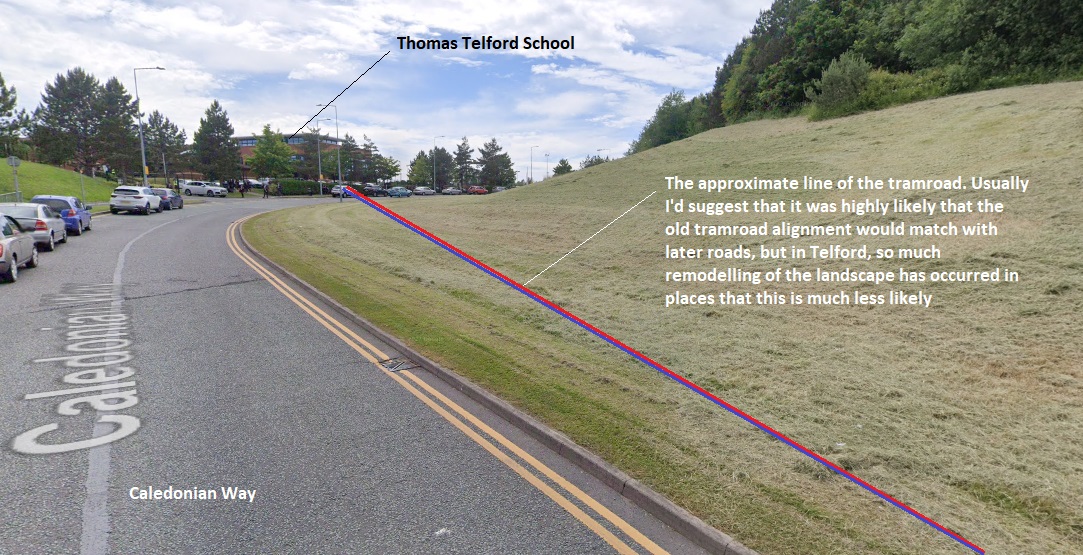
Both of the older maps consulted by Savage & Smith show the same route for the old tramroad. Between Park Road that the top of this extract much of the route was lost under old slag heaps associated with mine workings which postdated the tramroad. The area is now lost under Thomas Telford School and the Land Registry. The road at the top-right of this map extract is now Caledonian Way. [6]
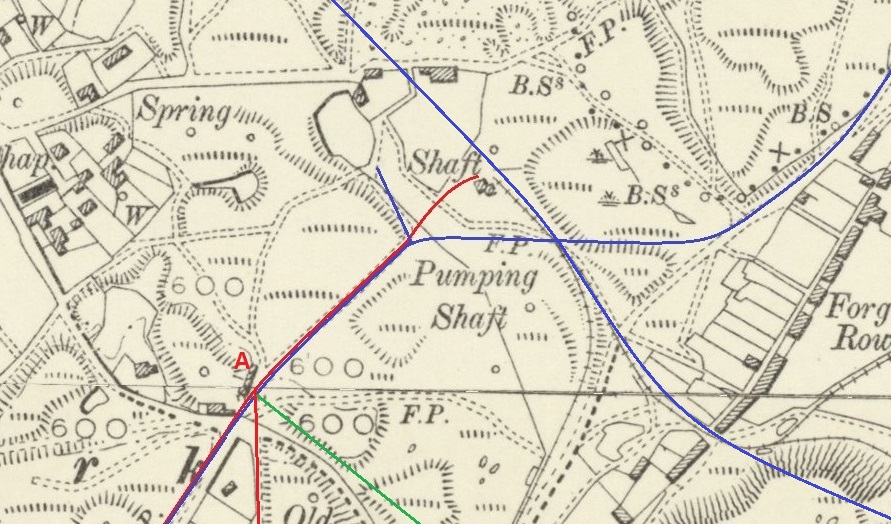
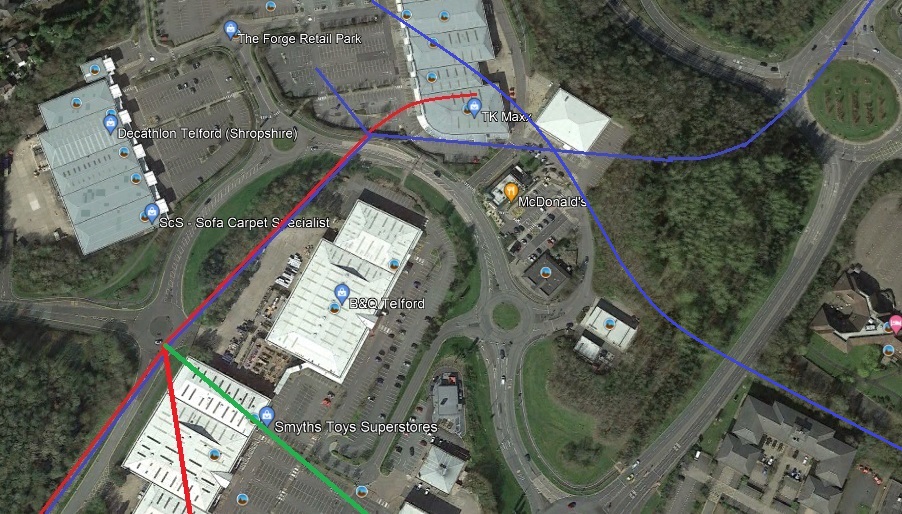
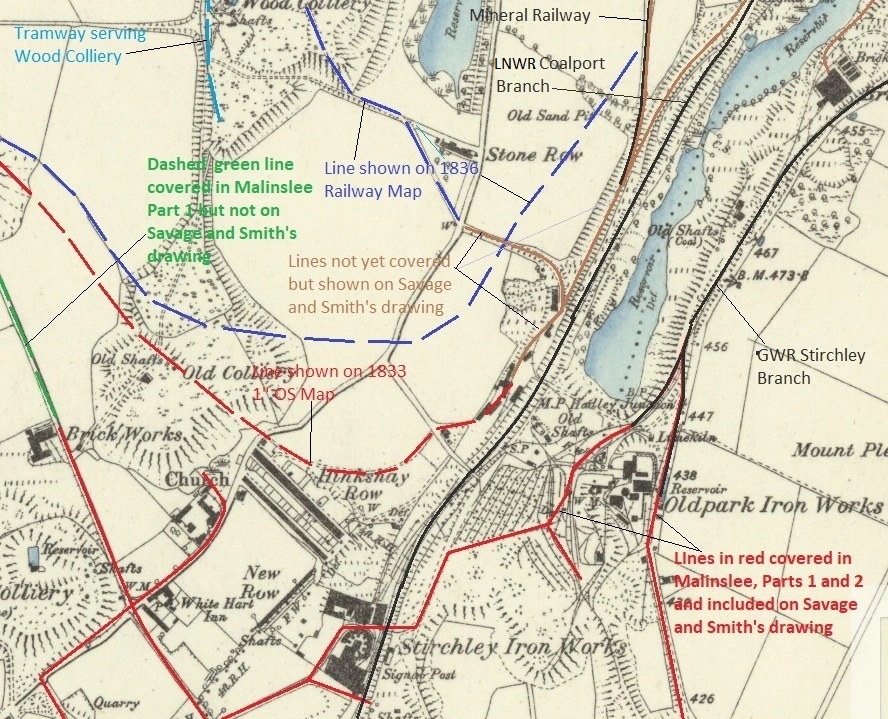
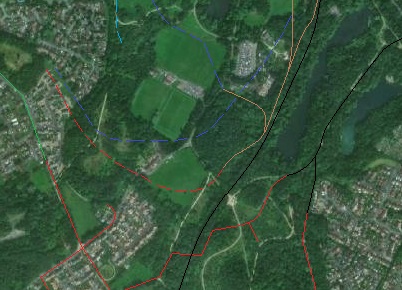
The approximate route imposed once again on the matching area on modern satellite imagery. [Google Earth, 4th April 2021]Looking West along West centre Way. The red/mauve line indicates very approximately the line of the old tramroad. We have nothing to assist us with determining the relative levels of the modern road and the old tramway. [Google Streeview, June 2022]The view looking South West along the line of Caledonian Way. [Google Streetview, June 2022]Looking Northeast from the same point. [Google Streetview, June 2022]The 6″ Ordnance Survey again (surveyed 1901, published 1903). [7] The map extract shows the area of what was Old Park Furnaces/Ironworks and Brickworks. The red lines continue to show the route of the tramroad as shown on the 1833 1″ Ordnance Survey. The mauve line entering the extract bottom-left and leaving top-right continues to shows one of the tramroads plotted by Savage & Smith on the railway maps referred to above. [1: p164] The green line shows the approximate route of a tramroad not included on Savage & Smith’s drawing. [1: p164] That branch-line appears on the British History Online plans below. We also need to note the presence of the later mineral railway that features on this and other map extracts. Those lines need to be looked at in a different article as they postdate the tramroads we are looking at by a number of decades! However, on this map there seems to be a significant correlation between the likely alignment of the tramroad represented by the mauve line which was plotted by Savage & Smith [1: p164] running into the map extract from the bottom-right and one of the mineral lines shown on the OS map. The deviation between the two alignments in the bottom right can be explained by the presence of a significant slag heap sitting over the older tramway alignment.[9]The same area on modern satellite imagery showing development up until April 2022 with the very approximate lines of tramroads superimposed by me. [Google Earth, 4th April 2021]
“Old Park Ironworks Company was started by Thomas Botfield on land leased from Isaac Hawkins Browne’s Old Park Estate. It started with two furnaces but by 1801 it had four blast furnaces in operation as well as a forge and rolling mill. By 1806 it was the largest producer of iron in Shropshire and the second largest iron producer in Britain. The Old Park works passed to the Old Park Company in 1856. This was bought by the Wellington Iron & Coal Company in 1874 but closed in 1877 when this company failed.” [8]
It should be noted that two locations in the Telford Area were, at different times, named ‘Old Park Ironworks’
The webpage introducing the Botfield Papers [11] contains the following:
“In 1815 the Old Park works consisted of four blast furnaces, a forge and associated collieries. Thereafter the business expanded considerably, as two pairs of blast furnaces at Hinksay and Stirchley, on either side of the Shropshire Canal, were brought into operation between 1825 and 1827. By 1830 the enterprise was producing 15,300 tons of pig iron a year, only slightly less than the Lilleshall company who were then the largest producers in Shropshire. In 1830 the forge at Stirchley came into operation and within the next few years two blast furnaces at Dark Lane were also completed.
The Botfield brothers, with the exception of William, had detached themselves from the day-to-day running of the ironworks, and had invested some of their handsome profits in landed property rather than ploughing it back into the family business. Thomas Botfield died in 1843, and his brother William in 1850, and control of the family business passed to their nephew Beriah, whose father, also Beriah, had died in 1813. Beriah Botfield (1807-1863) was MP for Ludlow 1840-1847, 1857-63 and a well known bibliographer who set up a private printing press at Norton Hall, Northamptonshire. The gradual decline of the Botfield family’s business was symptomatic of the Shropshire iron trade’s failure to adapt to modern methods. In 1856 the business was divided up after Beriah Botfield failed to agree terms for the renewal of the lease covering a large part of its territory. In 1877 the Old Park ironworks ceased operations, the consequent social distress being exacerbated by an outbreak of typhoid.” [11]
The location of the Old Park Brickworks and Ironworks near Hollinswood are marked on the British History Online plan below. The later Old Park Ironworks were at the location numbered ‘3’ to the immediate South of Randlay Pool on the plan.
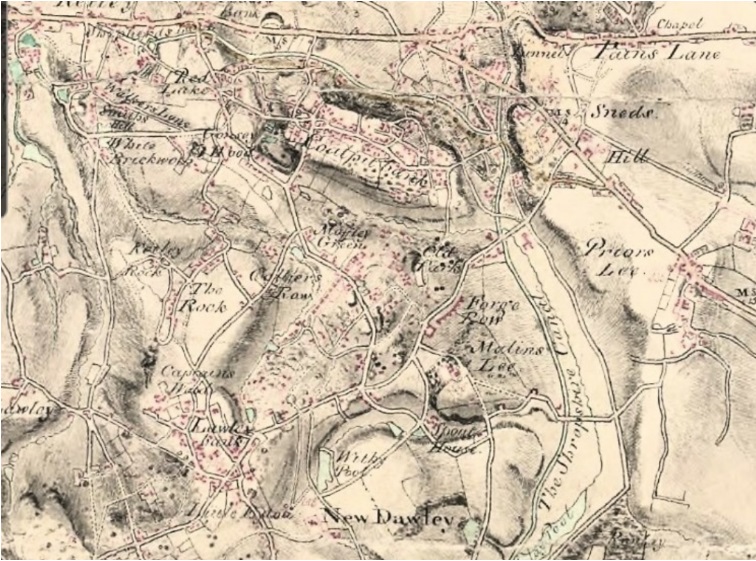
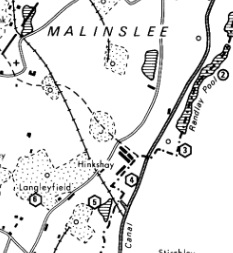
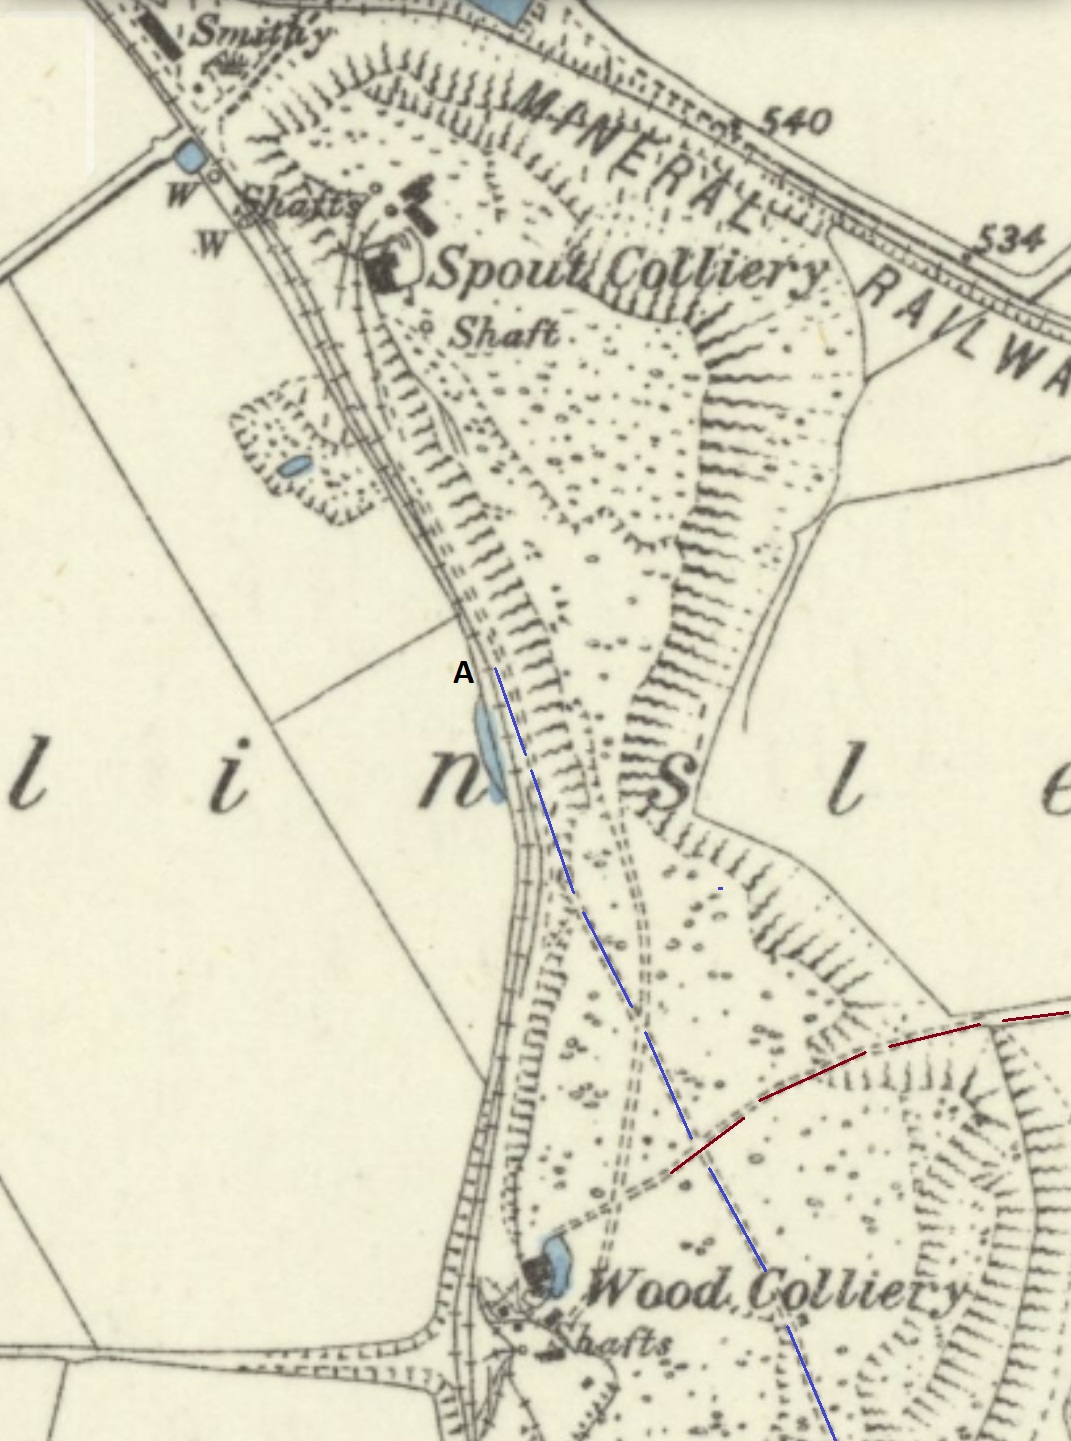
This plan comes from British History Online and shows the area of Dawley in the 1840s. It includes Malinslee which appears towards the top of the plan. Not noted on this plan are the later changes of use and name of some of the local industrial sites. For example the Ironworks numbered ‘3’, ‘4’ and ‘5’ were later to be known as Stirchley Ironworks and Old Park Ironworks. The next image below enlarges a section of this plan. [9]This enlarged extract from the above plan is of interest to us here because it shows waggonway routes extant in the 1840s. The line we are following features clearly at the centre of the image. It runs North from close to Withy Pool (just to the left of the ‘M’ in ‘MALINSLEE’) to the Old Park Brickworks and Ironworks which are marked by the hexagon and circle both numbered ‘1’ towards the top of this extract. Of interest is the fact that, at the junction of tramroads to the Southwest of the Ironworks and Brickworks, (marked ‘A’ above and ‘A’ on the OS Map extract above), this plan shows an additional tramroad branch to the ones shown by Savage & Smith. [1: p103] The additional branch runs Southeast from the junction at ‘A’. [9]An extract from a map drawn by Robert Dawson in 1814 showing Coalpit Bank, Old Park, the Shropshire Canal and Malinslee. Note Forge Row which appears on this map and on the 6″ OS extract above. Despite this map being almost contemporaneous with the early existence of the Ironworks, their existence is not noted by Dawson. [10]
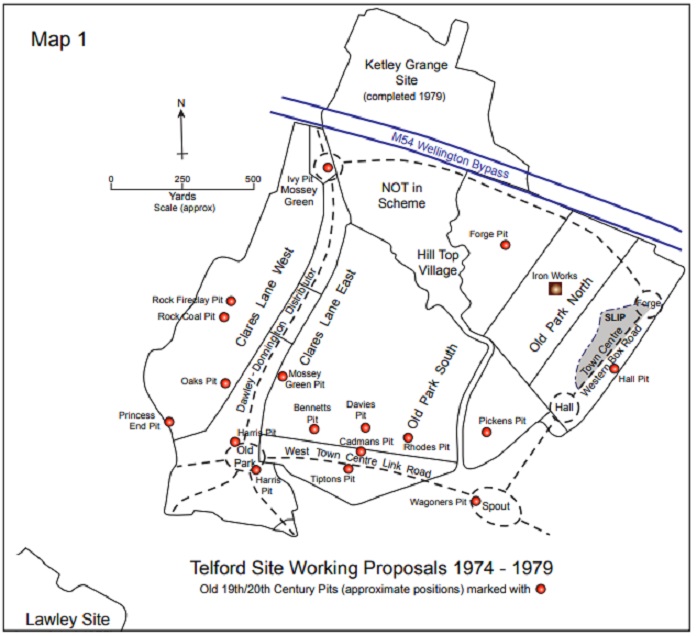
As we continue to look at this area, it is not surprising that it is difficult to relate modern locations to older features. We are now close to the centre of Telford, an area which has been considerably re-modelled both by modern development and by opencast mining. The next plan below gives and idea of the extent of opencast mining in the 1970s. The roads shown dotted on the plan were built as the New Town developed.
This plan comes from the Journal of the Shropshire Caving & Mining Club (Autumn Issue No. 2016.3) in an article by Ivor Brown. It shows the extent of opencast activities to the West of Telford Town Centre in the mid-1970s. Apparently, the site produced around 400,000 tons of coal and 80,000 tone of fireclay. The Old Park site was worked from 1974 to 1978. The journal indicates that the site contained over 100 dwellings which were acquired either by agreement or by Compulsory Purchase Order. Two specially built estates of bungalows were constructed by the Corporation to house many of the older residents, all having modern conveniences and amenities that their previous homes had lacked. The site also saw the closure of 0.8km of highway. The site was of 72 ha. and included 76 recorded shafts! [12]
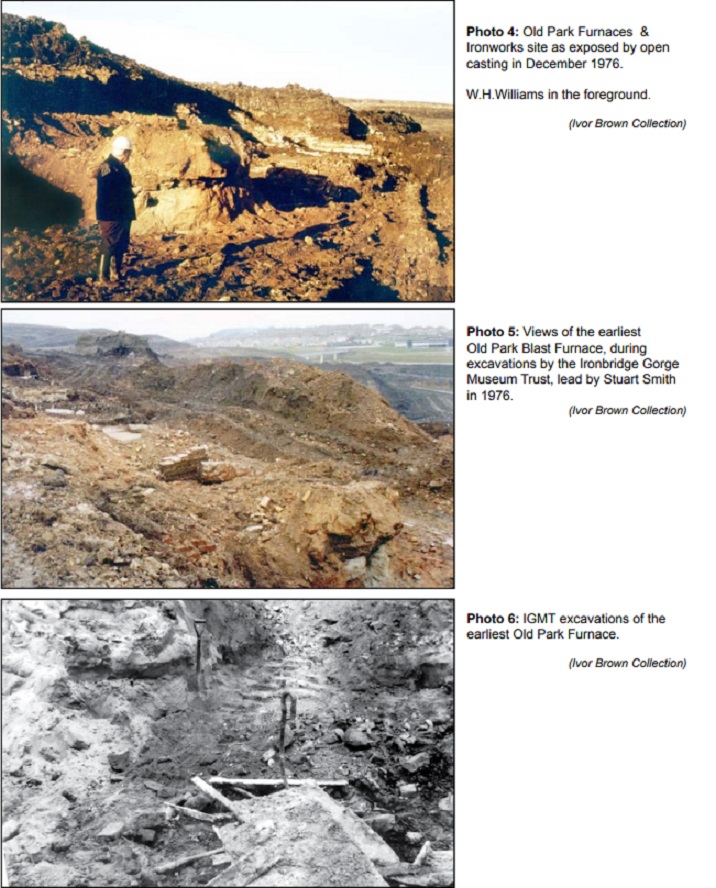
The Shropshire Caving & Mining Club’s Winter Issue of 2016 [13] included another article by Ivor Brown which contained details of archeological activity in advance of the opencast mining and during its operation. Old workings were found in almost every seam, but mainly in clay and coal, although it was obvious that ironstone had been worked where available. That journal includes a few photos of the Old Park Ironworks as exposed by the mining activity in 1976.
Photos from the Ivor Brown Collection of remains of the Old Park Ironworks uncovered by opencast mining in 1976, (c) Ivor Brown. [13]
Before continuing, it is worth stating clearly that the lines drawn on maps in this and other articles are very definitely approximate and represent the best estimates of Savage & Smith and my own interpretation of what they described in the 1960s before so much of the landscape was altered by opencast mining and subsequent development.
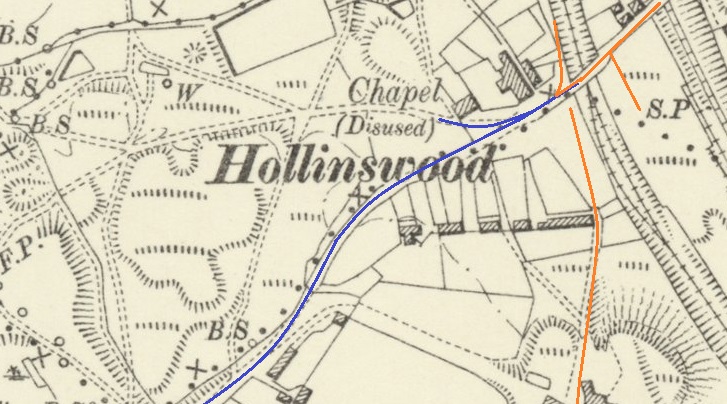
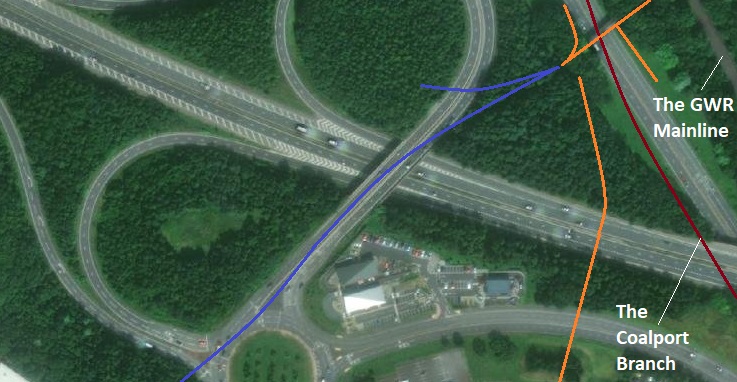
On the 1901/2 6″ OS Map again, a little further to the Northeast from Forge Row, we find the hamlet of Hollinswood. We can see both the Coalport Branch and the GWR mainline to the top-right of the map extract. The Ochre lines approximate to the lines which Savage & Smith indicate as being securely documented. The mauve lines continue to represent the tramroad line which Savage & Smith drew based on the 1836 railway maps. [14][1:p103][1:p164]This satellite image shows the same area as that on the 6″ OS Map above. It perhaps serves to demonstrate as effectively as any other image the dramatically different landscape and transport patterns of the 21st century. While it was possible to relate features on the 6″ OS Map back to the tramroads in the area. There is very little on this image that bears any relation to the 6″ OS Map of the turn of the 20th century. In one sense the lines drawn over the image are relatively meaningless in the world of the 21st century. The deep-red line is the route of the Coalport Branch which was a LNWR railway line. The A442 now follows the route of the railway here. The ochre lines approximate to those which Savage & Smith were certain of. The mauve line is tramroad they have drawn in their thesis which matches that on the 1836 railway map. One feature which remains in the 21st century is the line of the old GWR mainline which is tight in the top-right corner of both the map and the satellite image. The hamlet of Hollinswood has disappeared under the M54 and the A442. The general area has been re-wilded and given over to woodland. [14][1:p103][1:p164]
Having followed a tramroad route Northwards from St. Leonard’s to Hollinswood, we now turn our attention to what Savage & Smith have shown to the Southeast of St. Leonard’s and then to the East side of their traced map of the Malinslee area. …
First, we need to pick up on the tramroad indicated by the red-dashed line on the earlier images of the area close to St. Leonard’s.
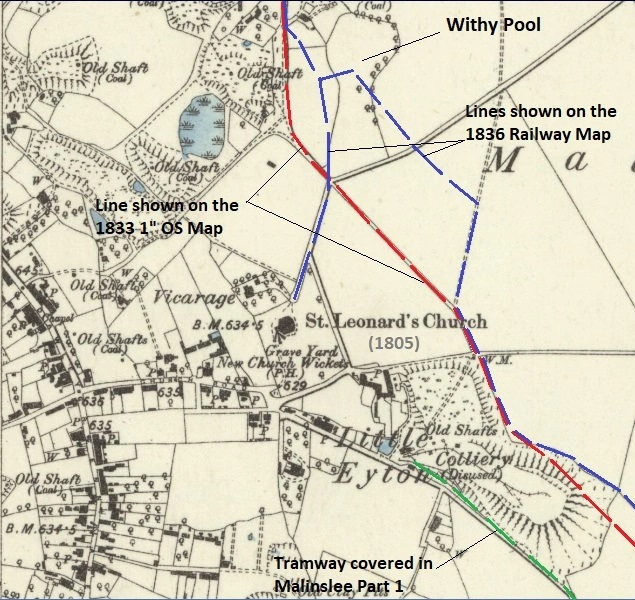
The tramroad is indicated by the red-dashed line on this plan which appeared earlier in this article. The red-dashed line runs on the Northeast side of Little Eyton Colliery and appears to run under the slag heap. The length of this line shown at the top of this extract can be followed easily on the ground in the 21st century. This is not possible the further South along the line that we travel. [2]
This extract from the circa. 1840 plan of Dawley shows that tramroad running from Withy Pool adjacent to the word ‘MALINSLEE’ down to the Canal at Hinkshay Pools and running to the Northeast side of Little Eyton Colliery slag heap. There is a short canal arm shown as well. which would have provided for transshipment of loads from waggons to canal tub-boats. [9]
These next few images are my attempt to follow the line of the tramroad from near Withy Pool down towards Hinkshay.
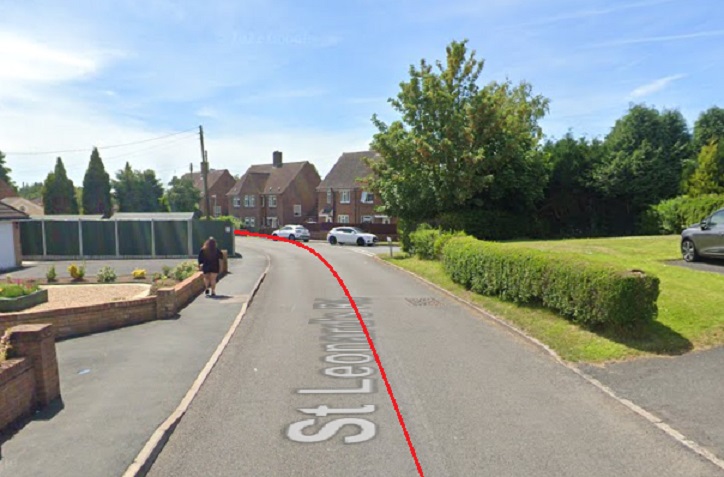
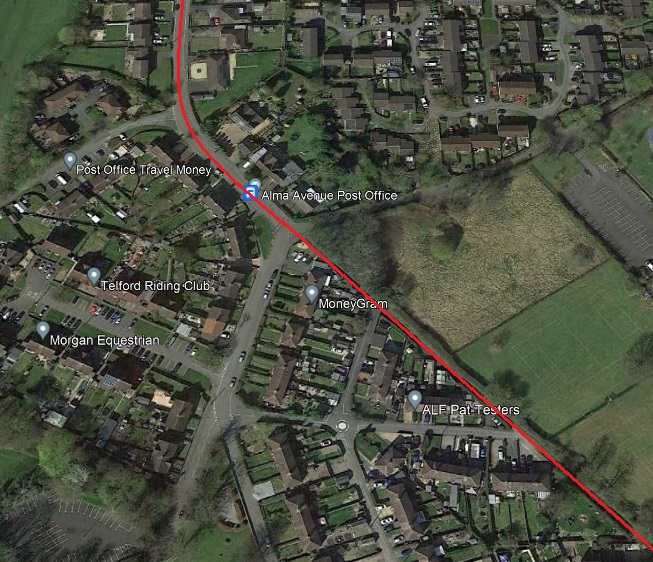
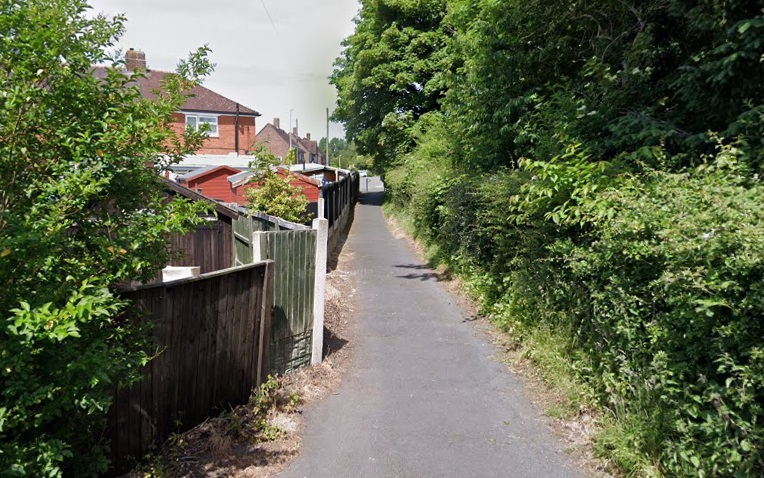
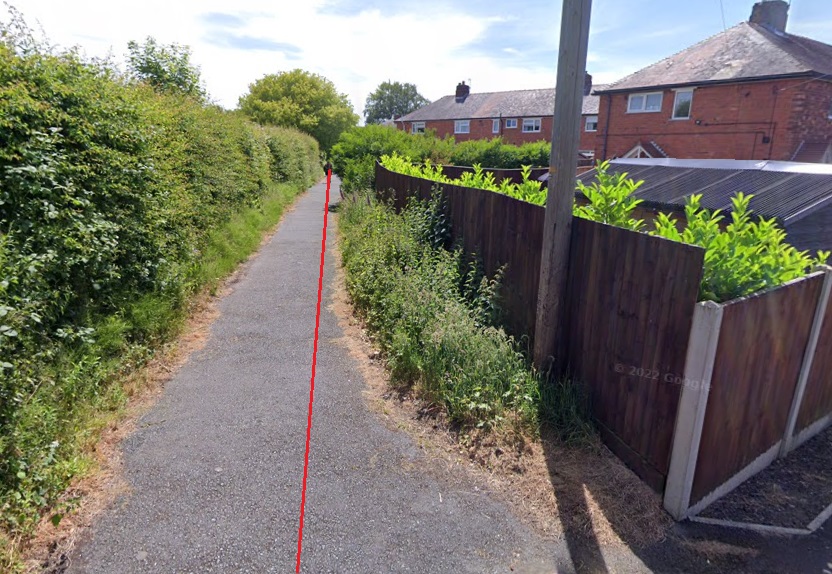
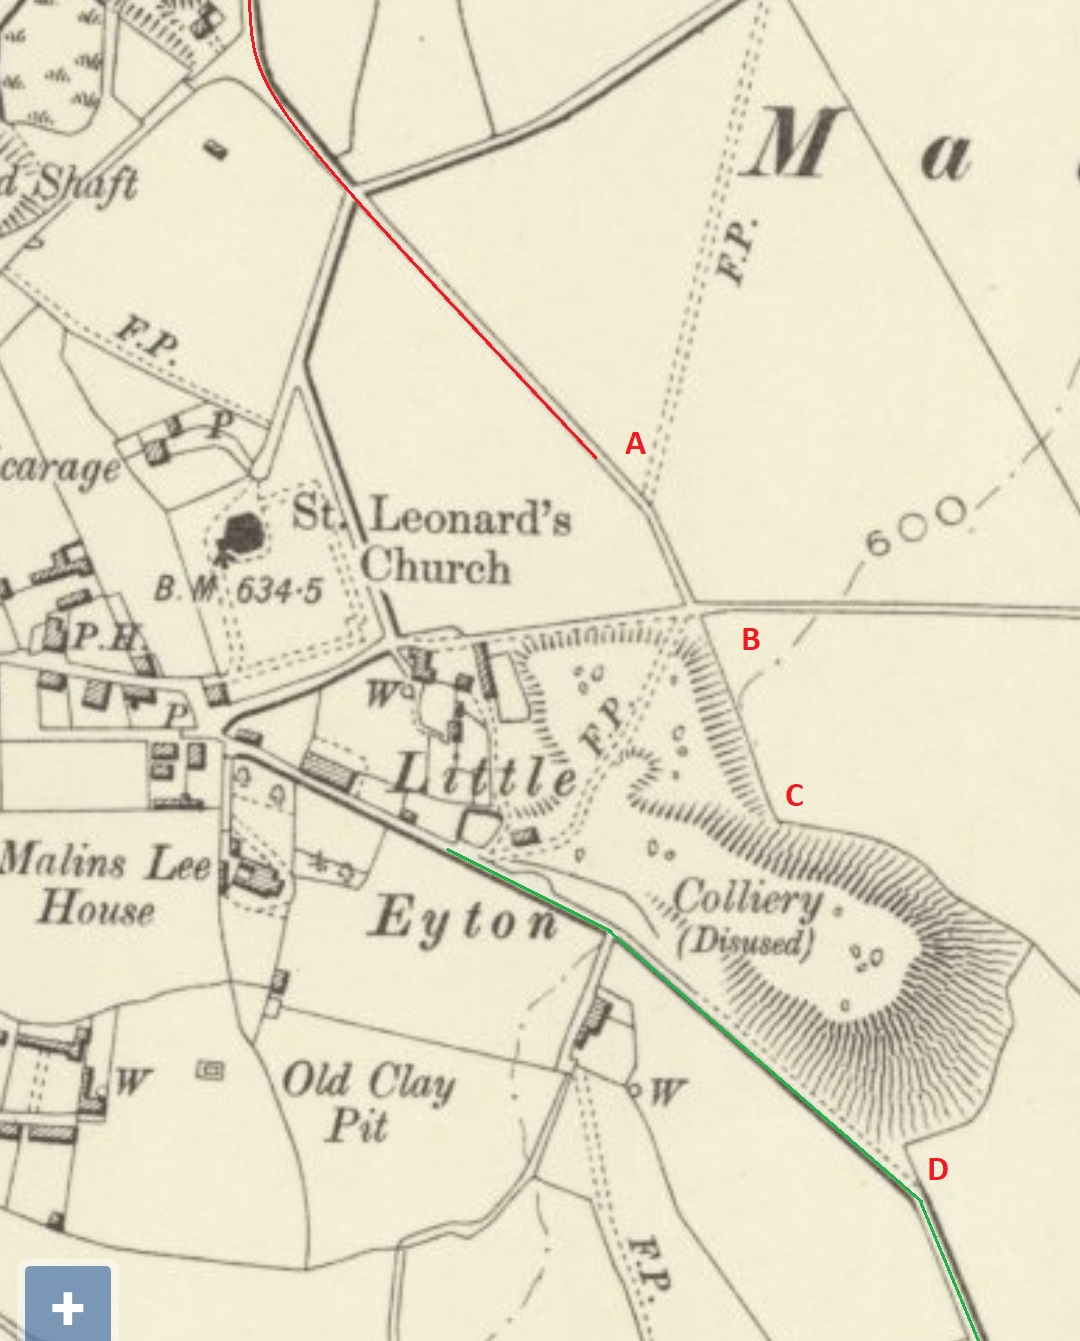
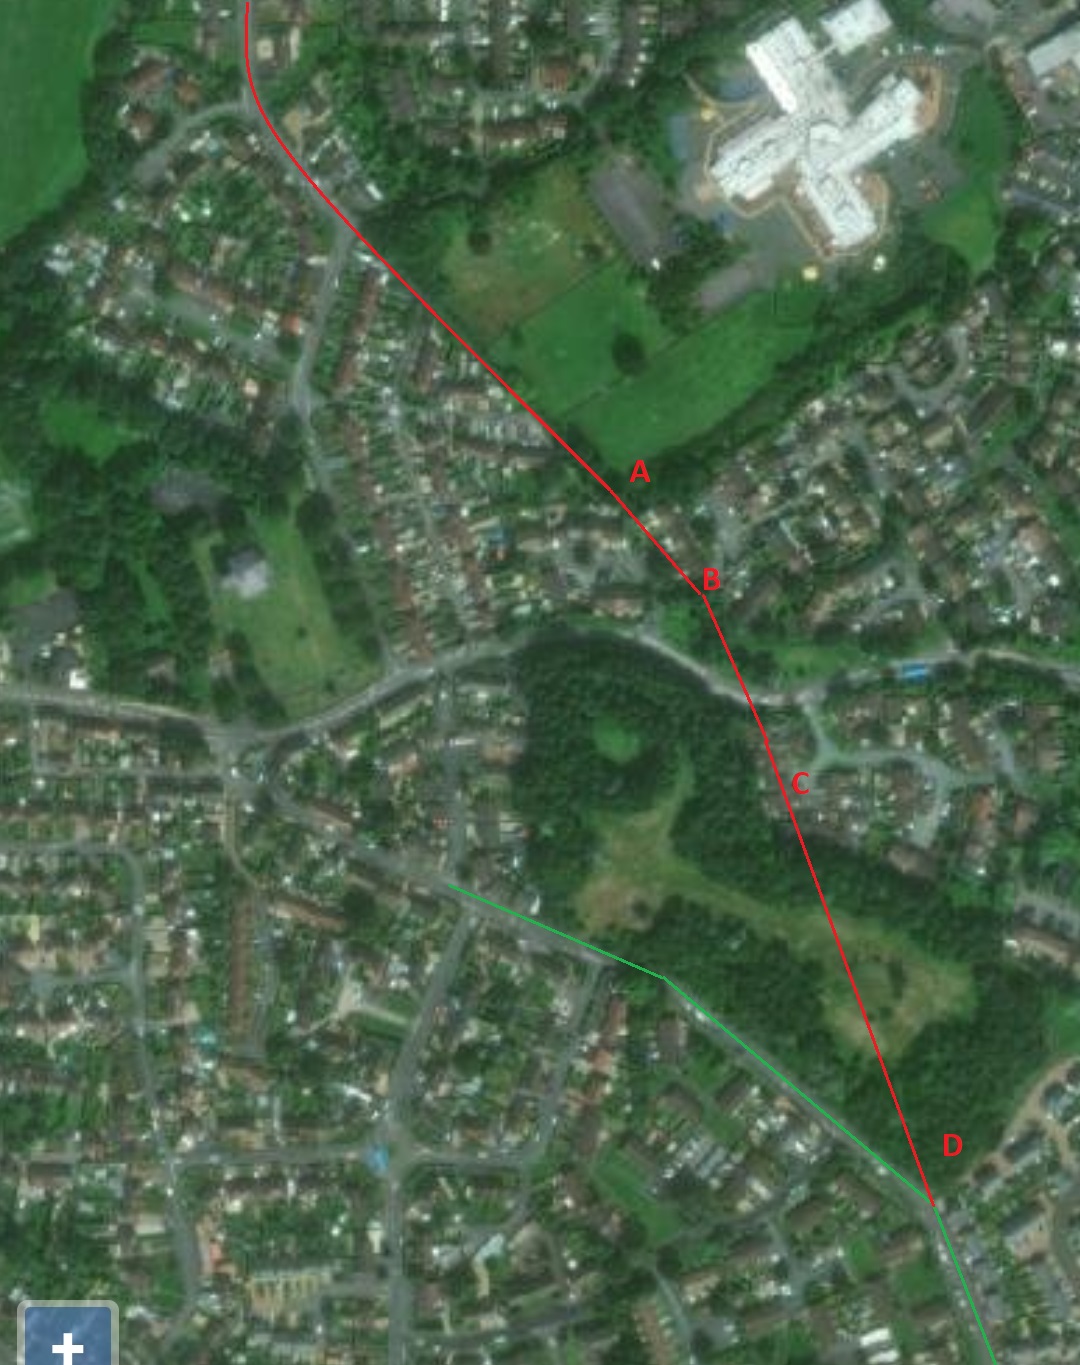
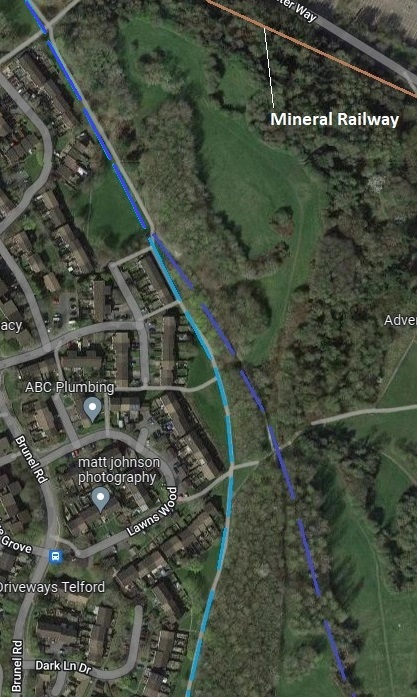
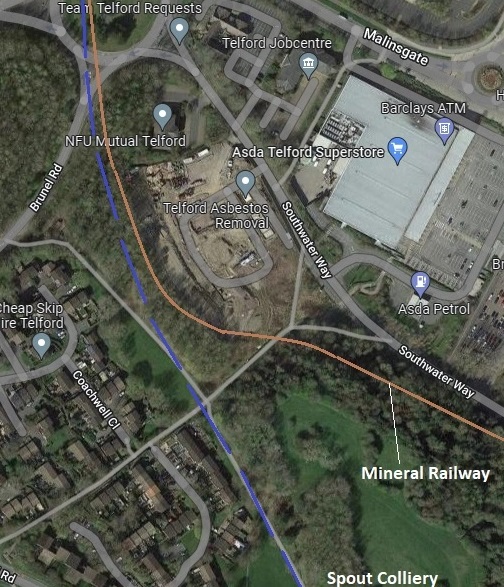
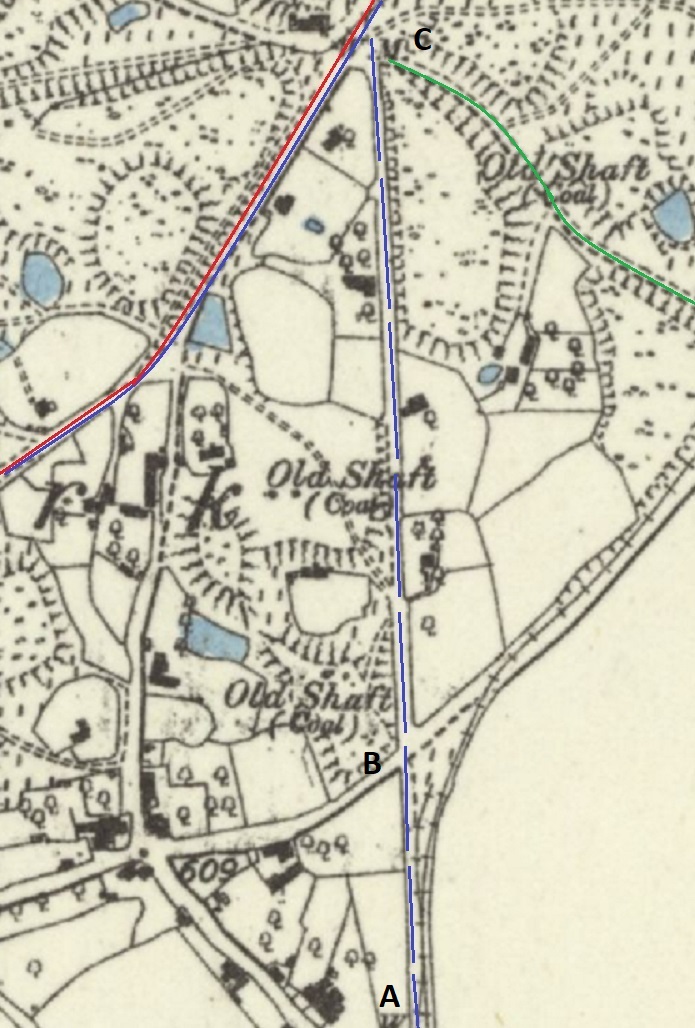
The old tramroad followed the route of St. Leonard’s Road. This view looks South towards St. Leonard’s Church. [Google Streetview, June 2022]St Leonard’s Road turns slightly towards the Southeast and becomes Alma Avenue. {Google Streetview, June 2022]As Alma Road turns back to the South, the old tramroad route is now a footpath. [Google Streetview, June 2022]The red line shows the route we are following. [Google Earth, 4th April 2021]Looking back to the Northwest along the line of the old tramroad from the end of Rhodes Avenue towards Alma Avenue. [Google Streetview, June 2022]Looking Southeast along the line of the old tramroad from the end of the northerly arm of Rhodes Avenue. [Google Streetview, June 2022]Continuing Southeast along the line of the old tramroad. [Google Streetview, March 2011]Looking Southeast again, from the end of the more southerly arm of Rhodes Avenue. [Google Streetview, March 2011]Having looked carefully at the OS Maps, my belief is that the line we are following, shown red at the top of this extract from the 1901/2 6″ OS map, continues along the track which would have run all the way between points A, B, C and D shown. The earlier 1840 map suggests that the slag heap of the colliery was of much smaller extent in the early 1800s. I think this is the interpretation which makes the most sense when comparing the different drawn lines on various plans and maps. We have already followed the green line shown in the bottom half of this map in the first post about tramroads in the Malinslee area (https://rogerfarnworth.com/2022/06/15/ancient-tramroads-near-telford-part-4-malinslee-part-1) [16]The same area shown on the ESRI satellite image provided by the National Library of Scotland. [16]
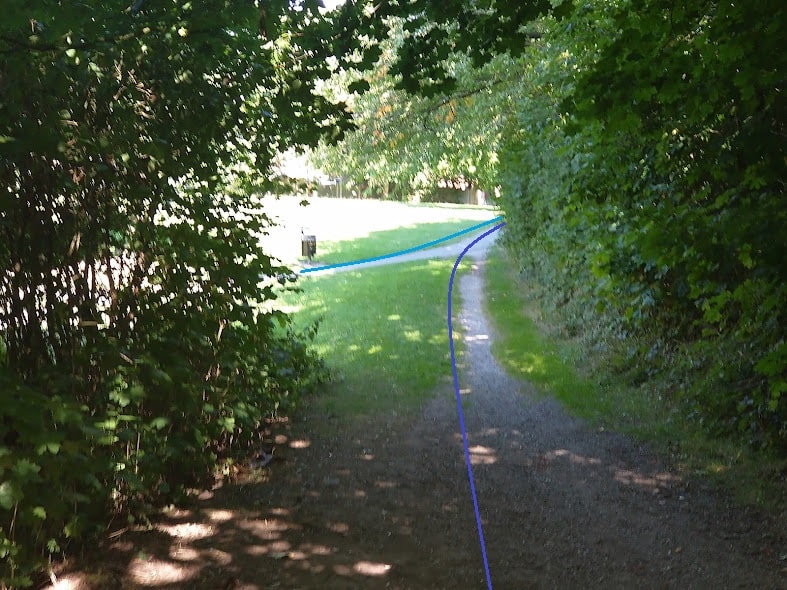
The next few pictures follow the line from A to C on the map/satellite image above.
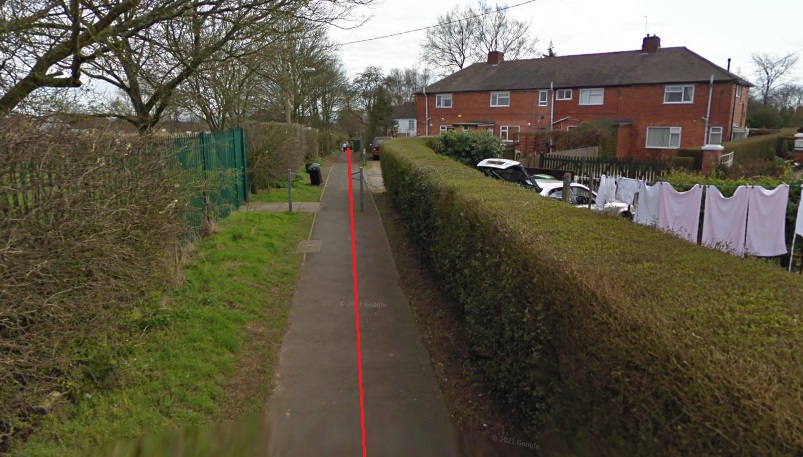
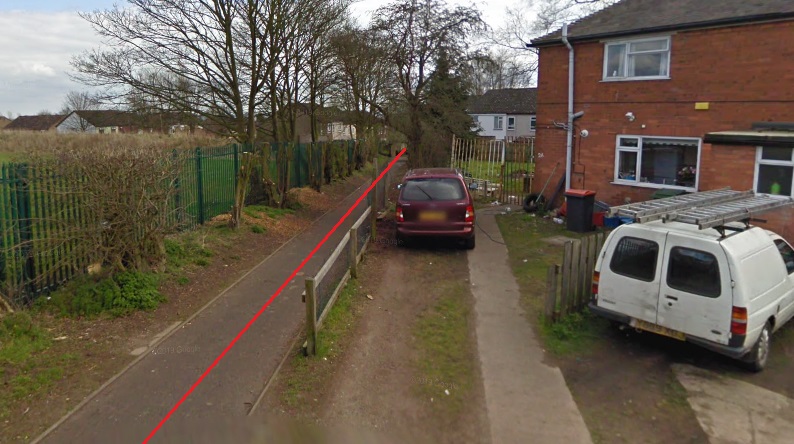
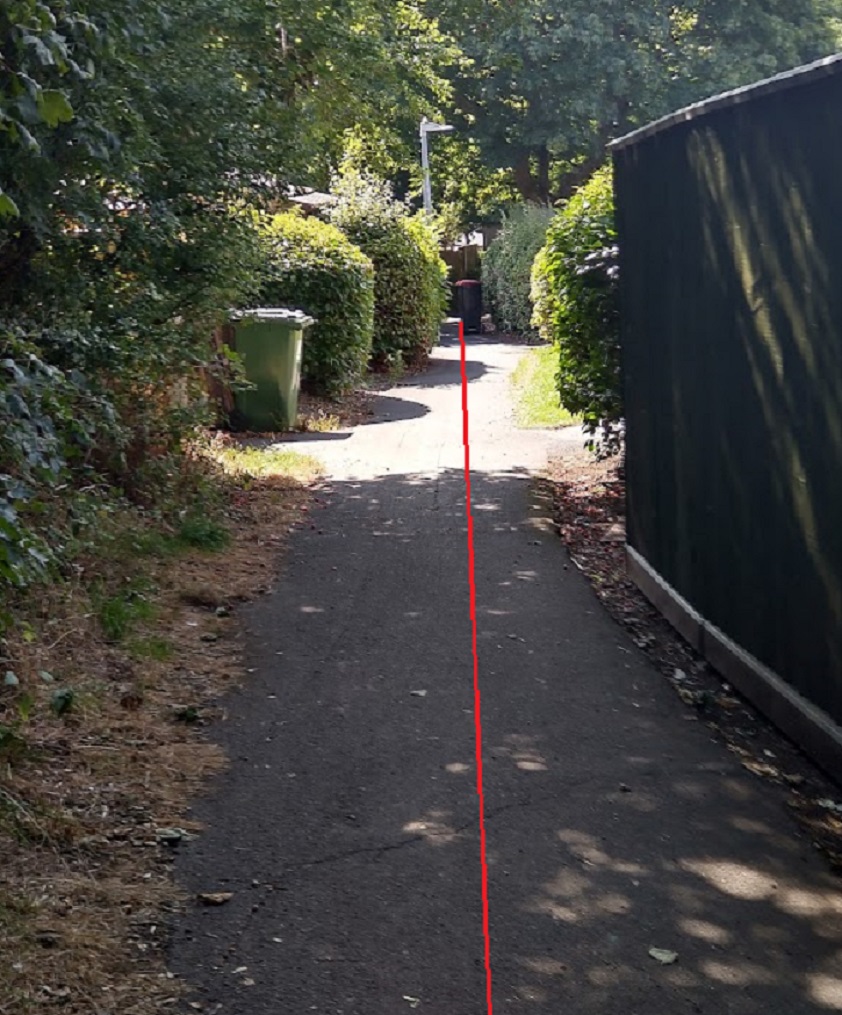
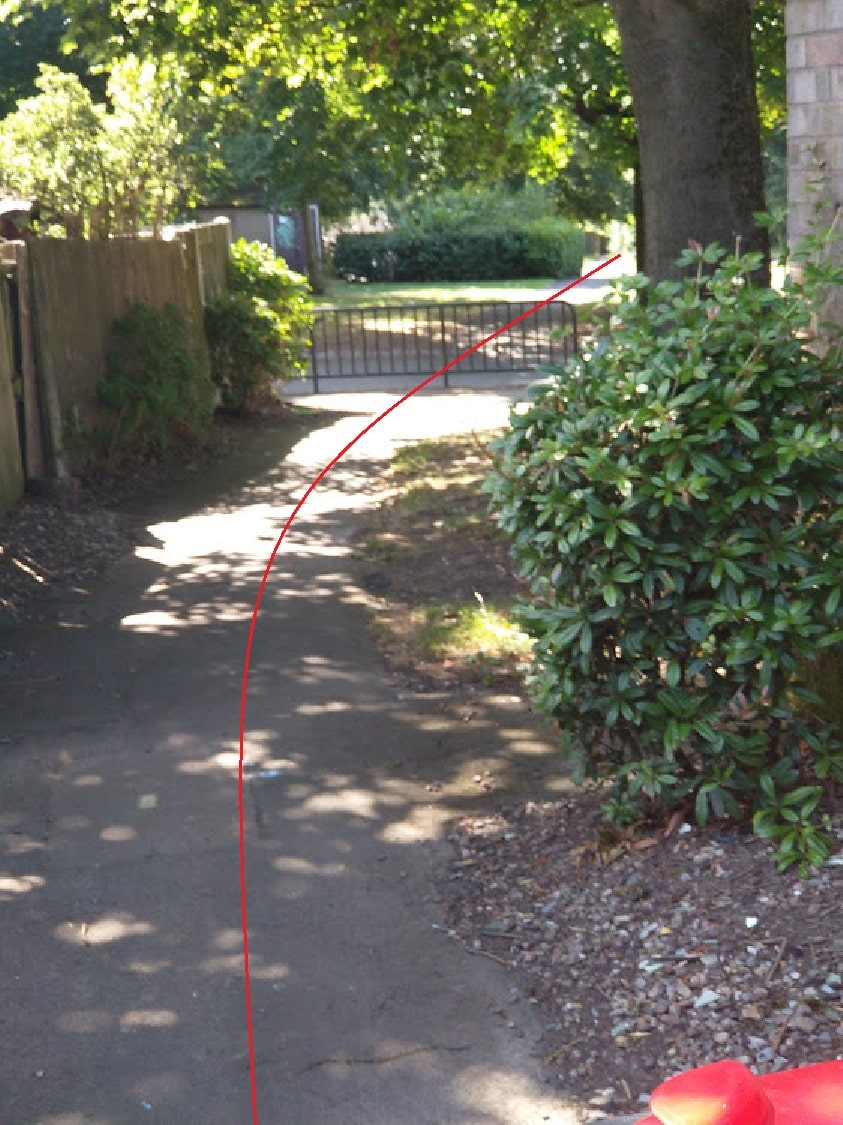
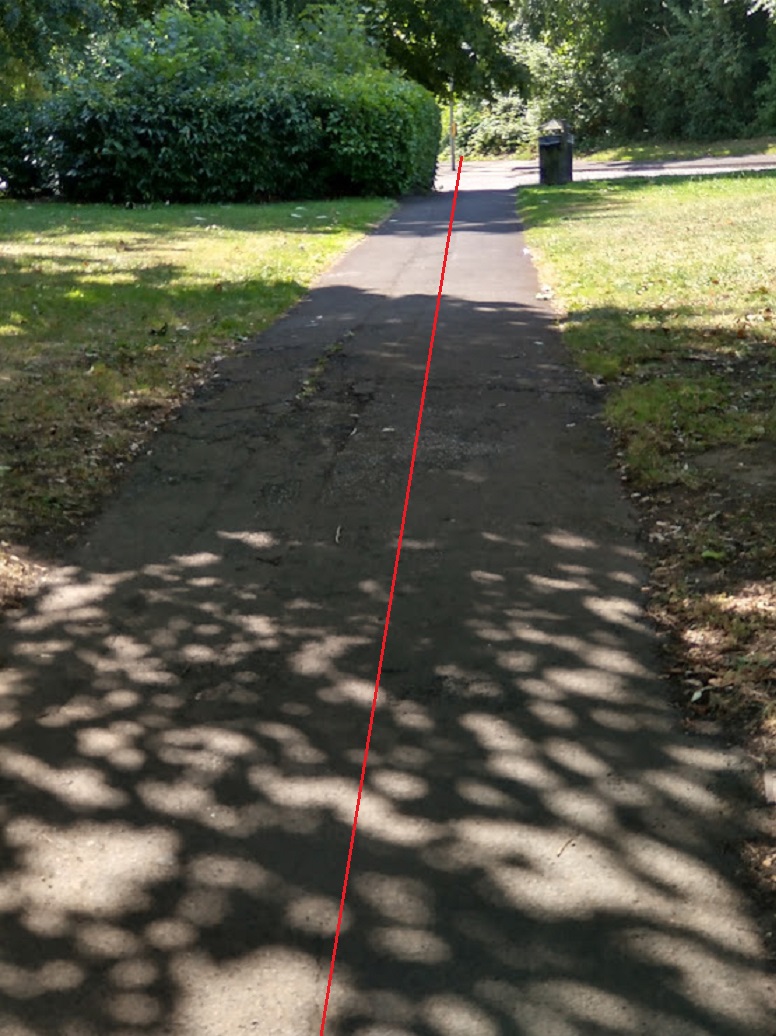
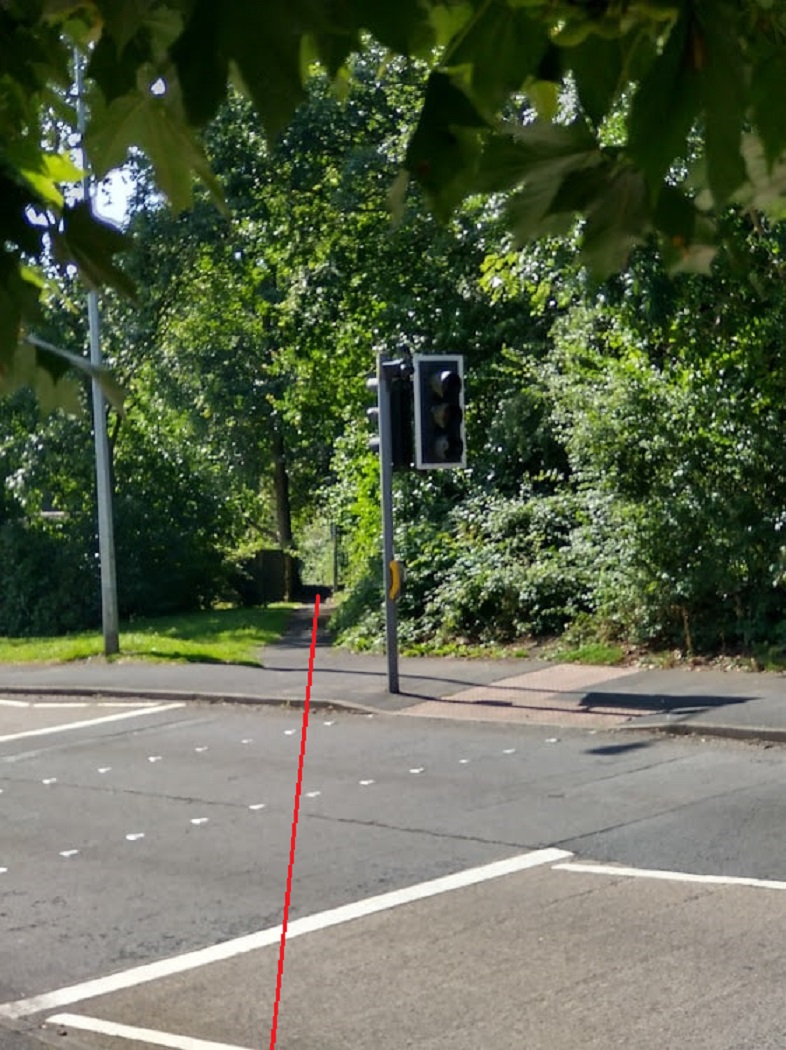
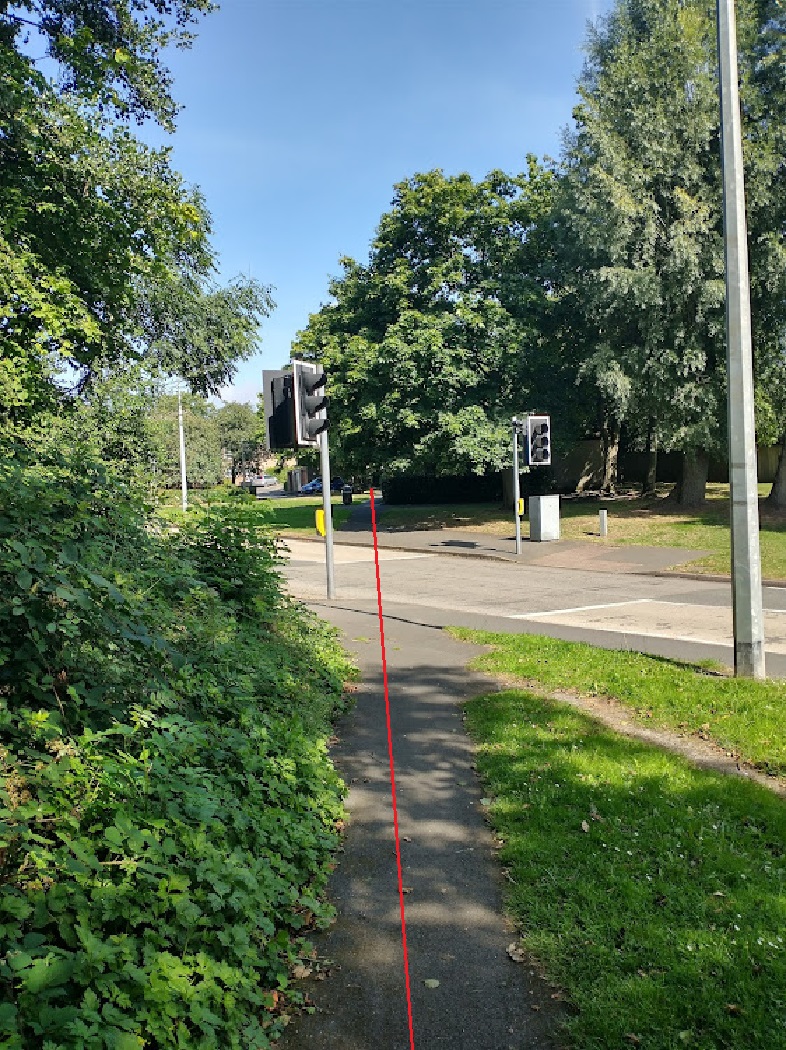
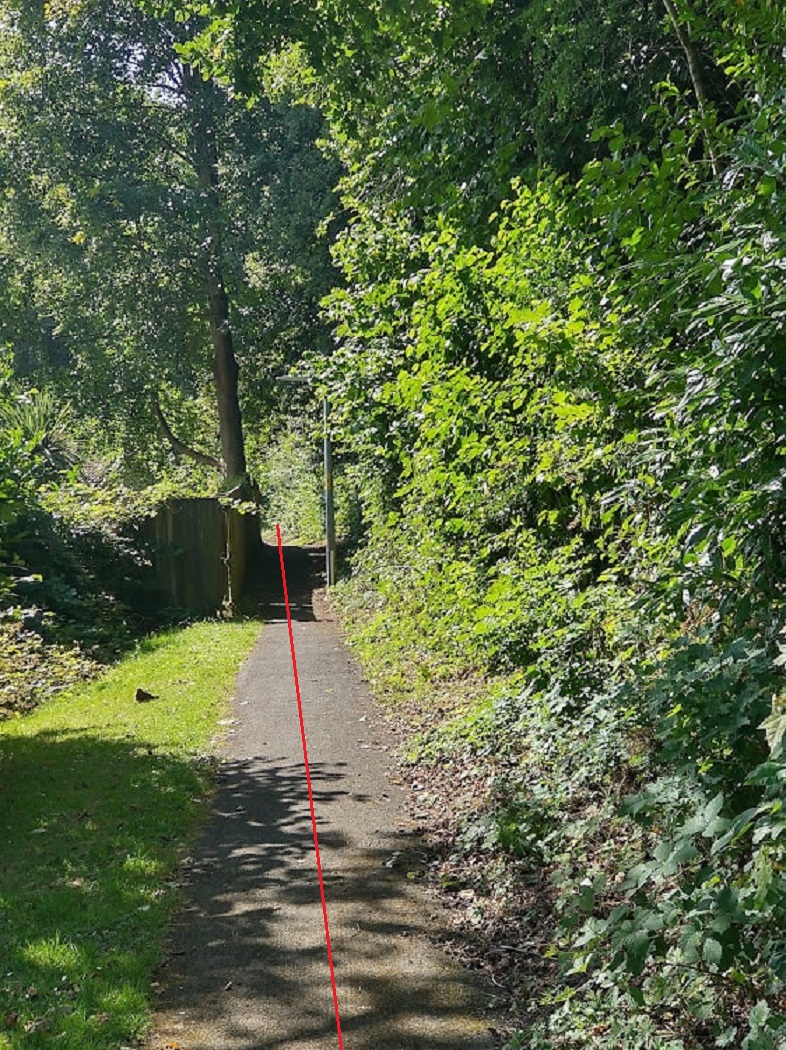
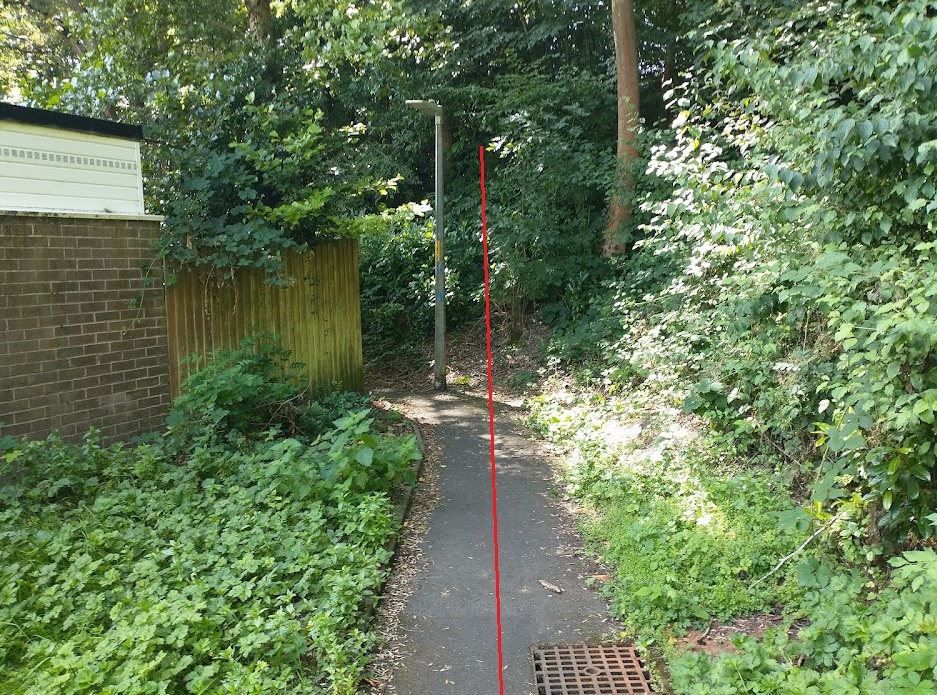
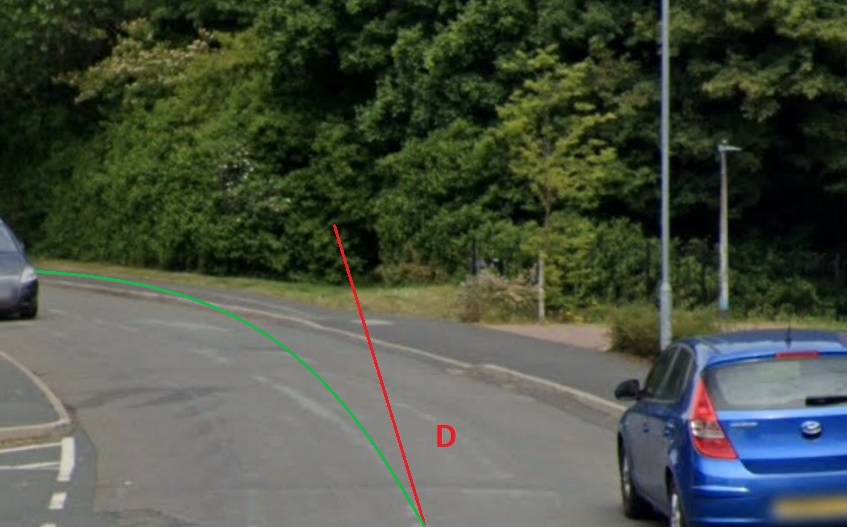
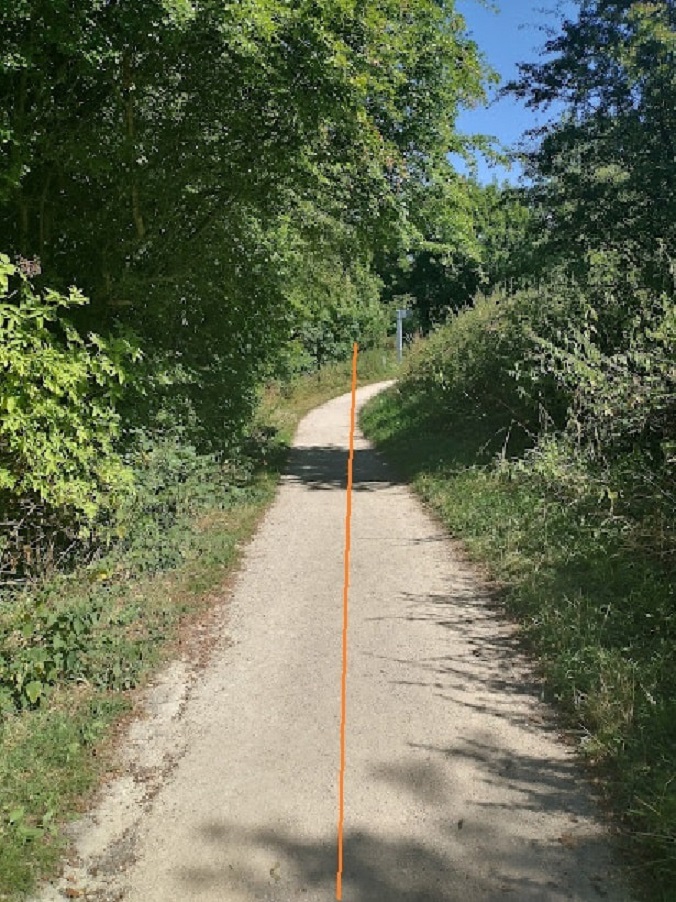
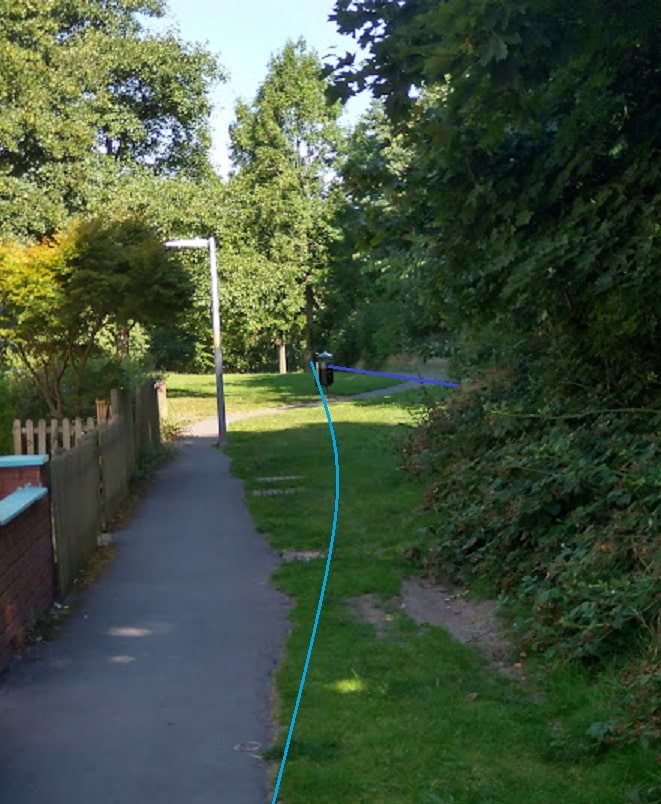
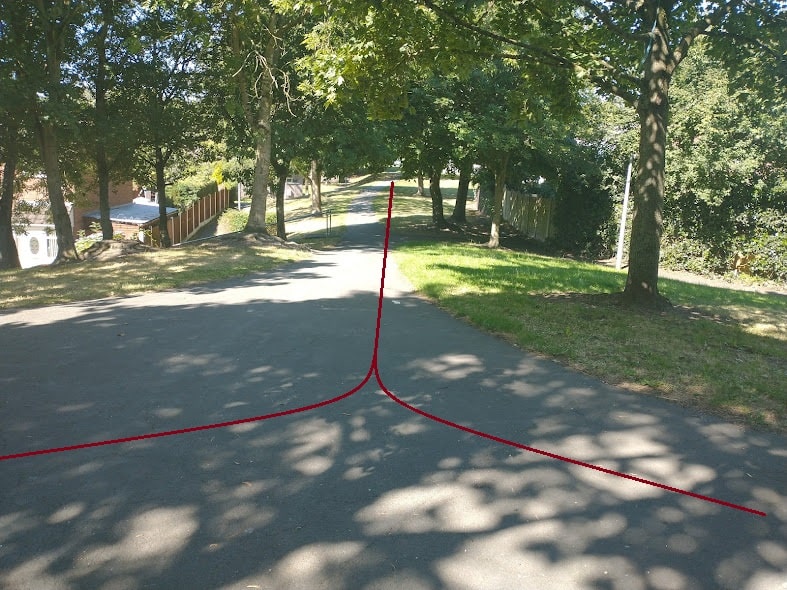
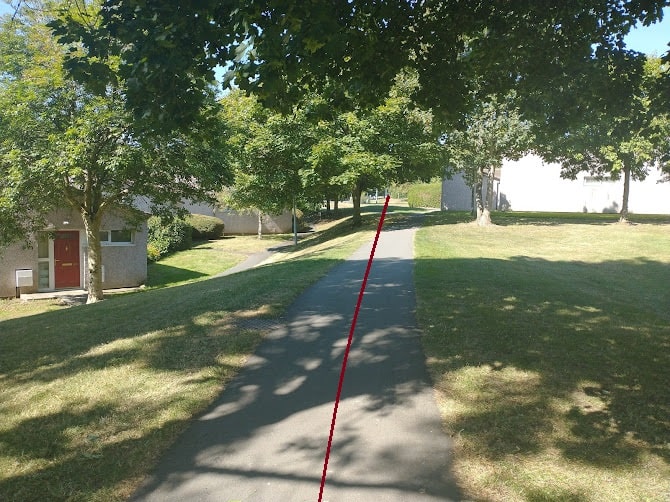
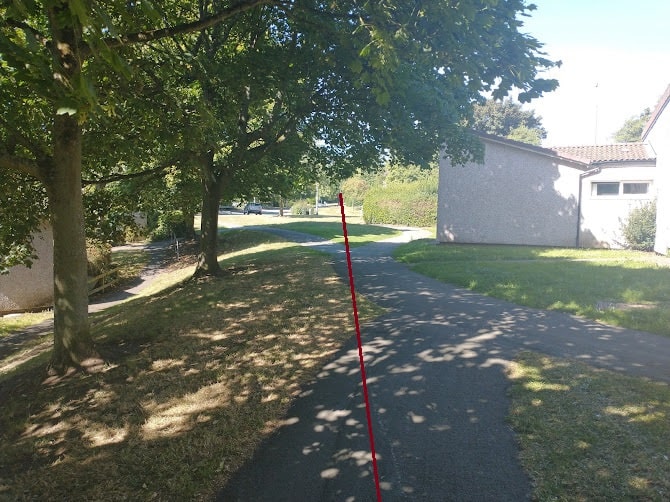
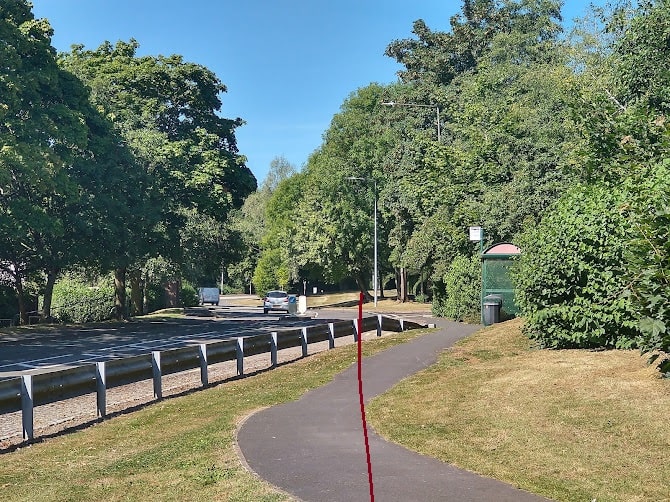
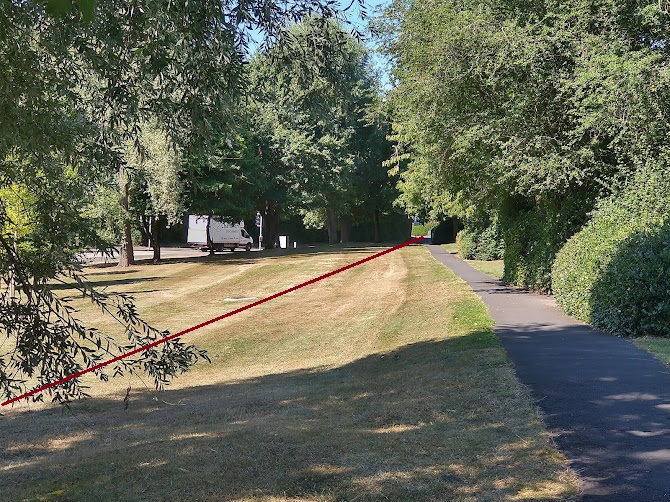
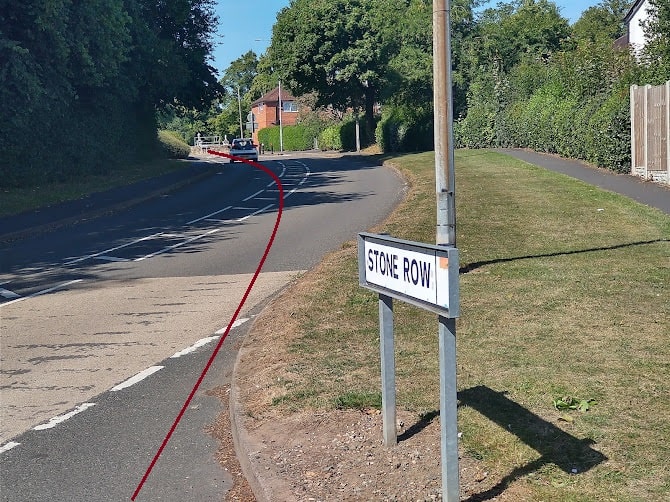
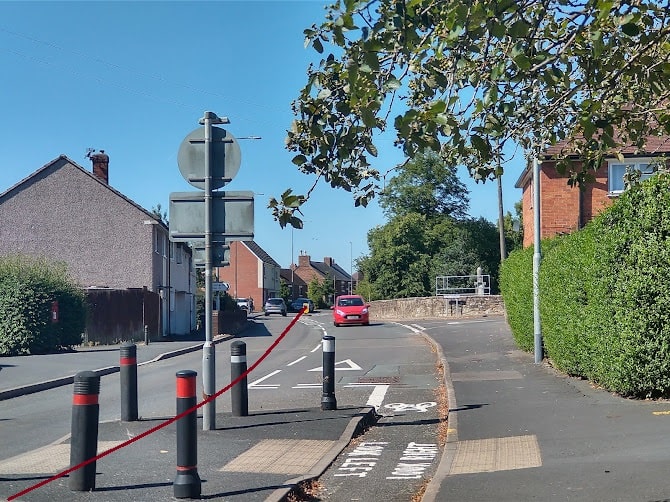
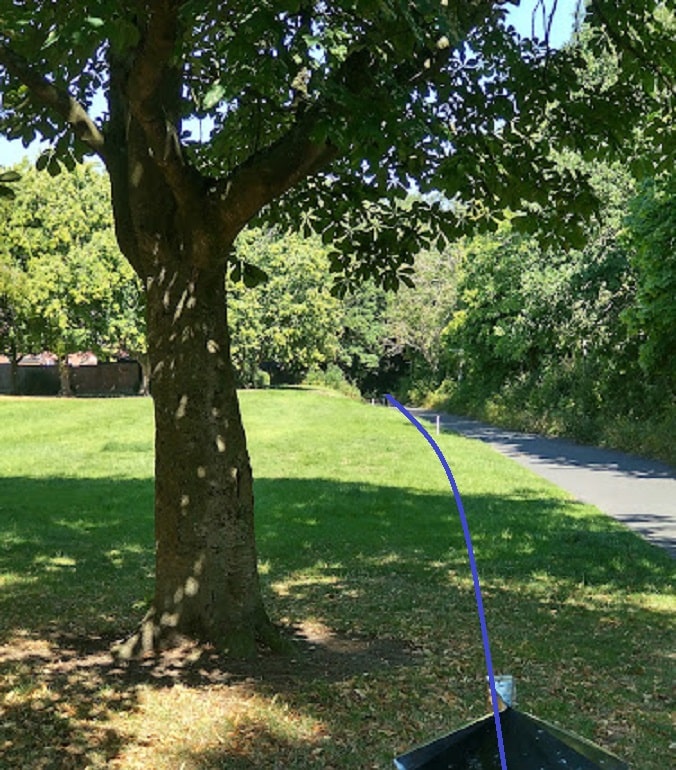
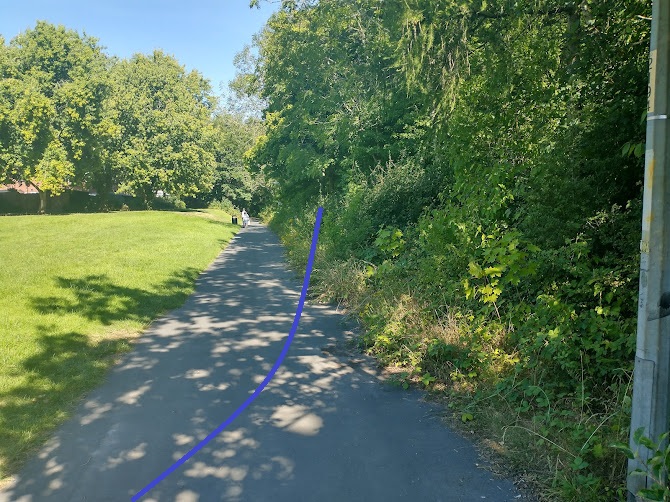
Continuing Southeast along the footpath which follows the old tramway route. [My photograph, 6th August 2022]The route continues across the modern ‘Stone Row’. [My photograph, 6th August 2022]And on towards Brunel Road. [My photograph, 6th August 2022]There is a pelican crossing at the point where the old tramroad crossed the line of the modern Brunel Road. [My photograph, 6th August 2022]Looking back Northwest along the line of the old tramroad. [My picture, 6th August 2022]Looking Southeast from the same location. [My photograph, 6th August 2022]At point ‘C’ on the map and satellite image above, the modern path turns to the left between the fence and the streetlight. The old tramway continued straight ahead and was eventually covered by the slag heap from Little Eyton Colliery. The slag heap has been on our right as we have walked along the path from Brunel Road, it now expands out across what was the line of the tramroad. [My photograph, 6th August 2022]The view Northwest alone Matlock Avenue. The tramroad serving the main buildings of LittleEyton Colliery bends away to the left (green line), the route we have been following ran under the slag heap which is directly ahead (red line). [Google Streetview, June 2022]
The first map extract below is taken from the 1881/82 6″ OS Map. It picks up the red-dashed line entering top-left. The line as drawn on this extract is that shown by Savage & Smith on their traced plan [1: p164] and it curves round to the Northeast on the Northeast side of Hinkshay Row. There seems, as the tramroad shown above approaches the canal, to be either a conflation of two tramroad routes Solid green/red and red-dashed on the map extract below) on the1840 plan of Dawley or a minor problem with the tracings undertaken by Savage & Smith which could easily be explained by the relative scales of the different plans that they refer to. As the notes below the first map extract below suggest there is a possibility that the red-dashed line shown by Savage & Smith which comes from the 1″ Ordnance Survey of 1833 is marginally out of position and when drawn on the larger scale 6″ mapping gives the discrepancy represented by the solid green/red line (my preferred route for the tramroad) as compared to the red-dashed line. On the extract below, this is further complicated by the mauve-dashed line which is that traced by Savage & Smith from the half-inch map of 1836.
Tramroad routes from various sources superimposed on the 1881/82 6″ OS Map of the area close to Stirchley and Old Park Ironworks. Where appropriate, the routes have been marginally adjusted from those shown by Savage and Smith to align with features on the 1881/82 mapping as appropriate. The density of lines is very apparent! The two dashed lines, one in red (1833) and one in mauve (1836) came from different maps at different scales. It is possible that they represent the same tramroad, and that both, in my opinion, represent the actual route shown by green/red solid lines on the extract.
A curving pathway to the East of Hinkshay Row calls into question my opinion and supports the red-dashed alignment which represents the 1833 1″ OS Map tramway alignment. Both red-dashed and mauve-dashed lines run under the spoil heap for the abandoned colliery Northeast of Hinkshay Row and so, if they are correct, must pre-date that colliery’s slag heap. There is a similarity between the various changes in alignment on the red-dashed line and the solid-red line a little to the South. I guess it has to be asked whether, given the differences in scale between different maps, these are in fact the same tramroad. We have already established that the solid-red line is an accurate representation of a tramroad. The question at stake here is whether the dashed-red line is a different route or not. The curving pathway to the Northeast of Hinkshay Row is probably the only feature on the map extract that would suggest that it is a separate route.
The light-brown tramroad line(s) are definitive, according to Savage and Smith. However the light-brown route which seems to end at Hinkshay Road/Dark Lane may well have extended across to the South of Stone Row and on beyond Wood Colliery, passing under what in 1881/2 is the extent of the Wood Colliery spoil heap. That extension can be presumed from the Savage and Smith drawn 1836 alignment which is shown here, marginally moved, from the Savage and Smith map above. We have noted elsewhere the existence of the GWR Stirchley Branch and the LNWR Coalport branch which will be the subject of other articles. We should also note the presence on the 1881/82 6″ maps of a Mineral Railway which enters this extract from the North and which was part of a network across this extract and beyond that replaced older tramroads.
On the 1881/82 6″ OS Map a tramroad is shown serving Wood Colliery. It is highlighted in light blue in the top-left of this extract. It is possible that the tramway route shown light-brown on this extract crossed or connected with this line prior to the spoil heap from the Colliery growing in size.
Note also the Old Park Ironworks which appear in the bottom-right of the extract and which were part of the Botfield empire featured in the notes earlier in this article. [1: p164][2]
The same tramroad lines approximately translated onto the ESRI satellite imagery provided by the National Library of Scotland. No annotations are provided in this case as they can bee seen on the map extract above. It is sufficient to remark that the details of tramroad alignments are difficult to relate to the Town Park in 21st century. But correlations there are and they are quite significant! [15]
In previous posts, we have considered many of the tramroads in this area. The comments made under the OS Map extract immediately above should be sufficient to highlight any details/issues. My judgement, for what it is worth, is that the solid green/red line should be given precedence over both of the lines traced by Savage & Smith. If I am correct, the tramroads which existed in this are become those shown below. …..
The 6″ OS map of 1881/82 again. This time we see only the lines which in my opinion exited in the immediate are of the White Hart Inn and the Stirchley Ironworks. [2]
Walking the area, a number of the features on the map extract can be seen to still be present in 21st century in some form or other. Exploring Telford Town Park is highly recommended!
The next map extract shows the area to the North and Northeast of the extract above. …..
The 1881/82 6″ OS Map again. On this extract, two of the lines drawn by Savage & Smith (red-dashed and mauve-dashed) have also been removed to leave those over which there is some certainty that they existed. The orang lines are those which Savage & Smith were able to confirm. The light-blue-dashed line in the top-left appears on the map and served Wood Colliery. The mauve-dashed line is a tramroad which predated the enlarged slag heap of Wood Colliery and which appears on Savage & Smith’s traced drawing of the area. The two black lines on the plan are the Coalport Branch (LNWR) and the Stirchley Branch (GWR). [1: p164] [2]
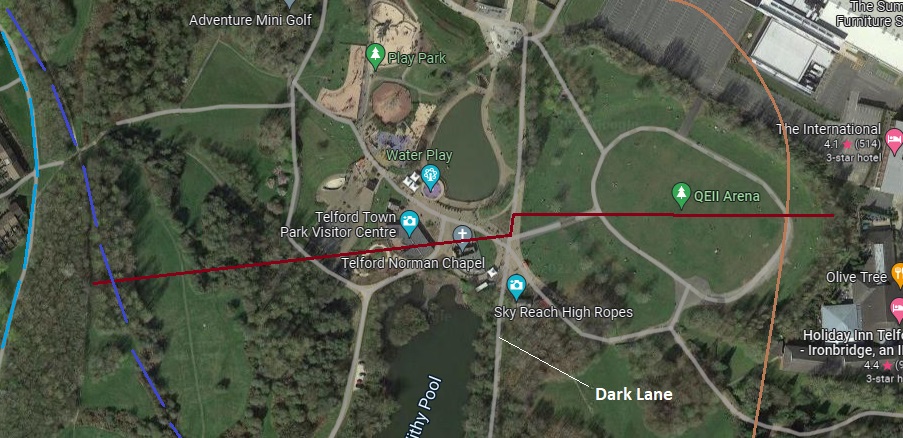
The same area on Google Maps. Some of the features shown on the 6″ OS map have been lost. The slag heaps remain and have been encouraged to become woodland. The Mauve and light-blue lines can still be picked out with care on the ground in the 21st century. [Google Maps]
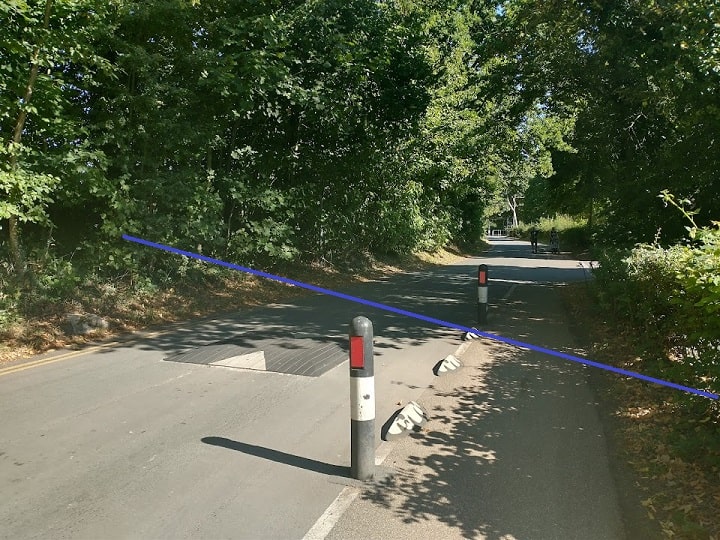
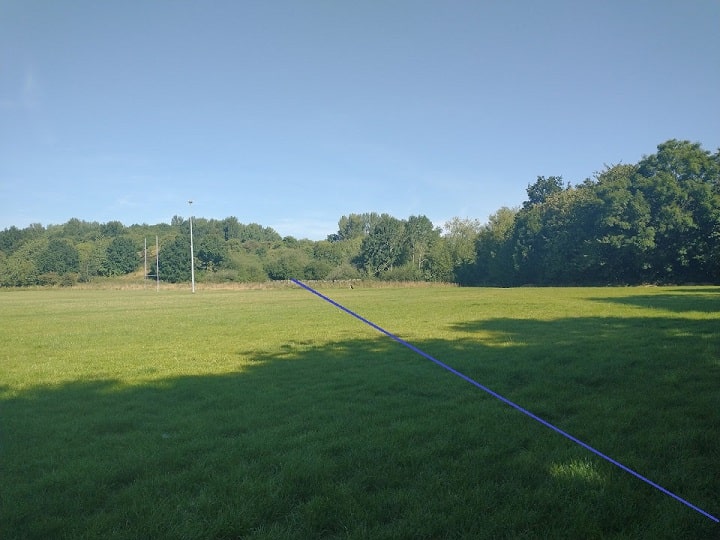
Looking North along Dark Lane, Telford. The large car park for Telford Town Park is ahead to the right. The old tramroad crossed the line of the lane at approximately this point before heading Northwest across the adjacent fields. {My photograph, 9th August 2022]Telford Rugby Club grounds: the old tramroad crossed the playing field on the diagonal (in a northwesterly direction). [My photograph, 9th August 2022]The line continues generally in a northwesterly direction but does deflect to the West for a short distance. I have found it very difficult to give a good approximation to the points at which the direction changed. Please see the mauve line as very approximate. [My photograph, 9th August 2022]The land rises as the landscaped waste heap of Wood Colliery is reached. Both footpaths visible in this image climb steeply. The old tramroad is buried under the waste heap. It horizontal alignment approximates to a later footpath across the waste heap
Before looking at the area immediately around Randlay Pool (which appears on the right side of the map extract above we need to trace the route of the two tramroads shown light-blue (not on the Savage & Smith drawing [1: p164]) and mauve on the extract OS map extract above. This next extract from the 1901/2 6″ OS map shows the line of the tramway marked light-blue as still in existence alongside Wood Colliery.
An enlarge extract from the 1881/82 6″ Ordnance Survey. The tramroad indicated by the light-blue-dashed line on the extract next above can easily be seen to serve Wood Colliery which appears to still be active at the time of the survey. The 1840 map of Dawley shows this tramroad. [9] The line of embankment South of the end of this tramroad suggests that at one time it extended down towards the disused colliery to the South. The mauve-dashed line is repeated on this extract. It is Savage & Smith’s line from the 1836 Shropshire Railway map. The tramroad shown by this line will have predated the growth of the slag heap of Wood Colliery. [1: p164][2]
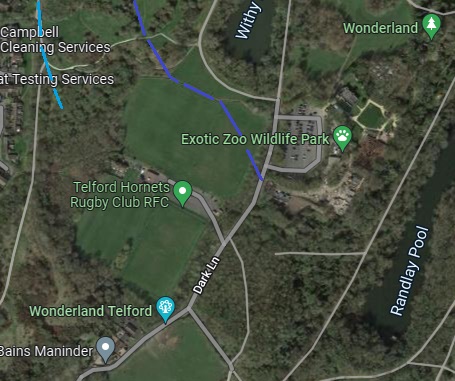
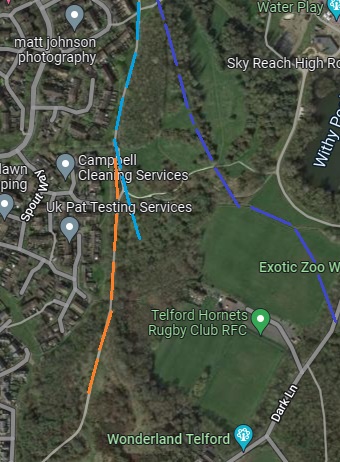
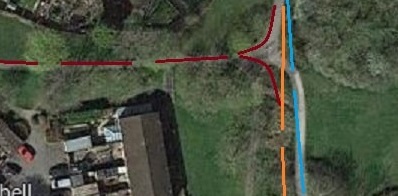
The same area as shown on the OS map extract above, with the tramroad routes transferred. It can be seen that the tramroad on the West side of the image follows the route of a path in Telford Town Park. The orange line being that which served Hinkshay Colliery. Wood Colliery was perhaps 100 metres North of the last ‘l’ in ‘Campbell’. The Reservoir shown on the OS Map is now called ‘Withy Pool’. Earler mapping shows a Withy Pool much closer to St. Leonard’s Church. [Google Maps]
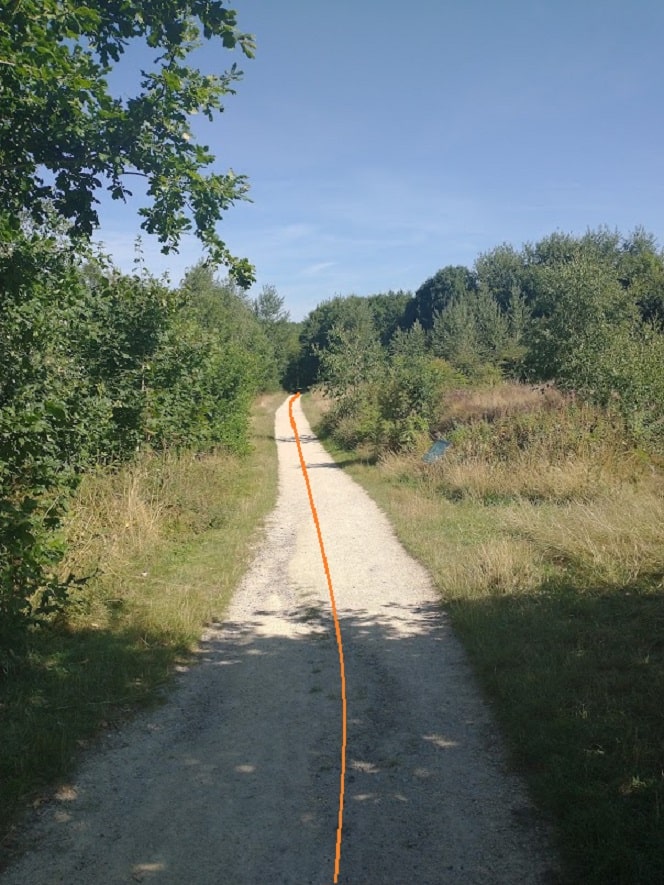
The following photographs show the approximate alignment of the two tramroads illustrated on the OS map extract and satellite image above. The first route begins bottom-left of the map/satellite image above. The first picture is taken a little south of the end of the orange-dashed line. …
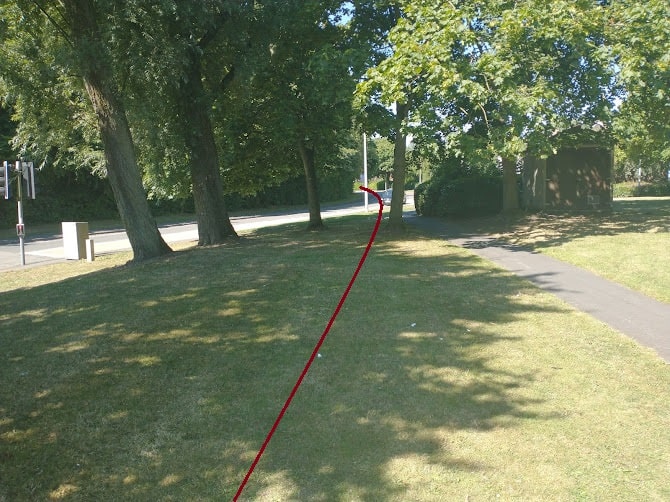
Looking North on the slag heap of what was Hinkshay Colliery. The modern footpath has been laid over the line of the old tramroad. [My photograph, 9th August 2022]Looking back to the South, from a point a couple of hundred metres to the North, along the tramroad line. [My photograph, 9th August 2022]Turning through 180 degrees to look North at the same point. The modern footpath follows the horizontal alignment of the tramroad. [My photograph, 9th August 2022]Looking North again, the modern footpath deviates from the line of the tramroad for a short length as it makes a connection with another path approaching from the East. [My photograph, 9th August 2022]
The two old tramroad routes run immediately next to each other as they converge a little to the North. We are immediately adjacent to the location of Wood Colliery.
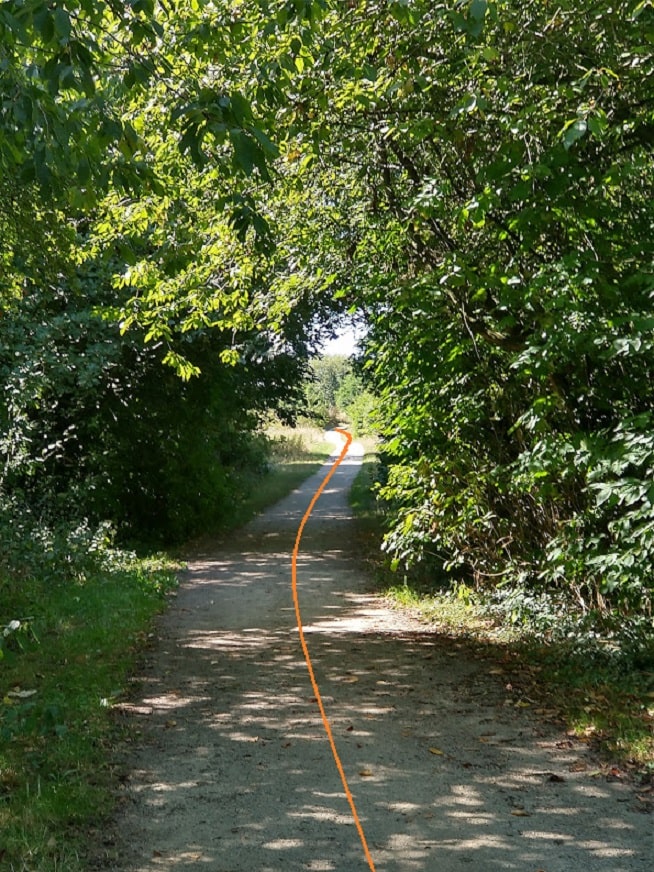
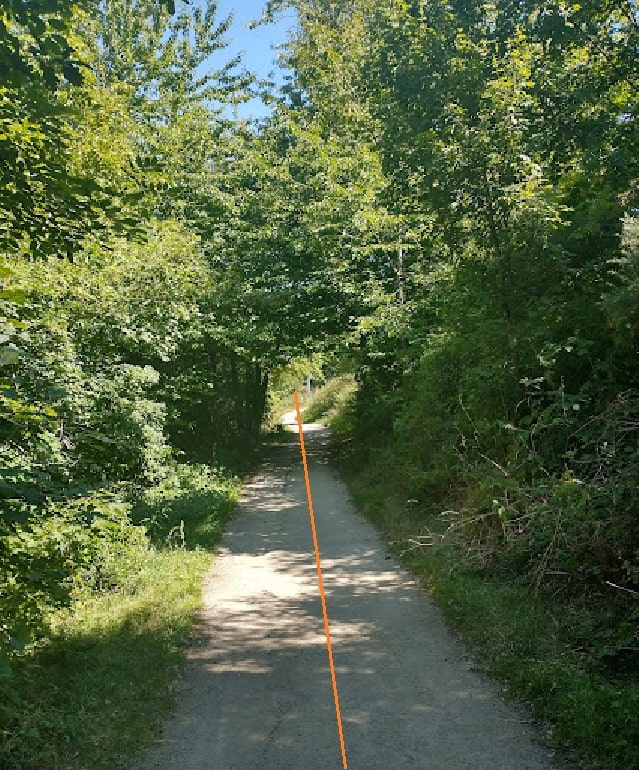
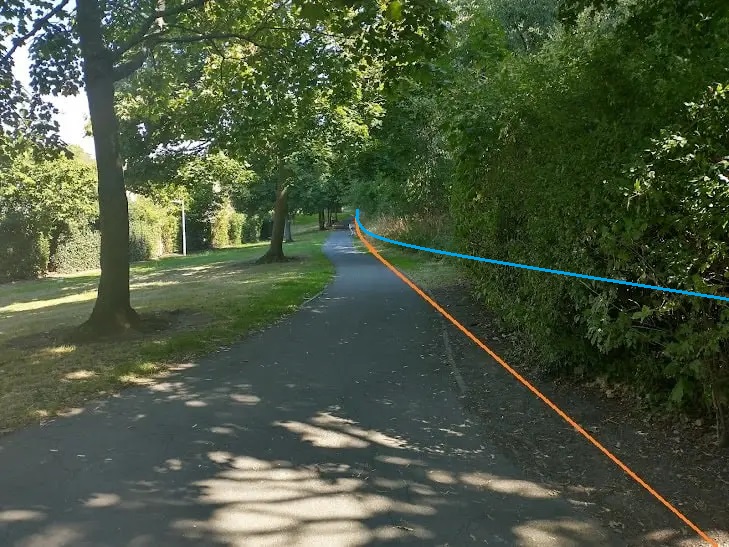
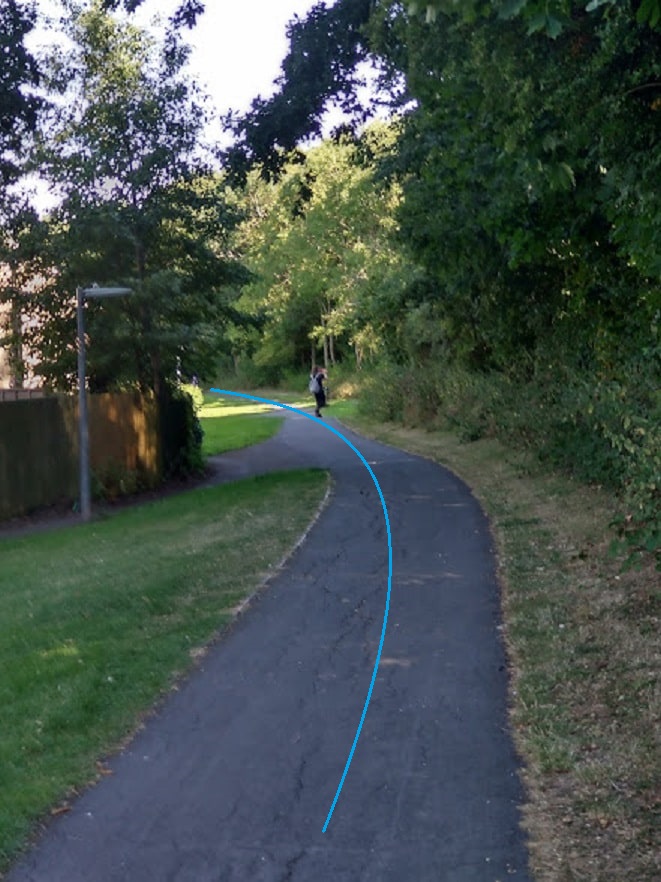
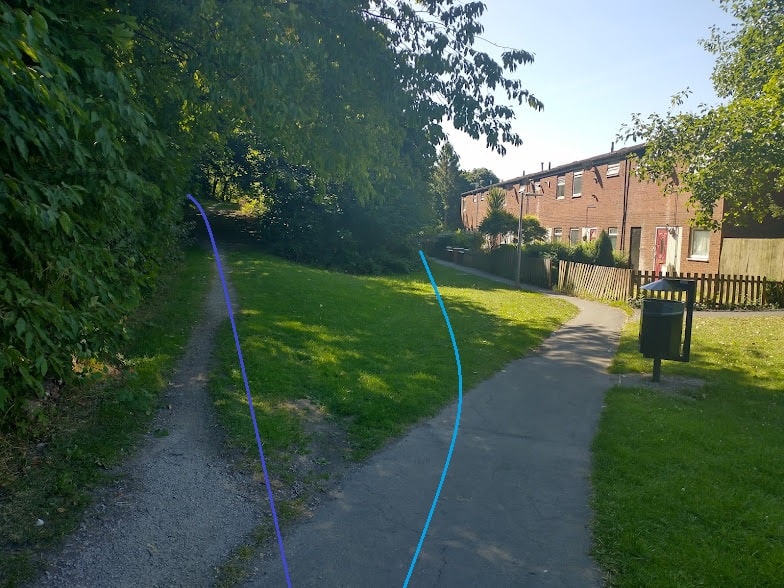
The ‘orange’ line continues Northward but now its alignment matches a tarmac-paved footpath. The footpath that we were following is now a few metres to the right of the ‘orange’ line. It follows the short stub-end of tramroad which meets our route at the horizon in this picture. [My photograph, 9th August 2022]Further North the tramroad the modern footpath continues to follow the old tramroad alignment. [My photograph, 9th August 2022]Another 200 metres or so and the two tramroad routes converge. [My photograph, 9th August 2022]Looking back to the South along the routes of the two tramroads. [My picture, 9th August 2022]
Having followed the orange and light-blue routes to their junction with the mauve route, we now need to return to the mauve route as it crosses the area of Wood Colliery slag-heap. It is important to bear in mind that the tramroad pre-dated the full extent of the slag-heap from Wood Colliery and although there is a 21st century footpath that seems to follow its alignment, the levels are likely to have been much different.
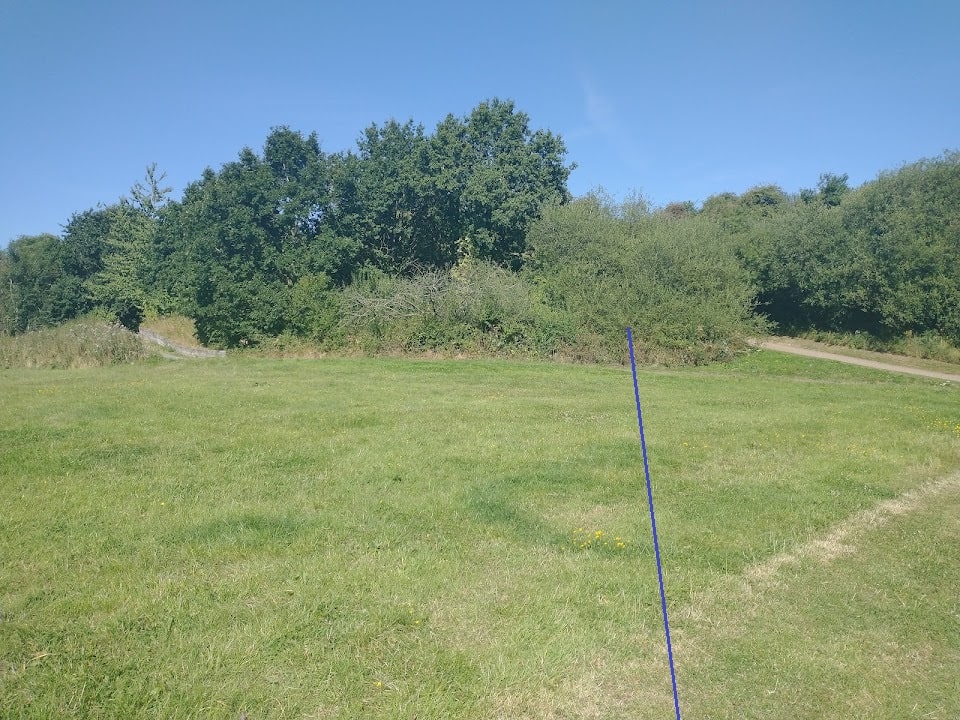
We have already note the extent of the colliery slag-heap on its Southeastern flank. This next photograph looks Southeast through the trees from the top of the slag-heap along the line of the ‘mauve’ tramroad.
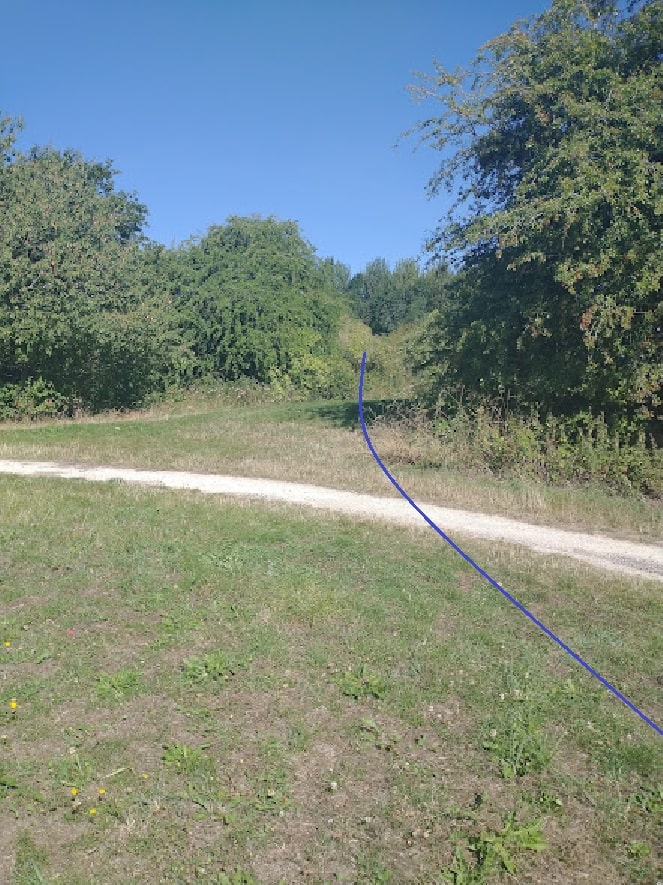
The trees in the distance camouflage Dark Lane which runs behind them. The Rugby field is in front of them at the lower level. The tramroad route is shown by the mauve line. [My photograph, 9th August 2022]We need to continue to bear in mind that the route shown in these pictures is approximate and that it is probably at a significantly higher level than the original tramroad. None-the-less, the tramroad alignment runs North-northwest across the slag-heap. [My photograph, 9th August 2022]In one sense this picture shows very little, the old tramroad will be somewhat below this landscape and even it route cannot be shown as it runs, in all probability directly beneath the line of undergrowth and trees in this picture. The line of trees almost exactly mirrors the tramroad route on the 6″ OS maps. [My photograph, 9th August 2022]
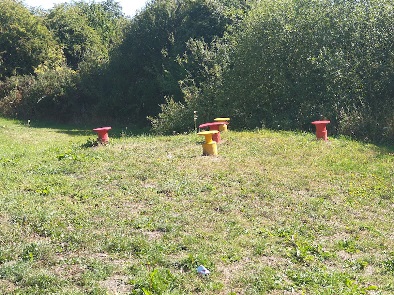
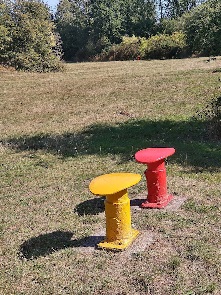
One lovely touch on Wood Colliery waste-heap is the use that has been made of old carriage/wagon buffers as seats. They appear like mushrooms in the grass areas which surround the old tramroad routes.
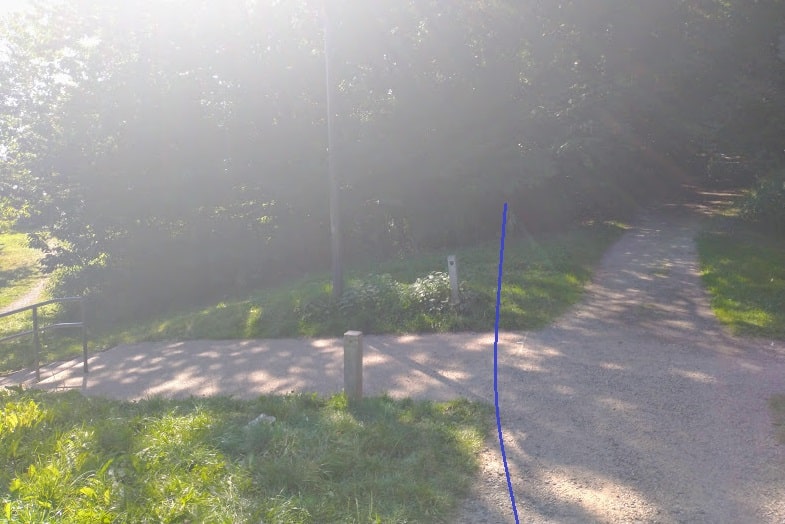
The next [photo is not the best, by a long chalk as it is taken directly into the Sun
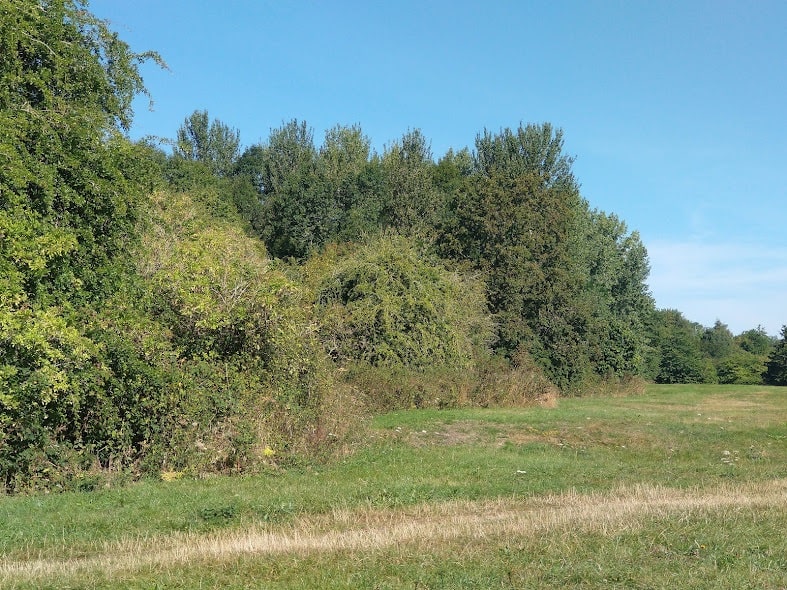
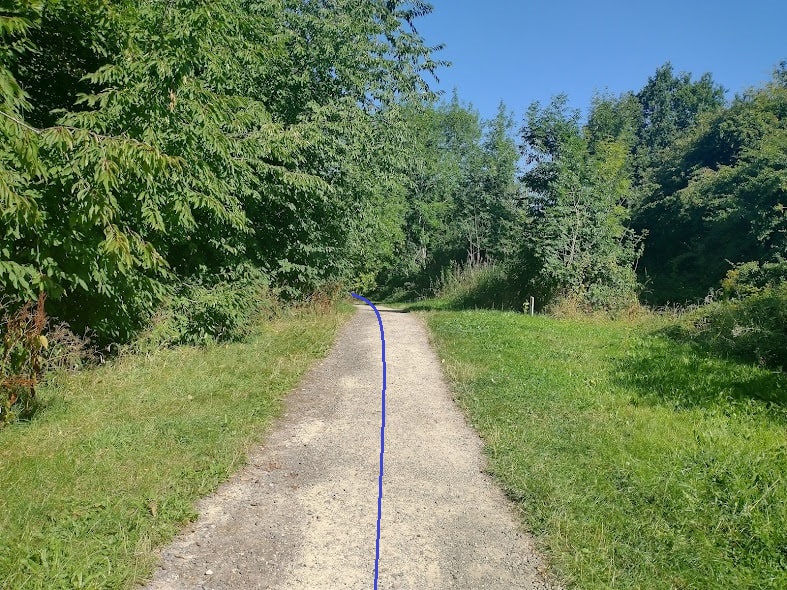
Looking back to the Southeast, the tramroad alignment takes it through the linear stand of tree of trees. The footpath at the extreme left of this picture gives access to the meadow which appears in the previous three or four shots. the path to the left of the mauve line follows the highest ridge of the colliery site and heads South towards the bottom of Telford Town Park. [My photograph, 9th August 2022]Turning through 180 degrees, this path follows the old tramroad’s alignment. [My photograph, 9th August 2022]And on, North to a junction with the light-blue route we followed. By this point, modern levels are much closer to those of the past! [My photograph, 9th August 2022]
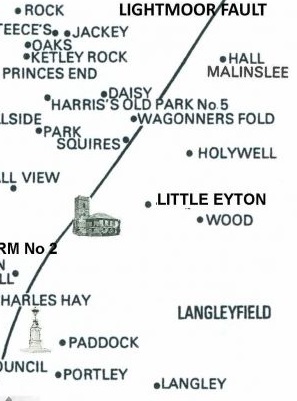
The adjacent image is an extract from a larger plan on the Dawley Heritage website [17] which shows the location of collieries in the Dawley area. St. Leonard’s Church and Little Eyton Colliery feature at the centre of the image. Comparing this with the extracts from the OS map above, it appears that the location of Wood Colliery has been confused with the colliery shown as ‘Old Colliery’ and adjacent to The White Hart Inn on the OS mapping. That marked Holywell Colliery seems to be named Spout Colliery on OS maps and collieries to the East do not appear on this extract (Wharf Colliery, Lodge Colliery and Little Dark Lance Colliery all appear on the 6″ OS map of 1881/82).
That shown as ‘Old Colliery’ on the OS Mapping close to The White Hart Inn may well have been known as ‘Hinkshay Colliery’ which is referred to in the online introduction to the ‘Botfield Papers’ held at Manchester University. [18]
Returning to the tramroad theme, it is worth noting a possible additional tramroad route which was not picked up by Savage & Smith and which also does not appear as a tramroad on the OS mapping. The extract below shows that possible route which ran between the area immediately adjacent to St. Leonard’s Church and Wood Colliery. It is suggested by the embankments at the possible junction with the tramroad shown at Wood Colliery and the straight alignment of the residual track/highway on the OS map.
The tramroads that we have already discussed are shown, green, red and light-blue on this extract from the 1881/82 6″ OS map. The deep-red-dashed line indicates the possible additional route. It appears that this may have made a triangular junction with the line running North-South adjacent to Wood Colliery. It appears to have crossed the ‘red’ line at a ‘diamond’ crossing and headed West towards the Church Wickets public house. Please note that this is a route which is unsupported by any direct evidence. [2]The same area in the 21st Century, the possible tramroad route heads from the location of Wood Colliery in a westerly direct through a gap in the modern housing to then meet Brunel Road which meanders around while the tramroad route runs due West. [Google Maps]Please this an the immediately following pictures with a dose of skepticism, they show the postulated additional tramroad route as it appears in the 21st century.
The batch of photos above first follow the line to the West before turning back round to look East towards the Town Park. [My photographs, 9th August 2022]
The batch of photographs above take us along Brunel Road following our possible tramroad alignment! [My photographs, 9th August 2022]
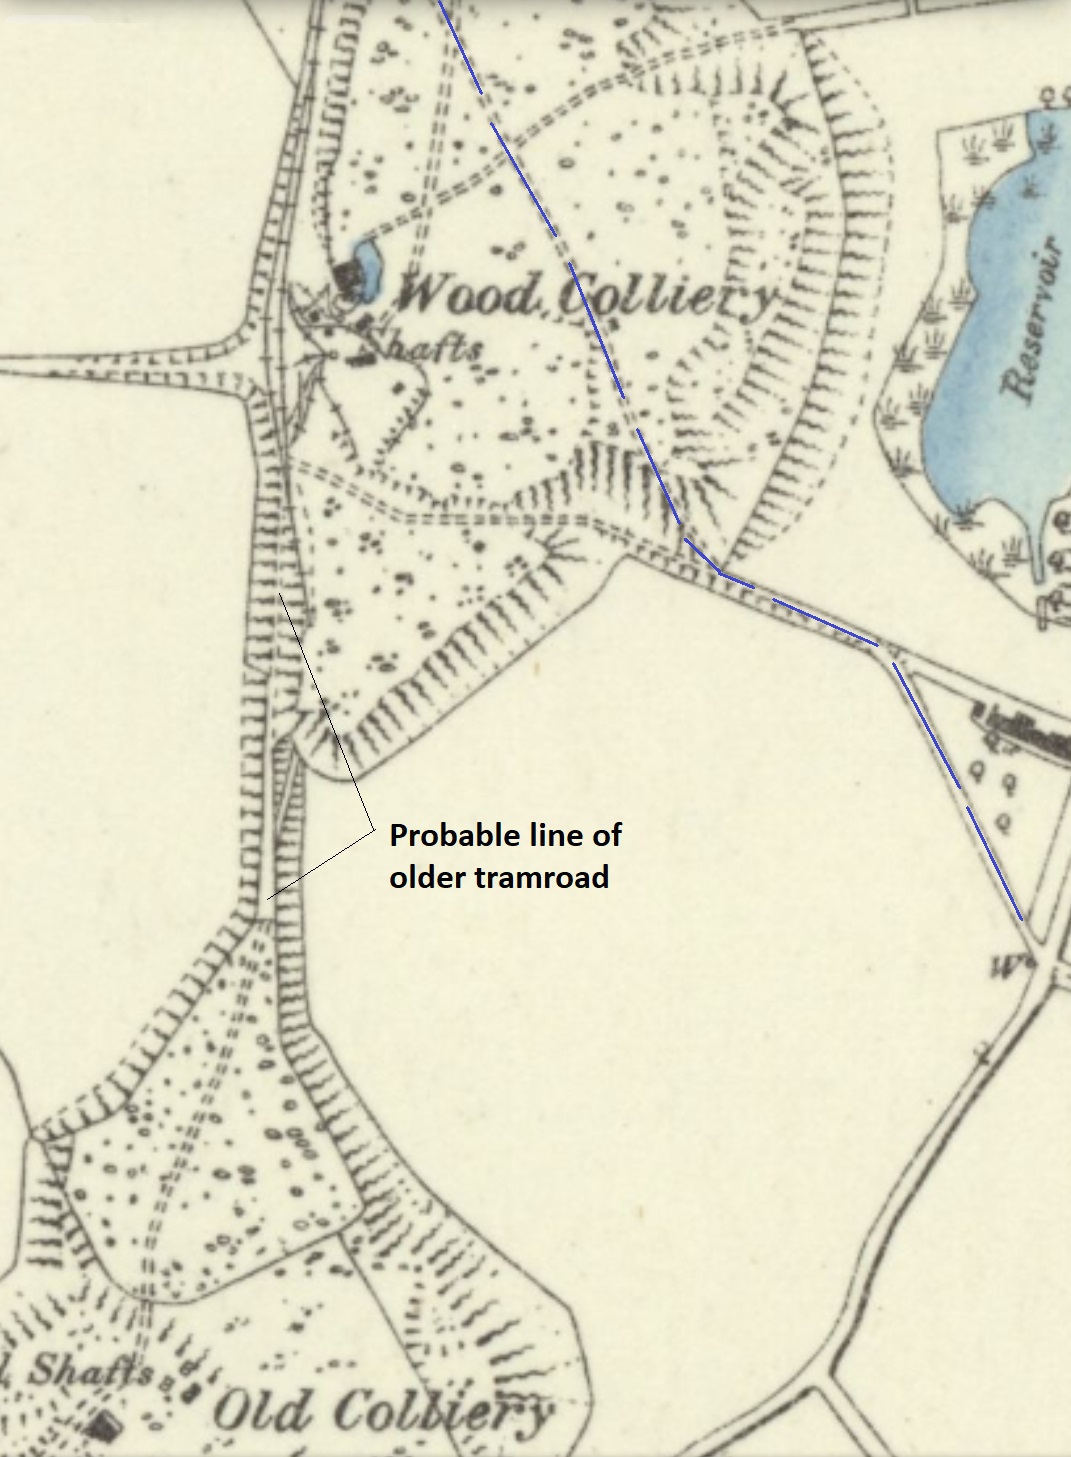
The next map extract shows the area between Wood and Spout Collieries. The tramroad alignment which passed under the later slag heap and that shown running North-South on the West side of Wood Colliery join just to the South of Spout Colliery.
The tramroad linking Spout and Wood Collieries is joined by the abandoned route which by 1881/82 was covered by the Wood Colliery waste heap at point ‘A’. There may also have been a tramroad linking Wood Colliery with Wharf Colliery to the East. This is shown by the deep-red-dashed line on this extract from the 1881/82 OS map. The next extract from the OS Map shows what may have been the route of a tram road between the two collieries. [2]
Approximately the same area as shown above but this time with the tramroads and mineral railway highlighted in light-blue, mauve and brown respectively. {Google Maps]
The tarmac path continues to follow the old tramroad route northwards. [My photograph, 9th August 2022]And still further North. Spout Colliery was on the right at this point. [My photograph, 9th August 2022]Another possible tramroad route which is suggested by the embankment arrangement close to Wharf Colliery and the two straight lengths of lane. It is shown by the deep-red-dashed line. It must be stressed, once again, that this is a line which I imagine may well have been present between two local collieries. [2]A similar area to the 6″ map extract above with the possible tramroad imposed on the satellite image, Virtually everything along the line has been completely remodeled/landscaped. Note Telford Norman Chapel – this is not its original location. When Telford Development Corporation altered the whole area to create the town centre and the Town Park, the Chapel was moved from its original location where redevelopment would have destroyed it. The buildings in the very top-right of the picture are part of Telford International Exhibition Centre. [Google Maps]
Wharf Colliery was owned in 1900 by the Hopley brothers. [19] According to mindat.org, Wood Colliery was owned in 1890 by the Haybridge Iron Co.; in 1895-1896 by the Stirchley Coal & Iron Co.; in 1900, again by the Haybridge Iron Co.; and in 1920 by W.T. Jo. [20] To complete the picture, Spout Colliery was owned in 1890 by the Haybridge Iron Co.; in 1895-1896 by the Stirchley Coal & Iron Co.; in 1900, again by the Haybridge Iron Co. [21]
The next map extract shows the area Northwest of Spout Colliery. …
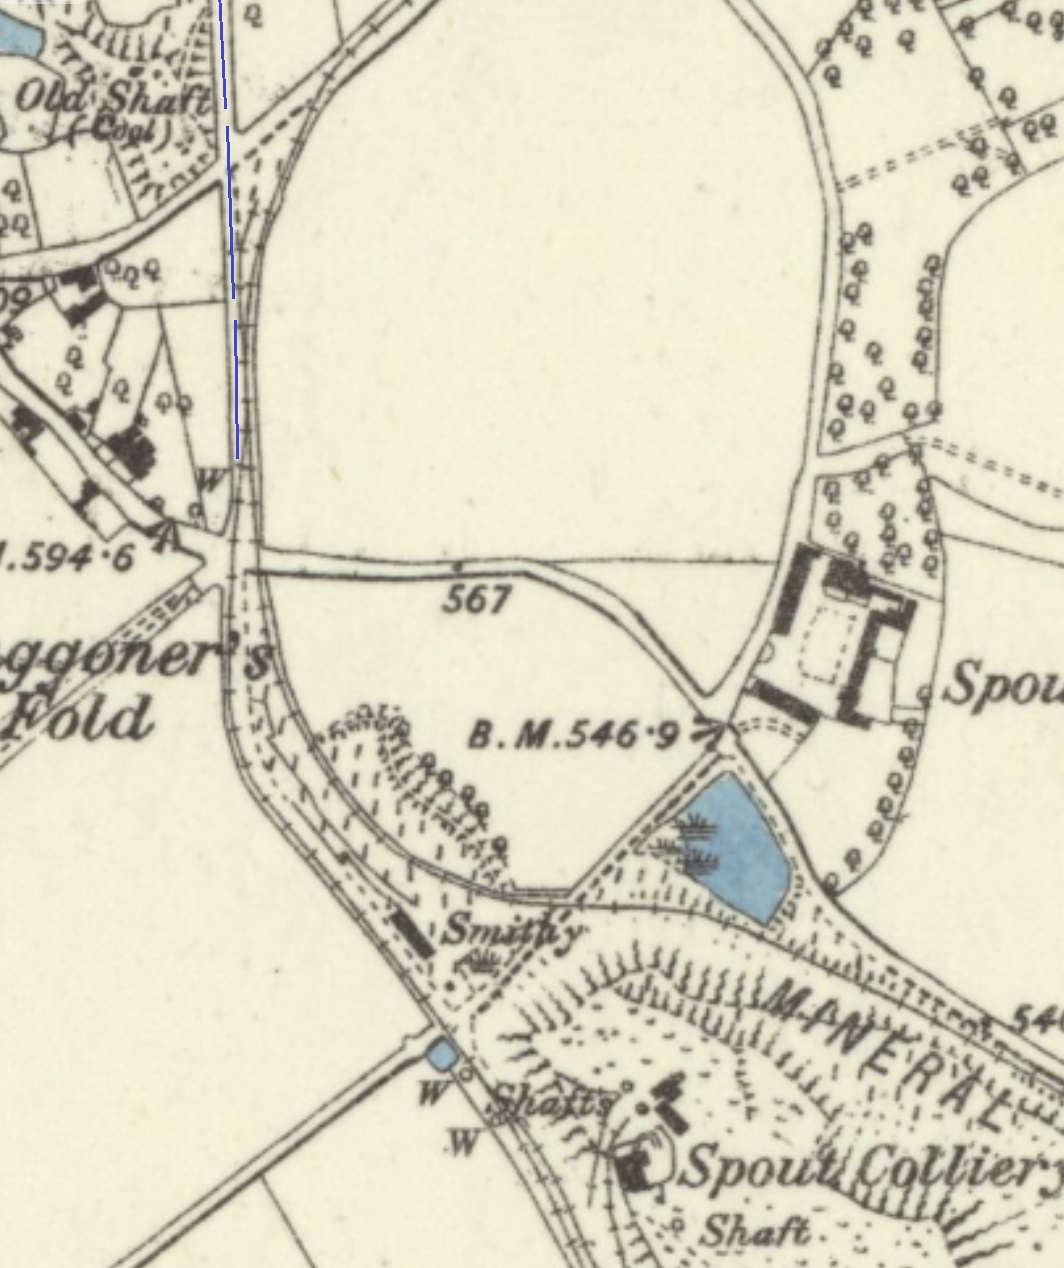
Again from the 6″ 1881/82 OS map, this extract shows two lines which were present in 1881/82. The Mineral Railway which was standard-gauge and the earlier narrow gauge tramroad. it is possible that, by 1881, The older tramroad had been replaced by a standard gauge line which made a junction with the Mineral Railway which ran on the Northeast side of Spout Colliery. Further North Savage & Smith show the tramroad continuing northwards as shown on this plan by the mauve-dashed line. They say that they took this information from the 1836 Shropshire Railway plans. [2]
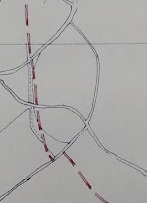
Savage & Smith show the tramroad crossing the lane/road to the Northwest of Spout Colliery. Their tracing shows a break in the tramroad at the lane which is illustrated in the adjacent extract from their plan. [1: 164] This seems to be unlikely as their tracing to the North of the lane follows the line shown on the OS map above. A tracing error or a discrepancy in scaling would make the most logical explanation for the step in their alignment. The OS map shows a continuous alignment.
This is approximately the same area as covered by the OS map extract above. Major redevelopment has occurred.
In the top half of this image there are no features which fix the line of the tramroad and the mineral railway. The routes are traced from the mapping onto the satellite image using overlay software. From here North the lines drawn must be seen as careful estimates!
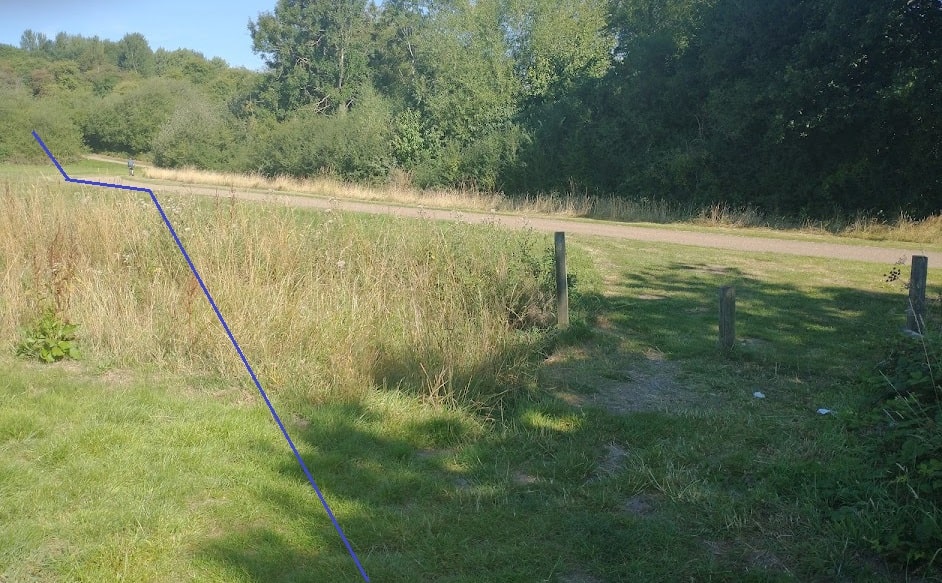
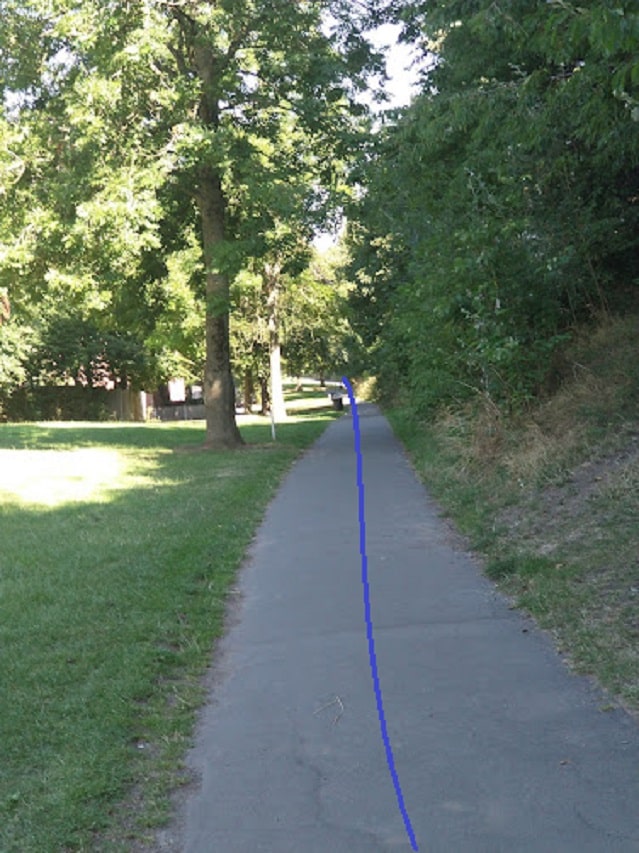
The tramroad alignment to the North of Spout Lane (or the footpath it is in the 21st century. [My photograph, 9th August 2022]It is difficult to provide a meaningful line on this picture which shows that the old tramroad alignment and the public footpath of the 21st century drift gradually further apart as they head for the horizon. The satellite image above shows this most effectively. [My photograph, 9th August 2022]
We pick up the tramroad route further North in the next extract from the 1881/82 OS map
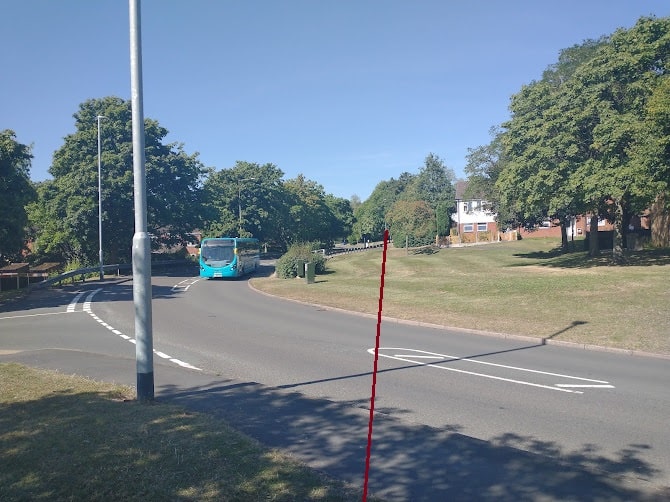
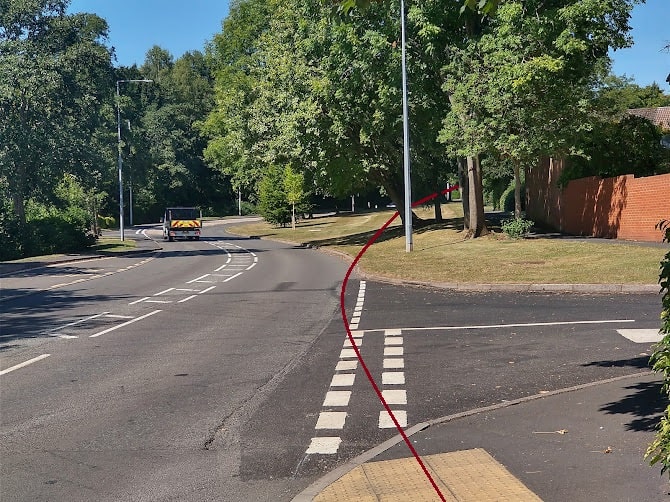
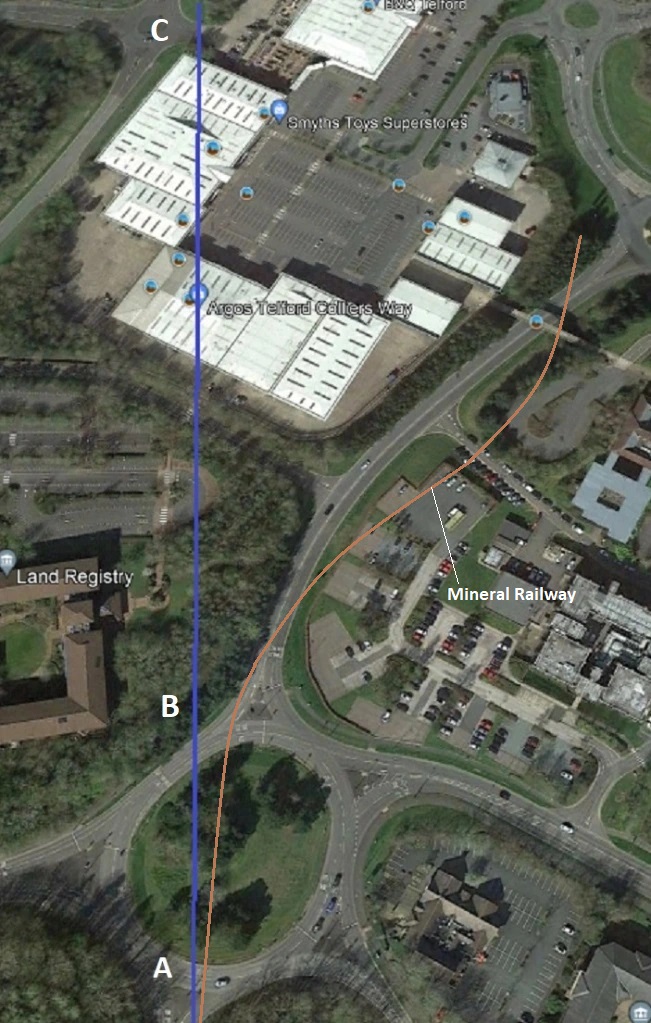
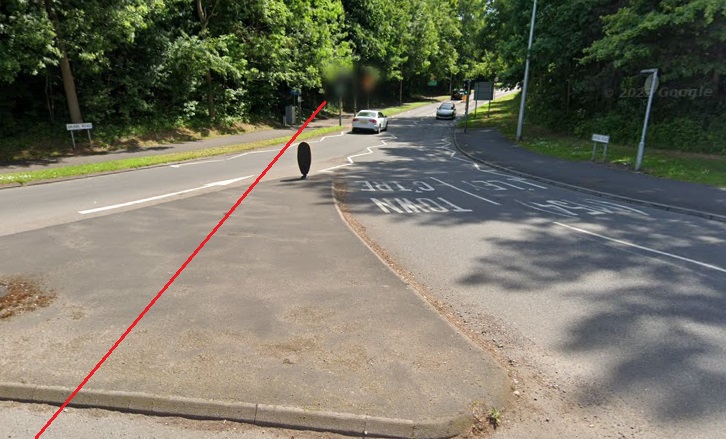
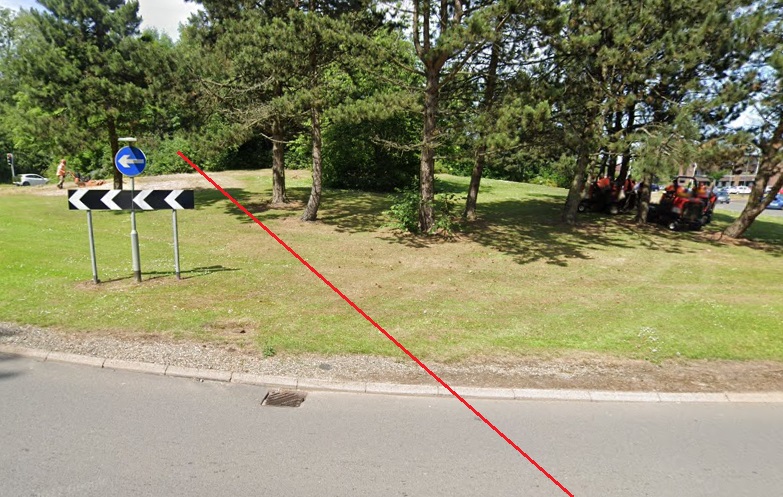
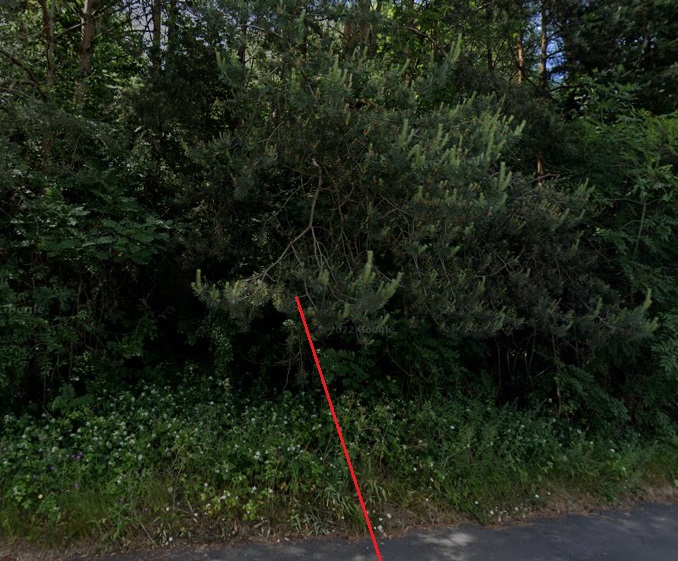
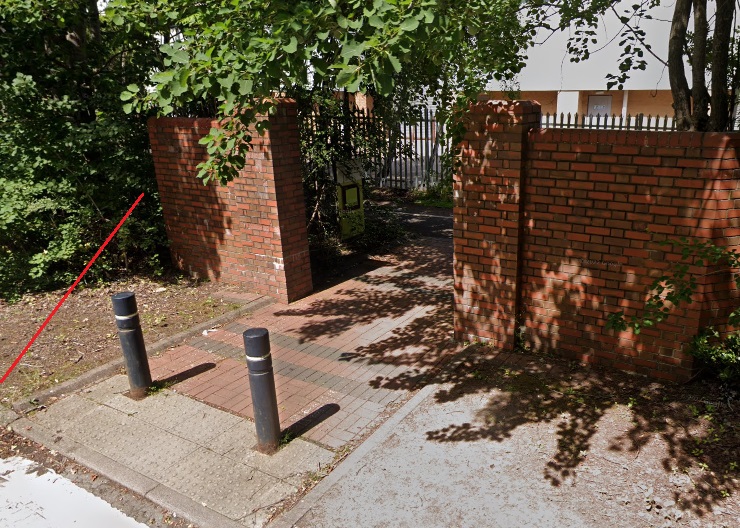
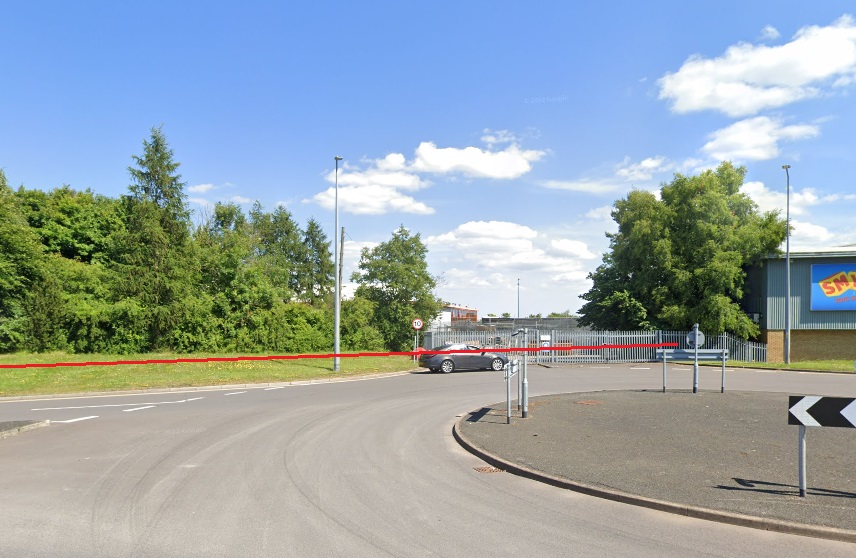
The mauve-dashed line on this next extract from the 6″ OS map of 1881/82 is the line we are currently following the combined red and mauve route is one we have already followed. The green line shows the approximate route of a tramroad not included on Savage & Smith’s drawing. [1: p164] but which appears on the British History Online plans of Dawley in the 1840s [9] earlier in this article. [2]The same area as on the map extract directly above. The locations marked ‘A’, ‘B’ and ‘C’ are the same geographical location.Looking back along the line of the old tramroad at point ‘A’ above [Google Streetview, June 2022]Looking forward along the line of the old tramroad at point ‘A’ above [Google Streetview, June 2022]Looking back along the line of the old tramroad across the modern roundabout towards point ‘A’ above [Google Streetview, June 2022]Looking from the roundabout towards point ‘B’. In the trees the ground rises significantly to meet an open area of grass which surrounds Telford Land Registry. [Google Streetview]
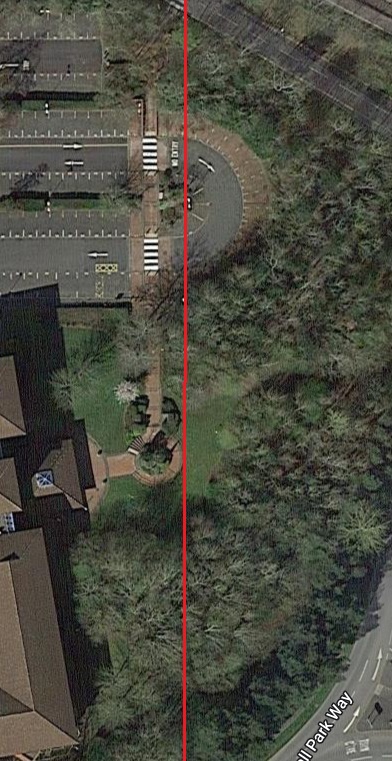
The remainder of this old tramroad route crosses the grounds of Telford’s Land Registry and then runs underneath the West side of Telford Bridge retail park. This first extract from the satellite images shows its approximate route across the grounds of the Land Registry. The buildings of the Registry are on the bottom-left of the image, its carpark are also on the left side of this image.
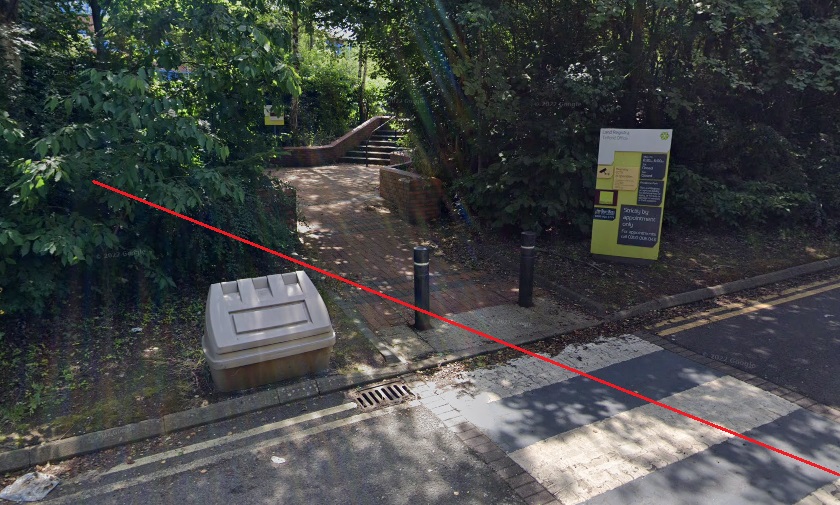
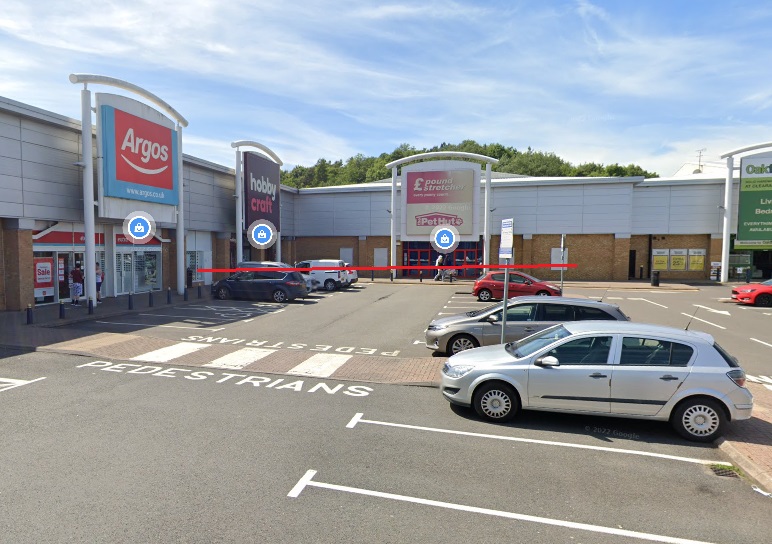
Looking Southwest across the access road to the Land Registry. The red line continues to show the North-South alignment of the old tramroad which crossed the line of the modern road approximately at the pedestrian crossing. {Google Streetview, June 2022]The line of the tramroad dissappears into the retail park and under Argos and Hobbycraft! [Google Streetview, June 2022]Looking West-Northwest along the face of buildings in Telford Bridge retail park. The alignment of the old tramroad runs from the face of Hobbycraft, close to its shared wall with Argos and runs through the brick wall of Poundstretcher/Pet Hut close to its shared wall with Oakfurniture. [Google Streetview, June 2022]The redline again shows the old tramroad’s approximate geographical position at the roundabout at the junction of Collier’s Way and Caledonian Way. Off to the left of this image it joined the route of the tramroad that we looked at first in this article. [Google Streetview, June 2022]
In my next post I plan to look at what is discernable of the historic tramroads along the line of and in the vicinity of the later Coalport (LNWR) and Stirchley (GWR) branches
References
R.F. Savage & L.D.W. Smith; The Waggon-ways and Plateways of East Shropshire; Birmingham School of Architecture, 1965. Original document is held by the Archive Office of the Ironbridge Gorge Museum Trust.


Pingback: Ancient Tramroads near Telford – Part 8 – Malinslee Part 4 – the East side of Malinslee in the vicinity of the later Coalport (LNWR) and Stirchley (GWR) Branches | Roger Farnworth