
The Route of the Ashover Light Railway – Clay Cross Works to Stretton
 The main Clay Cross Company Works were adjacent to the LMS main line from Sheffield to Derby, just south of Clay Cross Junction. The main facilities (locomotive and carriage sheds) for the Light Railway were at the site of the Works. The Clay Cross Company had standard-gauge sidings connected to the LMS mainline. There was an inclined siding alongside one of these sidings which permitted the narrow gauge line’s wagons to be propelled to a height where they could be tipped into standard gauge wagons. An electrical mechanism was used for this work. [2] In order to permit narrow-gauge access into the works standard-gauge track was crossed by means of hinged rail sections. [2]
 The ramped siding alongside the standard-gauge works line and the hinged rail sections also show up well in this image. They could be turned through 90°. The picture shows the transshipment tippler in early 1925, looking North. Ashover Light Railway wagons were hauled up the ramp using an electric winch and their contents tipped, by way of a moveable shute into standard gauge wagons on the siding below. (c) Topical Press Agency. [5]
As the map above shows, the line left Clay Cross Works in a Westerly direction before first turning Northwest and then round to the South. [4] The works themselves were on the East side of the standard-gauge line as it emerged from the North portal of Clay Cross tunnel. The Clay Cross and Egstow Station was in the location shown on the map below at the south side of the Works site.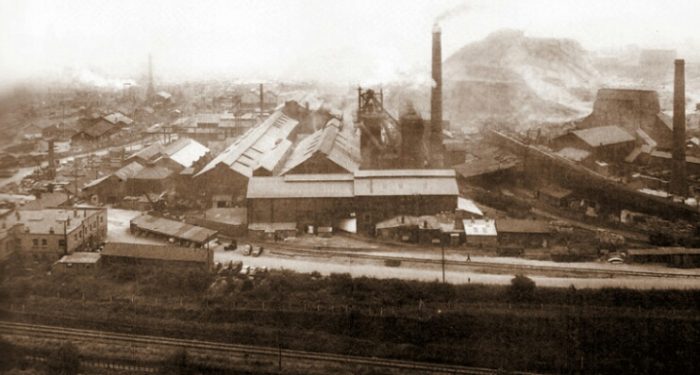 Clay Cross Works in 1929. [7]
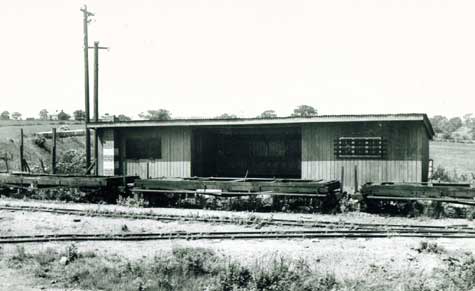 Clay Cross & Egstow passenger terminus – a single low platform with a wooden shelter – was on a short spur line, and was about half a mile from Clay Cross Station on the LMS. These pictures give a good impression of the station. [2][3][6][10]
 The station and yard. [6]
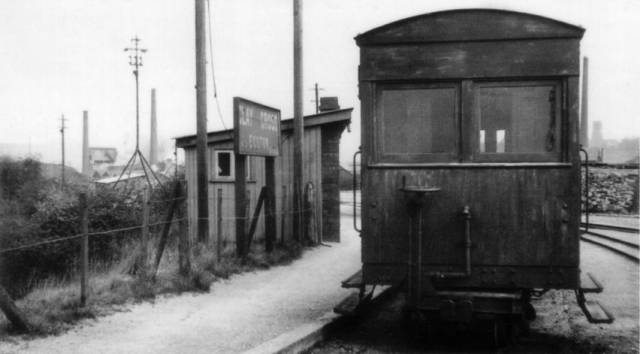 Clay Cross and Egstow Station. [10]
 The track plan of the Clay Cross Works showing both standard and narrow gauge lines. [24]
The Wikipedia article about the line states: “Clay Cross and Egstow [Station] had an unusually large name-board (10 ft by 3 ft) which stood on the single low platform. [12] There was a wooden station building consisting of an open-fronted wooden shelter, which had the manager’s office on one side, and on the other what was intended as a parcels office, but was actually used as a general storeroom. The station was the only one on the line to enjoy electric lighting.” [1]
The spur line from the station joined the line from the Works. After the junction with the Station spur, the main line climbed a fairly steep gradient, down which wagons attached to the rear of trains coming from the Ashover direction were allowed to run by gravity into reception sidings after the coaches had been hauled into the passenger station. [1] The relatively steep gradient allowed the narrow-gauge line to climb up an embankment to cross the main road north of Clay Cross (now the A61). That climb is shown in the first picture below. The route from Clay Cross & Egstow, with the Pirelli Bridge visible in the background. It is just possible to make out Chesterfield Road station, with the wooden walkway leading up from road level. [3]
The bridge over the main road was known locally as the Pirelli Bridge. It was a steel girder bridge spanning 45 feet. The height had to be 16 feet above road level, which required a half-mile long approach embankment to be built. The bridge and embankment and one cutting were the only major pieces of engineering on the entire route between Clay Cross and Ashover. [1] The nickname was the result of the Pirelli Tyre Company at Burton-upon-Trent having a large advertisement painted on the bridge. [2] The Pirelli Bridge over the A61. [8]
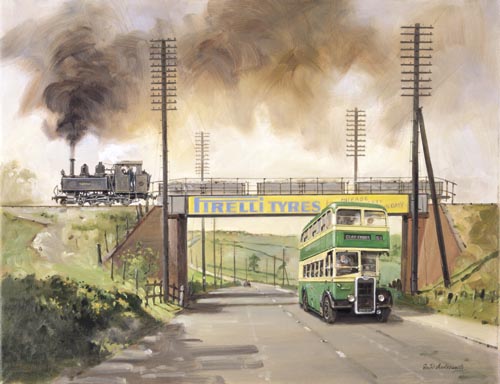 The same location painted by David Charlesworth. [9]
The first stopping place was Chesterfield Road Halt, immediately beyond the bridge. As a frequent service of buses passed the halt, [13] this was the usual point at which Chesterfield passengers joined and left the trains during the period that passenger traffic was maintained. In 1940, the wooden shelter was destroyed in a gale, and the pieces were used to construct a small store-shed at the back of the Clay Cross locomotive shed. [1]
Immediately beyond Chesterfield Road was Hilltop passing loop, but no platform was provided there. [2] Up to this point, the railway was on embankment. It now travelled through a series of cuttings and three different halts. Hilltop Cutting, North of Holmgate Halt and Holmgate Lane. This view looks South towards Holmgate and was taken in 1934. (c) I.M. Purdy. [14]
 The first cutting was Hilltop Cutting and this was the most significant cutting on the route. Travelling South trains reached Holmgate Road with its halt just beyond. Holmgate Halt had a siding capable of holding around six wagons. It was provided with a small wooden shelter and a telephone box. [1] Evidence suggests [15] that the siding was located on the North side of Holmgate Road and the Halt on the South side. [14] The route of the line at this point is illustrated on the adjacent sketch which is contained in one of the walks leaflets produced by the Ashover Light Railway Society. [17]
The three images immediately below are taken at the approximate location of the road crossing for Holmgate Road. The first image looks North along the line of the old railway. The second looks south through bollards along the line of the track bed of the old railway. The third looks down an adjacent modern footpath towards the line of the railway heading South. The crossing at Holmgate Road was un-gated.
At the point where the tramac path turns to the left, the railway formation follows on its right side. Pushing aside the foliage at this point, it is possible to access the remains of the old railway bridge over a small tributary of the River Amber which left the Amber at near Ogston Hall. [17] Holmgate Road looking North along the line of the old railway.
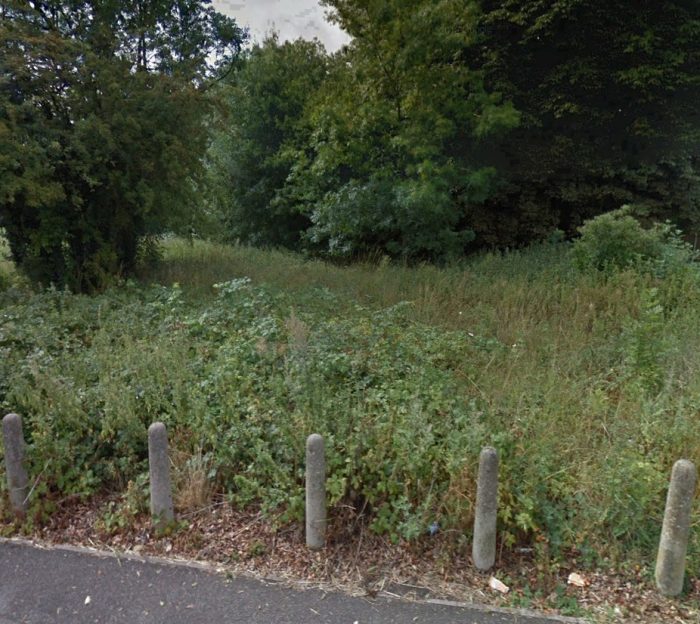 Holmgate Road looking South along the line of the old railway. The halt was immediately to the South of the road and its small building was on the left of this image. There is a grainy image of the halt in the Ashover Light Railway Society’s recent booklet. [14] This may be the only image of the halt is existence.
 Holmgate Road looking South. At the point where this footpath turns to the left ahead, it is immediately alongside what was the route of the Ashover Light Railway. That point is adjacent to the old stream bridge. [17]
 We have noted that immediately South of Holmgate Halt, the railway crossed a small tributary of the River Amber (Smithy Brook) which left the Amber at near Ogston Hall.
Following the modern-day tarmacked path takes one immediately alongside the old railway formation which runs through the copse area to the West of the path. The fishing pond encountered to the left of the modern path was not present when the railway was still in use. The car park for the fishing pond is at the location of Springfield Halt. The Halt consisted of nothing more than a name-board at a point where the line was crossed by a footpath/track. The location can be seen at the top of the adjacent map. [13][16]
After a short trip across the fields, Clay Lane was reached. Clay Lane Halt had a wooden shelter and a telephone box. It was located about a quarter of a mile from the main street in Clay Cross, near the Royal Oak public house. The points were laid for a siding, but this was never built, due to meagre goods traffic. Despite this, passenger traffic was initially good. [1]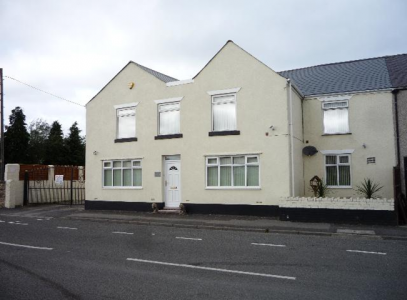 The Royal Oak shown on the map above on Clay Lane is now a private home. [18]
 The railway line met Clay Lane a little to the West of the Royal Oak Pub. The location is shown on the adjacent sketch map. [19] The pictures below are taken from Clay Lane. The first looks North along the line of the railway which was roughly on the line of the driveway. The second looks South along the line.
The Halt was on the North side of Clay Lane and is shown in a photograph in the 2016 book by Trevor Gosling. [16]
From Clay Lane, the line followed the ex-LMS standard-gauge Sheffield-Derby line, to Stretton. Close to the location of Stretton Halt, the railway crossed Horsescar Brook. Both this brook and Smithy Brook ran parallel to the two railway lines, either side of the standard-gauge railway cutting.
The mainline station was in deep cutting and pictures of the Ashover Light Railway Halt and railway taken from Ashover Road (B6014) often include sight of one of the coping stones at the end of the railway bridge wingwall.
The proximity of the Halt and the mainline station at Stretton meant that Stretton was the ideal interchange with the LMS. It had a wooden shelter, with a goods office and a telephone box. The loop-line at Stretton was used as accommodation for connecting trains. The timetables with the main line did not always coincide, and ALR trains sometimes had to wait for nearly half an hour. The loop line was removed in the 1940s. [1][20]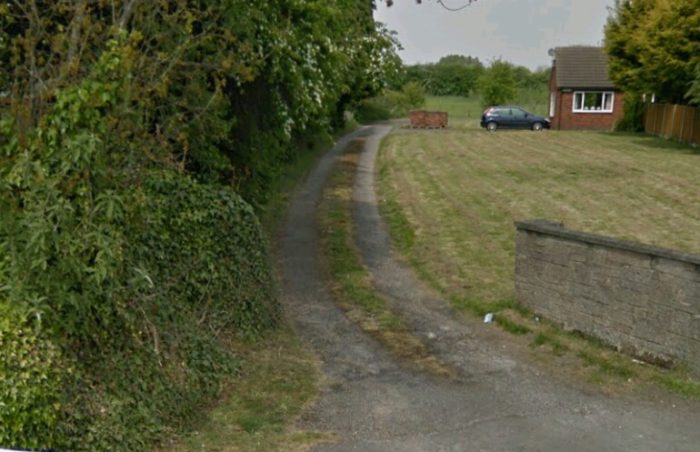 Looking North along the line from Clay Lane.
 Looking South along the line from the same point on Clay Lane.
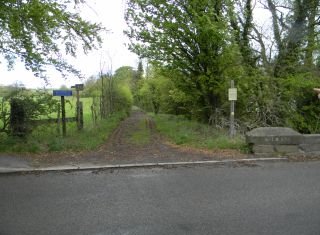
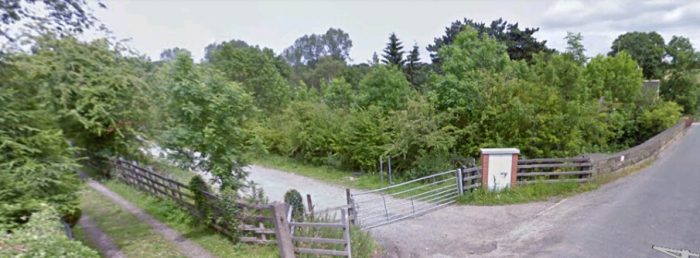 The railway formation North of Ashover Road (B6014) followed the gravel track beyond the metal field gate. The coping stone and bridge wingwall are to the right side of the picture. The halt was on the North side of the road.
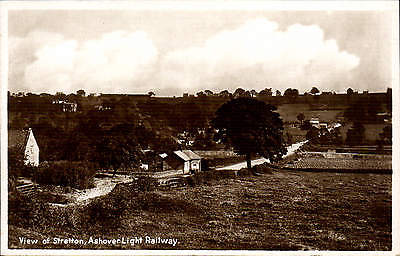 Stretton Halt is in the middle distance. [23]
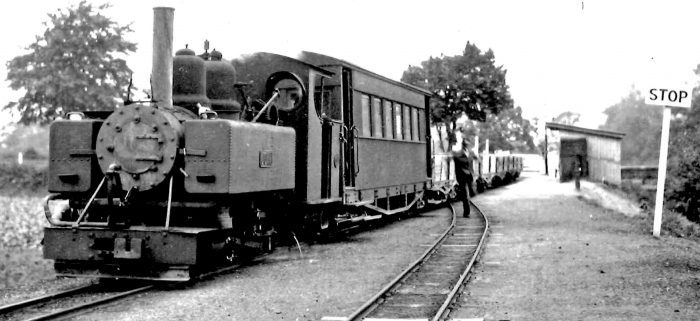 Ashover Light Railway Locomotive Joan at Stretton, entering the loop. [21]
 Joan at Stretton Level Crossing with a railway society tour in open mineral wagons. The coping stone to the right of the picture is still in place at the crossing location. [22]

The adjacent images show the coping stone in the above picture in the early 21st Century and the condition of the formation some years ago now. [2]
The crossing at Ashover Road, Stretton was the only protected crossing on the line. Stretton was the most important intermediate stopping place on the line, 2.5 miles from Clay Cross. [2] “For most of the distance from Clay Cross to Stretton the light railway ran parallel with the main Sheffield-Derby LMS line. The scenery to here was scarcely attractive, the influence of the nearby collieries being somewhat persistent, but, after leaving Stretton, the surroundings soon became very pretty.” [2]
We will explore the remainder of the line in the next post.
References
- https://en.m.wikipedia.org/wiki/Ashover_Light_Railway, accessed on 13th January 2018.
- The Ashover Light Railway; The Railway Magazine, Volume 96, No. 593, September 1950.
- http://www.alrs.org.uk/site/?page_id=31, accessed on 14th January 2019.
- https://maps.nls.uk/os/25k-gb-1937-61/index.html, accessed on 14th January 2019.
- Trevor L. Gosling; The Ashover Light Railway 1925-1950, An Illustrated Presentation; The Ashover Light Railway Society, Winger worth, Chesterfield, 2016; p15.
- https://picclick.co.uk/Clay-Cross-railway-station-and-yard-Ashover-Light-273368783149.html, accessed on 15th January 2019.
- https://municipaldreams.wordpress.com/2015/page/4, accessed on 14th January 2019.
- http://www.claycrosstoday.co.uk/Ashover-Light-Railway, accessed on 14th January 2019.
- http://davidcharlesworthart.com/railway.htm, accessed on 14th January 2019.
- http://colonelstephenssociety.co.uk/the%20colonels%20railways/ashover%20light%20railway/ashover%20light%20railway%20photo%20gallery.html, accessed on 15th January 2019.
- https://mapio.net/pic/p-75953053, accessed on 15th January 2019.
- K.P. Plant; The Ashover Light Railway. The Oakwood Press, 1987, p33.
- Ibid., p35.
- Trevor L. Gosling; The Ashover Light Railway 1925-1950, An Illustrated Presentation; The Ashover Light Railway Society, Winger worth, Chesterfield, 2016; p17.
- Ibid., p11.
- Ibid., p18.
- The Ashover Light Railway Society, Short Walks on a Railway Theme – Walk Number 1, Over the Hill – Clay Cross Works to Holmgate.
- http://www.claycrosstoday.co.uk/Pubs-Of-The-Past, accessed on 20th January 2019.
- The Ashover Light Railway Society, Short Walks on a Railway Theme – Walk Number 2, Across Green Pastures, Clay Cross to Stretton.
- K.P. Plant; op. cit; p44.
- https://www.pinterest.com/pin/374221050282986254/?lp=true, accessed on 19th January 2019.
- http://colonelstephenssociety.co.uk/the%20colonels%20railways/ashover%20light%20railway/ashover%20light%20railway%20members%20weekend/ashover%20light%20railway%20members%20weekend%20route.html, accessed on 14th January 2019. … RLinkinS on the forum national-preservation.com says: “I think this is the Birmingham Locomotive Club’s trip on 24/08/1948. There is a colour picture in Michael Whitehouse’s new album and the stains on the front of the smokebox are identical.” (https://www.national-preservation.com/threads/the-ashover-light-railway.1302307/#post-2352339, accessed on 16th January 2019).
- https://picclick.co.uk/Stretton-Ashover-Light-Railway-View-of-Stretton-390729127429.html, accessed on 19th January 2019.
- K.P. Plant; The Ashover Light Railway. The Oakwood Press, 1965, p36.

Pingback: Light Railways in the UK – the early years after the 1896 Act – The Railway Magazine, August 1905. … | Roger Farnworth